Bosch indego: English
English: Bosch indego
OBJ_BUCH-1573-003.book Page 23 Friday, November 23, 2012 9:10 AM
English | 23
Entsorgung
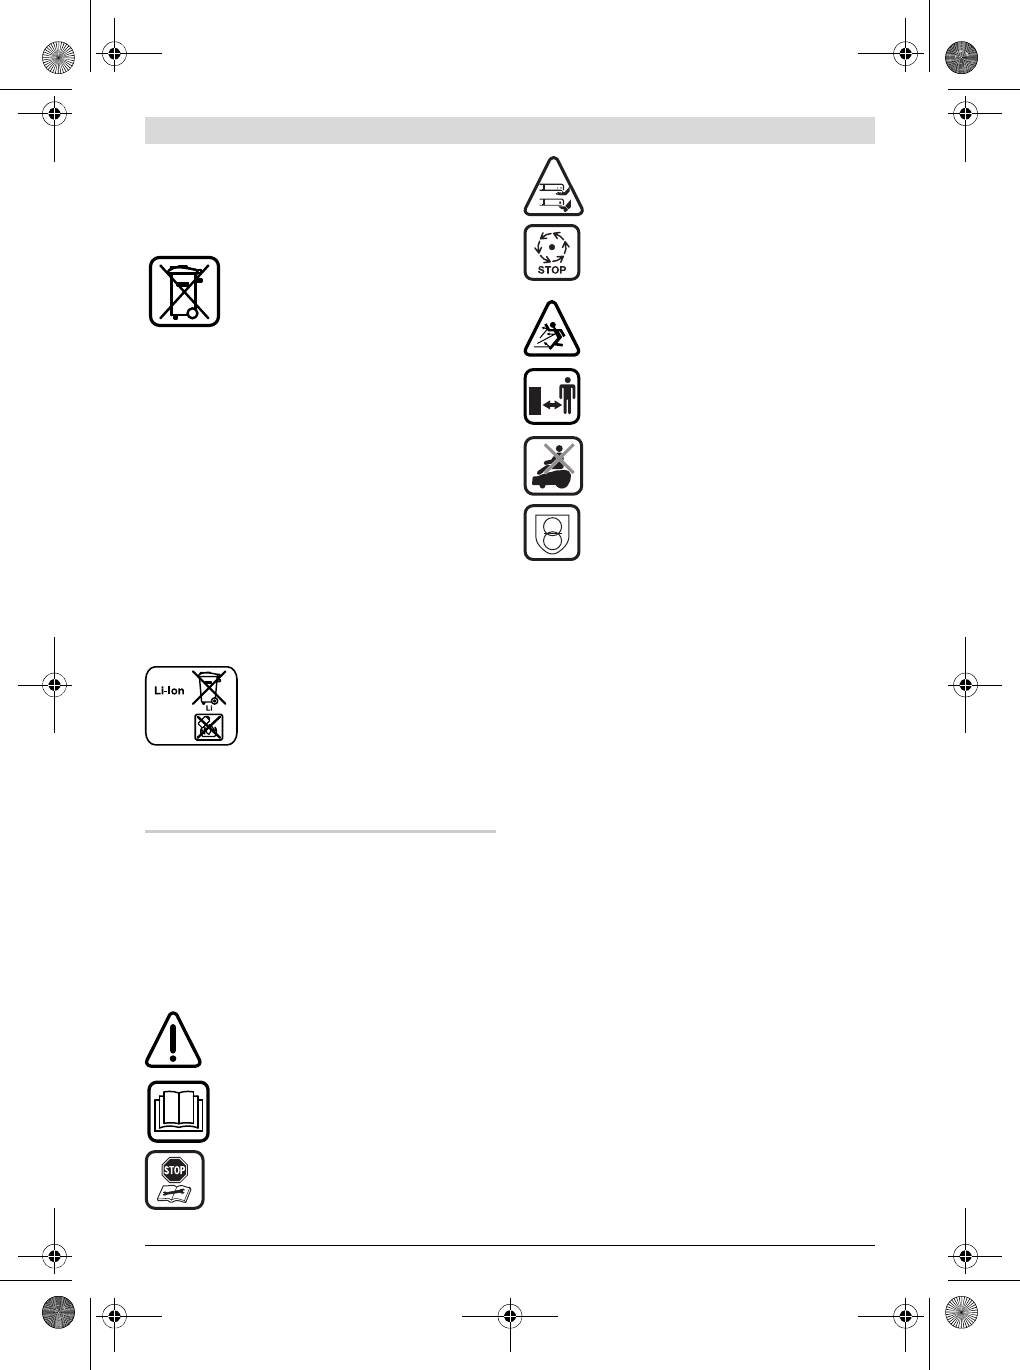
Caution: Do not touch rotating blades. Sharp
blade(s). Beware of severing toes or fingers.
Werfen Sie Gartengeräte, Ladegeräte und Akkus/Batterien
nicht in den Hausmüll!
Nur für EU-Länder:
Wait until all machine components have com-
pletely stopped before touching them. The blades
Gemäß der europäischen Richtlinie
continue to rotate after the machine is switched
2002/96/EG müssen nicht mehr gebrauchsfä-
off, a rotating blade can cause injury.
hige Elektro- und Elektronikgeräte und gemäß
der europäischen Richtlinie 2006/66/EG müs-
Pay attention that bystanders are not injured
sen defekte oder verbrauchte Akkus/Batterien
through foreign objects thrown from the ma-
getrennt gesammelt und einer umweltgerechten Wiederver-
chine.
wendung zugeführt werden.
Warning: Keep a safe distance from the machine
Nicht mehr gebrauchsfähige Akkus/Batterien können direkt
when operating.
abgegeben werden bei:
Deutschland
Recyclingzentrum Elektrowerkzeuge
Do not ride on the machine.
Osteroder Landstraße 3
37589 Kalefeld
Schweiz
Batrec AG
Battery charger contains a safety transformer.
3752 Wimmis BE
Integrierte Akkus dürfen nur zur Entsorgung entnom-
men werden. Durch das Öffnen der Gehäuseschale kann
das Gartengerät zerstört werden.
Operation
Integrierte Akkus dürfen zur Entsorgung nur durch ei-
Before working on the machine itself (e. g. mainte-
ne Kundendienststelle entnommen werden.
nance, tool change, etc.) as well as during transport
Akkus/Batterien:
and storage, remove the isolator key from the ma-
chine.
Li-Ion:
Bitte beachten Sie die Hinweise im Ab-
Never allow children or people unfamiliar with these in-
schnitt „Transport“.
structions to use the machine. Local regulations may re-
strict the age of the operator.
This machine is not intended for use by persons (including
children) with reduced physical, sensory or mental capa-
Änderungen vorbehalten.
bilities, or lack of experience and knowledge, unless they
have been given supervision or instruction concerning use
of the machine by a person responsible for their safety.
Children should be supervised to ensure that they do not
English
play with the machine.
The operator or user is responsible for accidents or haz-
ards occurring to other people or their property.
Safety Notes
If any hazard occurs whilst the machine is operating imme-
Warning! Read these instructions carefully, be familiar
diately press the red stop button.
with the controls and the proper use of the machine.
Ensure correct installation of the perimeter wire as in-
Please keep the instructions safe for later use!
structed.
Explanation of symbols on the machine
Check the perimeter wire is fully pegged to the ground
avoiding any slack lengths of wire.
General hazard safety alert.
Ensure no exits are blocked or obstructed by the
Periodically inspect the area where the machine is used
machine.
and remove all stones, sticks, wires and other foreign ob-
jects.
Warning: Read user instructions before operating
Do not run over any live mains cable running in the working
the machine.
area.
Periodically inspect to see that the blades, blade bolts and
cutter assembly are not worn or damaged. Replace worn or
Warning: Operate the disabling device before
damaged blades and bolts in sets to preserve balance.
working on or lifting the machine.
Never operate the machine with defective guards or with-
out safety devices.
Bosch Power Tools F 016 L70 825 | (23.11.12)
OBJ_BUCH-1573-003.book Page 24 Friday, November 23, 2012 9:10 AM
24 | English
Do not put hands or feet near or under rotating parts.
Battery Hazards
Never pick up or carry the machine while the motor is run-
Recharge only in the Bosch approved docking station.
ning.
In the unlikely event of liquid being ejected from the bat-
Do not leave the machine to operate unattended if you
tery avoid all contact with the machine. If contact with the
know that there are pets, children or people in the immedi-
liquid occurs, seek medical advise.
ate vicinity.
If the battery becomes defective, liquid can escape and
Start the machine according to the instructions standing
come into contact with adjacent components. Check any
well away from rotating parts.
parts concerned and contact the Bosch Service Centre.
Do not use the product at the same time as a sprinkler or
Do not open the machine and battery inside. Danger of
use the schedule to ensure that the two systems never run
short-circuiting and electric shock.
simultaneously.
Protect the machine against fire. Danger of battery ex-
Do not modify this product. Unauthorized modifications
plosion.
may impair the safety of your product and may result in in-
In case of damage and improper use of the machine, va-
creased noise and vibration.
pours may be emitted from the battery. Provide for
fresh air and seek medical help in case of complaints.
Remove the isolator key:
The vapours can irritate the respiratory system.
– before clearing a blockage,
Store the machine only within a temperature range between
– before checking, cleaning or working on the machine,
5 °C and 45 °C. As an example, do not leave the machine in
– if the machine vibrates abnormally (stop and check imme-
the car in summer.
diately),
– after striking a foreign object. Inspect the machine for
Safety Warnings for Docking Station and Power
damage and get advice on necessary repairs from your
Supply
Bosch Service Centre.
Only charge via the official Bosch docking station. Oth-
Maintenance and Storage
erwise there is danger of fire and explosion.
Always wear gardening gloves when handling or working
Check the docking station, power supply, cables and
near the sharp blades.
plugs periodically. If damage is detected, do not use
Before working on the machine itself, remove the isola-
the docking station or power supply. Never open the
tor key.
docking station or power supply. Have repairs per-
formed only by a qualified Bosch technician and only
Before working on the docking station or power supply,
using original spare parts. A damaged docking station,
remove plug from mains.
power supply, cable or plug increases the risk of an electric
Clean the exterior of the machine thoroughly using a soft
shock.
brush and cloth. Do not use water, solvents or polishes. Re-
Do not operate the docking station and power supply
move all grass and debris, especially from the ventilation
on easily flammable surfaces (e. g., paper, textiles,
slots.
etc.) or surroundings. The heating of the docking station
Turn the machine on its back and clean the blade area regular-
and power supply during the charging process can pose a
ly. Use a stiff brush or scraper to remove compacted grass
fire hazard.
clippings. (see figure A)
Supervise children at all times. This will ensure that chil-
Blades are reversible. (see figure B)
dren do not play with the docking station, power supply or
Keep all nuts, bolts and screws tight to be sure that the ma-
the machine.
chine is in safe working condition.
Children or persons that owing to their physical, senso-
Periodically visually inspect the machine and replace worn
ry or mental limitations or to their lack of experience or
or damaged parts for safety.
knowledge, are not capable of safely operating the
Ensure that only official Bosch replacement parts are used.
docking station or power supply, may only use this
docking station and power supply under supervision or
Replace all blades and bolts as a set as required.
after having been instructed by a responsible person.
Storage
Otherwise, there is danger of operating errors and injuries.
Remove isolator key when storing.
The voltage indicated on the power supply must corre-
spond to the voltage of the power source.
During winter season store the machine and the docking sta-
tion in a secure, dry place, out of the reach of children.
The power supply should ideally be connected into a socket
that is protected by a circuit-breaker that is actuated by a
Do not place other objects on the machine or docking station.
30 mA residual current. Check your Residual Current Device
SD-Card
(RCD) at regular intervals.
The machine has a SD-Card interface to allow software diag-
The supply cord must be inspected for signs of damage at reg-
nosis by a Bosch Service Centre.
ular intervals and may only be used if in perfect condition.
F 016 L70 825 | (23.11.12) Bosch Power Tools
OBJ_BUCH-1573-003.book Page 25 Friday, November 23, 2012 9:10 AM
English | 25
If the supply cord is damaged, it must be replaced by the
Technical Data
manufacturer, its service agent or similarly qualified per-
sons in order to avoid a hazard.
Robotic Mower Indego
Only use or replace cables for the docking station and power
Article number
3 600 HA2 ...
supply with Bosch approved parts.
Never touch the mains plug with wet hands.
Cutting width
cm 26
Do not run over, crush or pull the cables. Protect the cables
Height of cut
mm 20–60
from heat, oil and sharp edges.
Slope angle (max.)
°20
The power supply/docking station is double insulated for
safety and requires no earth connection. The operating volt-
Working area size
2
age is 230 V AC, 50 Hz (for non-EU countries 220 V, 240 V as
–maximum
m
1000
2
applicable). Contact your Bosch Service Centre for details.
–per charge up to*
m
200
If in doubt contact a qualified electrician or the nearest Bosch
Weight
kg 11.1
Service Centre.
Degree of protection
IPX1
The connection lead must be inspected for signs of visible
damage and ageing at regular intervals and may only be used
Serial number see type plate on the
if in perfect condition.
garden product
Products sold in GB only: Your product is fitted with a
Battery
Li-Ion
BS 1363/A approved electric plug with internal fuse (ASTA
approved to BS 1362).
Rated voltage
V= 32.4
If the plug is not suitable for your socket outlets, it should be
Capacity
Ah 3.0
cut off and an appropriate plug fitted in its place by an author-
ised customer service agent. The replacement plug should
Number of battery cells
18
have the same fuse rating as the original plug.
Operating time, average up to*
min 50
The severed plug must be disposed of to avoid a possible
shock hazard and should never be inserted into a mains sock-
Charging period (max.)
min 50
et elsewhere.
Perimeter Wire
Perimeter wire
Symbols
– minimum working length
m
20
The following symbols are important for reading and under-
– maximum working length
m
450
standing the operating instructions. Please take note of the
Docking Station
symbols and their meaning. The correct interpretation of the
symbols will help you to use the garden product in a better
Input voltage V42
and safer manner.
Power consumption
W150
Symbol Meaning
Charging current
A2.0
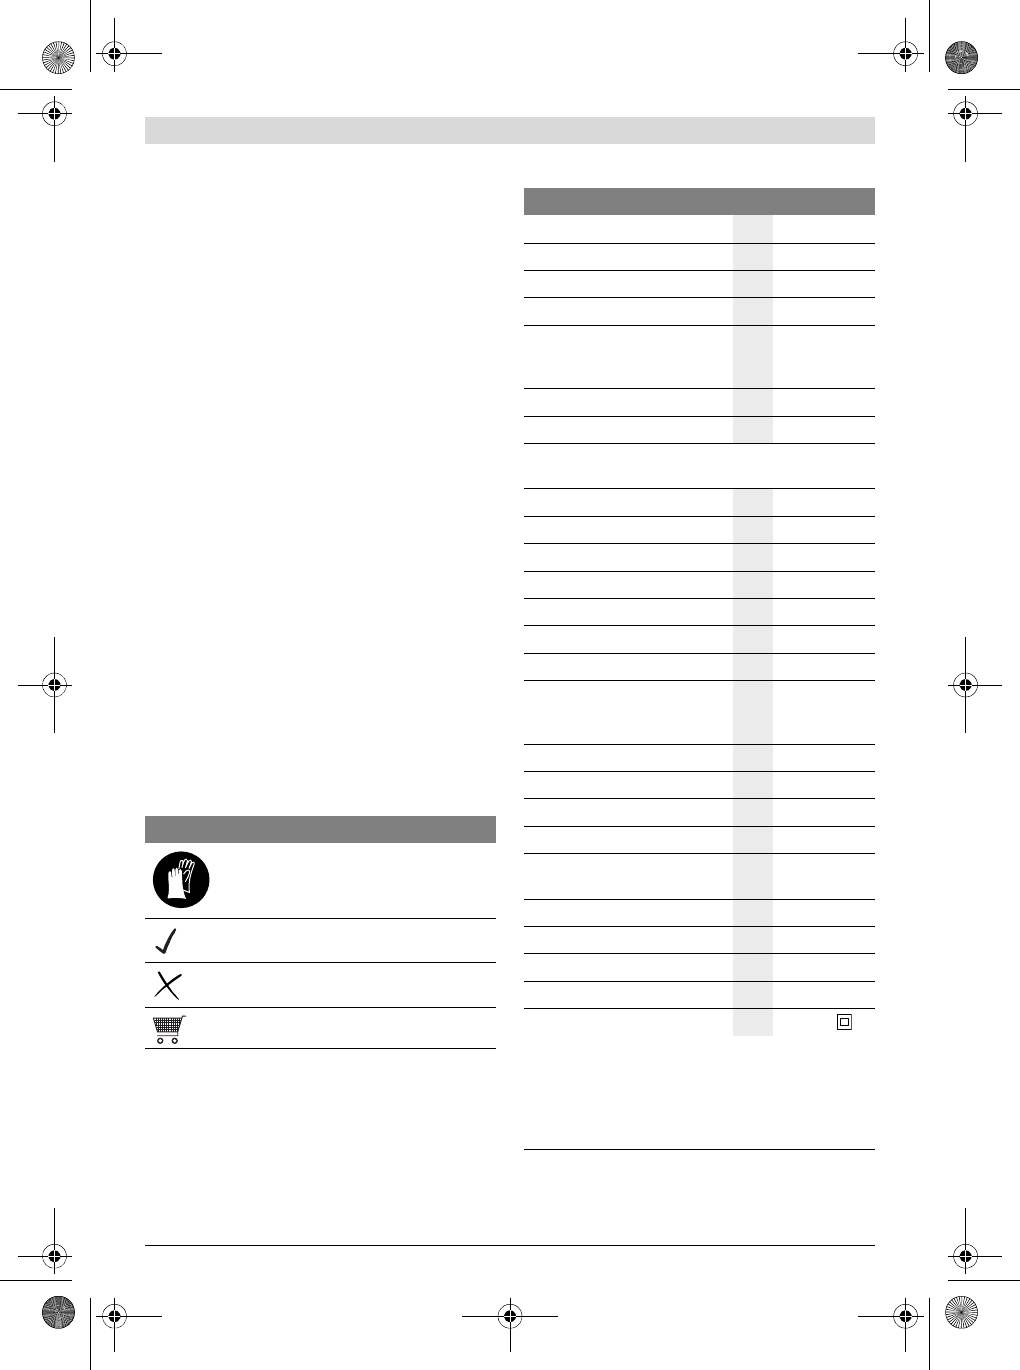
Wear protective gloves
Allowable charging temperature
range
°C 5–45
Weight
kg 2.0
Permitted action
Degree of protection
IPX1
Power Supply
Prohibited action
Input AC V 220 – 240
Accessories/Spare Parts
Protection class
/II
*depends on cutting height, grass conditions and moisture
**protected against splashing water from all directions
Intended Use
The values given are valid for a nominal voltage [U] of 230 V. For differ-
The garden product is intended for domestic lawn mowing.
ent voltages and models for specific countries, these values can vary.
Please observe the article number on the type plate of your garden
product. The trade names of the individual garden products may vary.
Bosch Power Tools F 016 L70 825 | (23.11.12)

OBJ_BUCH-1573-003.book Page 26 Friday, November 23, 2012 9:10 AM
26 | English
Robotic Mower Indego
Action Figure
Frequency
Hz 50/60
Connect first end of perimeter wire 5
Output DC
V42
Fix docking station to the ground 6
Degree of protection
IP44**
Lay out perimeter wire 7
Weight
kg 2.0
Connect second end of perimeter wire 8
*depends on cutting height, grass conditions and moisture
Clip on protective cover of docking station 9
**protected against splashing water from all directions
The values given are valid for a nominal voltage [U] of 230 V. For differ-
Install power supply 10
ent voltages and models for specific countries, these values can vary.
Docking station indicates power on 11
Please observe the article number on the type plate of your garden
product. The trade names of the individual garden products may vary.
Plug in isolator key 12
Charge battery by putting the machine into dock-
Noise/Vibration Information
ing station 13
Measured sound values determined according to EN 60335.
Welcome screen = Refer to manual 14
Typically the A-weighted noise levels of the product are:
Lift up and carry the machine 15
Sound pressure level 64 dB(A); sound power level 72 dB (A).
Uncertainty K =2.74 dB.
Set height of cut 16
Cleaning A
Declaration of Conformity
Maintenance B
We declare under our sole responsibility that the product de-
scribed under “Technical Data” is in conformity with the fol-
Lawn Preparation
lowing standards or standardization documents: EN 60335
(battery powered product) and EN 60335 (battery charger)
Remove stones, loose pieces of wood, wire, live mains cables
according to the provisions of the directives 2011/65/EU,
and other foreign objects from the cutting area.
2006/95/EC, 2004/108/EC, 2006/42/EC, 2000/14/EC.
Make sure that the cutting area is even and has no ditches,
2000/14/EC: Guaranteed sound power level 75 dB(A). Con-
grooves and steep slopes above 20° that are clear obstruc-
formity assessment procedure according to Annex VI.
tions for the machine.
Equipment category: 32
Cut the main area of the lawn with a conventional mower to a
Notified body:
max. height of 40 mm and the perimeter wire area to a max.
SRL, Sudbury, England, Nr. 1088
height of 20 mm.
Technical file (2006/42/EC, 2000/14/EC) at:
Bosch Lawn and Garden Ltd., PT-LG/ENS,
Installation
Stowmarket, Suffolk IP14 1EY, England
For a video guide on how to install the Indego please visit
Dr. Egbert Schneider
Helmut Heinzelmann
www.bosch-indego.com or use the following QR-Code.
Senior Vice President
Head of Product Certification
Engineering
PT/ETM9
Robert Bosch GmbH, Power Tools Division
D-70745 Leinfelden-Echterdingen
12.10.2012
Select a position for the docking station, horizontally leveled
and out of direct sun light.
Make sure that the docking station is placed by the side of the
Explanation of Installation Guide
cutting area with a straight 2 m track in front and behind.
(seepages3–11)
Whilst stood in the grass area to be cut it is important that the
docking station charging pins point to the left. (see figure 2)
Action Figure
Note - If the docking station is positioned with the charging
pins pointing either into the grass area or pointing to the right
Delivery scope/unpacking product 1
the Indego will not leave the dock.
Position the docking station 2 – 3
Pull the wire end through the front hole of the base plate and
Thread wire through base plate 4
straight through the wire duct and the rear hole. Fix the wire
with a peg inline with the hole. Cut off insulation carefully and
F 016 L70 825 | (23.11.12) Bosch Power Tools
English | 27
connect the wire to the right hand (red) terminal. (see
figures 4– 5)
Fix the docking station with 4 supplied fixing pins to the
ground. (see figure 6)
Lay out the perimeter wire anti-clockwise and flush to the
ground. Observe the minimum distances from lawn edges,
steps, walls, ponds, etc. Use the spacing guide. (see figure 7)
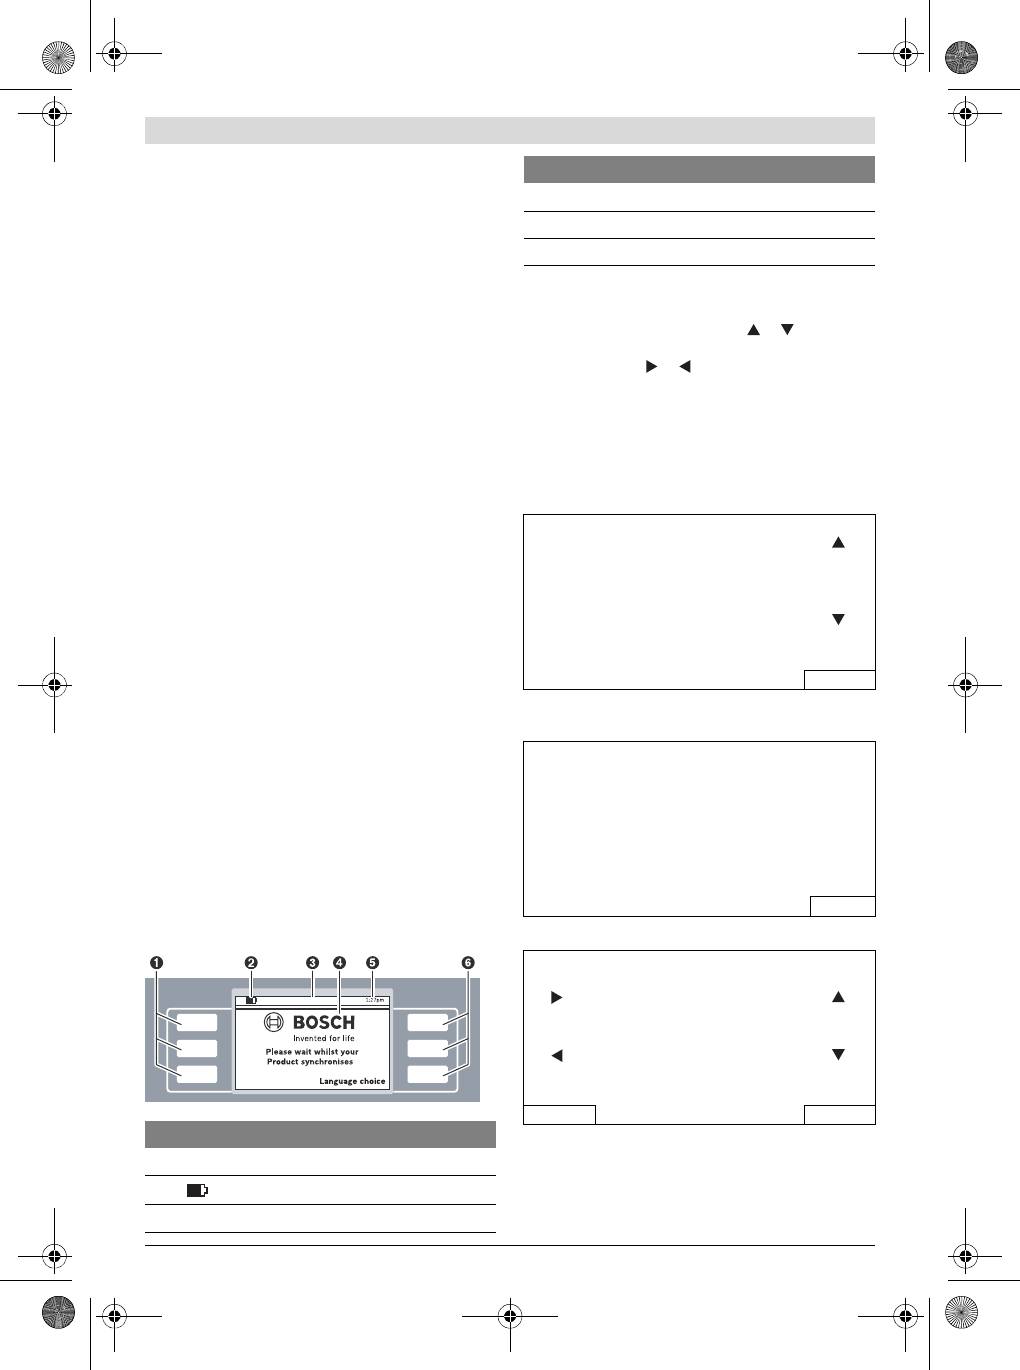
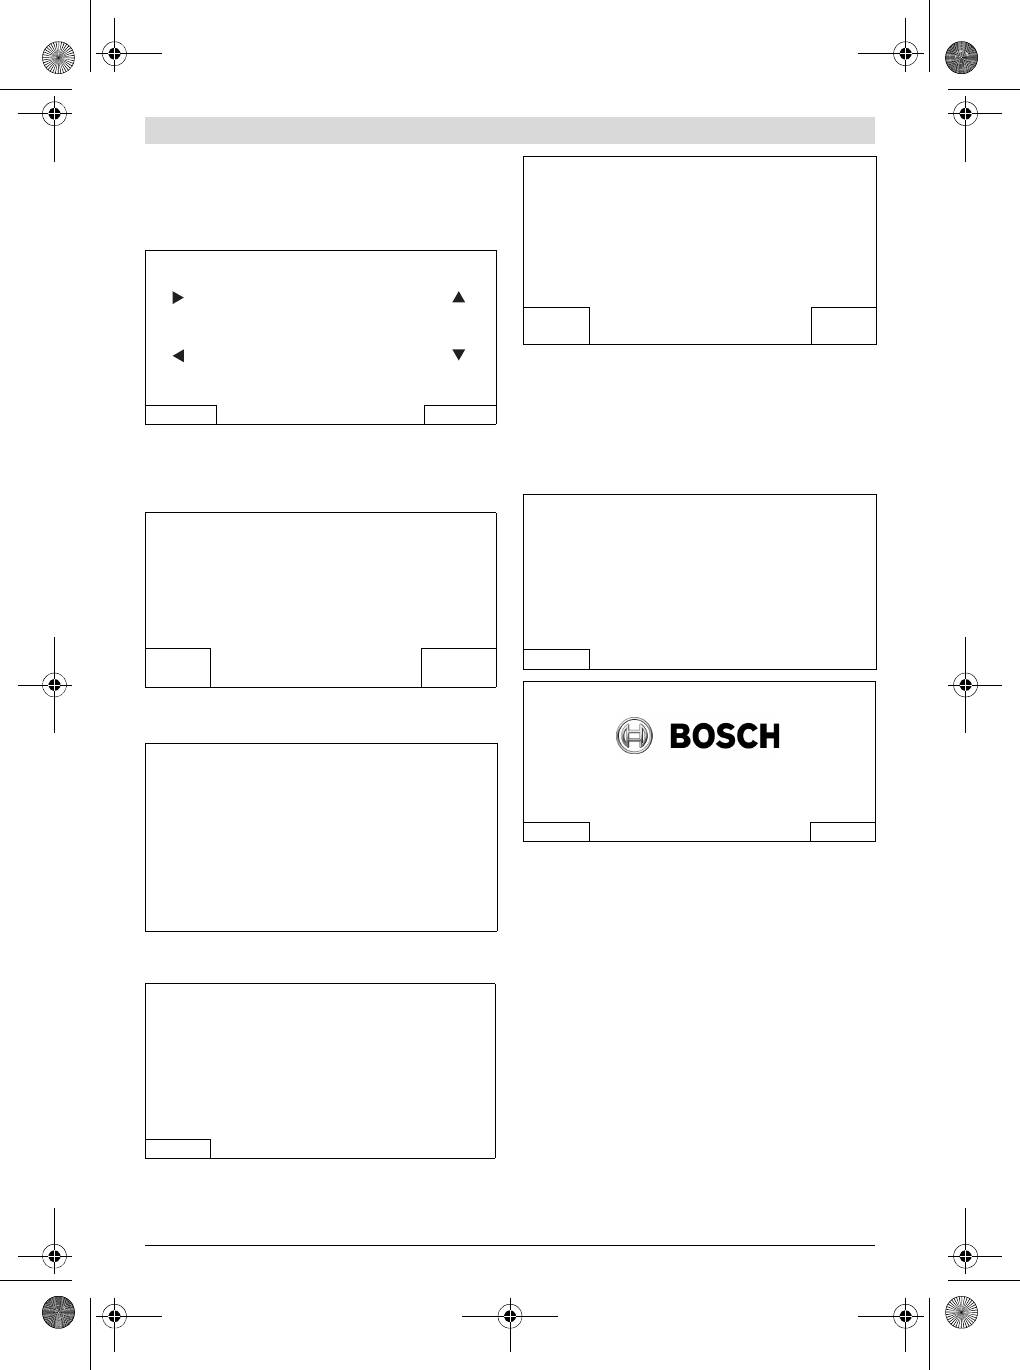
The buttons are multifunctional. The meaning depends on the
Trees, ponds, flower beds, etc. on the lawn must be delimited
individual menu function and is explained on the screen.
in clockwise direction. The lines to and from these zones may
not cross but the wire should be touching. (see figure 7)
The buttons next to the arrow symbols or allow to navi-
gate up or down through the menu options. The buttons next
Fix the wire with the first peg next to the docking station, ten-
to the arrow symbols or allow to go right or left through
sion and fix with pegs at a distance of approx. 50 cm. (see
the menu options.
figure 7)
The display will change to the next screen as soon as any op-
Continue the loop and bring the wire to the back of the dock-
tion is selected and confirmed.
ing station and inline with the other end of the wire. Fix the
second end of the wire also with the peg. Perimeter wire and
Installation
peg should be installed inline. Shorten the wire, cut off insula-
First press the button next to “Language choice”. The “Set
tion carefully and connect the wire to the left hand (black) ter-
Language” screen appears and shows the following.
minal. (see figure 8)
Clip on the protective cover of the docking station. (see
figure 9)
Note: The wire can be extended up to the maximum allowed
length of 450 m.
Note: If verticutting or raking is intended avoid the perimeter
wire.
Install the power supply in a cool, dry environment. Connect it
with the docking station and an indoor mains socket. (see
figure 10)
Check the indicator on the docking station (see figure 11):
Select one of the “Language” options and confirm with
–Indicator lights up continuously green, if the output volt-
“Save”.
age of the power supply is available and the perimeter wire
is not interrupted.
–Indicator flashes green, if the perimeter wire is broken,
long or short.
–Indicator does not light up when the output voltage of the
power supply is not available.
Initial Programming
Plug the isolator key into the machine and put it into the dock-
ing station for charging. (see figures 12 – 14)
Select “Proceed” to enter your personal PIN Code.
The welcome screen appears and shows following symbols:
Symbol Meaning
Select the input position with the left/right cursors, adjust the
Multifunctional buttons, left
digits with the up/down cursors and confirm with “Enter” or
select “Back” to return to the first “PIN Code” screen.
Battery capacity
Title of Menu/Submenu
Bosch Power Tools F 016 L70 825 | (23.11.12)
Robotic Lawnmower
OBJ_BUCH-1573-003.book Page 27 Friday, November 23, 2012 9:10 AM
Symbol Meaning
Display with dialog screens
Time
Multifunctional buttons, right
Set Language
English
Deutsch
Dansk
Svenska
Norsk
Suomi
Save
PIN Code
Please set up PIN Code
Proceed
PIN Code
Enter new PIN:
__ _ _
Back Enter
OBJ_BUCH-1573-003.book Page 28 Friday, November 23, 2012 9:10 AM
28 | English
Note: Keep the PIN code secret from third parties.
Mapping Completed
If you have lost your personal PIN code, you will have to return
the Indego and its docking station to a Bosch Service Center
Is this the back of the docking station
to be unlocked. Please contact your dealer or Bosch (see “Af-
or an obstacle? If this is an obstacle,
ter-sales Service and Application Service”).
remove it and machine will continue
Date & Time
mapping.
Docking
hh:mm
Obstacle
Station
dd/mm
Mapping is complete when the machine reaches the back of
Format: 12 hr
the docking station.
If the machine hasn’t reached the back of the docking station
Back Save
press “Obstacle” and observe information indicated on the
Select the “hh:mm”, “dd/mm” and “Format: 12 hr” input posi-
screen to complete installation.
tions with the left/right cursors, adjust the values with the
If the machine has reached the back of the docking station
up/down cursors and confirm with “Save” or select “Back” to
press “Docking Station”.
return to the first “PIN code” screen.
Mapping Completed
Installation
Mapping Completed. Mower is re-
Please press Follow Wire to
turning in the docking station.
complete installation process
Please wait.
Back
Back Follow Wire
Robotic Lawnmower
Press “Follow Wire” to complete mapping the garden.
(Select “Back” to return to the “Date & Time” screen.)
Installation
Invented for life
Step Back
Mow now Menu
Machine is about to start. Wire being
followed...
After a successful installation you can either immediately be-
gin to mow by pressing “Mow now” or set up a mowing sched-
ule in the “Menu > Select Daily Timer”.
For more information about the behaviour of the machine
while mowing see section “Mowing”.
The following screen indicates the initial follow of perimeter
wire:
Custom Settings
Mower Status
Configure the mowing schedules and the settings of the ma-
chine according to your needs. All menu items are listed in
Mapping the garden ...
section “Menu Navigation”.
The set up of a “Select Daily Timer” is explained in detail. The
other menus are self explaining.
Schedule
In “Menu > Select Daily Timer” 5 schedules are available.
Back
“MANUAL” should be used if you only want to instruct the ma-
The blades do not rotate when the machine follows the wire
chine to operate at the current time.
for the first time.
Each of the “CUSTOM” mode can be scheduled according to
your needs.
F 016 L70 825 | (23.11.12) Bosch Power Tools
OBJ_BUCH-1573-003.book Page 29 Friday, November 23, 2012 9:10 AM
English | 29
Example:
CUSTOM 1
Select Daily Timer
View Monday
Info MANUAL
Tuesday
CUSTOM 1
Wednesday
Edit
Thursday
CUSTOM 2
Friday
Edit CUSTOM 3
Saturday
CUSTOM 4
Sunday
CUSTOM 5
Back OK
Back Select
Set up all additionally required mowing days and confirm your
Select a “CUSTOM” schedule with the up/down cursors, e. g.
personal “CUSTOM 1” mowing schedule with “OK”.
“CUSTOM 1” and press “Edit”.
Select Daily Timer
CUSTOM 1
Info MANUAL
View Monday
CUSTOM 1
Tuesday
CUSTOM 2
Wednesday
Edit CUSTOM 3
Edit
Thursday
CUSTOM 4
Friday
CUSTOM 5
Saturday
Back Select
Sunday
Back OK
A tick will appear next to the saved mode.
Select the mowing day with the up/down cursors, e. g. “Mon-
The machine will start mowing as soon as day and start time of
day” and press “Edit”.
slot 1 is reached.
CUSTOM 1 – Monday
Note: Set up different schedules for seasonal growing condi-
tions in spring, summer and autumn. Observe the growth of
the grass and adjust your schedule if required.
Slot 1:
On
Start End
Note: The Indego’s cutting system is designed to cut small
12 : 00 14 : 00
lengths of grass (3–5 mm) so that the clippings can mulch
down and fertilise the lawn.
Slot 2: Off
Start End
::
Mowing
Cancel Save
Do not let children ride the machine.
Set up a time slot for “Start” and “End” of automatic mowing.
Press manual stop button before lifting. Always lift the
If a dormant period is required, e. g. at noon, two slots must
machine at its handle.
be established. For each day a single slot or both slots can be
For best mowing results, set up a frequent mowing schedule
turned ON or OFF.
for longer lasting battery and for preventing debris on the
The machine will work within a slot unless the battery needs
lawn.
charging. If the lawn area has been completed before the end
Once mowing has started:
of a time slot the machine will return to the docking station.
–in the “MANUAL”, the machine operates until the lawn ar-
Select slot 1 with the right/left cursors and select “On” or
ea has been cut or until the manual stop button is pressed
“Off” with the up/down cursors. Select “Start” with the
or until the battery needs charging.
right/left cursors and adjust a start time with the up/down
– in the programmable “Custom” mode, the machine oper-
cursors. Select “End” and adjust an end time in the same way.
ates continuously within a slot. It only pauses mowing for
If required set also a start and end time for slot 2. Press
charging. To stop mowing before the machine has finished
“Save” to confirm your entry.
a slot, press the manual stop button. If the lawn area has
If the machine should not operate, e. g. on Monday, select
been completed before the end of a time slot the machine
“Off” with the up/down cursors for both slots.
will return to the docking station.
The programmed slot is shown on a schedule.
The machine has following sensors:
– lift sensor, will be activated if the machine is lifted and
cause the machine and cutting blades to stop
– roll over sensor, will detect when the machine is inverted
and cause the machine and cutting blades to stop
Bosch Power Tools F 016 L70 825 | (23.11.12)
OBJ_BUCH-1573-003.book Page 30 Friday, November 23, 2012 9:10 AM
30 | English
– obstruction sensor, tactile detection for obstacle any-
Battery Charging
where in the full width of the path of the machine and cause
the machine to change its direction
The battery is equipped with temperature monitoring that al-
– tilt sensor, will be activated if the machine reaches an an-
lows charging only in the temperature range between 5 °C
gle of 45°
and 45 °C.
If one of the sensors is activated, such as lift sensor, the
The Lithium-Ion battery is supplied partially charged. To en-
screen will show a message, e. g. “Machine has been lifted.
sure full capacity of the battery, completely charge the ma-
Please enter PIN code to continue”. The display switches into
chine in the docking station before first use.
sleep mode, if no input is made for 3 minutes. Press any but-
The Lithium-Ion battery can be charged at any time without
ton to reactivate the screen.
reducing its service life. Interrupting the charging procedure
If the machine is in sleep mode, press any button to change to
does not damage the battery.
the PIN entry screen and enter the PIN code.
When the battery is run down or discharged, the machine is
shut off by means of a protective circuit: the blade no longer
moves.
Menu Navigation
Following tables show the various menu items.
Settings Explanation
Mow Settings Border Cut Never
Machine never cuts lawn border.
Every 4th time
Machine cuts lawn border every 4th mowing.
Every 2nd time
Machine cuts lawn border every 2nd mowing.
Cutting lane prox-
Set the proximity of the cutting lane
imity
Signal ID
Choice of different signals, if there is any signal interfer-
ence.
Delete Maps
Machine will map garden again.
Note: Machine should be in the docking station
Security Options Change PIN
PIN code is required for reactivation after auto-lock and
safety shut-down.
Changing of a PIN code needs entering of existing PIN
code first.
Auto Lock On
If buttons are not pressed for 3 min. they will be auto-
matically locked.
Recommended for safety reasons and protection
against theft.
Off
Buttons are always ready for input.
Set Language
Change of displayed language.
System Options Set Keypad
Set the volume of the keypad.
Volume
Set Display Display
Set the display brighter or darker.
Brightness
Info
Information about software version, serial number and
last service.
Factory Reset
Reset of the machine to factory setting will delete all per-
sonal settings.
A factory reset will require to repeat installation.
Set Time & Date
Edit date and time.
F 016 L70 825 | (23.11.12) Bosch Power Tools
OBJ_BUCH-1573-003.book Page 31 Friday, November 23, 2012 9:10 AM
English | 31
Select Daily
Explanation
Timer
MANUAL View
Help information when to use MANUAL.
Select
Select this programme if no schedule should be used.
CUSTOM 1 – 5 Edit Edit Monday
Program up to 5 automatic mowing schedules by setting
individual mowing days and time slots.
Edit Tuesday
Edit Wednesday
Edit Thursday
Edit Friday
Edit Saturday
Edit Sunday
Select
Activate one of 5 custom settings.
Schedule Info Explanation
Schedule Info
Overview of programmed mowing days.
Back
Return to Menu.
Change Schedule
Enter submenu “Select Daily Timer”.
Lock Controls Explanation
Lock Controls
To lock buttons immediately, independent from Auto-
Lock.
Unlock Controls
To unlock buttons the entry of the PIN code is required.
Troubleshooting
Problem Possible Cause Corrective Action
Machine fails to op-
Possible clogging Check underneath the garden product and clear out
erate
as necessary (always wear gardening gloves)
Battery not fully charged Replace garden product in the docking station
Grass too long Increase height of cut
Battery too hot/cold Allow to cool/warm
Isolator key not inserted correctly/fully Fit correctly
Motor starts and
Battery not fully charged Replace garden product in the docking station
stops immediately
Isolator key not inserted correctly/fully Fit correctly
Battery too hot/cold Allow to cool/warm
Increase height of cut
Machine functions
Possible internal fault Contact your Bosch Service Centre
intermittently
Bosch Power Tools F 016 L70 825 | (23.11.12)
OBJ_BUCH-1573-003.book Page 32 Friday, November 23, 2012 9:10 AM
32 | English
Problem Possible Cause Corrective Action
Garden product
Height of cut too low Increase height of cut
leaves ragged finish
Cutting blade blunt Replace the blade
Possible clogging Check underneath the garden product and clear out
as necessary (always wear gardening gloves)
Areas left uncut Time slot not long enough for garden size Incease mowing time slot
Battery duration Contact your Bosch Service Centre
Distance between obstacles sourrounded by
Increase distance between perimeter wire
perimeter wire is less than 1 m
Note: Obstacles with a height of more than 6 cm do
not require to be wired
Rough lawn conditions Increase/decrease cutting lane proximity from “mow
settings”
Excessive vibra-
Blade nut/bolt loose Tighten blade nut/bolt
tions/noise
Cutting blade damaged Replace the blade
No charging proce-
Charging pins corroded Clean the charging pins
dure possible
Possible internal fault Contact your Bosch Service Centre
Garden product un-
Perimeter wire not correct aligned Check perimeter wire and align it
able to dock
The LED on the
Mains plug of power supply not plugged in
Insert mains plug (fully) into the socket outlet
docking station does
(properly)
not light up
Possible faults with the socket outlet or mains
Have the mains voltage supply checked by an author-
cable
ized electrician
Power supply or docking station fault Have the power supply or docking station checked by
your Bosch Service Centre
After-sales Service and Application
Ireland
Origo Ltd.
Service
Unit 23 Magna Drive
www.bosch-garden.com
Magna Business Park
City West
In all correspondence and spare parts orders, please always
Dublin 24
include the 10-digit article number given on the type plate of
Tel. Service: (01) 4666700
the garden product.
Fax: (01) 4666888
Additionally be aware of your product’s software version (see
“Menu > Settings > System Options > Info”).
Australia, New Zealand and Pacific Islands
Robert Bosch Australia Pty. Ltd.
Great Britain
Power Tools
Robert Bosch Ltd. (B.S.C.)
Locked Bag 66
P.O. Box 98
Clayton South VIC 3169
Broadwater Park
Customer Contact Center
North Orbital Road
Inside Australia:
Denham
Phone: (01300) 307044
Uxbridge
Fax: (01300) 307045
UB 9 5HJ
Inside New Zealand:
Tel. Service: (0844) 7360109
Phone: (0800) 543353
Fax: (0844) 7360146
Fax: (0800) 428570
E-Mail: boschservicecentre@bosch.com
Outside AU and NZ:
Phone: +61 3 95415555
www.bosch.com.au
F 016 L70 825 | (23.11.12) Bosch Power Tools


