Sony CDX-M670: Getting Started
Getting Started: Sony CDX-M670
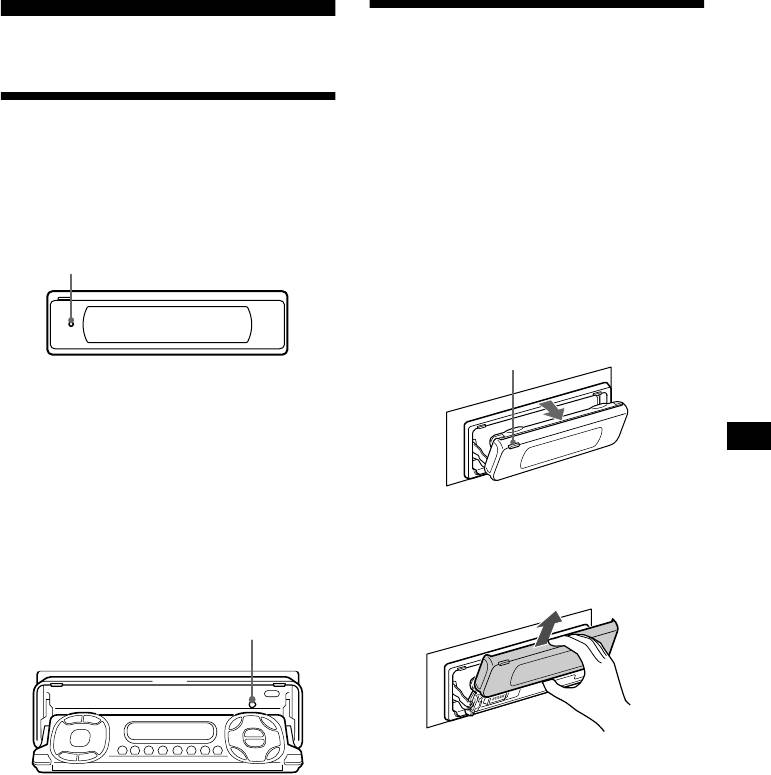
Detaching the main display
Getting Started
window
You can detach the main display window of this
Resetting the unit
unit to protect the unit from being stolen.
Before operating the unit for the first time, or
Caution alarm
after replacing the car battery or changing the
If you turn the ignition switch to the OFF
connections, you must reset the unit.
position without removing the front panel, the
Press the reset button on the front panel with a
caution alarm will beep for a few seconds.
pointed object, such as a ballpoint pen.
1 Press (OPEN) on the unit for 2
Reset button
seconds.
CD/MD playback or radio reception stops,
and the front panel automatically tilts at an
angle of 30°.
(OPEN)
Notes
• After resetting the unit in the closed position, be sure
to press (OPEN) once before operating further. If a
disc is in the unit, the disc will be ejected
automatically. Insert the disc again.
• Pressing the reset button will erase the clock setting
and some stored contents.
Resetting the unit during use in sub-
2 Detach the main display window as
illustrated.
display position
After the main display window detaching is
Press the reset button by the disc-slot with a
complete, the front panel closes
pointed object, such as a ballpoint pen.
automatically.
Reset button
Notes
• If you detach the main display window while the unit
is still turned on, the power will turn off automatically
to prevent the speakers from being damaged.
• Do not drop or put excessive pressure on the display
window.
• Do not subject the main display window to heat/high
temperature or moisture. Avoid leaving it in parked
cars or on dashboards/rear trays.
Tips
• If you want to detach the main display window, when
the front panel is in the sub-display position, press
(CLOSE) for 2 seconds. If a disc is partially inserted,
load the disc correcty or remove the disc from the
unit.
• When carrying the main display window with you,
use the supplied front panel case.
continue to next page t
9
Attaching the main display window
Place the main display window on the front side
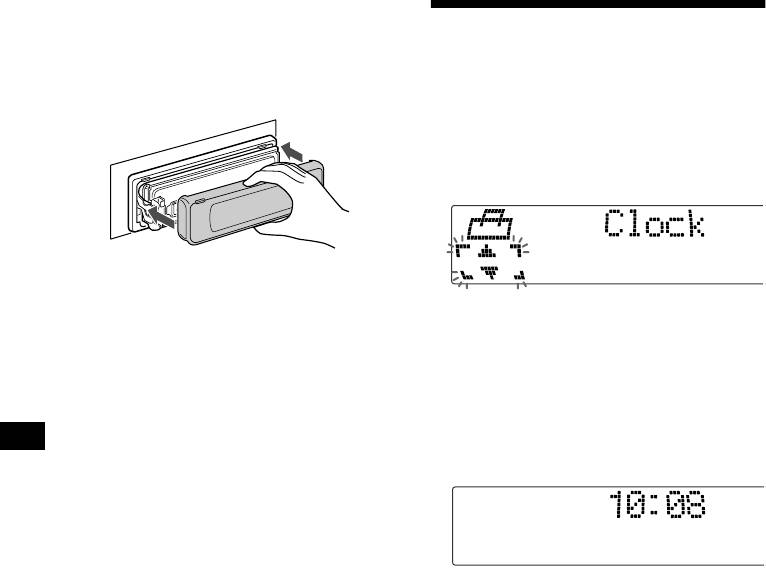
Setting the clock
of the unit as illustrated, then lightly push the
front panel into position until it clicks.
The clock uses a 24-hour digital indication.
Press (SOURCE) (or insert a disc) to operate the
unit.
Example: To set the clock to 10:08
1 Press (MENU), then press M or m (the
either (+/–) side of (DISC)) repeatedly
until “Clock” appears.
Note
Do not put anything on the inner surface of the main
display window.
1Press (ENTER).
The hour indication flashes.
2Press M or m to set the hour.
3Press , (the (+) side of (SEEK)).
The minute indication flashes.
4Press M or m to set the minute.
2 Press (ENTER).
The clock starts. After the clock setting is
completed, the display returns to normal play
mode.
Tips
• You can set the clock automatically with the RDS
feature (page 21).
• When D.Info mode is set to on, the time is always
displayed (page 34).
10
Оглавление
- CDX-M770 CDX-M670
- Getting Started
- CD/MD
- *
- Radio
- RDS
- DAB (optional)
- Tuning up for your best
- Other Functions
- Additional Information
- Procedimientos iniciales
- CD/MD
- *
- Radio
- RDS
- DAB (opcional)
- Ajuste del mejor sonido
- Otras funciones
- Información
- Komma igång
- CD/MD
- *
- Radio
- RDS
- DAB (tillval)
- Finjustera för bästa ljud
- Andra funktioner
- Ytterligare information
- Preparativos
- CD/MD
- *
- Rádio
- RDS
- DAB (opcional)
- Sintonização para o
- Outras funções
- Informações adicionais
- Ξεκινώντας
- CD/MD
- *
- Ραδιφωνο
- RDS
- Λειτουργία DAB
- Συντονισµς του µς του
- Λοιπές Λειτουργίες
- Πρσθετες
- Начало работы
- CD/MD
- Радиоприемник
- RDS
- DAB (как
- Настройка
- Другие функции
- Дополнительная


