Sony XAV-A1: инструкция
Раздел: Авто, мото оборудование и транспорт
Тип: Автомагнитола
Характеристики, спецификации
Инструкция к Автомагнитоле Sony XAV-A1
2-597-469-35(1)
AV Center
Operating Instructions
GB
Инструкция по эксплуатации
RU
For installation and connections, see the supplied Installation/Connections manual.
По установке и подсоединениям обращайтесь к прилагаемому Руководству по установке/
подсоединениям.
XAV-A1
XAV-C1
Sony Corporation Printed in Japan
2RR6P10A50002C
© 2005 Sony Corporation
This label is located on the bottom of the
chassis.
Disposal of Old Electrical & Electronic
Equipment (Applicable in the European
Union and other European countries with
separate collection systems)
This symbol on the product or on its
packaging indicates that this product shall
not be treated as household waste. Instead it
shall be handed over to the applicable
collection point for the recycling of electrical
and electronic equipment. By ensuring this
product is disposed of correctly, you will help
prevent potential negative consequences for
the environment and human health, which
could otherwise be caused by inappropriate
waste handling of this product. The recycling
of materials will help to conserve natural
resources. For more detailed information
about recycling of this product, please contact
your local Civic Office, your household waste
disposal service or the shop where you
purchased the product.
2

Table of Contents
Features...............................................................4
Precautions..........................................................5
Settings and Adjustments
Using the System Menu ...................................34
Getting Started
Monitor settings — MONITOR....................................34
Display settings — DSPL ..............................................34
Preparations........................................................9
Sound settings — SOUND ............................................35
Detaching the front panel................................................9
Other settings — OTHER..............................................36
Resetting the unit .............................................................9
Using the DVD Setup Menu.............................37
Opening up the monitor..................................................9
Language settings for DVD playback
Setting the clock..............................................................12
— Language ................................................................37
Attaching the front panel ..............................................12
Settings for digital audio output — Audio.................38
Location of Controls .........................................13
Display settings for the player — Display..................38
Main unit .........................................................................13
Settings for the parental control — Lock ....................38
Card remote commander RM-X706.............................14
Setting for the downmix signal — Downmix ............38
Locking discs — Lock ....................................................39
Basic Operation
Playing a Disc ....................................................15
TV/Radio/Other Components
Playing DVD/Video CD/Audio CD/MP3/JPEG ....15
Storing Channels/Radio Stations.....................42
Watching TV/Listening to the Radio ...............17
Storing automatically — BTM ......................................42
Watching TV or listening to radio ................................17
Storing manually ............................................................42
Watching/listening to other video/audio
Receiving the stored stations ........................................42
components .................................................................17
Using the Local seek mode in tuner function ............43
Switching FM reception to monaural..........................43
Auxiliary Audio/Video Equipment ..................44
Player
Setting for the auxiliary equipment.............................44
About the Source Menu...................................18
Displaying the image of the back camera ...................45
Display items on the CD/MP3 playback....................18
Switching the Front/Rear Output — Zone x
Using the Source Menu....................................19
Zone ...............................................................46
Playback order of MP3 files ..........................................19
Setting the screen — Wallpaper/Screen Effect ..........20
Setting the Play mode — Play Mode ...........................20
Other Features
Setting for the Display — Display ...............................21
Additional Information ....................................47
Setting the sound quality — Equalizer .......................23
Card remote commander precautions.........................47
Resuming Playback — Resume Play ................25
About the liquid crystal display (LCD) panel............47
Searching a Specific Point on a Disc — Scan ..26
Replacing the lithium battery .......................................47
Using the Menus on DVDs ...............................27
Removing the unit..........................................................48
Using PBC Functions — PBC (Playback
Troubleshooting................................................50
control)...........................................................28
General.............................................................................50
Starting Playback from a Selected Point
Picture ..............................................................................50
— Search Play ................................................29
Sound ...............................................................................51
Operation.........................................................................51
Radio reception...............................................................53
Various DVD Operations
Messages..........................................................................53
Changing the Audio Channels.........................30
Specifications ....................................................54
Adjusting the Audio Output Level
Glossary.............................................................55
— DVD Level Adjustment .............................31
Language Code List ..........................................57
Changing the Angles........................................32
Displaying the Subtitles ...................................33
3

Features
Welcome!
Thank you for purchasing this Sony AV Center. Before operating the unit, please read this
manual thoroughly and retain it for future reference.
7-inch in-dash motorized TFT monitor
Innovative in-dash monitor design allows the unit to be mounted in a single DIN slot. At
the touch of a button, a 7-inch wide-aspect-ratio screen slides out, for comfortable TV or
DVD viewing. (Sony TV tuner is optionally available.)
•High brightness and wide viewing angle monitor.
•Touch panel and graphic user interface.
DVD, CD, VCD playback compatibility
• Compatible with various disc formats, such as DVD-R/-RW, DVD+R/+RW, etc.
DVD-RW: compatible with video mode and VR mode (various editing available)
DVD+RW: compatible with video mode and +VR mode (various editing available)
• Plays back up to 1,000 tracks* recorded on DVD-R/-RW or DVD+R/+RW in MP3 file
format
* Depends on track length
2 video/audio inputs, 1 video input, 1 video/audio output (rear), and 1 digital output
provided
Zone × Zone
You can simultaneously listen to a separate sound source in this unit and auxiliary audio
equipment in the rear.
DVD level adjustment
Balances the output level differences between PCM, Dolby Digital and DTS, and the
volume level differences between disc and source.
EQ7
You can select an equalizer curve for 7 music types.
4
Precautions
To avoid the risk of injury or accident, read
•When backing up you car, be sure to look
the following precautions before installing
back for your safety.
and operating the unit.
On installation
On safety
•We recommend this unit should be
Comply with your local traffic rules and
installed by a qualified technician or service
regulations.
personnel
•While driving
– If you try to install this unit by yourself,
–You must not watch or operate the
refer to the supplied “Installation/
monitor. It may lead to distraction and
Connections” manual and read it
cause an accident.
carefully. Make sure to install this unit
Park your car in a safe place to watch the
properly.
monitor and operate the unit.
–Improper installation may cause battery
•While operating
drain or a short circuit.
– Do not insert your hands, fingers or
• If the unit does not work properly, check
foreign object into the unit while the
the connections first (refer to the supplied
monitor is functioning. It may cause
“Installation/Connections” manual). If
injury or damage to the unit.
everything in order, check the fuse.
– Keep small articles out of the reach of
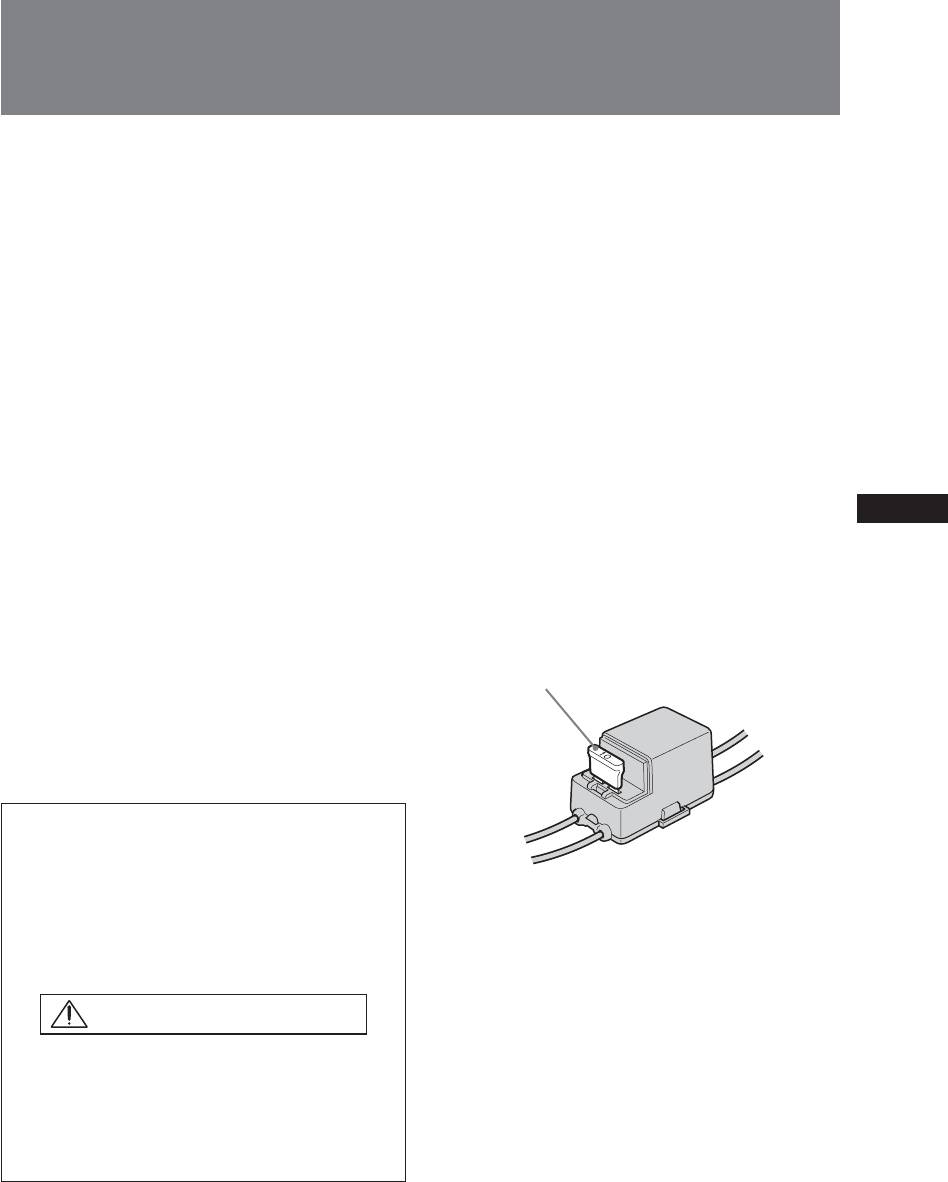
• Replacing the fuse
children.
–When replacing the fuse, be sure to use
• Do not touch the TV aerial and monitor at
only a fuse of the same rating (ampere
the same time during storms. You may get
rating).
an electric shock.
Fuse (10 A)
• If your car was parked in direct sunlight
resulting in a considerable rise in
temperature inside the car, allow the unit to
cool off before operating it.
Preventing accidents
The TV/video pictures appear only after
you park the car and set the parking brake.
When the car starts moving, the TV/video
– Using a different fuse or bridging the
pictures automatically disappear for safety
contacts with wire is highly dangerous
reasons, after displaying the following
and can lead to serious damage.
caution.
•Protect unit surface from damage
– Do not expose the unit surface to
Picture off for your safety!
chemicals such as insecticide, hair spray,
insect repellent, etc.
Do not operate equipment connected to
– Do not leave rubber or plastic materials
the TV tuner unit or watch the monitor
in contact with the unit for a long time.
while driving. You may cause a traffic
Otherwise the finish of the unit may be
accident if your attention is distracted by
impaired, or deformation may occur.
the monitor.
•When installing, be sure to turn the ignition
key to the off position. Installing the unit
• Do not use the Set Up feature while
while the ignition is on may cause battery
driving, or perform any other function
drain or short circuit.
which could divert your attention from the
•When installing, be sure not to damage any
road.
car parts such as pipes, tubes, fuel tank or
•When you connect the back camera:
wiring by using a drill. It can cause a fire
–When you drive, watch the surroundings
or an accident.
carefully for your safety. Do not depend
on the back camera exclusively.
5
Precautions
Installing location
Moisture condensation
• Do not install this unit where:
On a rainy day or in a very damp area,
– the driver’s view will be obstructed when
moisture condensation may occur inside the
the monitor is in either open or close
lenses and display of the unit. Should this
position.
occur, the unit will not operate properly. In
– the operation of the car or the airbag
such a case, remove the disc and wait for
system will be obstructed.
about an hour until the moisture has
– It will obstruct the operation of the
evaporated.
vehicle, especially the steering wheel,
shift lever or brake pedal.
To maintain high sound quality
Be careful not to splash juice or other soft
If you have any questions or problems
drinks onto the unit or discs.
concerning your unit, please consult your
nearest Sony dealer.
About this manual
• Instructions in this manual describe the
controls on the card remote commander.
You can also use the controls on the unit if
they have the same or similar names to
those on the card remote commander.
• In this manual, “DVD” is used as the
general term for DVD-R/-RW and
DVD+R/+RW.
• The meaning of the icons used in this
manual is described below:
Icon Meaning
Functions available for DVD VIDEOs,
DVD-Rs/DVD-RWs, or DVD+Rs/
DVD+RWs in video mode
Functions available for Video CDs or
CD-Rs/CD-RWs in video CD format
Functions available for music CDs or
CD-Rs/CD-RWs in music CD format
Functions available for files in MP3 format
stored on CD-ROMs/CD-Rs/CD-RWs/
DVD-Rs/DVD-RWs/DVD+Rs/
DVD+RWs
Functions available for files in JPEG
format stored on CD-ROMs/CD-Rs/
CD-RWs/DVD-Rs/DVD-RWs/DVD+Rs/
DVD+RWs
Precautions
• Do not use the custom functions while
driving, or perform any other function
which could divert your attention from the
road.
• The power aerial will extend automatically
while the unit is operating.
6
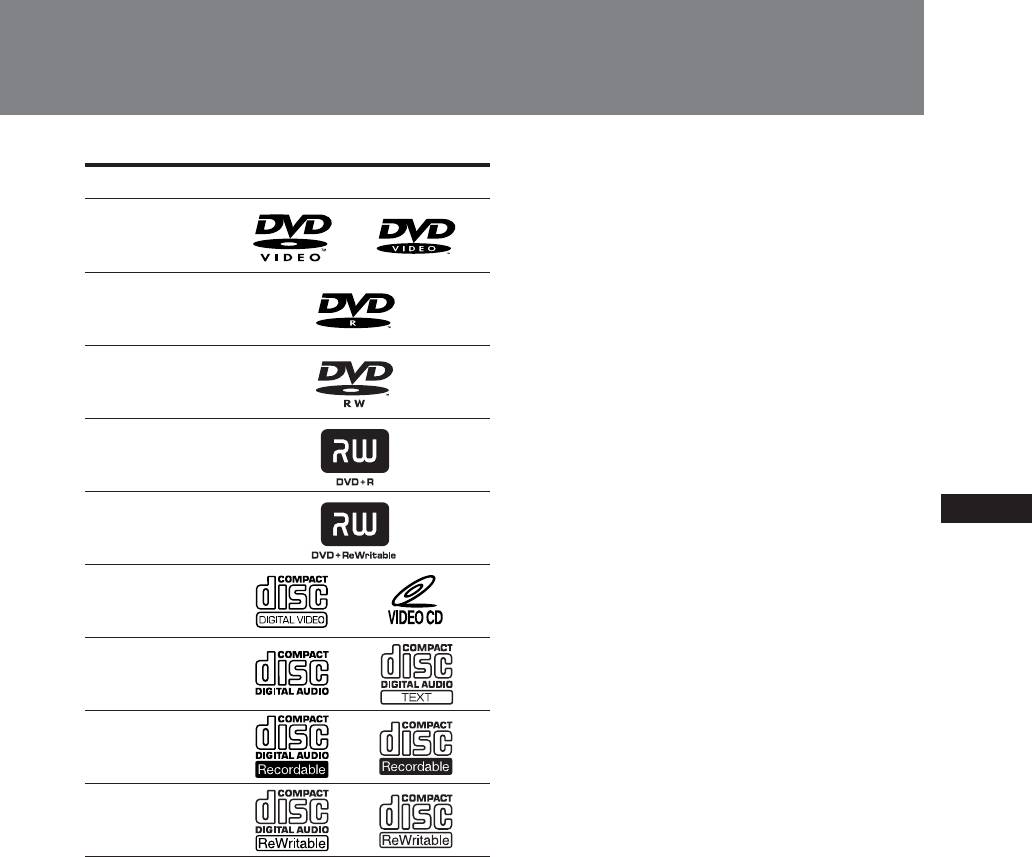
Playable discs
Video CD (VCD)
A Video CD can contain both audio and
Format of discs
visual data on a disc with the same size as a
regular Audio CD. The playing time is 74
DVD VIDEO
minutes for a standard 12-cm CD.
Audio CD
DVD-R*
An Audio CD containing audio data. The
playing time is 74 minutes for a standard 12-
cm CD.
DVD-RW*
CD-Recordable (CD-R)
With a CD-R, you can edit audio data. You
DVD+R*
can write information on a CD-R only once.
CD-Rewritable (CD-RW)
DVD+RW*
With a CD-RW, you can edit audio data. You
can write information on a CD-RW again and
again.
Video CD
CD-Extra
A CD-Extra has two sections (sessions) for
Audio CD
audio and data respectively. You can only
play the section of audio on this unit.
CD-R*
Notes
• You can play DVD-Rs/DVD-RWs, DVD+Rs/
DVD+RWs and CD-Rs/CD-RWs designed for audio
CD-RW*
with this unit. However, depending on the recorded
conditions, you cannot play some discs.
* Discs that are not finalized cannot be played.
• You cannot play CD-Rs/CD-RWs, DVD-Rs/DVD-
“DVD VIDEO”, “DVD-R”, “DVD-RW”, “DVD+R”,
RWs or DVD+Rs/DVD+RWs that are not finalized.
and “DVD+RW” are trademarks.
• Discs created in Packet Write format cannot be played.
• The discs listed below cannot be played on this unit:
– 8-cm discs
DVD
– CD-ROM (the data other than the MP3 or JPEG files)
A DVD contains both audio and visual data.
– CD-G
A 12-cm disc can hold 7 times the amount of
– Photo-CD
data contained in a CD-ROM, which equals
– VSD (Video single disc)
to 4 consecutive hours of playing time (8
– DVD-ROM (the data other than the MP3 or JPEG
hours for double-sided discs). DVDs are
files)
divided into 4 types: single sided single layer,
– DVD-RAM
single sided double layer, double sided single
– DVD-Audio
layer, and double sided double layer.
– CPRM
– Active-Audio (Data)
– CD-Extra (Data)
– Mixed CD
– SVCD (Super Video CD)
– CDV
– CD-F
– SACD (Super Audio CD)
7
Precautions
Note on DualDiscs
DVDs labeled
ALL
can be also played on this
A DualDisc is a two sided disc product which
unit.
mates DVD recorded material on one side
If you try to play any other DVD, the
with digital audio material on the other side.
message “Can not play” will appear on the
However, since the audio material side does
monitor screen. Depending on the DVD, no
not conform to the Compact Disc (CD)
region code may be labeled even though
standard, playback on this product is not
playing the DVD is prohibited by area
guaranteed.
restrictions.
Note on transparent discs
Note on playback operations of
12-cm discs containing of only an inner 8 cm
DVDs and VCDs
data portion (the rest is transparent) cannot
Some playback operations of DVDs and
be played on this unit.
VCDs may be intentionally set by software
producers.
Music discs encoded with
Since this unit plays DVDs and VCDs
copyright protection
according to the disc contents the software
This unit is designed to play back discs that
producers designed, some playback features
conform to the Compact Disc (CD) standard.
may not be available. Also, refer to the
Recently, various music discs encoded with
instructions supplied with the DVDs or
copyright protection are marketed by some
VCDs.
record companies. Please be aware that
among those discs, there are some that do not
Copyrights
conform to the CD standard and may not be
This product incorporates copyright
playable and recordable by this product.
protection technology that is protected by
method claims of certain U.S. patents, other
Region code
intellectual property rights owned by
This system is used to protect software
Macrovision Corporation, and other rights
copyrights.
owners. Use of this copyright protection
The region code is located on the bottom of
technology must be authorized by
the unit, and only DVDs labeled with an
Macrovision Corporation, and is intended for
identical region code can be played on this
home and other limited viewing uses only
unit.
unless otherwise authorized by Macrovision
Corporation. Reverse engineering or
disassembly is prohibited.
Manufactured under license from Dolby
Laboratories.
“Dolby”, “Pro Logic”, and the double-D
symbol are trademarks of Dolby
Laboratories.
“DTS” and “DTS 2.0 + Digital Out” are
trademarks of Digital Theater Systems, Inc.
Region code
8

Getting Started
Preparations
Detaching the front panel
Resetting the unit
You can detach the front panel of this unit to
Before operating the unit for the first time, or
prevent theft.
after replacing the car battery or changing the
connections, you must reset the unit.
Caution alarm
Detach the front panel by pressing RELEASE
If you turn the ignition switch to the OFF
and pull it off towards you.
position without detaching the front panel,
Use a pointed object such as a mechanical
the caution alarm will sound for a few
pencil to push the Reset button. To avoid the
seconds.
possibility of damage, you should not use a
The alarm will only sound if the built-in
needle or push the button too strongly.
amplifier is used.
Push Reset.
Press (OFF).
1
TILT
OPEN/CLOSE
The unit is turned off.
Press (RELEASE), then pull it off
2
towards you.
Reset button
Notes
• When the Reset button is pushed, the time and all
stored settings are lost and will have to be
reprogrammed.
• The reset procedure takes about 10 seconds after the
Reset button is pushed.
OFF
(RELEASE)
• When the reset procedure is completed, press OPEN/
CLOSE and verify that the monitor opens up properly.
Notes
• If you reset the unit while the monitor is open, close
• Do not drop the front panel and display window or put
the monitor once. Otherwise, it may not operate
excessive pressure on them.
properly.
• Do not subject the front panel to heat/high
temperature or moisture. Avoid leaving it in a parked
car or on a dashboard/rear tray.
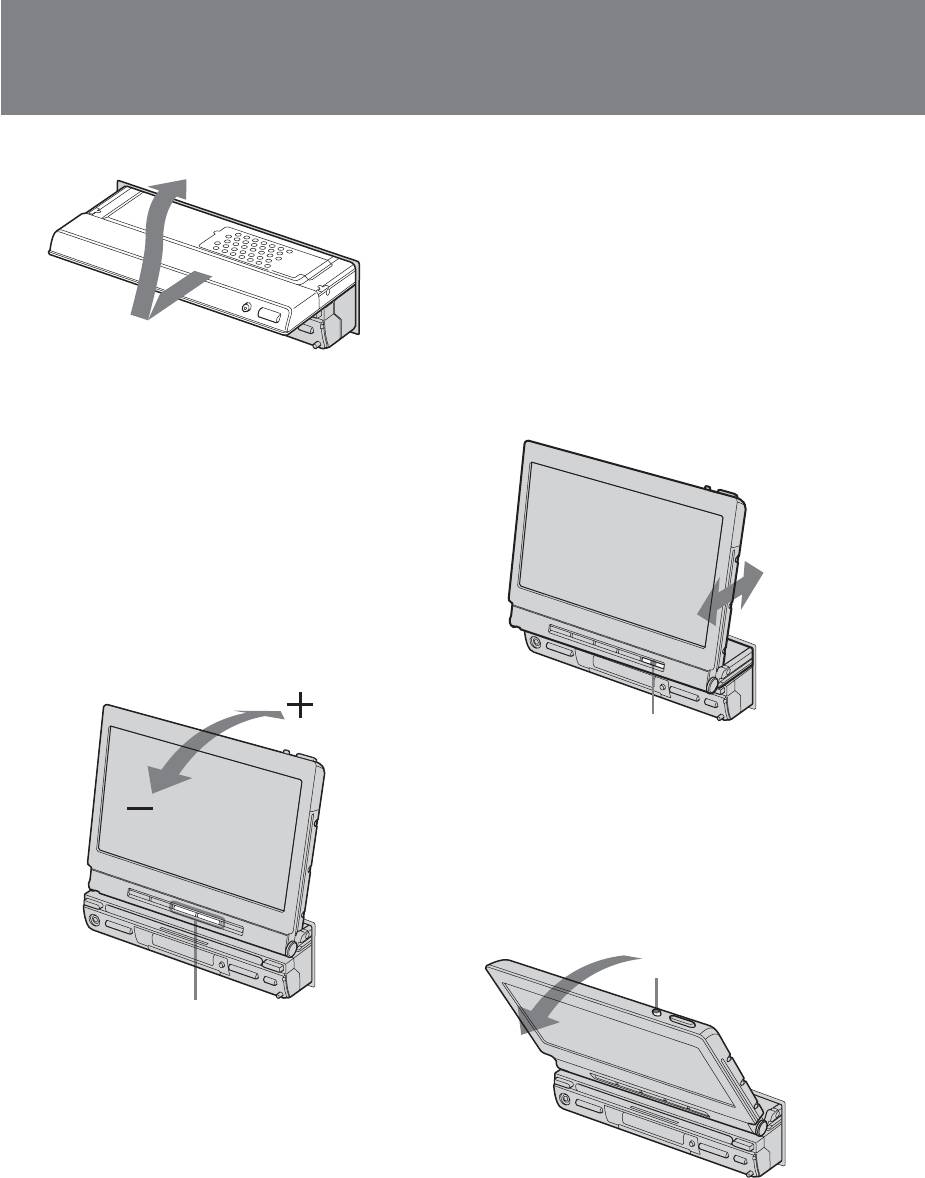
Opening up the monitor
Press OPEN/CLOSE on the monitor.
Tip
When carrying the front panel, use the supplied front
panel case.
OPEN/CLOSE
9
Preparations
The monitor slides out of the main unit.
Adjusting the monitor position
You can adjust the monitor position by sliding
it forward or backward while pressing SLIDE.
When the monitor cannot slide any more, the
monitor begins to slide in the opposite
direction. Press and hold SLIDE for 2 seconds
to slide the monitor back to the other
direction when the monitor is in halfway
through.
Notes
The adjustment is memorized, and the
• The card remote commander cannot be used for
monitor will automatically move to the same
opening up or closing the monitor.
position when it is opened up again.
• If movement of the monitor during opening or closing
has been impeded by the gear shift lever or another
obstacle, press OPEN/CLOSE again.
Adjusting the monitor angle
You can adjust the angle of the monitor for
best viewing.
Press ANGLE –/+ repeatedly.
The buttons adjust monitor position in
discrete steps.
SLIDE
Tilting the monitor ahead
In order to operate the button on the
dashboard easily, the monitor can be tilted
ahead.
Press TILT.
TILT
ANGLE –/+
+ button: Monitor is tilted backward.
– button: Monitor is tilted forward.
The adjustment is memorized, and the
monitor will move to the same angle the next
time it is opened up again after having been
closed.
Notes
The monitor will be tilted ahead.
• Do not move the monitor by hand.
To return to the original position, press TILT
• If OPEN/CLOSE was pressed while the monitor was
again.
opening or closing, the monitor may not stop at the
original angle. In such a case, press ANGLE –/+ to
Tip
adjust the angle.
If no operation is made for about 25 seconds, the monitor
will return to the original position.
10
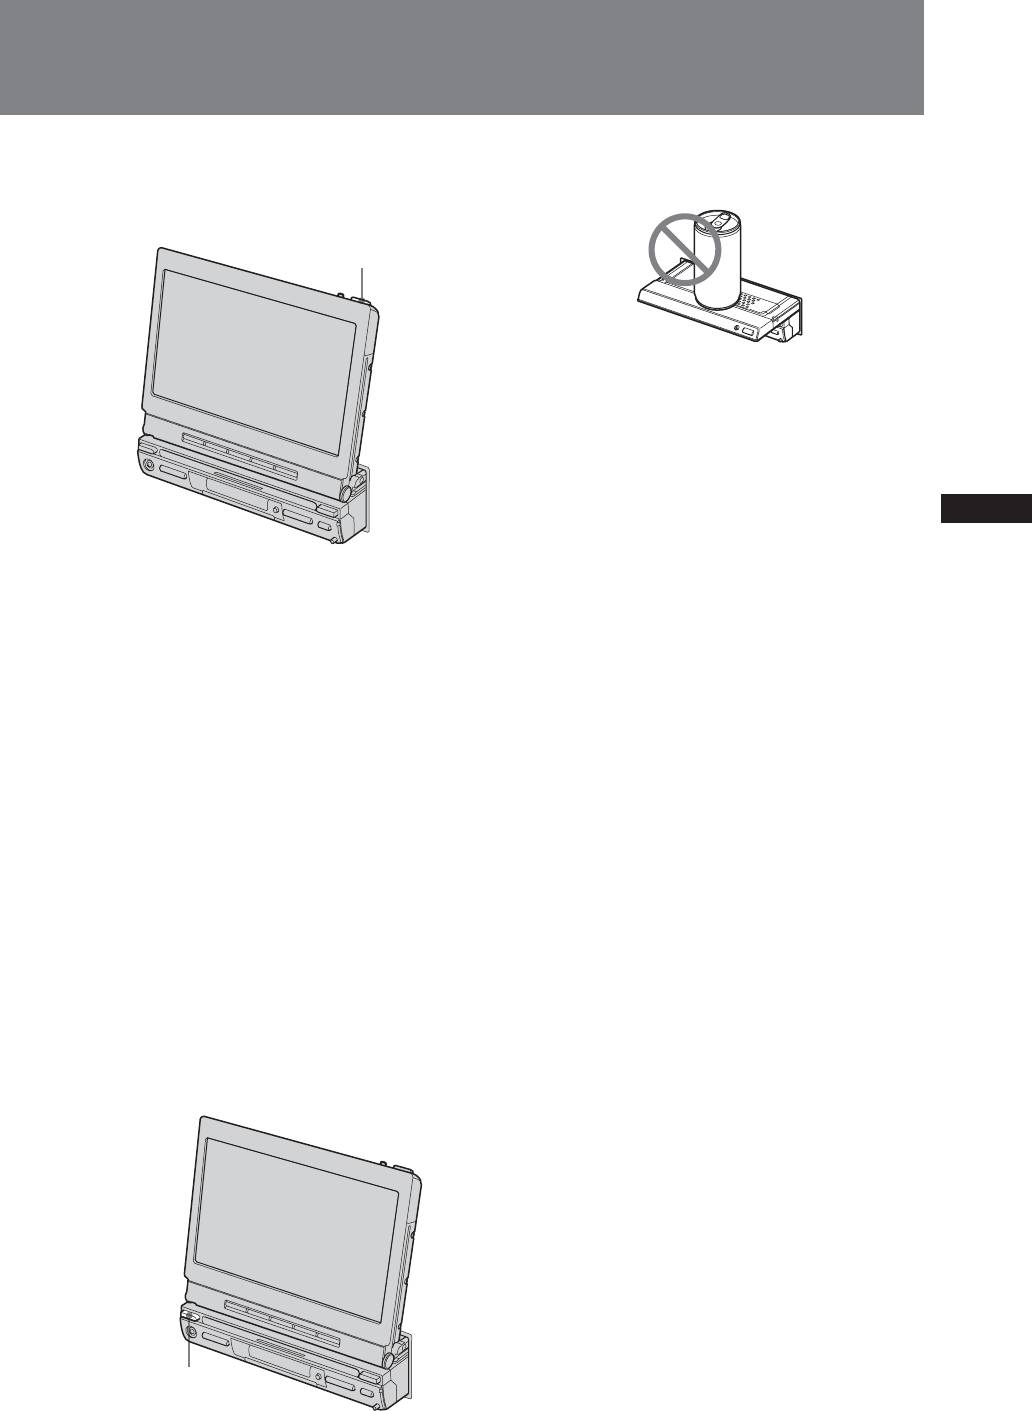
Closing the monitor
Note
Press OPEN/CLOSE.
Do not place any articles, such as cans or bottles, on the
The monitor retracts into the unit, and you
monitor. It may cause a malfunction.
can use only the audio functions of the unit.
OPEN/CLOSE
Shutting down
• If you press OFF on the card remote
commander while the monitor is opened
up, the sound is turned off, and the unit
switches to the standby mode, in which
only the clock indication is shown.
• If you set the ignition key of the car to OFF,
power to the unit is automatically turned
off.*
Tip
If you have pressed OFF when opening up the monitor,
you can touch the monitor or press SOURCE to turn the
picture on again.
*Warning when installing in a car without an ACC
(accessory) position on the ignition key
After turning off the ignition, be sure to press OFF on
the unit for 2 seconds to turn off the clock display.
Otherwise, the clock display does not turn off and this
causes battery drain.
To turn on the unit when it is turned off, press
SOURCE on the unit. (You cannot turn on the unit with
the card remote commander.)
SOURCE
11
Preparations
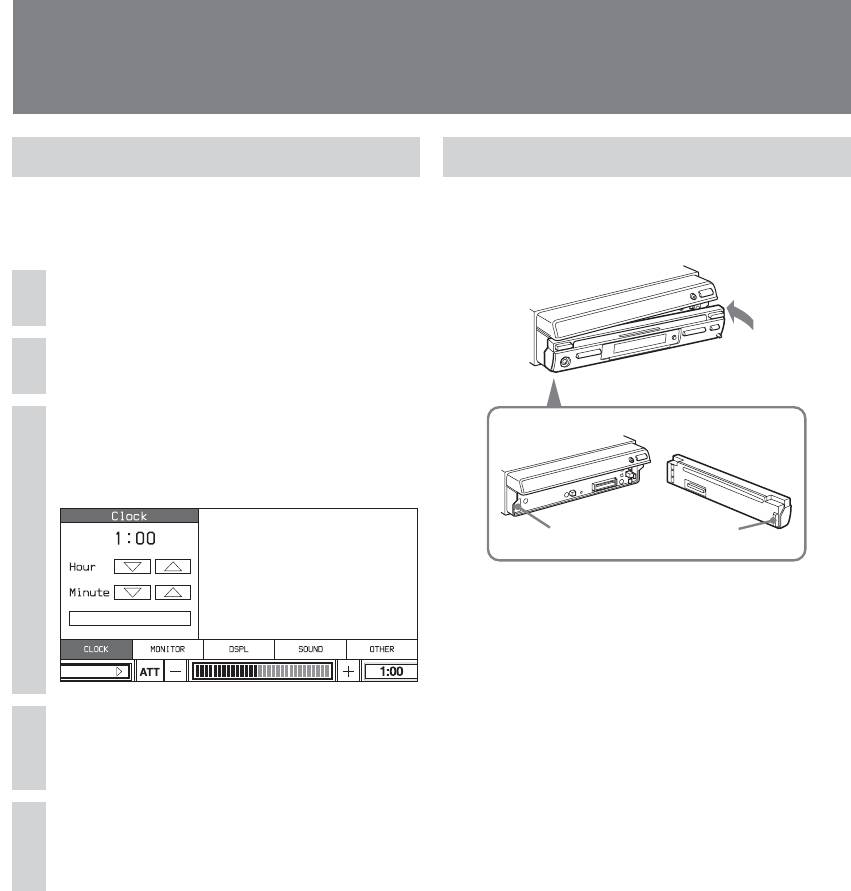
Setting the clock
Attaching the front panel
The clock uses a 24-hour digital indication.
Engage part A of the front panel with part B
of the unit, as illustrated, and push the right
On the monitor
side into position until it clicks.
Touch SOURCE LIST.
1
Touch MENU.
2
Touch CLOCK.
3
The clock adjust display appears.
B
A
Note
Do not put anything on the inner surface of the front
Enter
panel.
SOURCE LIST
Touch V/v to set the hour and
4
minute.
Touch Enter.
5
The clock starts from 00 seconds.
12
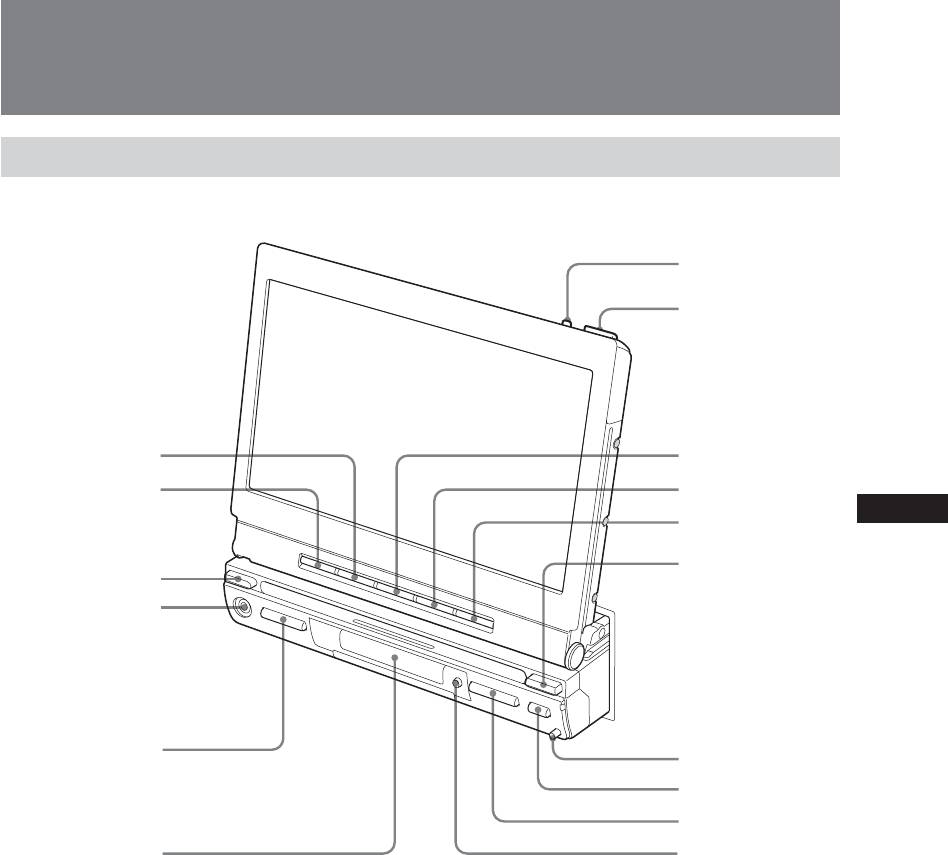
Location of Controls
Main unit
Monitor Open
7
8
1
9
2
0
qa
qs
3
4
5
qd
qf
qg
6
qh
Refer to the pages listed for details.
1 ZxZ button 46
9 ANGLE – button 10
2 SOURCE button 11, 17
0 ANGLE + button 10
3 SOURCE button 11, 17
qa SLIDE button 10
4 A/V IN jack
qs MODE button
5 VOL –/+ button
qd RELEASE button 9
6 Display window
qf Z (eject) button
7 TILT button 10
qg SEEK –/+ ./> button 26
8 OPEN/CLOSE button 9, 10, 11
qh OFF button 9, 11
* Warning when installing in a car without an ACC (accessory) position on the ignition key
After turning off the ignition, be sure to press OFF on the unit for 2 seconds to turn off the clock display.
Otherwise, the clock display does not turn off and this causes battery drain.
13
Location of Controls
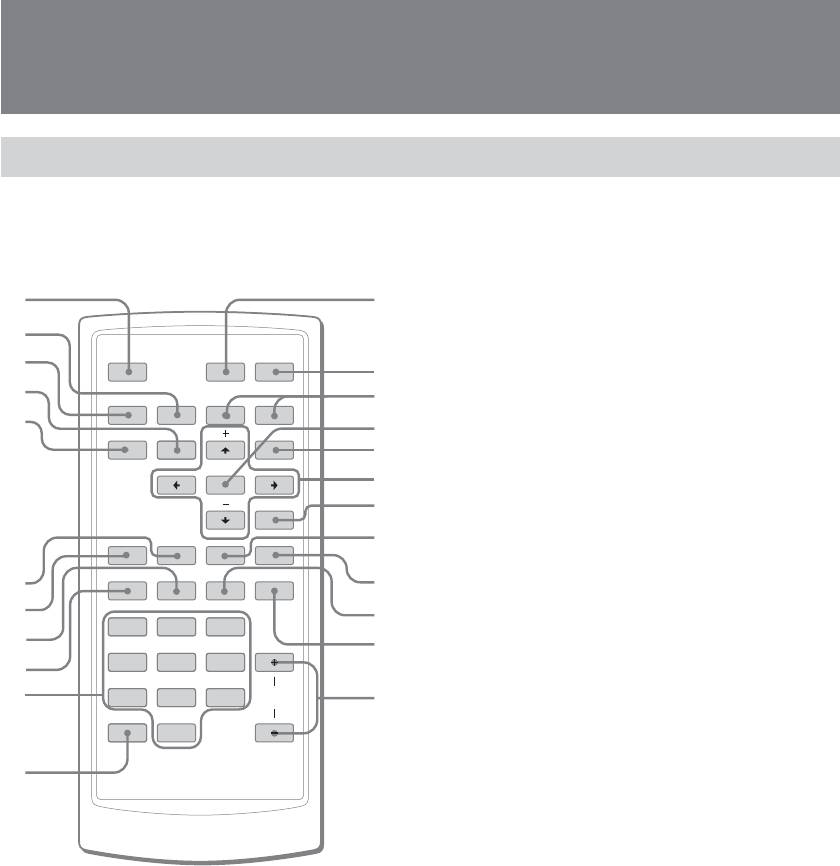
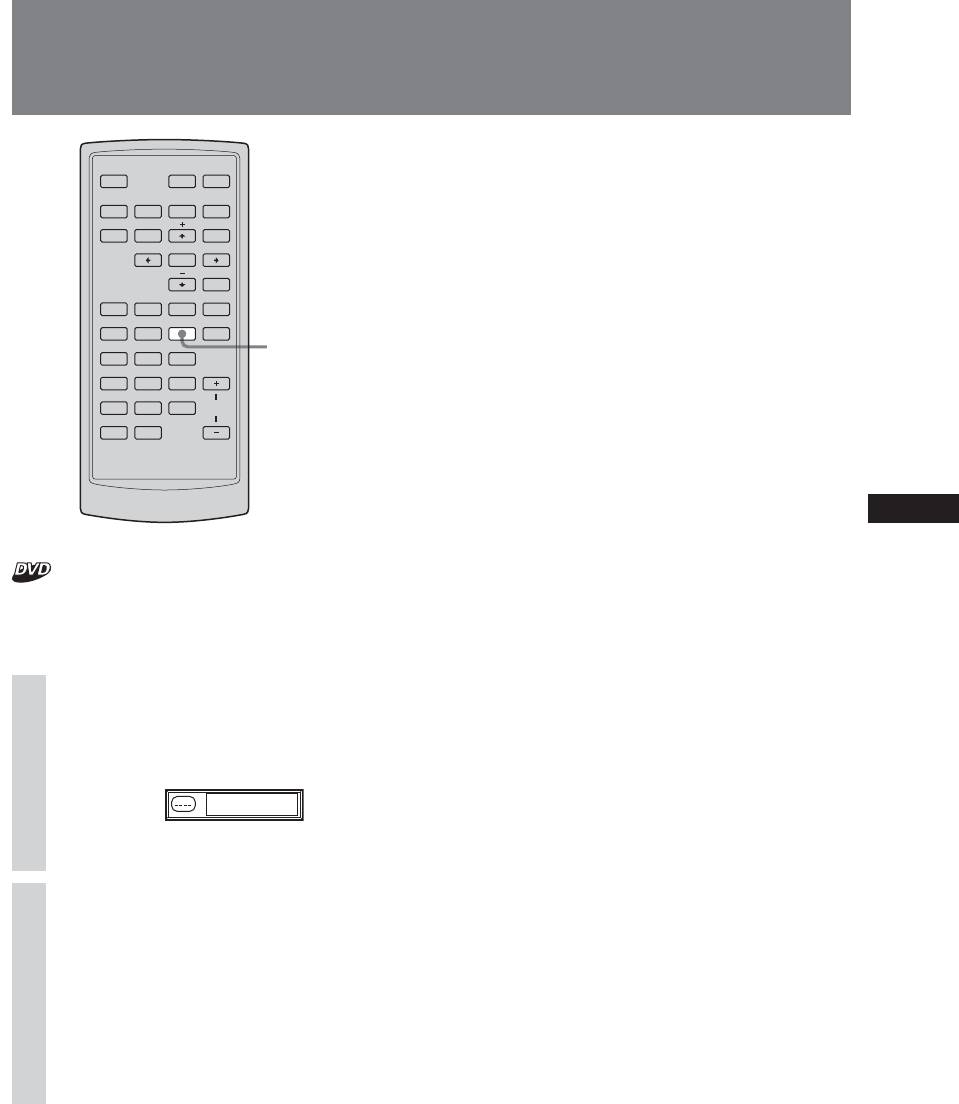
Card remote commander RM-X706
The unit can be operated with the card remote commander. For safety, stop the car before
using the card remote commander, or have a passenger operate it.
1
2
3
qd
4
qf
5
qg
qh
qj
qk
ql
6
7
8
9
q;
qa
14
q
s
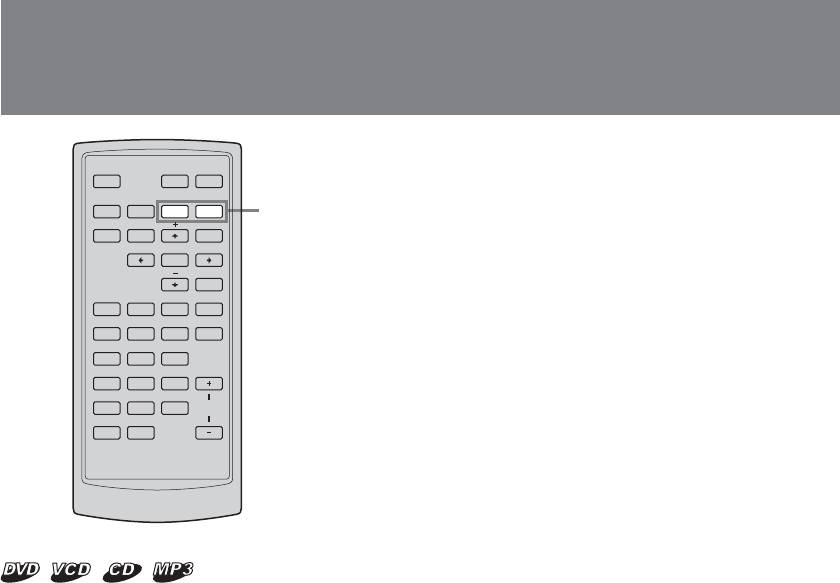
qs ATT button
To attenuate the sound. To cancel, press again.
Turning off the sound temporarily.
ATT
DVD
When you press the button, the sound is turned off
OFF
BX
and “ATT” appears on the display.
SRC
To restore the sound, press the button again
x
>.
TOP MENU
MENU
(or VOL +/–).
MODE
qd DVDu button 15, 25
To start/pause playback.
ENTER
qf ./> buttons 15, 26
O
qg ENTER button 27, 28, 29
To complete a setting.
REP
SHUF
EQ7 ZxZ
qh MENU button 27
SEARCH
AUDIO
SUBTITLE ANGLE
To display a menu on a DVD.
w;
qj </M/m/, buttons 27, 29
To move the cursor, or turn the pages.
12
3
wa
qk O (Return) button 28
ws
456
To return to the previous display, or previous
operation.
789
VOL
wd
ql EQ7 button 23
CLEAR
To select an equalizer type (Xplod, Vocal, Club, Jazz,
0
New Age, Rock, Custom or Off).
w; ZxZ (Zone x Zone) button 46
To switch the front/rear output.
wa SUBTITLE button 33
To change the subtitle language (DVD).
ws ANGLE button 32
To change the viewing angle (DVD).
wd VOL +/– buttons
Refer to the pages listed for details.
To adjust the volume.
1 OFF button 15, 28
1
To power off the source.
*
Only when an optional device is connected.
2 x button 15, 25
*
2
Only when PBC is Off.
To stop the source (VCD/DVD).
3 SRC (SOURCE) button 15, 17, 44
Note
To power on/change the source (CD/DVD/TUNER/
If the unit is turned off by pressing OFF for 2 seconds, it
AUX/TV*
1
).
cannot be operated with the card remote commander
4 TOP MENU button 27
unless SOURCE on the unit (3 on page 13) is pressed to
To display the top menu on a DVD.
activate the unit first.
5 MODE button 17, 44
To select the radio band (FM/AM)/select AUX/select
Tip
TV/select the unit.
See “Replacing the lithium battery” for details on how to
6 SHUF button 21
replace the battery (page 47).
7 REP button 21
8 AUDIO button 30
To change the audio output (VCD/DVD).
9 SEARCH button (VCD*
2
/DVD) 29
0 Number buttons 27, 28, 29
qa CLEAR button 29
To cancel entered numbers.
Basic Operation
Playing a Disc
When the disc is inserted
Playing DVD/Video CD/Audio
Press DVDu on the remote to start
CD/MP3/JPEG
playback.
Tip
Note
When PBC is On, DVD u on the remote may not
Depending on the disc, some operationmes may be
function to playback VCD. In such a case, press (ENTER).
different or restricted.
Refer to the operating instructions supplied with your
To stop playback
disc.
Touch x on the monitor (or press x on the
remote).
Open up the monitor (page 9).
1
To turn off the unit
Insert a disc.
Press OFF on the main unit or remote.
2
Playback starts automatically. (Depending on
Tip
the disc, press DVD u to start playback.)
You cannot insert a disc while the unit is turned off (if
A menu may appear on the screen when a
you turn the ignition switch to the off position).
DVD is inserted.
For details on these menus, see page 27.
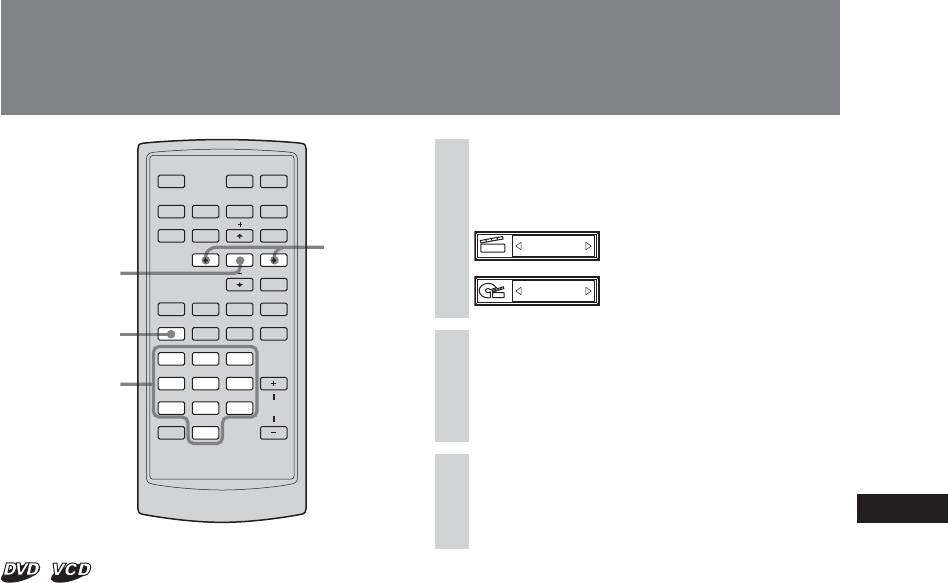
Other operations
To
Operation on
Operation on
the monitor
the remote
To switch from the other sources
1Touch “SOURCE LIST”.
Pause
Touch X.
Press DVD u.
Resume play after
Touch N.
Press DVD u.
pause
Go to the next
Touch >.
Press >.
chapter, track, or
scene in
continuous play
mode
Go back to the
Touch ..
Press ..
previous chapter,
track, or scene in
2Touch “CD/DVD”.
continuous play
On the remote, press (SRC) repeatedly.
mode
Notes
• If a large-size image is rotated, it may take longer to
display.
•A JPEG file is designed to be optimally displayed at 640
x 480 pixels. A file in another size may not be displayed
correctly, or picture shift (to the left or right) may occur.
•Progressive JPEG files cannot be displayed.
15
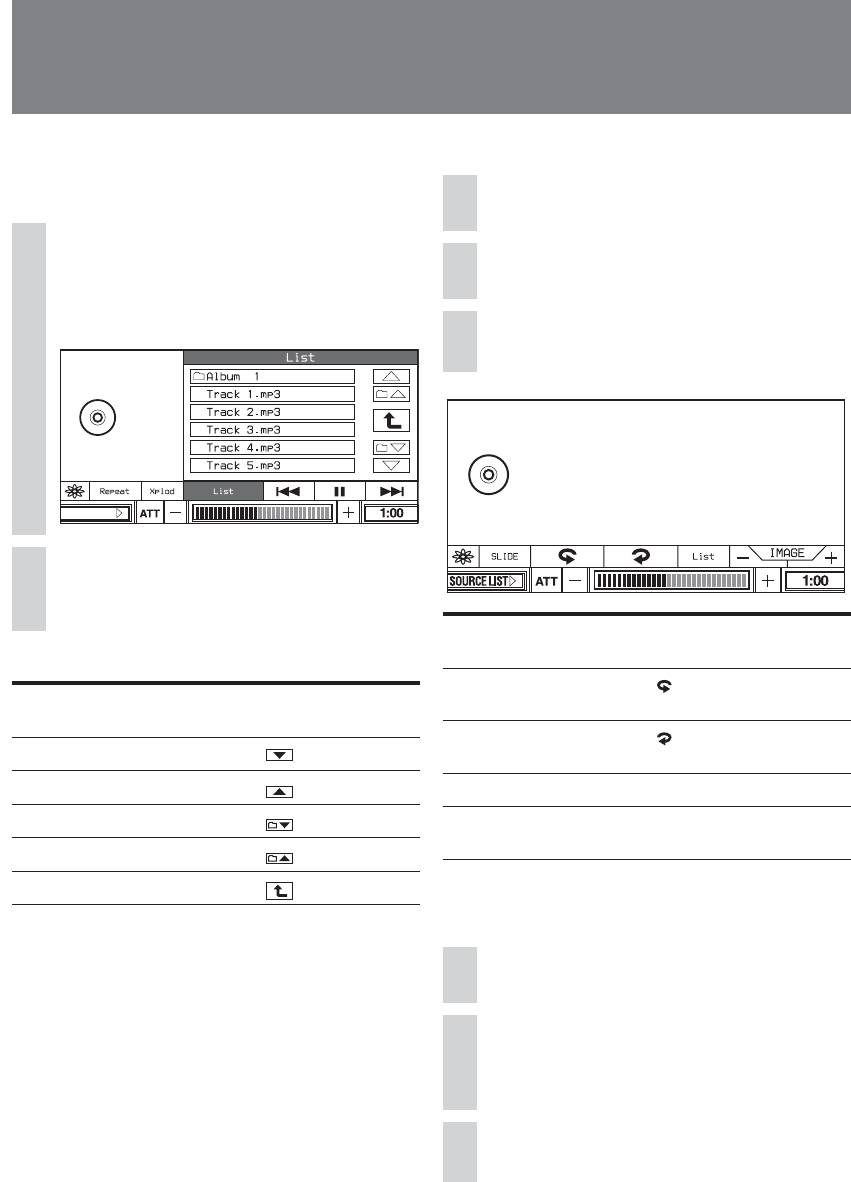
To select the track directly
You can select the track directly from the
album/track list on the display.
Touch LIST.
1
The album/track list appears.
Example for MP3
MP3
16
MP3
Playing a Disc
To playback a JPEG disc
Insert a JPEG disc.
1
Touch LIST.
2
Touch the desired file name.
3
MP3
JPG
SOURCE LIST
Touch the desired track name (or
2
number).
Other operations
To
Operation on
the monitor
Go to the next page
Touch .
Go to the previous page
Touch .
Go to the next album*
1
Touch .
Go to the previous album*
1
Touch .
Go to the previous tree*
2
Touch .
*
1
Available only when MP3 tracks are played.
*
2
Available only when MP3/JPEG files are played.
JPG
Album Root
JPG
To
Operation on
Operation on
the monitor
the remote
Turn the image 90
Touch .
Press <.
degree to the left
Turn the image 90
Touch .
Press ,.
degree to the right
Go to the next image
Touch IMAGE+.
Press >.
Go to the previous
Touch IMAGE–.
Press ..
image
To set the duration of the slide
show
Touch SLIDE.
1
Touch the duration you desire.
2
If you select Off, the slide show is set to off.
Touch SLIDE to close the screen.
3
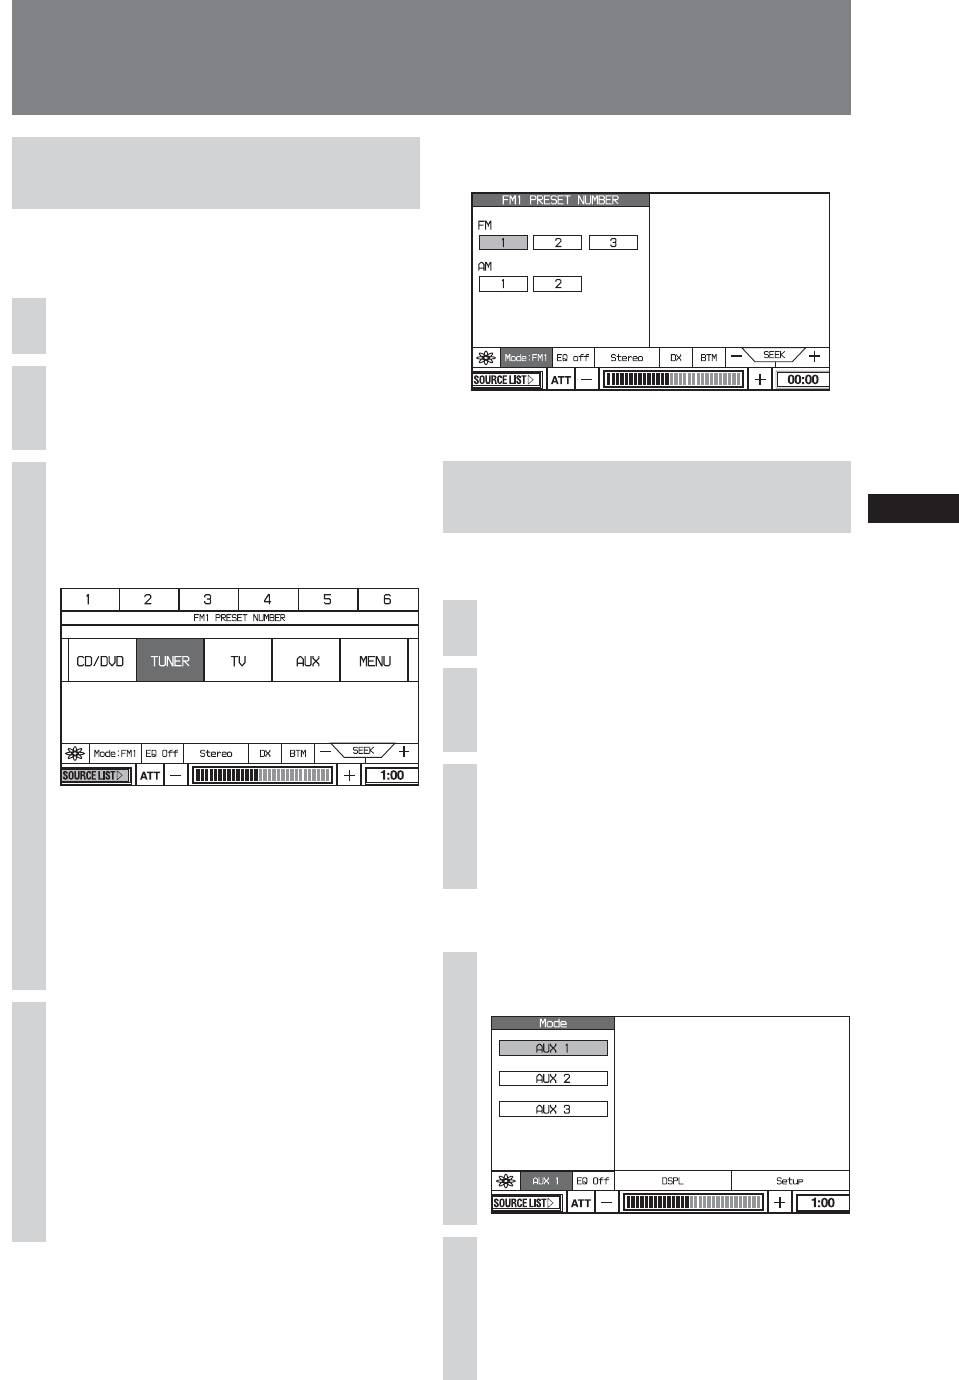
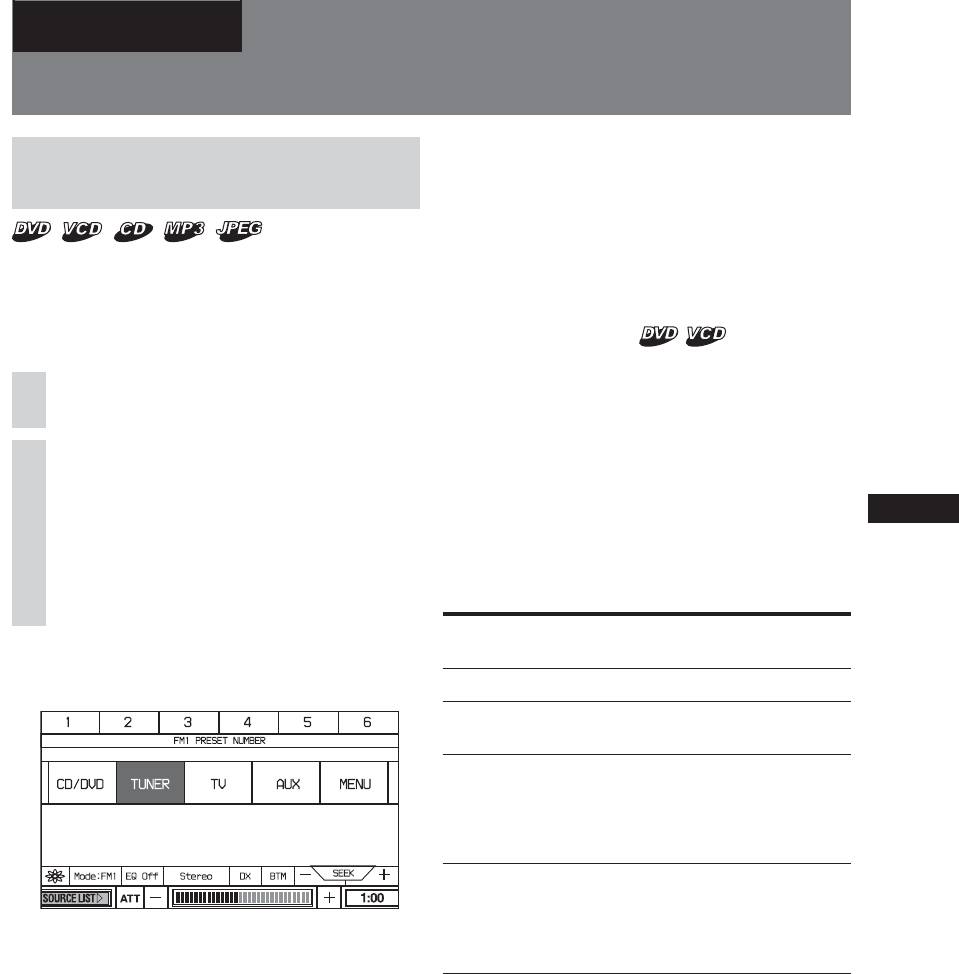
Watching TV/Listening to the Radio
To select the desired mode
Watching TV or listening to
1Touch the Mode menu box.
radio
Preparation: To view TV programmes on this unit, an
optional Sony TV tuner unit XT-V70 must be connected.
Open up the monitor (page 9).
1
Press (SOURCE) or touch the
2
2Touch the desired mode.
screen.
Select TV or radio function.
Watching/listening to other
3
video/audio components
To select the TV function:
1 Touch “SOURCE LIST”.
Preparation: Connect other component to this unit.
Open up the monitor (page 9).
1
Press (SOURCE) or touch the
2
screen.
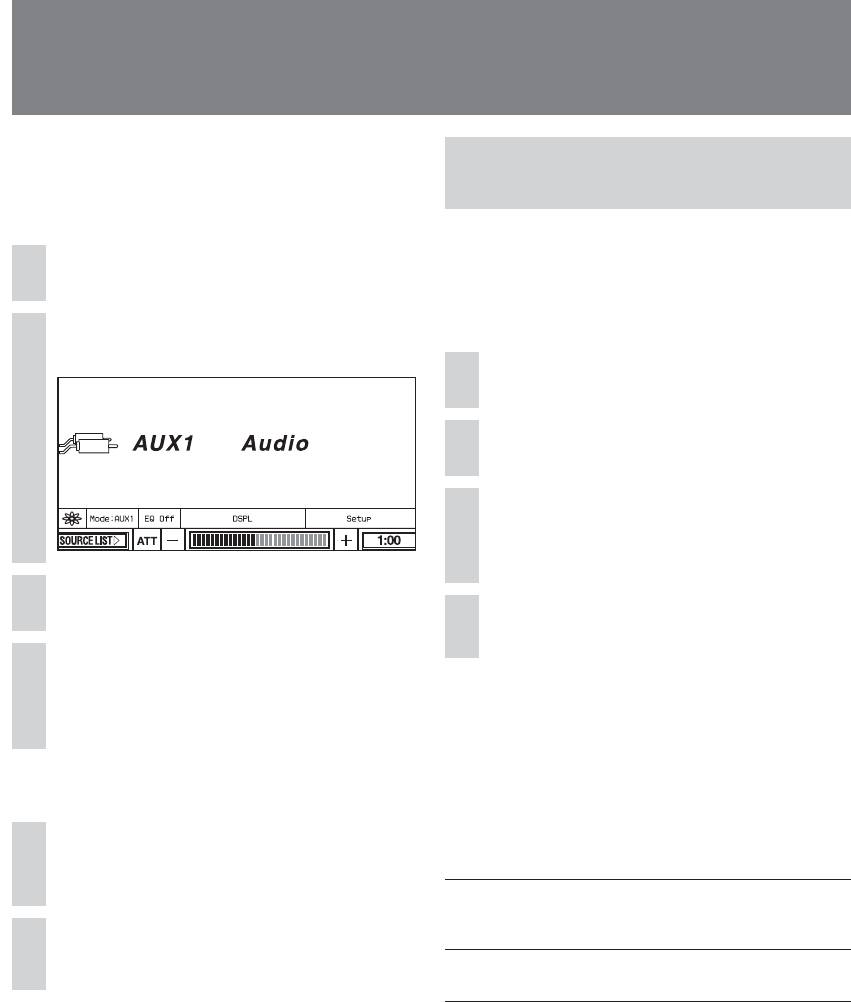
Select “AUX”.
2 Touch “TV”.
3
1 Touch “SOURCE LIST”.
To select the radio function:
2 Touch “AUX” on the monitor.
1 Touch “SOURCE LIST”.
On the remote, press (SRC) repeatedly.
2 Touch “TUNER”.
3 Touch “FM” or “AM”.
To select the connected device
On the remote, press (SRC) repeatedly to
select the TV or radio function.
Touch the Mode menu box.
1
Select a channel.
4
Using auto tuning
Touch SEEK +/– lightly until the desired
channel is received.
If you store the TV channels or radio stations,
see “Storing channels/Radio stations” on
page 42.
Touch the desired mode.
2
Select the desired mode depending on the
connected devices.
On the remote, press (MODE) repeatedly.
17
Player
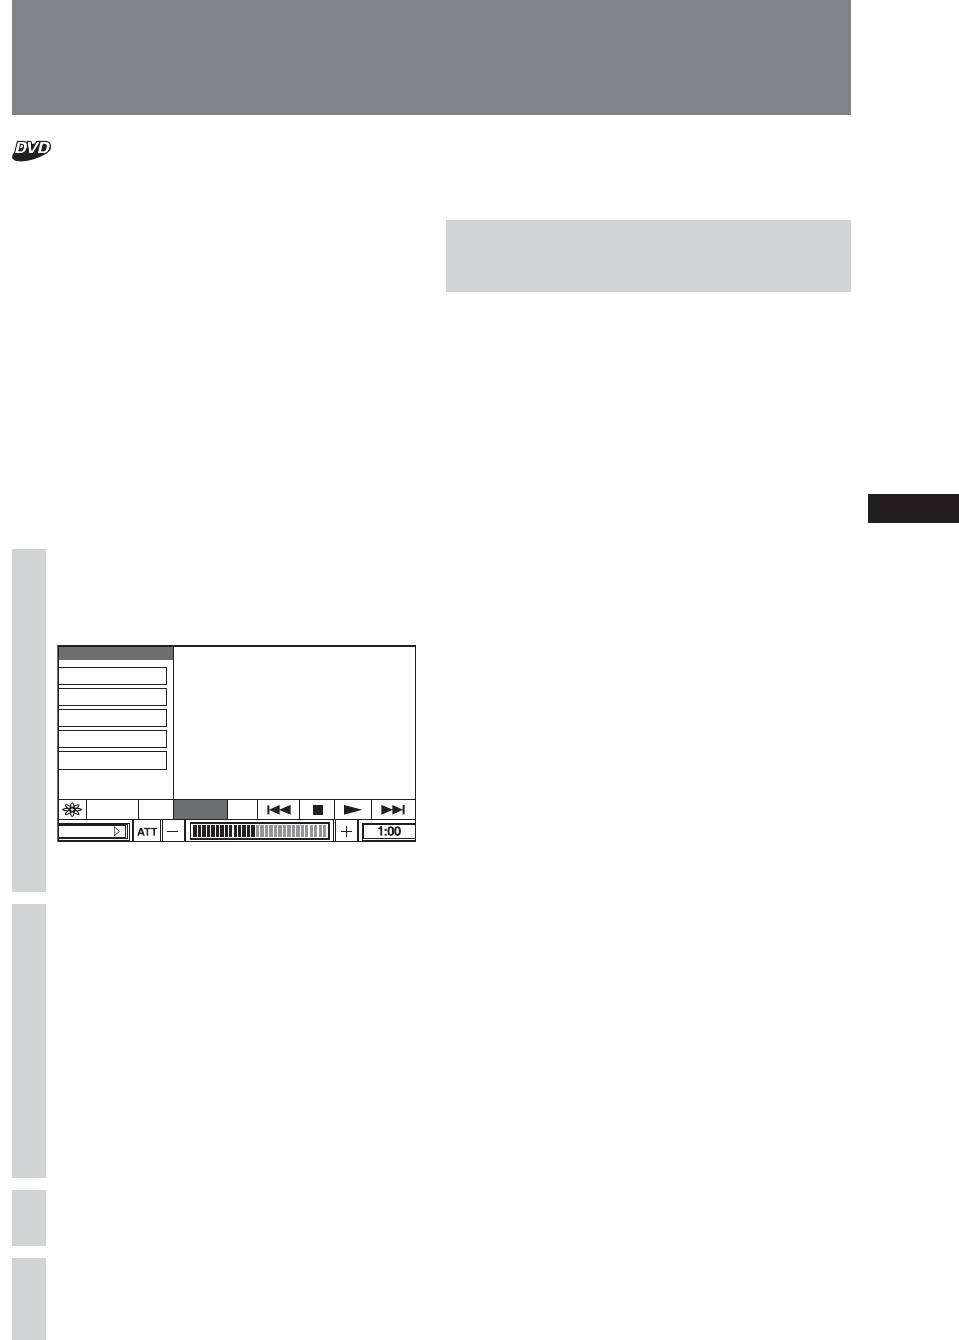
About the Source Menu
Display menu (page 21)
Use the source menus of this unit to adjust
the various functions and settings for
playback.
The displayed menu differs depending on the
status of the unit. To adjust each setting, see
page 20.
Screen Effect menu (page 20)
SOURCE LIST
Note
The items on the source menu, and the operation
procedures differ depending on the disc.
Display items on the CD/MP3
SOURCE LIST
playback
Play mode menu (DVD/CD/MP3)
(page 20)
MP3
SOURCE LIST
SOURCE LIST
Equalizer menu (page 23)
SOURCE LIST
18
MP3
D
B
MP3
A
C
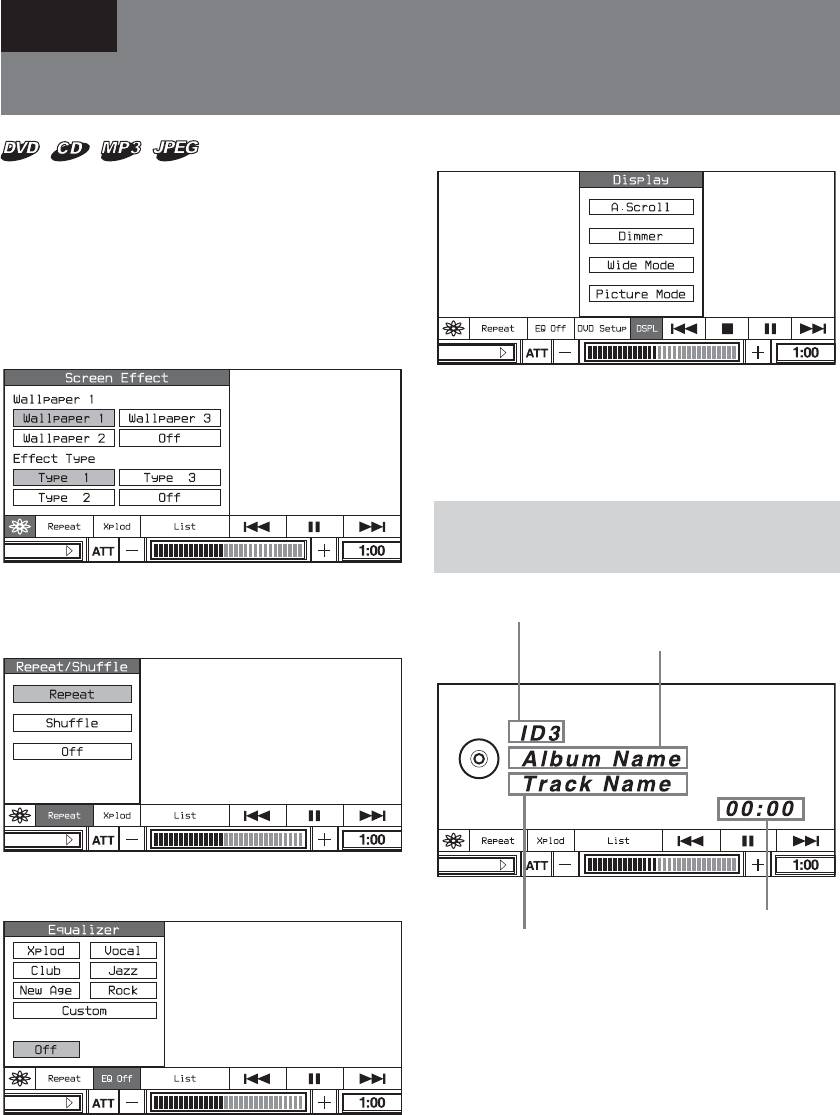
A Elapsed playback time
B Album name
*1
/Disc name
*2
C Track name
*3
D ID3 tag information
*1
*1 Appears only when MP3 files are played.
*2 CD TEXT only.
*3 MP3/CD TEXT only.
Using the Source Menu
To scroll the text information
Touch the desired information (B, C or D).
When “A. Scroll” is set to “On”, the text
information scrolls automatically (page 22).
Note
“
∗
” appears in place of the letters other than the
alphabet and numbers.
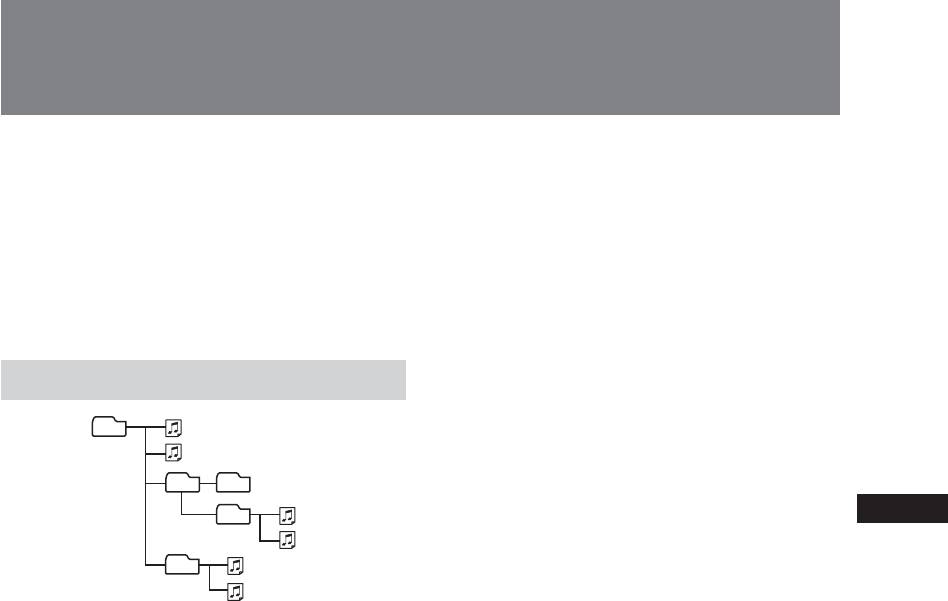
Playback order of MP3 files
Root
1
1
2
24
5
5
6
3
3
4
Notes
• The playback order may differ depending on the
writing software.
• The unit can play up to 1,000 tracks and 256 albums.
Tracks beyond the first 1,000 and albums beyond the
first 256 cannot be recognized.
Tips
• If you add numbers (01, 02, 03, etc.) to the front of the
track names, the tracks in each album will be played in
numerical order.
• Since a disc with many trees takes longer to start
playback, it is recommended that you create albums of
no more than two tree levels.
• For details on MP3 files, see “About MP3 files” on
page 49.
19
Using the Source Menu
Use the source menus of this unit to adjust
To close the Screen Effect menu
the various functions and settings for
Touch .
playback.
The displayed menu differs depending on the
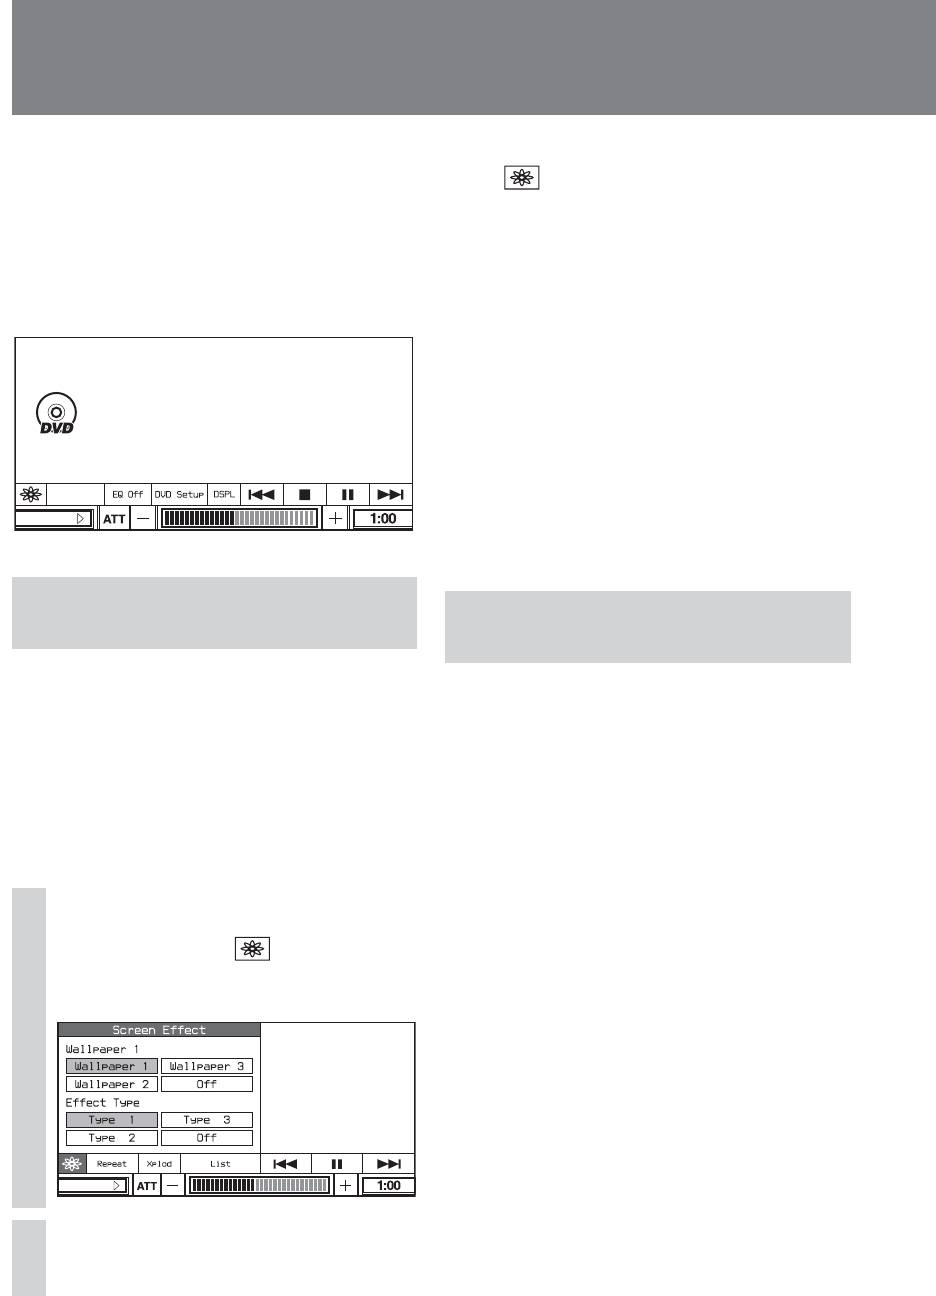
♦Wallpaper
status of the unit.
You can select the background picture from
“Wallpaper 1”, “Wallpaper 2”, “Wallpaper 3”
Screen example
or “Off”. When you select “Off”, the
For DVDs:
wallpaper is not set.
•You can set a different wallpaper for each
function.
♦Effect Type
You can select the screen effect from “Type
1”, “Type 2”, “Type 3” or “Off”. When you
Repeat Off
select “Off”, the screen effect is not set.
SOURCE LIST
•You can set a different effect type for each
function.
Setting the screen
Setting the Play mode
— Wallpaper/Screen Effect
— Play Mode
You can set the wallpaper and screen effect.
You can set the Repeat play/Shuffle play.
The following setting options are available.
The following setting options are available.
Wallpaper: select the wallpaper.
Repeat: repeat a title, chapter, album or track
Effect Type: select the display effect
after the item being played reaches the end.
combined with wallpaper.
Shuffle: play tracks in random order.
Repeat Off: play all tracks in the disc
Basic operation
repeatedly (normal play).
On the monitor
Tip
During playback, touch the Screen
1
The repeat options differ depending on the disc.
Effect menu box (
).
Notes
The Screen Effect menu appears.
• The selected play mode is cancelled when the disc
being played is ejected.
• When playing a VCD with the PBC function on,
Repeat/Shuffle play is not available.
• Shuffle play is not available on DVDs.
SOURCE LIST
Touch the desired setting.
2
20
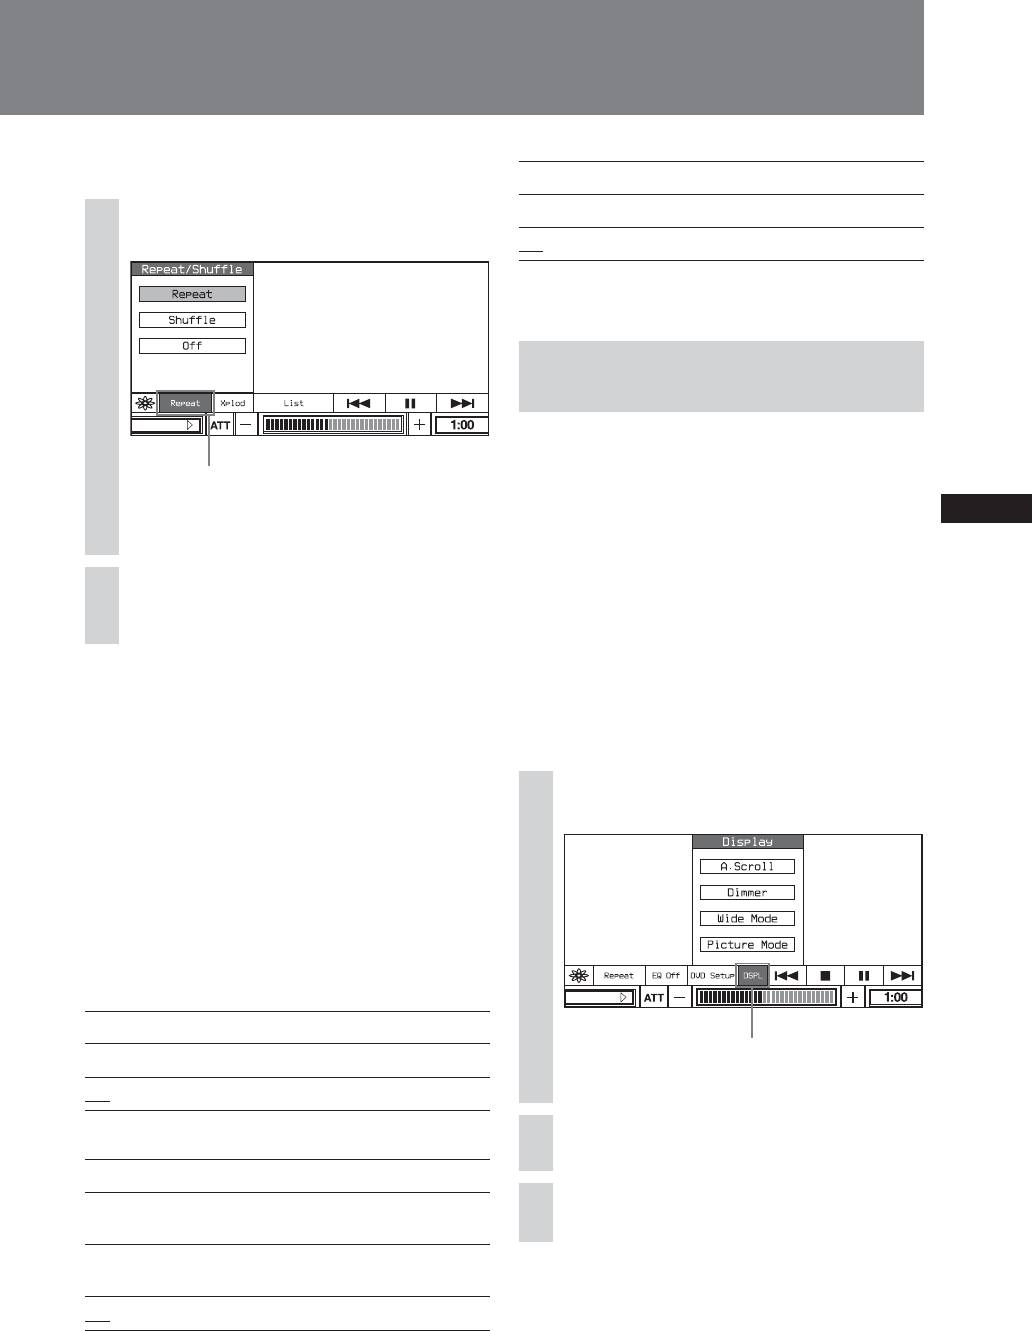
Basic operation
VCD (with PBC Off)/Audio CD:
On the monitor
Repeat repeats the current track.
Shuffle to play tracks in random order.
Touch the Play mode menu box.
1
Off normal play.
Tip
The default settings are underlined.
Setting for the Display
— Display
SOURCE LIST
The following setting options are available.
Play mode menu box
A.(Auto) Scroll: scroll long displayed items
automatically when the track is changed.
The Play mode menu appears.
Dimmer: adjust the display brightness.
Wide Mode: besides the normal mode (4:3)
the screen can also be set to the full, wide
Touch the desired option.
2
screen, zoom and cinema mode.
Picture Mode: adjust the picture
characteristics according to the programme
type, picture tone or personal preference.
To close the Play mode menu
Touch the Play mode menu box.
Basic operation
On the monitor
On the remote
Press (REP) or (SHUF) repeatedly to select
the desired option.
During playback, touch DSPL.
1
♦Repeat/Shuffle
The unit can repeat a title, chapter, or track
after the item being played reaches the end,
or play titles, chapters or tracks in random
order.
DVD:
SOURCE LIST
Title Repeat repeats the current title.
DSPL
Chapter Repeat repeats the current chapter.
The Display mode menu appears.
Off normal play.
MP3:
Touch the desired item.
2
Repeat repeats the current track.
Shuffle to play tracks in the album in random
Touch the desired setting.
order.
3
Album Repeat repeats the tracks in the current
album.
Off normal play.
21
Using the Source Menu
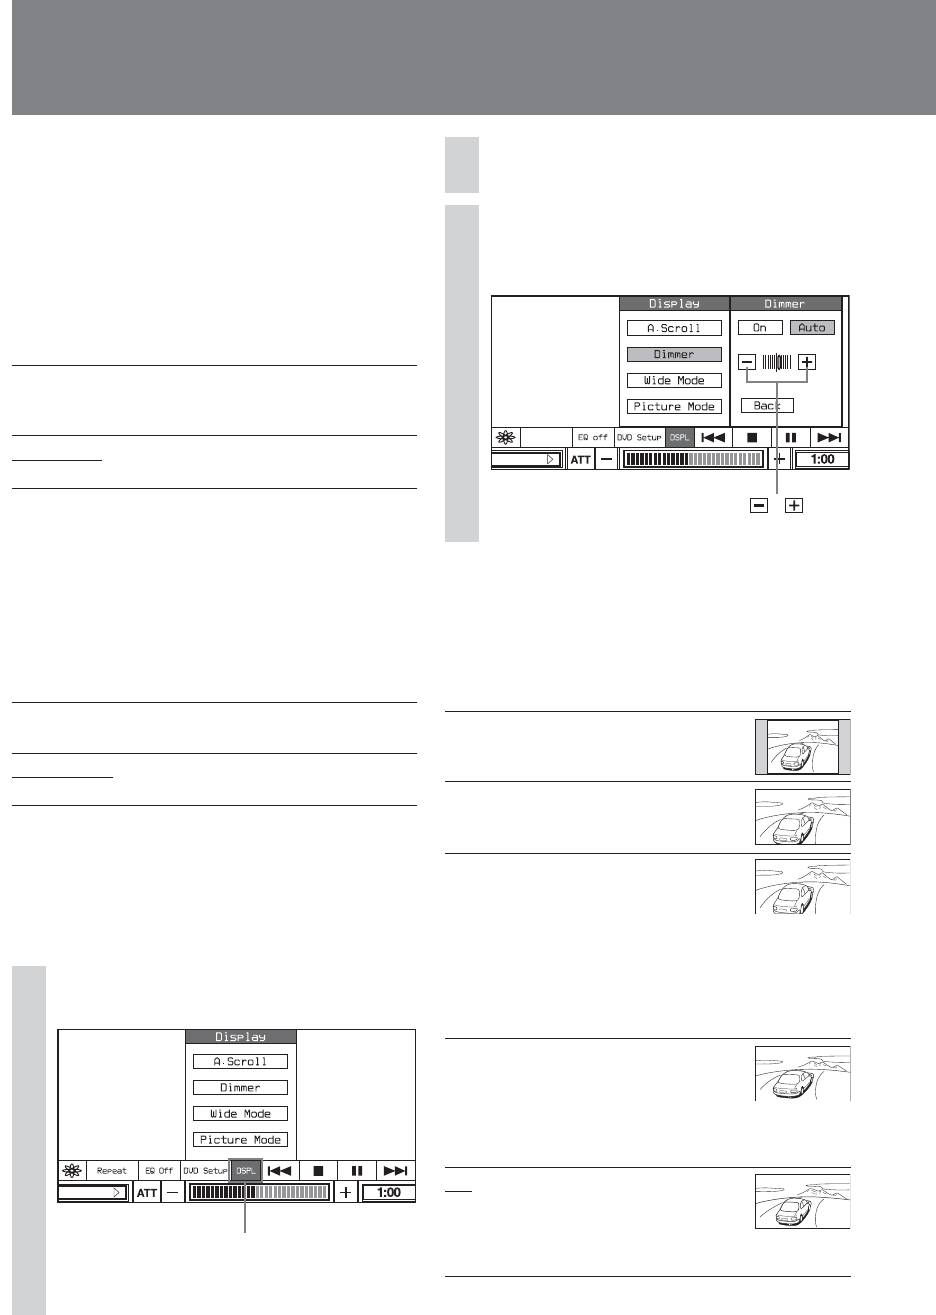
To return to the previous screen
Touch Back on the monitor.
Touch Dimmer.
2
To close the Display mode menu
Adjust the level while touching the
Touch DSPL.
3
– or +.
♦A. Scroll
You can scroll long displayed items
automatically when the track is changed.
A. Scroll On scrolls long displayed items
automatically when the track is
changed.
DISC Repeat
A. Scroll Off until touch the album/track, never
SOURCE LIST
scroll long displayed items.
Up to 31 characters are displayed.
,
♦Dimmer
You can adjust the display brightness.
♦Wide Mode (available with visual
sources)
According to the programme type, picture
Besides the normal mode (4:3) the screen can
tone or personal preference.
also be set to full, wide screen, zoom and
The following setting options are available.
cinema mode.
Dimmer On the display always has the same
Normal an image with an
brightness.
aspect ratio of 4 to 3
Dimmer Auto the display dims according to the
(regular images).
illumination lamp of the car.
Wide an image with an
aspect ratio of 16 to 9.
Adjusting the dimmer level
You can store your own settings of the
Zoom an image with an
dimmer level.
aspect ratio of 4 to 3
enlarged to the left
and right edges of the
On the monitor
screen, with the
overflowing parts of
the top and bottom
During playback, touch DSPL.
1
cut off to fill the
screen.
Cinema an image with an
aspect ratio of 4 to 3,
with only the left and
right sides of the
image being enlarged
to fill the screen.
SOURCE LIST
Full an image with an
aspect ratio of 4 to 3
enlarged to the left
DSPL
and right edges of the
screen.
The Display mode menu appears.
22
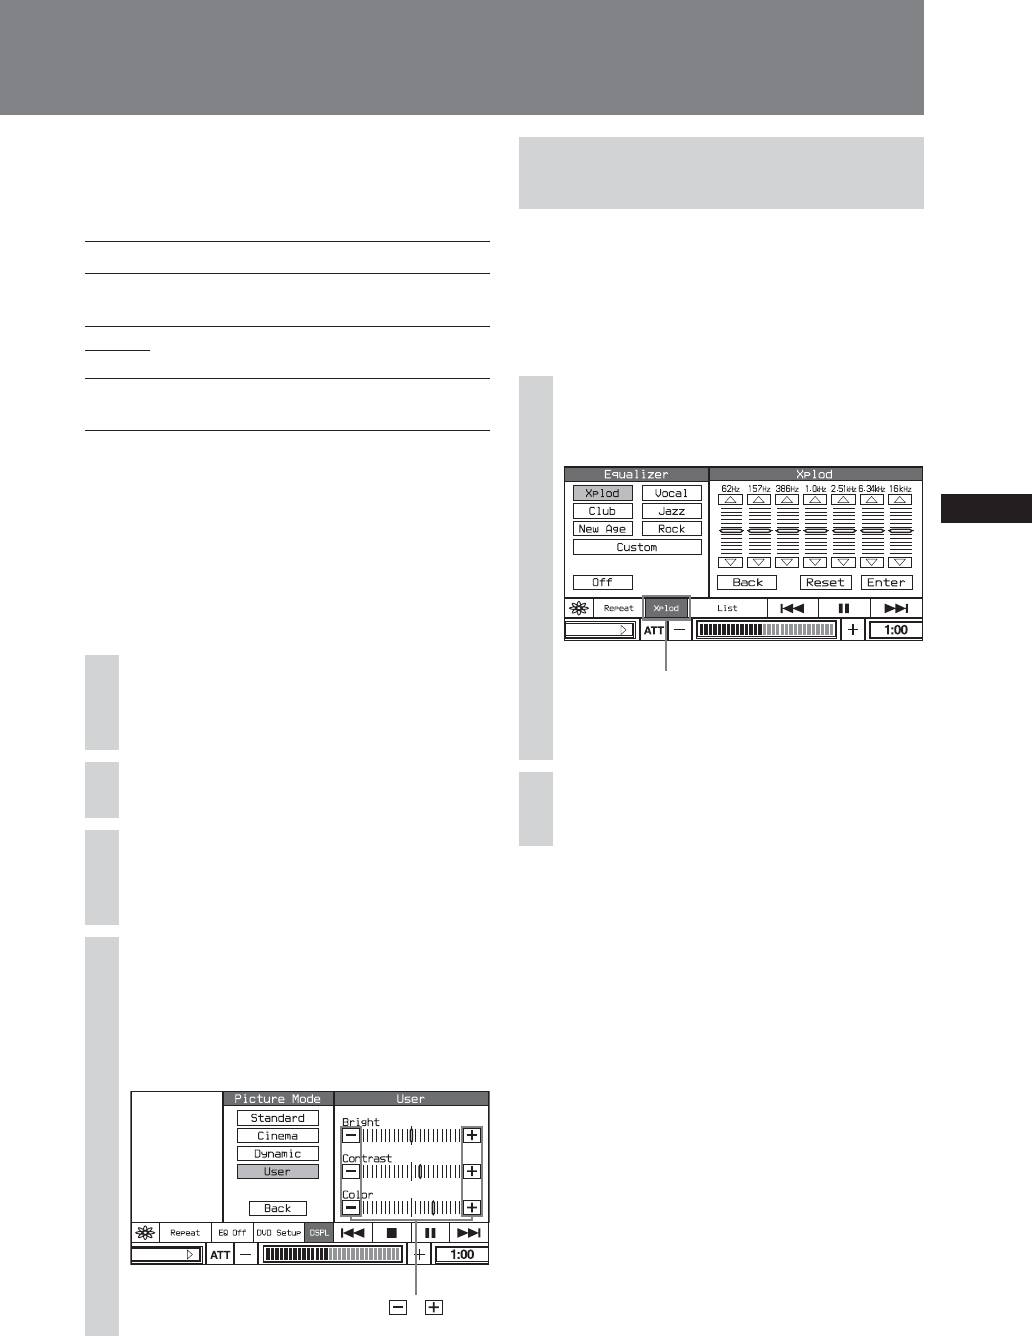
♦Picture Mode
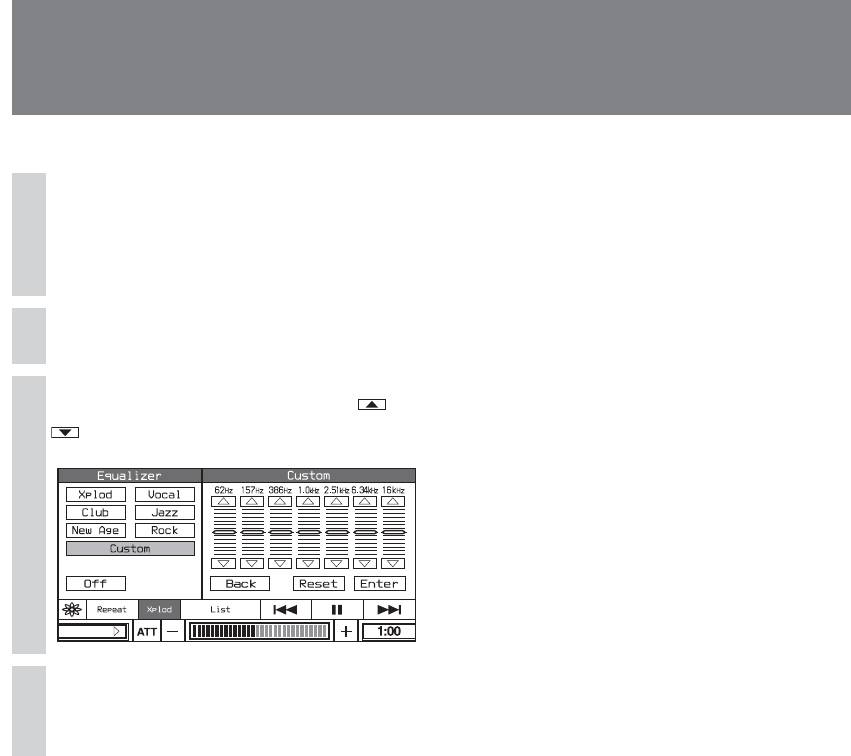
Setting the sound quality
You can adjust the picture characteristics
according to the programme type, picture
— Equalizer
tone or personal preference.
You can select the sound quality for each
Standard standard picture and function setting.
source. Also you can adjust the sound
characteristics and store the setting.
Cinema provides a clear picture with a clear
black and white definition.
Selecting the sound quality
Dynamic provides beautiful images with
On the monitor
bright, clear colors.
User you can adjust the picture
During playback, touch the
characteristics and store the setting.
1
Equalizer menu box.
Tip
The default settings are underlined.
Adjusting the custom settings
You can store your own user-adjustable
settings for different picture tones.
On the monitor
SOURCE LIST
During playback, touch DSPL.
Equalizer menu box
1
The Display mode menu appears.
The Equalizer menu appears.
Touch Picture Mode.
2
Touch the desired setting.
2
Touch User.
3
To close the Equalizer menu
The setting items appear.
Touch the Equalizer menu box.
Adjust the level while touching the
Adjusting the custom settings
4
– or +.
You can store your own user-adjustable
settings for different sound quality.
You can also adjust the level by touching the
setting bar.
On the remote
During playback, press (EQ7)
repeatedly.
Each time you press the button, the Equalizer
changes cyclically.
SOURCE LIST
,
Note
“Color” cannot be set when DVD is selected as a source.
23
Using the Source Menu
On the monitor
During playback, touch the
1
Equalizer menu box.
The Equalizer menu appears.
Touch the desired setting.
2
Adjust the level touching the or
3
.
SOURCE LIST
Press (ENTER).
4
To reset the setting, touch Reset.
24

Resuming Playback — Resume Play
The unit stores the point where you stopped
playback for up to 10 discs, and starts
Resume playback even after the unit is
turned off, or the disc being played is ejected.
To play from the point you
previously stopped.
On the monitor
Touch x during playback.
1
X x appears and playback stops.
Touch N to resume playback.
2
Playback starts from the point you stopped.
On the remote
Press x during playback.
1
X x appears and playback stops.
Press DVD u to resume playback.
2
To play from the beginning
Touch x (press x on the remote) again in
step 1, x appears and the resume playback is
now released. Next time you start playback,
the playback starts from the beginning of the
DVD.
Or, select the desired chapter on the DVD
menu or the Top menu depending on the
disc.
Notes
• Resume play is available only for DVDs.
• When storing a resume point for the 11th disc, the
stored resume point for the 1st disc is cleared
automatically.
• Resume play is cancelled when the setting for the
parental controls is changed.
• Depending on the disc or scene, you cannot use the
resume play.
• If parental control is applied, the resume play will not
work. In this case, playback starts from the beginning
of the disc when it is inserted.
25
Searching a Specific Point on a Disc — Scan
ATT
DVD
OFF
BX
SRC
x
>.
./>
TOP MENU
MENU
MODE
ENTER
O
REP
SHUF
EQ7 ZxZ
SEARCH
AUDIO
SUBTITLE ANGLE
12
3
456
789
VOL
CLEAR
0
You can quickly locate a specific point on a
disc with monitoring the picture.
During playback, touch and hold ./>
on the monitor (or press and hold ./>
on the remote), and release at the desired
point.
Note
While searching, audio is not output, and subtitles are
not displayed.
26
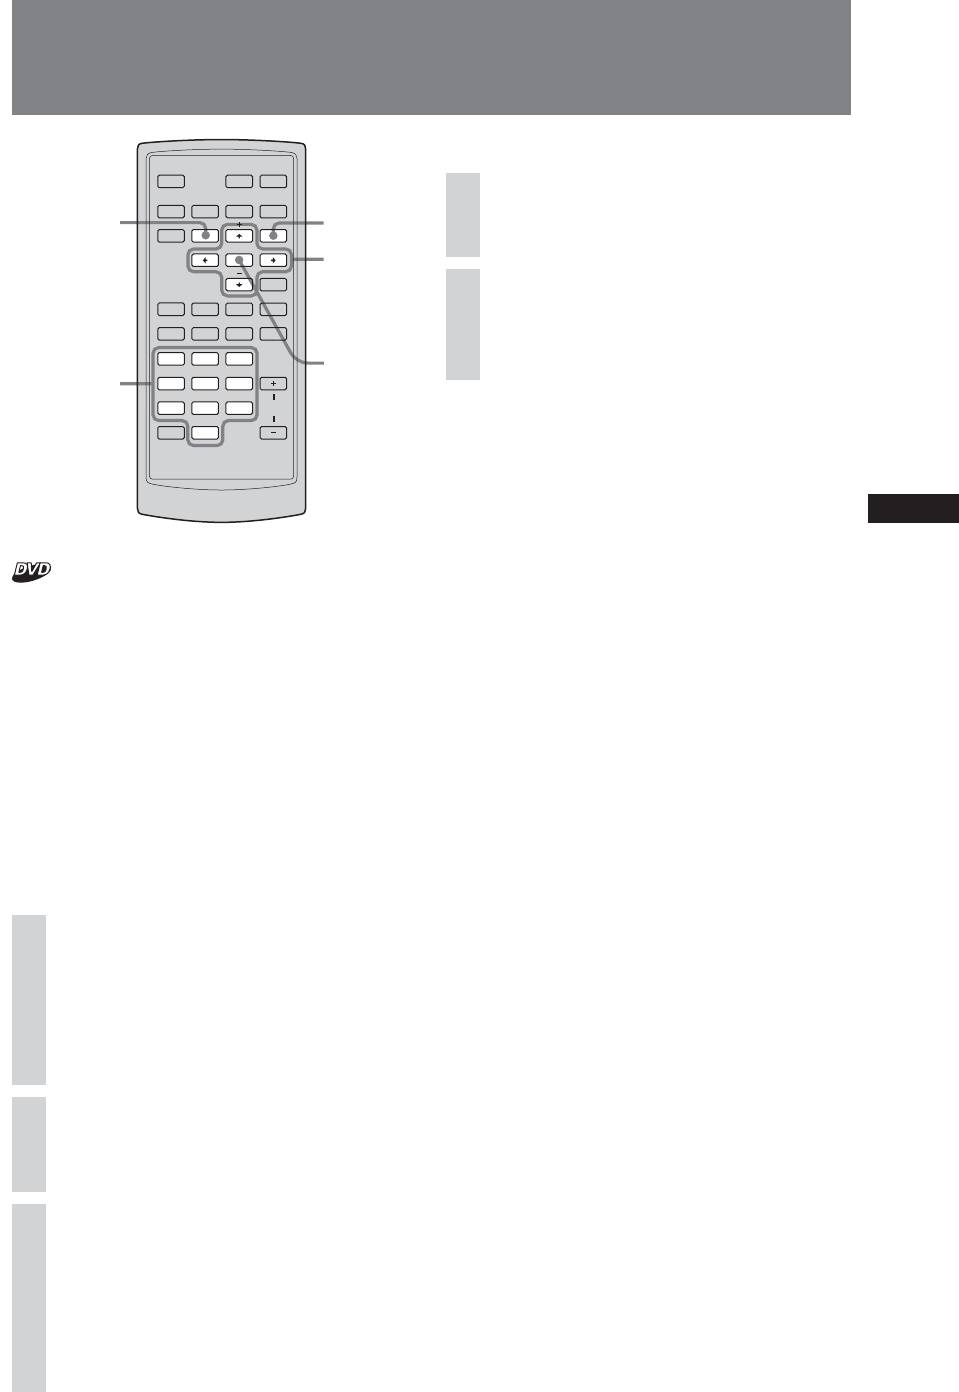
Using the Menus on DVDs
On the remote
ATT
DVD
OFF
BX
SRC
x
>.
During DVD playback, press
TOP MENU
TOP MENU
MENU
1
MODE
MENU
(TOP MENU) or (MENU).
ENTER
B/V/v/b
O
REP
SHUF
EQ7 ZxZ
Press M/m/</,, or the number
2
SEARCH
AUDIO
SUBTITLE ANGLE
buttons to select the desired item,
12
3
then press (ENTER).
ENTER
Number
456
buttons
789
VOL
CLEAR
Note
0
The items on the menu, and the operation procedures
differ depending on the DVD.
With some DVDs, you can use their original
menu(s), such as the Top menu or DVD
menu.
If the DVD contains several titles of tracks
and scenes, you can use the Top menu to
select the desired title, and start playing.
If the DVD contains more comprehensive
menu items, such as audio and subtitle
languages, titles, chapters, etc., you can use
the DVD menu to select the desired item, and
start playing.
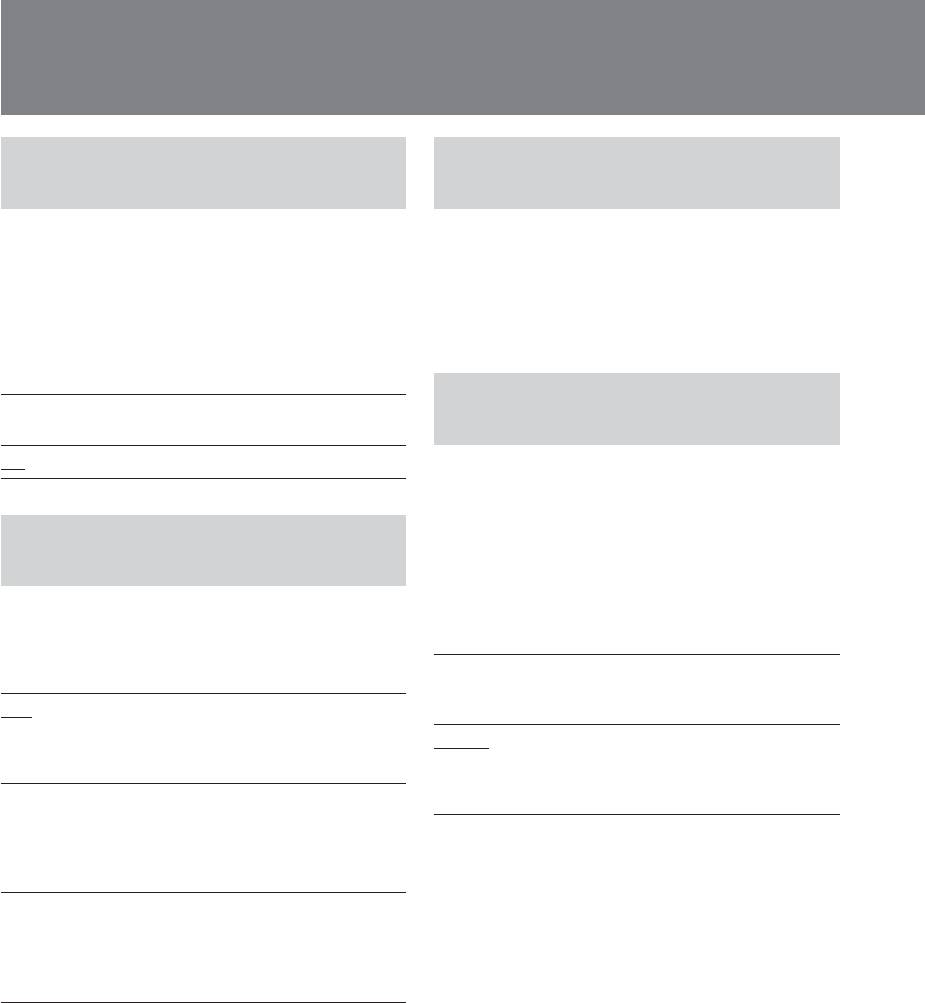
On the monitor
During playback, touch TOP MENU
1
or MENU.
The DVD menu or Top menu appears.
The contents of the menu differ depending on
the DVD.
Touch CURSOR.
2
The cursor box appears.
Touch v/V/b/B to select the
3
desired item, then touch Enter.
To move the position of the cursor box, touch
the position where you want to move the
cursor.
To close the cursor box, touch CLOSE.
27
Using PBC Functions — PBC (Playback control)
Notes
OFF
ATT
DVD
• The items on the menu, and the operation procedures
OFF
BX
DVDBX
differ depending on the disc.
SRC
x
>.
TOP MENU
MENU
• During PBC playback, the track number, playback
MODE
time, etc., are not displayed.
ENTER
• Repeat play and Shuffle play are not available during
O
PBC playback.
REP
SHUF
EQ7 ZxZ
O
SEARCH
AUDIO
SUBTITLE ANGLE
Tip
To resume PBC playback, stop playback by pressing
12
3
(OFF), then press DVD u. PBC playback starts.
Number
456
buttons
789
VOL
CLEAR
0
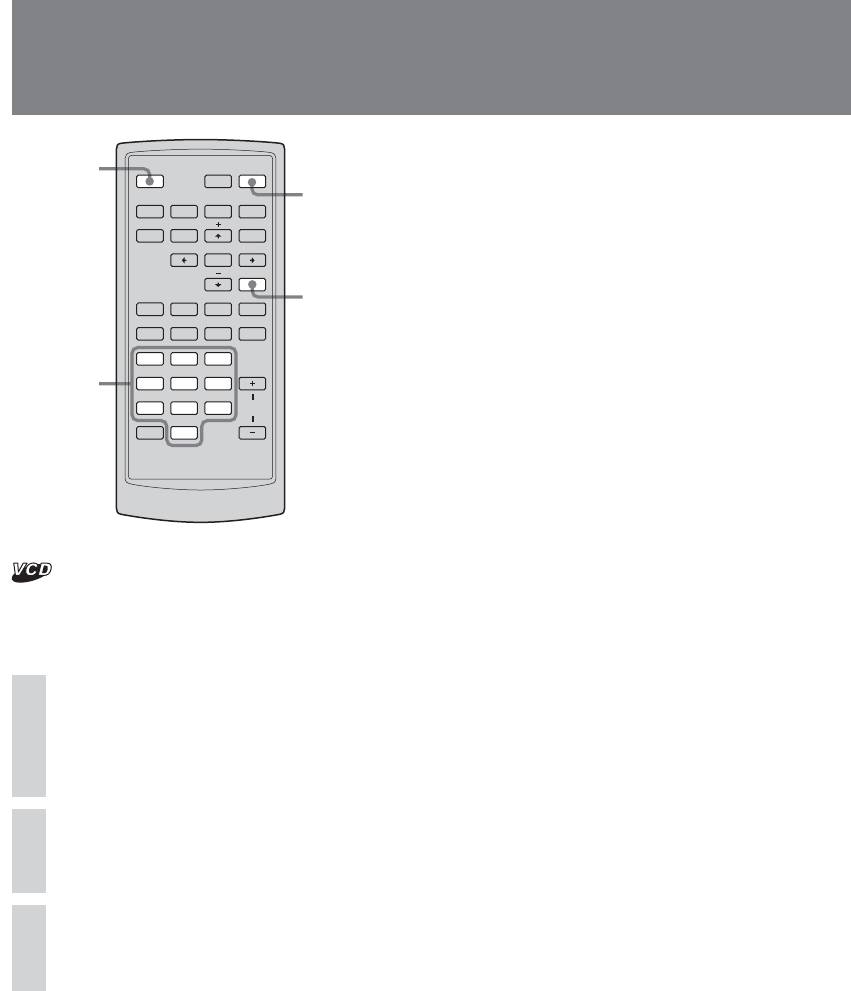
The PBC menu assists your operation
interactively while a PBC compatible VCD is
played.
Start playing a PBC compatible
1
VCD.
The PBC menu appears.
Press the number buttons to select
2
the desired item.
Follow the instructions in the
3
menu for interactive operations.
To return to the previous menu
Press O.
28
Starting Playback from a Selected Point
— Search Play
ATT
DVD
During playback, press (SEARCH)
OFF
BX
1
repeatedly on the remote.
SRC
x
>.
TOP MENU
MENU
MODE
B/b
3/12
: Chapter search
ENTER
ENTER
O
1/2
: Title search
REP
SHUF
EQ7 ZxZ
SEARCH
AUDIO
SUBTITLE ANGLE
SEARCH
12
3
Press < or ,, or the number
2
Number
456
buttons to select the desired
buttons
789
VOL
CLEAR
chapter or title.
0
Press (ENTER).
3
Playback starts from the selected point.
(with PBC Off)
To turn off the Play mode menu
You can quickly locate a desired point by
Press (SEARCH).
specifying the title, chapter or track.
The following search options are available
depending on the disc:
DVD:
•Title: starts playing from the selected title.
• Chapter: starts playing from the selected
chapter.
29
Various DVD Operations
Changing the Audio Channels
The audio language switches among the
ATT
DVD
OFF
BX
available languages.
When 4 digits appear, input the language
SRC
x
>.
TOP MENU
MENU
code corresponding to the desired language
MODE
(page 57).
ENTER
O
When the same language is displayed two or
more times, the DVD is recorded in multiple
REP
SHUF
EQ7 ZxZ
SEARCH
AUDIO
SUBTITLE ANGLE
audio formats.
AUDIO
12
3
VCD:
456
789
VOL
CLEAR
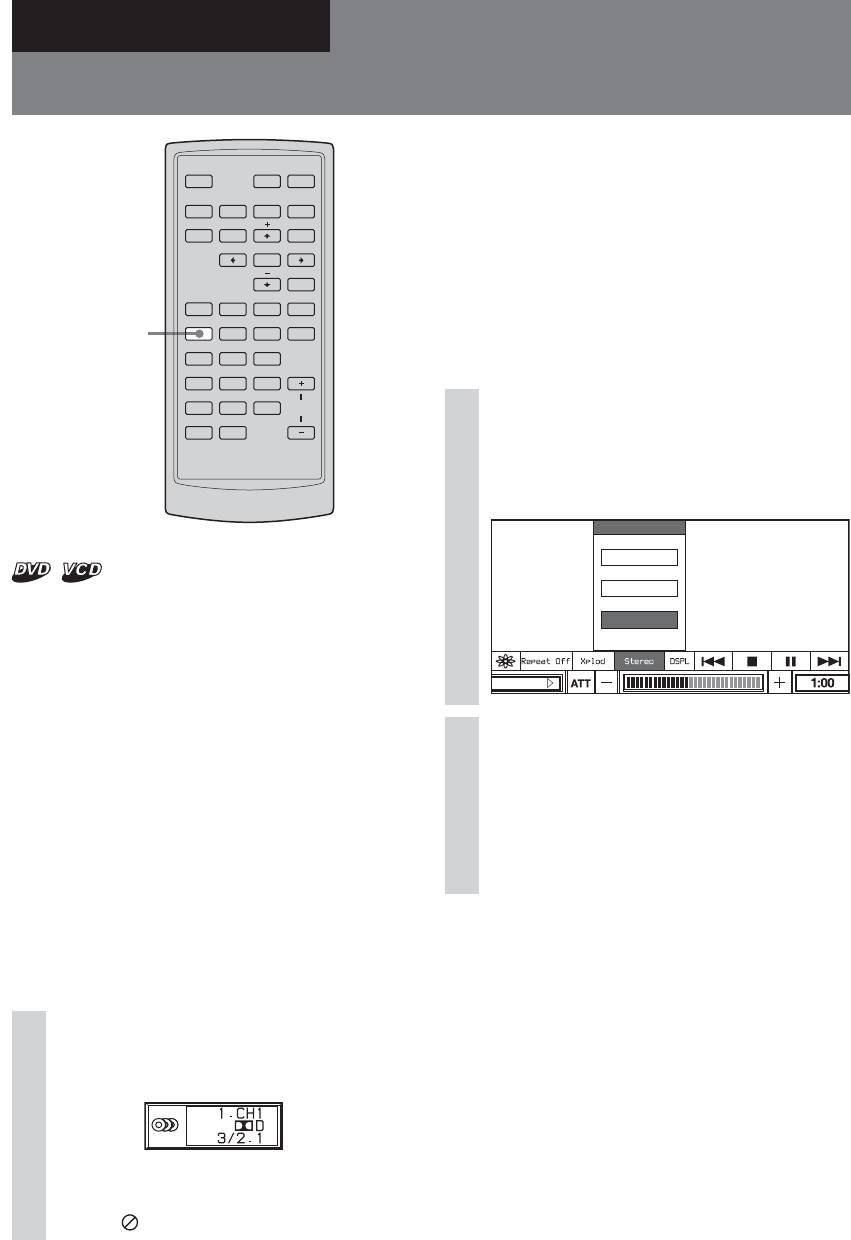
During playback, touch the Audio
0
1
channel box.
The audio channel menu appears.
Stereo/MONO
MONO/L
MONO/R
When playing a DVD recorded in multiple
audio formats (PCM, Dolby Digital, or DTS),
Stereo
you can change the audio format. If the DVD
is recorded with multilingual tracks, you can
SOURCE LIST
also change the language.
With VCDs, you can select sound from the
right or left channel and listen to the sound of
Touch the desired item.
2
the selected channel through both the right
and left speakers. For example, when playing
MONO/L: Left channel sound (monaural)
a disc containing a song with the vocals on
MONO/R: Right channel sound (monaural)
the right channel and the instruments on the
Stereo*: Standard stereo sound
left channel, you can hear the instruments
* The default setting
from both speakers by selecting the left
channel.
To turn off the Audio channel
On the monitor
menu
DVD:
Touch the Audio channel box.
During playback, touch AUDIO
On the remote
1
repeatedly.
During playback, press (AUDIO) repeatedly
to select the desired audio channels.
Tip
You can also change the settings by selecting “AUDIO”
The audio channel menu appears.
on the display.
If the disc does not contain multiple audio
formats,
appears.
30
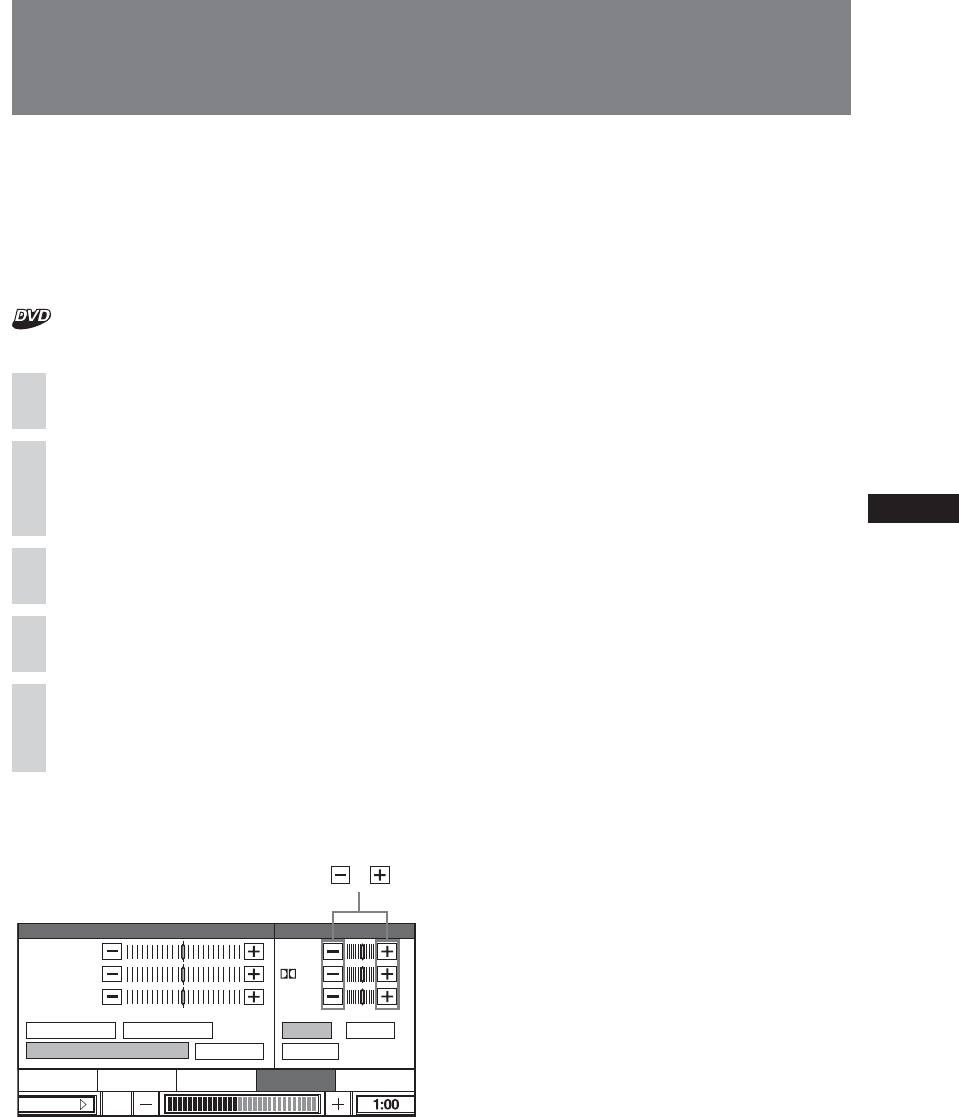
Adjusting the Audio Output Level
— DVD Level Adjustment
The audio output level for DVD video differs
depending on the recorded audio format
(PCM, Dolby Digital, or DTS). You can adjust
the output level of PCM, Dolby Digital or
DTS separately to reduce the volume level
differences between disc and source.
On the monitor
Touch SOURCE LIST.
1
Touch MENU.
2
The System menu appears.
Touch SOUND.
3
Touch DVD Level Adjust.
4
Touch On.
5
The output level is automatically adjusted.
To fine adjust the output level,
touch – or +.
,
Sound
DVD Level Adj
Sub PCM
Bass
D
Treble
Dts
Balance
Rear Att
On Off
DVD Level Adjust
Beep
Back
CLOCK MONITOR DSPL SOUND OTHER
SOURCE LIST
ATT
Notes
•You can adjust the output level only when a disc is
inserted in the unit.
•You can adjust the output level only after On is
touched.
31
Changing the Angles
ATT
DVD
OFF
BX
SRC
x
>.
TOP MENU
MENU
MODE
ENTER
O
REP
SHUF
EQ7 ZxZ
SEARCH
AUDIO
SUBTITLE ANGLE
ANGLE
12
3
456
789
VOL
CLEAR
0
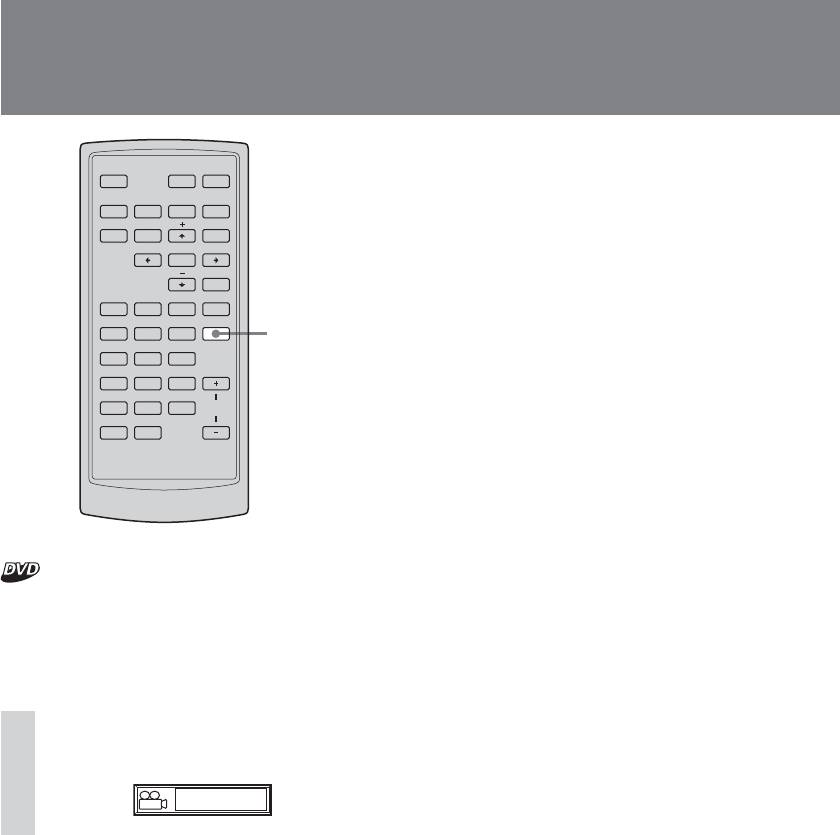
You can change the viewing angle if various
angles (multi-angles) for a scene are recorded
on a DVD.
On the monitor
Touch ANGLE on the monitor.
1
1/2
On the remote
Press (ANGLE) repeatedly to select the
desired angle number.
The angle changes.
Note
Depending on the DVD, you may not be able to change
the angles, even if multi-angles are recorded.
32
Displaying the Subtitles
ATT
DVD
OFF
BX
SRC
x
>.
TOP MENU
MENU
MODE
ENTER
O
REP
SHUF
EQ7 ZxZ
SEARCH
AUDIO
SUBTITLE ANGLE
12
3
SUBTITLE
456
789
VOL
CLEAR
0
You can turn the subtitles on or off, or change
the subtitle language if more are recorded on
the DVD.
During playback, touch SUBTITLE
1
(or press (SUBTITLE) on the
remote).
1.ENG
The subtitle language appears.
Touch SUBTITLE repeatedly.
2
On the remote, press (SUBTITLE) repeatedly
to select the desired language.
Available languages will vary, depending on
the disc.
When 4 digits appear, input the language
code corresponding to the desired language
(page 57).
To turn off the subtitles
Touch SUBTITLE on the monitor (or press
(SUBTITLE) repeatedly to select “OFF”).
Note
Depending on the DVD, you may not be able to change
(or turn off) the subtitles, even if multilingual subtitles
are recorded.
33
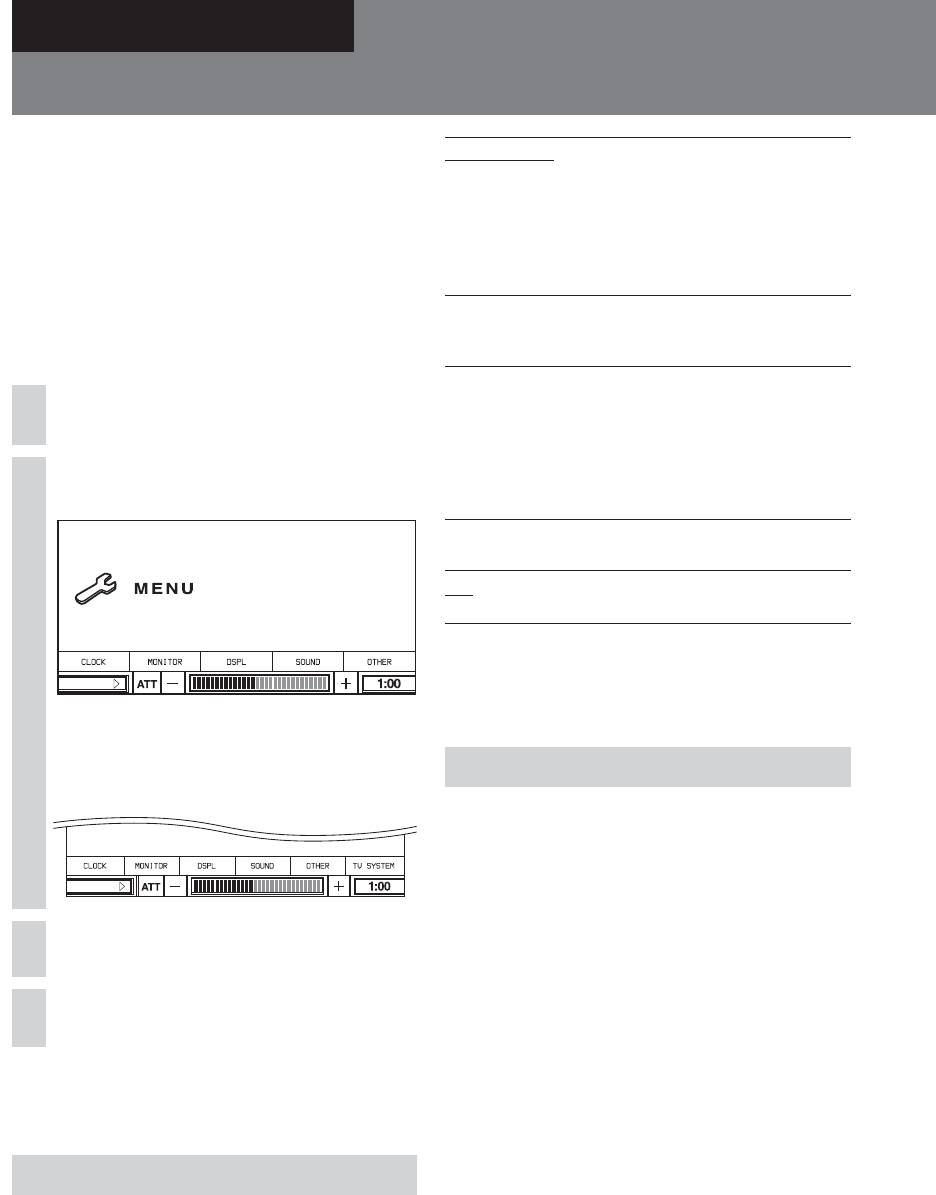
Using the System Menu
By using the System menu, you can make
various adjustments to items, such as picture
and sound.
When you change the setting about this unit
(e.g.: a language for the subtitle and the on-
screen display etc.), you have to set on the
Setup menu. For details, see page 37.
Basic operation
On the monitor
Touch SOURCE LIST.
1
Touch MENU.
2
SOURCE LIST
The System menu appears.
Tip
When connecting a TV tuner with PAL system, "TV
SYSTEM" appears in the menu.
34
SOURCE LIST
Settings and Adjustments
Auto Close On Closes the monitor automatically
when:
•you turn off the unit by pressing
OFF of the unit for 2 seconds.
•you turn the ignition switch to the
OFF position.
•you remove the front panel.
Auto Close Off Does not close the monitor
automatically when you turn off the
unit.
♦Rear Monitor
Selects the DVD/VCD signal format of the
rear monitor.
This setting affects when you connect the
optional rear monitor.
NTSC When playing back a DVD recorded
in NTSC system.
PAL When playing back a DVD recorded
in PAL system.
Tips
• This setting is available only when DVD/VCD
playback is stopped.
• The default settings are underlined above.
Display settings — DSPL
The following setting options are available.
♦A. Scroll
You can scroll long displayed items
automatically when the track is changed (up
to 31 characters are displayed). (CD-TEXT/
Touch the desired item.
3
MP3 only)
♦Dimmer
Touch the desired setting.
4
You can adjust the display brightness.
To turn off the System menu
♦Wide Mode
Touch the monitor.
Besides the normal mode (4:3), the screen can
also be set to full, wide screen, zoom and
cinema mode.
Monitor settings — MONITOR
♦Picture Mode
“Monitor” setting allows you to set the
You can adjust the picture characteristics
monitor of this unit.
according to the programme type, picture
tone or personal preference.
♦Auto Close
Selects On and Off the monitor options.
For the details of the settings, see page 21.
If you set to “On”, the monitor closes
automatically when you turn off the unit.
♦Rear Att
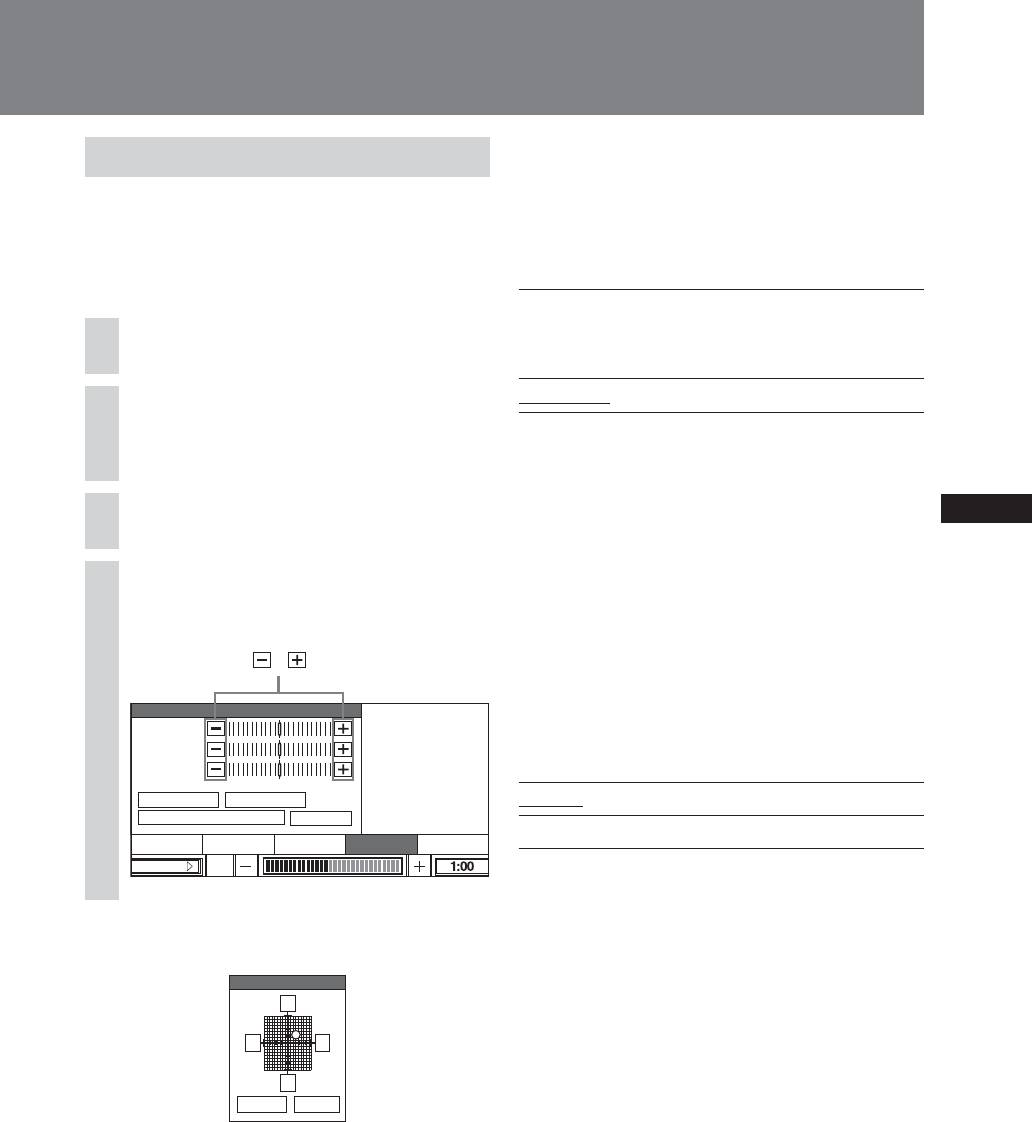
Sound settings — SOUND
Reducing the audio output level of the REAR
“SOUND” setting allows you to adjust the
MONITOR OUT if the playback sound is
sound according to the playback conditions
distorted.
and connected equipment.
This setting affects the output of the REAR
MONITOR OUT.
On the monitor
Rear Att On Reducing the audio output level.
Select this if the playback sound from
Touch SOURCE LIST.
the speakers (rear monitor) is
1
distorted.
Rear Att Off Normally, select this position.
Touch MENU.
2
The system menu appears.
This setting is available only for DVD or
VCD.
Touch SOUND.
♦DVD Level Adjust
3
The audio output level for DVD video differs
depending on the recorded audio format
Adjust the Sub, Bass or Treble level
4
(PCM, Dolby Digital or DTS). You can adjust
touching the – or +.
the output level of PCM, Dolby Digital or
DTS separately to reduce the volume level
,
differences between disc and format.
To adjust the output level, see page 31.
Sound
Sub
♦Beep
Bass
Treble
Turning the beep sound on or off.
Balance
Rear Att
Beep On Turns the beep sound on.
DVD Level Adjust
Beep
Beep Off Turns the beep sound off.
CLOCK MONITOR DSPL SOUND OTHER
SOURCE LIST
ATT
Tips
• When an optional power amplifier is connected, and
♦Balance
you are not using the built-in amplifier, the beep does
Adjusting the balance of each speaker.
not sound even if it is set to Beep On.
• The beep sound for warning will sound even if it is set
Balance
to Beep Off.
F
• The default settings are underlined above.
L R
R
Back
Reset
Touch F/R or L/R of the table on the monitor
to adjust the balance by step. You can also
touch the desired point directly to adjust the
balance.
To reset the setting, touch Reset.
35
Using the System Menu
♦Demo
Other settings — OTHER
Switching on and off the Demo mode. The
♦AUX 3
Demo screen is displayed only when the
You can set the function of the AUX3 jack.
power is off.
When you connect the back camera to AUX3
Demo On Turns on the Demo mode.
jack, set to “Back Camera”. To adjust the
position of the back camera while viewing
Demo Off Turns off the Demo mode.
the image of the camera, set to “Normal”.
Tip
Normal •Select this when you connect the
The default settings are underlined.
other components other than back
camera to AUX3 jack.
•Select this to test view while
♦Touch Panel Adjust
connecting the back camera.
If the touching position does not correspond
You can adjust the position of the
with the proper item, you will need to adjust
back camera while viewing the
image of the camera without setting
the touch panel position.
the shift lever to the “R(reverse)”
Touch 1, 2 and 3 of the touch panel in order.
position. However, note that the
image of the camera will be
displayed only when the parking
1
brake is set.
Back Camera Select this when you connect the back
camera to AUX3 jack.
2
♦Switching the NTSC/PAL system
3
You can switch the NTSC/PAL system of the
back camera in the AUX 3 mode.
Press and hold SEEK + of the main unit for 3
seconds while in AUX3 mode. The short beep
sounds and NTSC/PAL system is now
switched.
NTSC Switches the back camera to NTSC
system.
PAL Switches the back camera to PAL
system.
Note
This setting is available also when AUX 3 is set to
“Normal”.
♦PBC On
Switching on and off the PBC function of
VCDs. Available only when VCD is stopped.
PBC On Turns on the PBC function.
PBC Off Turns off the PBC function.
36
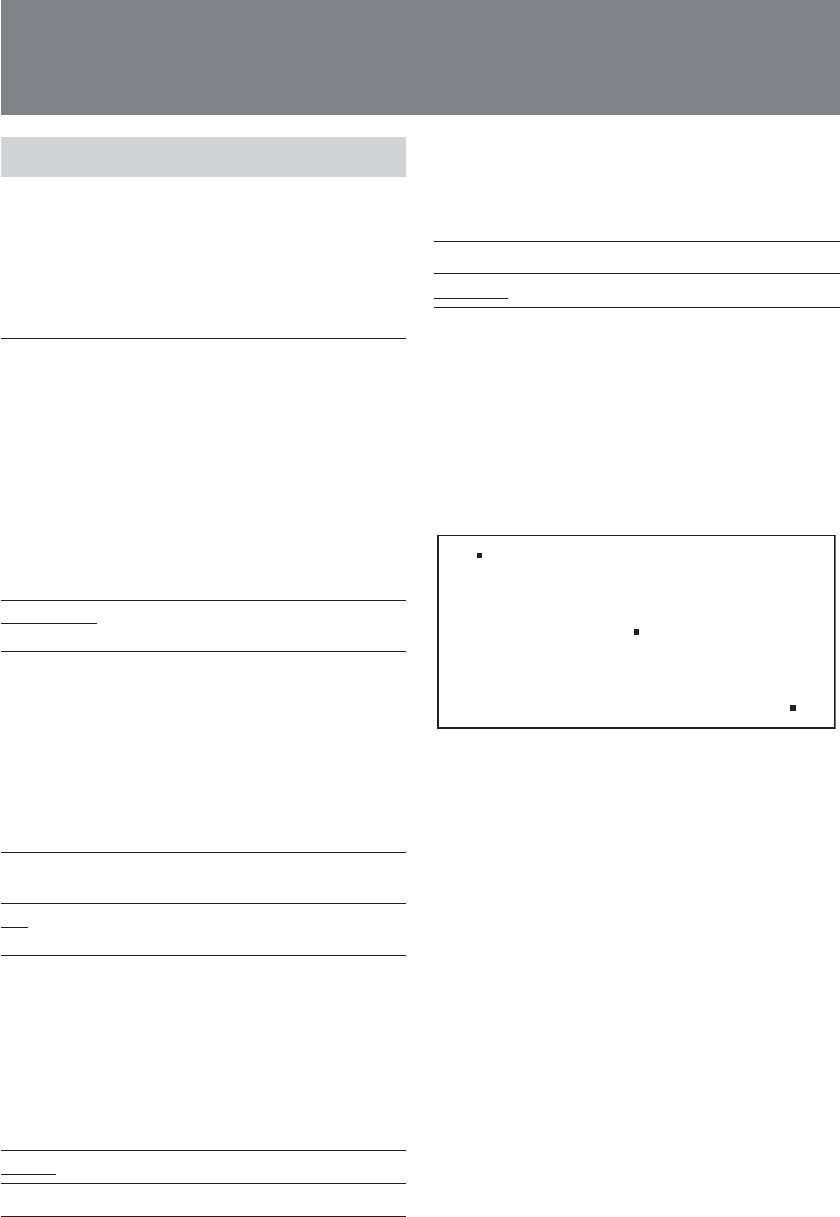
Using the DVD Setup Menu
To close the DVD Setup menu
By using the DVD Setup menu, you can make
Touch DVD Setup.
various adjustments to items, such as picture
and sound.
You can also set a language for the subtitle
Language settings for DVD
and the on-screen display, among other
playback — Language
things. For details on each setup items, see
pages from 37 to 41.
♦DVD Menu
Notes
You can select the desired language for the
• Playback settings stored in the disc take priority over
disc’s menu.
the Setup menu settings, and not all the functions
described may work.
Note
• Operations of the parental control available only on the
Regardless of your setting, the language other than you
remote.
set may be automatically activated, depending on the
DVD.
Basic operation
♦Audio
Switches the language of the sound track.
Touch DVD Setup while playback is
1
When you select “Original”, the language
stopped.
given priority in the disc is selected.
DVD Setup
Language
Notes
Audio
• Regardless of your setting, the language other than
Display
you set may be automatically activated, depending on
Lock
the DVDs.
Downmix
• Some DVDs are prohibited to change the audio
language output, even if multiple languages are
Disc Rep DSPL
DVD SetupEQ Off
recorded.
SOURCE LIST
♦Subtitle
The DVD Setup menu appears.
Switches the language for the subtitle
recorded on the DVD.
Touch the desired category.
2
Note
Language: Language setting for DVD
Regardless of your setting, the language other than you
playback.
set may be automatically activated, depending on the
DVDs.
Audio: Setting for digital audio output.
Display: Display setting for the player.
Lock: Setting for the parental control.
Downmix: Setting for the downmix signal.
Touch the desired item.
3
Touch the desired setting.
4
37
Using the DVD Setup Menu
Settings for digital audio
Settings for the parental
output — Audio
control — Lock
You can lock a disc, or set playback
♦DRC (Dynamic Range Control)
restrictions according to a predetermined
Makes the sound clear when the volume is
level such as viewer age. For details on the
turned down then playing a DVD that
setup procedures, see “Locking discs” on
conforms to “DRC”.
page 39.
This setting affects the outputs of AUDIO
OUT.
Setting for the downmix
On Gives you an impression of being at a
live performance.
signal — Downmix
Off Normally, select this position.
♦Downmix
You can select the downmix signal for
Display settings for the
optional audio component with a built-in
player — Display
DTS or Dolby Digital decoder.
This setting affects when you connect the
optional audio component with a built-in
♦Display
DTS or Dolby Digital decoder.
Selects the aspect ratio of the connected rear
Surround Select this when the unit is connected
monitor.
to an audio component with a built-in
16:9 Displays the wide picture.
DTS or Dolby Digital decoder.
Select this when you connect a wide-
screen monitor or a monitor with a
Normal Select this when the unit is connected
wide mode function.
to an audio component lacking a
built-in DTS or Dolby Digital
4:3 Letter Box Displays a wide picture with bands
decoder.
on the upper and lower positions of
the screen.
Select this when you connect a 4:3
Tip
screen monitor.
The default setting is underlined.
4:3 Panscan Displays a wide picture on the entire
screen and automatically cuts off the
positions that do not fit.
Select this when you connect a 4:3
screen monitor.
Note
Depending on the DVD, “4:3 Letter Box” may be selected
automatically instead of “4:3 Panscan”, and vice versa.
Tip
The default settings are underlined.
38
Changing the password
Locking discs — Lock
You can lock a disc, or set playback
Touch DVD Setup while playback is
restrictions according to a predetermined
1
stopped.
level such as viewer age. Restricted playback
scenes are blocked or replaced with different
The DVD Setup menu appears.
scenes when a parental control compatible
DVD is played.
Touch Lock.
2
Entering the password
Touch Password.
Touch DVD Setup while playback is
3
1
stopped.
Touch the number to enter your
The DVD Setup menu appears.
4
old password, then touch Enter.
Touch Lock.
2
Touch the number to enter your
5
new password, then touch Enter.
Touch Password.
3
If a wrong number entered, touch Clear.
It is set to “1111” upon purchase.
To return to the previous menu, touch Back.
LockDVD Setup
Password
Language
Rating
Current
Audio
Password
To confirm, touch the number to
6
Display
Area Code
12345
enter your new password, then
Lock
67890
Downmix
Clear
Enter
touch Enter.
Back
Back
The new password is set.
Disc Rep DSPL
DVD SetupEQ Off
SOURCE LIST
Touch the number to enter your
4
password, then touch Enter.
If a wrong number entered, touch Clear.
To return to the previous menu, touch Back.
To confirm, touch the number to
5
enter your password, then touch
Enter.
The password is set.
39

Using the DVD Setup Menu
Setting the parental control on
Changing the area and its movie
rating level
Touch DVD Setup while playback is
You can set the restriction levels depending
1
stopped.
on the area and its movie ratings.
The DVD Setup menu appears.
Touch DVD Setup while playback is
1
stopped.
Touch Lock.
2
The DVD Setup menu appears.
Touch Rating.
3
Touch Lock.
2
Touch the number to select the
4
Touch Area Code.
rating level, then touch Enter.
3
The password setting display appears.
When you set the parental control off, select
"Unlock".
Touch the number to enter your
To return to the previous menu, touch Back.
4
password, then touch Enter.
Touch the number to enter your
5
Touch the number to enter the
password, then touch Enter.
5
Area code, then touch Enter.
If a wrong number entered, touch Clear.
Note
When you play discs which do not have the parental
To return to the previous menu, touch Back.
control, playback cannot be restricted on this unit.
40

Area code list
Standard Code number
Argentina 2044
Australia 2047
Austria 2046
Belgium 2057
Brazil 2070
Canada 2079
Chile 2090
China 2092
Denmark 2115
Finland 2165
France 2174
Germany 2109
India 2248
Indonesia 2238
Italy 2254
Japan 2276
Korea 2304
Malaysia 2363
Mexico 2362
Netherlands 2376
New Zealand 2390
Norway 2379
Pakistan 2427
Philippines 2424
Portugal 2436
Russia 2489
Singapore 2501
Spain 2149
Sweden 2499
Switzerland 2086
Thailand 2528
United Kingdom 2184
41

TV/Radio/Other Components
Storing Channels/Radio Stations
Caution
To cancel the storing procedure
When tuning in stations while driving, use Best Tuning
Touch BTM ON during the storing
Memory (BTM) to prevent an accident.
procedure.
Notes
Storing automatically — BTM
• It takes several minutes to complete the storing
procedure.
You can store up to 18 VHF/UHF stations or
• If you cancel BTM during the storing procedure, the
18 for FM, 12 for AM stations. You can have
presetting will be proceeded partway.
the unit automatically select the stations with
the strongest signals and store them in order.
Storing manually
Note
You can select “TV” only when you connect the optional
While receiving the station that you want
Sony TV tuner unit XT-V70.
to store, touch and hold a number on the
top of the display.
On the monitor
On the remote, press and hold a number
button (1 to 6).
Touch SOURCE LIST.
The number button indication appears in the
1
display.
Touch TV or TUNER.
Note
2
If you try to store another station on the same number
When you select “TUNER”, proceed to step 3.
button, the previous stored station will be replaced.
When you select “TV”, proceed to step 4.
Receiving the stored stations
Touch to select the band “FM”,
3
Touch the number on the top of the display
“AM”.
(or press a number button (1 to 6) on the
remote).
Touch the Mode menu box to
4
select the desired mode.
Touch BTM.
5
Touch BTM ON.
6
Stored stations are memorized in order.
When the storing procedure is completed, the
regular display appears again.
42
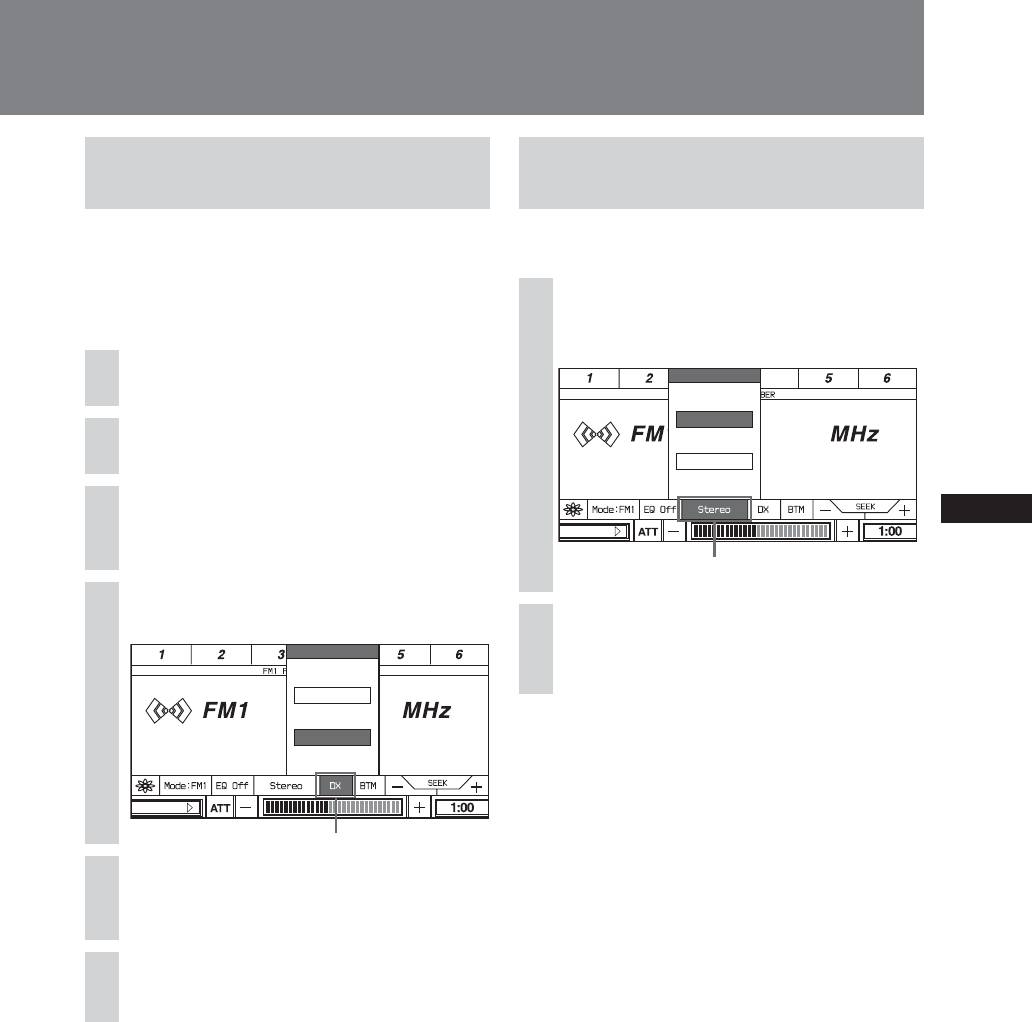
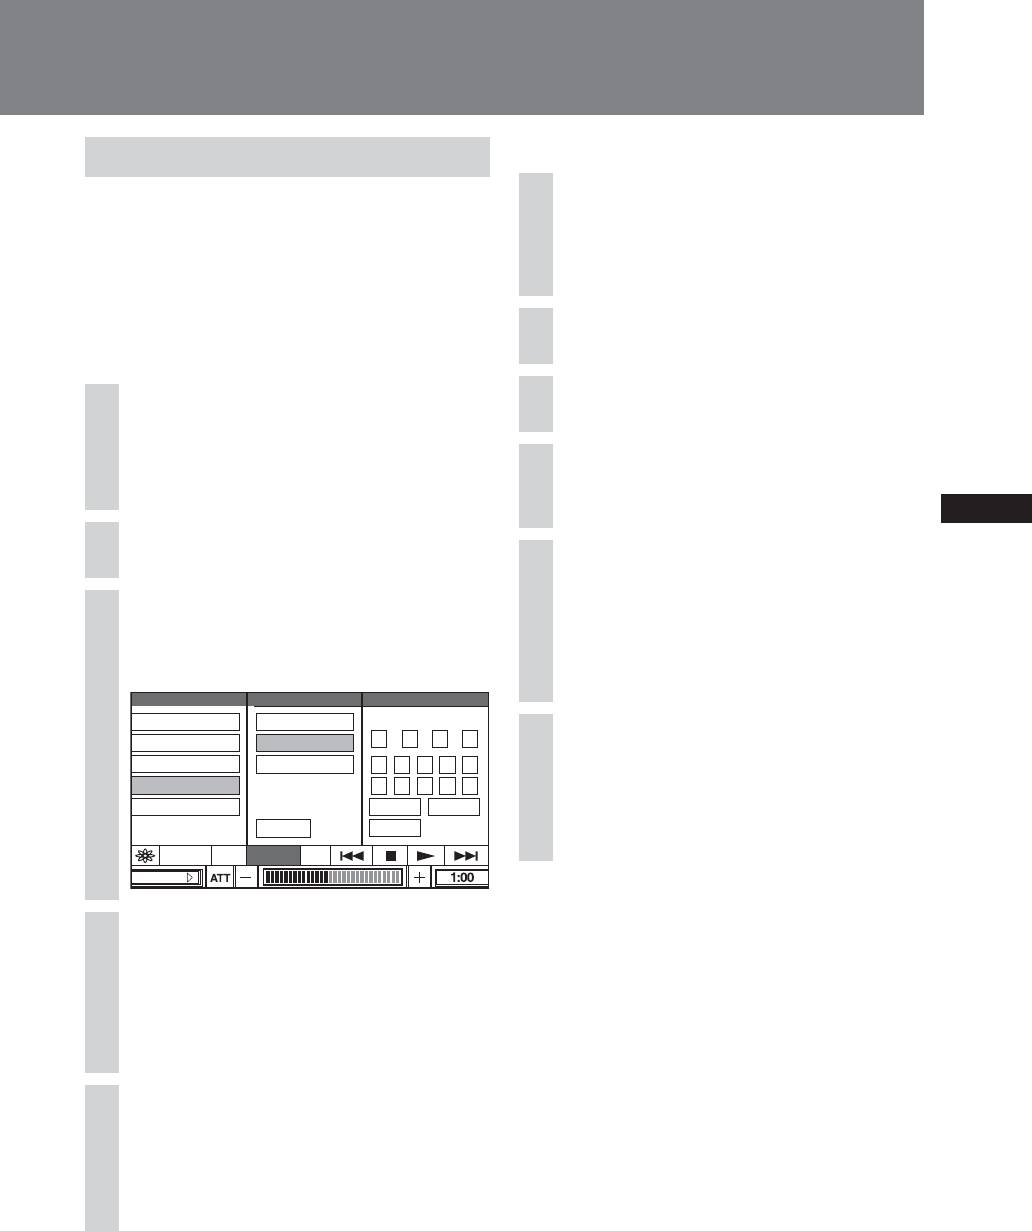
Using the Local seek mode in
Switching FM reception to
tuner function
monaural
If you set “Local” function to “On”, you can
If the FM broadcast is noisy, switch to FM
receive to only tune into stations with
reception to monaural.
stronger signals.
During FM reception mode, touch
On the monitor
1
the Stereo/MONO menu box.
Touch SOURCE LIST.
Stereo/MONO
1
Stereo
Touch TUNER.
2
MONO
Touch “FM” or “AM” to select the
3
SOURCE LIST
band.
Stereo/Mono
Touch the Local menu box.
4
Touch MONO.
Local/DX
2
To restore the stereo reception, touch Stereo.
Local
DX
SOURCE LIST
Local menu box
Touch “Local (Local On)” or “DX
5
(Local Off)”.
Touch and close the Local menu
6
box.
43
Auxiliary Audio/Video Equipment
You can connect optional devices to the AUX
Setting for the auxiliary
IN terminal on the unit.
equipment
Selecting auxiliary equipment
You can change the setting of the auxiliary
equipment.
Touch SOURCE LIST.
1
Basic operation
On the monitor
Touch AUX.
2
Touch SOURCE LIST.
1
Touch AUX.
2
Touch Setup menu box.
3
The Menu display appears.
Touch the Mode menu box.
3
Touch the desired setting.
4
Touch the desired mode.
4
Select the desired mode depending on the
To turn off the Setup menu
connected devices.
Touch Setup.
♦AUX 1
On the remote
♦AUX 2
Selecting the type of device connected to the
Press (SRC) repeatedly to select
1
AUX 1 and AUX 2 jacks.
“AUX”.
Audio Selects this when you connect the
audio device. The wallpaper will be
displayed on the screen.
Press (MODE) repeatedly to select
2
“AUX1”, ”AUX2” or “AUX3”.
Video Selects this when you connect the
video component.
♦AUX Volume
Adjusting the volume of the auxiliary
equipment.
You can adjust while touching + or – on the
monitor.
44

Auxiliary Audio/Video Equipment
Displaying the image of the
back camera
You can display the image of a back camera
(when you connect an optional back camera).
Make sure that you have connected the
camera cable to the unit’s AUX 3 jack
correctly. During the connection of the back
camera, set the AUX3 to “Normal” to check
the location of the back camera.
If you switch to “Back Camera”, the image of
the back camera will be displayed when the
back lamp lights up (or the shift lever is set to
the “R (reverse)” position).
You can also switch the NTSC/PAL system of
the back camera in the AUX3 mode. For
details about the function of AUX3 jack and
switching NTSC/PAL system, see page 36.
For details about connecting the camera
cable, refer to the supplied “Installation/
Connections” manual.
Notes
• When you drive, watch the surroundings carefully for
your safety. Do not depend on the back camera
exclusively.
• If a rear monitor is connected, its display gets black
when the shift lever is set to the R position. When the
shift lever is set to the other position, the display turns
back.
45
Switching the Front/Rear Output
— Zone x Zone
OFF
ATT
DVD
Press (ZxZ) on the main unit.
OFF
BX
5
SRC
x
>.
To operate the source of the front, use the
TOP MENU
MENU
MODE
buttons of the main unit*.
ENTER
O
To operate the source of the rear, use the card
remote commander.
REP
SHUF
EQ7 ZxZ
Z×Z
SEARCH
AUDIO
SUBTITLE ANGLE
* To use the PBC function (VCD) on the main
12
3
unit, inactivate Zone x Zone and set the PBC
456
function with the card remote commander.
789
VOL
CLEAR
0
Notes
• On the remote, press (ZxZ) to activate Zone x Zone,
and press (ZxZ) again to inactivate Zone x Zone.
• Once (OFF) on the main unit or on the remote is
pressed, the main unit is turned off, and Zone x Zone
is inactivated.
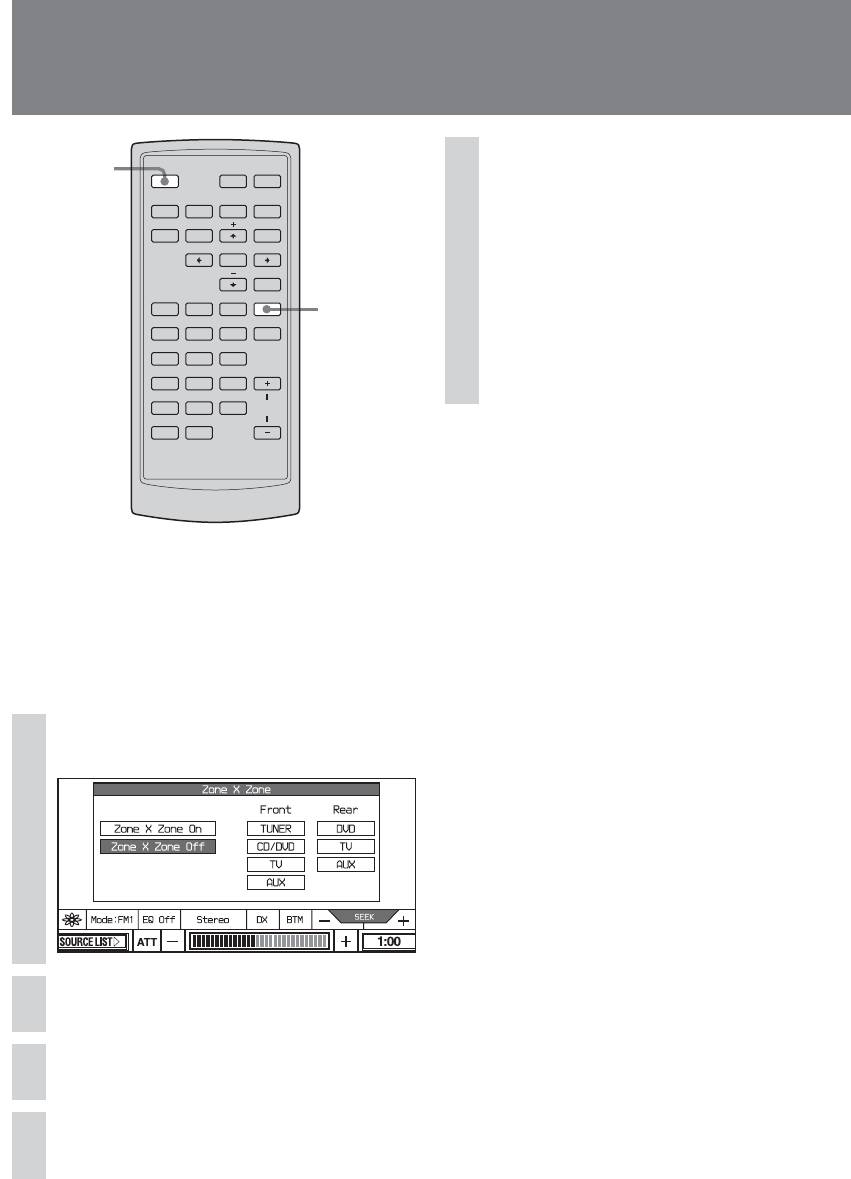
You can simultaneously listen to a separate
• The combinations of the sources below cannot be set.
sound source in this unit and auxiliary audio
– TV – AUX2 or AUX3
equipment in the rear.
– AUX2 – AUX3
This function is convenient when you want to
enjoy radio, music playback, etc, in the front,
and DVD playback in the rear.
Press (ZxZ) on the main unit.
1
Touch Zone x Zone On.
2
Touch the source of the front.
3
Touch the source of the rear.
4
46
Other Features
Additional Information
panel are flawless. However, there is a
Card remote commander
possibility that less than 0.01% of the
precautions
segments are defective and may not light up
• Do not leave the card remote commander
properly. However, these segments will not
on the dashboard, on the steering wheel, or
interfere with your viewing.
in other locations exposed to direct
sunlight. Especially in summer, very high
temperatures can occur in such locations,
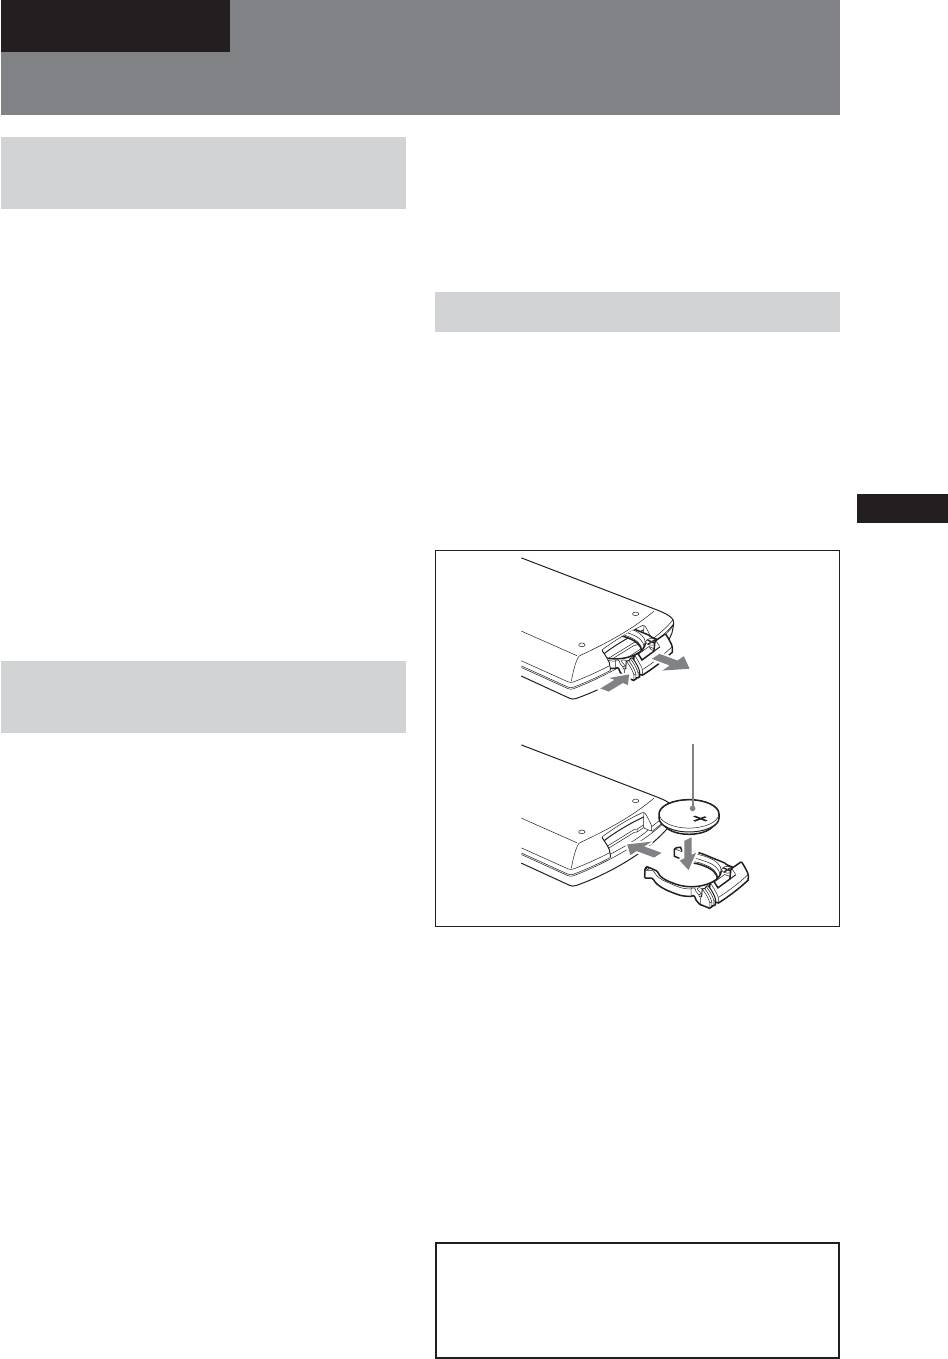
Replacing the lithium battery
causing deformation of the commander.
Under normal conditions, batteries will last
•When parking the car in sunlight, remove
approximately 1 year. (The service life may be
the card remote commander from its
shorter, depending on the conditions of use.)
mounting location and store it in the glove
When the battery becomes weak, the range of
compartment or in another protected
the card remote commander becomes shorter.
location.
Replace the battery with a new CR2025
• In direct sunlight, the signals from the card
lithium battery. Use of any other battery may
remote commander may sometimes not be
present a risk of fire or explosion.
picked up properly by the unit.
In such a case, move the commander closer
to the remote sensor on the front panel of
the main unit.
About the liquid crystal
display (LCD) panel
+ side facing up
• Do not press on the LCD panel on the
monitor unit as doing so can distort the
picture or cause a malfunction. The picture
may become unclear, or the LCD panel may
be damaged.
• Do not touch other than the finger. A
display gets damaged or break.
•Notes on cleaning
– Clean the LCD panel with a dry soft
cloth.
Notes on lithium battery
– Do not use solvents such as benzine,
• Keep the lithium battery out of the reach of
thinner, commercially available cleaners
children. Should the battery be swallowed,
or antistatic spray.
immediately consult a doctor.
• Do not use this unit in temperatures under
•Wipe the battery with a dry cloth to assure
5°C or over 45°C.
a good contact.
• If your car was parked in a cold or hot
• Be sure to observe the correct polarity when
place, the picture may not be clear. The
installing the battery.
monitor is not damaged. The picture will
• Do not hold the battery with metallic
become clear after the temperature in your
tweezers, otherwise a short-circuit may
car becomes normal.
occur.
Some stationary blue or red dots may appear
WARNING
on the monitor.
Battery may explode if mistreated.
These are called bright spots, and can happen
Do not recharge, disassemble, or dispose of
with any LCD.
in fire.
The LCD panel is highly sophisticated, and
more than 99.99% of the segments used in the
continue to next page t
47
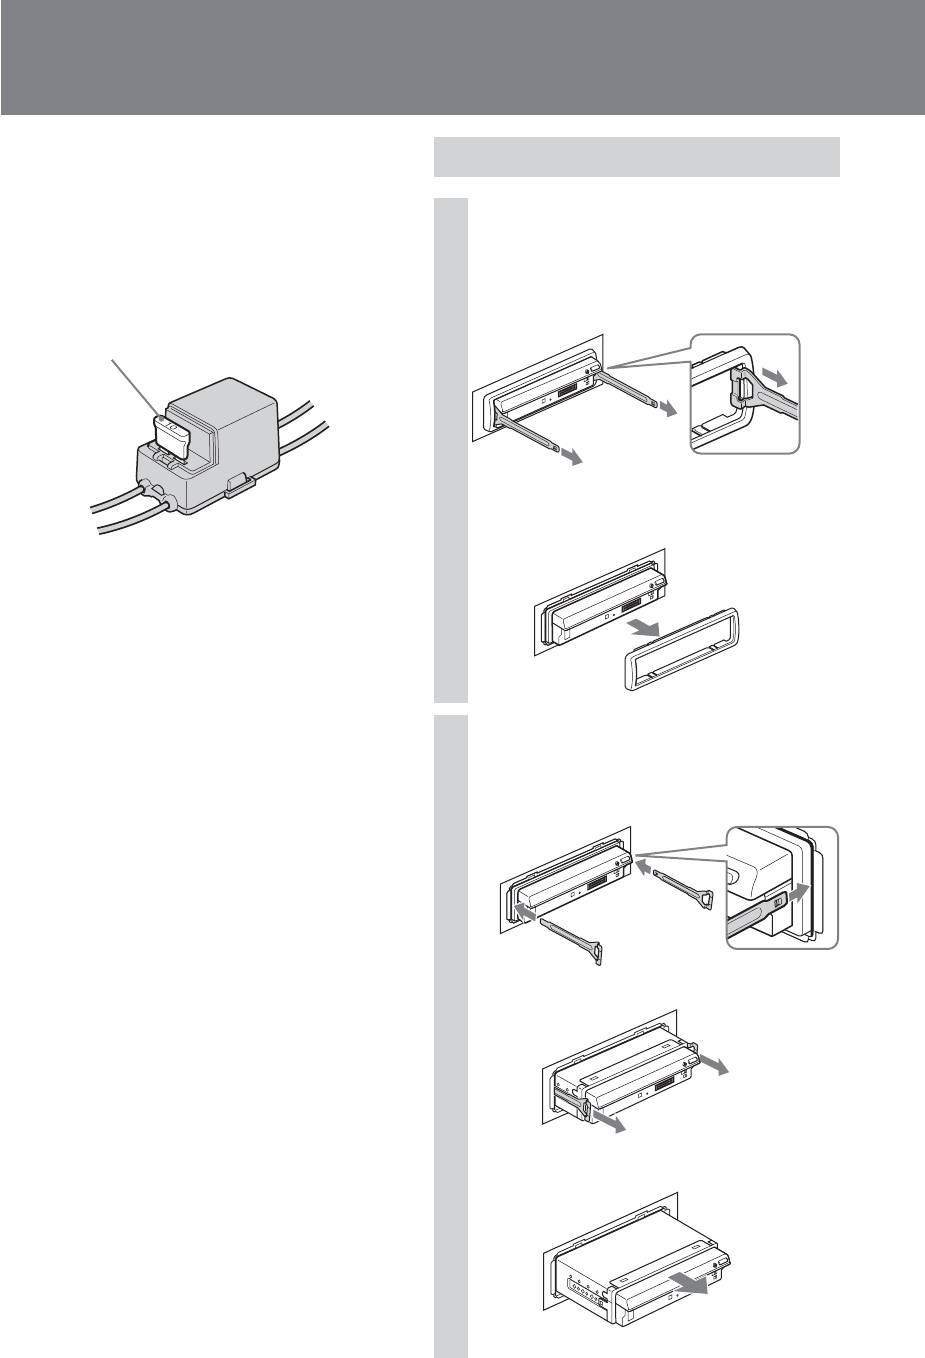
Additional Information
Fuse replacement
Removing the unit
When replacing the fuse, be sure to use one
matching the amperage rating stated on the
original fuse. If the fuse blows, check the
Remove the protection collar.
power connection and replace the fuse. If the
1
fuse blows again after replacement, there
1 Detach the front panel (page 9).
may be an internal malfunction. In such a
2 Engage the release keys together with the
case, consult your nearest Sony dealer.
protection collar.
Fuse (10 A)
3 Pull out the release keys to remove the
protection collar.
Cleaning the connectors
The unit may not function properly if the
connectors between the unit and the front
panel are not clean. In order to prevent this,
detach the front panel (page 9) and clean the
connectors with a cotton swab dipped in
alcohol. Do not apply too much force.
Otherwise, the connectors may be damaged.
Remove the unit.
2
1 Insert both release keys simultaneously
Notes
until they click.
• For safety, turn off the ignition before cleaning the
connectors, and remove the key from the ignition
switch.
• Never touch the connectors directly with your fingers
or with any metal device.
2 Pull the release keys to unseat the unit.
3 Slide the unit out of the mounting.
48

Notes on discs
About MP3 files
•To keep a disc clean, do not touch its
MP3, which stands for MPEG-1 Audio Layer-
surface. Handle the disc by its edge.
3, is a music file compression format
• Keep your discs in their cases or disc
standard. It compresses audio CD data to
magazines when not in use.
approximately 1/10 of its original size.
• Do not subject discs to heat/high
• The unit is compatible with the following
temperature.
standards.
Avoid leaving them in a parked car or on a
dashboard/rear tray.
For CD
• Do not attach labels, or use discs with
– ISO 9660 level 1/level 2 format, Joliet/
sticky ink/residue. Such discs may stop
Romeo in the expansion format
spinning when used, causing a
–Multi Session
malfunction, or may ruin the disc.
• Do not use any discs with labels or stickers
For DVD
attached.
– UDF Bridge format (combined UDF and
The following malfunctions may result
ISO 9660)
from using such discs:
– Inability to eject a disc (due to a label or
For MP3
sticker peeling off and jamming the eject
– ID3 tag version 1.0, 1.1, 2.2, 2.3 and 2.4
mechanism).
– Inability to read audio data correctly (e.g.,
• The maximum number of:
playback skipping, or no playback) due
– Albums: 256 (including root and empty
to heat shrinking of a sticker or label
folders).
causing a disc to warp.
–MP3 files (tracks) and albums contained
• Discs with non-standard shapes (e.g., heart,
in a disc: 1,000.
square, star) cannot be played on this unit.
– displayable characters for an album/
Attempting to do so may damage the unit.
track name is 31; ID3 tag is 31 characters.
Do not use such discs.
•You cannot play 8-cm discs.
Notes
• Before playing, clean the discs with a
• Be sure to finalize the disc before using on the unit.
commercially available cleaning cloth.
• When naming an MP3 file, be sure to add the file
Wipe each disc from the center out. Do not
expansion “.mp3” to the file name.
• If you play a high-bit-rate MP3, such as 320 kbps,
use solvents such as benzine, thinner,
sound may be intermittent.
commercially available cleaners, or
• During playback of a VBR (variable bit rate) MP3 file
antistatic spray intended for analogue
or fast-forward/reverse, elapsed playing time may not
discs.
display accurately.
• When the disc is recorded in Multi Session, only the
first track of the first session format is recognized and
played (any other format is skipped). The priority of
the format is CD-DA and MP3.
– When the first track is a CD-DA, only CD-DA of the
first session is played.
– When the first track is not a CD-DA, MP3 session is
played.
If the disc has no data in any of these formats, “DISC
Error” is displayed.
• The unit cannot play back Multi Border recorded MP3.
• DVD of sampling rate other than 44.1 kHz or 48 kHz
cannot be played.
49
Оглавление
- Additional Information
- Troubleshooting
- Specifications
- Glossary
- Language Code List


