Sony KDL-26 L4000: Set-up menu
Set-up menu: Sony KDL-26 L4000
26
GB
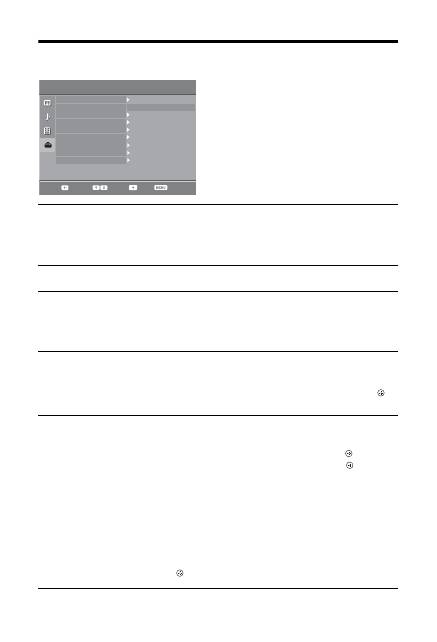
Set-up menu
You can select the options listed below on the “Set-up”
menu. To select options in “Settings”, see “Navigating
through menus” (page 20).
Auto Start-up
Starts the initial set-up to select the language, country/region and location, and tune
in all available digital and analogue channels. Usually, you do not need to do this
operation because the language and country/region will have been selected and
channels already tuned when the TV was first installed (page 7). However, this
option allows you to repeat the process (e.g., to retune the TV after moving house).
Language
Selects the language in which the menus are displayed.
Auto Tuning
(Only in
analogue mode)
Tunes in all the available analogue channels.
Usually you do not need to do this operation because the channels are already tuned
when the TV was first installed (page 7). However, this option allows you to repeat
the process (e.g., to retune the TV after moving house, or to search for new channels
that have been launched by broadcasters).
Programme
Sorting
(Only in
analogue mode)
Changes the order in which the analogue channels are stored on the TV.
1
Press
F
/
f
to select the channel you want to move to a new position,
then press
g
.
2
Press
F
/
f
to select the new position for your channel, then press
.
AV Preset
Assigns a name to any equipment connected to the side and rear sockets. The name
will be displayed briefly on the screen when the equipment is selected. You can skip
an input source that is not connected to any equipment.
1
Press
F
/
f
to select the desired input source, then press
.
2
Press
F
/
f
to select the desired option below, then press
.
•
AV1 (or AV2/AV3/HDMI1/HDMI2/Component/PC), VIDEO, DVD, CABLE,
GAME, CAM, SAT
: Uses one of the preset labels to assign a name to connected
equipment.
• “Edit”: Creates your own label.
1
Press
F
/
f
to select the desired letter or number (“_” for a blank
space), then press
g
.
If you input a wrong character
Press
G
/
g
to select the wrong character. Then, press
F
/
f
to select the correct
character.
2
Repeat the procedure in step 1 until the name is completed, then
press .
Auto Start-up
Language
Auto Tuning
Programme Sorting
English
AV Preset
HDMI Set-up
Sound Offset
Manual Programme Preset
Digital Set-up
Select:
Back:
Enter:
Exit:
Set-up
27
GB
Usi
ng MENU
Func
ti
ons
HDMI Set-up
Allows the TV to communicate with equipment that is compatible with the control
for HDMI function, and connected to the HDMI sockets of the TV. Note that
communication settings must also be made on the connected equipment.
“Control for HDMI”:
Sets whether or not to link the operations of the TV and the
connected equipment that is compatible with control for HDMI.
“Auto Devices Off”:
When this is set to “On”, the connected equipment that is
compatible with control for HDMI turns off when you switch the TV to standby
mode using the remote.
“Auto TV On”:
When this is set to “On”, the TV turns on when you turn on the
connected equipment that is compatible with control for HDMI.
“Device List Update”:
Creates or updates the “HDMI Device List”. Up to 11
compatible equipment items can be connected, and up to 5 equipment items can be
connected to a single socket. Be sure to update the “HDMI Device List” when you
change the connections or settings.
“HDMI Device List”:
Displays a list of connected equipment that is compatible
with control for HDMI.
Sound Offset
Sets an independent volume level to each equipment connected to the TV.
Manual
Programme
Preset
(Only in
analogue mode)
Changes the available analogue channel setting.
Press
F
/
f
to select the programme number you want to modify. Then, press
.
System
Presets programme channels manually.
1
Press
F
/
f
to select “System”, then press
.
2
Press
F
/
f
to select one of the following TV broadcast systems, then
press
G
.
B/G: For western European countries/regions
D/K: For eastern European countries/regions
L: For France
I: For the United Kingdom
~
Depending on the country/region selected for “Country” (page 6), this option may not be
available.
Channel
1
Press
F
/
f
to select “Channel”, then press
.
2
Press
F
/
f
to select “S” (for cable channels) or “C” (for terrestrial
channels), then press
g
.
3
Tune the channels as follows:
If you do not know the channel number (frequency)
Press
F
/
f
to search for the next available channel. When a channel has been found,
the search will stop. To continue searching, press
F
/
f
.
If you know the channel number (frequency)
Press the number buttons to enter the channel number of the broadcast you want or
your VCR channel number.
4
Press
to jump to “Confirm”, then press
.
Repeat the procedure above to preset other channels manually.
Label
Assigns a name of your choice, up to five letters or numbers, to the selected channel.
AFT
Allows you to fine-tune the selected programme number manually if you feel that a
slight tuning adjustment will improve the picture quality.
Continued

28
GB
Audio Filter
Improves the sound for individual channels in the case of distortion in mono
broadcasts. Sometimes a non-standard broadcast signal can cause sound distortion or
intermittent sound muting when watching mono programmes.
If you do not experience any sound distortion, we recommend that you leave this
option set to the factory setting “Off”.
~
“Audio Filter” is not available when “System” is set to “L”.
Skip
Skips unused analogue channels when you press PROG +/- to select channels. (You
can still select a skipped channel using the number buttons.)
Confirm
Saves changes made to the “
Manual Programme Preset
” settings.
Оглавление
- Indholdsfortegnelse
- Opstartsvejledning 1: Kontrol af det medfølgende tilbehør
- 3: Tilslutning af en antenne/video/dvd-optager
- 4: Undgå, at TV-apparatet vælter
- Sikkerhedsoplysninger
- Forholdsregler
- Oversigt over fjernbetjeningen
- Oversigt over TV-apparatets knapper og indikatorer
- Se TV Se TV
- Kontrol af den digitale elektroniske programguide (EPG) *
- Anvendelse af den digitale favoritliste *
- Anvendelse af ekstraudstyr Tilslutning af ekstraudstyr
- Visning af billeder fra tilsluttet udstyr
- Brug af kontrol til HDMI
- Anvendelse af funktionerne under MENU Navigation gennem menuer
- Menuen Billedjustering
- Menuen Lydjustering
- Menuen Funktioner
- Menuen Opsætning
- Menuen Digital opsætning
- Yderligere oplysninger Specifikationer
- Fejlsøgning
- Sisällysluettelo
- Aloitusopas 1: Mukana toimitettujen lisävarusteiden tarkistaminen
- 3: Antennin/videonauhurin/DVD-tallentimen kytkeminen
- 4: Television kaatumisen estäminen
- 7: Television automaattinen viritys
- Turvallisuusohjeita
- Varotoimenpiteet
- Kaukosäätimen painikkeet
- Television painikkeet ja merkkivalot
- Television katselu Television katselu
- Digitaalisen elektronisen ohjelmaoppaan (EPG) käyttö *
- Digitaaliset suosikit-luettelon käyttö *
- Lisälaitteiden käyttö Lisälaitteiden kytkentä
- Televisioon kytkettyjen laitteiden kuvan katselu
- HDMI-ohjauksen käyttäminen
- MENU-toimintojen käyttö Valikoissa liikkuminen
- Kuvasäädöt-valikko
- Äänisäädöt-valikko
- Ominaisuudet-valikko
- Perusasetukset-valikko
- Digi-tv-asetukset-valikko
- Lisätietoja Tekniset tiedot
- Vianmääritys
- Innhold
- Oppstart 1: Kontrollere tilbehøret
- 3: Koble til antenne/videospiller/ DVD-opptaker
- 4: Forhindre at TV-en velter
- 7: Stille inn TV-en automatisk
- Sikkerhetsinformasjon
- Forholdsregler
- Oversikt over fjernkontrollen
- Oversikt over knappene og indikatorene på TV-en
- Se TV Se TV
- Kontrollere den digitale elektroniske programguiden (EPG) *
- Bruke den digitale favorittlisten *
- Bruke tilleggsutstyr Koble til tilleggsutstyr
- Vise bilder fra utstyr som er koblet til TV-en
- Bruke kontroll for HDMI
- Bruke MENU -funksjonene Navigere gjennom menyene
- Bildejustering-meny
- Lydjustering-meny
- Egenskaper-meny
- Oppsett-meny
- Digital innstilling meny
- Tilleggsinformasjon Spesifikasjoner
- Feilsøking
- Innehållsförteckning
- Startguide 1: Kontrollera tillbehör
- 3: Ansluta en antenn/videobandspelare/ DVD-brännare
- 4: Förhindra att din TV välter
- 7: Automatisk inställning av TV:n
- Säkerhetsinformation
- Säkerhetsföreskrifter
- Översikt över fjärrkontrollen
- Översikt över TV:ns knappar och indikatorer
- Se på TV Se på TV
- Kontrollera den digitala, elektroniska programguiden (EPG) *
- Använda den digitala favoritlistan *
- Använda extra utrustning Ansluta extra utrustning
- Visa bilder från ansluten utrustning
- Använda kontroll för HDMI
- Använda MENY-funktioner Navigering i menyerna
- Menyn Bildjustering
- Menyn Ljudjustering
- Menyn Finesser
- Menyn Inställningar
- Menyn Digital inställning
- Övrig information Specifikationer
- Felsökning
- Table of Contents
- Start-up Guide 1: Checking the accessories
- 3: Connecting an aerial/VCR/ DVD recorder
- 4: Preventing the TV from toppling over
- 7: Auto-tuning the TV
- Safety information
- Precautions
- Overview of the remote
- Overview of the TV buttons and indicators
- Watching TV Watching TV
- Checking the Digital Electronic Programme Guide (EPG) *
- Using the Digital Favourite list *
- Using Optional Equipment Connecting optional equipment
- Viewing pictures from connected equipment
- Using control for HDMI
- Using MENU Functions Navigating through menus
- Picture Adjustment menu
- Sound Adjustment menu
- Features menu
- Set-up menu
- Digital Set-up menu
- Additional Information Specifications
- Troubleshooting
- Spis treści
- Instrukcja podłączania i programowania
- Informacje dotyczące bezpieczeństwa
- Środki ostrożności
- Odbiór audycji telewizyjnych Odbiór audycji telewizyjnych
- Korzystanie z listy Ulubione cyfrowe *
- Korzystanie z dodatkowego sprzętu Podłączanie dodatkowego sprzętu
- Korzystanie z funkcji MENU Poruszanie się po menu
- Informacje dodatkowe Dane techniczne
- Содержание
- Начало работы
- Сведения по безопасности
- Меры предосторожности
- Описание пульта ДУ
- Просмотр телевизионных программ Просмотр телевизионных программ
- Использование цифрового электронного экранного телегида (EPG) *
- Использование списка избранных цифровых программ *
- Использование дополнительных устройств Подключение дополнительных устройств
- Использование функций меню Навигация по системе меню
- Меню “Настройка изображения”
- Меню “Настройка звука”
- Меню “Функции”
- Меню “Настройка”
- Меню “Цифровая конфигурация”
- Дополнительные сведения Технические характеристики
