Sony CPD-120AS: Getting Started
Getting Started: Sony CPD-120AS

Getting Started
Before using this display, please make sure that the following items are
included in your package:
• Multimedia computer display (1)
• Warranty card (1)
• Operating instruction manual (1)
• Windows 95 Monitor Information Disk and its instruction manual (1)
✎ Tip
1)
This display will sync with any IBM or compatible system equipped with VGA
or greater
graphics capability. Although this display will sync to other platforms running at horizontal
2)
frequencies between 30 and 70 kHz, including Macintosh
and Power Macintosh systems, a
cable adapter is required. Please consult Sony Technical Support for advice on which adapter is
suitable for your needs.
1) VGA is a trademark of IBM Corporation.
2) Macintosh is a trademark of Apple Computer Inc.
Installation
p Step 1: Connect the computer
With the computer switched off, connect the video signal cable to the
display (VGA) connector on your computer. If your computer supports
the DDC plug-and-play standard, this connection will enable the DDC
communication between the display and the computer.
Also the video signal cable is combined with audio and microphone
cables. If your computer is equipped with sound capability, connect the
audio and microphone plugs to appropriate jacks located on your
computer.
If you use a USB (universal serial bus) device, connect the USB device to
the USB downstream jack and the PC to the USB upstream jack.
GB
Getting Started
10

p CPD-120AS
Computer
to USB port
Blue (to display
connector)
Green (to speaker
connector)
Red (to microphone
connector)
to
p CPD-220AS
Computer
to USB port
Blue (to display
connector)
Green (to speaker
connector)
Red (to microphone
connector)
to
✔Note on handling the video signal cable
Do not touch the pins of the video signal cable.
✔Note on USB ports
USB ports are included to provide state-of-the-art technology. Until USB support is
available at the operating system level, you must supply drivers to use USB devices. You
can upgrade your operating system to a version that supports USB at the operating system
level once a version becomes available.
See the manual that came with your USB device for more information on setting it up and
using it.
Continued to the next page ➔
Getting Started
GB
11
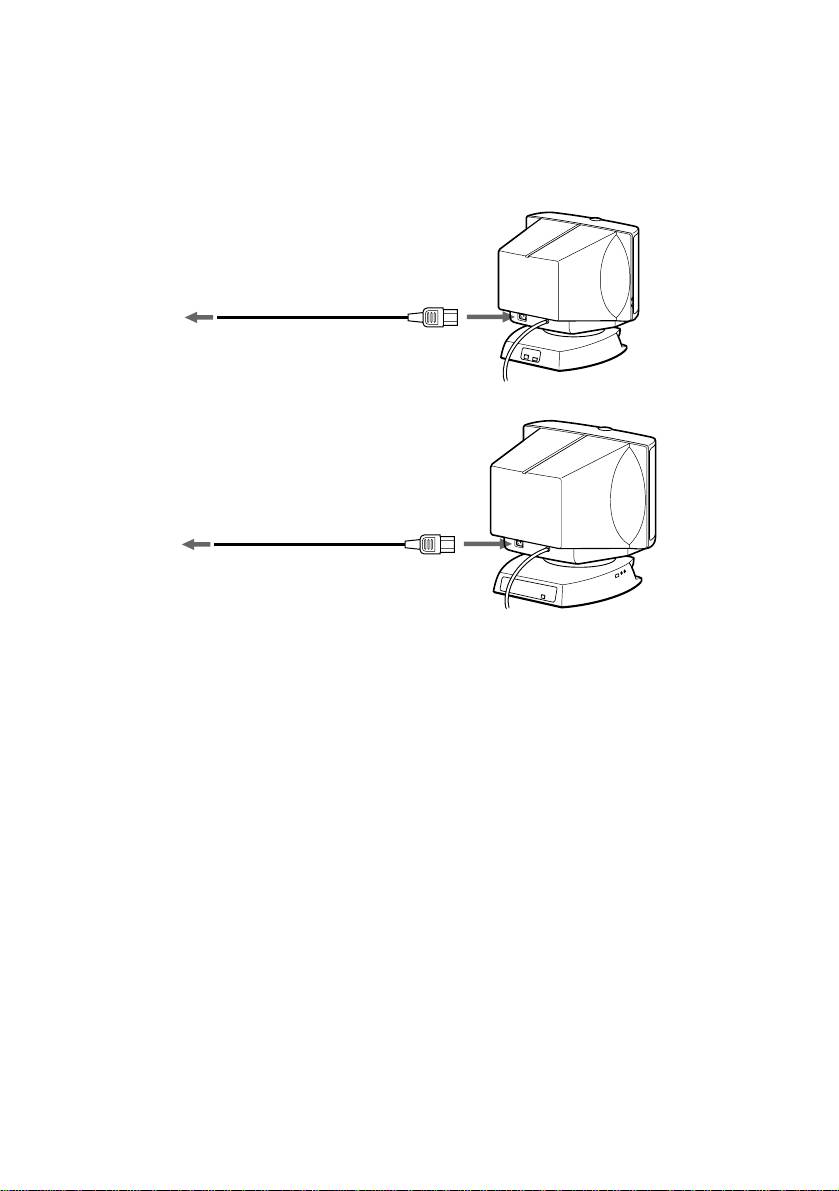
p Step 2: Connect the power cord
With the display switched off, connect the power cord to the display and
the other end to a power outlet.
p CPD-120AS
to a power outlet
Power cord (supplied)
p CPD-220AS
to a power outlet
Power cord (supplied)
p Step 3: Turn on the display and computer.
p Step 4: If necessary...
Adjust the user controls according to your personal preference.
The installation of your display is complete. Enjoy your display.
GB
Getting Started
12
Оглавление
- CPD-120AS CPD-220AS
- Table of Contents
- Introduction
- Precautions
- Functions of Controls
- Getting Started
- Using Your Display
- Adjustments
- Available Features
- Power Saving Function
- Specifications
- Troubleshooting
- Table des matières
- Introduction
- Précautions
- Fonctions des commandes
- Préambule
- Utilisation de l’écran
- Réglages
- Fonctions disponibles
- Fonction d’économie d’énergie
- Spécifications
- Dépannage
- Inhalt
- Einführung
- Sicherheitsmaßnahmen
- Vorbereitungen
- Arbeiten mit dem Monitor
- Einstellen des Monitors
- Sonderfunktionen
- Energiesparfunktion
- Technische Daten
- Störungsbehebung
- Índice
- Introducción
- Precauciones
- Funciones de los controles
- Procedimientos iniciales
- Uso del monitor
- Ajustes
- Funciones disponibles
- Función de ahorro de energía
- Especificaciones
- Solución de problemas
- Indice
- Introduzione
- Precauzioni
- Funzioni dei controlli
- Operazioni preliminari
- Utilizzo del display
- Regolazioni
- Funzioni disponibili
- Funzione di risparmio energetico
- Caratteristiche tecniche
- Soluzione dei problemi
- Содержание
- Введение
- Меры предосторожности
- Функции органов управления
- Подготовка к пользованию
- Как пользоваться монитором
- Настройка
- Другие возможности монитора
- Функция экономии электроэнергии
- Tехнические данные
- Устранение неполадок
