Sony CPD-120AS: Adjustments
Adjustments: Sony CPD-120AS
Adjustments
When one of the preset-type signals is input, no picture adjustment is
necessary.
You can, however, adjust the picture to your preference by following the
procedure described below.
To adjust the display, turn on the display and computer.
Select the adjustment item. You can adjust all items via the OSD (On
Screen Display).
Adjustments are automatically stored in the display’s memory.
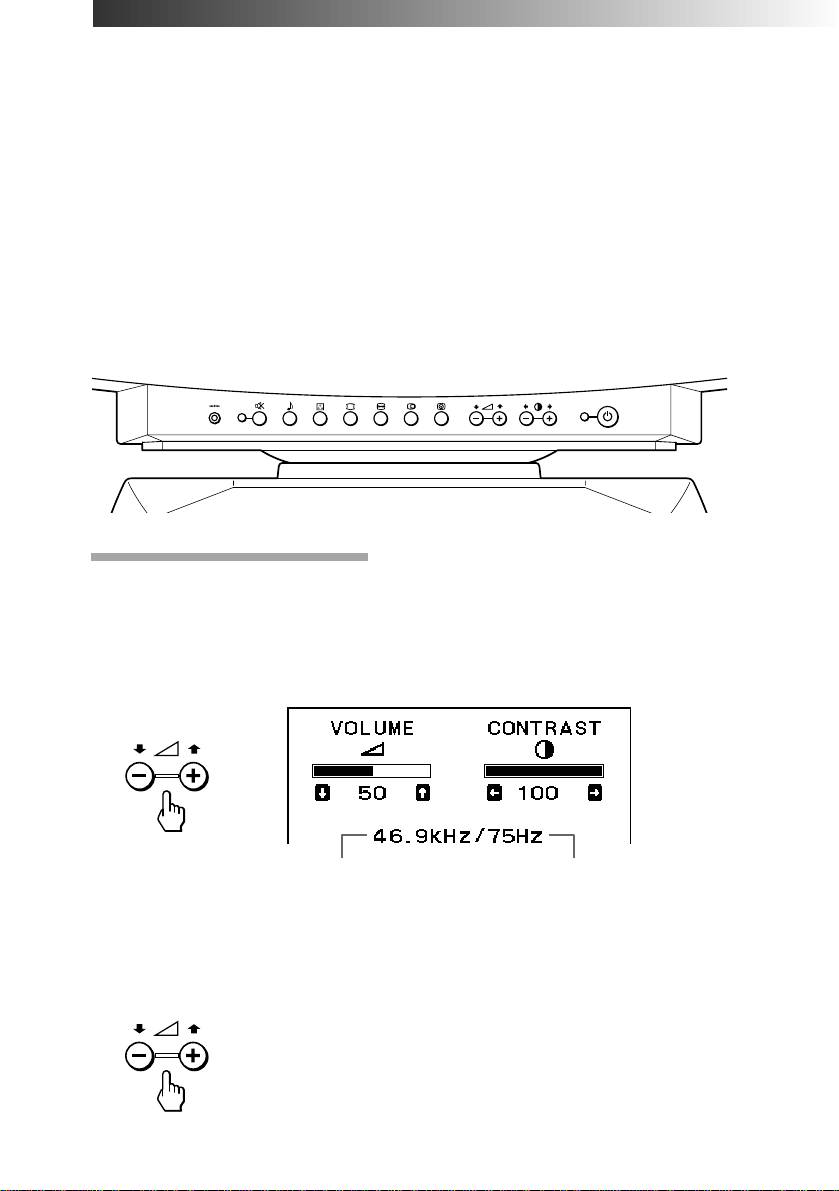
Control Panel
Adjusting volume
1. Press the . + or – button.
The VOLUME/CONTRAST OSD appears.
The horizontal and vertical frequencies for each input signal received
appear.
Horizontal
Vertical
frequency
frequency
2. Press the . +/– buttons to adjust volume.
+ to increase volume
– to decrease volume
GB
Adjustments
16

The VOLUME/CONTRAST OSD disappears 3 seconds after you release
the buttons.
✎ Tips
• The default setting of the volume level is 30 %.
• Adjust the volume while listening to the sound.
• Excessively high volume may cause howling.
p To mute the sound
Press the ¤ button. The ¤ indicator lights. The light indicates mute
function is in active mode.
Press again to cancel muting.
You can cancel muting also by pressing the . + button.
✎ Tip
¤ appears instead of . on the VOLUME/CONTRAST OSD while the sound is muted.
Adjusting the picture contrast
The adjustment data becomes the common setting for all input signals.
1. Press the > + or – button.
The VOLUME/CONTRAST OSD appears.
The horizontal and vertical frequencies for each input signal received
appear.
Continued to the next page ➔
Adjustments
GB
17
2. Press the > +/– buttons to adjust the picture contrast.
+ for more contrast
– for less contrast
The VOLUME/CONTRAST OSD disappears 3 seconds after you release
the buttons.
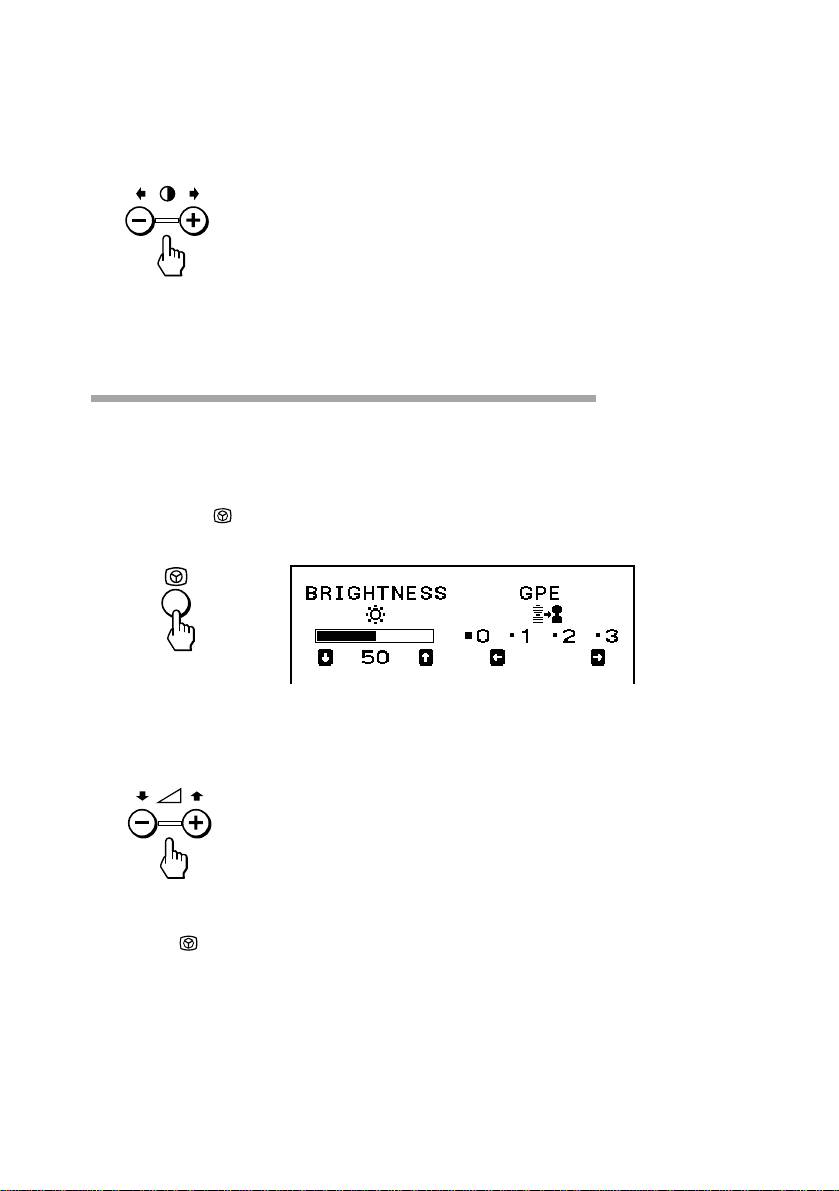
Adjusting the picture brightness
The adjustment data becomes the common setting for all input signals.
1. Press the button.
The BRIGHTNESS/GPE OSD appears.
2. Press the . +/– buttons to adjust the picture brightness.
+ for more brightness
– for less brightness
To exit the OSD
Press the button again.
✎ Tip
If you don’t touch any buttons the OSD automatically disappears after 10 seconds.
When you want to adjust another item, press the button of the item. The OSD of the selected
item appears.
GB
Adjustments
18

Adjusting the picture centering
The adjustment data becomes the individual setting for each input signal
received.
1. Press the S button.
The CENTER OSD appears.
2. For vertical adjustment For horizontal adjustment
Press the . +/– buttons. Press the > +/– buttons.
+ to move up + to move right
– to move down – to move left
To exit the OSD
Press the S button again.
✎ Tip
If you don’t touch any buttons, the OSD automatically disappears after 10 seconds.
When you want to adjust another item, press the button of the item. The OSD of the selected
item appears.
Adjustments
GB
19
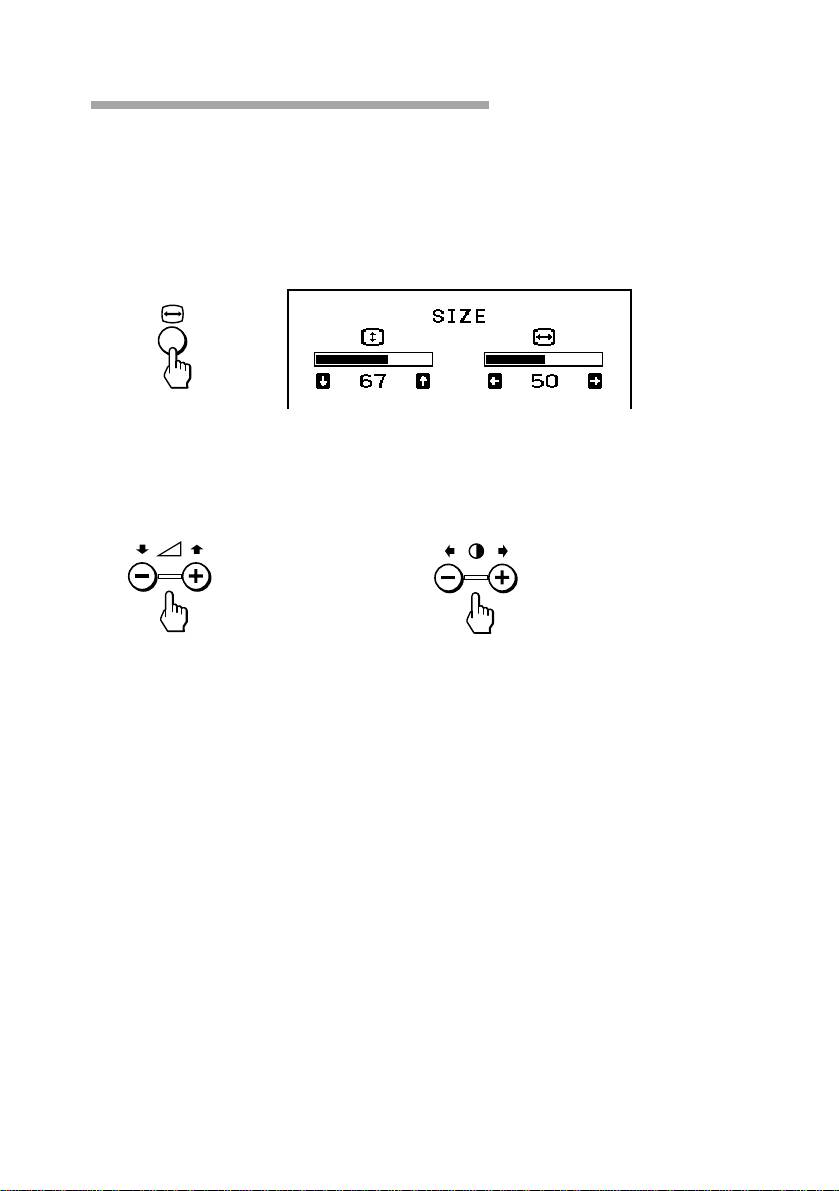
Adjusting the picture size
The adjustment data becomes the individual setting for each input signal
received.
1. Press the Å button.
The SIZE OSD appears.
2. For vertical adjustment For horizontal adjustment
Press the . +/– buttons. Press the > +/– buttons.
+ to increase + to increase
– to decrease – to decrease
To exit the OSD
Press the Å button again.
✎ Tip
If you don’t touch any buttons, the OSD automatically disappears after 10 seconds.
When you want to adjust another item, press the button of the item. The OSD of the selected
item appears.
GB
Adjustments
20

Adjusting the picture rotation
The adjustment data becomes the common setting for all input signals.
1. Press the d button.
The GEOMETRY OSD appears.
2. Press the . +/– buttons.
+ to rotate clockwise
– to rotate counterclockwise
To exit the OSD
Press the d button again.
✎ Tip
If you don’t touch any buttons, the OSD automatically disappears after 10 seconds.
When you want to adjust another item, press the button of the item. The OSD of the selected
item appears.
Adjustments
GB
21
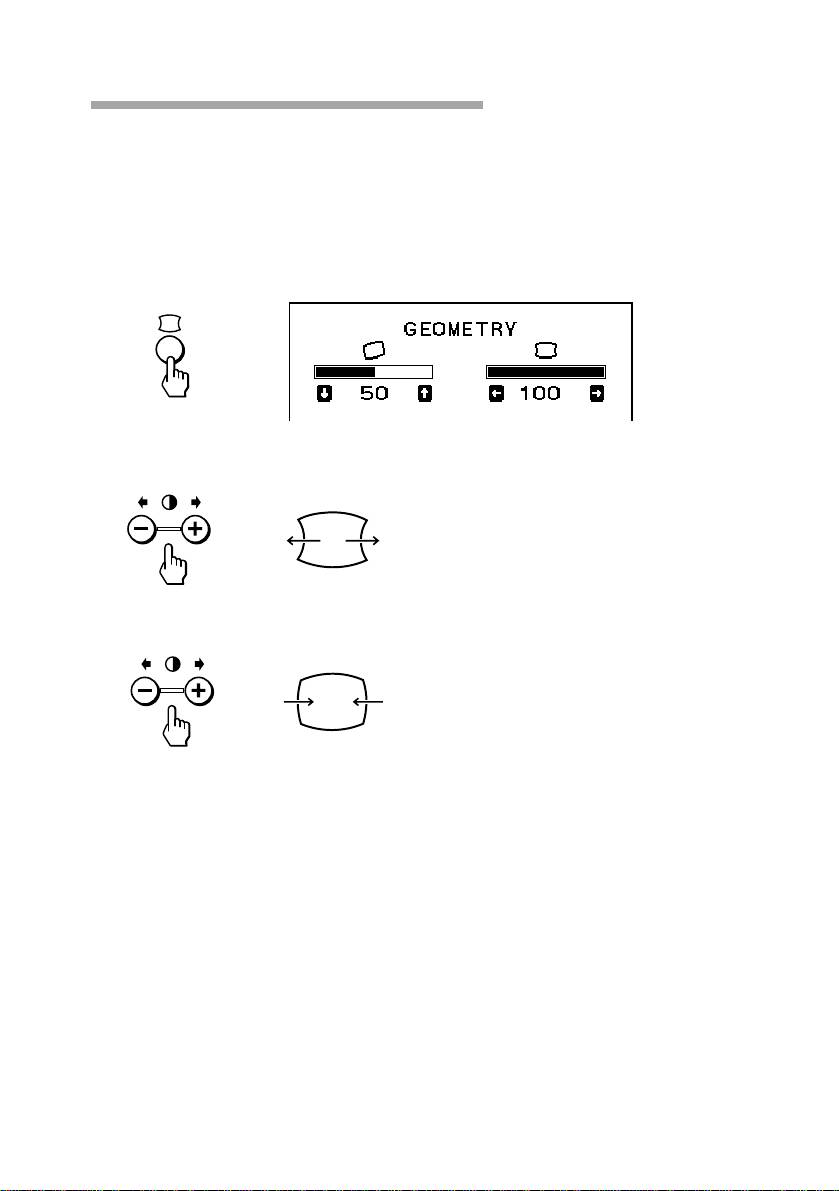
Adjusting the pincushion
The adjustment data becomes the individual setting for each input signal
received.
1. Press the d button.
The GEOMETRY OSD appears.
2. Press the > +/– buttons.
+ to expand the picture sides
– to diminish the picture sides
To exit the OSD
Press the d button again.
✎ Tip
If you don’t touch any buttons, the OSD automatically disappears after 10 seconds.
When you want to adjust another item, press the button of the item. The OSD of the selected
item appears.
GB
Adjustments
22
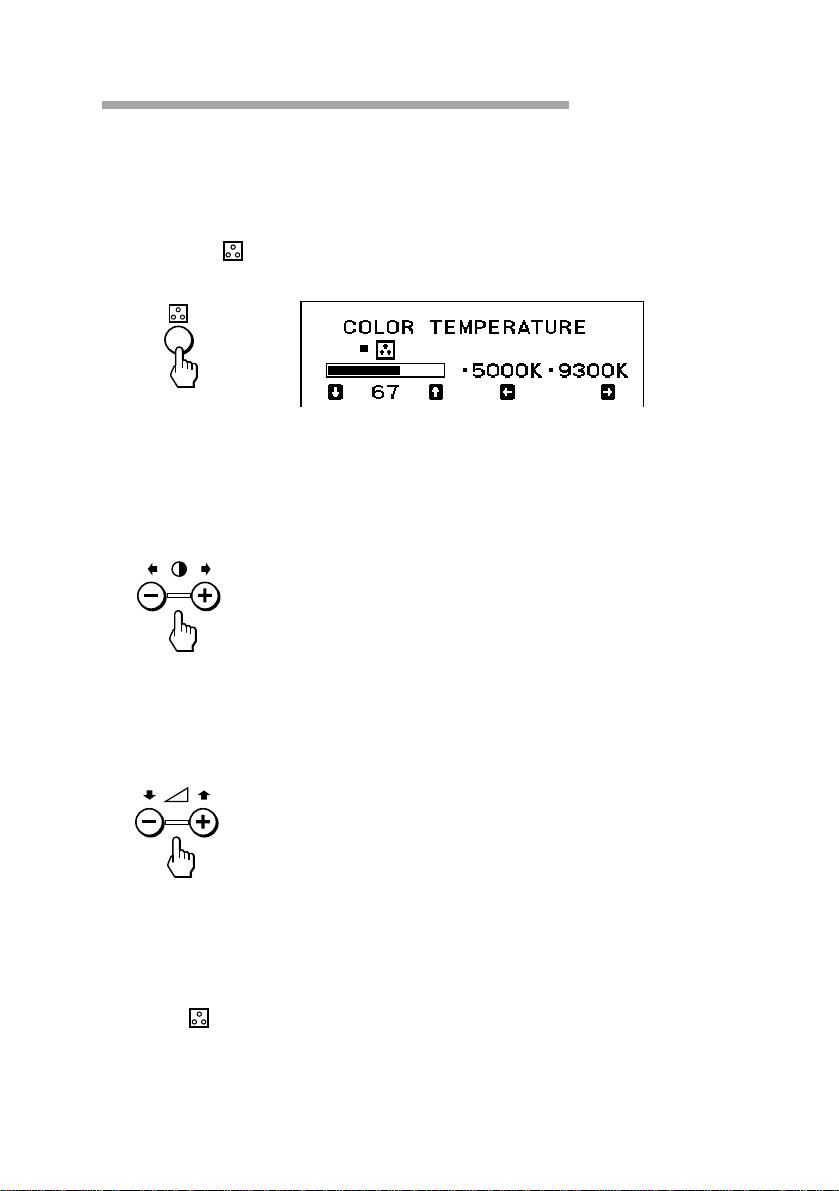
Setting the color temperature
The selected color temperature becomes the common setting for all input
signals.
1. Press the button.
The COLOR TEMPERATURE OSD appears.
2. Adjust with the . +/– and > +/– buttons.
To select 5000K or 9300K
Press > +/– buttons.
The selected color temperature is indicated.
+ to select 9300K
– to select 5000K
To obtain the desired color temperature between 5000K and
9300K
Press . +/– buttons.
+ for higher temperature
– for lower temperature
✎ Tip
The first press of . + or – button recalls the color temperature which was obtained at the
last adjustment.
To exit the OSD
Press the button again.
✎ Tip
If you don’t touch any buttons, the OSD automatically disappears after 10 seconds.
When you want to adjust another item, press the button of the item. The OSD of the selected
item appears.
Adjustments
GB
23

Resetting
p To recall the factory settings for individual
adjustment item
Press the button of the adjustment item you want to recall the factory
settings, and then press the ? button immediately before the OSD
disappears.
p To recall the factory settings for the current
mode
Press the ? button immediately when no OSD is shown.
p To recall the factory settings for all modes
Press and hold the ? button for 2 seconds.
All adjustments return to the factory settings.
GB
Adjustments
24
Оглавление
- CPD-120AS CPD-220AS
- Table of Contents
- Introduction
- Precautions
- Functions of Controls
- Getting Started
- Using Your Display
- Adjustments
- Available Features
- Power Saving Function
- Specifications
- Troubleshooting
- Table des matières
- Introduction
- Précautions
- Fonctions des commandes
- Préambule
- Utilisation de l’écran
- Réglages
- Fonctions disponibles
- Fonction d’économie d’énergie
- Spécifications
- Dépannage
- Inhalt
- Einführung
- Sicherheitsmaßnahmen
- Vorbereitungen
- Arbeiten mit dem Monitor
- Einstellen des Monitors
- Sonderfunktionen
- Energiesparfunktion
- Technische Daten
- Störungsbehebung
- Índice
- Introducción
- Precauciones
- Funciones de los controles
- Procedimientos iniciales
- Uso del monitor
- Ajustes
- Funciones disponibles
- Función de ahorro de energía
- Especificaciones
- Solución de problemas
- Indice
- Introduzione
- Precauzioni
- Funzioni dei controlli
- Operazioni preliminari
- Utilizzo del display
- Regolazioni
- Funzioni disponibili
- Funzione di risparmio energetico
- Caratteristiche tecniche
- Soluzione dei problemi
- Содержание
- Введение
- Меры предосторожности
- Функции органов управления
- Подготовка к пользованию
- Как пользоваться монитором
- Настройка
- Другие возможности монитора
- Функция экономии электроэнергии
- Tехнические данные
- Устранение неполадок
