Sony KF-50SX100K: Using the "Further Programme Preset" function
Using the "Further Programme Preset" function: Sony KF-50SX100K
18
Menu System
Menu System
With this feature you can:
a) Individually attenuate the strength of a channel signal in case of a strong local aerial signal (striped picture).
b) Individually adjust the volume level of each channel.
c) Even normally the automatic fine tuning (AFT) is operating, however you can manually fine-tune the TV to obtain a better picture
reception if the picture is distorted.
d) Preset the AV output for the programme positions of channels with scrambled signals (eg from a pay TV decoder). In this way
a connected VCR records the unscrambled signal.
Using the "Further Programme Preset" function
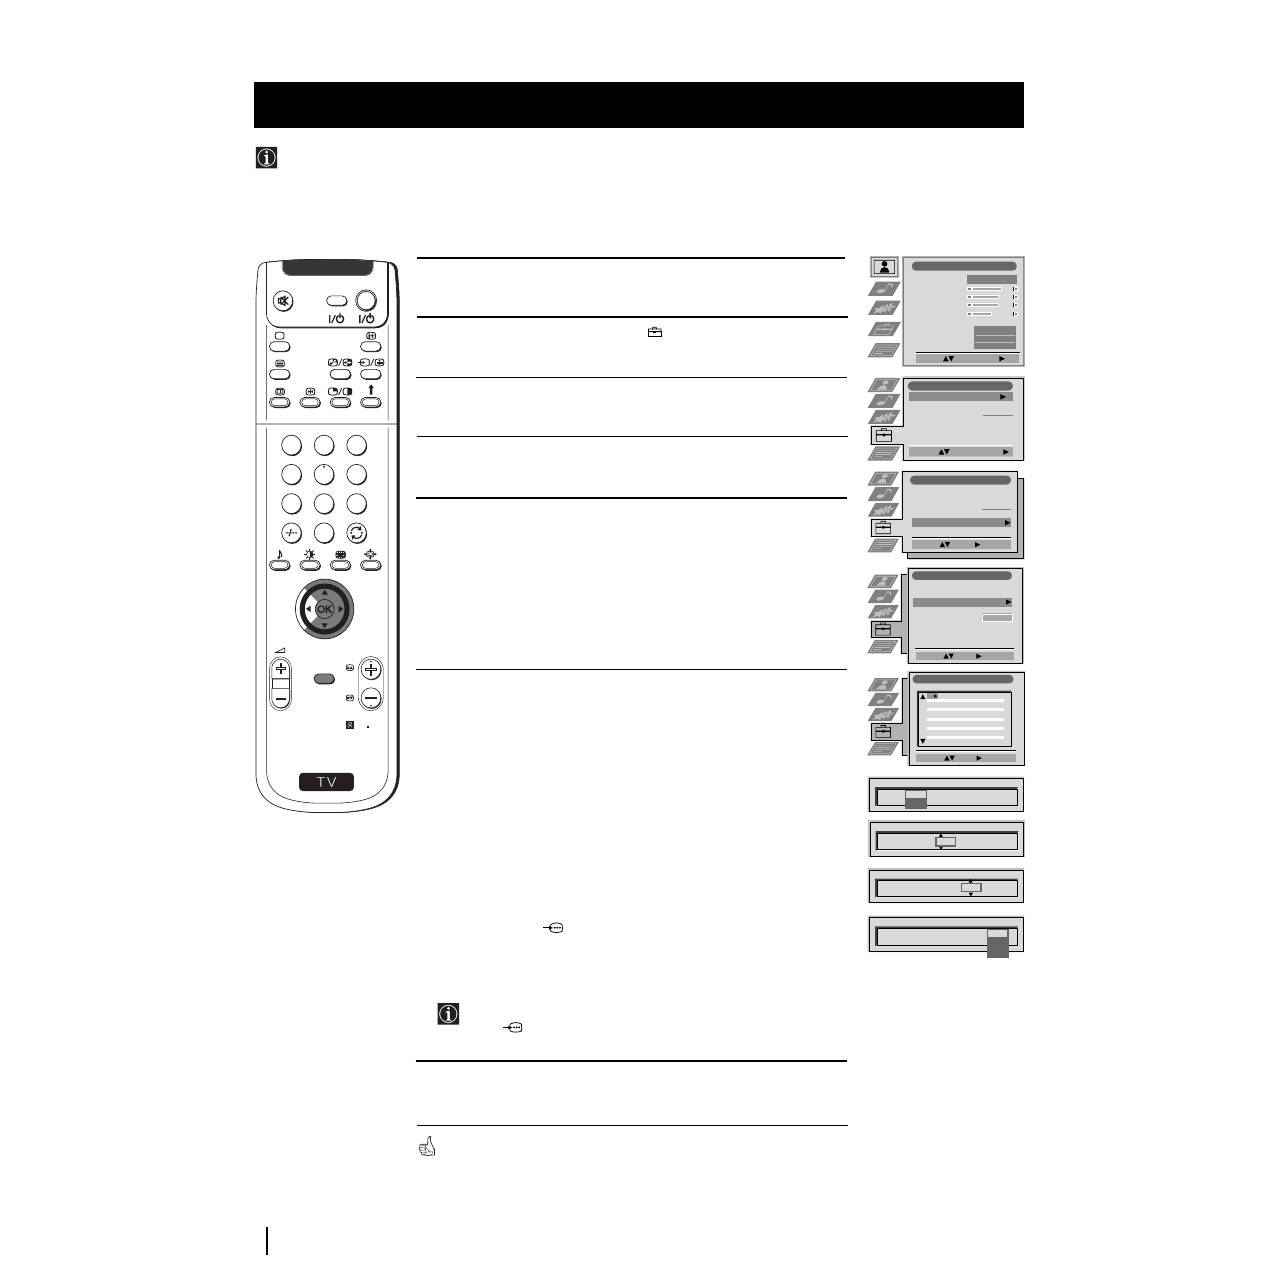
1
Press the MENU button on the remote control to display the menu
on the screen.
2
Push the joystick to
$
to select the
symbol, then push to
z
to
enter the Set Up menu.
3
Push the joystick to
$
or
4
to select Manual Set Up then push to
z
to enter.
4
Push the joystick to
$
or
4
to select Further Programme Preset,
then push to
z
.
5
Push the joystick to
$
or
4
to select the relevant programme
number, then push to
z
repeatedly to select:
a) ATT (RF attenuator)
b) VOL (Volume Offset)
c) AFT (Automatic Fine Tuning) or
d) DECODER
The selected item changes colour.
6
a) ATT
Push the joystick to
$
to select On, then press the OK button.
Repeat steps 5 and 6 a) to attenuate other channels.
b) VOL
Push the joystick to
$
or
4
to adjust the volume level of the channel
over a range of -7 to +7, then press the OK button. Repeat steps 5
and 6b) to adjust the volume level of the other channels.
c) AFT
Push the joystick to
$
or
4
to fine tune the channel frequency over
a range of -15 to +15, then press the OK button. Repeat steps 5 and
6c) if you wish to fine tune other channels.
d) DECODER
Push the joystick to
$
or
4
to select AV1 (for a decoder connected
to the Scart
:
1/
) or AV2 (for a decoder connected to the Scart
:
2/
q
2 (SMARTLINK)), then press the OK button.
Repeat steps 5 and 6d) to select the AV1 or AV2 output for other
programme positions.
The picture from the decoder connected to the Scart connector
:
1/
or
:
2/
q
2 (SMARTLINK) on the back of the
set will appear on this programme number.
7
Press the MENU button to exit and return to the normal TV screen.
The set is now ready for use.
S
RM 903
PROGR
MENU
1
4
7
2
5
8
0
3
6
9
TV
VIDEO
Picture Adjustment
Select:
Enter Menu:
Picture Mode
Contrast
Brightness
Colour
Sharpness
Reset
AI
Noise Reduction
Colour Tone
Personal
On
Off
Normal
Set Up
Auto Tuning
Programme Sorting
Select NexTView
AV Preset
Manual Set Up
Select:
Start Auto Tuning
Start
- - - - - - -
Enter:
Set Up
Auto Tuning
Programme Sorting
Select NexTView
AV Preset
Manual Set Up
Select:
- - - - - - -
Manual Set Up
Select:
Enter:
Language/Country
Manual Programme Preset
Further Programme Preset
RGB Set Up
Personal ID
Demo
- - - - - - -
Further Programme Preset
Select:
Enter:
PROG
AFT
VOL
ATT
DECODER
On
On
On
Off
Off
Off
0
0
0
Off
Off
Off
1
2
3
4
5
6
7
8
9
10
11
PROG
AFT
VOL
ATT
DECODER
1
Off
On
PROG
AFT
VOL
ATT
DECODER
1
On
-5
2
PROG
AFT
VOL
ATT
DECODER
1
On
-5
2
Off
AV1
AV2
PROG
AFT
VOL
ATT
DECODER
1
On
- 5
Оглавление
- Introduction
- Overview of TV Buttons
- Overview of Remote Control Buttons
- Inserting Batteries into the Remote Control
- Switching on the set and Automatically Tuning
- Changing the Screen Format
- On Screen display Menus Guide
- Adjusting the Picture
- Adjusting the Sound
- Using the Features Menu
- Manually Tuning the TV
- Labelling a channel
- Skipping Programme positions
- Using the "Further Programme Preset" function
- Inputting Your Personal ID
- Using the Demo Mode
- Adjusting the H Centre picture for an RGB source
- Labelling and Selecting the screen format of Input Sources
- Using Multi PIP (Picture In Picture)
- Teletext
- NexTView *
- Connecting Optional Equipment
- Using Optional Equipment
- Smartlink
- Optimum Viewing Area
- Replacing the Lamp
- Specifications
- Troubleshooting
- Úvod
- Kontrola přídavných doplňků Přehled tlačítek aparátu
- Přehled tlačítek dálkového ovladače
- Vložení baterií do dálkového ovladače
- Zapnutí aparátu a automatické naladění
- Změna formátu zobrazení
- Stručný návod k volbě Menu
- Seřízení obrazu
- Seřízení zvuku
- Použití menu “Spec. funkce”
- Ruční ladění televizoru
- Identifikace jednotlivých vysílacích stanic
- Vynechávání programových pozic
- Použití funkce “Rozšířené předvolby”
- Zavedení Vašeho osobního ID čísla
- Ukázka různých funkcí
- Seřízení vodorovného centrování obrazu pro videozdroj RGB
- Identifikace a volba formátu zobrazení vstupních signálů
- Multi Obrazy (Multi PIP)
- Teletext
- NexTView *
- Připojení přídavných zařízení
- Použití přídavných zařízení
- Smartlink
- Optimální úhel vidění
- Výměna žárovky
- Specifikace
- Řešení problémů
- Wprowadzenie
- Sprawdzanie dostarczonych akcesoriów
- Przegląd przycisków pilota do zdalnego sterowania
- Wkładanie baterii do pilota
- Włączanie telewizora i automatyczne programowanie
- Zmiana formatu ekranu
- Krótki przewodnik po systemie menu
- Regulacja obrazu
- Regulacja dźwięku
- Użycie menu “Funkcje”
- Ręczne programowanie urządzenia
- Identyfikacja poszczególnych kanałów
- Pomijanie numerów programów
- Stosowanie funkcji “Dalsze nastawianie”
- Wprowadzenie Identyfikatora Osobistego
- Przegląd poszczególnych funkcji
- Regulacja geometrii obrazu dla źródła RGB
- Identyfikacja i wybór formatu ekranu źródeł wejściowych
- Obrazy zwielokrotnione (Multi PIP)
- Telegazeta
- NexTView *
- Podłączanie dodatkowych urządzeń
- Zastosowanie dodatkowych urządzeń
- Smartlink
- Optymalny kąt oglądania
- Wymiana lampy
- Dane techniczne
- Rozwiązywanie problemów
- Bevezetés
- A mellékelt tartozékok ellenőrzése A készülék gombjainak általános leírása
- A távvezérlő gombjainak általános leírása
- Az elemek behelyezése a távvezérlőbe
- A készülék bekapcsolása és automatikus hangolás
- A képernyő formátumának változtatása
- Gyors útmutató a menükben való mozgáshoz
- A kép beállítása
- A hang beállítása
- A “Jellemzők” menü használata
- A TV kézi hangolása
- Az adók egyéni beazonosítása
- Programhelyek figyelmen kívül hagyása
- A “További programok tárolása” funkció használata
- Személyazonosítójának bevitele
- A különböző funkciók bemutatása
- A kép vízszintes közepének beállítása RGB forráshoz
- A bemenő források képformátumának beazonosítása és kiválasztása
- Többszörös kép (Multi PIP)
- Teletext
- NexTView *
- Választható készülékek csatlakoztatása
- Választható készülékek használata
- Smartlink
- Optimális látószög
- Az égő cseréje
- Műszaki jellemzők
- Problémamegoldás
- Введениe
- Проверка комплектности поставки вспомогательных приспособлений Общее описание кнопок aппapaтa
- Общее описание кнопок пульта дистанционного управления
- Пpикpeплeниe aппapaтa the set
- Включение aппapaтa и автоматический поиск
- Измeнeниe paзмepoв экpaнa
- Быстрая справка для перемещения по меню
- Настройка изображения
- Звуковая настройка
- Использование меню «Параметры»
- Ручная настройка программ ТВ
- Индивидуальная идентификация телевизионных станций
- Пропуск позиций программы
- Использование функции «Настройка (Продолжение)»
- Введение Персонального Пароля
- Демонстрация различных функций
- Настройка геометрии изображения для источника RGB
- Определение и выбор формата экрана в зависимости от входного сигнала
- Мульти Изображения (Мульти РIР)
- Телетекст
- NexTView *
- Подключение оборудования
- Использование дополнительного оборудования
- Смартлинк
- Оптимальный угол зрения
- Зaмeнa пpoeкциoннoй лaмпы
- СПЕЦИФИКАЦИИ
- Bыявлeниe неисправностей
- Увод
- Проверка на доставените принадлежности Основно описание на бутоните на aпapaтa
- Ocнoвнo oпиcaние на бутoните на диcтанциoннoтo упpавление
- Инсталиране на батериите в пулта за дистанционно управление
- Включване на aпapaтa и автоматично настройване
- Cмянa нa фopмaтa нa eкpaнa
- Cиcтeмa за бързо преминаване през менютата
- Настройване на oбpaзa
- Настройване на звyкa
- Използване на менюто «Характеристики»
- Ръчно настройване на тeлeвизopa
- Индивидуална идентификация на излъчваните програми
- Пропускане на програмни позиции
- Използване на функцията «Настройване (Продължение)»
- Зaдaвaнe на Вашата Персонална Идентификация
- Демонстриране на различните функции
- Настройка на хоризонталното центриране на образа за източник на RGB
- Разпознаване и избор на екранния формат за входния сигнал
- Два образа на екрана (РАР)
- Телетекст
- NexTView *
- Свързване на допълнителнa апаратypa
- Използване на допълнителнa апаратypa
- Смартлинк
- Оптимален ъгъл за гледане
- Смяна на лампата
- Cпeцификaции
- Oтcтpаняване на неизпpавнocти
