Sony KF-50SX100K: instruction
Class: Household, kitchen appliances, electronics and equipment
Type: Home Theater System
Manual for Sony KF-50SX100K
Table of contents
R
4-078-836-
31
(1)
Instruction Manual
KF-50SX100K
©2000 by Sony Corporation
GB
Návod k obsluze
CZ
Instrukcja obsługi
PL
Kezelési útmutató
HU
Инструкция пo эксплyатации
RU
Инструкции за експлоатация
BG

3
GB
Introduction
Thank you for choosing this Sony “Grand Wega” model.
Before operating the set, please read this manual thoroughly and retain it for future reference.
• Symbols used in the manual:
•
Informs you of possible hazards.
•
Important information.
•
Information on a feature.
• 1,2... Sequence of instructions.
•
Shaded buttons on the remote control show the
buttons you have to press to follow the sequence
of instructions.
•
Informs you of the result of the instructions.
Safety Information
All TV’s operate on extremely high voltages. To prevent fire or electric shock, please follow the safety guidelines indicated in the
blue sheet supplied.
•
When moving the set two persons are needed. DO NOT push speaker nets placed on the both side of the screen to prevent
these parts from deformation and do not grasp the front panels to prevent these parts from breaking off. Support screen
bottom with one hand while grasping the top part with the other hand
.
•Do not block or cover the ventilation opening placed on the left bottom rear side of the set. For ventilation, leave a space of at least
10 cm from the wall.
•After transporting the set directly from a cold to a warm location, or if the room temperature has changed suddenly, pictures may
be blurred or show poor colour over portions of the picture. This is because moisture has condensed on the mirrors or lenses inside
the set. Let the moisture evaporate before using the set.
•To obtain a clear picture, do not expose the screen to direct illumination or direct sunlight. If possible, use spot lighting directed
down from the ceiling.
•The screen of this set has an anti-reflection screen coating. To avoid screen degradation, follow the mentioned below:
• To remove dust from the screen surface, wipe with the suplied cleaning cloth or a soft cloth.
• Clean the screen and cabinet with a soft dampened cloth. Do not use any abrasive cleaners. As a safety precaution, unplug the
set before cleaning it.
•Avoid touching the screen, and take care not to scratch the surface with hard objects.
Table of Contents
Introduction ...................................................................................................................................................................................................................... 3
Safety Information............................................................................................................................................................................................................ 3
Overview
Checking the Accessories Supplied.................................................................................................................................................................. 4
Overview of TV Buttons .................................................................................................................................................................................... 4
Overview of Remote Control Buttons.............................................................................................................................................................. 5
Installation
Inserting Batteries into the Remote Control.................................................................................................................................................... 6
Connecting the Aerial and VCR ....................................................................................................................................................................... 6
Stabilizing the set ................................................................................................................................................................................................ 6
First Time Operation
Switching on the set and Automatically Tuning............................................................................................................................................ 7
Menu System
Changing the Screen Format ............................................................................................................................................................................. 9
Introducing the Menu System........................................................................................................................................................................... 9
On Screen display Menus Guide .................................................................................................................................................................... 10
Using the Menu System:
Adjusting the Picture ..................................................................................................................................................................................... 11
Adjusting the Sound ...................................................................................................................................................................................... 12
Using the Features menu............................................................................................................................................................................... 14
Manually Tuning the TV ............................................................................................................................................................................... 15
Labelling a channel ........................................................................................................................................................................................ 16
Skipping programme positions.................................................................................................................................................................... 17
Using the “Further Programme Preset” function...................................................................................................................................... 18
Inputting your personal ID ........................................................................................................................................................................... 19
Using the Demo Mode................................................................................................................................................................................... 20
Adjusting the H Centre picture for an RGB source................................................................................................................................... 21
Labelling and Selecting the screen format of Input Sources .................................................................................................................... 22
Using Multi PIP (Picture In Picture)............................................................................................................................................................ 23
Using PAP (Picture And Picture)................................................................................................................................................................. 23
Teletext
...................................................................................................................................................................................................................... 24
NexTView
................................................................................................................................................................................................................. 26
Optional Connections
Connecting Optional Equipment.................................................................................................................................................................... 28
Using Optional Equipment.............................................................................................................................................................................. 29
Smartlink ............................................................................................................................................................................................................ 30
Remote Control of other Sony Equipment .................................................................................................................................................... 30
Additional Information
Optimum Viewing Area .................................................................................................................................................................................. 31
Replacing the Lamp .......................................................................................................................................................................................... 32
Specifications ..................................................................................................................................................................................................... 33
Troubleshooting ................................................................................................................................................................................................ 34
MENU
K

4
One Remote Control
(RM-903)
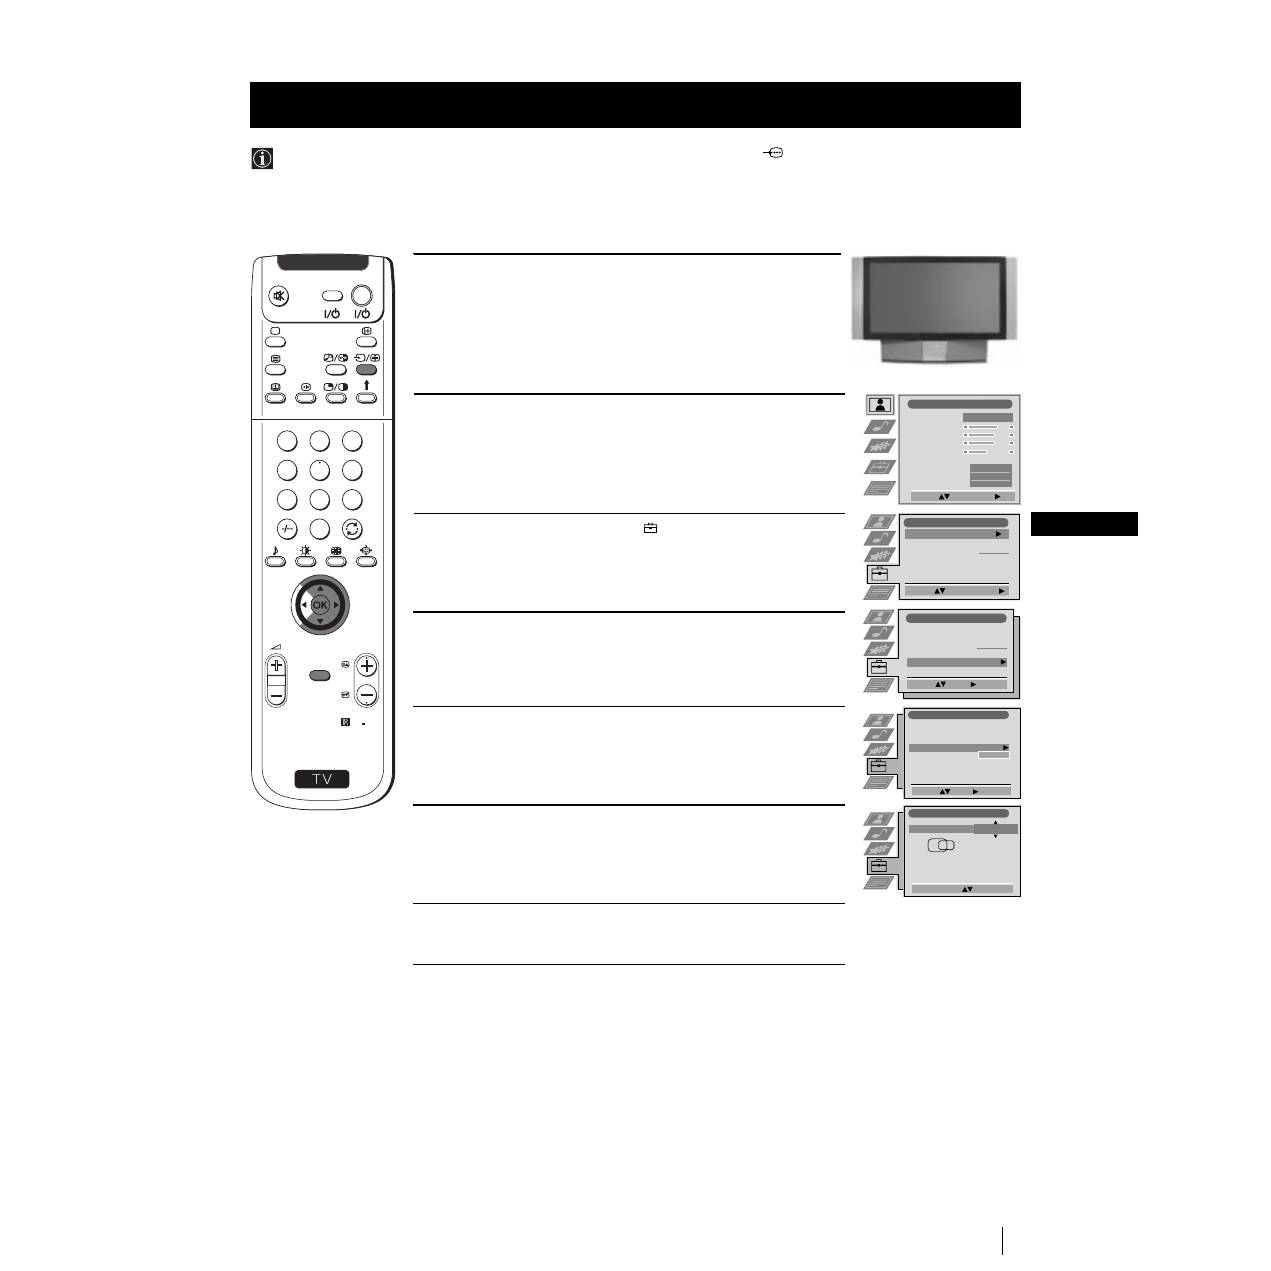
Overview of TV Buttons
(conectores lado izquierdo)
Checking the Accessories Supplied
Overview
Two batteries (R6 type)
Lamp
indicator (see
page 32)
Video Input
jack
Programme up
or down buttons
(selects TV channels)
Selecting
input source
Volume control
buttons
On
/Off
Switch
Standby indicator:
• By pressing the
switch off button of
the Remote Control,
standby indicator
lights up in red
colour.
• By pressing the main
switch off on the set,
the standby indicator
lights up in amber
colour.
Headphone
jack
Audio Input
jacks
S Video
Input jack
Press on the mark
,
on the front of the set
to reveal the front
connectors.
Overview
s
1 Wrench
2 Brackets
2 Screws
1 Cleaning cloth
5
GB
S
RM 903
PROGR
MENU
1
4
7
2
5
8
0
3
6
9
K
VIDEO
TV
VIDEO
TV
VTR 1 2 3 4 DVD
C H
Overview
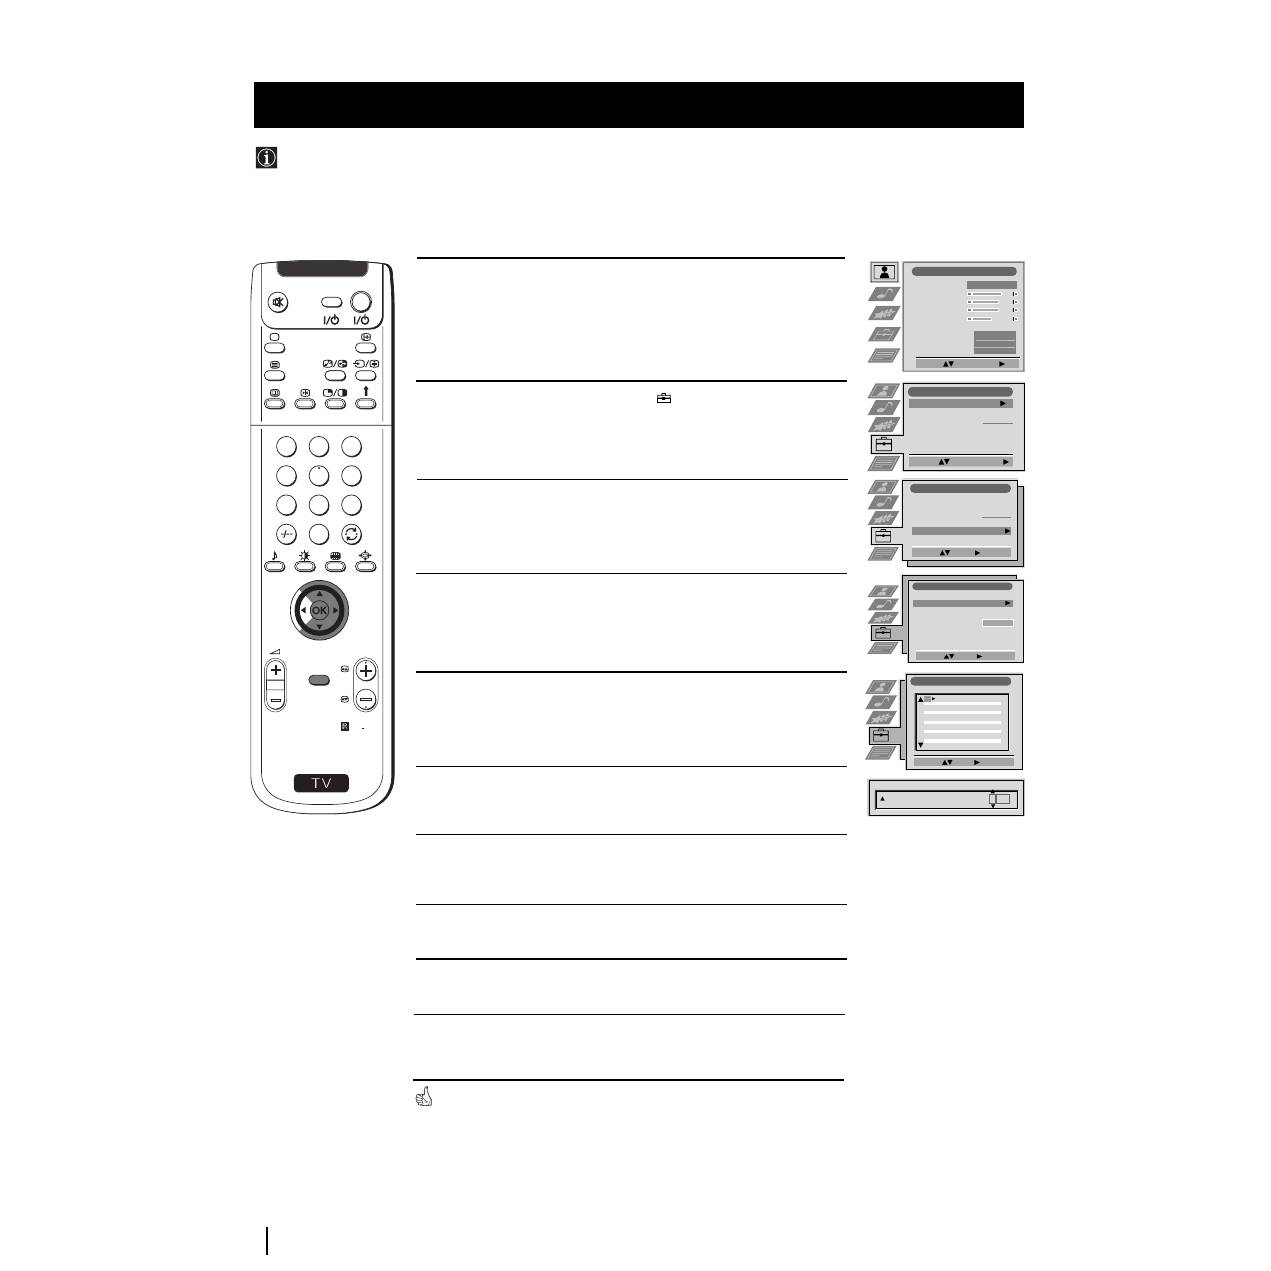
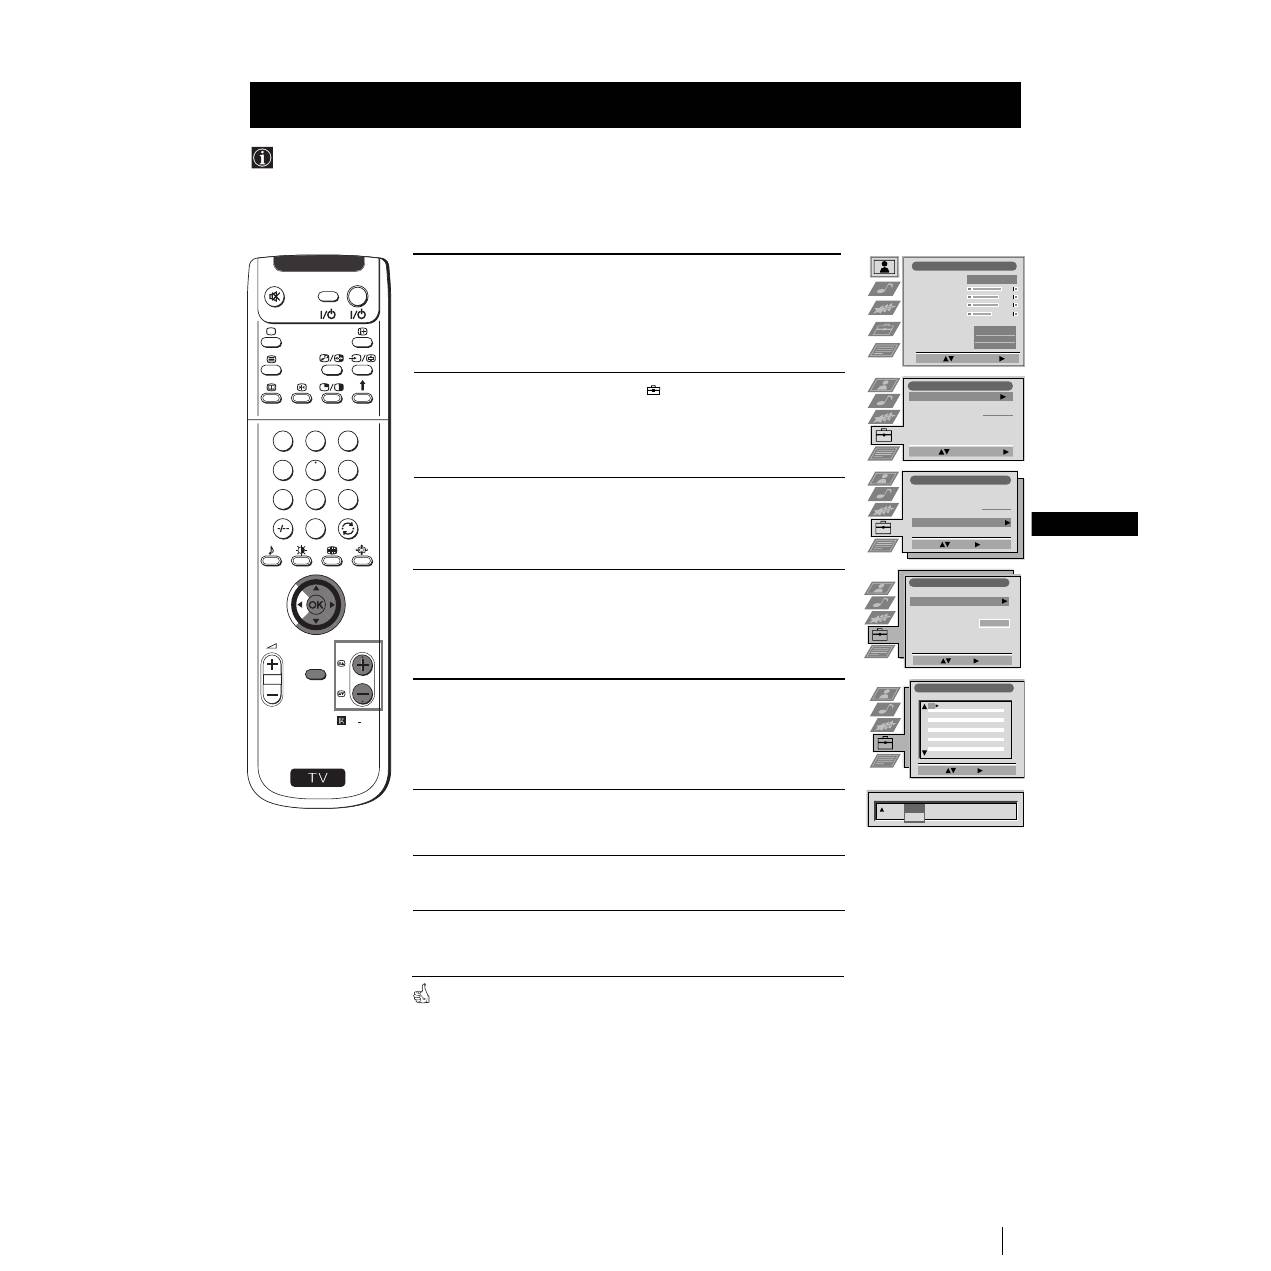
Overview of Remote Control Buttons
Resetting to factory set levels
Press not only to return picture and sound
settings to factory-set levels, but also to re-
install the set as the first time it was switched
on.
After the "Language/Country" menu
appeared on the screen, proceed in the same
way as described in the section "Switching on
the set and automatically Tuning" of this
instruction manual.
VCR on/off
Press to switch your VCR on or off.
Muting the Sound
Press to mute TV sound.
Press again to restore the sound.
Selecting TV mode
Press to switch off Teletext or video input.
PAP (Picture And Picture)
For more details, please refer to the section
"Using PAP (Picture And Picture)".
Selecting Teletext
Press to switch on Teletext.
Displaying EPG
Press to display the Electronic Programme
Guide (EPG). Press again to switch off EPG.
Freezing the picture
Press to freeze the picture. Press again to
return to the normal picture.
Selecting channels
Press to select channels.
For double-digit programme numbers, e.g.
23, press -/-- first, then the buttons 2 and 3.
If you enter an incorrect first digit, this
should be corrected by entering another digit
(0-9) and then selecting -/-- button again to
enter the programme number of your choice.
Selecting Sound mode
Press repeatedly to change the sound mode.
Selecting Picture mode
Press repeatedly to change the picture mode.
Adjusting TV Volume
Press to adjust the volume of the TV.
Displaying the time
Press to switch the time on or off
(available only when teletext is
broadcast).
VCR operation
For more details, please refer to the
section "Remote Control of other
Sony Equipment".
Besides TV functions, all coloured buttons as well as green
symbols are also used for Teletext operation. For more details,
please refer to the "Teletext" section of this instruction manual.
Overview
To Temporarily Switch Off
Press to temporarily switch off TV (the standby
indicator
on the set lights up in red). Press
again to switch on TV from standby mode.
After 15-30 minutes without a signal and
without any button being pressed, the set
switches automatically into standby mode.
Displaying On Screen Information
Press to display all on-screen indications.
Press again to cancel.
Selecting Input source
Press repeatedly until the desired input symbol of
the source appears on the screen.
Back to the channel last watched
Press to watch the last channel selected (watched for
at least 5 seconds).
Selecting Screen format
Press repeteadly to change the format of the screen
(for more details, please refer to the section
“Changing the Screen format”).
Displaying Multi PIP (Picture In Picture)
Press to display Multi PIP mode. Press again to
cancel.
Joystick for menu selection
• When MENU is switched on:
4
Scroll Up
$
Scroll Down
Z
Previous menu or selection
z
Next menu or selection
OK
Confirms your selection
• When MENU is switched off:
Z
Return to the last menu screen.
OK
Shows a channel overview
Selecting channels
Press to select the next or previous channel.
Displaying the menu system
Press to display the menu on the screen. Press again
to remove the menu display from the screen.
6
Installation
Make sure you insert the batteries using the correct
polarities.
Always remember to dispose of used batteries in an
environmental friendly way.
Inserting Batteries into the Remote Control
Connecting cables are not supplied.
Connecting the Aerial and VCR
or
VCR
The Scart lead is optional.
If you use this optional connection it can improve picture and sound quality when using a VCR.
If you do not use a SCART lead, after automatically tuning the set refer to the "Manually Tuning the TV" section of this
instruction manual, to tune in the set to the output of your VCR. Also refer to your VCR instruction manual to find out
how to find the output channel of your VCR.
OUT
IN
Installation
Stabilizing the set the set
After setting up, secure the set to a wall, etc., with the supplied brackets, for safety purposes.
1
Mount the two supplied brackets with the screws to the upper rear side of the set.
2
Pass a strong cord or a chain through each bracket mounted in 1, and then secure to a wall or a pillar, etc.
Do not block or cover this ventilation opening. For
ventilation, leave a space of at least 10 cm from the wall.
7
GB
First Time Operation
The first time you switch on your TV, a sequence of menu screen appear on the TV enabling you to 1) choose the language
of the menu screen, 2) choose the country in which you wish to operate the set, 3) search and stores all
available channels (TV Broadcast) and 4) change the order in which the channels (TV Broadcast) appear on the screen.
However, if you need to change the language menu, change the country, change or repeat the tuning (e.g. when you move
house) or rearrange again the order of the channels afterwards, you can do that by selecting the appropriate menu in
the
(Set Up)
.
Switching on the set and Automatically Tuning
1
Connect the set plug to the mains socket (220-240V AC, 50 Hz). Press
the
on
/off button on your set to switch on. The first time you press
this button the Language/Country menu displays automatically on
the screen.
2
Push the joystick on the remote control to
$
or
4
to select the
language, then press OK to confirm your selection. From now on all
the menus will appear in the selected language.
3
Push the joystick to
$
or
4
to select the country in which you will
operate the set, then press OK to confirm your selection.
Select "Off" instead of a country if you do not want your
channels (TV Broadcasts) stored in a given channel sequence
starting from programme position 1.
4
The Auto Tuning menu appears on the screen in the selected
language, then press the OK button on the remote control to select
Yes
.
5
A new menu appears automatically on the screen asking you to
check that the aerial is connected. Confirm that the aerial is connected
and then press the OK button to start the automatic tuning.
• The TV starts to automatically search and store all available
channels (TV Broadcast) for you.
• If you have selected “Off” option in the Country menu and
you make a new autotuning afterwards, the TV Broadcasts
will be stored from the selected programme number.
This procedure could take some minutes. Please, be patient and
do not press any button. Otherwise the automatic tuning will
not be completed.
continued...
First Time Operation
Language/Country
Language
Country
Select Language:
Confirm: OK
4
Italiano
Français
Español
English
Deutsch
Dansk
Č
e
š
tina
Language/Country
Language
Country
Select Language:
Confirm: OK
4
Italiano
Français
Español
English
Deutsch
Dansk
Č
e
š
tina
Language/Country
Language
Country
Select Language:
Confirm: OK
4
Italiano
Français
Español
English
Deutsch
Dansk
Č
e
š
tina
Language/Country
Language
Country
Select Country:
Confirm: OK
4
Finland
Denmark
Czech Rep.
Bulgaria
Belgium
Austria
Off
Do you want to start
automatic tuning?
Yes: OK No:
Please confirm that
aerial is connected!
Yes: OK No:
1
2
3
4
5
CO2
CO3
CO4
CO7
CO8
Searching...
S
RM 903
PROGR
MENU
1
4
7
2
5
8
0
3
6
9
TV
VIDEO
8
First Time Operation
S
RM 903
PROGR
MENU
1
4
7
2
5
8
0
3
6
9
VIDE
TV
O
Programme Sorting
Select Prog:
Confirm:
PROG
CH
LABEL
1
2
3
4
5
6
7
8
9
10
11
C03
C05
C07
C08
C09
C11
C12
C13
C14
C15
C16
TV 5
PRO 7
EU-SP
SWF
RTL
SAT
MDR
DDI
DSF
RTL 2
KAB 1
Programme Sorting
Select Position:
Move: OK
C03
TV 5
PROG
CH
LABEL
C03
C05
C07
C08
C09
C11
C12
C13
C14
C15
C16
TV 5
PRO 7
EU-SP
SWF
RTL
SAT
MDR
DDI
DSF
RTL 2
KAB 1
1
2
3
4
5
6
7
8
9
10
11
6
After all available channels are captured and stored, the
Programme Sorting menu appears automatically on the screen
enabling you to change the order in which the channels appear
on the screen.
a)
If you do not wish to change the channel order, go to step 7.
b)
If you wish to change the channel order:
1
Push the joystick on the remote control to
$
or
4
to select the
programme number with the channel (TV Broadcast) you wish to
rearrange, then push to
z
.
2
Push the joystick to
$
or
4
to select the new programme number
position for your selected channel (TV Broadcast), then press OK.
The selected channel now moves to its new programme
position and the other channels move accordingly.
3
Repeat steps b1) and b2) if you wish to change the order of the
other channels.
7
Press the MENU button to exit and return to the normal TV screen.
The set is now ready for use.
First Time Operation
9
GB
1
Press the
button on the remote control repeatedly to select one
of the following formats.
Smart:
imitation of wide screen effect for 4:3 broadcast.
4:3:
conventional 4:3 picture size, full picture information.
14:9:
compromise between 4:3 and 16:9 picture size.
Zoom:
widescreen format for letterbox movies.
Wide:
for 16:9 broadcast.
In Smart, Zoom and 14:9 modes parts of the top and bottom of the
screen are cut off. Press
$
or
4
to adjust the position of the image on
screen (eg to read subtitles).
2
Press the OK button to confirm your selection.
First Time Operation - Menu System
This feature allows you to change the size of the TV picture.
Changing the Screen Format
1
Press the MENU button to switch the first level menu on.
2
•To higlight the desired menu or option, push the joystick to
4
or
$
.
•To enter to the selected menu or option, push to
z
•To return to the last menu or option, push to
Z
.
•To alter settings of your selected option, push to
$
/
4
/
Z
or
z
.
•To confirm and store your selection, press OK.
3
Press the MENU button to remove the menu from the screen.
Your set uses an on-screen menu system to guide you through the operations. Use the following buttons on the
Remote Control to operate the menu system:
Introducing the Menu system
OK
push to
$
/
4
/
Z
or
z
press
OK
Picture Adjustment
Select:
Enter Menu:
Picture Mode
Contrast
Brightness
Colour
Sharpness
Reset
AI
Noise Reduction
Colour Tone
Personal
On
Off
Normal
Picture Adjustment
Select:
Enter Menu:
Picture Mode
Contrast
Brightness
Colour
Sharpness
Reset
AI
Noise Reduction
Colour Tone
Personal
On
Off
Normal
S
RM 903
PROGR
MENU
1
4
7
2
5
8
0
3
6
9
TV
VIDEO
4:3
4:9
Zoom
Wide
Smart
First Time Operation - Menu System
Joystick:
S
RM 903
PROGR
MENU
1
4
7
2
5
8
0
3
6
9
TV
VIDEO
10
Picture Adjustment
Select:
Enter:
Picture Mode
Contrast
Brightness
Colour
Sharpness
Reset
AI
Noise Reduction
Colour Tone
Personal
On
Off
Normal
Audio Adjustment
Equaliser Mode
Equaliser
Adjustment
Balance
Loudness
Space
Auto Vol. Control
Dual Sound
Volume
Dual Sound
Personal
Mono
Off
Off
Off
Mono
Select:
Enter:
0.
0
0
Set Up
Auto Tuning
Programme Sorting
Select NexTView
AV Preset
Manual Set Up
Select:
Start Auto Tuning
Start
- - - - - - -
Enter:
Set Up
Auto Tuning
Programme Sorting
Select NexTView
AV Preset
Manual Set Up
Select:
- - - - - - -
Enter:
Set Up
Auto Tuning
Programme Sorting
Select NexTView
AV Preset
Manual Set Up
Select:
- - - - - - -
Enter:
Set Up
Auto Tuning
Programme Sorting
Select NexTView
AV Preset
Manual Set Up
Select:
- - - - - - -
Enter:
Set Up
Auto Tuning
Programme Sorting
Select NexTView
AV Preset
Manual Set Up
Select:
- - - - - - -
Do you want to start
automatic tuning?
Yes: OK No:
Programme Sorting
Select Prog:
Confirm:
PROG
CH
LABEL
1
2
3
4
5
6
7
8
9
10
11
C03
C05
C07
C08
C09
C11
C12
C13
C14
C15
C16
TV 5
PRO 7
EU-SP
SWF
RTL
SAT
MDR
DDI
DSF
RTL 2
KAB 1
Manual Set Up
Select:
Enter:
Language/Country
Manual Programme Preset
Further Programme Preset
RGB Set Up
Personal ID
Demo
- - - - - - -
Manual Set Up
Select:
Enter:
Language/Country
Manual Programme Preset
Further Programme Preset
RGB Set Up
Personal ID
Demo
- - - - - - -
Manual Set Up
Select:
Enter:
Language/Country
Manual Programme Preset
Further Programme Preset
RGB Set Up
Personal ID
Demo
- - - - - - -
Manual Set Up
Select:
Enter:
Language/Country
Manual Programme Preset
Further Programme Preset
RGB Set Up
Personal ID
Demo
- - - - - - -
Manual Set Up
Select:
Enter:
Language/Country
Manual Programme Preset
Further Programme Preset
RGB Set Up
Personal ID
Demo Start
- - - - - - -
Manual Set Up
Select:
Enter:
Language/Country
Manual Programme Preset
Further Programme Preset
RGB Set Up
Personal ID
Demo
- - - - - - -
Teletext
Top / Bottom / Full
Text Clear
Reveal
Time Page
Page Overview
Select:
Enter:
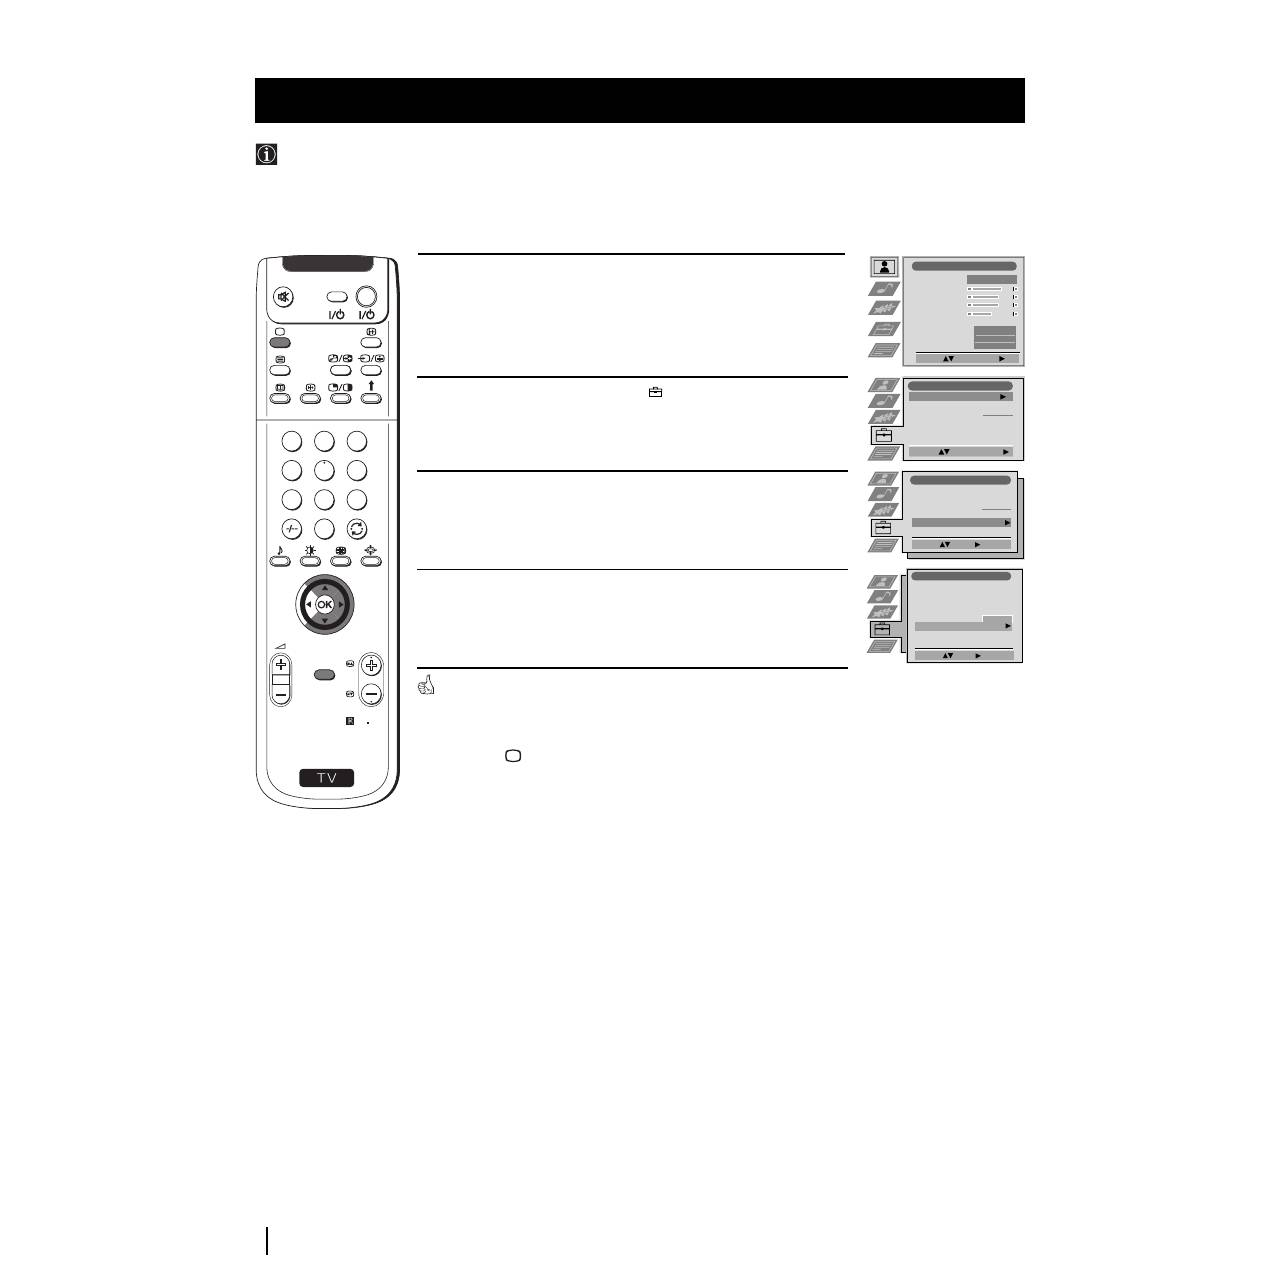
Menu System
On Screen display Menus Guide
Picture Adjustment
Select:
Enter Menu:
Picture Mode
Contrast
Brightness
Colour
Sharpness
Reset
AI
Noise Reduction
Colour Tone
Personal
On
Off
Normal
Audio Adjustment
Equaliser Mode
Equaliser
Adjustment
Balance
Loudness
Space
Auto Vol. Control
Dual Sound
Volume
Dual Sound
Mono
Off
Off
Off
Mono
Select:
Enter Menu:
0.
0
0
Personal
Features
Auto Format
Format Correction
Sleep Timer
Parental Lock
AV2 Output
Normal
On
Off
Off
TV
Select:
Enter Menu:
Speaker
Main
Set Up
Auto Tuning
Programme Sorting
Select NexTView
AV Preset
Manual Set Up
Select:
Enter Menu:
Set Up
Auto Tuning
Programme Sorting
Select NexTView
AV Preset
Manual Set Up
Select:
Enter Menu:
Set Up
Auto Tuning
Programme Sorting
Select NexTView
AV Preset
Manual Set Up
Select:
Enter Menu:
- - - - - - -
Features
Auto Format
Format Correction
Sleep Timer
Parental Lock
AV2 Output
Normal
On
Off
Off
TV
Select:
Enter:
Speaker
Main
Refer to the section
"Adjusting the Picture”
Refer to the section
"Adjusting the Sound”
Refer to the section
"Using the features
menu”
Refer to the section
"Switching on the set
and Automatically
Tuning"
Refer to the section
"Switching on the set
and Automatically
Tuning"
Refer to the
section
“NexTView”
Refer to the
section
"Labelling and
selecting the
screen format
of Input
Sources”
Refer to the
section "Teletext"
Menu System
Refer to the section
"Switching on the set
and Automatically
Tuning"
Refer to the sections
"Manually Tuning the
TV", "Labelling a
channel" and "Skipping
programme positions"
Refer to the section
"Using the Further
Programme Preset
function"
Refer to the section
"Adjusting the H centre
picture for an RGB
source"
Refer to the section
"Inputting your
personal ID"
Refer to the section
"Using the Demo
Mode"
11
GB
1
Press the MENU button on the remote control to display the menu
on the screen.
2
Push the joystick to
z
to enter the Picture Adjustment menu.
3
Push the joystick to
$
or
4
to select the item you wish to change,
then push to
z
.
Refer to the table below to chose the item and for the effect of
each control:
Picture Mode
$
Live
(for live broadcast programmes)
Personal
(for individual settings)
Movie
(for films)
4
Game
(for computer games)
Contrast
Z
Less
z
More
Brightness
*
Z
Darker
z
Brighter
Colour
*
Z
Less
z
More
Sharpness
*
Z
Softer
z
Sharper
Hue
**
Z
Reddish
z
Greenish
Reset
Resets picture to the factory preset levels.
AI
(Artificial
4
Off
: Normal
Intelligence)
$
On:
Automatic optimization of contrast level
according to the TV signal
Noise
$
High:
High noise reduction.
Reduction
Mid:
Medium noise reduction.
Low:
Low noise reduction.
Auto:
Optimum noise reduction automatically
selected.
4
Off:
No noise reduction.
Colour Tone
$
Warm:
Gives a warm tint to the picture.
-
--
Normal:
Normal.
4
Cool:
Gives a cool tint to the picture.
*
Can only be altered if Personal Picture Mode is selected.
**
Only avalaible for NTSC colour signal (e.g: USA video tapes).
4
Push the joystick to
4
,
$
,
Z
or
z
to alter the selected item, then
press the OK button to store the new adjustment.
5
Repeat steps 3 and 4 to alter the other items.
6
Press the MENU button to exit and return to the normal TV screen.
Changing the Picture Mode Quickly
You can quickly change the Picture Mode without entering the
Picture Control menu screen.
1
Press the
button on the remote control repeatedly to directly
access and select your desired picture mode (Live, Personal, Movie,
or Game).
2
Press the OK button to remove the display from the screen.
Menu System
Although the picture is adjusted at the factory, you can modify it to suit your own taste.
Adjusting the Picture
Picture Adjustment
Select:
Enter Menu:
Picture Mode
Contrast
Brightness
Colour
Sharpness
Reset
AI
Noise Reduction
Colour Tone
Personal
On
Off
Normal
Picture Adjustment
Select:
Enter:
Picture Mode
Contrast
Brightness
Colour
Sharpness
Reset
AI
Noise Reduction
Colour Tone
Personal
On
Off
Normal
Picture Mode
Live
Personal
Movie
Game
Contrast
AI
On
Off
Picture Mode
Live
Personal
Movie
Game
Colour Tone
Warm
Normal
Cool
Noise Reduction
High
Mid
Low
Auto
Off
S
RM 903
PROGR
MENU
1
4
7
2
5
8
0
3
6
9
TV
VIDEO
K
Menu System
12
Menu System
Menu System
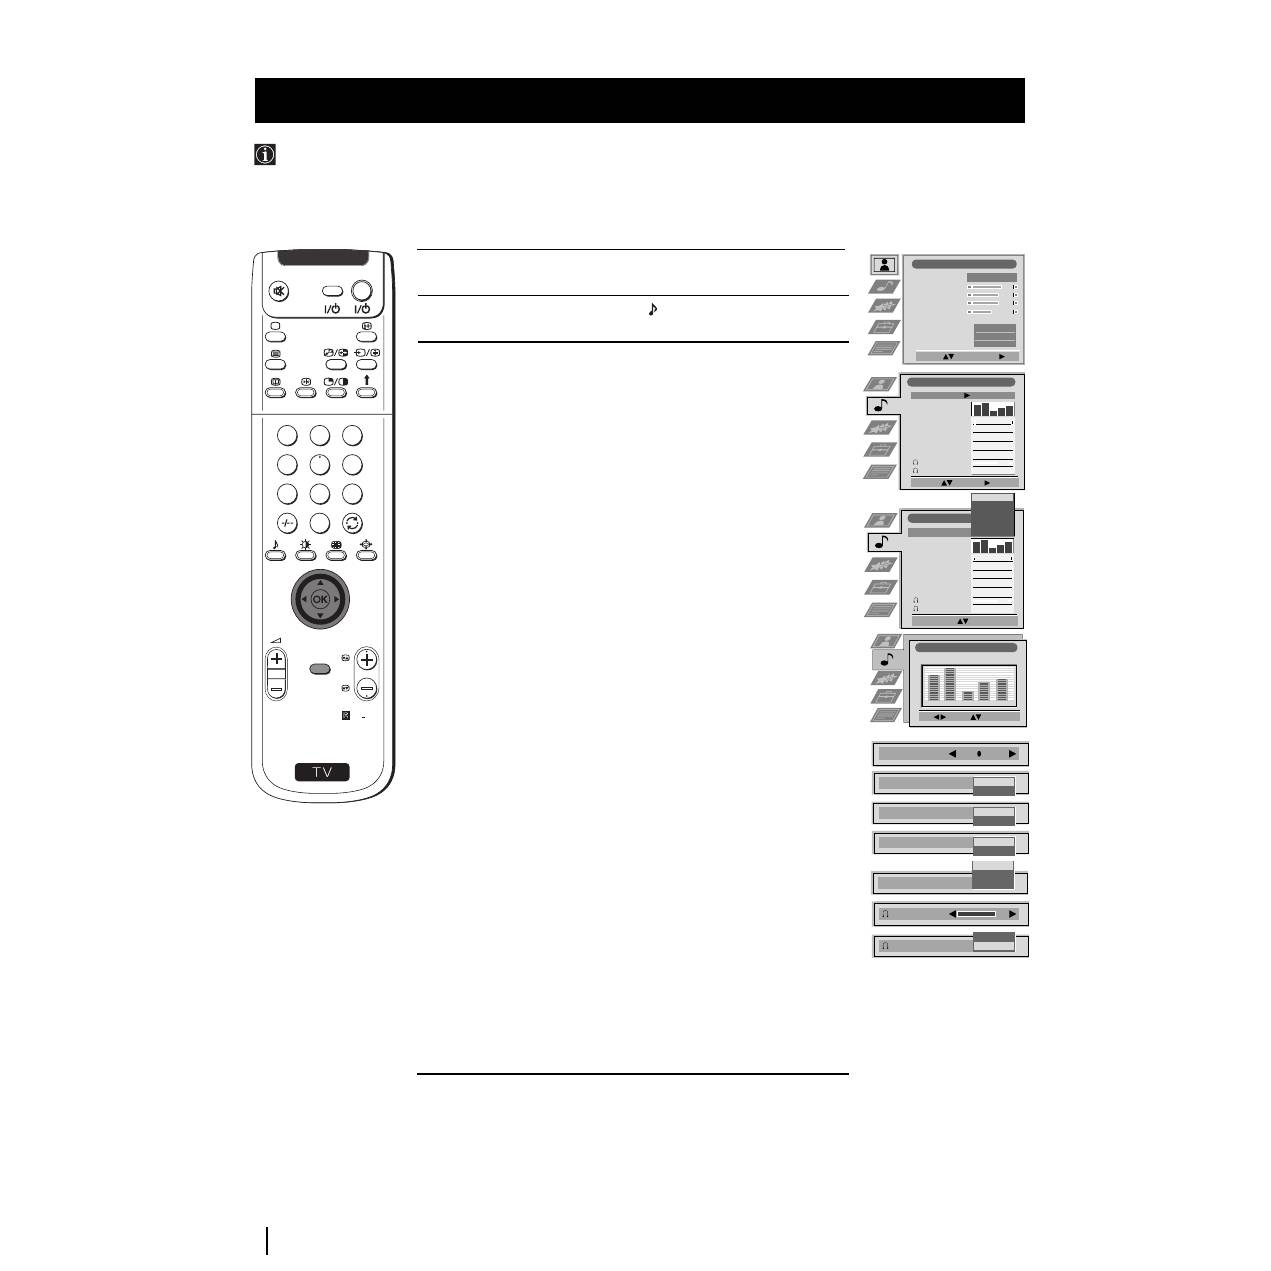
Although the sound is adjusted at the factory, you can modify it to suit your own taste.
Adjusting the Sound
1
Press the MENU button on the remote control to display the menu
on the screen.
2
Push the joystick to
$
to select the symbol, then push to
z
to
enter to the Audio Adjustment menu.
3
Push the joystick to
$
or
4
to select the item you wish to change,
then push to
z
.
Refer to the table below to chose the item and for the effect of
each control:
Equaliser Mode
$
Personal
(for individual settings)
Vocal
Jazz
Rock
Pop
4
Flat
(fixed setting, cannot be adjusted)
*Equaliser
Push
to
z
or
Z
to select the frequency band you
Adjustment
want to alter and push to
$
or
4
to adjust. Finally,
press the OK button to store the new adjustment.
Balance
Z
Left
z
Right
Loudness
$
Off:
normal
4
On:
for music broadcasts
Space
$
Off:
normal
4
On:
acoustic sound effect
Auto Vol.
$
Off:
volume level changes according to the
Control
broadcast signal
4
On:
volume level of the channels will stay the same
independent of the broadcast signal (e.g. in
case of advertisement)
Dual Sound
• For a stereo broadcast:
$
Mono
4
Stereo
• For a bilingual broadcast:
$
Mono
(for mono channel if available)
A
(for channel 1)
4
B
(for channel 2)
Headphones:
l
Volume
Z
Less
z
More
l
Dual Sound
• For a stereo broadcast:
$
Mono
4
Stereo
• For a bilingual broadcast:
$
Mono
(for mono channel if available)
A
(for channel 1)
B
(for channel 2)
4
PAP
(only when PAP is switched on)
*
Can only be permanently stored if Personal Equaliser Mode is selected,
the other modes (Vocal, Jazz, Rock or Pop) store until the next mode
change.
S
RM 903
PROGR
MENU
1
4
7
2
5
8
0
3
6
9
TV
VIDEO
Picture Adjustment
Select:
Enter Menu:
Picture Mode
Contrast
Brightness
Colour
Sharpness
Reset
AI
Noise Reduction
Colour Tone
Personal
On
Off
Normal
Audio Adjustment
Equaliser Mode
Equaliser
Adjustment
Balance
Loudness
Space
Auto Vol. Control
Dual Sound
Volume
Dual Sound
Personal
Mono
Off
Off
Off
Mono
Select:
Enter:
0.
0
0
Audio Adjustment
Equaliser Mode
Equaliser
Adjustment
Balance
Loudness
Space
Auto Vol. Control
Dual Sound
Volume
Dual Sound
Personal
Mono
Off
Off
Off
Mono
Personal
Vocal
Jazz
Rock
Pop
Flat
Select Mode:
Confirm: OK
0.
0
0
Equaliser Adjustment
Sel:
Adjust:
Confirm:OK
(Personal)
+
0
–
120
500
1,5K
5 K
10 K
Balance
.
Loudness
Off
On
Space
Off
On
Auto Vol. Control
Off
On
Dual Sound
Mono
A
B
Volume
Dual Sound
B
A
continued...
13
GB
Menu System
4
Push the joystick to
$
,
4
,
Z
or
z
to alter the selected item, then
press the OK button to store the new adjustment.
5
Repeat steps 3 and 4 to alter the other items.
6
Press the MENU button to exit and return to the normal TV screen.
Changing Sound Mode Quickly
You can quickly change Sound mode without entering the Sound
Control menu screen.
1
Press the button on the remote control repeatedly to directly
access and select your desired sound mode (Personal, Vocal, Jazz,
Rock
, Pop or Flat).
2
Press the OK button to remove the display from the screen.
Menu System
Equaliser Mode
Personal
Vocal
Jazz
Rock
Pop
Flat
S
RM 903
PROGR
MENU
1
4
7
2
5
8
0
3
6
9
TV
VIDEO
14
Menu System
Menu System
Using the Features menu you can:
a) Select if you want to listen to the sound from the set directly or through an external amplifier.
b) Adjust automatically the size of picture.
c) Select a time period after which the set switches itself into standby mode.
d) Lock the buttons on the set. In this way, the set only works by using the remote control buttons.
e) Select the source to be output from the Scart connector
:
2/
q
2 (SMARTLINK). In this way you can record from this scart
connector while watching another source. If your VCR supports Smartlink, this procedure is not necessary.
Using the Features Menu
1
Press the MENU button on the remote control to display the menu
on the screen.
2
Push the joystick to
$
to select the
symbol, then push to
z
to
enter to the Features menu.
3
Push the joystick to
$
or
4
to select the desired menu item, then
push to
z
(see the table below for the effect of each menu item).
4
Push to
$
or
4
to select the desired setting and press the OK button
to store.
5
Press the MENU button to exit and return to the normal TV screen.
Features
Effect / Operation
Speaker
$
Main
(sound from the set)
4
Centre In
(sound from external amplifier)
Auto Format
$
Off:
Size of picture is not automatically adjusted.
(only for aerial
Normal:
Size of picture is automatically adjusted
signal)
according to the broadcaster information.
4
Full:
The set automatically adjusts the picture size
to eliminate any dark areas on the TV picture (as
shown on the section “Changing the Screen
Format)”.
Format Correction
$
Off:
4:3/14:9 is selected.
(only if Auto Format
is set to “Normal”
4
On:
Smart mode is selected automatically for
or “Full”)
4:3/14:9 broadcast.
Sleep Timer
4
Off
10
min.
20
min.
...
$
90
min.
• One minute before the set switches into standby
mode, the time remaining is displayed on the
screen
automatically.
• When watching the TV, press the
button on
the remote control to display the time remaining.
• To return to normal operation from standby
mode, press the TV
button on the remote
control.
Parental lock
$
Off
(Normal mode)
4
On
(The set can only be switched on using the
remote control, the buttons on the TV do not
work)
AV2 Output
$
TV
(audio/video signal from the aerial)
AV1
(audio/video signal from the Scart
connector
:
1/
).
AV2
(audio/video signal from the Scart
connector
:
2/
q
2 (SMARTLINK).
AV3
(audio/video signal from the Scart
connector
:
3/
q
3).
4
AV4
(audio/video signal from the connector
…
4
placed in the front of the set).
If you have connected a decoder, please remember
to change back the AV2 Output to "TV" for correct
unscrambling.
Picture Adjustment
Select:
Enter Menu:
Picture Mode
Contrast
Brightness
Colour
Sharpness
Reset
AI
Noise Reduction
Colour Tone
Personal
On
Off
Normal
Features
Auto Format
Format Correction
Sleep Timer
Parental Lock
AV2 Output
Normal
On
Off
Off
TV
Select:
Enter:
Speaker
Main
Speaker
Main
Centre In
10 min
Sleep Timer
Parental Lock
Off
On
AV2 Output
TV
AV1
AV2
AV3
AV4
Auto Format
Off
Normal
Full
Format Correction
Off
On
S
RM 903
PROGR
MENU
1
4
7
2
5
8
0
3
6
9
TV
VIDEO
15
GB
1
Press the MENU button on the remote control to display the
menu on the screen.
2
Push the joystick to
$
to select the
symbol, then push to
z
to
enter the Set Up menu.
3
Push the joystick to
$
or
4
to select Manual Set Up, then push
to
z
.
4
Push the joystick to
$
or
4
to select Manual Programme Preset,
then push to
z
.
5
Push the joystick to
$
or
4
to select on which programme number
you want to preset a channel (for VCR select programme number
"0"), then push twice to
z
. The column SYS is highlighted.
6
Push the joystick to
$
or
4
to select the system for TV Broadcast
and VCR channel (B/G for western european countries, L for
France, I for Great Britain or D/K for eastern european countries)
or a external input source (EXT), then push to
z
. The column CH
is highlighted.
7
Push the joystick to
$
or
4
to select the channel tuning, "C" for
terrestrial channels (for TV Broadcast or VCR channel), "S" for
cable channels or F for, direct frequency input then push to
z
.
8
a) If you know the channel number of the TV Broadcast, the VCR
test signal channel or the frequency, press the number buttons
to enter directly the channel number. Then press the OK button
to store.
b) If you do not know the channel number, push the joystyck to
$
to select SEARCH and the set starts automatically to search for
the next available TV Broadcast channel or the channel of the
VCR signal. Then press the OK button to store or press
$
to
continue searching the desired channel.
c) For external input sources (EXT), push to
$
to select the input
source where you have connected your equipment (AV1, AV2,
AV3 or AV4). Then press the OK button to store.
9
Repeat steps 4 to 8 a), b) or c) if you wish to store more channels.
10
Press the MENU button to exit and return to the normal TV screen.
The set is now ready for use.
Menu System
Picture Adjustment
Select:
Enter Menu:
Picture Mode
Contrast
Brightness
Colour
Sharpness
Reset
AI
Noise Reduction
Colour Tone
Personal
On
Off
Normal
Set Up
Auto Tuning
Programme Sorting
Select NexTView
AV Preset
Manual Set Up
Select:
Start Auto Tuning
Start
- - - - - - -
Enter:
Set Up
Auto Tuning
Programme Sorting
Select NexTView
AV Preset
Manual Set Up
Select:
- - - - - - -
Manual Set Up
Select:
Enter:
Language/Country
Manual Programme Preset
Further Programme Preset
RGB Set Up
Personal ID
Demo
- - - - - - -
Manual Programme Preset
Select:
Enter:
PROG
CH
SYS
SKIP
LABEL
C09
C10
ARD
BBC
B/G
B/G
Off
Off
Off
Off
Off
Off
Off
Off
Off
Off
Off
1
2
3
4
5
6
7
8
9
10
11
PROG
CH
SYS
Off
SKIP
LABEL
1
B/G
L
I
D/K
EXT
PROG
SYS
Off
SKIP
LABEL
1
B/G
CH
C
S
F
- -
PROG
SYS
Off
SKIP
LABEL
1
B/G
CH
03
SEARCH
C
PROG
CH
SYS
Off
SKIP
LABEL
3
EXT
AV1
AV2
AV3
AV4
S
RM 903
PROGR
MENU
1
4
7
2
5
8
0
3
6
9
TV
VIDEO
Menu System
Use this function to preset channels (TV Broadcast) or a video input source one by one to the programme order of your choice.
Manually Tuning the TV
16
Menu System
Menu System
Names for channels (TV Broadcasts) are usually taken automatically from Teletext if available. You can however name a channel or
an input video source using up to five characters (letters or numbers). Using this function, you can easily identify which channel
(TV Broadcasts) or video source you are watching.
Labelling a channel
1
Press the MENU button on the remote control to display the
menu on the screen.
2
Push the joystick to
$
to select the
symbol, then push to
z
to
enter the Set Up menu.
3
Push the joystick to
$
or
4
to select Manual Set Up, then push
to
z
.
4
Push the joystick to
$
or
4
to select Manual Programme Preset,
then push to
z
.
5
Push the joystick to
$
or
4
to select the programme number with
the channel you wish to name.
6
Push the joystick to
z
repeatedly until the first element of the
LABEL
column is highlighted.
7
Push the joystick to
$
or
4
to select a letter, number, "+" or a
blank, then push to
z
to confirm this character. Select the other
four characters in the same way.
8
After selecting all the characters, press the OK button.
9
Repeat steps 5 to 8 if you wish to label other channels.
10
P
ress the MENU button to exit and return to the normal TV
screen.
When you select a named channel, the name appears for a few seconds
on the screen.
S
RM 903
PROGR
MENU
1
4
7
2
5
8
0
3
6
9
TV
VIDEO
Picture Adjustment
Select:
Enter Menu:
Picture Mode
Contrast
Brightness
Colour
Sharpness
Reset
AI
Noise Reduction
Colour Tone
Personal
On
Off
Normal
Set Up
Auto Tuning
Programme Sorting
Select NexTView
AV Preset
Manual Set Up
Select:
Start Auto Tuning
Start
- - - - - - -
Enter:
Set Up
Auto Tuning
Programme Sorting
Select NexTView
AV Preset
Manual Set Up
Select:
- - - - - - -
Manual Set Up
Select:
Enter:
Language/Country
Manual Programme Preset
Further Programme Preset
RGB Set Up
Personal ID
Demo
- - - - - - -
Manual Programme Preset
Select:
Enter:
PROG
CH
SYS
SKIP
LABEL
C09
C10
ARD
BBC
B/G
B/G
Off
Off
Off
Off
Off
Off
Off
Off
Off
Off
Off
1
2
3
4
5
6
7
8
9
10
11
PROG
SYS
Off
SKIP
LABEL
1
B/G
CH
C 03
A
17
GB
1
Press the MENU button on the remote control to display the menu
on the screen.
2
Push the joystick to
$
to select the
symbol, then push to
z
to
enter the Set Up menu.
3
Push the joystick to
$
or
4
to select Manual Set Up, then push
to
z
.
4
Push the joystick to
$
or
4
to select Manual Programme Preset,
then push to
z
.
5
Push the joystick to
$
or
4
to select the programme position you
want to skip, then push to
z
to enter the SKIP column.
6
Push the joystick to
$
to select On, then press the OK button to
store.
7
Repeat steps 5 and 6 to skip other unused programme positions.
8
Press the MENU button to exit and return to the normal TV screen.
When changing channels (TV Broadcasts) with the PROGR +/- buttons,
the skipped programme positions do not appear. You can, however, still
select them using the number buttons.
Menu System
Menu System
You can programme this set to skip any unwanted programme numbers when they are selected with the PROGR +/-
buttons. To cancel this function afterwards, proceed in the same way as described below by selecting Off instead of On in step 6.
Skipping Programme positions
S
RM 903
PROGR
MENU
1
4
7
2
5
8
0
3
6
9
TV
VIDEO
Picture Adjustment
Select:
Enter Menu:
Picture Mode
Contrast
Brightness
Colour
Sharpness
Reset
AI
Noise Reduction
Colour Tone
Personal
On
Off
Normal
Set Up
Auto Tuning
Programme Sorting
Select NexTView
AV Preset
Manual Set Up
Select:
Start Auto Tuning
Start
- - - - - - -
Enter:
Set Up
Auto Tuning
Programme Sorting
Select NexTView
AV Preset
Manual Set Up
Select:
- - - - - - -
Manual Set Up
Select:
Enter:
Language/Country
Manual Programme Preset
Further Programme Preset
RGB Set Up
Personal ID
Demo
- - - - - - -
PROG
SYS
SKIP
LABEL
1
B/G
CH
C 09
ARD
Off
On
Manual Programme Preset
Select:
Enter:
PROG
CH
SYS
SKIP
LABEL
C09
C10
ARD
BBC
B/G
B/G
Off
Off
Off
Off
Off
Off
Off
Off
Off
Off
Off
1
2
3
4
5
6
7
8
9
10
11
18
Menu System
Menu System
With this feature you can:
a) Individually attenuate the strength of a channel signal in case of a strong local aerial signal (striped picture).
b) Individually adjust the volume level of each channel.
c) Even normally the automatic fine tuning (AFT) is operating, however you can manually fine-tune the TV to obtain a better picture
reception if the picture is distorted.
d) Preset the AV output for the programme positions of channels with scrambled signals (eg from a pay TV decoder). In this way
a connected VCR records the unscrambled signal.
Using the "Further Programme Preset" function
1
Press the MENU button on the remote control to display the menu
on the screen.
2
Push the joystick to
$
to select the
symbol, then push to
z
to
enter the Set Up menu.
3
Push the joystick to
$
or
4
to select Manual Set Up then push to
z
to enter.
4
Push the joystick to
$
or
4
to select Further Programme Preset,
then push to
z
.
5
Push the joystick to
$
or
4
to select the relevant programme
number, then push to
z
repeatedly to select:
a) ATT (RF attenuator)
b) VOL (Volume Offset)
c) AFT (Automatic Fine Tuning) or
d) DECODER
The selected item changes colour.
6
a) ATT
Push the joystick to
$
to select On, then press the OK button.
Repeat steps 5 and 6 a) to attenuate other channels.
b) VOL
Push the joystick to
$
or
4
to adjust the volume level of the channel
over a range of -7 to +7, then press the OK button. Repeat steps 5
and 6b) to adjust the volume level of the other channels.
c) AFT
Push the joystick to
$
or
4
to fine tune the channel frequency over
a range of -15 to +15, then press the OK button. Repeat steps 5 and
6c) if you wish to fine tune other channels.
d) DECODER
Push the joystick to
$
or
4
to select AV1 (for a decoder connected
to the Scart
:
1/
) or AV2 (for a decoder connected to the Scart
:
2/
q
2 (SMARTLINK)), then press the OK button.
Repeat steps 5 and 6d) to select the AV1 or AV2 output for other
programme positions.
The picture from the decoder connected to the Scart connector
:
1/
or
:
2/
q
2 (SMARTLINK) on the back of the
set will appear on this programme number.
7
Press the MENU button to exit and return to the normal TV screen.
The set is now ready for use.
S
RM 903
PROGR
MENU
1
4
7
2
5
8
0
3
6
9
TV
VIDEO
Picture Adjustment
Select:
Enter Menu:
Picture Mode
Contrast
Brightness
Colour
Sharpness
Reset
AI
Noise Reduction
Colour Tone
Personal
On
Off
Normal
Set Up
Auto Tuning
Programme Sorting
Select NexTView
AV Preset
Manual Set Up
Select:
Start Auto Tuning
Start
- - - - - - -
Enter:
Set Up
Auto Tuning
Programme Sorting
Select NexTView
AV Preset
Manual Set Up
Select:
- - - - - - -
Manual Set Up
Select:
Enter:
Language/Country
Manual Programme Preset
Further Programme Preset
RGB Set Up
Personal ID
Demo
- - - - - - -
Further Programme Preset
Select:
Enter:
PROG
AFT
VOL
ATT
DECODER
On
On
On
Off
Off
Off
0
0
0
Off
Off
Off
1
2
3
4
5
6
7
8
9
10
11
PROG
AFT
VOL
ATT
DECODER
1
Off
On
PROG
AFT
VOL
ATT
DECODER
1
On
-5
2
PROG
AFT
VOL
ATT
DECODER
1
On
-5
2
Off
AV1
AV2
PROG
AFT
VOL
ATT
DECODER
1
On
- 5
19
GB
1
Press the MENU button on the remote control to display the menu
on the screen.
2
Push the joystick to
$
to select the
symbol, then push to
z
to
enter the Set Up menu.
3
Push the joystick to
$
or
4
to select Manual Set Up, then push to
z
.
4
Push to
$
or
4
to select Personal ID, then push to
z
.
5
Push the joystick to
$
or
4
to select a letter, number, + or a blank;
then push to
z
to confirm this character. Select the other ten
characters in the same way.
6
After selecting all the characters, press the OK button. A new menu
appears automatically on the screen asking you to be sure that you
want to save this ID.
7
a) If you do not wish to store this ID, push the joystick to
Z
and
repeat steps 4 to 6 to enter a new ID.
b) If you wish to store this ID, press the OK button.
Remember that this code can only be input once.
8
Press the MENU button to return to the normal TV screen.
When you enter the Manual Set Up menu, in the "Personal ID" option the
code you entered above will be displayed. You will not be able to select and
change this option.
Menu System
Menu System
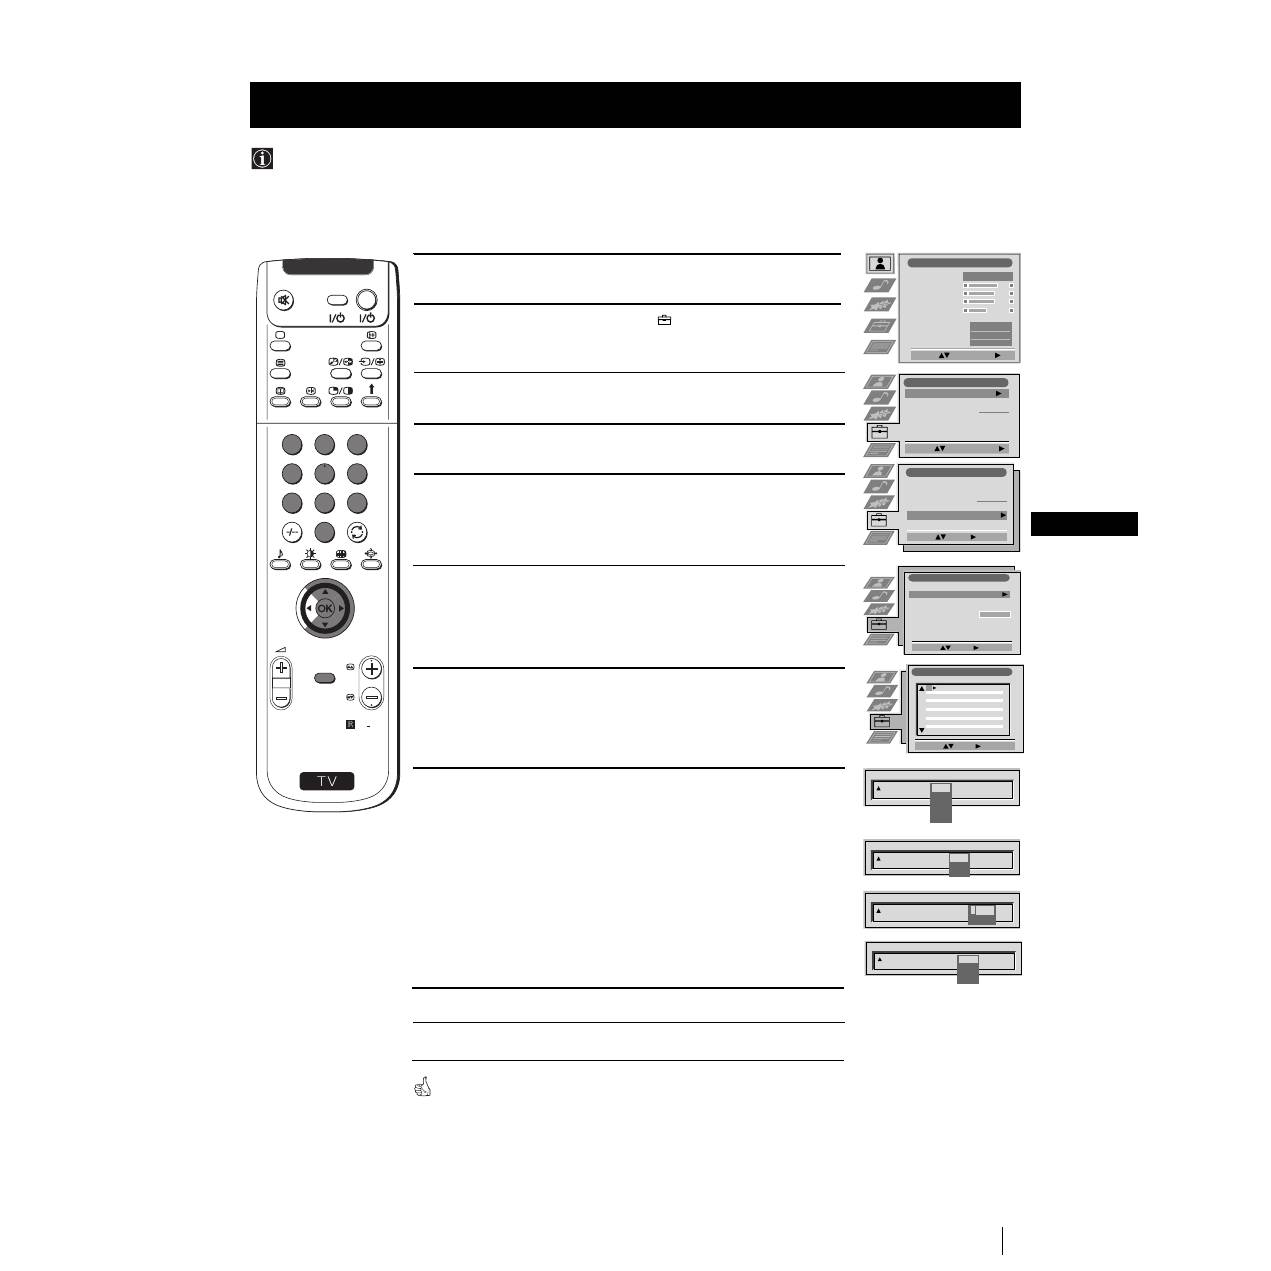
You can programme this set with a personal code, using up to eleven characters (letters and numbers). Then using
this fuction it will be possible to identify your set if it was ever stolen.
This code can only be input once!
Make sure to write it down in this instruction manual.
Inputting Your Personal ID
S
RM 903
PROGR
MENU
1
4
7
2
5
8
0
3
6
9
TV
VIDEO
Picture Adjustment
Select:
Enter Menu:
Picture Mode
Contrast
Brightness
Colour
Sharpness
Reset
AI
Noise Reduction
Colour Tone
Personal
On
Off
Normal
Set Up
Auto Tuning
Programme Sorting
Select NexTView
AV Preset
Manual Set Up
Select:
Start Auto Tuning
Start
- - - - - - -
Enter:
Set Up
Auto Tuning
Programme Sorting
Select NexTView
AV Preset
Manual Set Up
Select:
- - - - - - -
Manual Set Up
Select:
Enter:
Language/Country
Manual Programme Preset
Further Programme Preset
RGB Set Up
Personal ID
Demo
- - - - - - -
Manual Set Up
Select A-Z, 0-9:
Store: OK
Language/Country
Manual Programme Preset
Further Programme Preset
RGB Set Up
Personal ID
Demo
A - - - - - - - - - -
Are you sure?
Save: OK Cancel:
20
Menu System
This function provides an overview of some of the features available on this set.
Using the Demo Mode
Menu System
1
Press the MENU button on the remote control to display the menu
on the screen.
2
Push the joystick to
$
to select the
symbol, then push to
z
to
enter the Set Up menu.
3
Push the joystick to
$
or
4
to select Manual Set Up, then push to
z
.
4
Push to
$
or
4
to select Demo, then push to
z
to enter and start
the demonstration.
The set starts the demonstration and shows most of the
available picture functions.
Note:
Press the
button on the remote control to stop the Demo mode
and return to the normal TV screen.
S
RM 903
PROGR
MENU
1
4
7
2
5
8
0
3
6
9
TV
VIDEO
Picture Adjustment
Select:
Enter Menu:
Picture Mode
Contrast
Brightness
Colour
Sharpness
Reset
AI
Noise Reduction
Colour Tone
Personal
On
Off
Normal
Set Up
Auto Tuning
Programme Sorting
Select NexTView
AV Preset
Manual Set Up
Select:
Start Auto Tuning
Start
- - - - - - -
Enter:
Set Up
Auto Tuning
Programme Sorting
Select NexTView
AV Preset
Manual Set Up
Select:
- - - - - - -
Manual Set Up
Select:
Enter:
Language/Country
Manual Programme Preset
Further Programme Preset
RGB Set Up
Personal ID
Demo Start
- - - - - - -
21
GB
1
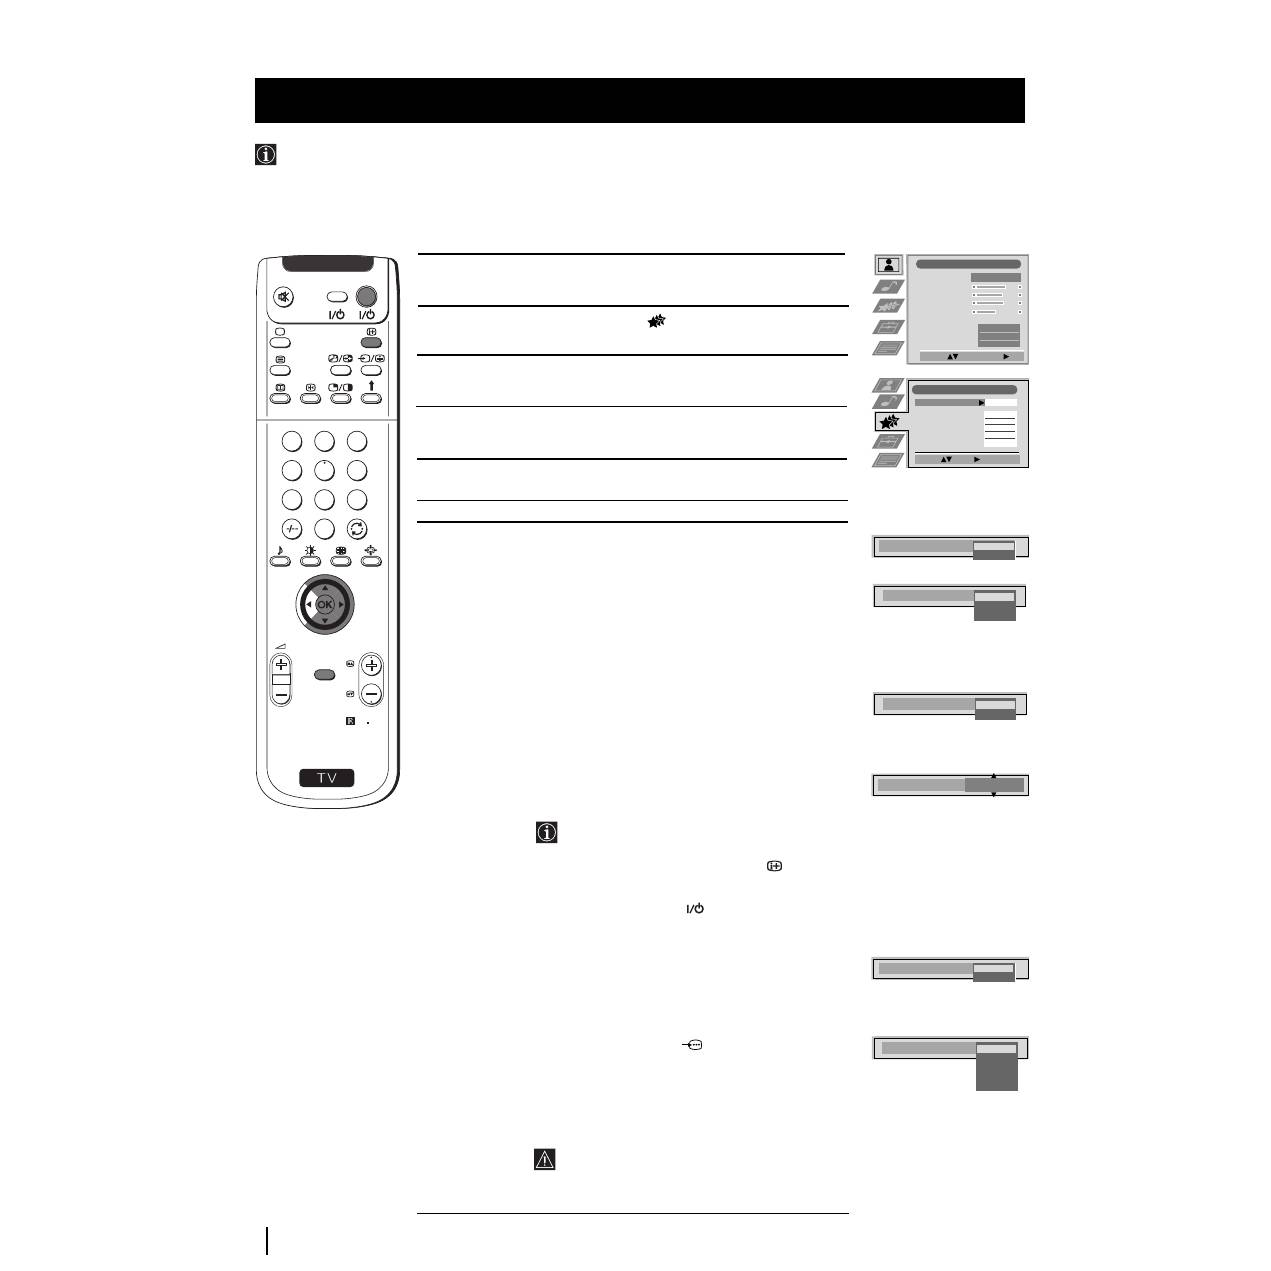
Press the
…
button repeatedly on the remote control until the
symbol
…
1
appears on the screen.
2
Push the MENU button to display the menu on the screen.
3
Push the joystick to
$
to select the
symbol, then push to
z
to
enter the Set Up menu.
4
Push to
$
or
4
to select Manual Set Up then push to
z
to enter.
5
Push the joystick to
$
or
4
to select RGB Set Up then push to
z
.
6
Push the joystick to
z
to enter H Centre, then push to
$
or
4
to
adjust the centre of the picture over a range of -10 to +10. Press
the OK button to store.
7
Press the MENU button to exit and return to the normal TV screen.
Menu System
S
RM 903
PROGR
MENU
1
4
7
2
5
8
0
3
6
9
TV
VIDEO
Menu System
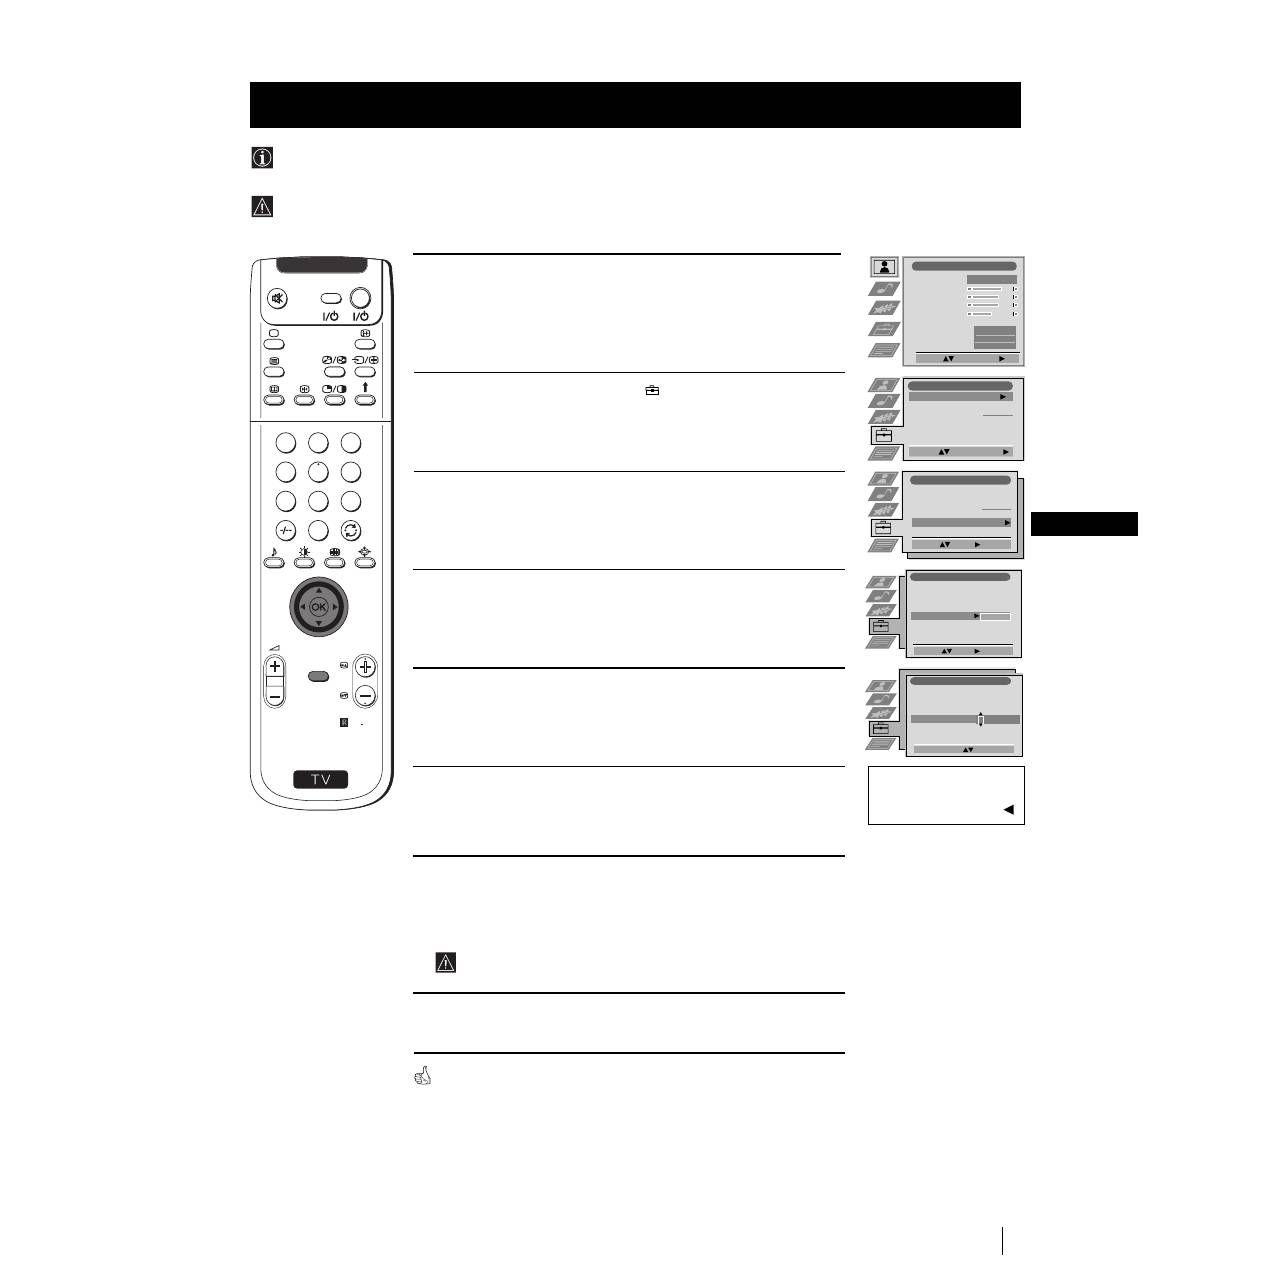
When connecting an RGB source, such as a DVD player, to the Scart connector
:
1/
you may need to readjust the H Centre
of the picture.
Adjusting the H Centre picture for an RGB source
Picture Adjustment
Select:
Enter Menu:
Picture Mode
Contrast
Brightness
Colour
Sharpness
Reset
AI
Noise Reduction
Colour Tone
Personal
On
Off
Normal
Set Up
Auto Tuning
Programme Sorting
Select NexTView
AV Preset
Manual Set Up
Select:
Start Auto Tuning
Start
- - - - - - -
Enter:
Set Up
Auto Tuning
Programme Sorting
Select NexTView
AV Preset
Manual Set Up
Select:
- - - - - - -
Manual Set Up
Select:
Enter:
Language/Country
Manual Programme Preset
Further Programme Preset
RGB Set Up
Personal ID
Demo
- - - - - - -
RGB Set Up
RGB Set Up
Adjust Position:
Confirm: OK
H Centre
O
…
1
