Sony KDL-22PX300: instruction
Class: Household, kitchen appliances, electronics and equipment
Type:
Manual for Sony KDL-22PX300
Table of contents
GB
FR
IT
DE
ES
PT
NL
User's Guide
RU
Mode d'emploi
Guida per l'utente
Benutzerhandbuch
Guía del usuario
Manual do Utilizador
Gebruikershandleiding
Руководство пользователя
KDL-22PX300
Networking
Table of contents
Connecting to a network...............................................................34
Creating network settings .............................................................36
Preparation
Part names......................................................................................3
Connecting digital audio equipment .............................................. 5
Connecting the controller............................................................... 5
Turning the built-in PlayStation
TM2 on and off ............................. 6
Games
Playing a game ............................................................................... 7
Using Memory Cards................................................................... 10
Audio CDs
Playing an audio CD .................................................................... 12
DVDs
Watching a DVD.......................................................................... 14
Using the playback modes ...........................................................18
Adjusting DVD player settings.................................................... 20
Main menu
Displaying the main menu ........................................................... 27
Using the Browser screen ............................................................ 27
Using the System Configuration menu........................................ 28
Using the Version Information screen ......................................... 31
2
Table of contents
Preparation
Connect to Description
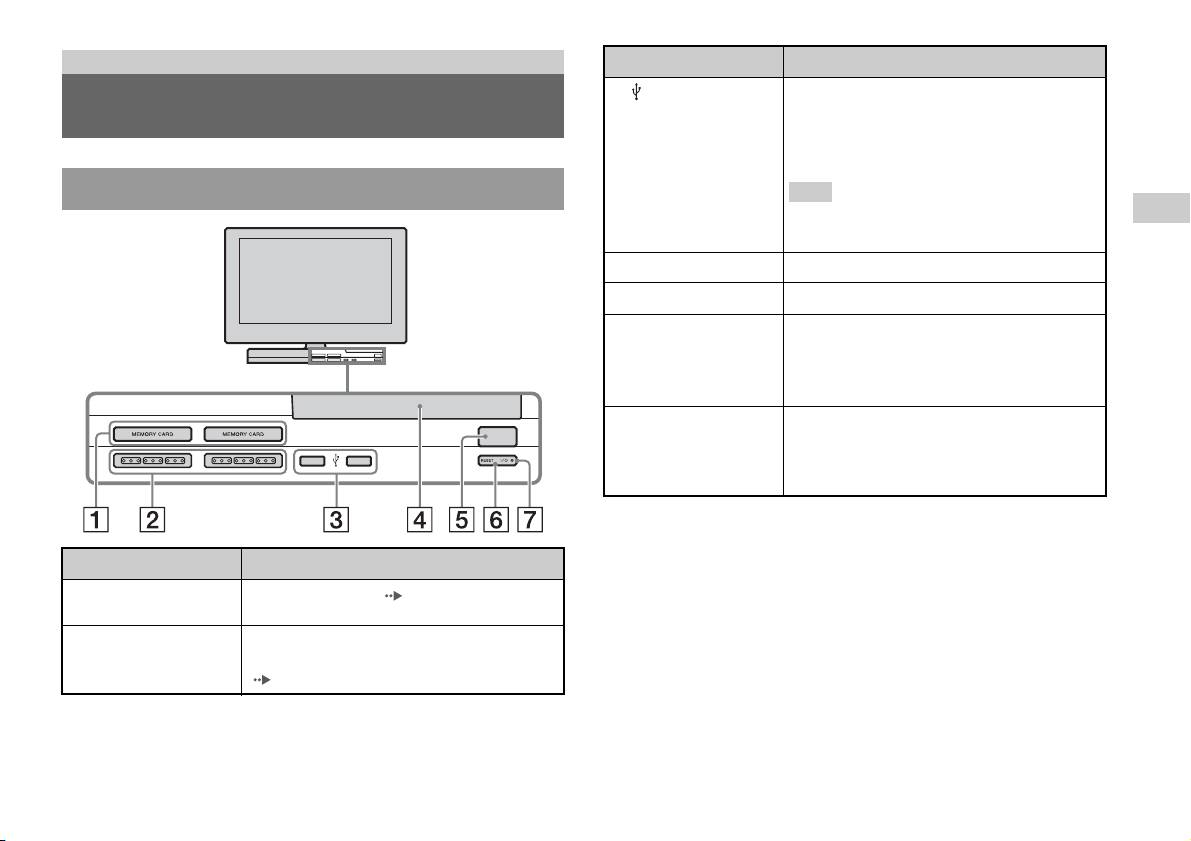
3 USB connector
You can connect various USB devices to the built-in
Part names
PlayStation
TM2, but not all are compatible. Refer to
the instructions supplied with the USB device for
more information.
Built-in PlayStationTM2 front
Hint
GB
You cannot play photo, music, video files using the
PlayStation's USB connector.
Preparation
4 Disc cover
Press the OPEN button, and the cover slides open.
5 OPEN button
Press to open the disc cover.
6 "/1 (on/standby)/
Press to turn on the built-in PlayStationTM2, to enter
RESET button
standby mode, or to reset.
RESET: Press once.
Standby: Press for more than one second.
7 "/1 (on/standby)
Lights up in green when the built-in PlayStationTM2
OPEN
indicator
is on.
Lights up in red when the built-in PlayStation
TM2 is
in standby mode.
Connect to Description
1 MEMORY CARD slot
Insert a memory card ( page 11).
1/2
2 Controller port 1/2
Insert the Analog Controller (DUALSHOCK®2)
into a controller port of the PlayStation
TM2
(page5).
Part names
3
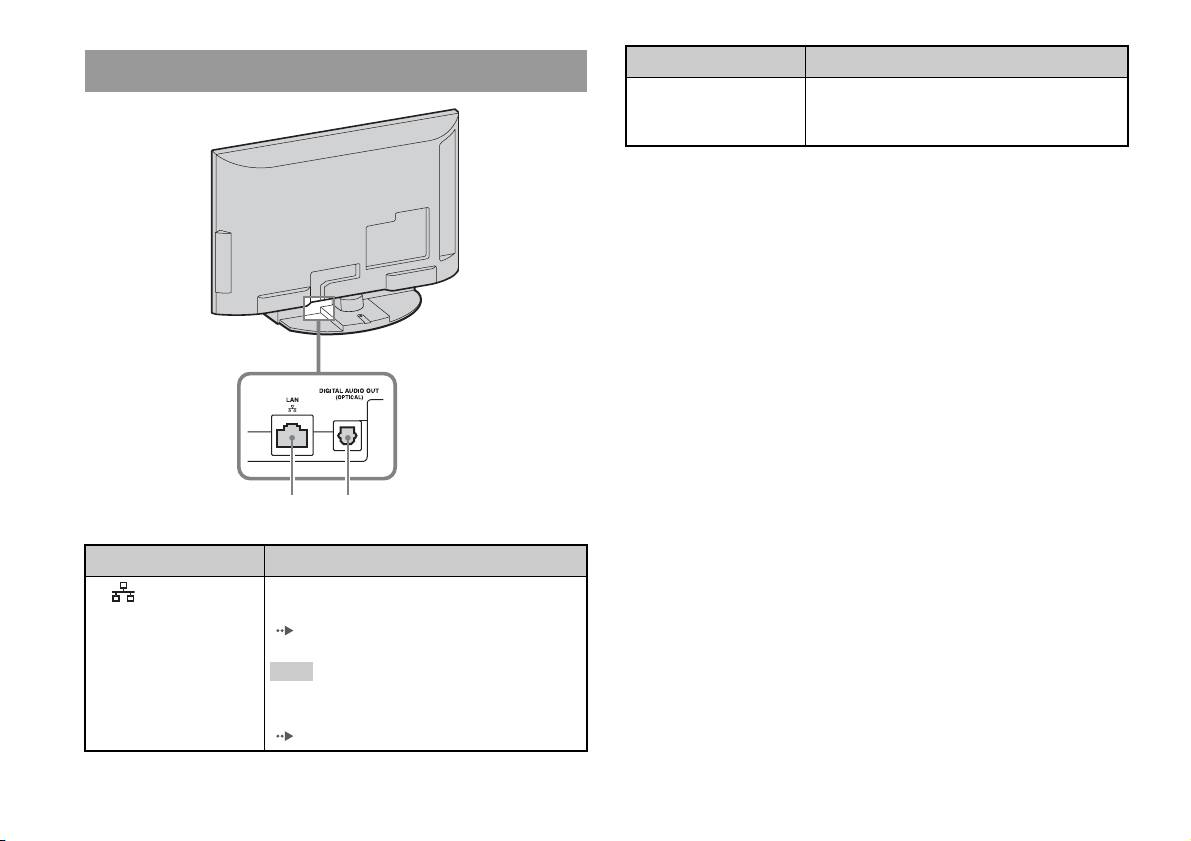
Built-in PlayStationTM2 rear
Connect to Description
1 LAN
You can enjoy online games by connecting the
PlayStation
TM2 to a broadband network
( page 34).
Hint
To enjoy "BRAVIA" home network features,
connect to LAN of the TV using an Ethernet cable
( page 34).
4
Part names
1 2
Connect to Description
2 DIGITAL AUDIO OUT
You can listen to the built-in PlayStationTM2 sound
(OPTICAL)
on a Home theatre system connected via digital
input.
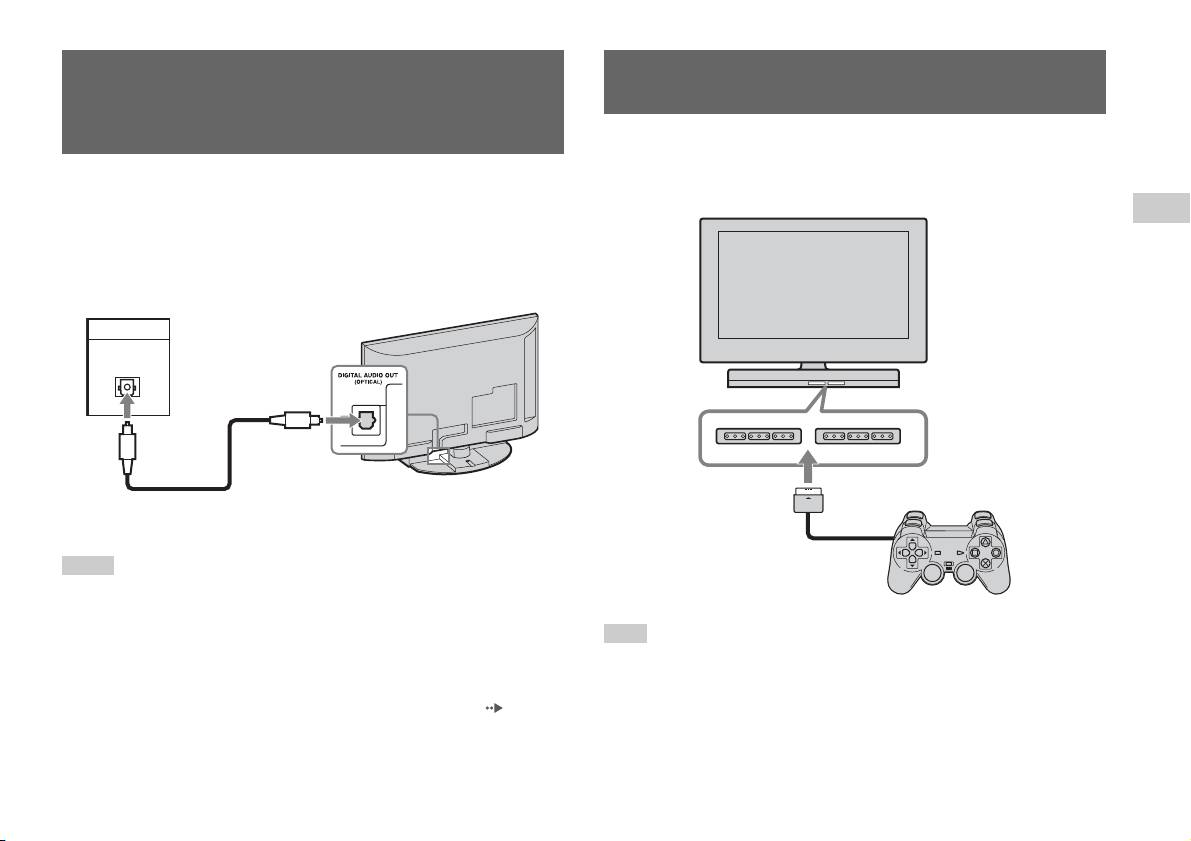
Connecting digital audio
Connecting the controller
equipment
1 Insert the Analog Controller (DUALSHOCK®2) into a controller
port of the built-in PlayStation
TM2.
By using a commercially available optical digital cable, you can enjoy
surround sound with the effect of being in a movie theatre or a concert hall.
Built-in PlayStationTM2 front
GB
When connecting the built-in PlayStationTM2 to audio equipment with
Preparation
digital connectors, refer to the instructions supplied with the device to be
connected.
Connected device
Built-in PlayStationTM2 rear
DIGITAL IN
OPTICAL
Commercially available optical
digital cable
Hints
Analog Controller
(DUALSHOCK
®2)
• If you connect the built-in PlayStationTM2 to audio equipment using an optical
digital cable, it may affect the audio output of some PlayStation
TM2 format
software with the result that no sound is produced. If this happens, use a cable such
Hint
as the Audio cable (not supplied) and connect it to the TV's AUDIO OUT. Do not
Some software titles designate a specific controller port to be used. Refer to the
use an optical digital cable.
instructions supplied with the software for details.
• After connecting digital audio equipment, set "Digital Out (Optical)" to "On" in the
System Configuration menu. For details, see "Digital Out (Optical)" ( page 29).
• The DIGITAL AUDIO OUT (OPTICAL) connection outputs digital audio from
the built-in PlayStation
TM2.
Connecting digital audio equipment
5
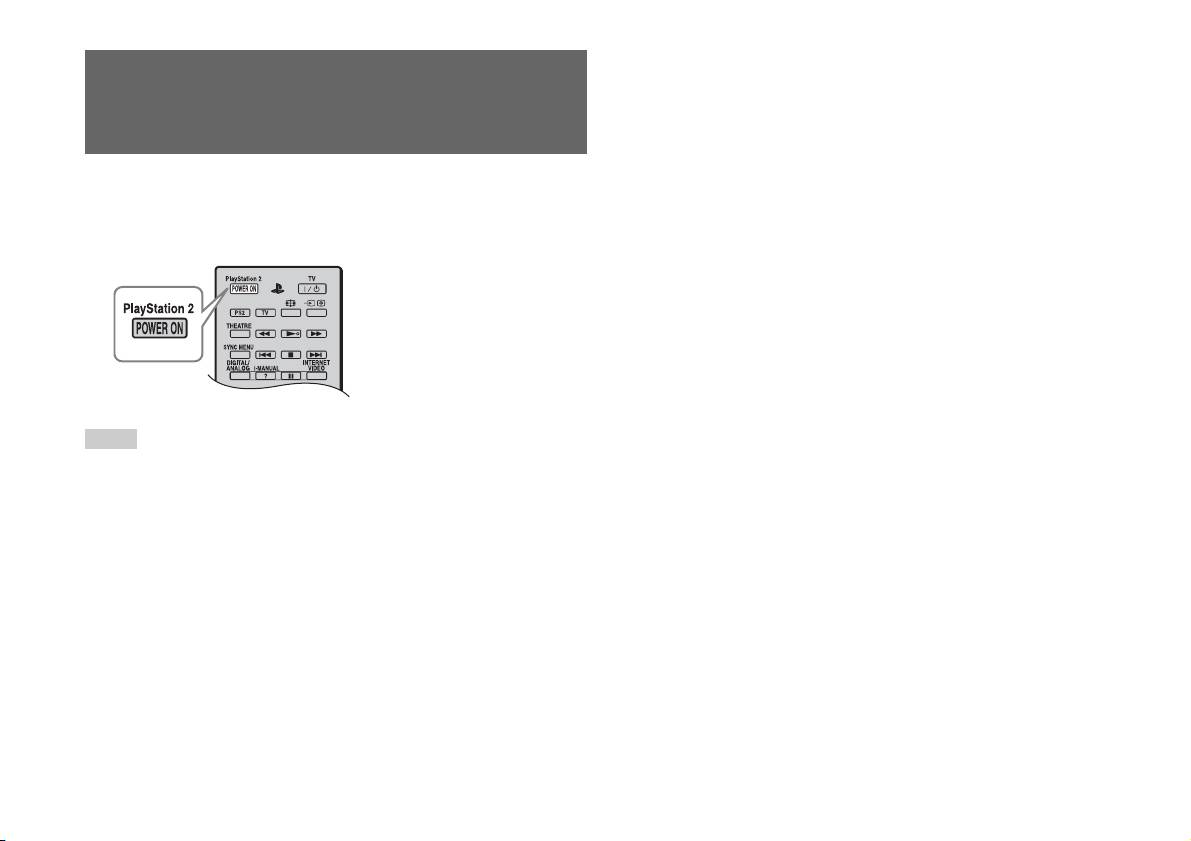
Turning the built-in
PlayStation
TM2 on and off
1 Press PlayStation 2 POWER ON on the TV's remote to turn on
the TV and the PlayStation
TM2. (The TV input mode is
automatically switched to PlayStationTM2.)
Hints
• When you turn the TV off, the PlayStationTM2 is also turned off. In addition, when
functions below are activated, the PlayStation
TM2 will also be turned off in
conjunction with the TV.
– Idle TV Standby
– Sleep Timer
– PC Power Management
– Reminder
–On Timer
–Picture Frame
• Do not access the memory card when a warning message (such as, "the TV will
soon turn off...") appears.
6
Turning the built-in PlayStationTM2 on and off
Games
Playing a game
GB
Games
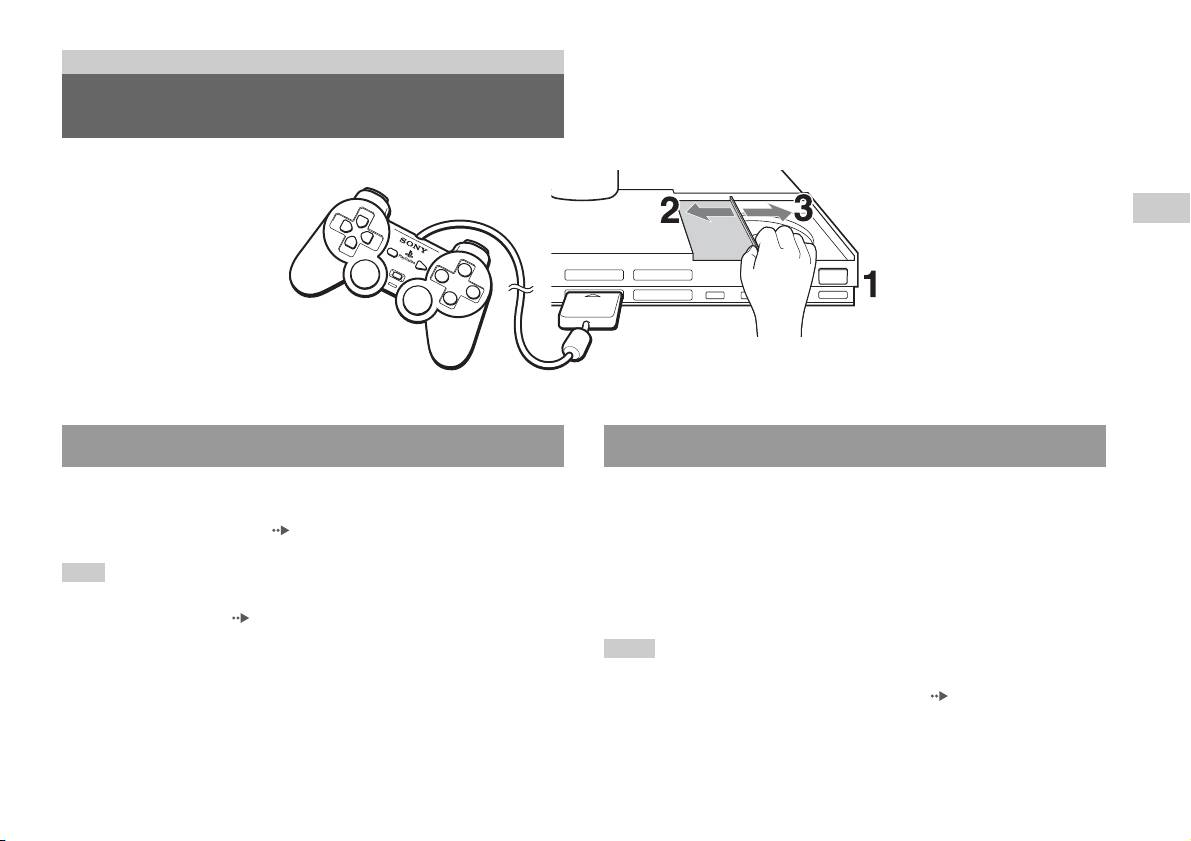
OPEN
Before playing a game Starting a game
Check that the connections to the TV and audio equipment are correct and
1 Press the OPEN button to release the disc cover lock.
that the precautions have been met.
• "Connecting the controller" ( page 5)
2 Slide the disc cover to the left, then place the disc with the
label side facing up.
Hint
To play online games, you first need to connect to and set up a network. See
3 Close the disc cover by sliding it to the right until it is locked.
"Connecting to a network" ( page 34) for details.
Hints
• Be sure to lock the disc cover to play a disc.
• You can also start a game from the Browser screen ( page 27).
• If you turn on the built-in PlayStation
TM2 after inserting a disc, the game will start
automatically.
Playing a game
7
To reset a game
Press the \/1 (on/standby)/RESET button on the built-in PlayStationTM2
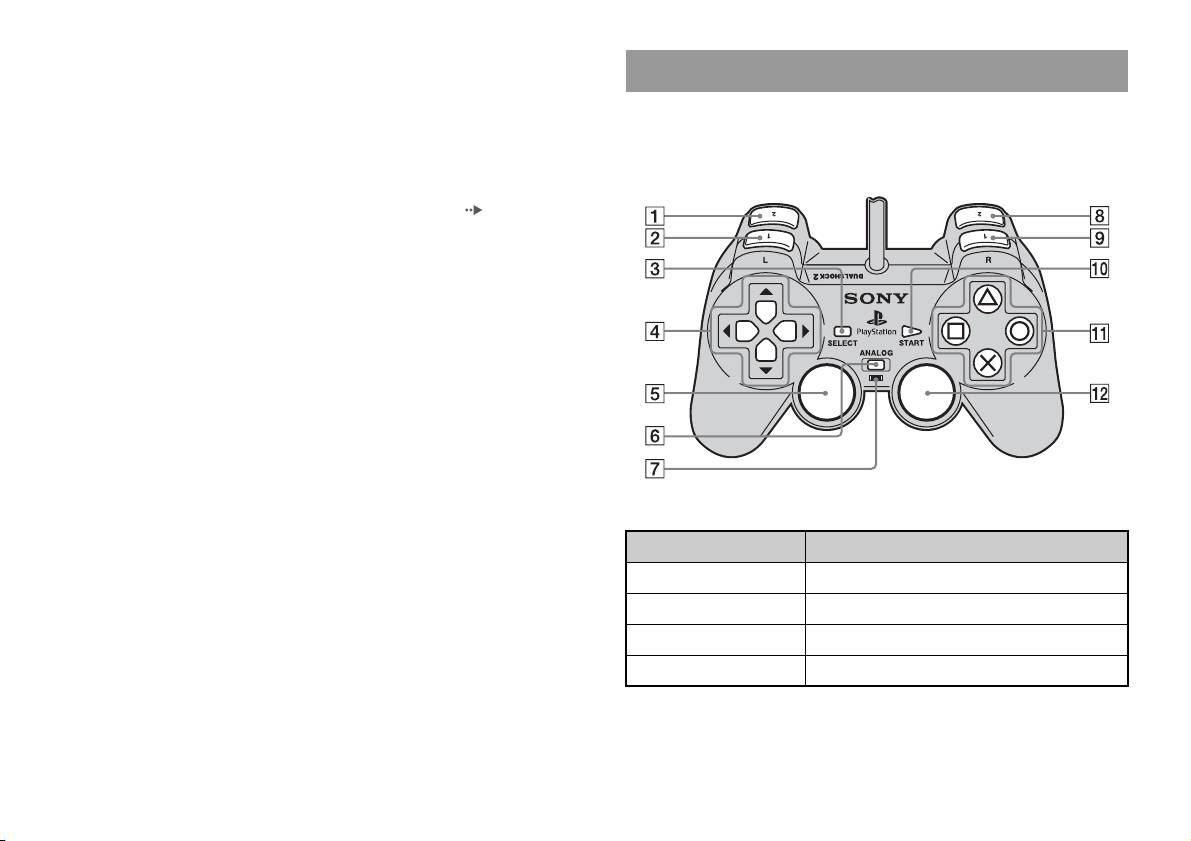
Using the Analog Controller (DUALSHOCK®2)
front. Do not accidentally press the @/1/RESET button while playing a
The Analog Controller (DUALSHOCK
®2) is equipped with a pressure-
game, as doing so will cause the game to reset.
sensitive button function. It also has a vibration function.
To end a game
Part names
Press the "/1 (on/standby)/RESET button on the built-in PlayStationTM2
front after saving game data, and then remove the disc ( page 3).
RESET: Press once.
Standby: Press for more than one second.
Button/Switch Description
1 L2 button
2 L1 button
3 SELECT button
4 Directional buttons
8
Playing a game
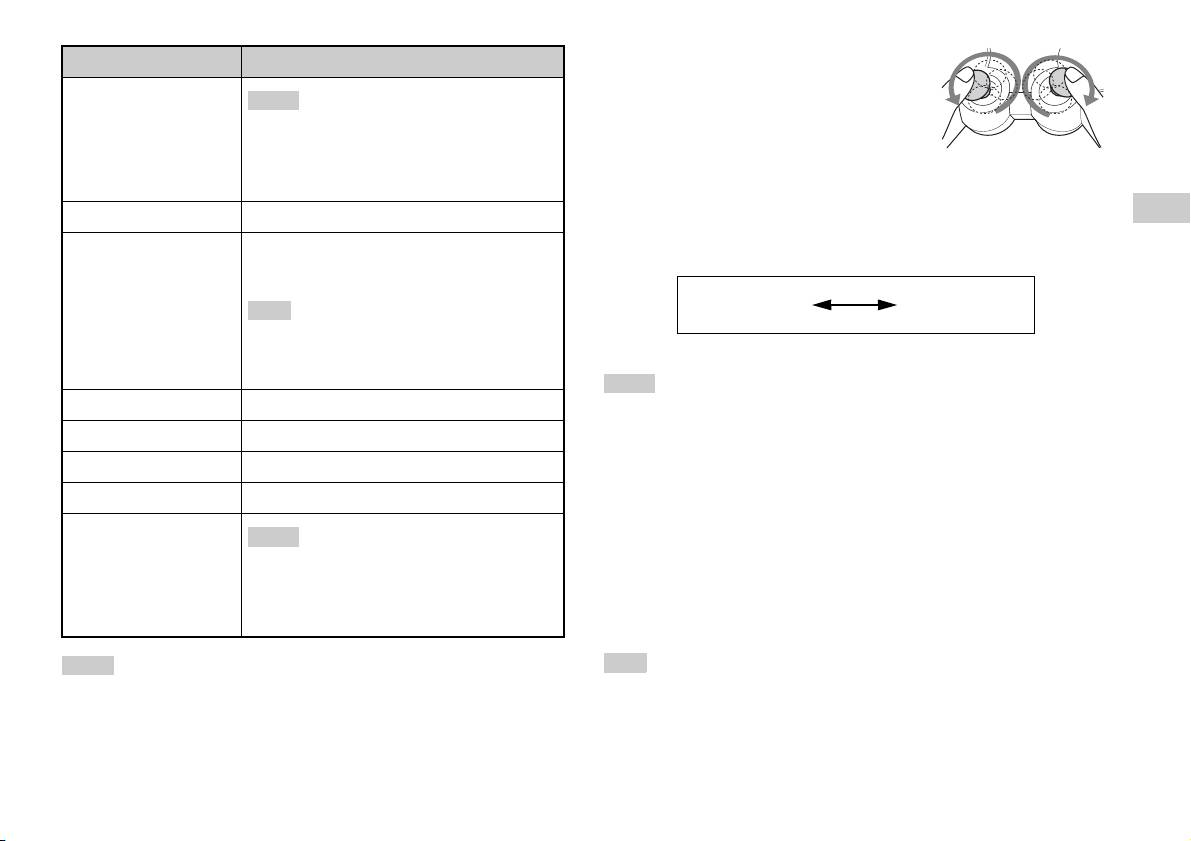
• Before using the Analog Controller
Button/Switch Description
(DUALSHOCK
®2), with the built-in
5 Left analog stick/ L3
PlayStation
TM2 turned on, rotate the left and right
Hints
button
analog sticks once with your thumbs. Do not twist
• The left analog stick and L3 button, function only
the analog sticks, but rotate as if drawing a circle as
in analogue mode (indicator: red).
shown in the diagram.
• The L3 button function when the analog stick is
pressed.
About mode switching
6 ANALOG mode button
The ANALOG mode button can be used to switch between two modes.
GB
Switch between digital mode and analogue mode.
Switch to the appropriate mode for use. Note, however, that some software
Games
7 Mode indicator
Digital mode: Lights off.
titles make this adjustment automatically.
Analogue mode: Lights up in red.
Digital mode
Analog mode
Hint
(indicator: off)
(indicator: red)
Depending on the software, you may not be able to
switch modes even if you press the ANALOG mode
button.
Hints
8 R2 button
• When using the Analog Controller in digital mode, the left and right analog sticks
do not function. Also, the pressure-sensitive button function is turned off.
9 R1 button
• Depending on the software, you may not be able to switch modes even if you press
q; START button
the ANALOG mode button.
qa f/a/×/s buttons
About analog controls
qs Right analog stick/ R3
Hints
• When playing a PlayStationTM2 format software title, you can use all
button
buttons in analog mode except for the START, SELECT, L3 and R3
• The right analog stick and R3 button, function
only in analogue mode (indicator: red).
buttons.
• The R3 button function when the analog stick is
• When playing a PlayStation
TM format software title, only the left and
pressed.
right analog sticks can be used in analog mode.
Hints
Hint
• Depending on the software, the buttons for use in analogue mode may be limited.
Depending on the software, the buttons for use in analog mode may be limited. Refer
Refer to the instructions supplied with the software for details.
to the instructions supplied with the software for details.
• The vibration function can be set to on or off in the software options menu.
Depending on the software, the vibration function may be set to on automatically.
Playing a game
9
About the vibration function
The vibration function can be set to ON or OFF in the software options
Using Memory Cards
menu.
Hint
You can save and load game data using a Memory Card (sold separately).
Depending on the software, the vibration function may be set to "On" automatically.
You can also delete game data or copy game data from one Memory Card
to another.
About using the Analog Controller (DUALSHOCK®)
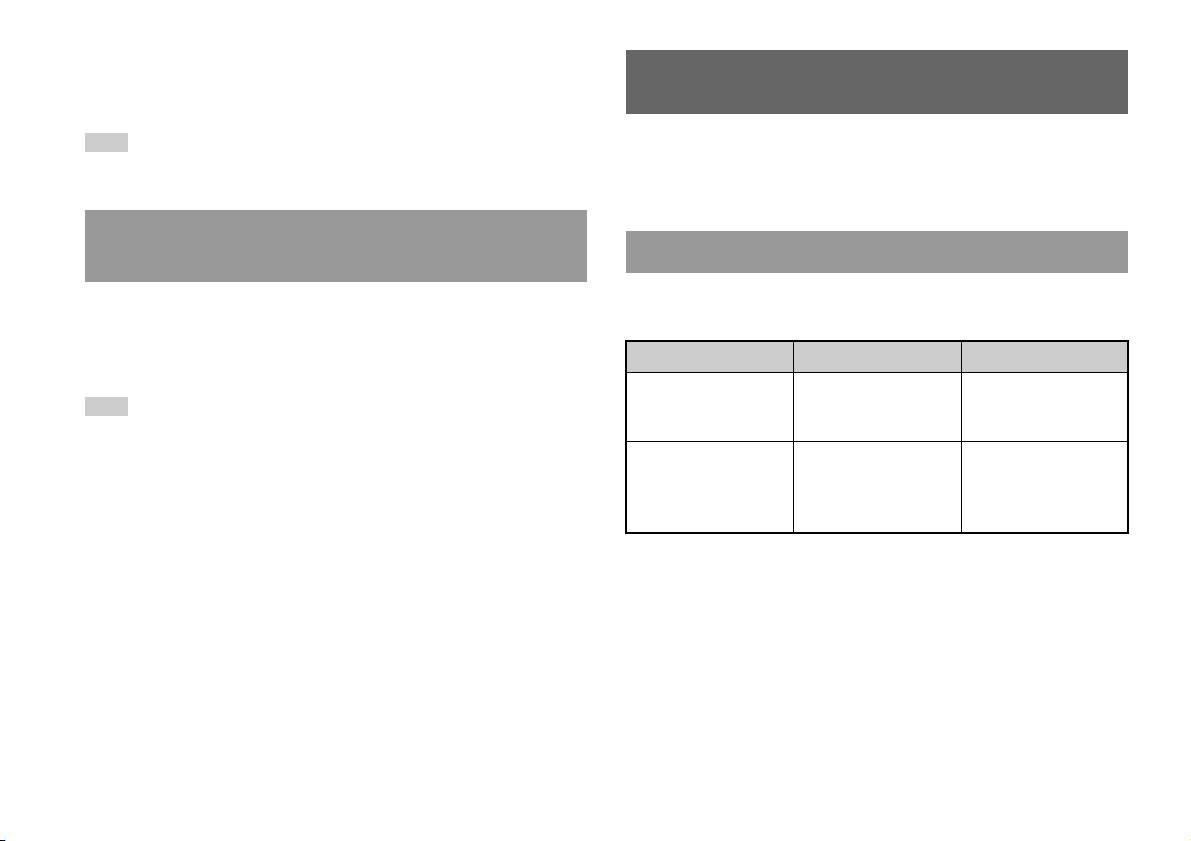
About Memory Card types
(SCPH-110 E)
There are two types of Memory Cards. Select a Memory Card suitable for
You can use the Analog Controller (DUALSHOCK®) (SCPH-110 E) with
the software in use.
the built-in PlayStation
TM2, but the functions of the buttons in analog mode
may be different from those of the Analog Controller (DUALSHOCK
®2).
Memory Card type Compatible software Amount of memory
Only the left and right analog sticks can be used in analog mode.
Memory Card (8MB) (for
PlayStation
TM2 format
Approx. 8 MB
Hint
PlayStation
TM2)
software
(SCPH-10020 E)
Not all PlayStationTM2 format software titles support the use of the Analog Controller
(DUALSHOCK
®) (SCPH-110 E). The Analog Controller (DUALSHOCK®2)
Memory Card
PlayStation
TM format
15 memory blocks
should be used in such cases.
(SCPH-1020 E)*
software
(approx. 120 KB)
* This product is no
longer manufactured.
MagicGate™ is a term of copyright protection technology developed by Sony
Corporation
10
Using Memory Cards
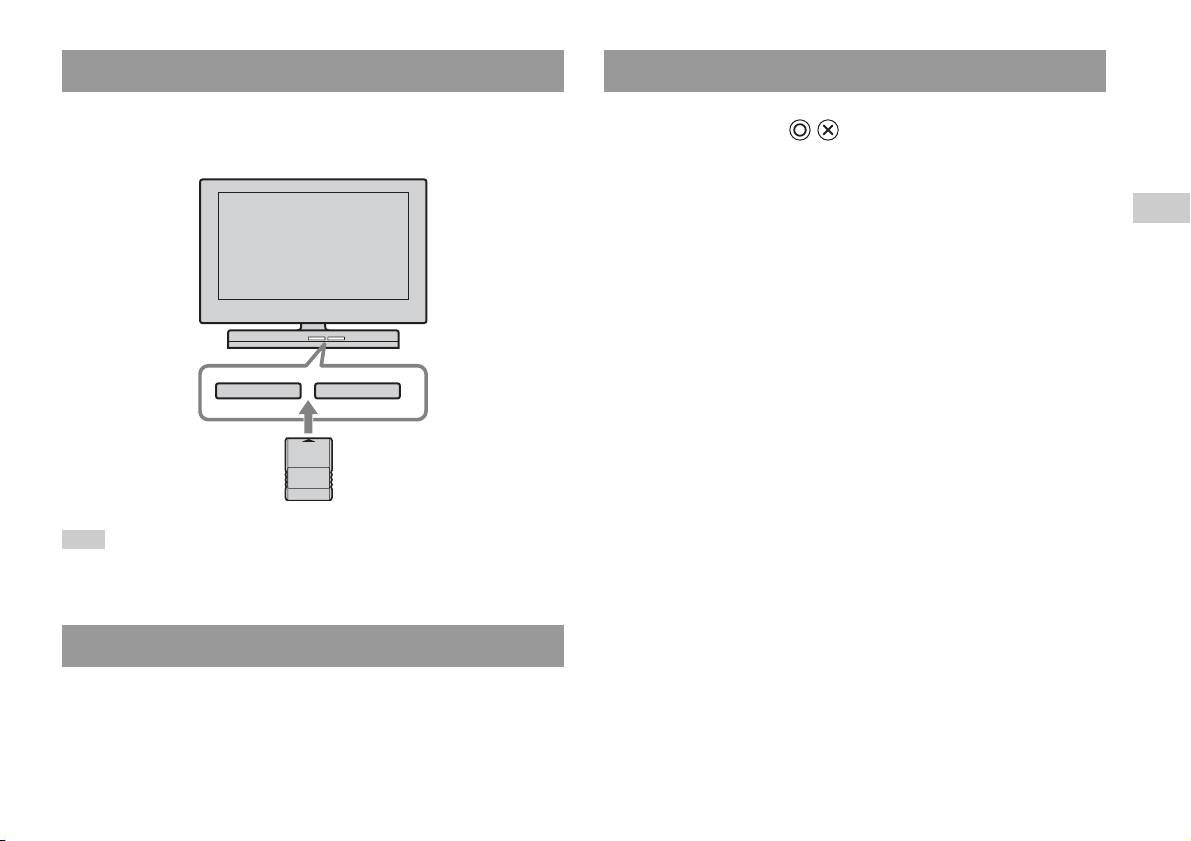
Inserting a Memory Card
Copying or deleting game data
Insert the Memory Card into a MEMORY CARD slot on the built-in
You can delete saved data or copy data to another memory card. Use
PlayStation
TM2 front.
directional buttons and the button of the controller to select items.
Built-in PlayStationTM2 front
1 Turn on the built-in PlayStationTM2 with no disc inserted, and
then insert a memory card.
GB
Games
2 Select "Browser", and then select the memory card you want
to copy or delete data from.
3 Select the icon for the data item, and select "Copy" or
"Delete".
4 Follow the instructions that appear on the set-up screen.
MEMORY CARDMEMORY CARD
Hint
Some software titles designate a specific MEMORY CARD slot to use. Refer to the
instructions supplied with the software for details.
Saving or loading game data
Depending on the software, the procedure for saving or loading may vary.
Refer to the instructions supplied with the software for details.
Using Memory Cards
11

Audio CDs
Operating the CD player during playback
Playing an audio CD
Using the directional buttons, select the icon for the desired track and then
press the button.
Icon (button*) Function
Playing a CD
. (L1 button) Go to the beginning of the current or previous track
1 Turn on the built-in PlayStationTM2 and insert the disc
m (L2 button) Fast reverse
(page7).
M (R2 button) Fast forward
Follow steps 1 to 3 of "Starting a game".
The track numbers are displayed.
> (R1 button) Go to the beginning of the next track
N (START button) Start playback
2 Using the directional buttons, select the track number you
X (START button) Pause playback
want to play and then press the button.
Playback begins.
x (SELECT button) Stop playback
* You can operate directly by pressing the analog controller (DUALSHOCK®2)
Hints
buttons shown in parentheses.
• If you turn on the built-in PlayStationTM2 after inserting a disc, the track numbers
are displayed automatically.
Hint
• You can also start playback from the Browser screen ( page 27).
You can also use the DVD Remote Control (for PlayStationTM2) (sold separately).
Caution
Ending audio CD playback
To play an audio CD recorded in DTS format, you must turn the volume fully
down, and then connect a device with a DTS decoder to the DIGITAL OUT
(OPTICAL) connector ( page 5). Note that an extremely loud noise may be
1 Using the directional buttons, select x and then press the
emitted.
button.
Playback stops. Press the OPEN button on the built-in PlayStationTM2
front to remove the disc.
12
Playing an audio CD

5 Select the audio CD icon, and then press the button.
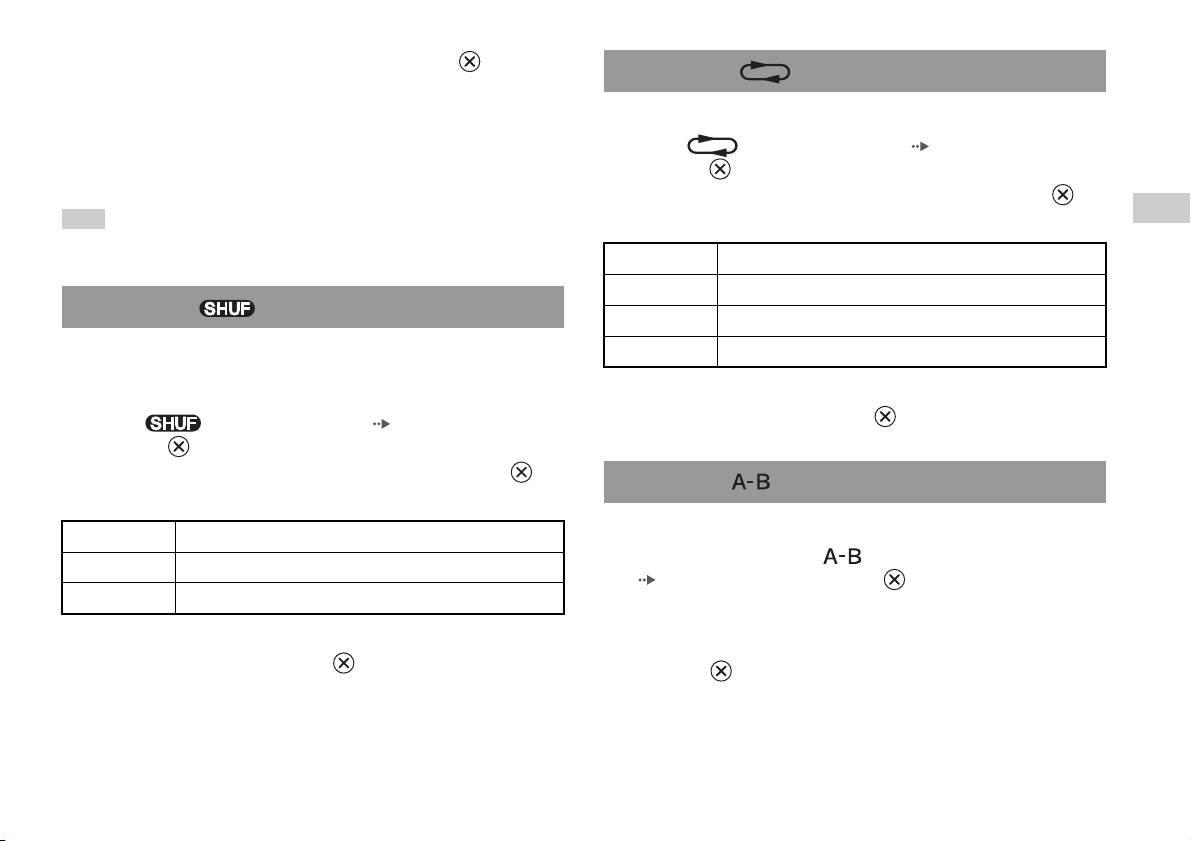
Playing in various modes
The track numbers are displayed, and the setting option is shown in the
You can set for "Play Mode" and "Repeat".
lower left of the screen.
Play Mode Normal Plays tracks as recorded on the CD
6 Select the desired track, and then press the button.
Playback begins.
Program Plays tracks in a specified order
GB
Shuffle Plays tracks in a random order
Hints
Audio CDs
Repeat Off Does not play the CD repeatedly
• You can also access the Play Options screen from the screen displaying the tracks
by selecting the Audio CD icon in the upper left corner of the screen and pressing
All Plays all tracks repeatedly
the button.
• You can set "Play Mode" and "Repeat" at the same time.
1 Plays a track repeatedly
1 At the Browser screen ( page 27), use the directional
buttons to select the audio CD icon and then press the
button.
The Play Options screen is displayed.
2 Select "Play Mode" or "Repeat", and then press the
button.
3 Select the desired setting, and then press the button.
If you select "Program", the screen for specifying track order will be
displayed. Select the tracks you want to play.
4 Press the button.
The Browser screen is displayed.
Playing an audio CD
13
DVDs
Using the Control Panel
Watching a DVD
1 Start playback of the DVD ( page 16).
2 Press the SELECT button.
You can operate the DVD player using the following methods.
The Control Panel is displayed. If you press the SELECT button again,
• Using the on-screen Control Panel
the display will change its position on the screen.
• Operating directly using the Analog Controller (DUALSHOCK
®2)
• Using the DVD Remote Control (for PlayStation
TM2) (sold separately)
The following instructions assume use of the Control Panel to operate the
DVD player. Some operations may be different depending on the method
used.
Hints
• For details about playing a DVD, refer to the instructions supplied with the DVD.
• The built-in PlayStation
TM2 plays disc content as recorded in the DVD software.
3 Using the directional buttons, select an icon and then press
Note that not all features are available on all DVDs.
the button.
Hint
To turn off the Control Panel, press the SELECT button (once or twice), or press the
button.
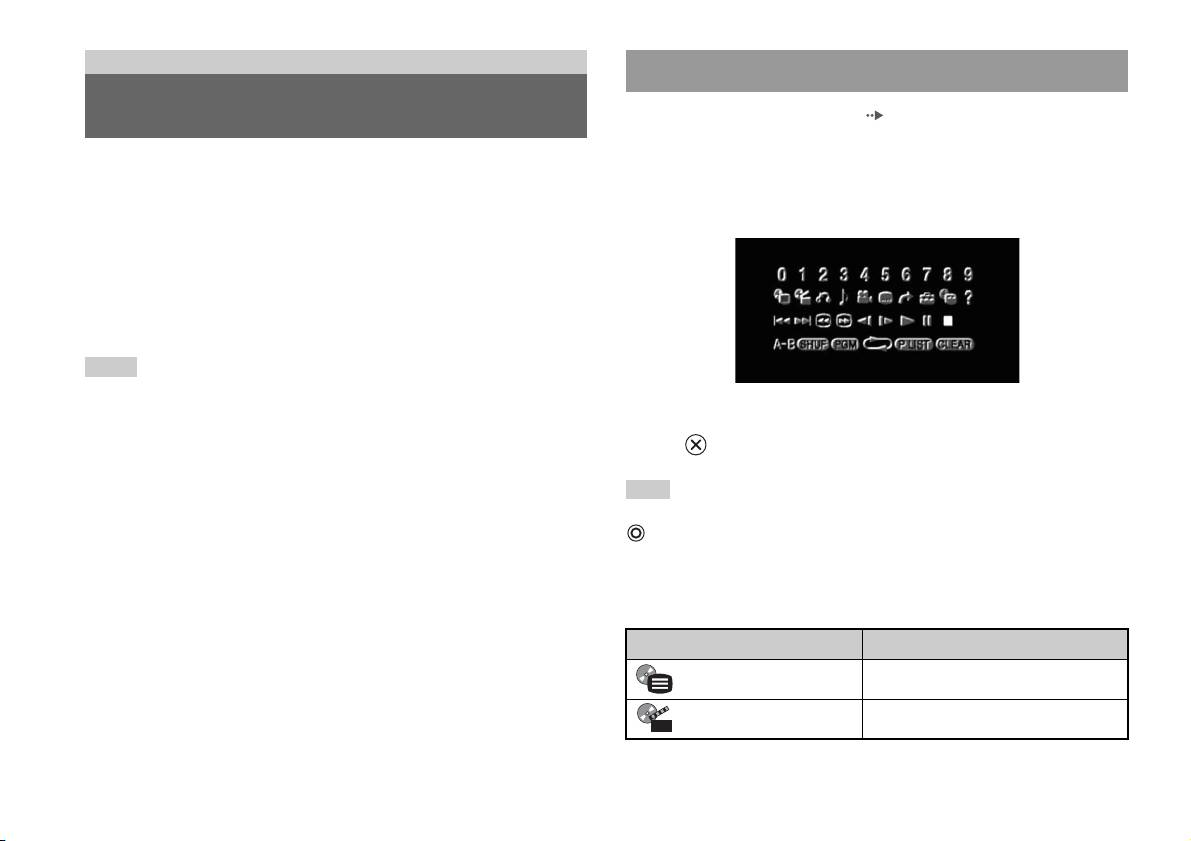
Control Panel item list
You can access the following options in the Control Panel.
Icon Function
Menu Displays the DVD-Video menu
Top Menu Displays the DVD-Video menu
14
Watching a DVD
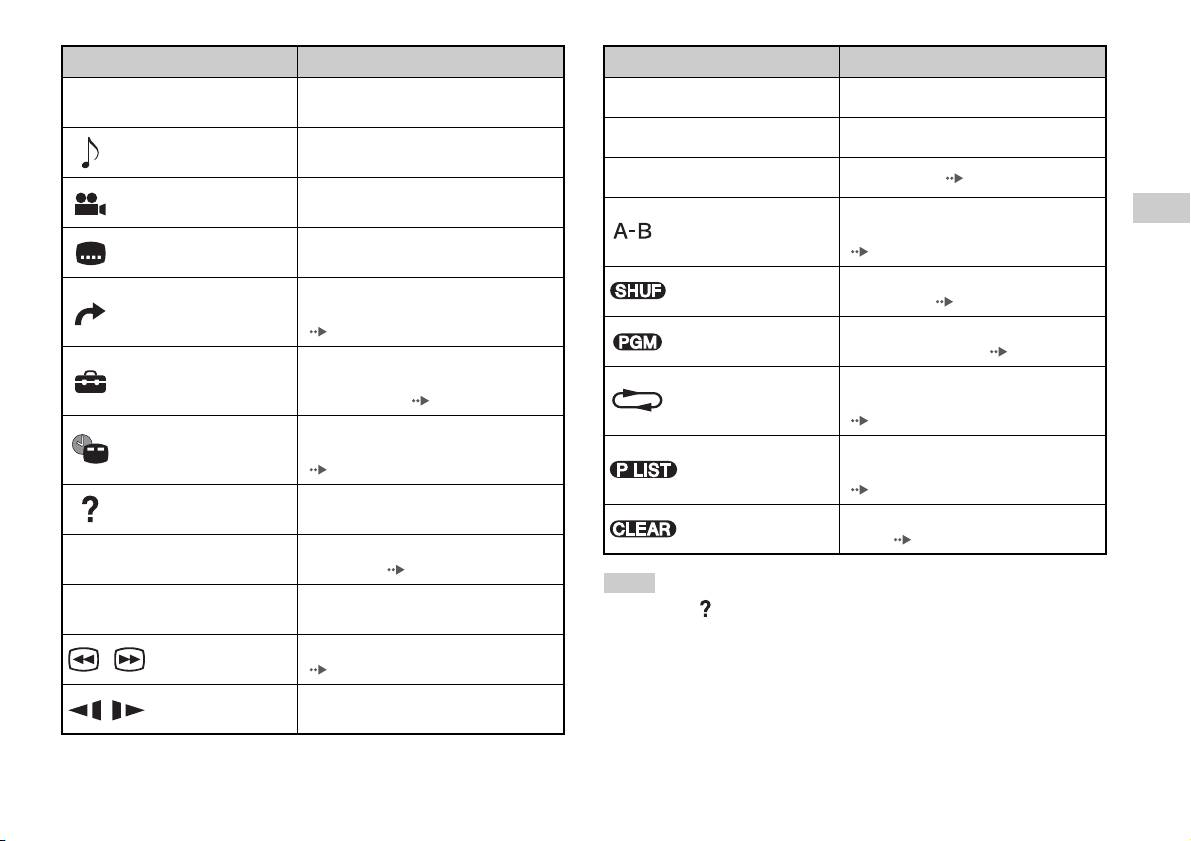
Icon Function
Icon Function
Returns to the previously selected screen
Return
N
Play Starts playback
O
within the DVD's menu
X
Pause Pauses playback
Displays and changes audio options on
Audio Options
DVDs with multiple audio tracks
x
Stop Stops playback ( page 16)
Displays and changes viewing angles on
Angle Options
DVDs recorded with multi-angle options
Specifies a scene for playback, and starts
GB
A-B Repeat
playback of the scene that has been set
DVDs
Displays and changes subtitle options on
Subtitle Options
( page 19)
DVDs with subtitle options
Begins playback of titles or chapters in a
Skips to the selected title, chapter or the
Shuffle Play
random order ( page 19)
Go To
specified time, and starts playback
( page 16)
Begins playback of titles or chapters in a
Program Play
programmed sequence ( page 18)
Displays and changes options for
Setup
language, picture quality, Parental Control
Selects repeated playback of all the titles
level, audio, etc. ( page 20)
Repeat Play
on the disc, or one title or one chapter
( page 19)
Displays the current title or chapter
Time Display
number, the elapsed time, etc.
For DVD-RW discs (VR mode), selects
( page 17)
Original/Play List
Original or Play List content to play
( page 18)
Displays the direct button functions of the
Help
Analog Controller (DUALSHOCK
®2)
Clears selected numbers or playback
Clear
modes ( page 20)
Used to enter the number of a chapter you
0~9
Go to Chapter
want to play ( page 16)
Hints
Returns/skips to the beginning of the
./> Previous/Next
• You can use " " to check the options that can be accessed directly using the
current, previous or next chapter
buttons of the Analog Controller. To access the options directly using the
Fast reverses/forwards playback
controller, you must clear the Control Panel from the screen.
/Search
( page 17)
• Depending on the playback mode, some options may not be available or cannot be
adjusted.
Changes to playback/reverse playback in
/Slow
slow-motion
Watching a DVD
15
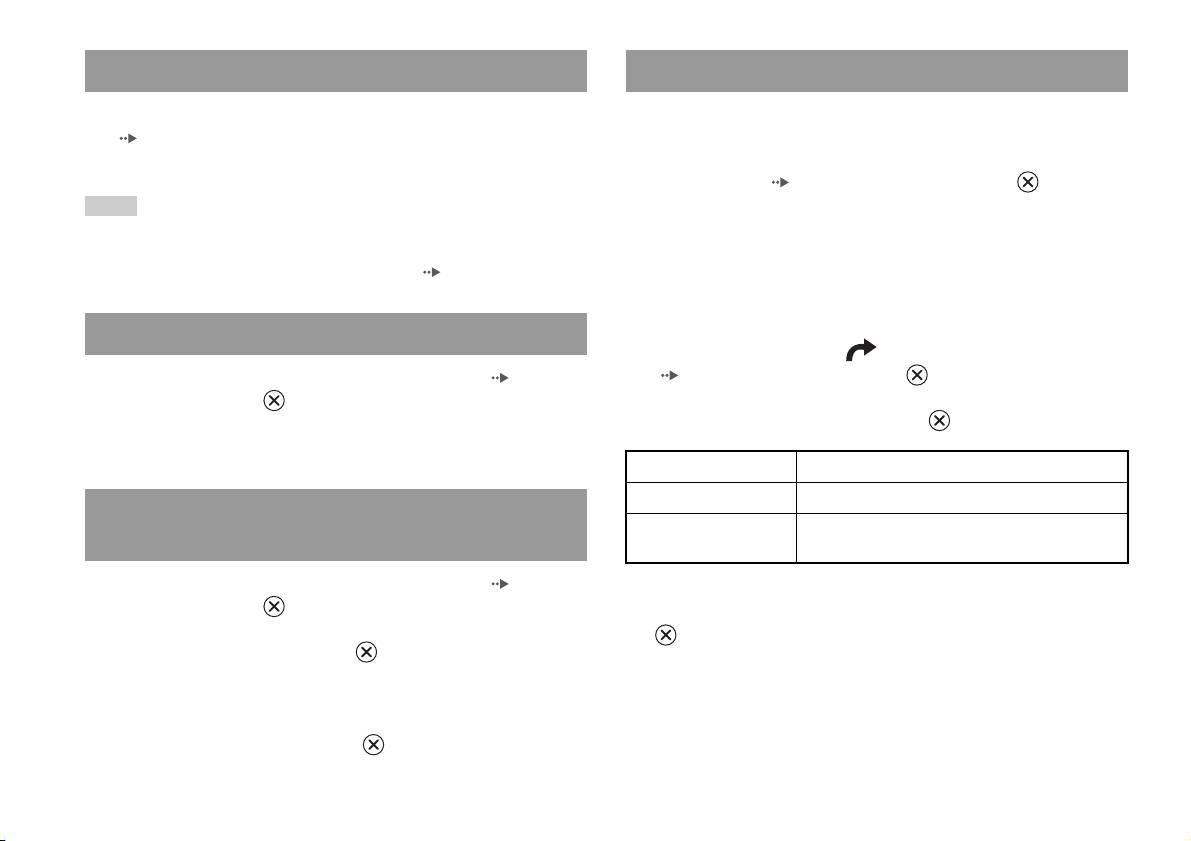
Playing a DVD
Selecting a specific scene for playback
1 Turn on the built-in PlayStationTM2 and insert a disc
Selecting a scene by chapter number
(page7).
Follow steps 1 to 3 of "Starting a game". Playback begins.
1 During playback, select the desired chapter number in the
Control Panel ( page 14) and then press the button.
Hints
Playback of the selected chapter begins. If you want to play a chapter
• If you turn on the built-in PlayStationTM2 after inserting a disc, playback will begin
with a single digit number (i.e. 1-9), enter a leading zero. For example,
automatically.
enter as "01".
• You can also start playback from the Browser screen ( page 27).
Selecting a scene by title number, chapter number or by
specifying the time
Ending DVD playback x
1 During playback, select in the Control Panel
1 During playback, select x in the Control Panel ( page 14)
( page 14) and then press the button.
and then press the button.
Playback stops. Press the OPEN button on the built-in PlayStationTM2
2 Select an item, and then press the button.
front, and then remove the disc.
Title Specifies the title number
Chapter Specifies the chapter number
Playing a DVD from the last stopping point
C XX:XX:XX
Specifies the elapsed time for the chapter (or title)
(Resume Play)
(or T XX:XX:XX)
1 During playback, select x in the Control Panel ( page 14)
and then press the button.
3 Select the numbers for the desired scene, and then press the
button.
2 Select N, and then press the button.
Playback of the selected chapter begins.
Playback begins from the point where you stopped the disc in step 1.
To clear Resume Play
After step 1, select x and then press the button.
16
Watching a DVD
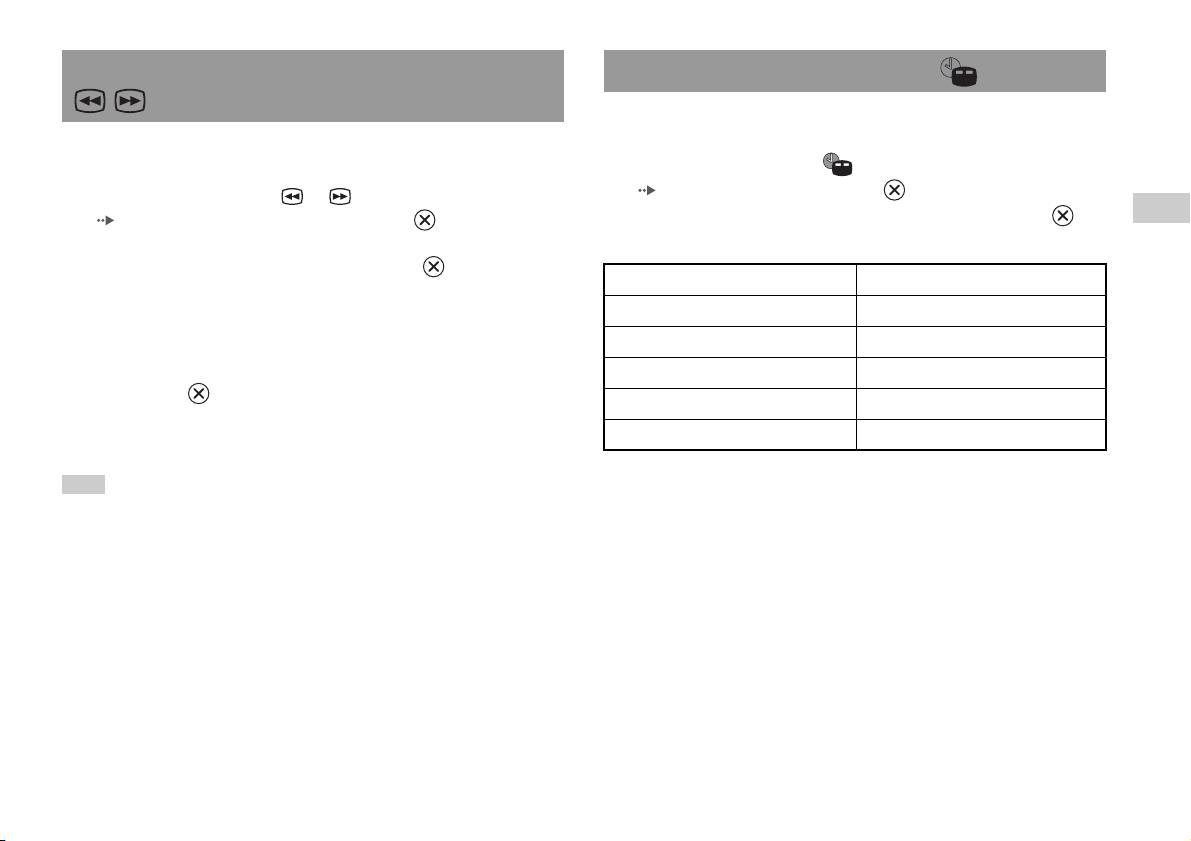
Finding a particular point on a DVD (Search) Displaying playback information
You can display information such as the current title number or elapsed
time.
You can search either forwards or backwards to quickly locate a particular
point on a DVD.
1 During playback, select in the Control Panel
( page 14) and then press the button.
1 During playback, select or in the Control Panel
The display changes as shown below each time you press the
GB
( page 14) and then press and hold the button.
button.
DVDs
Search speed changes as shown below when you press either the up or
down directional button while holding down the button.
Title X Chapter X Title number and chapter number
• Search 3
• Search 2
Title X Chapter X C XX:XX:XX Elapsed time of current chapter
• Search 1
Title X Chapter X C - XX:XX:XX Remaining time of current chapter
•Slow
Title X Chapter X T XX:XX:XX Elapsed time of current title
2 Release the button when you reach the point you are
Title X Chapter X T - XX:XX:XX Remaining time of current title
searching for.
(Off)
Playback returns to normal speed.
Hint
To use the Analog Controller to Search during playback, press and hold down the L2
or R2 button to begin searching. Use the directional buttons to change speeds.
Release the L2 or R2 button when you reach the point you are searching for.
Watching a DVD
17
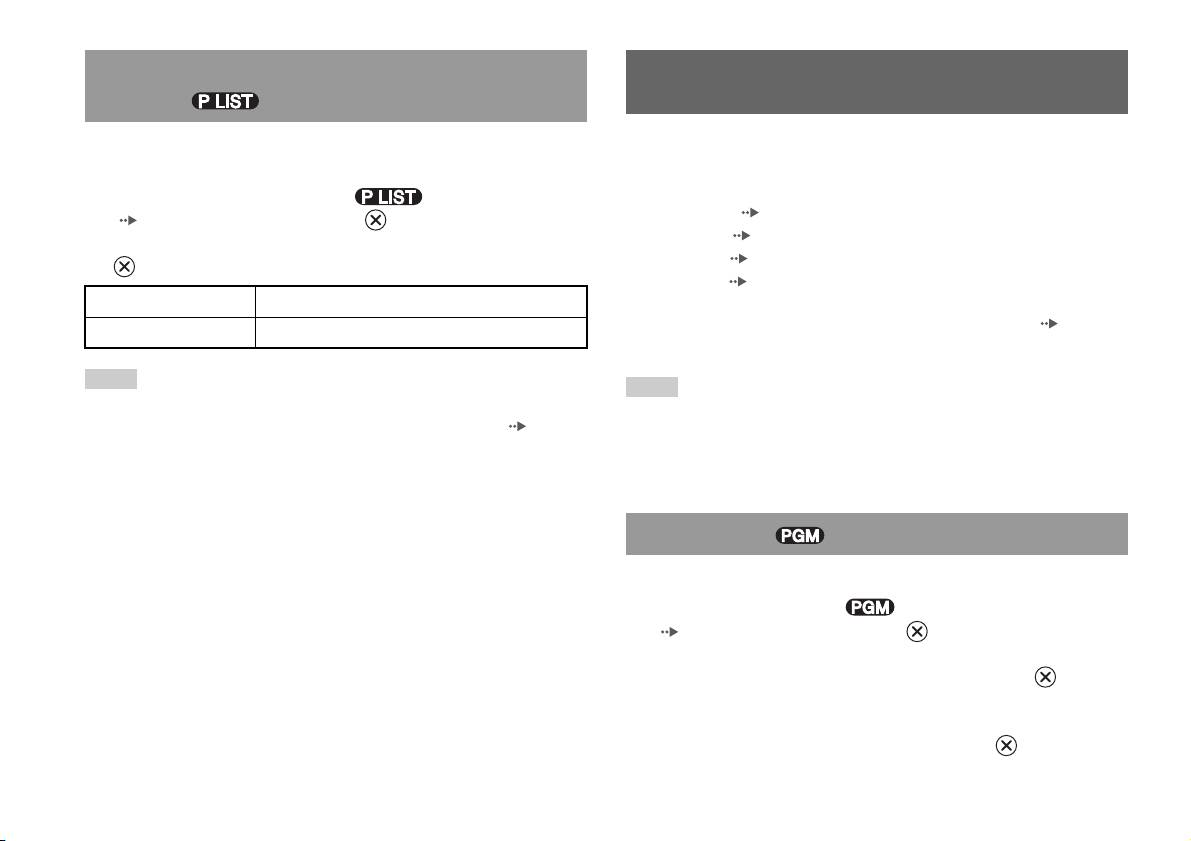
Selecting Original or Play List for DVD-RW
Using the playback modes
playback
When using a DVD-RW disc (VR mode), you can select the type of titles
Using the various playback modes, you can play titles or chapters in the
you want to play.
order you want or repeat playback of a specific scene. There are four
playback modes:
1 With playback stopped, select in the Control Panel
• Program Play ( page 18)
( page 14) and then press the button.
• Shuffle Play ( page 19)
Original and Play List will be selected in turn each time you press the
• Repeat Play ( page 19)
button.
• A-B Repeat ( page 19)
Original Plays content in the originally recorded sequence
The following instructions assume use of the Control Panel ( page 14)
Play List Plays edited content. Play List is the default setting.
to operate the DVD player.
Hints
Hints
• Slow-motion play in reverse is not available for DVD-RW discs (VR mode).
• You can play combinations of Program Play, Shuffle Play, and Repeat Play. Note,
• You cannot use this function with Resume Play. Clear Resume Play ( page 16)
however, that some Shuffle Play or Repeat Play options may not be available
before selecting this feature.
depending on the combination.
• The built-in PlayStation
TM2 plays disc content as recorded in the DVD software.
Program Play
You can create programmes to play titles and chapters in any order.
1 During playback, select in the Control Panel
( page 14) and then press the button.
2 Select a programme number, and then press the button.
If no programmes have been set, the only option will be "1. Title".
3 Select the title number, and then press the button.
18
Using the playback modes
4 Select the chapter number, and then press the button.
Repeat Play
To play all the chapters, select "All". Repeat steps 2 to 4 to set other
titles or chapters.
You can set this option to play titles or chapters repeatedly.
5 Press the START button.
1 Select in the Control Panel ( page 14), and then
press the button.
Program Play begins.
The display changes as shown below each time you press the
Hint
button.
GB
DVDs
The setting will not be cleared after Program Play finishes.
Disc Repeat Repeats playback of all titles
Title Repeat Repeats playback of one title
Shuffle Play
Chapter Repeat Repeats playback of one chapter
You can set this option for random playback of all titles or chapters
Repeat Off Clears Repeat Play
recorded on a disc. Playback order will be different each time Shuffle Play
is used.
2 Select N, and then press the button.
1 Select in the Control Panel ( page 14), and then
press the button.
The display changes as shown below each time you press the
A-B Repeat
button.
You can set a specific scene to be played repeatedly.
Title Shuffle Plays titles in random order
1 During playback, select in the Control Panel
Chapter Shuffle Plays chapters in random order
( page 14) and then press the button at the point you
Shuffle Off Clears Shuffle Play
want to start repeated playback.
The starting point (point A) is set.
2 Select N, and then press the button.
2 Press the button at the point you want to end repeated
playback.
The ending point (point B) is set, and repeated playback of the section
from A to B begins.
Using the playback modes
19
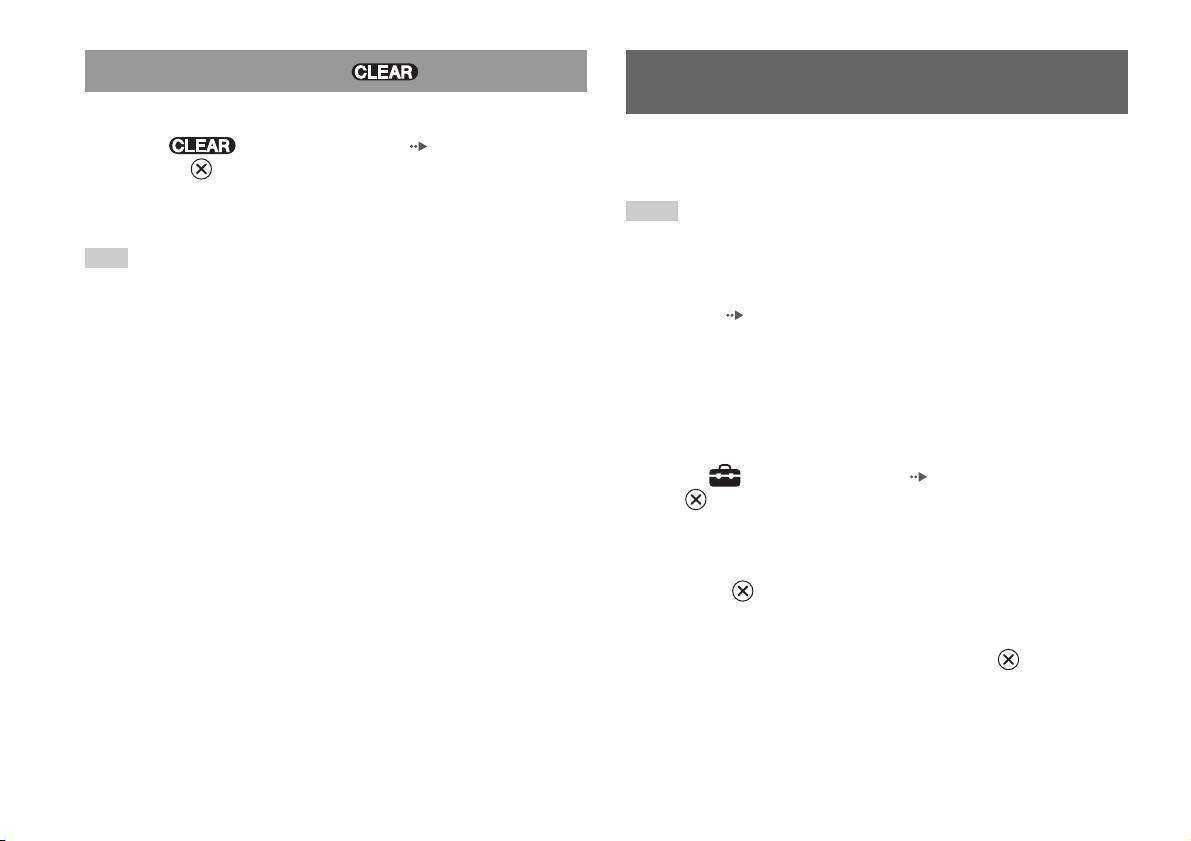
Clearing playback modes
Adjusting DVD player settings
Clears playback modes to allow normal playback.
1 Select in the Control Panel ( page 14), and then
You can use the Control Panel to adjust DVD player settings, such as the
press the button.
language for subtitles, audio language, and Parental Control level.
A message stating, "Play mode contents cleared", is displayed and the
built-in PlayStation
TM2 returns to normal playback.
Hints
• Some DVDs do not support all settings. The built-in PlayStationTM2 plays disc
Hint
content as recorded in the DVD software. If the DVD does not support the features
listed, you will not be able to change the settings.
If multiple playback modes have been set in a combination, all playback modes are
• The following options are not available during playback or Resume Play. Clear
cleared.
Resume Play ( page 16) before changing these settings.
– "Menu", "Audio" and "Subtitles" in Language Setup
– "TV Type" and "Progressive" in Screen Setup
– "Parental Control" in Custom Setup
– "DTS" and "Audio Track Auto Select Mode" in Audio Setup
You can change DVD player settings using the following procedure:
1 Select in the Control Panel ( page 14), and then press
the button.
The Setup icon bar is displayed.
2 Select the icon for the setting you want to change, and then
press the button.
The current setting for each item is displayed.
3 Select the desired item, and then press the button.
The menu option becomes active and can be selected.
20
Adjusting DVD player settings


