Sony KDL-22PX300: Table of contents
Table of contents: Sony KDL-22PX300
Table of contents
- Table of contents

Networking
Table of contents
Connecting to a network...............................................................34
Creating network settings .............................................................36
Preparation
Part names......................................................................................3
Connecting digital audio equipment .............................................. 5
Connecting the controller............................................................... 5
Turning the built-in PlayStation
TM2 on and off ............................. 6
Games
Playing a game ............................................................................... 7
Using Memory Cards................................................................... 10
Audio CDs
Playing an audio CD .................................................................... 12
DVDs
Watching a DVD.......................................................................... 14
Using the playback modes ...........................................................18
Adjusting DVD player settings.................................................... 20
Main menu
Displaying the main menu ........................................................... 27
Using the Browser screen ............................................................ 27
Using the System Configuration menu........................................ 28
Using the Version Information screen ......................................... 31
2
Table of contents
Preparation
Connect to Description
3 USB connector
You can connect various USB devices to the built-in
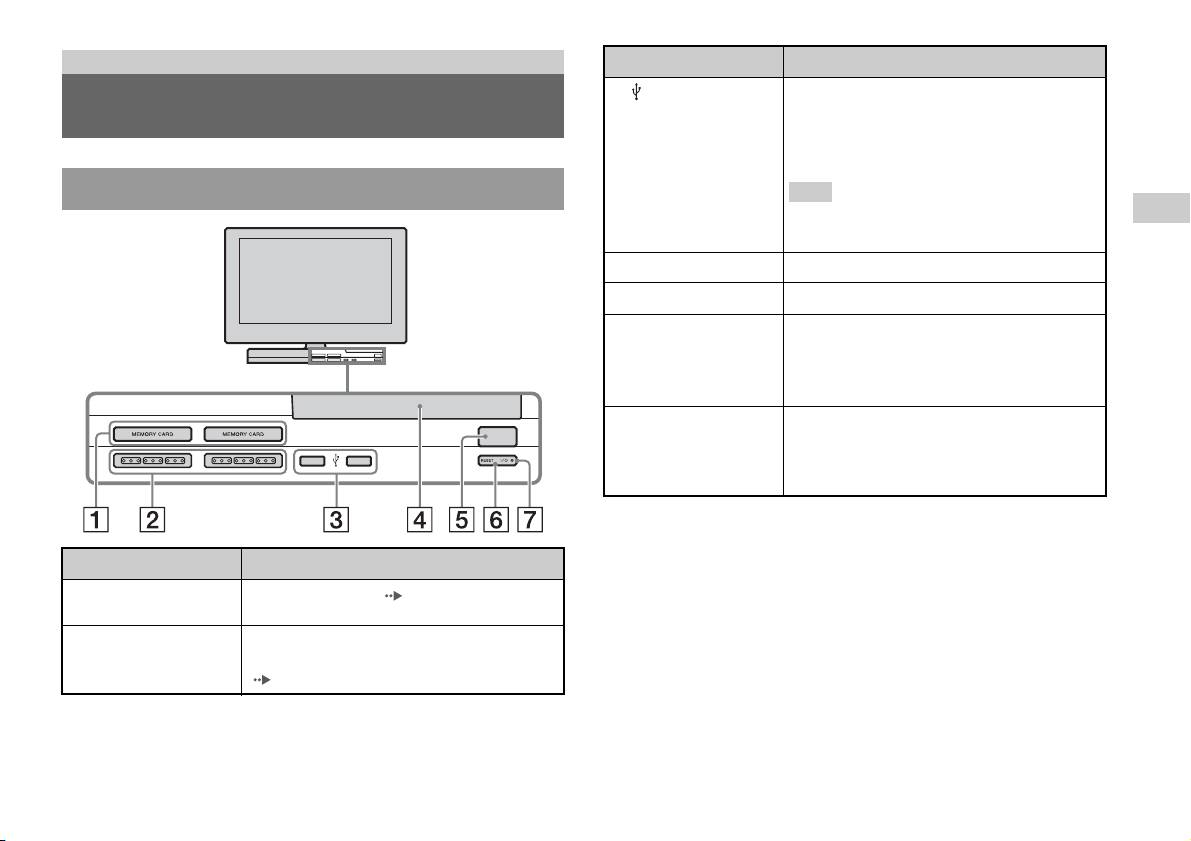
Part names
PlayStation
TM2, but not all are compatible. Refer to
the instructions supplied with the USB device for
more information.
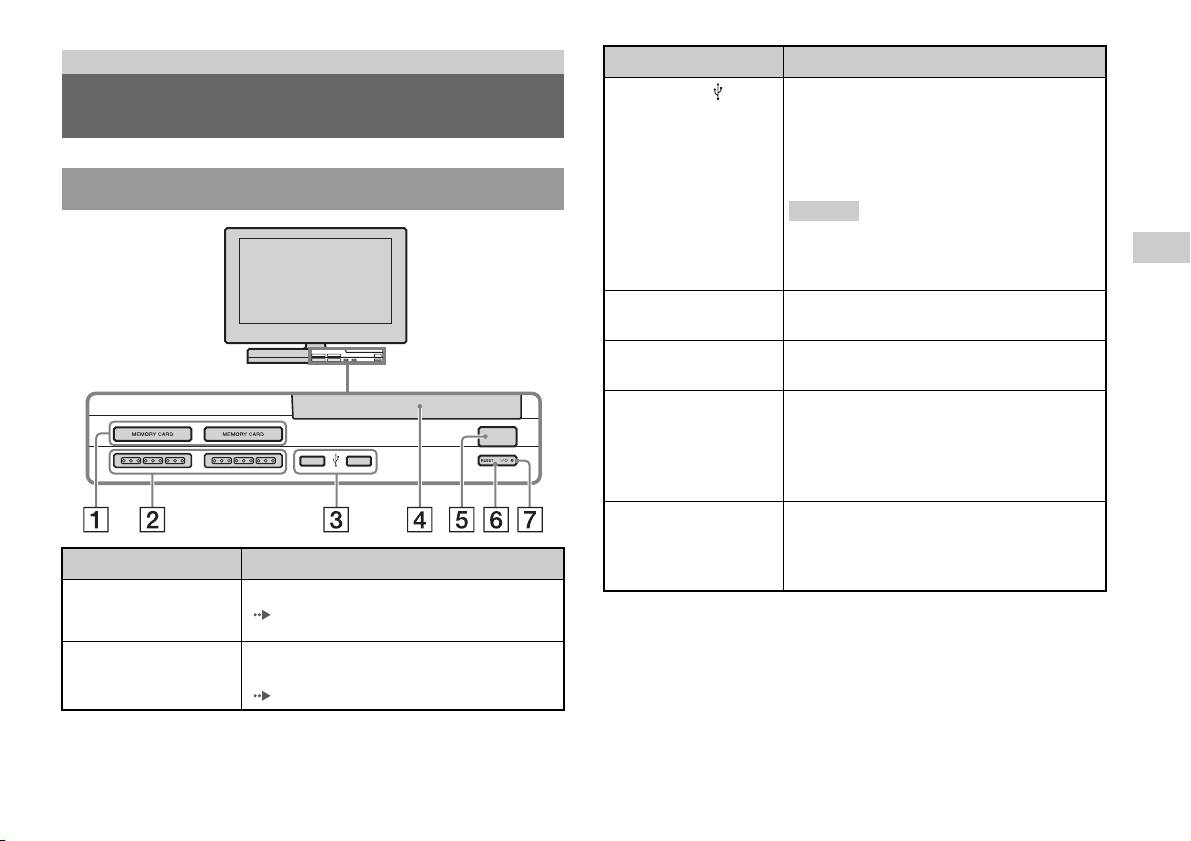
Built-in PlayStationTM2 front
Hint
GB
You cannot play photo, music, video files using the
PlayStation's USB connector.
Preparation
4 Disc cover
Press the OPEN button, and the cover slides open.
5 OPEN button
Press to open the disc cover.
6 "/1 (on/standby)/
Press to turn on the built-in PlayStationTM2, to enter
RESET button
standby mode, or to reset.
RESET: Press once.
Standby: Press for more than one second.
7 "/1 (on/standby)
Lights up in green when the built-in PlayStationTM2
OPEN
indicator
is on.
Lights up in red when the built-in PlayStation
TM2 is
in standby mode.
Connect to Description
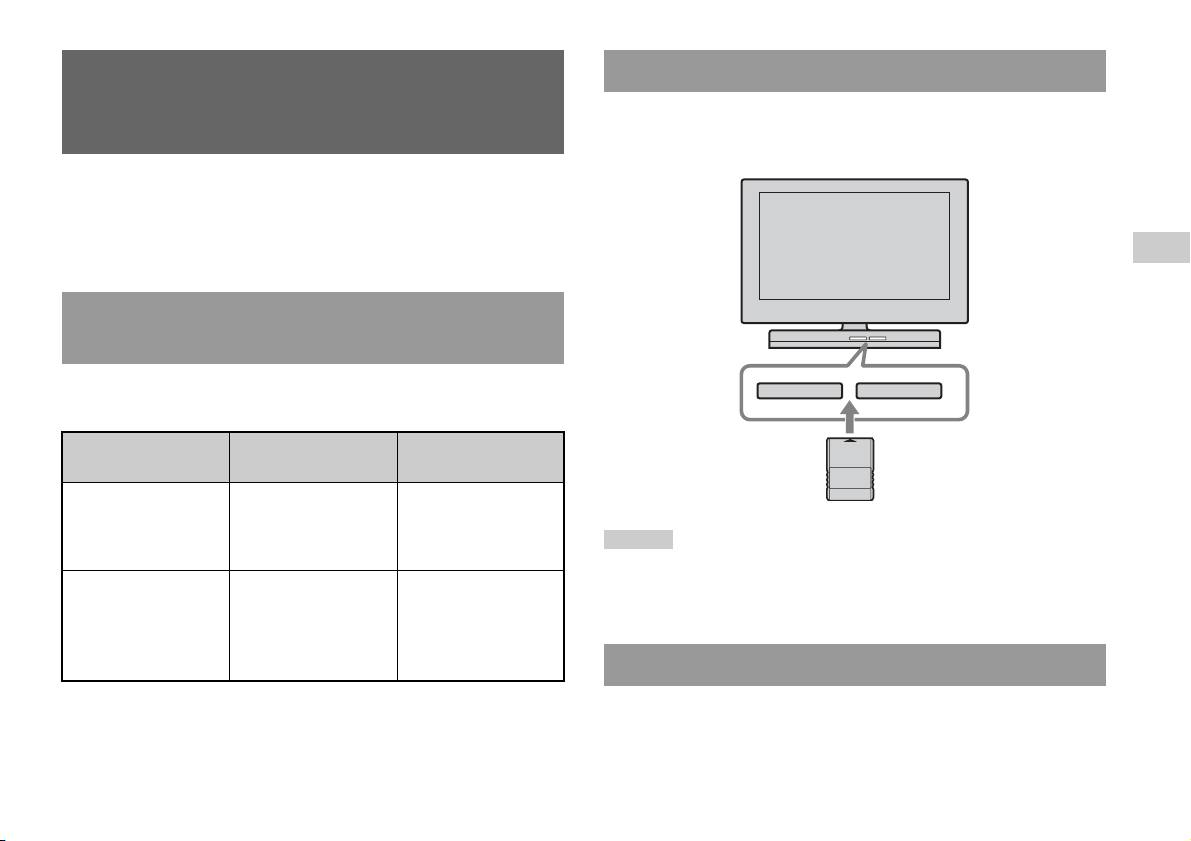
1 MEMORY CARD slot
Insert a memory card ( page 11).
1/2
2 Controller port 1/2
Insert the Analog Controller (DUALSHOCK®2)
into a controller port of the PlayStation
TM2
(page5).
Part names
3

Built-in PlayStationTM2 rear
Connect to Description
1 LAN
You can enjoy online games by connecting the
PlayStation
TM2 to a broadband network
( page 34).
Hint
To enjoy "BRAVIA" home network features,
connect to LAN of the TV using an Ethernet cable
( page 34).
4
Part names
1 2
Connect to Description
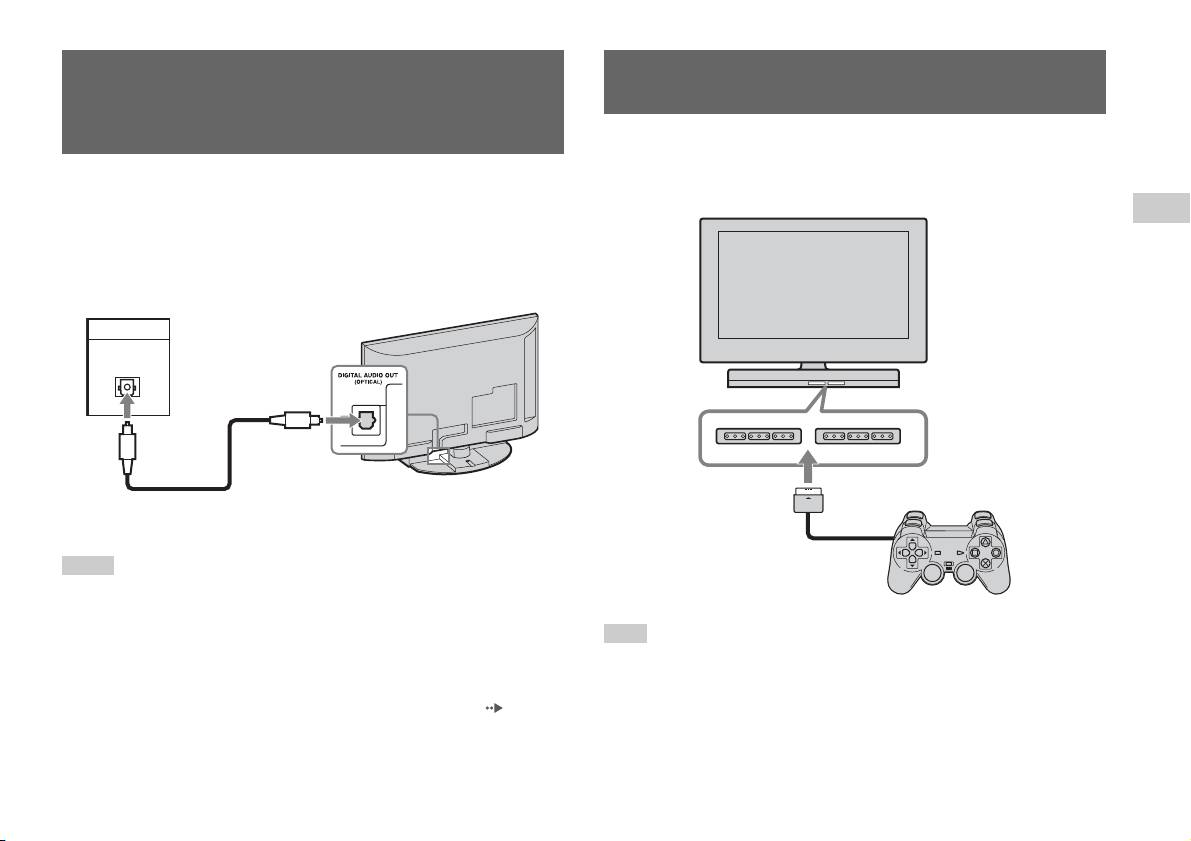
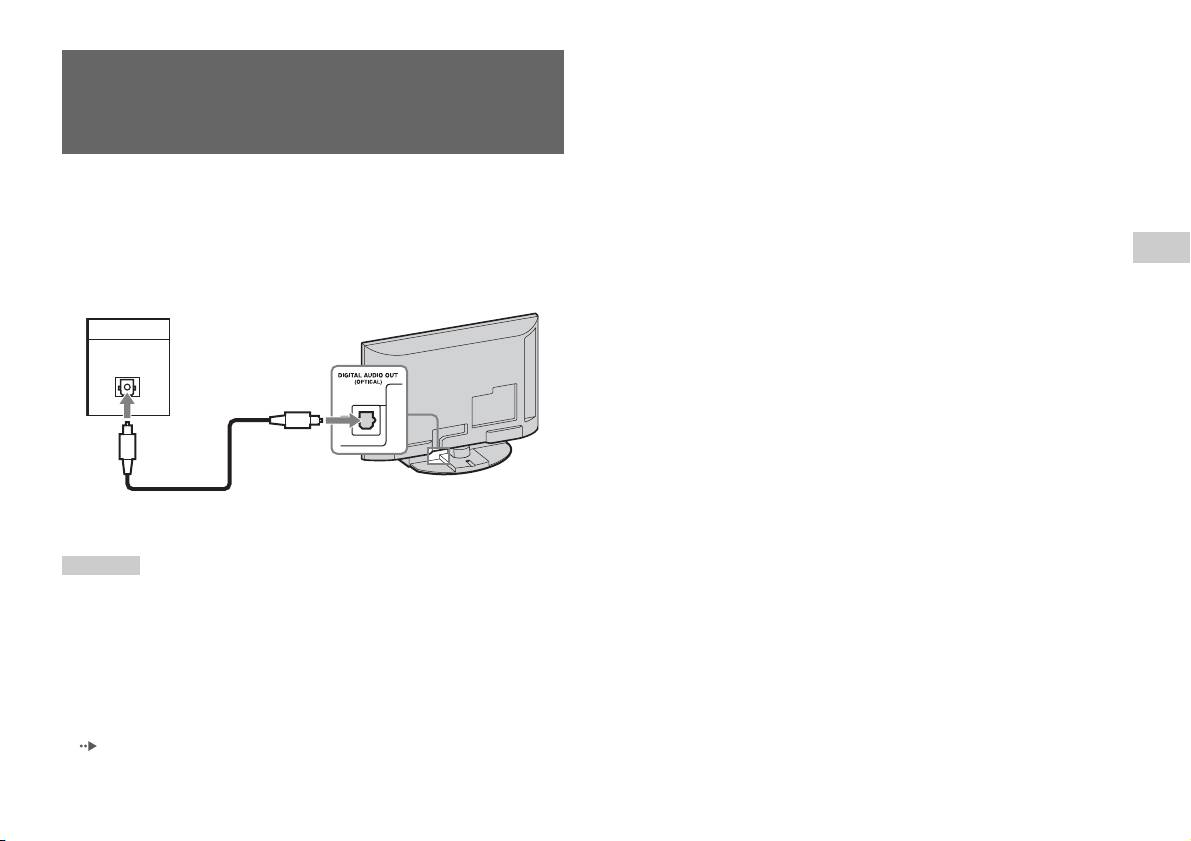
2 DIGITAL AUDIO OUT
You can listen to the built-in PlayStationTM2 sound
(OPTICAL)
on a Home theatre system connected via digital
input.
Connecting digital audio
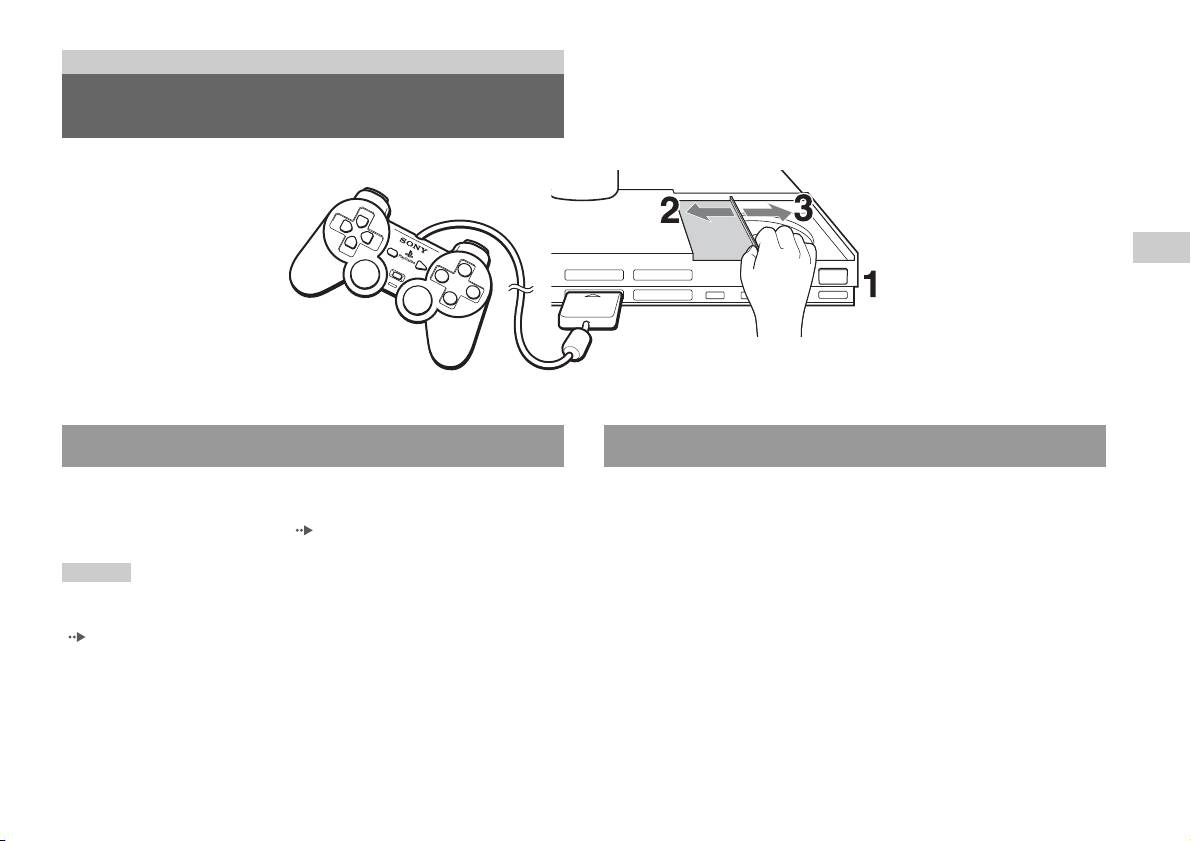
Connecting the controller
equipment
1 Insert the Analog Controller (DUALSHOCK®2) into a controller
port of the built-in PlayStation
TM2.
By using a commercially available optical digital cable, you can enjoy
surround sound with the effect of being in a movie theatre or a concert hall.
Built-in PlayStationTM2 front
GB
When connecting the built-in PlayStationTM2 to audio equipment with
Preparation
digital connectors, refer to the instructions supplied with the device to be
connected.
Connected device
Built-in PlayStationTM2 rear
DIGITAL IN
OPTICAL
Commercially available optical
digital cable
Hints
Analog Controller
(DUALSHOCK
®2)
• If you connect the built-in PlayStationTM2 to audio equipment using an optical
digital cable, it may affect the audio output of some PlayStation
TM2 format
software with the result that no sound is produced. If this happens, use a cable such
Hint
as the Audio cable (not supplied) and connect it to the TV's AUDIO OUT. Do not
Some software titles designate a specific controller port to be used. Refer to the
use an optical digital cable.
instructions supplied with the software for details.
• After connecting digital audio equipment, set "Digital Out (Optical)" to "On" in the
System Configuration menu. For details, see "Digital Out (Optical)" ( page 29).
• The DIGITAL AUDIO OUT (OPTICAL) connection outputs digital audio from
the built-in PlayStation
TM2.
Connecting digital audio equipment
5
Turning the built-in
PlayStation
TM2 on and off
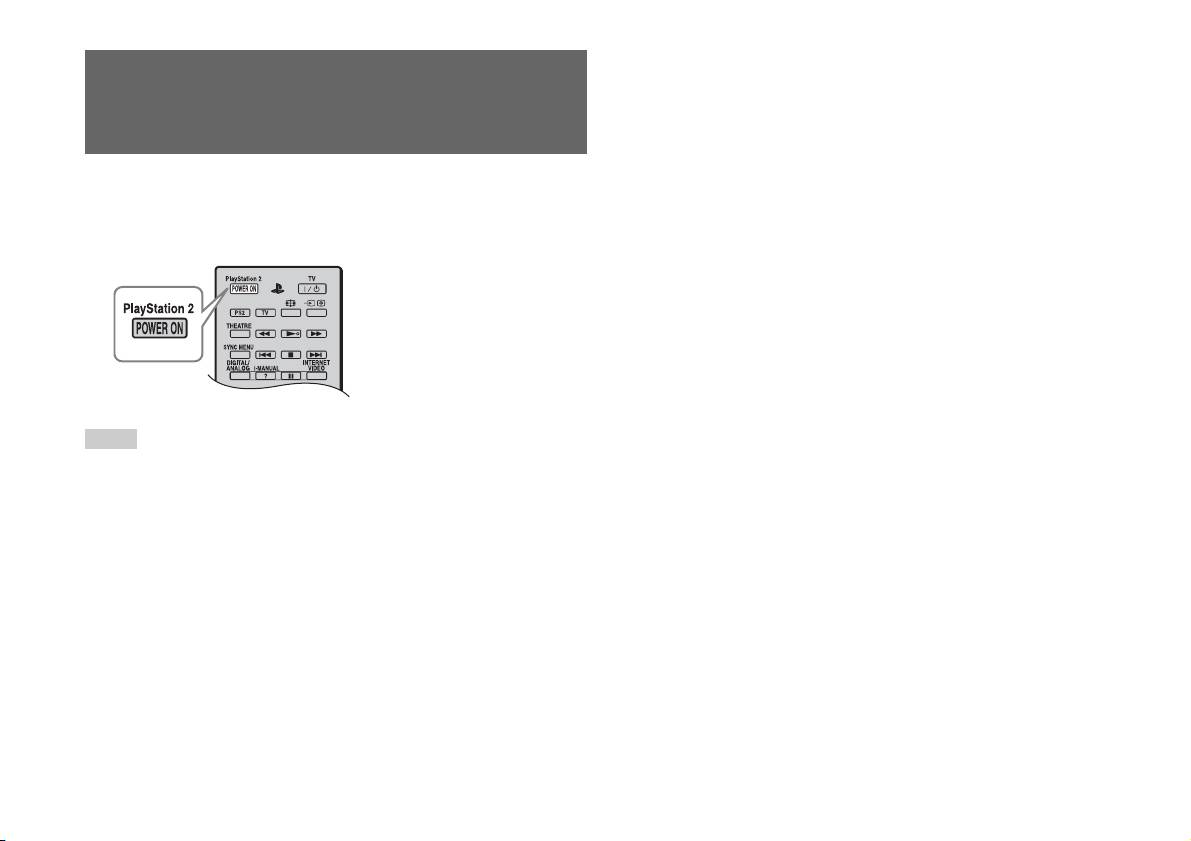
1 Press PlayStation 2 POWER ON on the TV's remote to turn on
the TV and the PlayStation
TM2. (The TV input mode is
automatically switched to PlayStationTM2.)
Hints
• When you turn the TV off, the PlayStationTM2 is also turned off. In addition, when
functions below are activated, the PlayStation
TM2 will also be turned off in
conjunction with the TV.
– Idle TV Standby
– Sleep Timer
– PC Power Management
– Reminder
–On Timer
–Picture Frame
• Do not access the memory card when a warning message (such as, "the TV will
soon turn off...") appears.
6
Turning the built-in PlayStationTM2 on and off
Games
Playing a game
GB
Games
OPEN
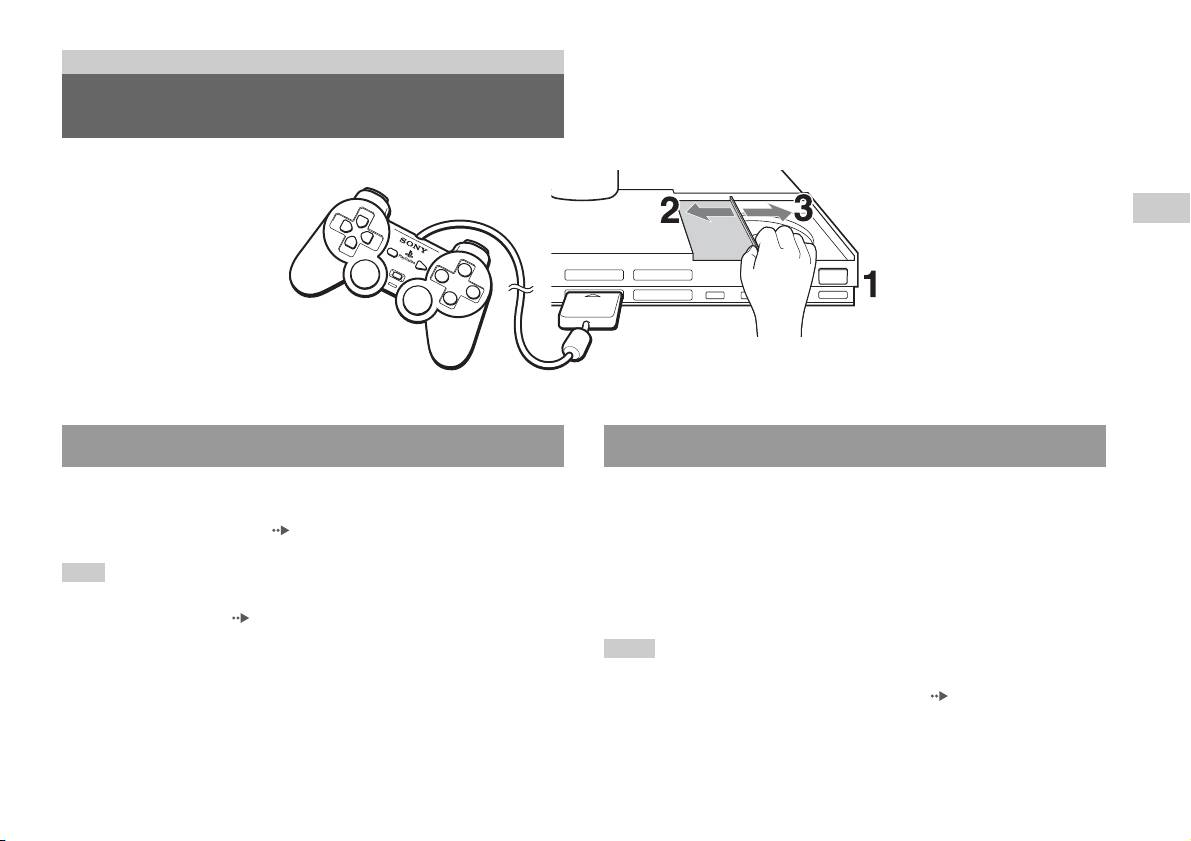
Before playing a game Starting a game
Check that the connections to the TV and audio equipment are correct and
1 Press the OPEN button to release the disc cover lock.
that the precautions have been met.
• "Connecting the controller" ( page 5)
2 Slide the disc cover to the left, then place the disc with the
label side facing up.
Hint
To play online games, you first need to connect to and set up a network. See
3 Close the disc cover by sliding it to the right until it is locked.
"Connecting to a network" ( page 34) for details.
Hints
• Be sure to lock the disc cover to play a disc.
• You can also start a game from the Browser screen ( page 27).
• If you turn on the built-in PlayStation
TM2 after inserting a disc, the game will start
automatically.
Playing a game
7

To reset a game
Press the \/1 (on/standby)/RESET button on the built-in PlayStationTM2
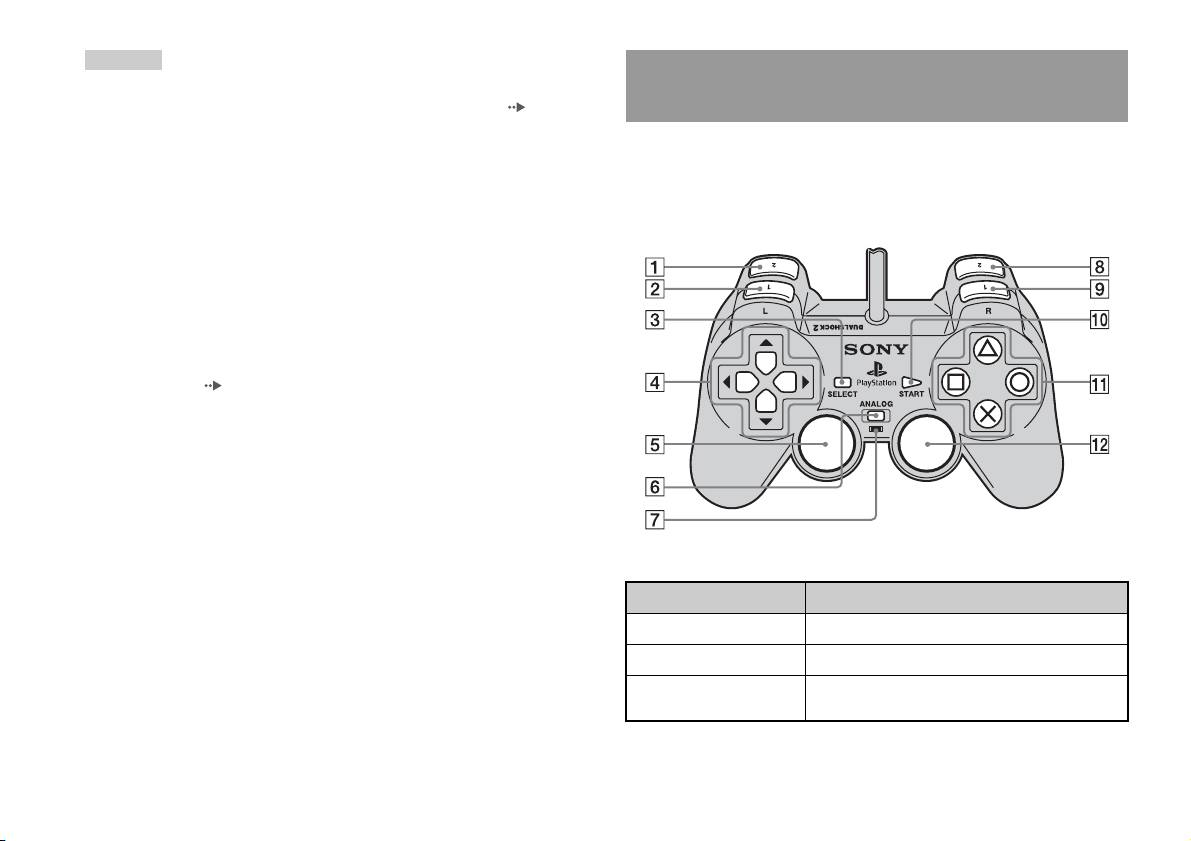
Using the Analog Controller (DUALSHOCK®2)
front. Do not accidentally press the @/1/RESET button while playing a
The Analog Controller (DUALSHOCK
®2) is equipped with a pressure-
game, as doing so will cause the game to reset.
sensitive button function. It also has a vibration function.
To end a game
Part names
Press the "/1 (on/standby)/RESET button on the built-in PlayStationTM2
front after saving game data, and then remove the disc ( page 3).
RESET: Press once.
Standby: Press for more than one second.
Button/Switch Description
1 L2 button
2 L1 button
3 SELECT button
4 Directional buttons
8
Playing a game
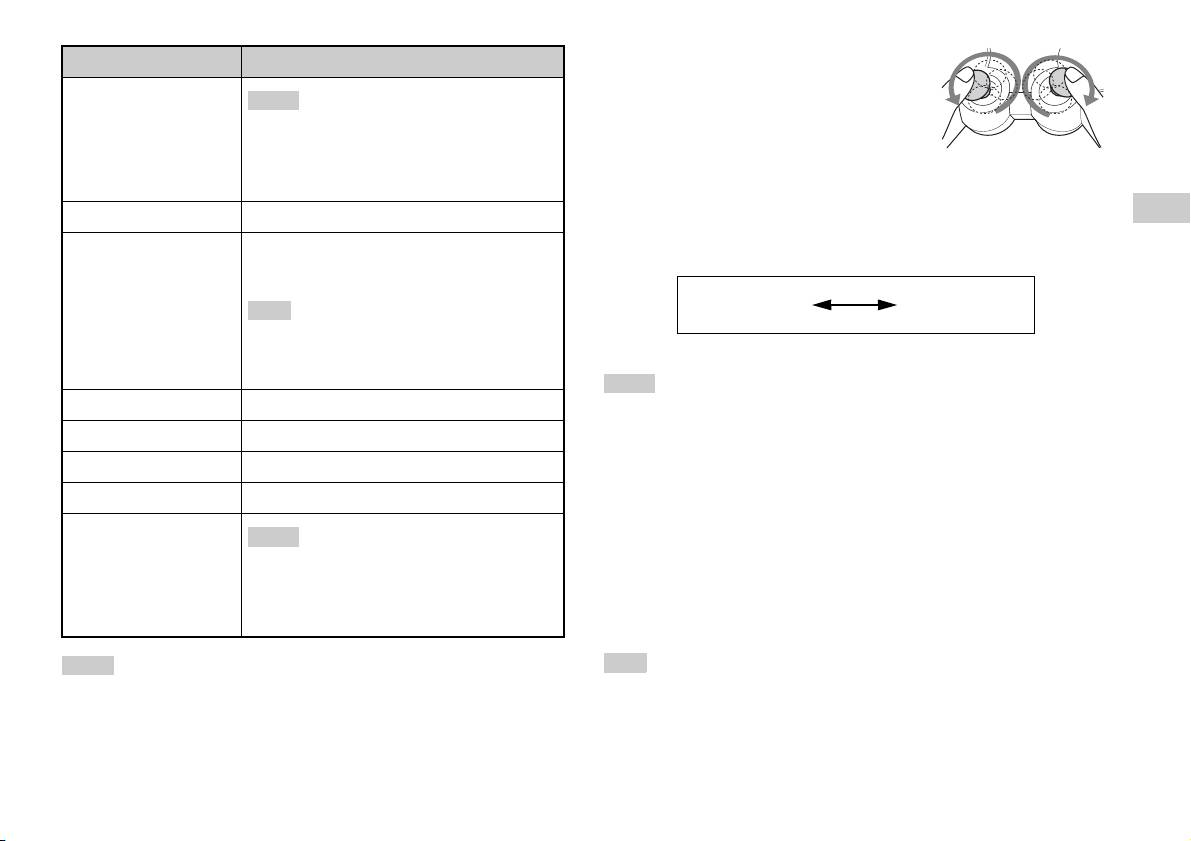
• Before using the Analog Controller
Button/Switch Description
(DUALSHOCK
®2), with the built-in
5 Left analog stick/ L3
PlayStation
TM2 turned on, rotate the left and right
Hints
button
analog sticks once with your thumbs. Do not twist
• The left analog stick and L3 button, function only
the analog sticks, but rotate as if drawing a circle as
in analogue mode (indicator: red).
shown in the diagram.
• The L3 button function when the analog stick is
pressed.
About mode switching
6 ANALOG mode button
The ANALOG mode button can be used to switch between two modes.
GB
Switch between digital mode and analogue mode.
Switch to the appropriate mode for use. Note, however, that some software
Games
7 Mode indicator
Digital mode: Lights off.
titles make this adjustment automatically.
Analogue mode: Lights up in red.
Digital mode
Analog mode
Hint
(indicator: off)
(indicator: red)
Depending on the software, you may not be able to
switch modes even if you press the ANALOG mode
button.
Hints
8 R2 button
• When using the Analog Controller in digital mode, the left and right analog sticks
do not function. Also, the pressure-sensitive button function is turned off.
9 R1 button
• Depending on the software, you may not be able to switch modes even if you press
q; START button
the ANALOG mode button.
qa f/a/×/s buttons
About analog controls
qs Right analog stick/ R3
Hints
• When playing a PlayStationTM2 format software title, you can use all
button
buttons in analog mode except for the START, SELECT, L3 and R3
• The right analog stick and R3 button, function
only in analogue mode (indicator: red).
buttons.
• The R3 button function when the analog stick is
• When playing a PlayStation
TM format software title, only the left and
pressed.
right analog sticks can be used in analog mode.
Hints
Hint
• Depending on the software, the buttons for use in analogue mode may be limited.
Depending on the software, the buttons for use in analog mode may be limited. Refer
Refer to the instructions supplied with the software for details.
to the instructions supplied with the software for details.
• The vibration function can be set to on or off in the software options menu.
Depending on the software, the vibration function may be set to on automatically.
Playing a game
9
About the vibration function
The vibration function can be set to ON or OFF in the software options
Using Memory Cards
menu.
Hint
You can save and load game data using a Memory Card (sold separately).
Depending on the software, the vibration function may be set to "On" automatically.
You can also delete game data or copy game data from one Memory Card
to another.
About using the Analog Controller (DUALSHOCK®)
About Memory Card types
(SCPH-110 E)
There are two types of Memory Cards. Select a Memory Card suitable for
You can use the Analog Controller (DUALSHOCK®) (SCPH-110 E) with
the software in use.
the built-in PlayStation
TM2, but the functions of the buttons in analog mode
may be different from those of the Analog Controller (DUALSHOCK
®2).
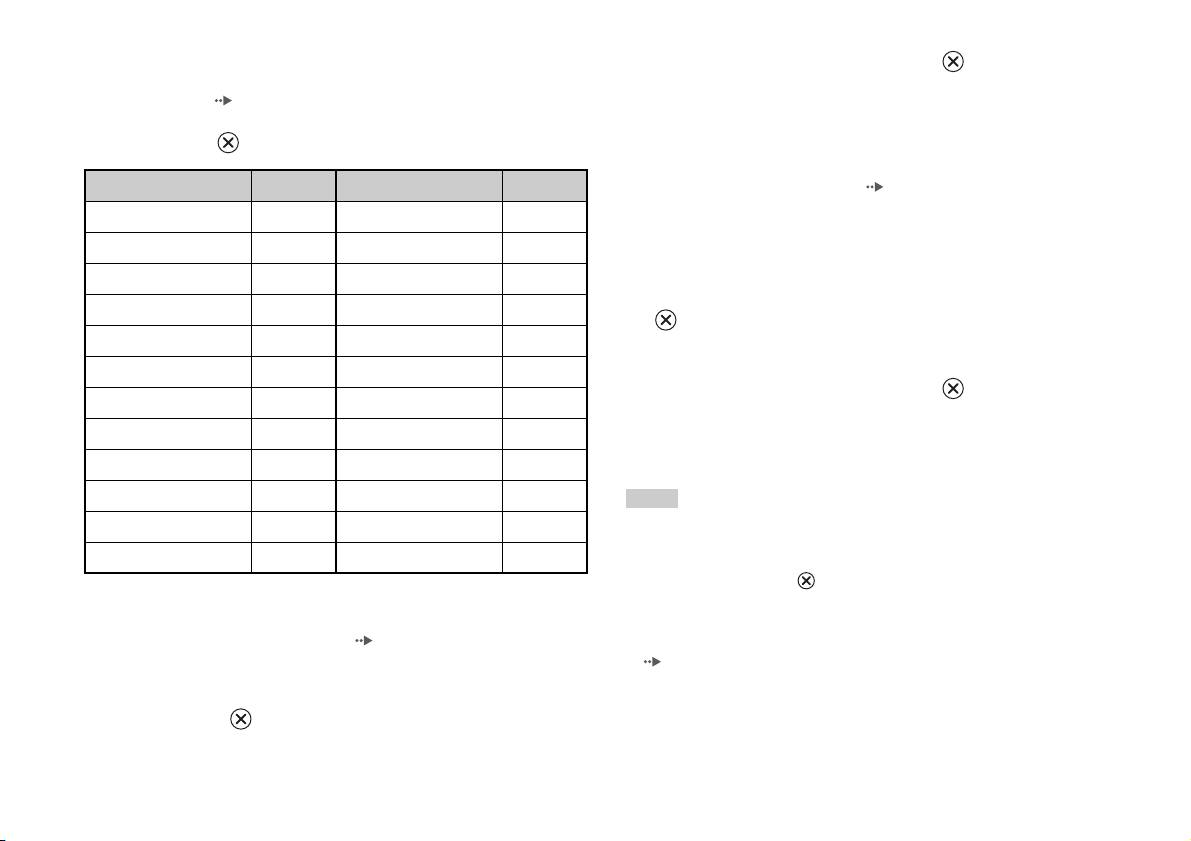
Memory Card type Compatible software Amount of memory
Only the left and right analog sticks can be used in analog mode.
Memory Card (8MB) (for
PlayStation
TM2 format
Approx. 8 MB
Hint
PlayStation
TM2)
software
(SCPH-10020 E)
Not all PlayStationTM2 format software titles support the use of the Analog Controller
(DUALSHOCK
®) (SCPH-110 E). The Analog Controller (DUALSHOCK®2)
Memory Card
PlayStation
TM format
15 memory blocks
should be used in such cases.
(SCPH-1020 E)*
software
(approx. 120 KB)
* This product is no
longer manufactured.
MagicGate™ is a term of copyright protection technology developed by Sony
Corporation
10
Using Memory Cards
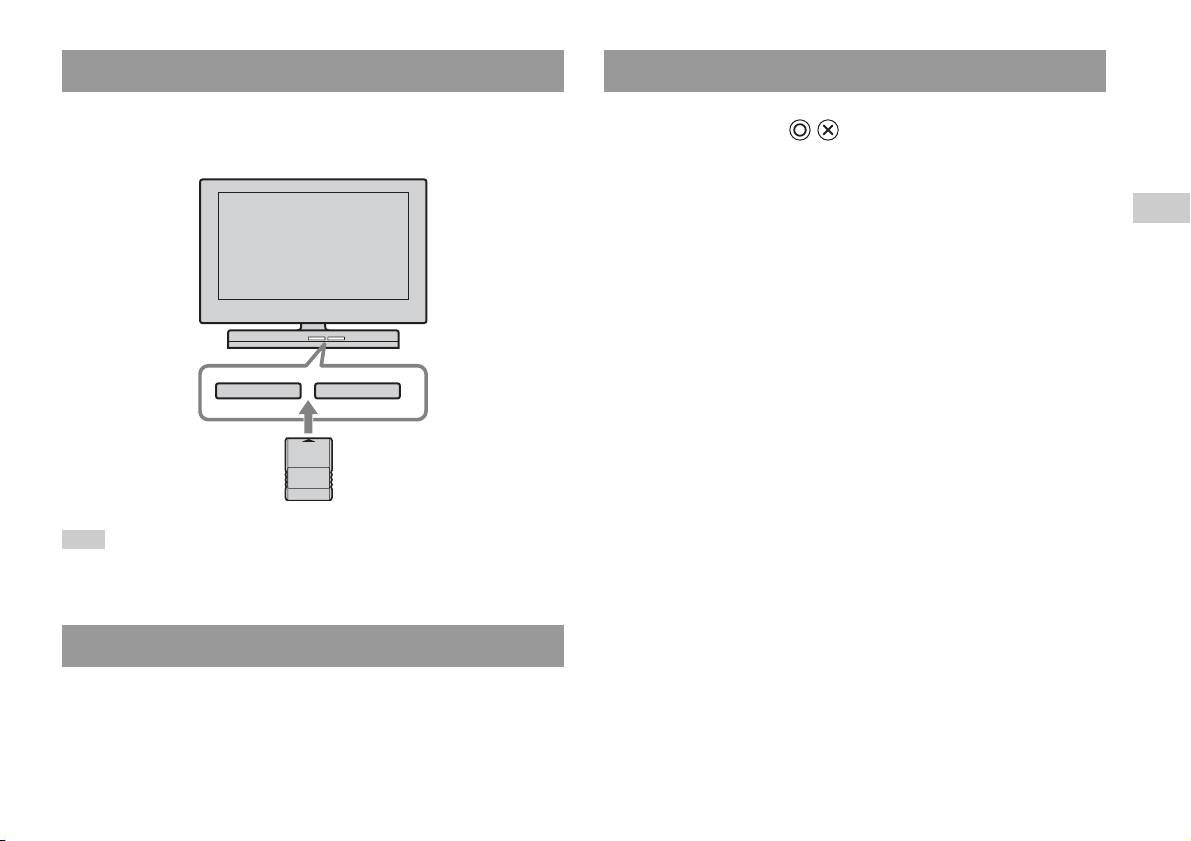
Inserting a Memory Card
Copying or deleting game data
Insert the Memory Card into a MEMORY CARD slot on the built-in
You can delete saved data or copy data to another memory card. Use
PlayStation
TM2 front.
directional buttons and the button of the controller to select items.
Built-in PlayStationTM2 front
1 Turn on the built-in PlayStationTM2 with no disc inserted, and
then insert a memory card.
GB
Games
2 Select "Browser", and then select the memory card you want
to copy or delete data from.
3 Select the icon for the data item, and select "Copy" or
"Delete".
4 Follow the instructions that appear on the set-up screen.
MEMORY CARDMEMORY CARD
Hint
Some software titles designate a specific MEMORY CARD slot to use. Refer to the
instructions supplied with the software for details.
Saving or loading game data
Depending on the software, the procedure for saving or loading may vary.
Refer to the instructions supplied with the software for details.
Using Memory Cards
11

Audio CDs
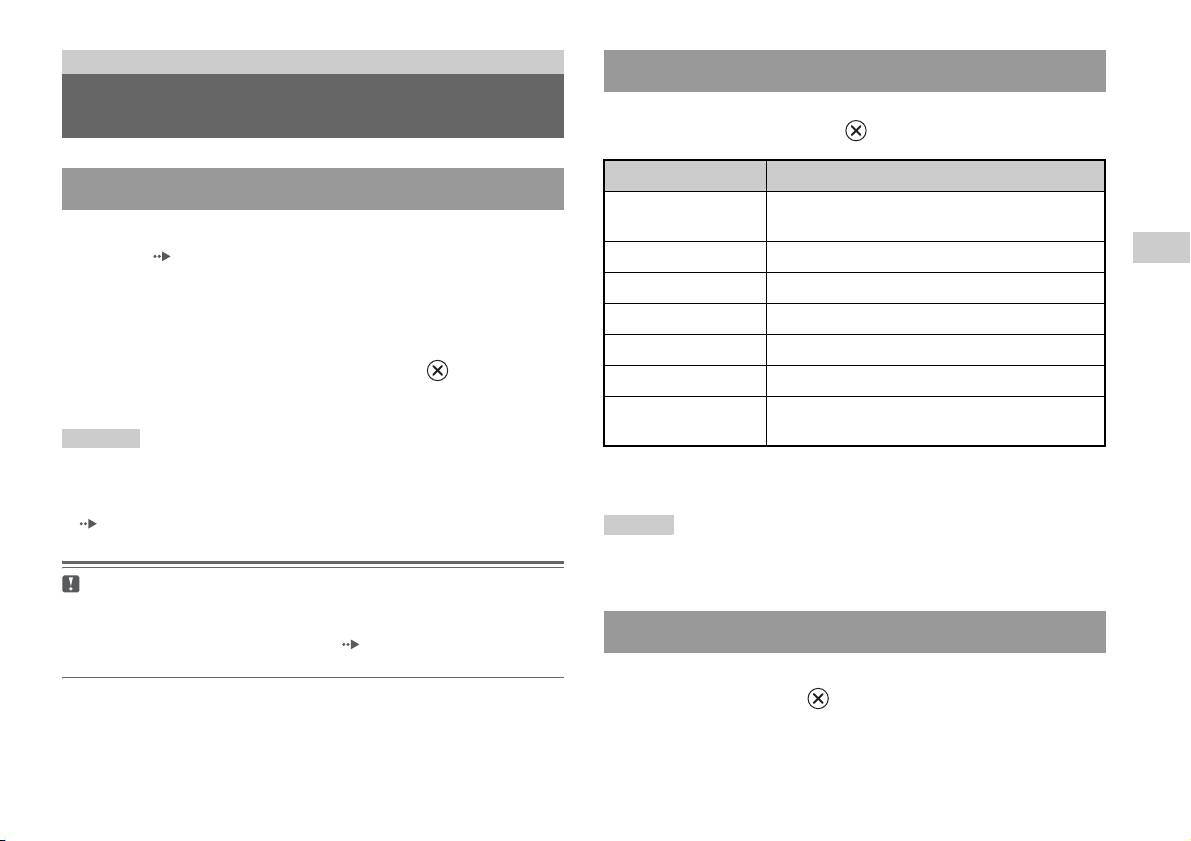
Operating the CD player during playback
Playing an audio CD
Using the directional buttons, select the icon for the desired track and then
press the button.
Icon (button*) Function
Playing a CD
. (L1 button) Go to the beginning of the current or previous track
1 Turn on the built-in PlayStationTM2 and insert the disc
m (L2 button) Fast reverse
(page7).
M (R2 button) Fast forward
Follow steps 1 to 3 of "Starting a game".
The track numbers are displayed.
> (R1 button) Go to the beginning of the next track
N (START button) Start playback
2 Using the directional buttons, select the track number you
X (START button) Pause playback
want to play and then press the button.
Playback begins.
x (SELECT button) Stop playback
* You can operate directly by pressing the analog controller (DUALSHOCK®2)
Hints
buttons shown in parentheses.
• If you turn on the built-in PlayStationTM2 after inserting a disc, the track numbers
are displayed automatically.
Hint
• You can also start playback from the Browser screen ( page 27).
You can also use the DVD Remote Control (for PlayStationTM2) (sold separately).
Caution
Ending audio CD playback
To play an audio CD recorded in DTS format, you must turn the volume fully
down, and then connect a device with a DTS decoder to the DIGITAL OUT
(OPTICAL) connector ( page 5). Note that an extremely loud noise may be
1 Using the directional buttons, select x and then press the
emitted.
button.
Playback stops. Press the OPEN button on the built-in PlayStationTM2
front to remove the disc.
12
Playing an audio CD

5 Select the audio CD icon, and then press the button.
Playing in various modes
The track numbers are displayed, and the setting option is shown in the
You can set for "Play Mode" and "Repeat".
lower left of the screen.
Play Mode Normal Plays tracks as recorded on the CD
6 Select the desired track, and then press the button.
Playback begins.
Program Plays tracks in a specified order
GB
Shuffle Plays tracks in a random order
Hints
Audio CDs
Repeat Off Does not play the CD repeatedly
• You can also access the Play Options screen from the screen displaying the tracks
by selecting the Audio CD icon in the upper left corner of the screen and pressing
All Plays all tracks repeatedly
the button.
• You can set "Play Mode" and "Repeat" at the same time.
1 Plays a track repeatedly
1 At the Browser screen ( page 27), use the directional
buttons to select the audio CD icon and then press the
button.
The Play Options screen is displayed.
2 Select "Play Mode" or "Repeat", and then press the
button.
3 Select the desired setting, and then press the button.
If you select "Program", the screen for specifying track order will be
displayed. Select the tracks you want to play.
4 Press the button.
The Browser screen is displayed.
Playing an audio CD
13
DVDs
Using the Control Panel
Watching a DVD
1 Start playback of the DVD ( page 16).
2 Press the SELECT button.
You can operate the DVD player using the following methods.
The Control Panel is displayed. If you press the SELECT button again,
• Using the on-screen Control Panel
the display will change its position on the screen.
• Operating directly using the Analog Controller (DUALSHOCK
®2)
• Using the DVD Remote Control (for PlayStation
TM2) (sold separately)
The following instructions assume use of the Control Panel to operate the
DVD player. Some operations may be different depending on the method
used.
Hints
• For details about playing a DVD, refer to the instructions supplied with the DVD.
• The built-in PlayStation
TM2 plays disc content as recorded in the DVD software.
3 Using the directional buttons, select an icon and then press
Note that not all features are available on all DVDs.
the button.
Hint
To turn off the Control Panel, press the SELECT button (once or twice), or press the
button.
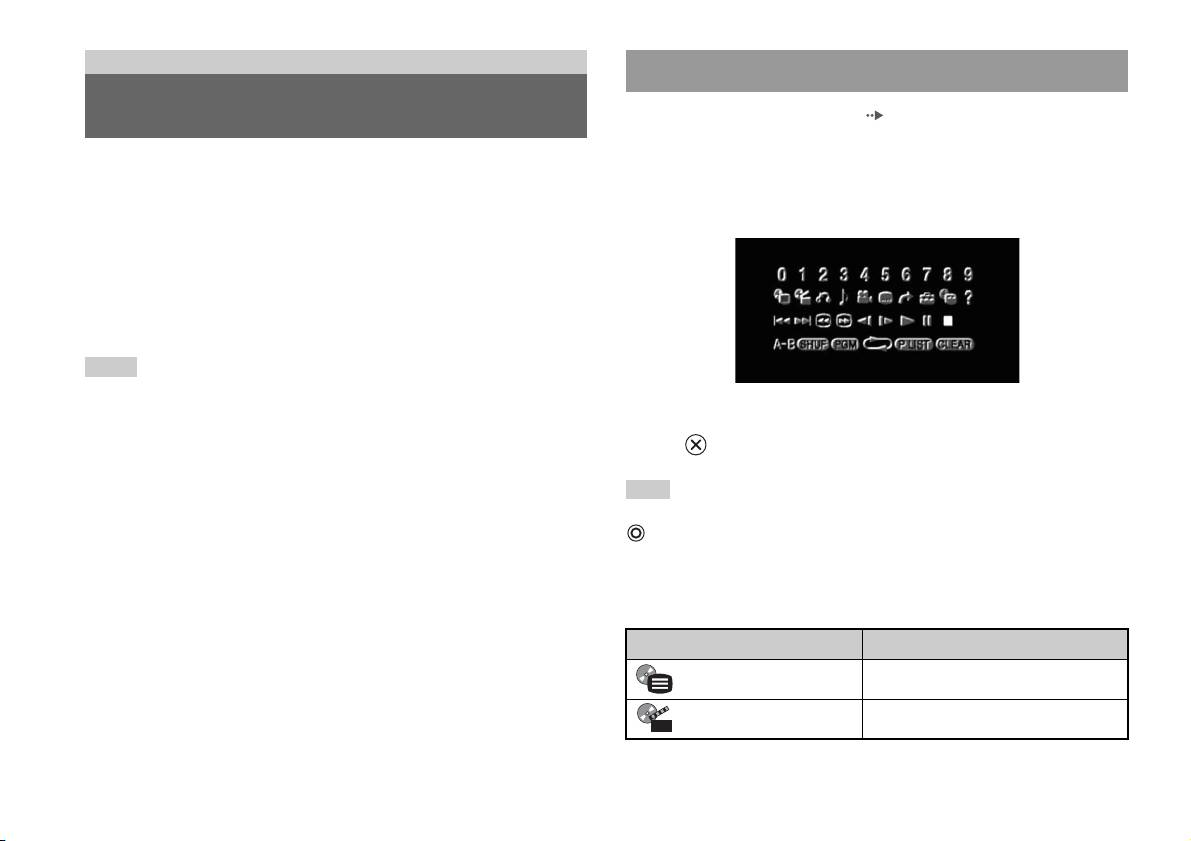
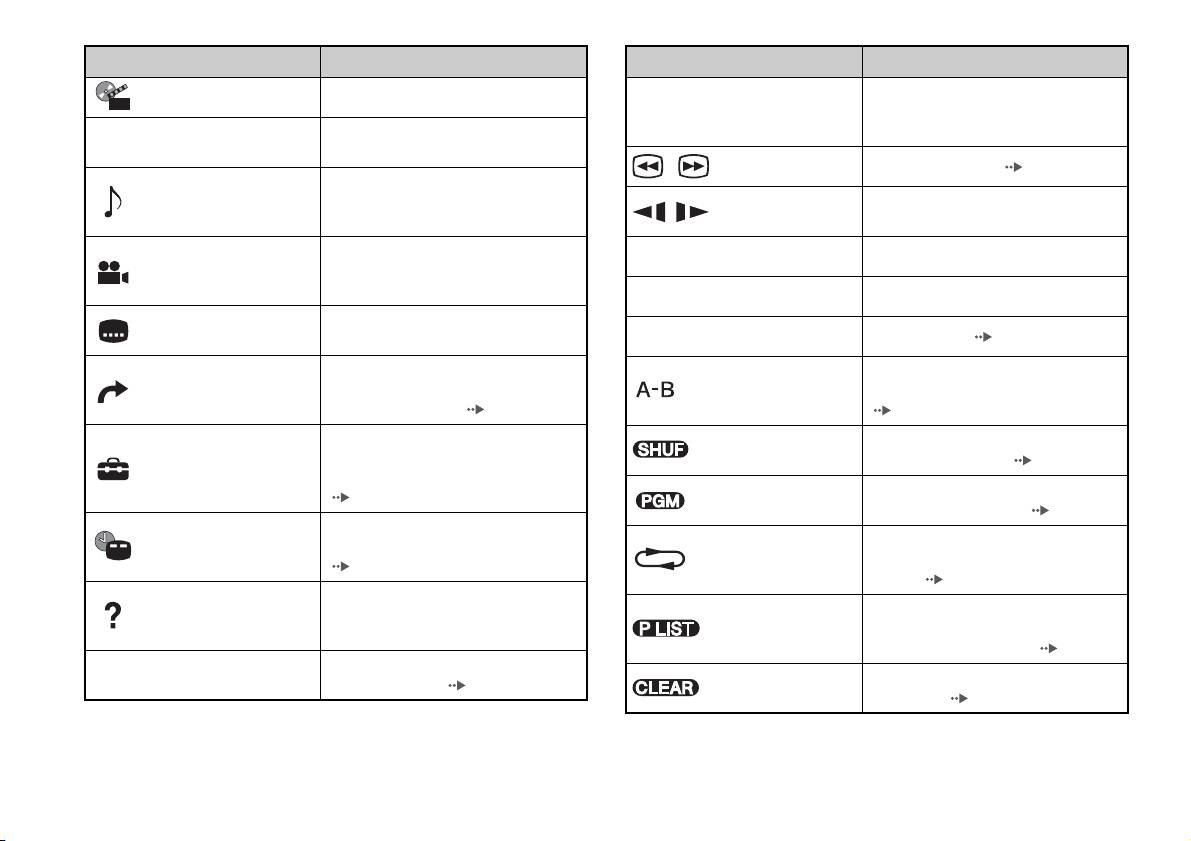
Control Panel item list
You can access the following options in the Control Panel.
Icon Function
Menu Displays the DVD-Video menu
Top Menu Displays the DVD-Video menu
14
Watching a DVD
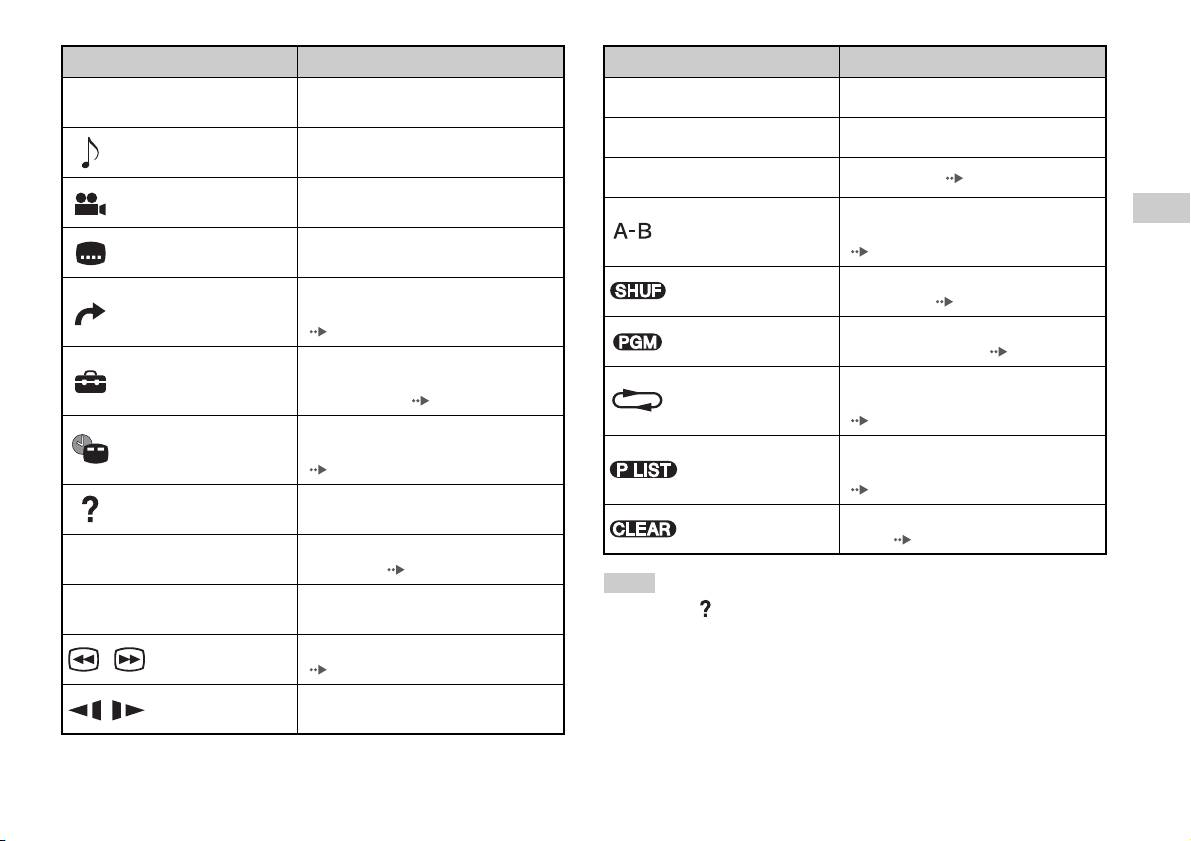
Icon Function
Icon Function
Returns to the previously selected screen
Return
N
Play Starts playback
O
within the DVD's menu
X
Pause Pauses playback
Displays and changes audio options on
Audio Options
DVDs with multiple audio tracks
x
Stop Stops playback ( page 16)
Displays and changes viewing angles on
Angle Options
DVDs recorded with multi-angle options
Specifies a scene for playback, and starts
GB
A-B Repeat
playback of the scene that has been set
DVDs
Displays and changes subtitle options on
Subtitle Options
( page 19)
DVDs with subtitle options
Begins playback of titles or chapters in a
Skips to the selected title, chapter or the
Shuffle Play
random order ( page 19)
Go To
specified time, and starts playback
( page 16)
Begins playback of titles or chapters in a
Program Play
programmed sequence ( page 18)
Displays and changes options for
Setup
language, picture quality, Parental Control
Selects repeated playback of all the titles
level, audio, etc. ( page 20)
Repeat Play
on the disc, or one title or one chapter
( page 19)
Displays the current title or chapter
Time Display
number, the elapsed time, etc.
For DVD-RW discs (VR mode), selects
( page 17)
Original/Play List
Original or Play List content to play
( page 18)
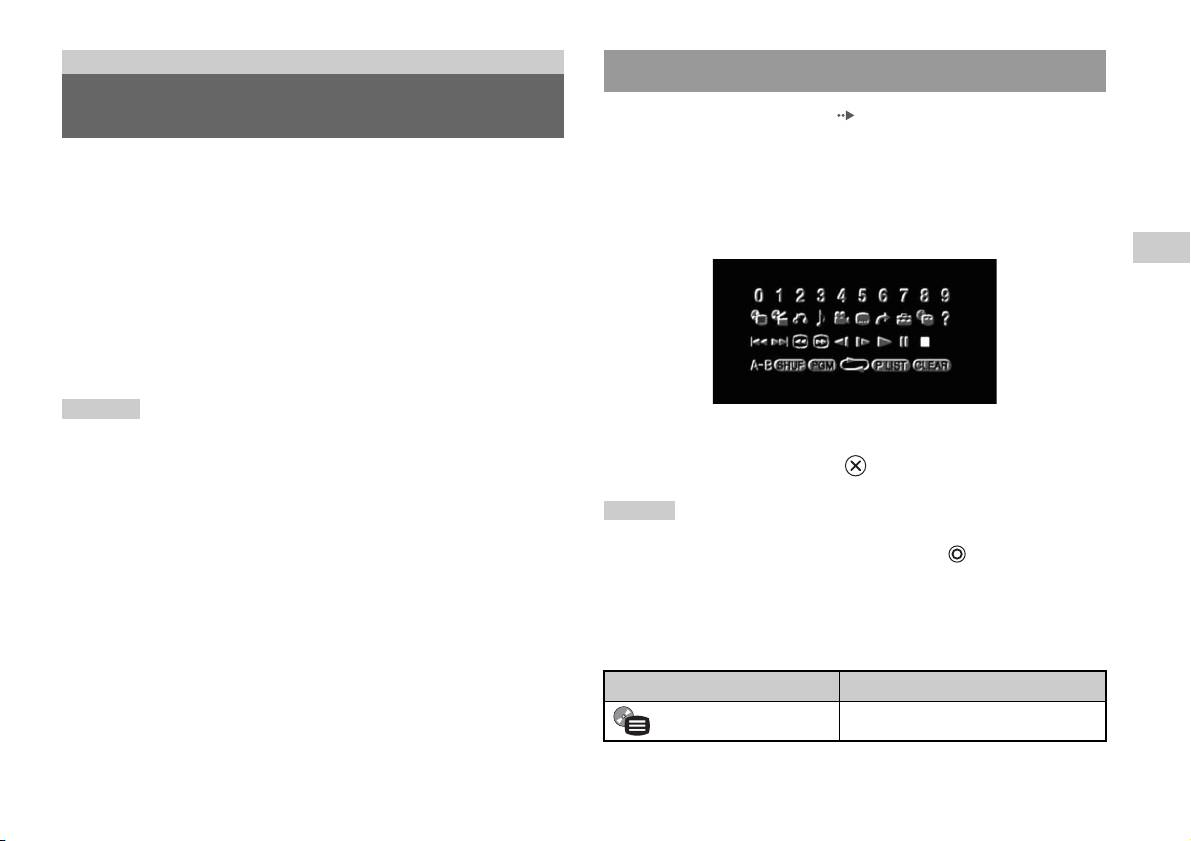
Displays the direct button functions of the
Help
Analog Controller (DUALSHOCK
®2)
Clears selected numbers or playback
Clear
modes ( page 20)
Used to enter the number of a chapter you
0~9
Go to Chapter
want to play ( page 16)
Hints
Returns/skips to the beginning of the
./> Previous/Next
• You can use " " to check the options that can be accessed directly using the
current, previous or next chapter
buttons of the Analog Controller. To access the options directly using the
Fast reverses/forwards playback
controller, you must clear the Control Panel from the screen.
/Search
( page 17)
• Depending on the playback mode, some options may not be available or cannot be
adjusted.
Changes to playback/reverse playback in
/Slow
slow-motion
Watching a DVD
15
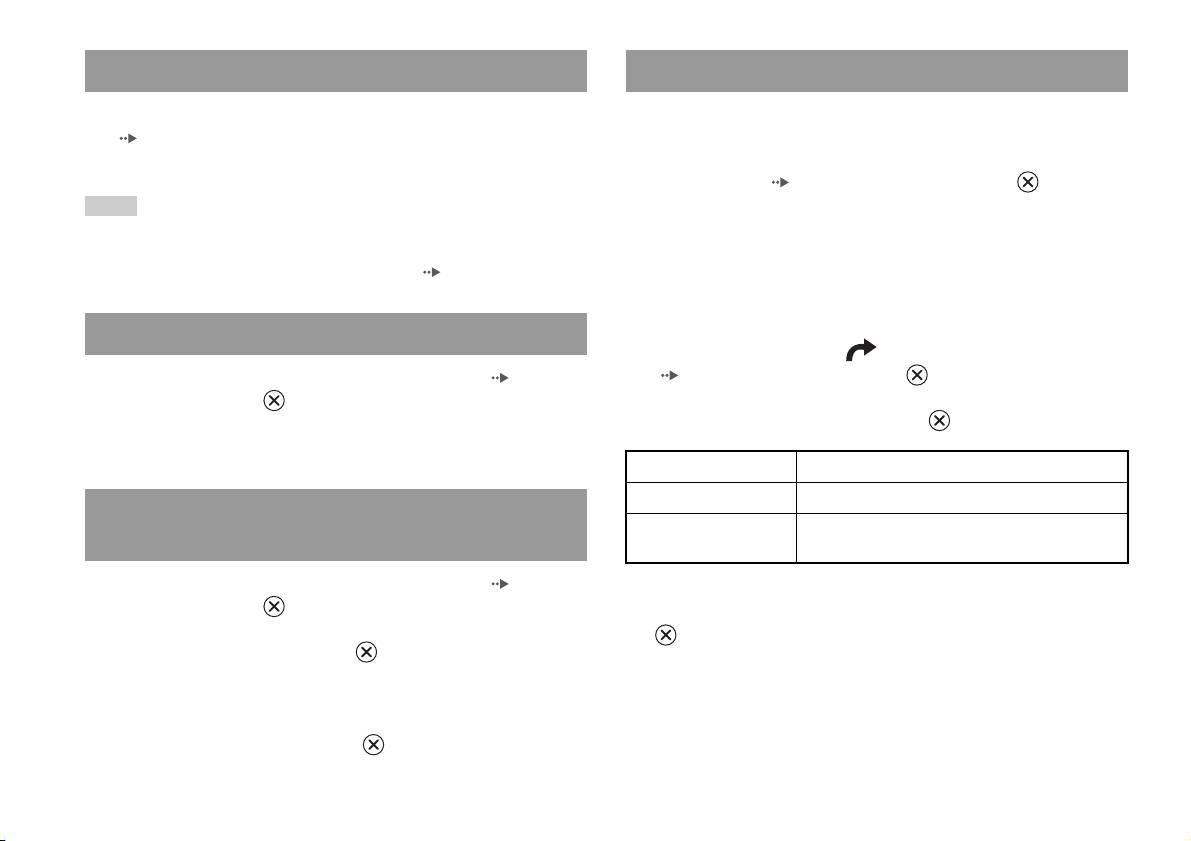
Playing a DVD
Selecting a specific scene for playback
1 Turn on the built-in PlayStationTM2 and insert a disc
Selecting a scene by chapter number
(page7).
Follow steps 1 to 3 of "Starting a game". Playback begins.
1 During playback, select the desired chapter number in the
Control Panel ( page 14) and then press the button.
Hints
Playback of the selected chapter begins. If you want to play a chapter
• If you turn on the built-in PlayStationTM2 after inserting a disc, playback will begin
with a single digit number (i.e. 1-9), enter a leading zero. For example,
automatically.
enter as "01".
• You can also start playback from the Browser screen ( page 27).
Selecting a scene by title number, chapter number or by
specifying the time
Ending DVD playback x
1 During playback, select in the Control Panel
1 During playback, select x in the Control Panel ( page 14)
( page 14) and then press the button.
and then press the button.
Playback stops. Press the OPEN button on the built-in PlayStationTM2
2 Select an item, and then press the button.
front, and then remove the disc.
Title Specifies the title number
Chapter Specifies the chapter number
Playing a DVD from the last stopping point
C XX:XX:XX
Specifies the elapsed time for the chapter (or title)
(Resume Play)
(or T XX:XX:XX)
1 During playback, select x in the Control Panel ( page 14)
and then press the button.
3 Select the numbers for the desired scene, and then press the
button.
2 Select N, and then press the button.
Playback of the selected chapter begins.
Playback begins from the point where you stopped the disc in step 1.
To clear Resume Play
After step 1, select x and then press the button.
16
Watching a DVD
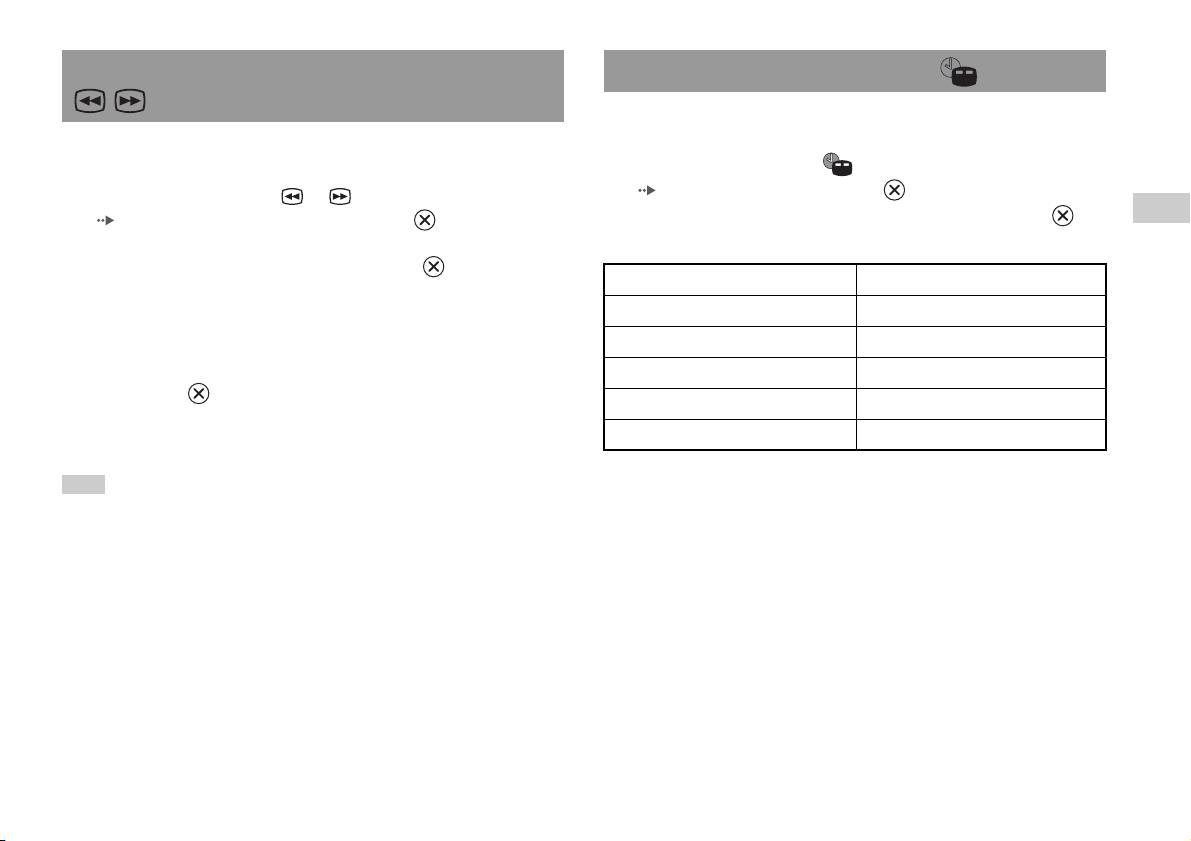
Finding a particular point on a DVD (Search) Displaying playback information
You can display information such as the current title number or elapsed
time.
You can search either forwards or backwards to quickly locate a particular
point on a DVD.
1 During playback, select in the Control Panel
( page 14) and then press the button.
1 During playback, select or in the Control Panel
The display changes as shown below each time you press the
GB
( page 14) and then press and hold the button.
button.
DVDs
Search speed changes as shown below when you press either the up or
down directional button while holding down the button.
Title X Chapter X Title number and chapter number
• Search 3
• Search 2
Title X Chapter X C XX:XX:XX Elapsed time of current chapter
• Search 1
Title X Chapter X C - XX:XX:XX Remaining time of current chapter
•Slow
Title X Chapter X T XX:XX:XX Elapsed time of current title
2 Release the button when you reach the point you are
Title X Chapter X T - XX:XX:XX Remaining time of current title
searching for.
(Off)
Playback returns to normal speed.
Hint
To use the Analog Controller to Search during playback, press and hold down the L2
or R2 button to begin searching. Use the directional buttons to change speeds.
Release the L2 or R2 button when you reach the point you are searching for.
Watching a DVD
17
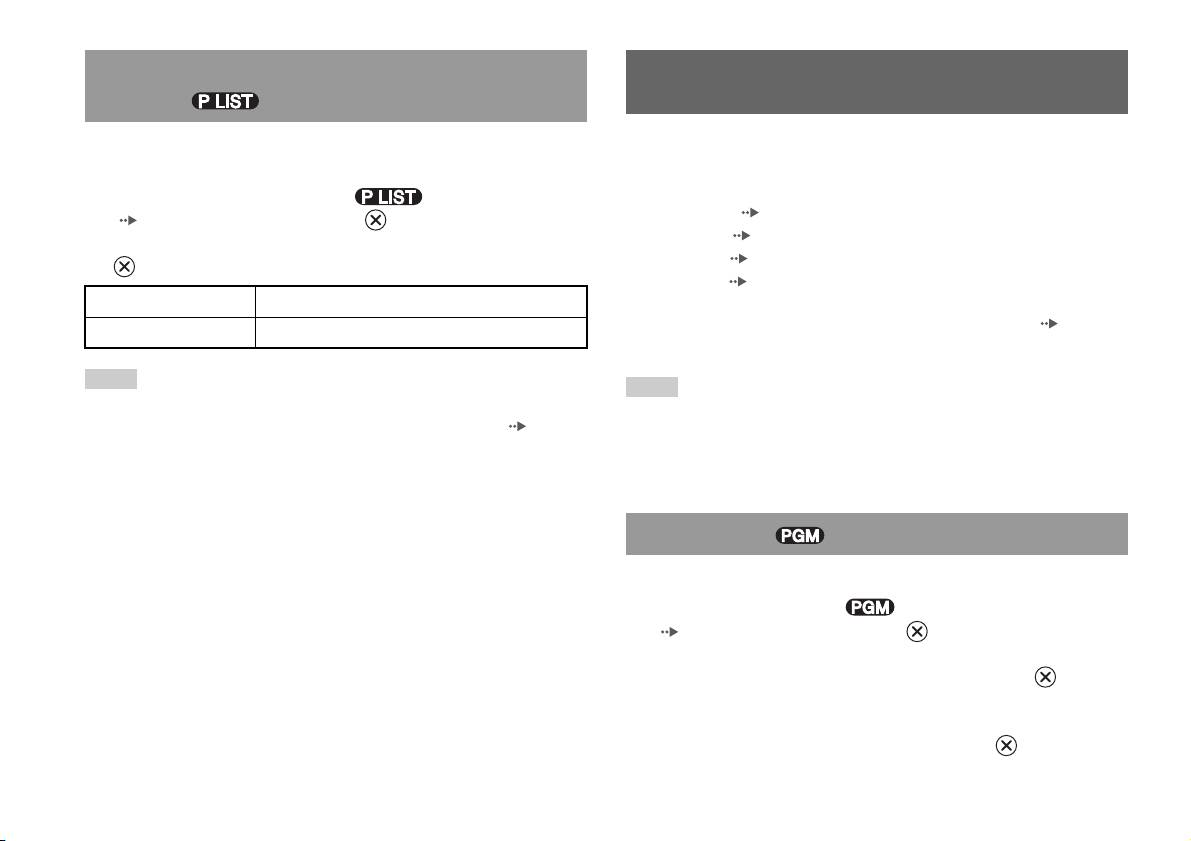
Selecting Original or Play List for DVD-RW
Using the playback modes
playback
When using a DVD-RW disc (VR mode), you can select the type of titles
Using the various playback modes, you can play titles or chapters in the
you want to play.
order you want or repeat playback of a specific scene. There are four
playback modes:
1 With playback stopped, select in the Control Panel
• Program Play ( page 18)
( page 14) and then press the button.
• Shuffle Play ( page 19)
Original and Play List will be selected in turn each time you press the
• Repeat Play ( page 19)
button.
• A-B Repeat ( page 19)
Original Plays content in the originally recorded sequence
The following instructions assume use of the Control Panel ( page 14)
Play List Plays edited content. Play List is the default setting.
to operate the DVD player.
Hints
Hints
• Slow-motion play in reverse is not available for DVD-RW discs (VR mode).
• You can play combinations of Program Play, Shuffle Play, and Repeat Play. Note,
• You cannot use this function with Resume Play. Clear Resume Play ( page 16)
however, that some Shuffle Play or Repeat Play options may not be available
before selecting this feature.
depending on the combination.
• The built-in PlayStation
TM2 plays disc content as recorded in the DVD software.
Program Play
You can create programmes to play titles and chapters in any order.
1 During playback, select in the Control Panel
( page 14) and then press the button.
2 Select a programme number, and then press the button.
If no programmes have been set, the only option will be "1. Title".
3 Select the title number, and then press the button.
18
Using the playback modes
4 Select the chapter number, and then press the button.
Repeat Play
To play all the chapters, select "All". Repeat steps 2 to 4 to set other
titles or chapters.
You can set this option to play titles or chapters repeatedly.
5 Press the START button.
1 Select in the Control Panel ( page 14), and then
press the button.
Program Play begins.
The display changes as shown below each time you press the
Hint
button.
GB
DVDs
The setting will not be cleared after Program Play finishes.
Disc Repeat Repeats playback of all titles
Title Repeat Repeats playback of one title
Shuffle Play
Chapter Repeat Repeats playback of one chapter
You can set this option for random playback of all titles or chapters
Repeat Off Clears Repeat Play
recorded on a disc. Playback order will be different each time Shuffle Play
is used.
2 Select N, and then press the button.
1 Select in the Control Panel ( page 14), and then
press the button.
The display changes as shown below each time you press the
A-B Repeat
button.
You can set a specific scene to be played repeatedly.
Title Shuffle Plays titles in random order
1 During playback, select in the Control Panel
Chapter Shuffle Plays chapters in random order
( page 14) and then press the button at the point you
Shuffle Off Clears Shuffle Play
want to start repeated playback.
The starting point (point A) is set.
2 Select N, and then press the button.
2 Press the button at the point you want to end repeated
playback.
The ending point (point B) is set, and repeated playback of the section
from A to B begins.
Using the playback modes
19
Clearing playback modes
Adjusting DVD player settings
Clears playback modes to allow normal playback.
1 Select in the Control Panel ( page 14), and then
You can use the Control Panel to adjust DVD player settings, such as the
press the button.
language for subtitles, audio language, and Parental Control level.
A message stating, "Play mode contents cleared", is displayed and the
built-in PlayStation
TM2 returns to normal playback.
Hints
• Some DVDs do not support all settings. The built-in PlayStationTM2 plays disc
Hint
content as recorded in the DVD software. If the DVD does not support the features
listed, you will not be able to change the settings.
If multiple playback modes have been set in a combination, all playback modes are
• The following options are not available during playback or Resume Play. Clear
cleared.
Resume Play ( page 16) before changing these settings.
– "Menu", "Audio" and "Subtitles" in Language Setup
– "TV Type" and "Progressive" in Screen Setup
– "Parental Control" in Custom Setup
– "DTS" and "Audio Track Auto Select Mode" in Audio Setup
You can change DVD player settings using the following procedure:
1 Select in the Control Panel ( page 14), and then press
the button.
The Setup icon bar is displayed.
2 Select the icon for the setting you want to change, and then
press the button.
The current setting for each item is displayed.
3 Select the desired item, and then press the button.
The menu option becomes active and can be selected.
20
Adjusting DVD player settings
4 Select the desired setting, and then press the button.
Setting TV display options
The setting of the item is completed. For details, see the instructions
for each item ( pages 21 to 26).
In the Screen Setup menu, you can set the screen size (aspect ratio) and
other options that affect picture quality.
Hints
• The default setting for each menu item is underlined in the explanations below.
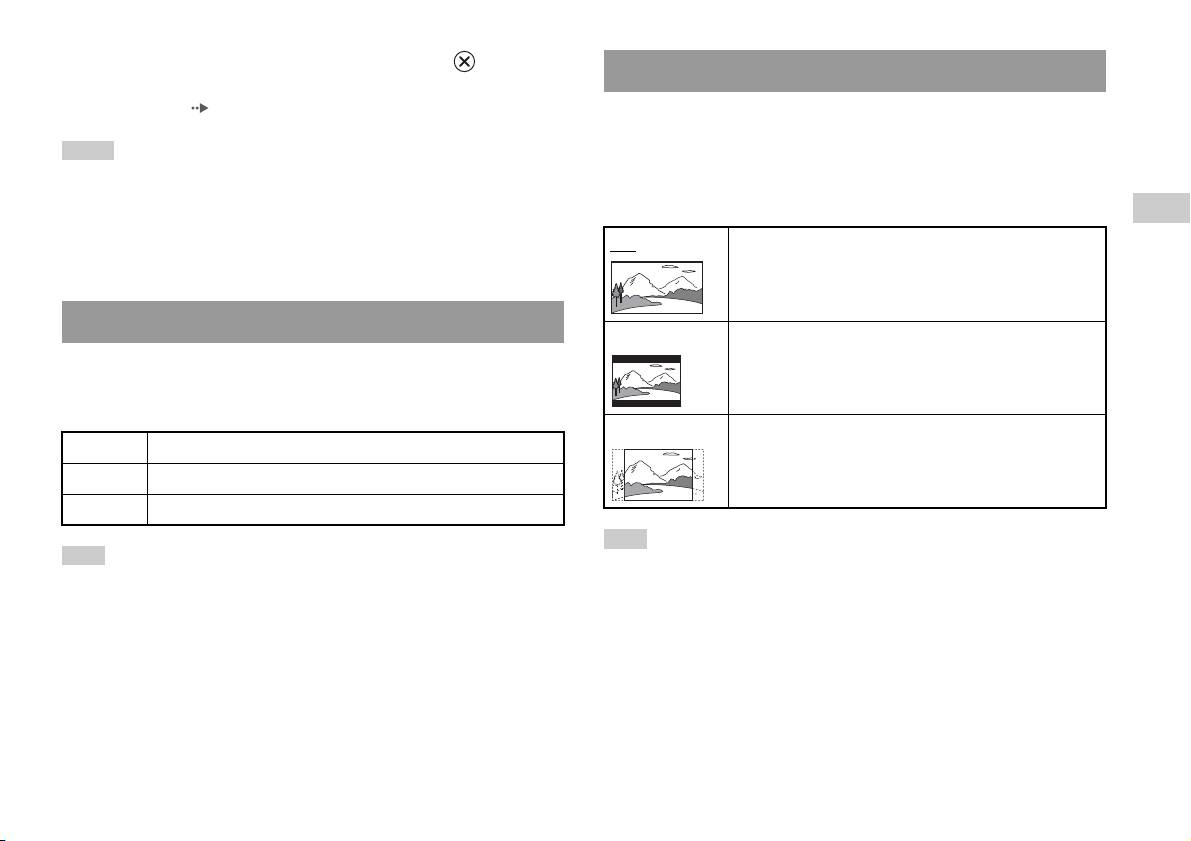
TV Type
• To return to the Control Panel after making settings, press the SELECT button.
You can set the aspect ratio to match the screen format.
GB
• Settings are saved when you do any of the following:
DVDs
– Stop playback (including stopping Resume Play)
16:9 Screen Format: Wide
– Open the disc cover
Setting language options
4:3 Letter Box Screen Format: 4:3
In "Language Setup" you can choose the language for the DVD's menu,
This setting displays a wide picture with margins on the upper
and lower portions of the screen.
audio and subtitles. Note that if you select a language that is not recorded
on the DVD, one of the recorded languages is selected automatically.
4:3 PAN SCAN Screen Format: 4:3
Menu Selects the language for the DVD's menu
This setting displays a picture adjusted to the height of the
screen, cutting off portions at left and right that do not fit.
Audio Selects the language for the DVD's audio track
Subtitles Selects the language for the DVD's subtitles
Hint
Hint
When you set "Progressive" to "On", "TV Type" is automatically set to "16:9".
If you select "Audio Follow" for subtitles, the subtitle language will automatically be
set to match the language selected for the DVD's audio track.
Adjusting DVD player settings
21
DNR (Digital Noise Reduction)
Progressive
You can use this setting to help reduce roughness in the on-screen image
You can display an image in which the picture updates all the lines in one
and produce a cleaner picture.
pass. In most cases, this results in a clearer, flicker-free image.
Off
DNR is not used.
On Progressive scan (480p)*
DNR1 Increases picture quality
Off
Interlace scan
DNR2 Increases picture quality (maximum)
* The DVD player's progressive scan mode is only available when playing a disc
recorded in NTSC format, and viewed on a TV that supports progressive scan
(480p).
Hints
• "DNR2" is more effective for reducing image roughness than "DNR1", but in some
Hints
cases an afterimage may appear. If this occurs, select "Off".
• The DNR function may produce limited results on some DVDs.
• DVDs can contain video-based and film-based material, which use different frame
rates. When playing video-based material using progressive scan, some images
• When you set "Progressive" to "On", "DNR" is automatically turned off and cannot
may appear unnatural. If this occurs, set "Progressive" to "Off" and view in
be turned on.
standard interlace mode.
• When you set "Progressive" to "On", "TV Type" ( page 21) is automatically set
Outline Sharpening
to "16:9".
You can sharpen or soften the outline of the on-screen image. The higher
• DVD-RW disc (VR mode) content can only be viewed in standard interlace format.
the value, the sharper the outline. Normally, select "0".
The "Progressive" option is not available when playing such content.
•-2 •-1 •0
•+1 •+2
Hint
Depending on the DVD, Outline Sharpening may produce limited results.
Display
During playback, you can display playback status information in the top
right corner of the screen for a few seconds.
On
Playback status information is displayed for a few seconds.
Off Playback status information is not displayed.
22
Adjusting DVD player settings
4 Select the region to base the Parental Control level on, and
Setting viewer options
then press the button.
If you select "Other", see "Region code list" ( page 24).
Pause mode
You can use this option to set a picture status when playback is paused.
5 Select "Level", and then press the button.
The list of level options is displayed.
Auto A picture with moving elements is displayed without jitter. Normally
select this position.
GB
6 Select a restriction level, and then press the button.
DVDs
Frame A picture without moving elements can be displayed at high resolution.
To clear Parental Control
Parental Control
With DVD playback stopped, go to step 6 in "Setting Parental Control" and
In some regions, the viewing of some DVD content may be restricted
set "Level" to "Off".
based on viewer age or other factors. You can use the Parental Control
feature to restrict the level of content that may be viewed through your
built-in PlayStation
TM2.
The lower the value, the stricter the restriction.
Setting Parental Control
1 Select "Parental Control", and then press the button.
The screen for registering a password is displayed. If a password has
already been registered, the screen for confirming the password is
displayed.
2 Select a number, and then press the button.
Repeat step 2 to enter a four-digit password. If you want to clear a
number, press the button. When registering a password, you are
required to enter it again for confirmation.
3 Select "Region", and then press the button.
The list of region options is displayed.
Adjusting DVD player settings
23
Region code list
2 Select a number, and then press the button.
To enter a Parental Control region code, select "Other" in step 4 of "Setting
Repeat step 2 to enter a four-digit password. You are required to enter
Parental Control" ( page 23). Use the directional buttons to select the
it again for confirmation.
first letter, and then press the right directional button. Then select the next
letter and press the button.
Temporary override of Parental Control restrictions
Region Code Region Code
1 Start playback of the DVD ( page 16).
Austria AT Malta MT
You will be prompted to temporarily change the Parental Control level
to allow playback. This usually occurs immediately at disc start-up but
Belgium BE Netherlands NL
may also occur at different times depending on the DVD.
Czech Republic CZ Norway NO
2 Using the directional buttons, select "Yes" and then press the
Denmark DK Poland PL
button.
Finland FI Portugal PT
The screen for entering the password is displayed.
France FR Russia RU
3 Select a number, and then press the button.
Germany DE Slovakia SK
Repeat step 3 to enter the four-digit password. After entering the
Greece GR Spain ES
password, playback will begin again. When DVD playback is stopped,
the Parental Control level returns to the original setting.
Ireland IE Sweden SE
Israel IL Switzerland CH
Hints
Italy IT Turkey TR
• If you forget your password, insert a DVD without the parental control feature. In
the control panel, select x (Stop) to stop playback, and then select x (Stop) again
Luxembourg LU United Kingdom GB
to clear resume play. Select "Setup", and then select "Parental Control" in "Custom
Setup", and then press the button. Press the SELECT button on the Analog
Controller, and then enter the number "7444".
Changing your password
• If you do not set a password, you cannot change the Parental Control settings.
In step 2 of "Setting Parental Control" ( page 23), complete the
• Some DVDs with the Parental Control feature do not allow use of playback modes
following steps:
( pages 18 to 19).
1 Using the directional buttons, select "Change Password" and
then press the button.
The screen for changing the password is displayed.
24
Adjusting DVD player settings

Dolby Digital
Setting sound options
This option sets Dolby Digital as the output signal for the DIGITAL OUT
(OPTICAL) connector.
Audio Digital Out
You can switch the method of outputting the audio signal when you
On Select this option when the built-in PlayStationTM2 is connected to an
connect the following audio devices to the DIGITAL OUT (OPTICAL)
audio device with a built-in Dolby Digital decoder.
connector.
Off
Select this option when the built-in PlayStationTM2 is connected to an
audio device without a built-in Dolby Digital decoder.
GB
DVDs
Caution
When the built-in PlayStationTM2 is connected to an audio device without a
DTS
Dolby Digital, DTS or MPEG decoder, set "Dolby Digital", "DTS" and
This option sets DTS as the output signal for the DIGITAL OUT
"MPEG" to "Off". If you set these options to "On" without the necessary
(OPTICAL) connector.
decoder, you may have no sound or an extremely loud noise may be emitted.
On Select this option when the built-in PlayStation
TM2 is connected to an
Digital Out (Optical)
audio device with a built-in DTS decoder.
This option sets the type of output for the DIGITAL OUT (OPTICAL)
Off
Select this option when the built-in PlayStationTM2 is connected to an
connector.
audio device without a built-in DTS decoder.
On Select this option when you want sound (audio signal) to be output
through the DIGITAL OUT (OPTICAL) connector.
MPEG
Settings for "Dolby Digital", "DTS" and "MPEG" are displayed.
This option sets MPEG AUDIO as the output signal for the DIGITAL
OUT (OPTICAL) connector.
Off Select this option when you do not want sound to be output through the
DIGITAL OUT (OPTICAL) connector.
Settings for "Dolby Digital", "DTS" and "MPEG" are not displayed.
On Select this option when the built-in PlayStation
TM2 is connected to an
audio device with a built-in MPEG decoder.
Off
Select this option when the built-in PlayStationTM2 is connected to an
audio device without a built-in MPEG decoder.
Adjusting DVD player settings
25

Audio Track Auto Select Mode
This setting gives priority to the audio track that contains the highest
number of channels when you play a DVD on which multiple audio
formats (PCM, Dolby Digital, DTS or MPEG) are recorded. If PCM,
Dolby Digital, DTS and MPEG have the same number of channels, the
built-in PlayStationTM2 selects PCM, Dolby Digital, DTS and MPEG
audio tracks in that order.
On Priority given
Off
No priority given
Hints
• If you set "DTS" to "Off" in "Audio Digital Out" ( page 25), the DTS audio
track is not played.
• Depending on the DVD, the audio channel with priority may be predetermined. In
this case, the audio track will be selected based on the DVD's order of priority.
DVD Volume
You can set this option if the audio output level of the DVD is low. You
can set this only when "Digital Out (Optical)" is set to "Off" in "Audio
Digital Out" ( page 25).
+2 Turns up the volume (maximum)
+1 Turns up the volume
Standard
Normally select this option.
Caution
If you set this option to "+1" or "+2", the sound may become distorted. If this
happens, change the setting to "Standard". Also note that if you set the volume
too high, it may harm your hearing or damage the speakers.
26
Adjusting DVD player settings

Main menu
Using the Browser screen
Displaying the main menu
You can do the following from the Browser screen:
From the main menu, you can access information and change various
• Copy or delete game data saved on a Memory Card
settings. You can also move to the following screens from the main menu.
• Start a game
The main menu is displayed when you turn on the built-in PlayStationTM2
• Start playback of an audio CD
GB
without a disc inserted.
Main menu
• Start playback of a DVD
• Browser screen ( page 27)
• System Configuration menu ( page 28)
1 Display the main menu ( page 27).
• Version Information screen ( page 31)
2 Using the directional buttons, select "Browser" and then
1 Press PlayStation 2 POWER ON on the TV's remote.
press button.
The main menu is displayed. Note that it may take some time for the
The Browser screen is displayed.
main menu to be displayed.
3 Insert a disc or Memory Card.
The icon for the inserted item is displayed on the Browser screen.
\
Hint
If you press PlayStation 2 POWER ON on the TV's remote with a disc inserted, the
main menu will not be displayed. To display the main menu, press the OPEN button
on the built-in PlayStation
TM2 front and remove the disc. Then press PlayStation 2
POWER ON on the TV's remote.
Displaying the main menu
27
4 Select an icon, and then press button.
• When you select the Memory Card icon, icons for data saved on the
Using the System Configuration
Memory Card are displayed. To copy or delete saved game data, see
"Copying or deleting game data" ( page 11).
menu
• If you select the icon for a PlayStation
TM2 or PlayStationTM format
software disc, the game will start.
From the System Configuration menu, you can change settings for
• When you select the icon for an audio CD, the tracks contained on
numerous options including language or time display, and audio or video
the CD are displayed. See "Playing an audio CD" ( page 12).
output method.
• If you select the icon for a DVD, playback of the DVD will begin.
1 Display the main menu ( page 27).
Hint
The message "There is no data" is displayed on the Browser screen when no Memory
2 Using the directional buttons, select "System Configuration"
Card or disc is inserted in the built-in PlayStation
TM2.
and then press button.
The System Configuration menu is displayed.
3 Select an item, and then press button.
The menu option becomes active and can be selected.
4 Select the desired setting, and then press button.
For details, see the instructions for each menu item ( pages 29 to
30).
28
Using the System Configuration menu

Hints
Screen Size
• The default setting for each menu item is underlined in the explanations below.
• Changes to each setting are saved and remain in effect even after you turn off or
You can set the display mode for the TV.
reset the built-in PlayStation
TM2.
4:3
Full*
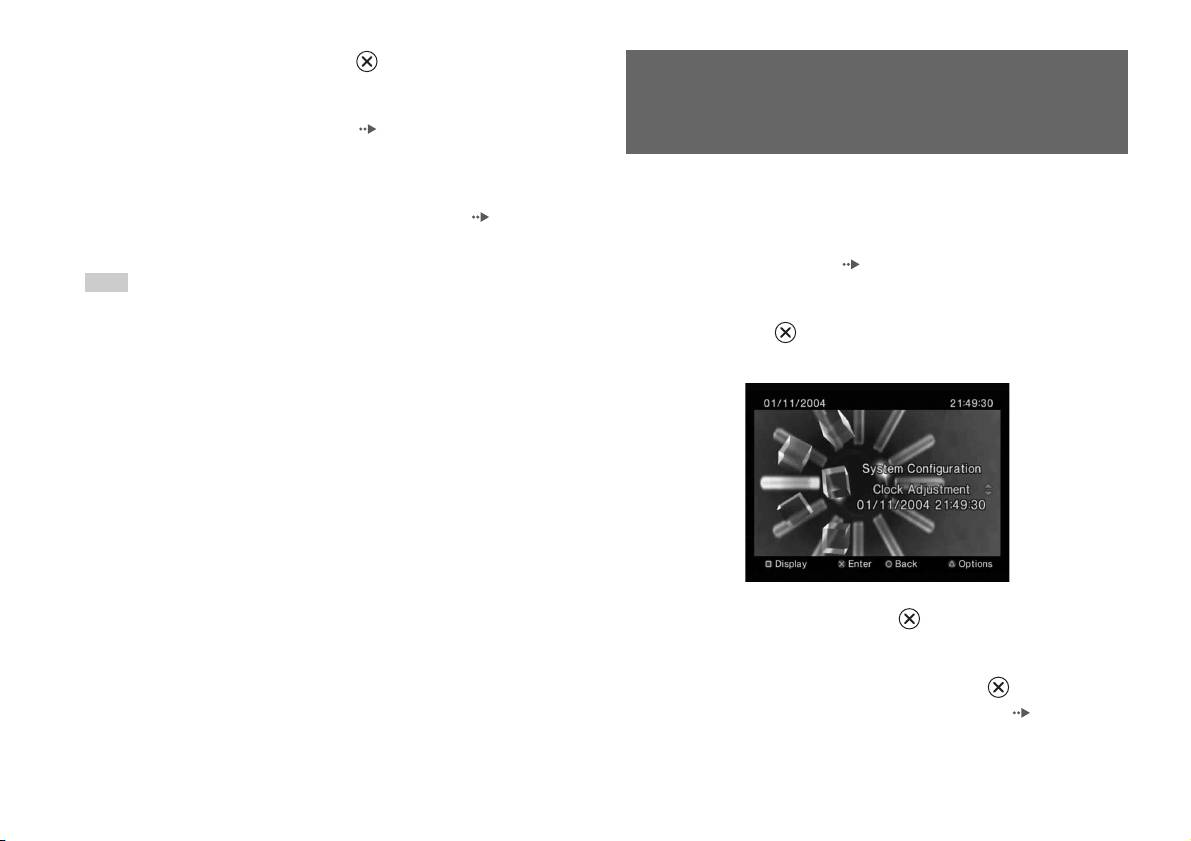
Clock Adjustment
GB
16:9
You can set the date and time. Use the directional buttons to set "Year",
Main menu
"Month", "Day", "Hour", "Minute" and "Second". The setting goes into
* "Full" display mode is compatible with the System Configuration menu, Browser
effect when you press the button.
screen and audio CD screen.
Optional settings
If you press the button at the "Clock Adjustment" screen, you can set
Digital Out (Optical)
options such as "Date Format" or "Time Format". Use the directional
You can set whether to output the signal through the DIGITAL OUT
buttons and the button to make each setting.
(OPTICAL) connector.
Time Format Sets the system clock to either 12-hour or 24-hour
On Select this option when you want to output signal
clock display
through the DIGITAL OUT (OPTICAL) connector.
Date Format Sets the display order of year, month and day
Off Select this option when you do not want to output
Time Zone Sets the time zone
signal through the DIGITAL OUT (OPTICAL)
connector.
Daylight Savings Time Sets Standard or Daylight Savings (Summer Time).
Normally select "Standard".
Using the System Configuration menu
29
German Displays messages in German
Remote Control
Italian Displays messages in Italian
You can set this option when using the DVD Remote Control (for
Dutch Displays messages in Dutch
PlayStation
TM2) (sold separately).
Portuguese Displays messages in Portuguese
Gameplay Function On Select this option when operating PlayStationTM2 or
PlayStation
TM format software with the DVD Remote
Control.
Gameplay Function Off Select this option when not operating PlayStation
TM2
or PlayStation
TM format software with the DVD
Remote Control.
Hint
The following limitations apply when the DVD Remote Control is set to "Gameplay
Function On":
– Depending on the software, some remote control buttons may not work properly.
– The buttons of the DVD Remote Control will not work when two or more
buttons are pressed at the same time.
– Some software titles may stop operating properly when a controller is removed
from controller port 1. If this happens, set to "Gameplay Function Off".
Language
You can use this option to select the language displayed on the main menu,
Browser screen, System Configuration menu, and Version Information
screen.
English Displays messages in English
French Displays messages in French
Spanish Displays messages in Spanish
30
Using the System Configuration menu

2 Select an item, and then press the button.
Using the Version Information
The available options are displayed.
screen
3 Select the desired setting, and then press the button.
For details, see the instructions for each item ( pages 31 to 33).
You can check version information for various built-in PlayStationTM2
Hint
components by selecting this option. You can also change optional settings
GB
The default setting for each menu item is underlined in the explanations below.
for some items.
Main menu
1 At the main menu ( page 27), press the button.
The Version Information screen is displayed.
Console
The built-in PlayStationTM2 automatically adjusts its internal settings for
optimal playback. When "Diagnosis" is set to "On", the built-in
PlayStationTM2 makes additional adjustments.
Diagnosis
Off Diagnosis is turned off.
On Diagnosis is turned on.
Hint
Optional settings
The "Diagnosis" setting will automatically return to the default setting in the
Optional settings are available for "Console", "PlayStation® Driver" and
following cases:
"DVD Player". "DVD Player" can be set only if the DVD player's
– When playback of PlayStation
TM2 or PlayStationTM format software or a DVD
"Progressive" option is set to "On".
begins
– When the built-in PlayStation
TM2 is reset
1 Using the directional buttons, select an item and then press
– When the built-in PlayStation
TM2 is turned off
the button.
The current setting for the item is displayed.
Using the Version Information screen
31
PlayStationTM Driver
DVD Player
You can set the PlayStationTM Driver programme to optimise performance
If you set "Progressive" to "On" when the built-in PlayStationTM2 is
of PlayStation
TM format software.
connected to a TV without the necessary equipment, the picture quality
may be reduced or the picture may not be displayed. You can clear the
Hint
"Progressive" setting by following the procedure below.
The settings will automatically return to the default settings in the following case:
Remove the DVD before clearing the setting.
– When the built-in PlayStation
TM2 is turned off
Clear Progressive Setting
Disc Speed
No Leaves the "Progressive" setting on
Standard Loads discs at normal speed
Yes Clears the "Progressive" setting
Fast Loads discs at high speed
1 Display the Version Information screen.
Hint
Set to "Standard" in the following cases:
2 Using the directional buttons, select "DVD Player" and then
– When fast loading does not produce improved results
press the button.
– When using a software that is not compatible with fast loading
The "Clear Progressive Setting" option is displayed.
Texture Mapping
3 Press the button.
Standard
Displays as normal
4 Select "Yes", and then press the button.
Smooth Displays with reduced roughness in on-screen images
5 Press the button twice.
Hint
The display returns to the main menu.
Set to "Standard" in the following cases:
– When smooth texture mapping does not produce improved results
6 Press the OPEN button on the built-in PlayStationTM2 front,
– If the picture does not display properly when set to "Smooth"
and place a DVD in the built-in PlayStation
TM2.
32
Using the Version Information screen

7 Close the disc cover.
Playback begins.
Hint
The setting will not be cleared if 1) you do not start a DVD after step 4 or 2) you reset
or turn off the built-in PlayStation
TM2 before step 6.
GB
Main menu
Using the Version Information screen
33
Networking
Connecting with an Ethernet cable
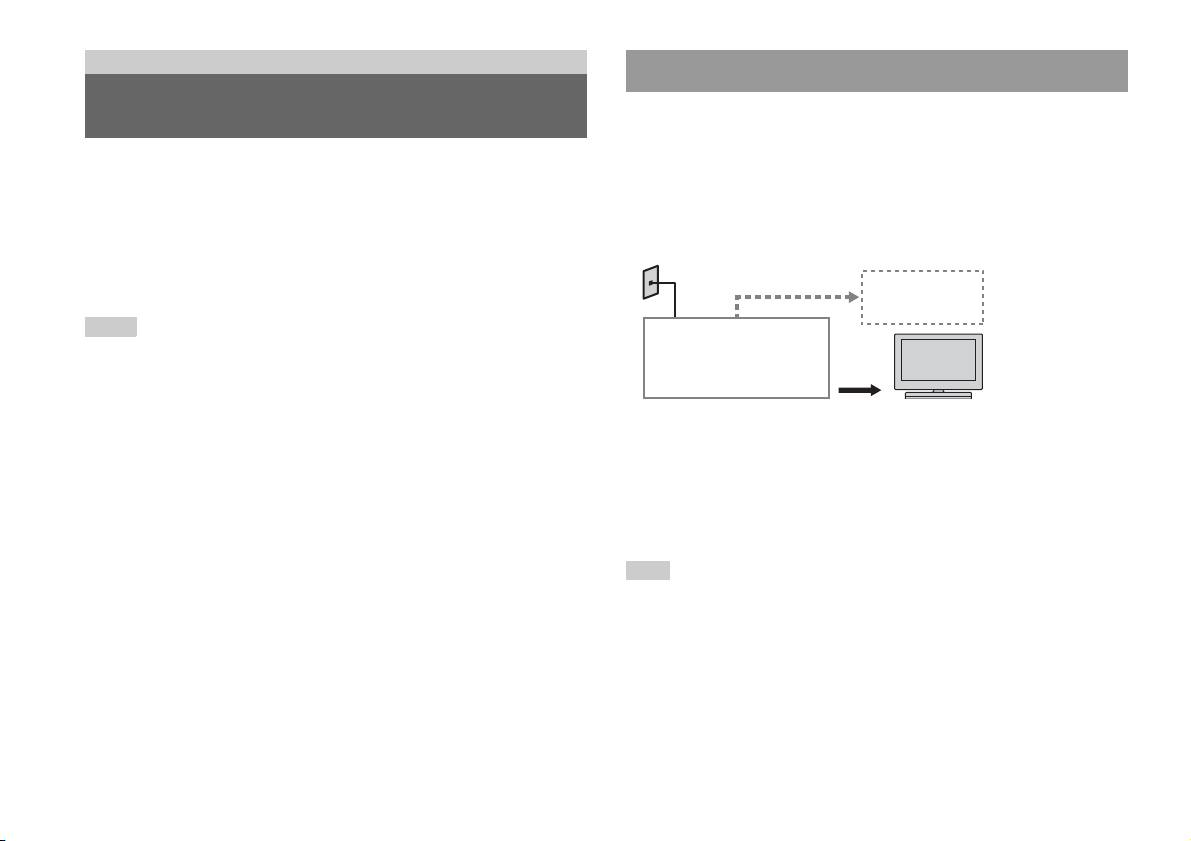
Connecting to a network
You can connect the built-in PlayStationTM2 to a network using an Ethernet
cable connected to the NETWORK connector on the rear. You can connect
to a 100 Base-TX or 10 Base-T network. Refer to the instructions supplied
You can enjoy online games by connecting the PlayStationTM2 to a
with the network device for details.
broadband network. To play all online games, you will need the following:
• A network compatible PlayStation
TM2 game
Basic Network Setup
• Broadband Internet service
Network line
• A commercially available Ethernet cable
• A memory card (8MB) (for PlayStation
TM2) (sold separately)
PC
Hints
• You cannot play online games using a dial-up or ISDN connection.
Broadband modem,
router etc.
• USB connectivity from the External Network Device to the USB connector is not
supported.
• There are two types of Ethernet cables: straight-through cable and crossover cable.
Network equipment Ethernet cable
(not supplied)
Ensure that you use the correct type of cable when connecting the PlayStation
TM2
to your Broadband Internet connection. Refer to the instructions supplied with the
Network line: This will vary depending on the type of broadband service
network device, or your Broadband Internet Service Provider for details.
in your home.
• Do not connect to the TV LAN using the Ethernet cable.
Network equipment: The type of equipment used will also vary
depending on the type of service.
Hint
When connecting the built-in PlayStationTM2 and a PC to the network, a network
device such as a router or a hub may be required. Refer to the instructions supplied
with the network device for details.
34
Connecting to a network
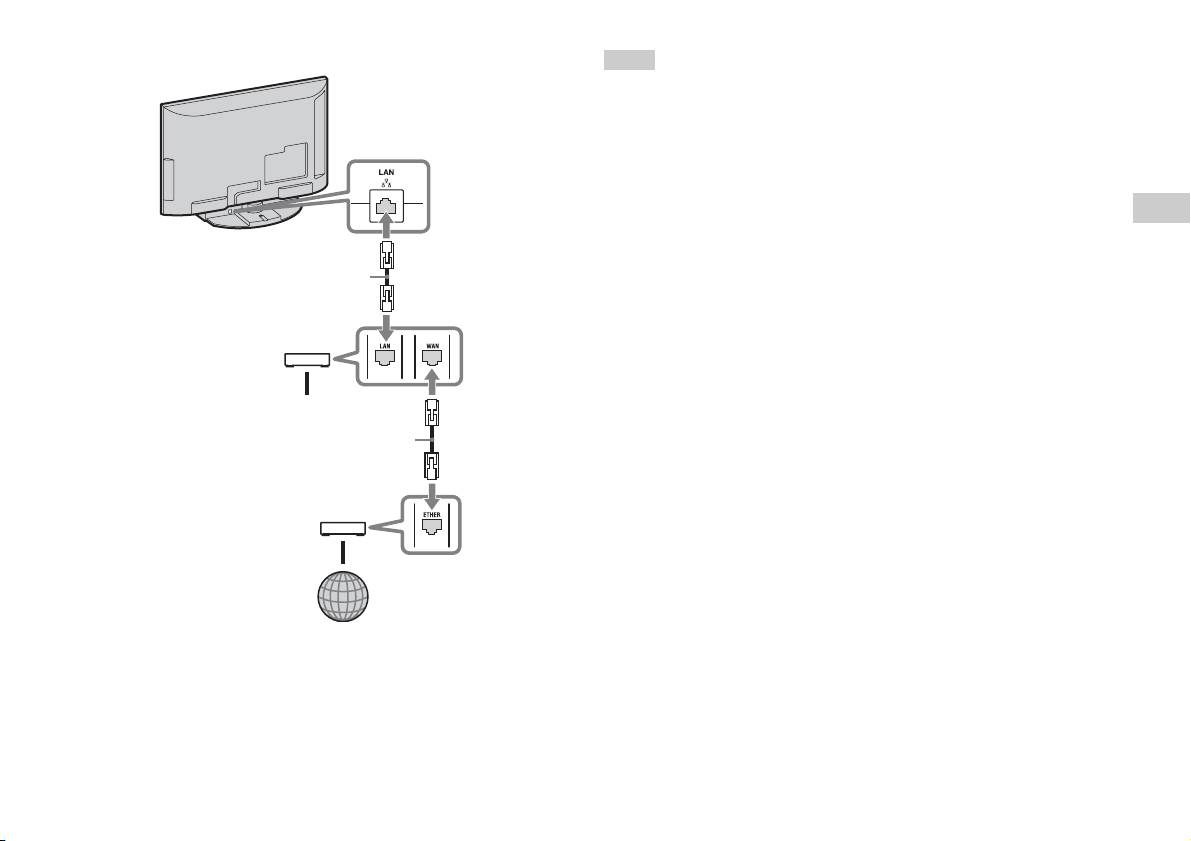
Connecting the built-in PlayStationTM2
Hints
• Do not plug the AC power cord (mains lead) into the electrical outlet until you have
made all other connections.
• Do not connect Ethernet cables or telephone cords of the following types to the
Built-in PlayStation
TM2
network connector; too much electrical current may pass through the connector,
causing a malfunction, excessive heat or fire in the connector:
– Standard residential telephone lines
– Ethernet cables not appropriate for use with a 10Base-T/100Base-TX network
GB
– Any ISDN (digital) compatible phone or data line
Networking
– PBX phone lines
– Other unknown types of telephone lines
Network cable (not supplied)
Router
To network devices
Network cable (not supplied)
DSL Modem/Cable Modem
Internet
1 Connect the Ethernet cable to the NETWORK connector on the
rear.
2 Connect the Ethernet cable to the network device.
Connecting to a network
35

Creating network settings
After you have connected an Ethernet cable to the built-in PlayStationTM2,
you will need to create and save network settings. To do this you need a
Network Access Disc supplied by registering your PlayStationTM2. You
can register your PlayStation
TM2.
You will need the following items to create a network setting:
– A Memory Card (8MB) (for PlayStationTM2) (sold separately)
– Login and network setup information provided by your Broadband Internet
Service Provider
Hint
Depending on the type of Internet service used, you may need to provide your
Broadband Internet Service Provider with your MAC Address. You can find the
MAC Address for your PlayStation
TM2 listed in the Version Information screen
( page 31).
36
Creating network settings
Connexion réseau
Table des matières
Connexion au réseau ....................................................................37
Création des paramètres réseau ....................................................39
Préparation
Noms des composants.................................................................... 3
Raccordement d’équipements audio numériques .......................... 5
Branchement de la manette............................................................6
Mise sous tension et hors tension de la PlayStation
TM2
intégrée .................................................................................... 6
Jeux
Comment jouer............................................................................... 7
Utilisation des Memory Cards (Cartes Mémoire)........................11
CD audio
Lecture d’un CD audio.................................................................13
DVD
Lecture d’un DVD ....................................................................... 15
Utilisation des modes de lecture .................................................. 19
Paramètres et réglages du lecteur DVD....................................... 22
Menu principal
Affichage du menu principal ....................................................... 29
Utilisation de l’écran navigateur.................................................. 30
Utilisation du menu Configuration du Système........................... 31
Utilisation de l’écran d’informations sur la version .................... 33
2
Table des matières
Préparation
Connexion à Description
3 Connecteur USB
Vous pouvez connecter divers périphériques USB à
Noms des composants
la PlayStation
TM2 intégrée, mais ils ne sont pas tous
compatibles. Pour en savoir davantage, reportez-
vous aux instructions fournies avec le périphérique
USB.
Avant de la PlayStationTM2 intégrée
Conseil
Vous ne pouvez pas lire de fichiers de photo, de
musique ou vidéo à l’aide du connecteur USB de la
FR
PlayStation.
Préparation
4 Couvercle du
Appuyez sur le bouton OPEN et le couvercle
compartiment à disque
s’ouvre en glissant.
5 Bouton OPEN
Appuyez pour ouvrir le couvercle du compartiment
à disque.
6 Bouton "/1 (marche/
Appuyez pour mettre sous tension la PlayStationTM2
veille)/RESET
intégrée, pour passer en mode de veille ou pour
OPEN
réinitialiser.
RESET : Appuyez une fois.
Veille : Appuyez pendant plus d’une seconde.
7 Indicateur "/1
S’allume en vert lorsque la PlayStationTM2 intégrée
(marche/veille)
est sous tension.
S’allume en rouge lorsque la PlayStation
TM2
Connexion à Description
intégrée est en mode de veille.
1 Fente pour MEMORY
Insérez une Memory Card (Carte Mémoire)
CARD (Carte Mémoire)
( page 11).
1/2
2 Port de manette 1/2
Insérez la Manette Analogique (DUALSHOCK®2)
dans un port de manette de la PlayStation
TM2
(page6).
Noms des composants
3

Arrière de la PlayStationTM2 intégrée
Connexion à Description
1 LAN
Vous pouvez jouer en ligne en connectant la
PlayStation
TM2 à un réseau à large bande
( page 37).
Conseil
Pour profiter des fonctions réseau domestique
« BRAVIA », connectez-vous au réseau du
téléviseur à l’aide d’un câble Ethernet ( page 37).
4
Noms des composants
1 2
Connexion à Description
2 DIGITAL AUDIO OUT
Vous pouvez écouter le son de la PlayStationTM2
(OPTICAL)
intégrée sur un système Home Cinéma raccordé via
l’entrée analogique.
• La connexion DIGITAL AUDIO OUT (OPTICAL) reproduit le son numérique de
la PlayStation
TM2 intégrée.
Raccordement d’équipements
audio numériques
Vous pouvez profiter du son ambiophonique grâce à un câble numérique
optique commercialisé qui reproduit la qualité acoustique d’un cinéma ou
d’une salle de concert. Si vous raccordez la PlayStationTM2 intégrée à un
équipement audio à l’aide de connecteurs numériques, reportez-vous aux
FR
instructions qui accompagnent le périphérique à connecter.
Préparation
Périphérique connecté
Arrière de la PlayStationTM2 intégrée
DIGITAL IN
OPTICAL
Câble numérique optique
commercialisé
Conseils
• Si vous raccordez la PlayStationTM2 intégrée à un équipement audio à l’aide d’un
câble numérique optique, cela peut affecter la sortie audio de certains logiciels au
format PlayStation
TM2 et empêcher la reproduction du son. Si cela se produit,
utilisez un câble tel que le câble AV (non fourni) et connectez-le à la prise AUDIO
OUT du téléviseur. N’utilisez pas de câble numérique optique.
• Une fois l’équipement audio numérique raccordé, réglez le paramètre « DIGITAL
OUT (OPTICAL) » sur « Activé » dans le menu Configuration du Système. Pour
plus de détails, reportez-vous à la section « DIGITAL OUT (OPTICAL) »
( page 32).
Raccordement d’équipements audio numériques
5

Branchement de la manette
Mise sous tension et hors tension
de la PlayStation
TM2 intégrée
1 Insérez la Manette Analogique (DUALSHOCK®2) dans un port
de manette de la PlayStation
TM2 intégrée.
1 Appuyez sur la touche PlayStation 2 POWER ON de la
Avant de la PlayStationTM2 intégrée
télécommande du téléviseur pour mettre le téléviseur et la
PlayStation
TM2 sous tension. (Le mode d’entrée du téléviseur
bascule automatiquement vers la PlayStation
TM2.)
Conseils
• Quand vous éteignez le téléviseur, la PlayStationTM2 se met également hors
tension. En outre, quand les fonctions ci-dessous sont activées, la PlayStation
TM2
est aussi mise hors tension en même temps que le téléviseur.
– Mise en veille du téléviseur
Manette Analogique
– Arrêt programmé
(DUALSHOCK
®2)
– Gestion d’alimentation PC
– Rappel
Conseil
– Marche programmée
– Cadre Photo
Certains logiciels spécifient l’utilisation d’un port de manette particulier. Pour plus
de détails, reportez-vous aux instructions qui accompagnent le logiciel.
• N’accédez pas à la Memory Card (Carte Mémoire) lorsqu’un message
d’avertissement (tel que « le téléviseur va bientôt s’éteindre... ») apparaît.
6
Branchement de la manette
Jeux
Comment jouer
FR
OPEN
Jeux
Avant de jouer Démarrage d’un jeu
Vérifiez que les raccordements au téléviseur et à l’équipement audio sont
1 Appuyez sur la touche OPEN pour libérer le verrou du
corrects et que toutes les précautions ont été prises.
couvercle du compartiment à disque.
• « Branchement de la manette » ( page 6)
2 Faites glisser le couvercle du compartiment à disque vers la
Conseil
gauche, puis placez le disque en orientant l’étiquette vers le
Pour jouer à des jeux en ligne, vous devez d’abord vous connecter à un réseau et le
haut.
configurer. Pour plus de détails, reportez-vous à la section « Connexion au réseau »
(page37).
3 Fermez le couvercle du compartiment à disque en le faisant
glisser vers la droite jusqu’à ce qu’il se verrouille.
Comment jouer
7
Conseils
Utilisation de la Manette Analogique
• Veillez à verrouiller le couvercle du compartiment à disque pour lire un disque.
• Vous pouvez également lancer un jeu à partir de l’écran navigateur ( page 30).
(DUALSHOCK®2)
• Si vous mettez la PlayStation
TM2 intégrée sous tension après avoir inséré un disque,
le jeu démarre automatiquement.
La Manette Analogique (DUALSHOCK
®2) est dotée d’une fonction de
bouton sensible à la pression. Elle propose également une fonction de
Pour réinitialiser un jeu
vibration.
Appuyez sur le bouton \/1 (marche/veille)/RESET située à l’avant de la
Noms des composants
PlayStation
TM2 intégrée. N’appuyez pas par inadvertance sur le bouton
@/1/RESET pendant que vous jouez, car cela entraînerait la réinitialisation
du jeu.
Pour arrêter un jeu
Appuyez sur le bouton "/1 (marche/veille)/RESET à l’avant de la
PlayStation
TM2 intégrée après avoir enregistré les données de jeu, puis
retirez le disque ( page 3).
RESET: Appuyez une fois.
Veille: Appuyez sur la touche pendant plus d’une seconde.
Touche/Commutateur Description
1 Touche L2
2 Touche L1
3 Touche SELECT
(sélection)
8
Comment jouer

Touche/Commutateur Description
Conseils
• Selon le logiciel, les touches disponibles en mode analogique peuvent être limitées.
4 Touches
directionnelles
Pour plus de détails, reportez-vous aux instructions qui accompagnent le logiciel.
• Il est possible d’activer ou de désactiver la fonction de vibration à l’aide du menu
5 Joystick analogique
Conseils
d’options logiciel. Selon le logiciel, il se peut que la fonction de vibration soit
gauche/Touche L3
activée automatiquement.
• Le joystick analogique gauche et la touche L3 ne
• Après avoir mis la PlayStation
TM2 intégrée sous
fonctionnent qu’en mode analogique (indicateur :
tension et avant d’utiliser la Manette Analogique
rouge).
(DUALSHOCK
®2), faites pivoter une fois les
• La touche L3 fonctionne lorsque l’utilisateur
joysticks analogiques gauche et droit avec les
appuie sur le joystick analogique.
FR
pouces. Pour ceci, ne tordez pas les joysticks
Jeux
6 Touche de mode
Bascule entre le mode numérique et le mode
analogiques, mais faites-les pivoter comme si vous
ANALOG (analogique)
analogique.
dessiniez un cercle (voir l’illustration).
7 Indicateur de mode
Mode numérique : éteint.
A propos du changement de mode
Mode analogique : allumé en rouge.
La touche de mode ANALOG (analogique) peut être utilisée pour passer
d’un mode à l’autre. Elle permet de basculer vers le mode approprié.
Conseil
Remarquez cependant que certains logiciels effectuent ce réglage
Selon le logiciel, il se peut que vous ne puissiez pas
automatiquement.
changer de mode, même si vous appuyez sur la
touche de mode ANALOG (analogique).
Mode numérique
Mode analogique
8 Touche R2
(indicateur : éteint)
(indicateur : rouge)
9 Touche R1
q; Touche START (mise
Conseils
en marche)
• Lorsque vous utilisez la Manette Analogique en mode numérique, les joysticks
qa Touches f/a/×/s
analogiques gauche et droit ne fonctionnent pas. En outre, la fonction de bouton
sensible à la pression est désactivée.
qs Joystick analogique
Conseils
droit/Touche R3
• Selon le logiciel, il se peut que vous ne puissiez pas changer de mode, même si
• Le joystick analogique droit et la touche R3 ne
vous appuyez sur la touche de mode ANALOG (analogique).
fonctionnent qu’en mode analogique (indicateur :
rouge).
• La touche R3 fonctionne lorsque l’utilisateur
appuie sur le joystick analogique.
Comment jouer
9

A propos des commandes analogiques
• Lorsque vous jouez à un jeu au format PlayStationTM2, vous pouvez
A propos de l’utilisation de la Manette
utiliser toutes les touches en mode analogique, à l’exception des touches
Analogique (DUALSHOCK®) (SCPH-110 E)
START (mise en marche), SELECT (sélection), L3 et R3.
• Lorsque vous lisez un logiciel au format PlayStation
TM, seuls les
Vous pouvez utiliser la Manette Analogique (DUALSHOCK®)
joysticks analogiques gauche et droit peuvent être utilisés en mode
(SCPH-110 E) avec la PlayStation
TM2 intégrée, mais les fonctions des
analogique.
touches en mode analogique peuvent être différentes de celles de la
Manette Analogique (DUALSHOCK®2). Seuls les joysticks analogiques
Conseil
gauche et droit peuvent être utilisés en mode analogique.
Selon le logiciel, les touches disponibles en mode analogique peuvent être limitées.
Pour plus de détails, reportez-vous aux instructions qui accompagnent le logiciel.
Conseil
Tous les jeux au format PlayStationTM2 ne prennent pas en charge l’utilisation de la
A propos de la fonction de vibration
Manette Analogique (DUALSHOCK
®) (SCPH-110 E). Dans ce cas, utilisez la
Manette Analogique (DUALSHOCK
®2).
Il est possible d’activer ou de désactiver la fonction de vibration à l’aide du
menu d’options logiciel.
Conseil
Selon le logiciel, il se peut que la fonction de vibration soit activée automatiquement.
10
Comment jouer
Insertion d’une Memory Card (Carte Mémoire)
Utilisation des Memory Cards
Insérez la Memory Card (Carte Mémoire) dans une fente pour MEMORY
(Cartes Mémoire)
CARD (Carte Mémoire) située à l’avant de la PlayStation
TM2 intégrée.
Avant de la PlayStationTM2 intégrée
Vous pouvez sauvegarder et charger des données de jeu à l’aide d’une
Memory Card (Carte Mémoire) (vendue séparément). Il est également
possible de supprimer des données de jeu ou de copier des données de jeu
d’une Memory Card (Carte Mémoire) vers une autre.
FR
Jeux
A propos des types de Memory Cards (Cartes
Mémoire)
Il existe deux types de Memory Cards (Cartes Mémoire). Sélectionnez une
MEMORY CARDMEMORY CARD
Memory Card (Carte Mémoire) adaptée au logiciel utilisé.
Type de Memory Card
Logiciels compatibles Quantité de mémoire
(Carte Mémoire)
Memory Card (Carte
Logiciel au format
Environ 8 MB
Mémoire) (8 MB) (pour
PlayStation
TM2
PlayStation
TM2)
Conseil
(SCPH-10020 E)
Certains logiciels spécifient l’utilisation d’une fente pour MEMORY CARD (Carte
Memory Card (Carte
Logiciel au format
15 blocs mémoire
Mémoire) particulière. Pour plus de détails, reportez-vous aux instructions qui
Mémoire)
PlayStation
TM
(environ 120 KB)
accompagnent le logiciel.
(SCPH-1020 E)*
* Ce produit n’est plus
en fabrication.
Sauvegarde ou chargement de données de jeu
MagicGate™ est un terme qui désigne une technologie de protection des droits
La procédure de sauvegarde ou de chargement peut varier selon le logiciel.
d’auteurs développée par Sony Corporation.
Pour plus de détails, reportez-vous aux instructions qui accompagnent le
logiciel.
Utilisation des Memory Cards (Cartes Mémoire)
11

Copie ou suppression de données de jeu
Vous pouvez supprimer les données enregistrées ou les copier vers une
autre Memory Card (Carte Mémoire). Utilisez les touches directionnelles
et la touche de la manette pour sélectionner des éléments.
1 Mettez sous tension la PlayStationTM2 intégrée, alors
qu’aucun disque n’est inséré, puis insérez une Memory Card
(Carte mémoire).
2 Sélectionnez « Navigateur » et la Memory Card (Carte
Mémoire) sur laquelle vous souhaitez copier ou supprimer
des données.
3 Sélectionnez l’icône de l’élément de données et « Copier »
ou « Supprimer ».
4 Suivez les instructions qui apparaissent sur l’écran de
réglage.
12
Utilisation des Memory Cards (Cartes Mémoire)
CD audio
Utilisation du lecteur CD pendant la lecture
Lecture d’un CD audio
A l’aide des touches directionnelles, sélectionnez l’icône de la plage
désirée, puis appuyez sur la touche .
Icône (touche*) Fonction
Lecture d’un CD
. (touche L1) Accéder au début de la plage en cours ou de la plage
précédente
1 Mettez la PlayStationTM2 intégrée sous tension et insérez le
FR
disque ( page 7).
m (touche L2) Rembobiner rapidement
CD audio
Suivez les étapes 1 à 3 de la section « Démarrage d’un jeu ».
M (touche R2) Avancer rapidement
Les numéros de plages s’affichent.
> (touche R1) Accéder au début de la plage suivante
2 A l’aide des touches directionnelles, sélectionnez le numéro
N (touche START) Démarrer la lecture
de plage à lire, puis appuyez sur la touche .
X (touche START) Suspendre la lecture
La lecture démarre.
x (touche
Arrêter la lecture
SELECT)
Conseils
• Si vous mettez la PlayStationTM2 intégrée sous tension après avoir inséré un disque,
* Vous pouvez utiliser directement le lecteur en appuyant sur les touches de la
les numéros de plages s’affichent automatiquement.
manette analogique (DUALSHOCK
®2) indiquées entre parenthèses.
• Vous pouvez également lancer la lecture à partir de l’écran navigateur
( page 30).
Conseil
Vous pouvez également utiliser la Télécommande DVD (pour PlayStationTM2)
(vendue séparément).
Attention
Pour lire un CD audio enregistré au format DTS, vous devez réduire le volume
au minimum, puis raccorder un périphérique équipé d’un décodeur DTS au
Arrêt de la lecture d’un CD audio
connecteur DIGITAL OUT (OPTICAL) ( page 5). Remarquez qu’il est
possible que vous entendiez un bruit extrêmement fort.
1 A l’aide des touches directionnelles, sélectionnez x, puis
appuyez sur la touche .
La lecture s’arrête. Appuyez sur le bouton OPEN de la face avant de
la PlayStation
TM2 intégrée pour retirer le disque.
Lecture d’un CD audio
13
5 Sélectionnez l’icône du CD audio, puis appuyez sur la touche
Lecture dans différents modes
.
Vous pouvez sélectionner « Mode de Lecture » ou « Mode Répétition ».
Les numéros de plages s’affichent et l’option apparaît dans la partie
inférieure gauche de l’écran.
Mode de
Lecture
Lit les plages comme elles sont enregistrées sur
Lecture
Continue
le CD
6 Sélectionnez la plage désirée, puis appuyez sur la touche .
La lecture démarre.
Programme Lit les plages dans un ordre spécifié
Lecture
Lit les plages dans un ordre aléatoire
Conseils
Aléatoire
• Vous pouvez également accéder à l’écran Options de Lecture à partir de l’écran
Mode
Désactivé(e) Ne lit pas le CD de manière répétée
indiquant les plages en sélectionnant l’icône du CD audio dans le coin supérieur
Répétition
gauche de l’écran et en appuyant sur la touche .
Tout Lit toutes les plages de manière répétée
• Vous pouvez sélectionner simultanément « Mode de Lecture » et « Mode
1 Lit une plage de manière répétée
Répétition ».
1 Sur l’écran navigateur ( page 30), utilisez les touches
directionnelles pour sélectionner l’icône du CD audio, puis
appuyez sur la touche .
L’écran Options de Lecture s’affiche.
2 Sélectionnez « Mode de Lecture » ou « Mode Répétition »,
puis appuyez sur la touche .
3 Sélectionnez le paramètre désiré, puis appuyez sur la touche
.
Si vous sélectionnez « Programme », l’écran de spécification de
l’ordre des plages s’affiche. Sélectionnez les plages à lire.
4 Appuyez sur la touche .
L’écran navigateur s’affiche.
14
Lecture d’un CD audio
DVD
Utilisation du Panneau de commandes
Lecture d’un DVD
1 Lancez la lecture du DVD ( page 17).
2 Appuyez sur la touche SELECT (de sélection).
Vous pouvez utiliser le lecteur DVD à l’aide des méthodes suivantes.
Le Panneau de commandes s’affiche. Si vous appuyez à nouveau sur
• Utilisation du Panneau de commandes affiché
la touche SELECT (de sélection), l’affichage change de position à
• Fonctionnement direct à l’aide de la Manette Analogique
l’écran.
(DUALSHOCK
®2)
FR
• Utilisation de la Télécommande DVD (pour PlayStation
TM2) (vendue
DVD
séparément)
Les instructions suivantes supposent l’utilisation du Panneau de
commandes pour contrôler le lecteur DVD. Certaines opérations peuvent
être différentes selon la méthode employée.
Conseils
• Pour plus de détails sur la lecture d’un DVD, reportez-vous aux instructions
3 A l’aide des touches directionnelles, sélectionnez une icône,
fournies avec le DVD.
puis appuyez sur la touche .
• La PlayStation
TM2 intégrée lit le contenu du disque tel qu’il a été enregistré dans le
logiciel du DVD. Remarquez que toutes les fonctions ne sont pas disponibles sur
l’ensemble des DVD.
Conseil
Pour désactiver le Panneau de commandes, appuyez à une ou deux reprises sur la
touche SELECT (de sélection), ou appuyez sur la touche .
Liste des paramètres du Panneau de commandes
Vous pouvez accéder aux options suivantes dans le Panneau de
commandes.
Icône Fonction
Menu Affiche le menu des disques DVD vidéo
Lecture d’un DVD
15
Icône Fonction
Icône Fonction
Menu principal Affiche le menu des disques DVD vidéo
Permet de revenir au début du chapitre en
./> Précédent/Suivant
cours ou précédent, ou de passer au début
Permet de revenir à l’écran sélectionné
du chapitre suivant
O
Retour
précédemment au sein du menu du DVD
/ Recherche Retour/avance rapide ( page 18)
Affiche et permet de changer les options
Choix audio
audio de DVD comportant plusieurs piste
Permet de passer à la lecture ou à la lecture
/ Ralenti
audio
retour au ralenti
Affiche et permet de changer les angles de
Choix d’angle de
N
Lecture Démarre la lecture
caméra de DVD enregistrés sous plusieurs
caméra
angles
X
Pause Suspend la lecture
Choix des sous-
Affiche et permet de changer les options de
titres
sous-titres de DVD avec sous-titres
x
Arrêt Arrête la lecture ( page 17)
Permet de passer au titre ou au chapitre
Spécifie une scène pour lecture et démarre
Lecture répétée
Atteindre
sélectionné, ou encore au temps spécifié, et
la lecture de la scène spécifiée
A-B
de démarrer la lecture ( page 17)
( page 21)
Affiche et permet de changer les options de
Démarre la lecture de titres ou de chapitres
Lecture aléatoire
langue, de qualité d’image, de niveau de
dans un ordre aléatoire ( page 20)
Réglages
Contrôle parental, du son, etc.
Lecture
Démarre la lecture de titres ou de chapitres
( page 22)
programmée
dans un ordre programmé ( page 20)
Affiche le numéro du titre ou du chapitre
Affichage du
Sélectionne la lecture répétée de tous les
en cours, le temps écoulé, etc.
temps
Lecture répétée
titres sur le disque, ou d’un seul titre ou
( page 18)
chapitre ( page 21)
Affiche la liste des fonctions associées aux
Pour des disques DVD-RW (en mode VR),
Aide
touches d’accès direct de la Manette
Original/Play List
permet de sélectionner le contenu Original
Analogique (DUALSHOCK
®2)
ou Play List pour la lecture ( page 19)
Permet d’entrer le numéro du chapitre que
0~9
Aller au chapitre
Efface les numéros ou les modes de lecture
vous souhaitez lire ( page 17)
Effacement
sélectionnés ( page 21)
16
Lecture d’un DVD

Conseils
Reprise de la lecture depuis le point où vous avez
• Vous pouvez utiliser « » pour vérifier les options accessibles directement à
l’aide des touches de la Manette Analogique. Pour accéder directement aux options
arrêté le disque (Reprise de lecture)
à l’aide de la manette, vous devez faire disparaître le Panneau de commandes de
l’écran.
1 Pendant la lecture, sélectionnez x dans le Panneau de
• Selon le mode de lecture, il se peut que certaines options ne soient pas disponibles
commandes ( page 15), puis appuyez sur la touche .
ou ne puissent pas être réglées.
2 Sélectionnez N, puis appuyez sur la touche .
La lecture reprend depuis le point où vous avez arrêté le disque à
Lecture d’un DVD
FR
l’étape 1.
DVD
1 Mettez la PlayStationTM2 intégrée sous tension et insérez un
Pour désactiver Reprise de lecture
disque ( page 7).
Après l’étape 1, sélectionnez x, puis appuyez sur la touche .
Suivez les étapes 1 à 3 de la section « Démarrage d’un jeu ». La lecture
démarre.
Sélection d’une scène particulière pour la
Conseils
• Si vous mettez la PlayStationTM2 intégrée sous tension après avoir inséré un disque,
lecture
la lecture démarre automatiquement.
• Vous pouvez également lancer la lecture à partir de l’écran navigateur
Sélection d’une scène par numéro de chapitre
( page 30).
1 Pendant la lecture, sélectionnez le numéro du chapitre
souhaité dans le Panneau de commandes ( page 15), puis
Arrêt de la lecture d’un DVD x
appuyez sur la touche .
La lecture du chapitre sélectionné démarre. Si vous souhaitez lire un
1 Pendant la lecture, sélectionnez x dans le Panneau de
chapitre portant un numéro à un chiffre (1 à 9), entrez le zéro à gauche.
commandes ( page 15), puis appuyez sur la touche .
Par exemple, entrez « 01 ».
La lecture s’arrête. Appuyez sur le bouton OPEN de la face avant de
la PlayStation
TM2 intégrée, puis retirez le disque.
Sélection d’une scène par numéro de titre ou de chapitre,
ou encore en spécifiant le temps
1 Pendant la lecture, sélectionnez dans le Panneau de
commandes ( page 15), puis appuyez sur la touche .
Lecture d’un DVD
17
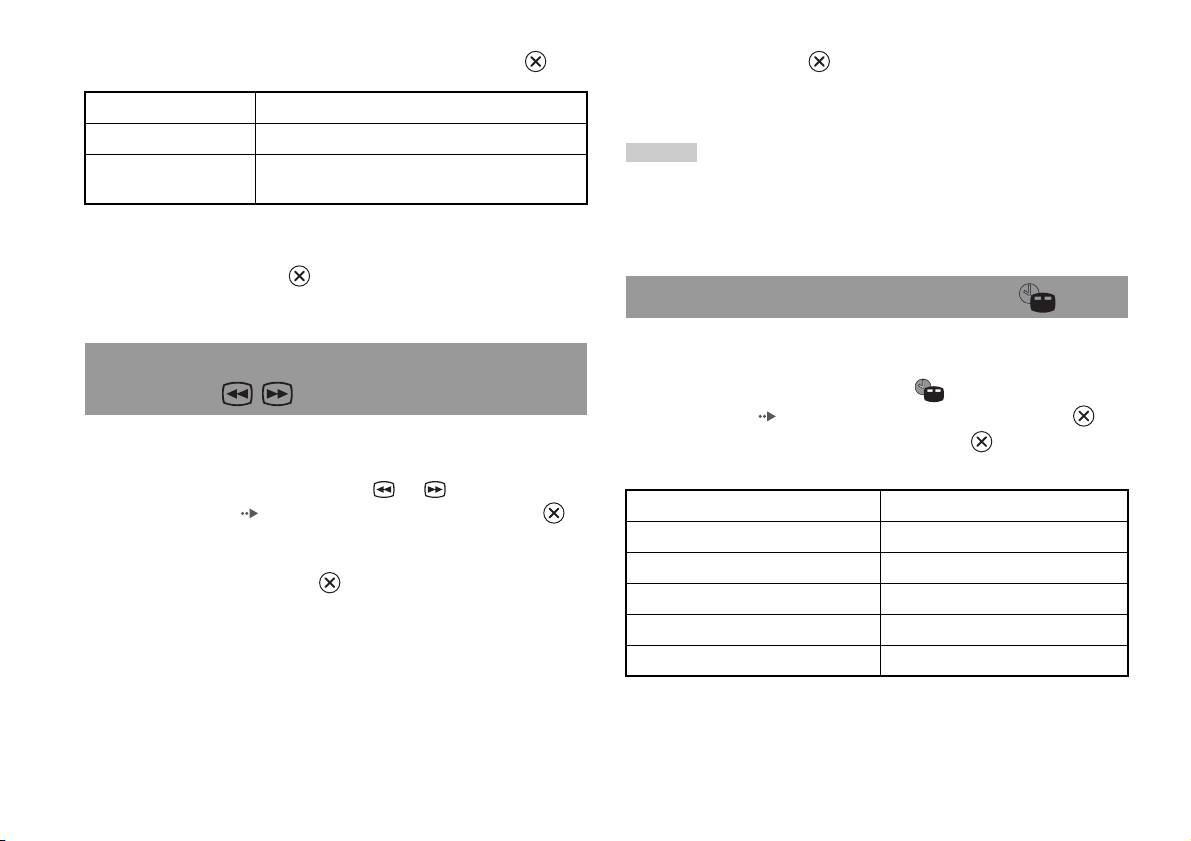
2 Sélectionnez une option, puis appuyez sur la touche .
2 Relâchez la touche quand vous avez trouvé le point que
vous cherchez.
Titre Spécifie le numéro du titre
La lecture revient à la vitesse normale.
Chapitre Spécifie le numéro du chapitre
Conseil
C XX:XX:XX
Spécifie le temps écoulé du chapitre (ou du titre)
Pour utiliser la Manette Analogique afin d’effectuer une recherche pendant la
(ou T XX:XX:XX)
lecture, maintenez la touche L2 ou R2 enfoncée afin de lancer la recherche. Utilisez
les touches directionnelles pour modifier la vitesse. Relâchez la touche L2 ou R2
quand vous avez trouvé le point que vous cherchez.
3 Sélectionnez les numéros de la scène souhaitée, puis
appuyez sur la touche .
La lecture du chapitre sélectionné démarre.
Affichage des informations de lecture
Vous pouvez afficher des informations, telles que le numéro du titre en
cours ou le temps écoulé.
Recherche d’un point particulier sur un DVD
(Recherche)
1 Pendant la lecture, sélectionnez dans le Panneau de
commandes ( page 15), puis appuyez sur la touche .
Vous pouvez rechercher soit en avant, soit en arrière pour localiser
A chaque fois que vous appuyez sur la touche , l’écran change tel
rapidement un point particulier sur un DVD.
qu’illustré ci-dessous.
1 Pendant la lecture, sélectionnez ou dans le Panneau
Titre X Chapitre X Numéro du titre et numéro du chapitre
de commandes ( page 15), puis maintenez la touche
enfoncée.
Titre X Chapitre X C XX:XX:XX Temps écoulé du chapitre en cours
Lorsque vous appuyez sur la touche directionnelle haut ou bas pendant
Titre X Chapitre X C -XX:XX:XX Temps restant du chapitre en cours
que vous maintenez la touche enfoncée, la vitesse de recherche
change tel qu’indiqué ci-dessous.
Titre X Chapitre X T XX:XX:XX Temps écoulé du titre en cours
• Recherche 3
Titre X Chapitre X T -XX:XX:XX Temps restant du titre en cours
• Recherche 2
(Désactivé)
• Recherche 1
• Ralenti
18
Lecture d’un DVD
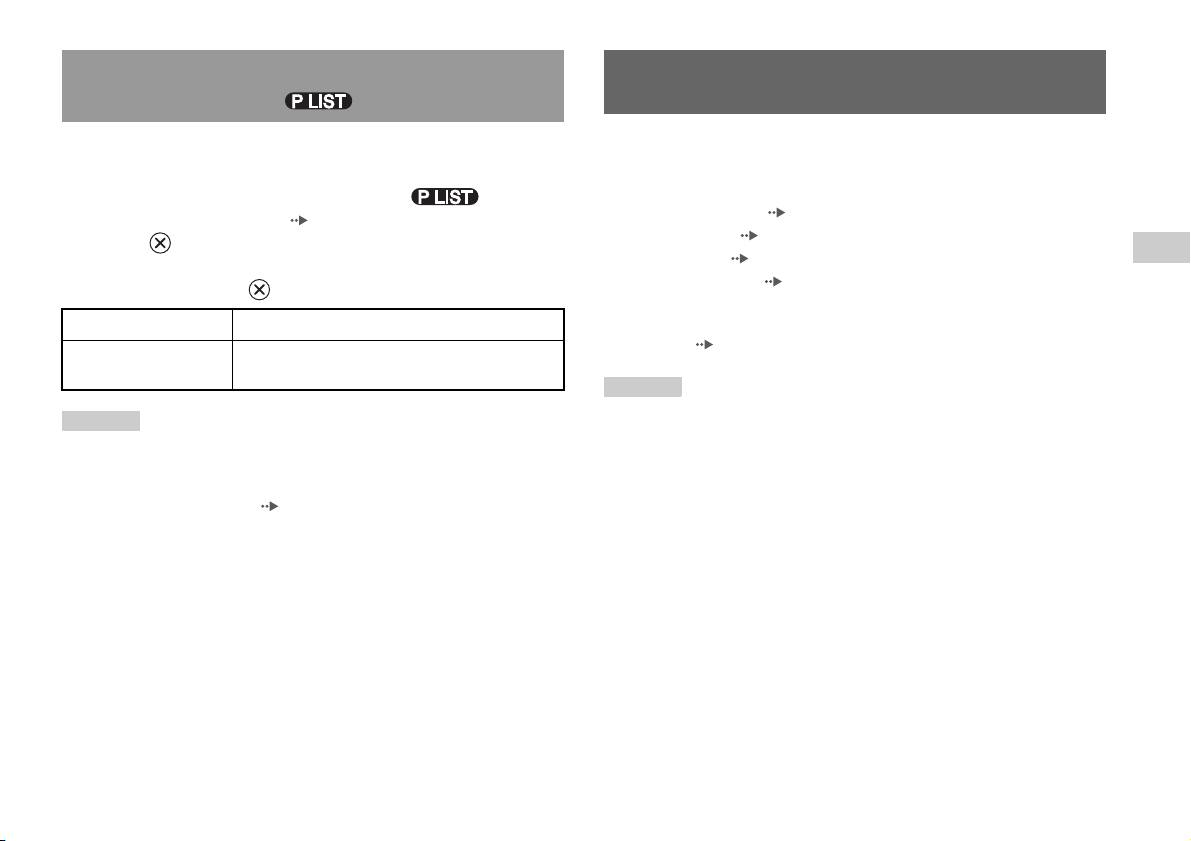
Sélection du contenu Original ou Play List pour la
Utilisation des modes de lecture
lecture d’un DVD-RW
Si vous utilisez un disque DVD-RW (en mode VR), vous pouvez
A l’aide des différents modes de lecture, vous pouvez lire des titres ou des
sélectionner le type de titres que vous souhaitez lire.
chapitres dans l’ordre souhaité ou répéter la lecture d’une scène
particulière. Il existe quatre modes de lecture :
1 Une fois la lecture arrêtée, sélectionnez dans le
• Lecture programmée ( page 20)
Panneau de commandes ( page 15), puis appuyez sur la
• Lecture aléatoire ( page 20)
touche .
FR
• Lecture répétée ( page 21)
Vous pouvez basculer entre les options Original et Play List en
DVD
• Lecture répétée A-B ( page 21)
appuyant sur la touche .
Original Lit le contenu dans l’ordre d’enregistrement initial
Les instructions suivantes supposent l’utilisation du Panneau de
commandes ( page 15) pour contrôler le lecteur DVD.
Play List Lit le contenu modifié. Play List est le paramètre par
défaut.
Conseils
• Vous pouvez combiner les modes Lecture programmée, Lecture aléatoire et
Conseils
Lecture répétée. Il se peut cependant que certaines options de Lecture aléatoire et
• La lecture au ralenti en arrière n’est pas disponible sur les disques DVD-RW (mode
de Lecture répétée ne soient pas disponibles selon la combinaison choisie.
VR).
• La PlayStation
TM2 intégrée lit le contenu du disque tel qu’il a été enregistré dans le
• Vous ne pouvez pas utiliser cette fonction avec la fonction Reprise de lecture.
logiciel du DVD.
Désactivez Reprise de lecture ( page 17) avant de sélectionner cette fonction.
Utilisation des modes de lecture
19
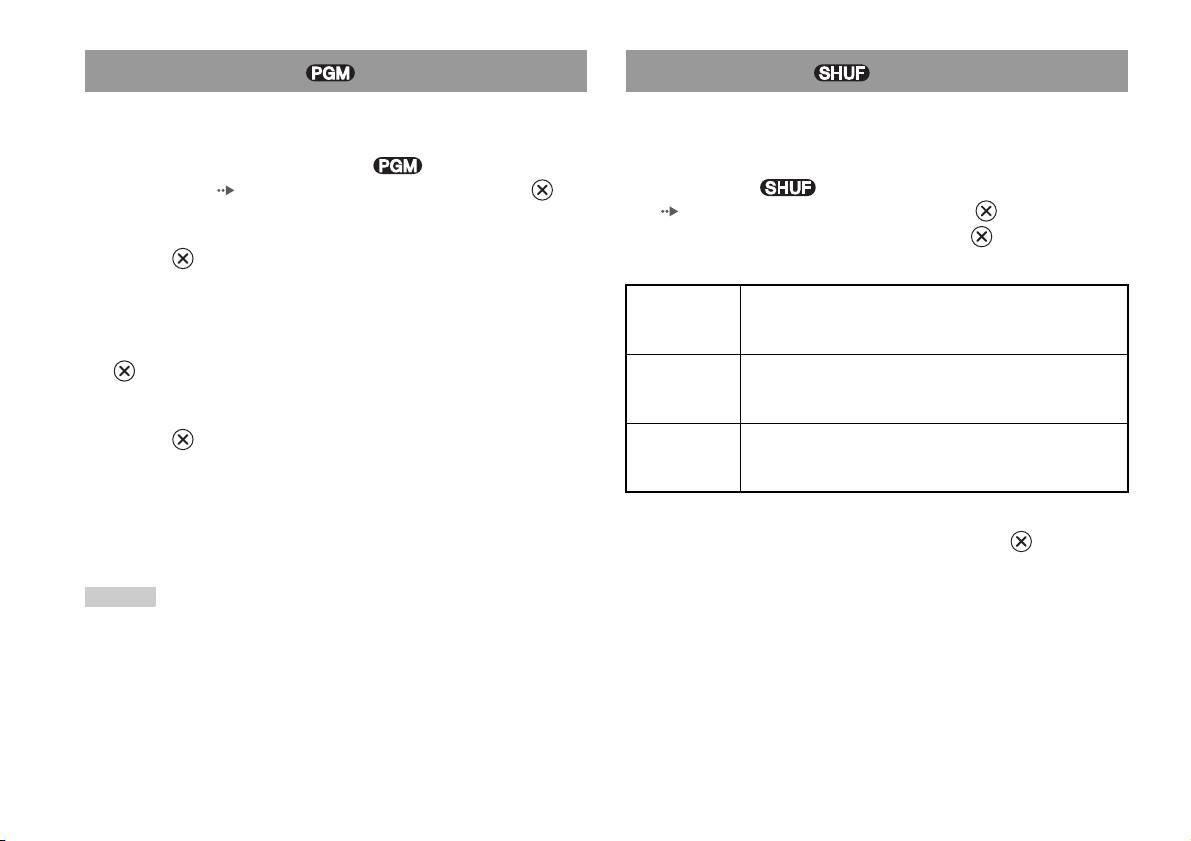
Lecture programmée Lecture aléatoire
Vous pouvez créer des programmes de lecture de titres et de chapitres dans
Vous pouvez sélectionner cette option pour obtenir une lecture aléatoire de
n’importe quel ordre.
tous les titres ou chapitres enregistrés sur un disque. L’ordre de lecture sera
différent à chaque sélection du mode Lecture aléatoire.
1 Pendant la lecture, sélectionnez dans le Panneau de
commandes ( page 15), puis appuyez sur la touche .
1 Sélectionnez dans le Panneau de commandes
( page 15), puis appuyez sur la touche .
2 Sélectionnez un numéro de programme, puis appuyez sur la
A chaque fois que vous appuyez sur la touche , l’écran change tel
touche .
qu’illustré ci-dessous.
Si aucun programme n’est défini, la seule option disponible est « 1.
Titre ».
Sélection
Lecture de titres en ordre aléatoire
aléatoire des
titres
3 Sélectionnez le numéro de titre, puis appuyez sur la touche
.
Sélection
Lecture de chapitres en ordre aléatoire
aléatoire des
chapitres
4 Sélectionnez le numéro de chapitre, puis appuyez sur la
touche .
Sélection
Désactive le mode Lecture aléatoire
aléatoire
Pour lire tous les chapitres, sélectionnez « Tout ». Répétez les étapes 2
désactivée
à 4 pour définir d’autres titres ou chapitres.
5 Appuyez sur la touche START.
2 Sélectionnez N, puis appuyez sur la touche .
La lecture programmée commence.
Conseil
Les réglages ne sont pas effacés une fois la lecture programmée terminée.
20
Utilisation des modes de lecture

Lecture répétée
Lecture répétée A-B
Vous pouvez définir cette option pour lire des titres ou chapitres de
Vous pouvez définir une scène particulière à lire de manière répétée.
manière répétée.
1 Pendant la lecture, sélectionnez dans le Panneau de
1 Sélectionnez dans le Panneau de commandes
commandes ( page 15), puis appuyez sur la touche au
( page 15), puis appuyez sur la touche .
point auquel vous souhaitez démarrer la lecture répétée.
A chaque fois que vous appuyez sur la touche , l’écran change tel
Le point de début (point A) est enregistré.
qu’illustré ci-dessous.
FR
2 Appuyez sur la touche au point auquel vous souhaitez finir
DVD
Répétition du
Lecture répétée de tous les titres
la lecture répétée.
disque
Le point de fin (point B) est enregistré et la lecture répétée du passage
Répétition du
Lecture répétée d’un titre
de A à B commence.
titre
Répétition d’un
Lecture répétée d’un chapitre
chapitre
Désactivation des modes de lecture
Répétition
Désactive le mode Lecture répétée
Désactive les modes de lecture pour reprendre une lecture normale.
désactivée
1 Sélectionnez dans le Panneau de commandes
( page 15), puis appuyez sur la touche .
2 Sélectionnez N, puis appuyez sur la touche .
Le message « Contenu du mode de lecture effacé » s’affiche et la
PlayStation
TM2 intégrée revient à une lecture normale.
Conseil
Si vous avez défini une combinaison de plusieurs modes de lecture, ils sont tous
désactivés.
Utilisation des modes de lecture
21

3 Sélectionnez le paramètre désiré, puis appuyez sur la touche
Paramètres et réglages du
.
L’option de menu devient active et peut être sélectionnée.
lecteur DVD
4 Sélectionnez le paramètre désiré, puis appuyez sur la touche
.
Vous pouvez utiliser le Panneau de commandes pour définir les paramètres
La valeur du paramètre est définie. Pour plus de détails, reportez-vous
du lecteur DVD, tels que la langue des sous-titres, la langue de la bande-
aux instructions relatives à chaque paramètre ( pages 23 à 28).
son et le niveau de Contrôle parental.
Conseils
Conseils
• Le paramètre par défaut de chaque option de menu a été souligné dans les
• Certains DVD ne prennent pas en charge tous les paramètres. La PlayStationTM2
explications ci-dessous.
intégrée lit le contenu du disque tel qu’il a été enregistré dans le logiciel du DVD.
Si le DVD ne prend pas en charge les fonctions répertoriées, vous ne pouvez pas
• Pour revenir au Panneau de commandes une fois les paramètres définis, appuyez
modifier les paramètres.
sur la touche SELECT.
• Les options suivantes ne sont pas disponibles pendant la lecture ou la fonction
• Les paramètres sont sauvegardés lorsque vous effectuez une des opérations
Reprise de lecture. Désactivez Reprise de lecture ( page 17) avant de modifier
suivantes :
ces paramètres.
– Arrêt de la lecture (y compris l’arrêt de la fonction Reprise de lecture)
– « Menu », « Audio » et « Sous-titres » dans Sélection de la langue
– Ouverture du couvercle du compartiment à disque
– « Type TV » et « Balayage progressif » dans Réglage de l’écran
– « Contrôle parental » dans Réglage personnalisé
– « DTS » et « Sélection automatique de plage audio » dans Réglage audio
Vous pouvez modifier les paramètres du lecteur DVD de la manière
suivante :
1 Sélectionnez dans le Panneau de commandes
( page 15), puis appuyez sur la touche .
La barre d’icônes Configurer s’affiche.
2 Sélectionnez l’icône correspondant au paramètre à modifier,
puis appuyez sur la touche .
La valeur actuelle de chaque option s’affiche.
22
Paramètres et réglages du lecteur DVD

4:3 Letter Box Format de l’écran : 4:3
Sélection de la langue
Cette option affiche les images larges avec des bandes en haut
et en bas de l’écran.
Dans « Sélection de la langue », vous pouvez choisir la langue du menu du
DVD, de la bande-son et des sous-titres. Remarquez que si vous
sélectionnez une langue qui n’est pas enregistrée sur le DVD, une des
4:3 PAN SCAN Format de l’écran : 4:3
langues enregistrées est sélectionnée automatiquement.
Cette option affiche les images élargies en fonction de la
hauteur de l’écran, les parties gauche et droite qui ne
Menu Permet de sélectionner la langue du menu du DVD
s’adaptent pas à l’écran étant coupées.
Audio Permet de sélectionner la langue de la bande-son du DVD
FR
Conseil
DVD
Sous-titres Permet de sélectionner la langue des sous-titres du DVD
Lorsque « Balayage progressif » est réglé sur « Activé », « Type TV » est
automatiquement réglé sur « 16:9 ».
Conseil
Si vous sélectionnez « Idem audio » pour les sous-titres, la langue de ceux-ci sera
DNR (Digital Noise Reduction, réduction du bruit
automatiquement définie pour correspondre à la langue sélectionnée pour la bande-
numérique)
son du DVD.
Ce paramètre peut vous aider à réduire les irrégularités affichées à l’écran
et à obtenir une image plus claire.
Réglage du mode d’affichage du téléviseur
Désactivé(e)
La réduction DNR n’est pas utilisée.
Dans le menu Réglage de l’écran, vous pouvez définir la taille de l’écran
DNR1 Augmente la qualité de l’image
(rapport d’aspect) et d’autres options qui affectent la qualité de l’image.
DNR2 Augmente la qualité de l’image (maximum)
Type TV
Conseils
Vous pouvez définir le rapport d’aspect afin qu’il corresponde au format
de l’écran.
• « DNR2 » est plus efficace pour réduire les irrégularités de l’image que « DNR1 »,
mais dans certains cas, ce paramètre risque de produire une image rémanente. Dans
ce cas, sélectionnez « Désactivé(e) ».
16:9 Format de l’écran : large
• La fonction DNR peut produire des résultats limités sur certains DVD.
• Lorsque « Balayage progressif » est réglé sur « Activé », « DNR » est
automatiquement désactivé et ne peut pas être activé.
Paramètres et réglages du lecteur DVD
23

Précision des contours
Conseils
Vous pouvez accentuer ou atténuer les contours de l’image affichée. Plus
• Les DVD peuvent contenir des données de type vidéo et de type film utilisant des
la valeur est élevée, plus les contours sont accentués. En règle générale,
vitesses d’images différentes. Lors de la lecture de données de type vidéo utilisant
sélectionnez « 0 ».
le balayage progressif, certaines images peuvent paraître non naturelles. Dans ce
cas, réglez « Balayage progressif » sur « Désactivé » et visionnez le DVD en mode
•-2 •-1 •0
•+1 •+2
entrelacé standard.
• Lorsque « Balayage progressif » est réglé sur « Activé », « Type TV »
( page 23) est automatiquement réglé sur « 16:9 ».
Conseil
• Le contenu du disque DVD-RW (mode VR) ne peut être visionné qu’au format
Selon le DVD, il se peut que le paramètre Précision des contours produise des
entrelacé standard. L’option « Balayage progressif » n’est pas disponible lors de la
résultats limités.
lecture d’un tel contenu.
Affichage
Pendant la lecture, vous pouvez afficher le statut de lecture dans le coin
supérieur droit de l’écran pendant quelques secondes.
Activé(e)
Le statut de lecture s’affiche pendant quelques secondes.
Désactivé(e) Le statut de lecture ne s’affiche pas.
Balayage progressif
Vous pouvez afficher une image dans laquelle toutes les lignes sont
réactualisées en un seul passage. Dans la plupart des cas, cela produit une
image plus claire et sans sautillement.
Activé Balayage progressif (480p)*
Désactivé
Balayage de l’interface
* Le mode Balayage progressif du lecteur DVD est disponible uniquement lors de
la lecture d’un disque enregistré au format NTSC, et ce sur un téléviseur prenant
en charge le balayage progressif (480p).
24
Paramètres et réglages du lecteur DVD
3 Sélectionnez « Région », puis appuyez sur la touche .
Définition des options de l’afficheur
La liste des codes de région s’affiche.
Mode de pause
4 Sélectionnez la région sur laquelle seront basés les niveaux
Vous pouvez utiliser cette option pour définir l’état d’une image lorsque la
de Contrôle parental, puis appuyez sur la touche .
lecture est suspendue.
Si vous sélectionnez « Autres », reportez-vous à la section « Liste des
codes de région » ( page 26).
Auto Une image contenant des sujets en mouvement est affichée sans
sautillement. En règle générale, sélectionnez cette position.
5 Sélectionnez « Niveau », puis appuyez sur la touche .
FR
Image Une image contenant des sujets immobiles peut être affichée en haute
La liste des options de niveau s’affiche.
DVD
résolution.
6 Sélectionnez un niveau de restriction, puis appuyez sur la
Contrôle parental
touche .
Dans certaines régions, le visionnage du contenu de certains DVD peut
être restreint selon l’âge de l’utilisateur ou d’autres facteurs. Vous pouvez
Pour désactiver le Contrôle parental
utiliser la fonction Contrôle parental pour restreindre le niveau du contenu
Une fois la lecture du DVD arrêtée, passez à l’étape 6 de la section
qui pourra être lu sur votre PlayStation
TM2 intégrée.
« Réglages du Contrôle parental » et réglez « Niveau » sur
Plus la valeur est faible, plus la restriction sera forte.
« Désactivé(e) ».
Réglages du Contrôle parental
1 Sélectionnez « Contrôle parental », puis appuyez sur la
touche .
L’écran d’enregistrement d’un code d’accès s’affiche. Si vous avez
déjà entré un code d’accès, l’écran de confirmation s’affiche.
2 Sélectionnez un chiffre, puis appuyez sur la touche .
Répétez l’étape 2 pour saisir un code d’accès à quatre chiffres. Si vous
souhaitez effacer un chiffre, appuyez sur la touche . Lorsque vous
spécifiez un code d’accès, vous devez le saisir à nouveau pour
confirmation.
Paramètres et réglages du lecteur DVD
25
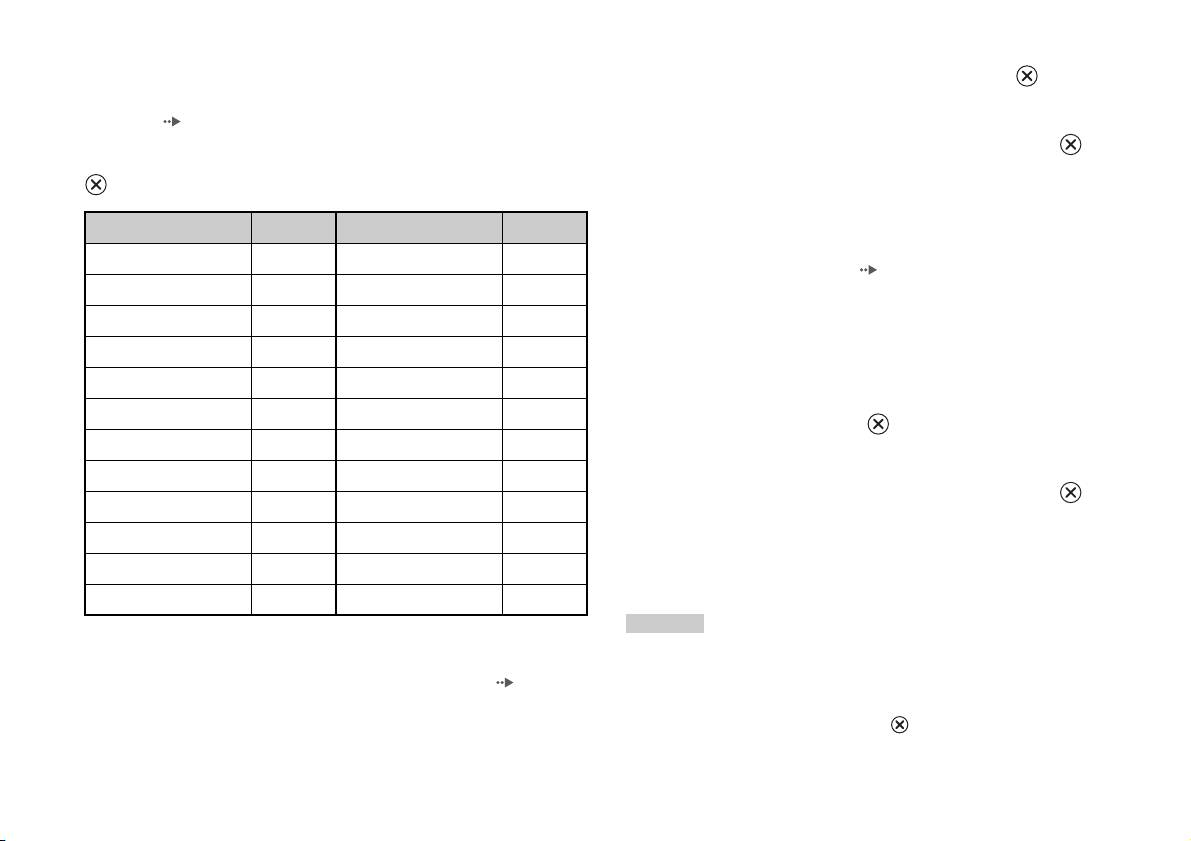
Liste des codes de région
1 A l’aide des touches directionnelles, sélectionnez « Changer
Si vous souhaitez entrer un code de région pour le Contrôle parental,
le code d’accès », puis appuyez sur la touche .
sélectionnez « Autres » à l’étape 4 de la section « Réglages du Contrôle
L’écran de changement du code d’accès s’affiche.
parental » ( page 25). Utilisez les touches directionnelles pour
sélectionner la première lettre, puis appuyez sur la touche directionnelle
2 Sélectionnez un chiffre, puis appuyez sur la touche .
droite. Ensuite, sélectionnez la deuxième lettre et appuyez sur la touche
Répétez l’étape 2 pour saisir un code d’accès à quatre chiffres. Vous
.
êtes invité à le spécifier à nouveau pour confirmation.
Région Code Région Code
Annulation temporaire des restrictions de Contrôle parental
Allemagne DE Malte MT
1 Lancez la lecture du DVD ( page 17).
Autriche AT Norvège NO
Vous serez invité à modifier temporairement le niveau de Contrôle
Belgique BE Pays-Bas NL
parental pour autoriser la lecture. Cela se produit généralement
immédiatement au démarrage du disque, mais peut également survenir
Danemark DK Pologne PL
à différents moments, selon le DVD.
Espagne ES Portugal PT
2 A l’aide des touches directionnelles, sélectionnez « Oui »,
Finlande FI Royaume-Uni GB
puis appuyez sur la touche .
France FR Russie RU
L’écran de saisie du code d’accès s’affiche.
Grèce GR République tchèque CZ
3 Sélectionnez un chiffre, puis appuyez sur la touche .
Irlande IE Slovaquie SK
Répétez l’étape 3 pour saisir le code d’accès à quatre chiffres. Une fois
Israël IL Suisse CH
le code d’accès entré, la lecture recommence. Lorsque vous arrêtez la
lecture du DVD, le niveau du Contrôle parental est rétabli au niveau
Italie IT Suède SE
préalablement choisi.
Luxembourg LU Turquie TR
Conseils
• Si vous oubliez votre mot de passe, insérez un DVD dépourvu de fonctions de
Changement de votre code d’accès
contrôle parental. Dans le panneau de commande, sélectionnez x (Arrêt) pour
A l’étape 2 de la section « Réglages du Contrôle parental » ( page 25),
arrêter la lecture, puis sélectionnez de nouveau x (Arrêt) pour désactiver la reprise
exécutez les étapes suivantes :
de la lecture. Sélectionnez « Réglages », puis « Contrôle parental » dans « Réglage
personnalisé », puis appuyez sur la touche . Appuyez sur la touche SELECT de
la Manette Analogique, puis entrez le nombre « 7444 ».
26
Paramètres et réglages du lecteur DVD

• Si vous ne définissez pas de code d’accès, vous ne pouvez pas modifier les
Dolby Digital
paramètres du Contrôle parental.
Sélectionnez cette option pour émettre les signaux Dolby Digital via le
• Certains DVD proposant la fonction de Contrôle parental n’autorisent pas
connecteur DIGITAL OUT (OPTICAL).
l’utilisation des modes de lecture ( pages 19 à 21).
Activé(e) Sélectionnez cette option si la PlayStationTM2 intégrée est raccordée
à un appareil audio équipé d’un décodeur Dolby Digital intégré.
Réglage du son
Désactivé(e)
Sélectionnez cette option si la PlayStationTM2 intégrée est raccordée
à un appareil audio dépourvu de décodeur Dolby Digital intégré.
Sortie audio numérique
Vous pouvez changer le mode de sortie des signaux audio lorsque vous
FR
raccordez les appareils suivants au connecteur DIGITAL OUT
DTS
DVD
(OPTICAL).
Sélectionnez cette option pour émettre les signaux DTS via le connecteur
DIGITAL OUT (OPTICAL).
Attention
Activé(e) Sélectionnez cette option si la PlayStation
TM2 intégrée est raccordée
Si la PlayStationTM2 intégrée est connectée à un appareil audio dépourvu de
à un appareil audio équipé d’un décodeur DTS intégré.
décodeur Dolby Digital, DTS ou MPEG, réglez « Dolby Digital », « DTS » et
« MPEG » sur « Désactivé(e) ». Si vous réglez ces options sur « Activé(e) »
Désactivé(e)
Sélectionnez cette option si la PlayStationTM2 intégrée est raccordée
sans disposer du décodeur nécessaire, il se peut que la console n’émette aucun
à un appareil audio dépourvu de décodeur DTS intégré.
son ou un bruit très fort.
MPEG
DIGITAL OUT (OPTICAL)
Sélectionnez cette option pour émettre les signaux MPEG AUDIO via le
Cette option définit le type de sortie du connecteur DIGITAL OUT
connecteur DIGITAL OUT (OPTICAL).
(OPTICAL).
Activé(e) Sélectionnez cette option si la PlayStation
TM2 intégrée est raccordée
Activé(e) Sélectionnez cette option si vous souhaitez que le son (signal audio)
à un appareil audio équipé d’un décodeur MPEG intégré.
soit émis via le connecteur DIGITAL OUT (OPTICAL).
Les paramètres de « Dolby Digital », « DTS » et « MPEG »
Désactivé(e)
Sélectionnez cette option si la PlayStationTM2 intégrée est raccordée
s’affichent.
à un appareil audio dépourvu de décodeur MPEG intégré.
Désactivé(e) Sélectionnez cette option si vous ne souhaitez pas que le son soit
émis via le connecteur DIGITAL OUT (OPTICAL).
Les paramètres de « Dolby Digital », « DTS » et « MPEG » ne
s’affichent pas.
Paramètres et réglages du lecteur DVD
27
Sélection automatique de plage audio
Ce paramètre accorde la priorité à la bande-son contenant le plus grand
nombre de canaux lorsque vous lisez un DVD sur lequel sont enregistrés
plusieurs formats audio (PCM, Dolby Digital, DTS ou MPEG). Si les
formats PCM, Dolby Digital, DTS et MPEG possèdent le même nombre
de canaux, la PlayStation
TM2 intégrée sélectionne les bande-son PCM,
Dolby Digital, DTS et MPEG dans cet ordre.
Activé(e) Priorité accordée
Désactivé(e)
Aucune priorité accordée
Conseils
• Si vous réglez « DTS » sur « Désactivé(e) » dans « Sortie audio numérique »
( page 27), la bande sonore DTS n’est pas lue.
• Selon le DVD, le canal audio ayant la priorité peut être prédéterminé. Dans ce cas,
la bande sonore sera sélectionnée en se basant sur l’ordre de priorité du DVD.
Volume du DVD
Vous pouvez définir cette option si le niveau de sortie audio du DVD est
bas. Cette option n’est disponible que si « DIGITAL OUT (OPTICAL) »
est réglé sur « Désactivé(e) » dans « Sortie audio numérique »
( page 27)
.
+2 Augmente le volume (maximum)
+1 Augmente le volume
Normal
En règle générale, sélectionnez cette option.
Attention
Si vous réglez cette option sur « +1 » ou « +2 », le son risque d’être déformé.
Dans ce cas, sélectionnez « Normal ». Remarquez également que si vous réglez
le volume trop fort, cela risque d’endommager les haut-parleurs ou votre ouïe.
28
Paramètres et réglages du lecteur DVD

Menu principal
Conseil
Si vous appuyez sur la touche PlayStation 2 POWER ON de la télécommande du
téléviseur alors qu’un disque est inséré, le menu principal ne s’affiche pas. Pour
Affichage du menu principal
afficher le menu principal, appuyez sur le bouton OPEN situé à l’avant de la
PlayStation
TM2 intégrée et retirez le disque. Ensuite, appuyez sur la touche
PlayStation 2 POWER ON de la télécommande du téléviseur.
A partir du menu principal, vous pouvez accéder à des informations et
modifier divers paramètres. Il permet également d’accéder aux écrans
suivants. Le menu principal s’affiche lorsque vous mettez la
PlayStation
TM2 intégrée sous tension sans avoir inséré de disque.
FR
• Ecran navigateur ( page 30)
Menu principal
• Menu Configuration du Système ( page 31)
• Ecran d’informations sur la version ( page 33)
1 Appuyez sur la touche PlayStation 2 POWER ON de la
télécommande du téléviseur.
Le menu principal s’affiche. Remarquez que l’affichage du menu
principal peut prendre un certain temps.
Affichage du menu principal
29
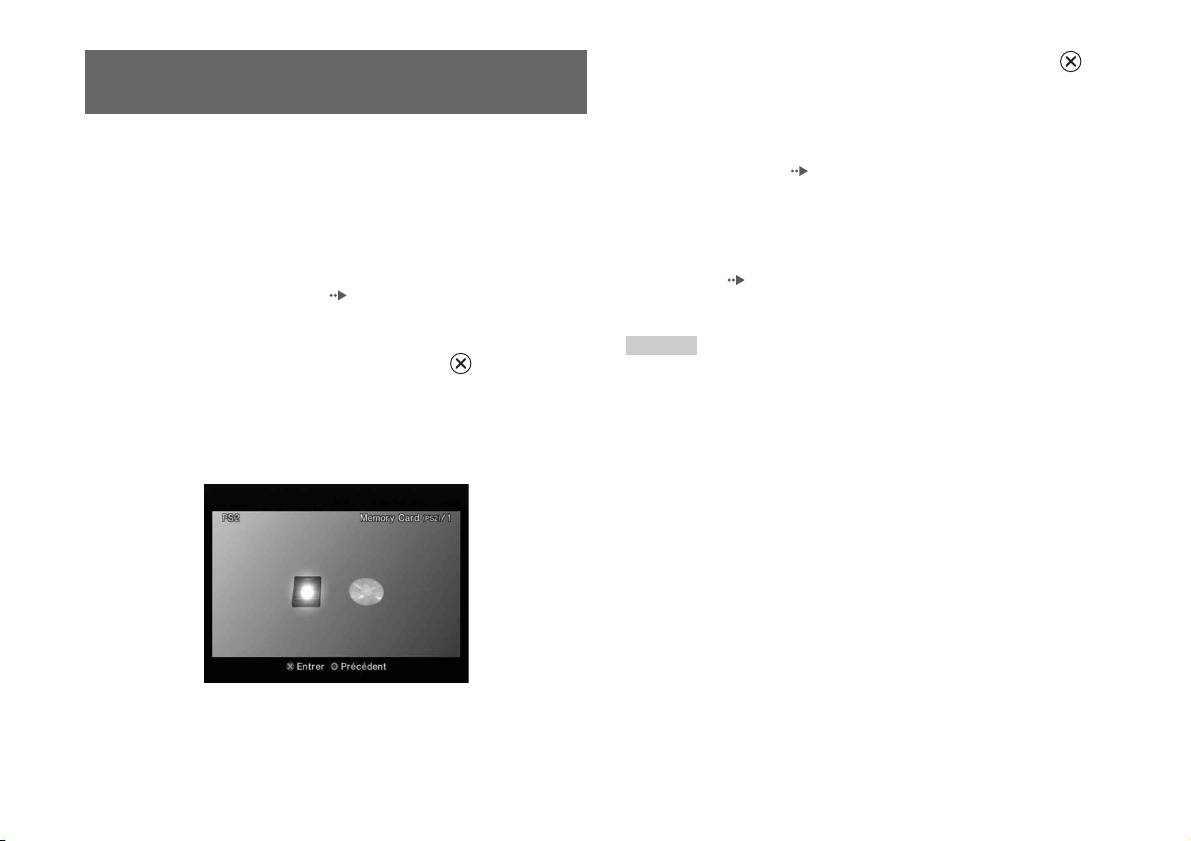
4 Sélectionnez une icône, puis appuyez sur la touche .
Utilisation de l’écran navigateur
• Lorsque vous sélectionnez une icône de Memory Card (Carte
Mémoire), les icônes des données sauvegardées sur celle-ci
s’affichent. Pour copier ou supprimer les données de jeu
L’écran navigateur vous permet de réaliser les opérations suivantes :
enregistrées, reportez-vous à la section « Copie ou suppression de
• Copie ou suppression de données de jeu sauvegardées sur une Memory
données de jeu » ( page 12).
Card (Carte Mémoire)
• Si vous sélectionnez l’icône d’un disque de logiciel au format
• Démarrage d’un jeu
PlayStation
TM2 ou PlayStationTM, le jeu démarre.
• Lancement de la lecture d’un CD audio
• Si vous sélectionnez l’icône d’un CD audio, les plages contenues sur
• Lancement de la lecture d’un DVD
le CD s’affichent. Reportez-vous à la section « Lecture d’un CD
audio » ( page 13).
1 Affichez le menu principal ( page 29).
• Si vous sélectionnez l’icône d’un DVD, la lecture du DVD démarre.
2 A l’aide des touches directionnelles, sélectionnez
Conseil
« Navigateur », puis appuyez sur la touche .
Le message « Aucune donnée » s’affiche sur l’écran navigateur si aucune Memory
L’écran navigateur s’affiche.
Card (Carte Mémoire) ou aucun disque ne sont insérés dans la PlayStation
TM2
intégrée.
3 Insérez un disque ou une Memory Card (Carte Mémoire).
L’icône de l’élément inséré s’affiche dans l’écran Navigateur.
\
30
Utilisation de l’écran navigateur
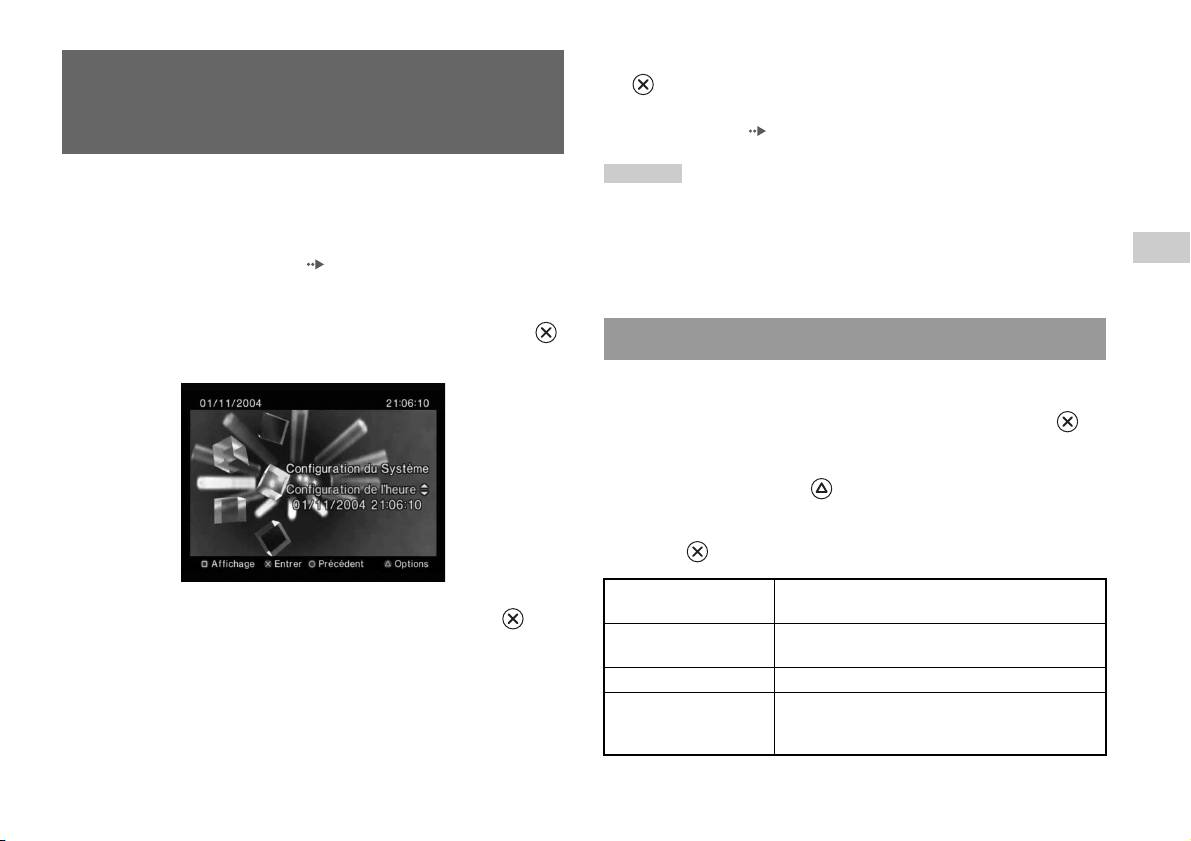
4 Sélectionnez le paramètre désiré, puis appuyez sur la touche
Utilisation du menu
.
Pour plus de détails, reportez-vous aux instructions relatives à chaque
Configuration du Système
option de menu ( pages 31 à 33).
Conseils
A partir du menu Configuration du Système, vous pouvez modifier les
• Le paramètre par défaut de chaque menu a été souligné dans les explications ci-
paramètres de nombreuses options, telles que la langue ou l’affichage de
dessous.
l’heure, ainsi que le mode de sortie audio ou vidéo.
• Les modifications apportées à chaque paramètre sont enregistrées et restent en
FR
vigueur même après la mise hors tension ou la réinitialisation de la PlayStation
TM2
1 Affichez le menu principal ( page 29).
Menu principal
intégrée.
2 A l’aide des touches directionnelles, sélectionnez
« Configuration du Système », puis appuyez sur la touche .
Configuration de l’heure
Le menu Configuration du Système s’affiche.
Vous pouvez régler la date et l’heure. Utilisez les touches directionnelles
pour régler l’année, le mois, le jour, l’heure, les minutes et les secondes.
Ce paramètre entre en vigueur lorsque vous appuyez sur la touche .
Réglages facultatifs
Si vous appuyez sur la touche lorsque l’écran « Configuration de
l’heure » est affiché, vous pouvez définir des options telles que « Affichage
de la date » ou « Affichage de l’heure ». Utilisez les touches directionnelles
et la touche pour définir chaque paramètre.
Affichage de l’heure Configure l’horloge système pour utiliser le format à
12 heures ou à 24 heures
3 Sélectionnez une option, puis appuyez sur la touche .
Affichage de la date Définit l’ordre d’affichage de l’année, du mois et du
L’option de menu devient active et peut être sélectionnée.
jour
Fuseaux horaires Définit le fuseau horaire
Type d’heure Spécifie l’utilisation de l’heure d’hiver (standard) ou
de l’heure d’été. En règle générale, sélectionnez
« Standard ».
Utilisation du menu Configuration du Système
31

Taille de l’écran
Télécommande
Vous pouvez régler le mode d’affichage du téléviseur.
Vous pouvez définir cette option lorsque vous utilisez la Télécommande
DVD (pour PlayStation
TM2) (vendue séparément).
4:3
Fonction Jeu Activée Sélectionnez cette option lorsque vous souhaitez faire
Plein écran*
fonctionner des logiciels au format PlayStation
TM2 ou
16:9
PlayStation
TM à l’aide de la Télécommande DVD.
* Le mode d’affichage « Plein écran » est compatible avec le menu Configuration
Fonction Jeu Désactivée Sélectionnez cette option lorsque vous ne souhaitez
du Système, l’écran navigateur et l’écran CD audio.
pas faire fonctionner des logiciels au format
PlayStation
TM2 ou PlayStationTM à l’aide de la
Télécommande DVD.
DIGITAL OUT (OPTICAL)
Conseil
Vous pouvez choisir de diffuser le signal via le connecteur DIGITAL OUT
Les restrictions suivantes s’appliquent si la Télécommande DVD est utilisée avec
(OPTICAL).
l’option réglée sur « Fonction Jeu Activée » :
– Selon le logiciel, il se peut que certaines touches de la télécommande ne
Activé Sélectionnez cette option si vous souhaitez que les
fonctionnent pas.
signaux audio soient émis via le connecteur DIGITAL
– La Télécommande DVD ne fonctionne pas si vous appuyez sur plusieurs touches
OUT (OPTICAL).
simultanément.
– Certains logiciels risquent de ne pas fonctionner correctement si la manette est
Désactivé Sélectionnez cette option si vous ne souhaitez pas que
débranchée du port de manette 1. Si cela se produit, sélectionnez l’option
les signaux audio soient émis via le connecteur
« Fonction Jeu Désactivée ».
DIGITAL OUT (OPTICAL).
32
Utilisation du menu Configuration du Système

Langue
Utilisation de l’écran
Cette option permet de sélectionner la langue d’affichage du menu
principal, de l’écran navigateur, du menu Configuration du Système et de
d’informations sur la version
l’écran d’informations sur la version.
Vous pouvez vérifier les informations sur la version de différents
Anglais Affiche les messages en anglais
composants de la PlayStation
TM2 intégrée en sélectionnant cette option. Il
Français Affiche les messages en français
est également possible de modifier des paramètres facultatifs pour certains
éléments.
FR
Espagnol Affiche les messages en espagnol
Menu principal
Allemand Affiche les messages en allemand
1 Lorsque le menu principal est affiché ( page 29), appuyez
sur la touche .
Italien Affiche les messages en italien
L’écran d’informations sur la version s’affiche.
Néerlandais Affiche les messages en néerlandais
Portugais Affiche les messages en portugais
Réglages facultatifs
Vous pouvez définir des réglages facultatifs pour les paramètres
« Console », « Lecteur PlayStation
® » et « Lecteur DVD ». « Lecteur
DVD » ne peut être défini que si l’option « Balayage progressif » du
lecteur DVD est réglée sur « Activé ».
Utilisation de l’écran d’informations sur la version
33

1 A l’aide des touches directionnelles, sélectionnez une
option, puis appuyez sur la touche .
Console
La valeur actuelle de l’option s’affiche.
La PlayStationTM2 intégrée règle automatiquement ses configurations
internes pour obtenir une lecture optimale. Si « Diagnostic » est réglé sur
2 Sélectionnez une option, puis appuyez sur la touche .
« Activé », la PlayStation
TM2 intégrée effectue des réglages
Les options disponibles s’affichent.
supplémentaires.
3 Sélectionnez le paramètre désiré, puis appuyez sur la touche
Diagnostic
.
Pour plus de détails, reportez-vous aux instructions relatives à chaque
Désactivé La fonction Diagnostic est désactivée.
paramètre ( pages 34 à 36).
Activé La fonction Diagnostic est activée.
Conseil
Conseil
Le paramètre par défaut de chaque menu a été souligné dans les explications ci-
dessous.
Le paramètre « Diagnostic » redevient automatiquement le paramètre par défaut
dans les cas suivants :
– Lors de la lecture d’un logiciel au format PlayStation
TM2 ou PlayStationTM ou
lorsqu’un DVD démarre
– Lorsque la PlayStation
TM2 intégrée est réinitialisée
– Lorsque la PlayStation
TM2 intégrée est mise hors tension
34
Utilisation de l’écran d’informations sur la version
Pilote PlayStationTM
Lecteur DVD
Vous pouvez régler le programme Pilote PlayStationTM pour optimiser les
Si vous réglez « Balayage progressif » sur « Activé » lorsque la
performances d’un logiciel au format PlayStation
TM.
PlayStation
TM2 intégrée est raccordée à un téléviseur qui ne dispose pas de
l’équipement nécessaire, la qualité de l’image peut être réduite ou il se peut
Conseil
que l’image ne s’affiche pas. Vous pouvez désactiver le paramètre
Les paramètres par défaut sont automatiquement rétablis dans le cas suivant :
« Balayage progressif » de la manière suivante.
– Lorsque la PlayStation
TM2 intégrée est mise hors tension
Retirez le DVD avant de désactiver ce paramètre.
FR
Vitesse du Disque
Désactiver Balayage Progressif
Menu principal
Normale Charge les disques à vitesse normale
Non Laisse le paramètre « Balayage progressif » activé
Rapide Charge les disques à grande vitesse
Oui Désactive le paramètre « Balayage progressif »
Conseil
1 Affichez l’écran d’informations sur la version.
Réglez cette option sur « Normale » dans les cas suivants :
– Lorsque le chargement rapide ne produit aucune amélioration des résultats
2 A l’aide des touches directionnelles, sélectionnez « Lecteur
– Lorsque vous utilisez un logiciel non compatible avec le chargement rapide
DVD », puis appuyez sur la touche .
L’option « Désactiver Balayage Progressif » s’affiche.
Textures
3 Appuyez sur la touche .
Standard
Affiche une texture normale
Lisse Réduit les irrégularités des images affichées
4 Sélectionnez « Oui », puis appuyez sur la touche .
Conseil
5 Appuyez à deux reprises sur la touche .
Réglez cette option sur « Standard » dans les cas suivants :
L’écran revient au menu principal.
– Lorsqu’une texture lisse ne produit aucune amélioration des résultats
– Si l’image ne s’affiche pas correctement alors que l’option « Lisse » est
6 Appuyez sur le bouton OPEN à l’avant de la PlayStationTM2
sélectionnée
intégrée et insérez un DVD dans la PlayStation
TM2 intégrée.
Utilisation de l’écran d’informations sur la version
35

7 Refermez le couvercle du compartiment à disque.
La lecture démarre.
Conseil
Le paramètre ne sera pas désactivé si 1) vous ne démarrez pas la lecture d’un DVD
après l’étape 4 ou si 2) vous réinitialisez ou mettez hors tension la PlayStation
TM2
intégrée avant l’étape 6.
36
Utilisation de l’écran d’informations sur la version

Connexion réseau
Connexion avec un câble Ethernet
Connexion au réseau
Vous pouvez connecter la PlayStationTM2 intégrée à un réseau à l’aide d’un
câble Ethernet raccordé au connecteur NETWORK (réseau) situé à
l’arrière. Vous pouvez établir la connexion à un réseau 100 Base-TX ou 10
Vous pouvez jouer en ligne en connectant la PlayStationTM2 à un réseau à
Base-T. Pour plus de détails, reportez-vous aux instructions qui
large bande. Pour jouer à tous les jeux en ligne, vous devez disposer des
accompagnent le périphérique réseau.
éléments suivants :
• Un jeu PlayStation
TM2 compatible avec le réseau
Configuration d’un réseau de base
FR
• Service Internet de à large bande
Ligne du réseau
Connexion réseau
• Un câble Ethernet disponible dans le commerce
• Une Memory Card (Carte Mémoire) (8 MB) (pour PlayStation
TM2)
PC
(vendue séparément)
Conseils
Modem large bande,
routeur, etc.
• Vous ne pouvez pas jouer en ligne en utilisant une connexion par ligne commutée
ou RNIS.
• Les connexions USB du périphérique réseau externe au connecteur USB ne sont
Equipement du réseau Câble Ethernet
(non fourni)
pas prises en charge.
• Il existe deux types de câbles Ethernet : les câbles directs et les câbles de relais.
Ligne du réseau : Varie selon le type de service large bande disponible
Vérifiez que vous utilisez le type de câble correct lorsque vous raccordez la
à votre domicile.
PlayStation
TM2 à votre connexion Internet à large bande. Pour plus de détails,
reportez-vous au mode d’emploi qui accompagne le périphérique réseau ou
Equipement du réseau : Le type d’équipement utilisé varie également
adressez-vous à votre fournisseur de services Internet à large bande.
en fonction du type de service.
• Ne vous connectez pas au connecteur LAN du téléviseur à l’aide du câble Ethernet.
Conseil
Lors de la connexion de la PlayStationTM2 intégrée et d’un PC au réseau, un
périphérique réseau, tel qu’un routeur ou un concentrateur, peut être nécessaire. Pour
plus de détails, reportez-vous aux instructions qui accompagnent le périphérique
réseau.
Connexion au réseau
37

Connexion de la PlayStationTM2 intégrée
Conseils
• Ne branchez pas le câble d’alimentation sur une prise électrique avant d’avoir
effectué tous les autres raccordements.
• Ne pas branchez les câbles Ethernet ou les cordons téléphoniques suivants au
PlayStation
TM2 intégrée
connecteur NETWORK (réseau) ; une trop grande quantité de courant électrique
risque de passer par le connecteur, entraînant ainsi une défaillance, une chaleur
excessive ou un début d’incendie :
– Lignes téléphoniques résidentielles normales
– Câbles Ethernet non adaptés à une utilisation avec un réseau 10Base-T/
100Base-TX
– Téléphone ou ligne de données compatible RNIS (numérique)
Câble réseau (non fourni)
– Lignes téléphoniques PBX
– Autres types de lignes téléphoniques inconnus
Routeur
Vers les périphériques réseau
Câble réseau (non fourni)
Modem DSL/Modem câble
Internet
1 Branchez le câble Ethernet sur le connecteur NETWORK
(réseau) situé à l’arrière.
2 Raccorder le câble Ethernet au périphérique réseau.
38
Connexion au réseau

Création des paramètres réseau
Lorsque vous avez raccordé un câble Ethernet à la PlayStationTM2 intégrée,
vous devez créer et enregistrer des paramètres de réseau. Pour cela, vous
devez disposer du Disque d’accès au réseau fourni avec votre
PlayStation
TM2. Vous pouvez enregistrer votre PlayStationTM2.
FR
Vous devez disposer des éléments suivants pour créer une configuration de
Connexion réseau
réseau :
– Une Memory Card (Carte Mémoire) (8 MB) (pour PlayStationTM2) (vendue
séparément)
– Des informations de connexion et de configuration du réseau obtenues auprès de
votre fournisseur de services Internet à large bande
Conseil
Selon le type de service Internet utilisé, il se peut que vous deviez spécifier votre
adresse MAC à votre fournisseur de services Internet à large bande. Vous trouverez
l’adresse MAC de votre PlayStation
TM2 sur l’écran d’informations sur la version
(page33).
Création des paramètres réseau
39

Collegamento in rete
Indice
Collegamento a una rete...............................................................37
Creazione di impostazioni di rete.................................................39
Preparazione
Nomi di componenti ......................................................................3
Collegamento delle apparecchiature audio digitali........................5
Collegamento del controller...........................................................6
Accensione e spegnimento della PlayStation
TM2 integrata............6
Giochi
Riproduzione di un gioco............................................................... 7
Uso delle Memory Card............................................................... 11
CD audio
Riproduzione di un CD audio ......................................................13
DVD
Visione di un DVD ...................................................................... 15
Uso delle modalità di riproduzione.............................................. 20
Regolazione delle impostazioni del lettore DVD ........................22
Menu principale
Visualizzazione del menu principale ...........................................30
Uso della schermata Browser.......................................................31
Uso del menu Configurazione di Sistema.................................... 32
Uso della schermata delle informazioni sulla versione................ 34
2
Indice

Preparazione
Collegamento a Descrizione
3 Connettore USB
È possibile collegare vari dispositivi USB alla
Nomi di componenti
PlayStation
TM2 integrata, anche se non tutti sono
compatibili. Per ulteriori informazioni, fare
riferimento alle istruzioni per l’uso in dotazione con
il dispositivo USB.
PlayStationTM2 integrata - Parte anteriore
Nota
Non è possibile riprodurre foto, musica e file video
utilizzando il connettore USB della PlayStation.
4 Coperchio per il disco
Premere il tasto OPEN per aprire il coperchio.
IT
Preparazione
5 Tasto OPEN
Premere il tasto per aprire il coperchio del disco.
6 Tasto "/1 (acceso/
Premere il tasto per accendere la PlayStationTM2
attesa)/RESET
integrata, per accedere alla modalità di attesa o per
resettare il sistema.
RESET: premere il tasto una volta.
Attesa: premere il tasto per almeno un secondo.
OPEN
7 Indicatore "/1
Si illumina in verde quando la PlayStationTM2
(acceso/attesa)
integrata è accesa.
Si illumina in rosso quando la PlayStation
TM2
integrata è nella modalità di attesa.
Collegamento a Descrizione
1 Ingresso MEMORY
Inserire una Memory Card ( pagina 11).
CARD 1/2
2 Ingresso controller
Inserire il Controller Analogico
1/2
(DUALSHOCK®2) in un ingresso controller della
PlayStation
TM2 ( pagina 6).
Nomi di componenti
3

PlayStationTM2 integrata - Parte posteriore
Collegamento a Descrizione
1 LAN
È possibile giocare in rete collegando la
PlayStation
TM2 a una rete a banda larga
( pagina 37).
Nota
Per utilizzare le funzionalità “BRAVIA” per la rete
domestica, effettuare il collegamento all’ingresso
LAN del televisore utilizzando un cavo Ethernet
( pagina 37).
4
Nomi di componenti
1 2
Collegamento a Descrizione
2 DIGITAL AUDIO OUT
È possibile ascoltare l’audio della PlayStationTM2
(OPTICAL)
integrata su un sistema home theatre collegato
attraverso l’ingresso digitale.

• Il collegamento DIGITAL AUDIO OUT (OPTICAL) trasmette l’audio digitale
dalla PlayStation
TM2 integrata.
Collegamento delle
apparecchiature audio digitali
Utilizzando un cavo digitale ottico tra quelli disponibili in commercio, è
possibile ascoltare l’audio surround come se ci si trovasse in un cinema o
una sala concerti. Quando si collega la PlayStationTM2 integrata
all’apparecchiatura audio con connettori digitali, consultare le istruzioni in
dotazione con il dispositivo da collegare.
IT
Dispositivo collegato
PlayStationTM2 integrata - Parte posteriore
Preparazione
DIGITAL IN
OPTICAL
Cavo digitale ottico disponibile
in commercio
Note
• Se si collega la PlayStationTM2 integrata a un’apparecchiatura audio mediante un
cavo digitale ottico, questo potrebbe influenzare l’output audio di qualche software
per PlayStation
TM2, con il risultato che non viene emesso alcun suono. In tal caso,
usare un cavo come il cavo Audio (non in dotazione) e collegarlo al connettore
AUDIO OUT del televisore. Non usare un cavo digitale ottico.
• Dopo aver collegato l’apparecchiatura audio digitale, impostare “DIGITAL OUT
(OPTICAL)” su “On” nel menu Configurazione di Sistema. Per ulteriori
informazioni, vedere “DIGITAL OUT (OPTICAL)” ( pagina 33).
Collegamento delle apparecchiature audio digitali
5

Collegamento del controller
Accensione e spegnimento della
PlayStation
TM2 integrata
1 Inserire il Controller Analogico (DUALSHOCK®2) in un
ingresso controller della PlayStation
TM2 integrata.
1 Premere il tasto PlayStation 2 POWER ON sul telecomando del
PlayStationTM2 integrata - Parte anteriore
televisore per accendere il televisore e la PlayStation
TM2. (La
modalità di ingresso del televisore viene automaticamente
impostata sulla PlayStation
TM2.)
Note
• Quando si spegne il televisore, viene spenta anche la PlayStationTM2. Inoltre,
quando vengono attivate le funzioni riportate di seguito, la PlayStation
TM2 viene
spenta insieme al televisore.
– Standby TV per inattività
Controller Analogico
– Timer Spegnimento
(DUALSHOCK
®2)
– Gestione Energia PC
– Promemoria
Nota
– Avvio timer
– Cornice
Alcuni titoli software indicano un ingresso controller specifico da usare. Fare
riferimento alle istruzioni per l’uso in dotazione con il software.
• Non accedere alla scheda di memoria quando è visibile un messaggio di avviso (ad
esempio “Il televisore sarà spento...”).
6
Collegamento del controller

Giochi
Riproduzione di un gioco
OPEN
IT
Giochi
Prima della riproduzione di un gioco Avvio di un gioco
Controllare che i collegamenti all’apparecchiatura televisiva e audio siano
1 Premere il tasto OPEN per rilasciare il coperchio del disco.
corretti e che siano state prese le dovute precauzioni.
• “Collegamento del controller” ( pagina 6)
2 Far scorrere il coperchio del disco verso sinistra, quindi
inserire il disco in modo che il lato dell’etichetta sia rivolto
Nota
in alto.
Per giocare online, è necessario prima collegare e configurare una rete. Per ulteriori
informazioni, vedere “Collegamento a una rete” ( pagina 37).
3 Chiudere il coperchio del disco facendolo scorrere verso
destra fino a bloccarlo in posizione.
Note
• Assicurarsi di bloccare il coperchio del disco per riprodurre un disco.
• Un gioco può essere avviato anche dalla schermata del Browser ( pagina 31).
Riproduzione di un gioco
7
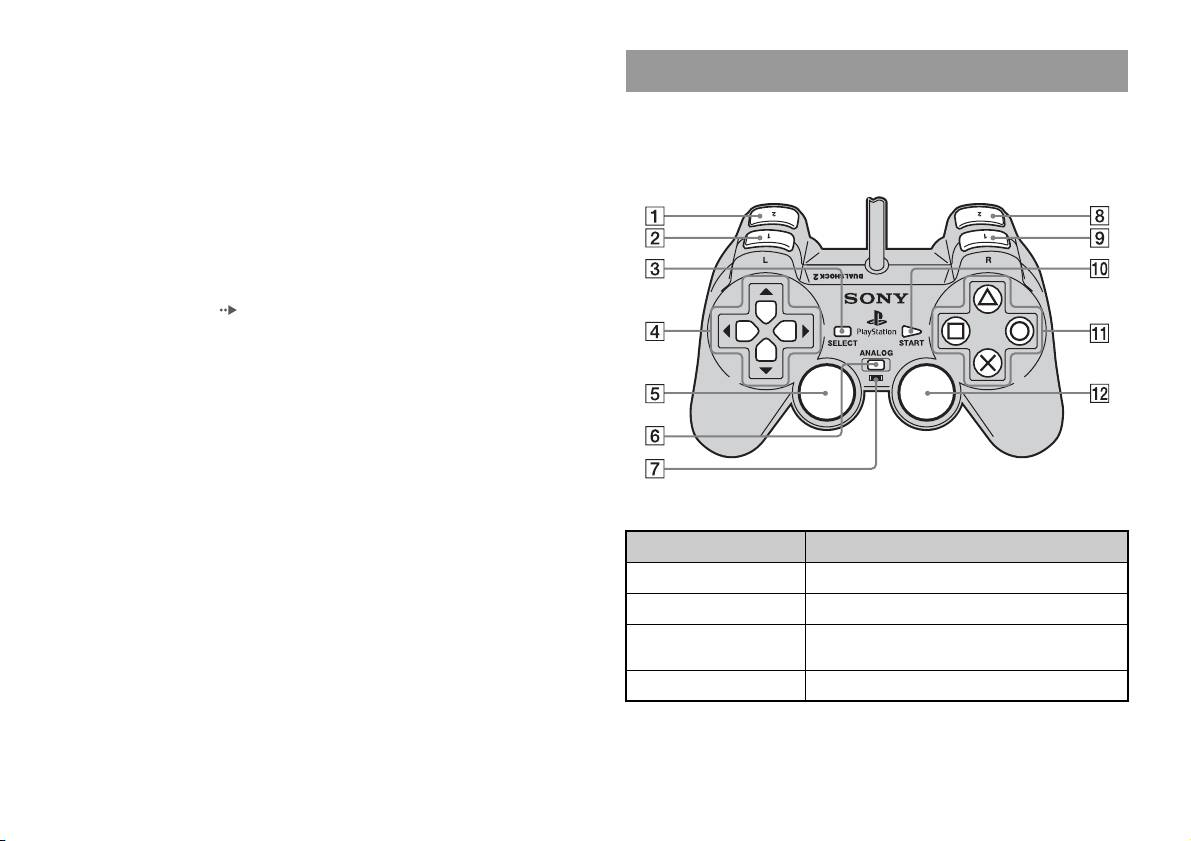
• Se si accende la PlayStationTM2 integrata dopo l’inserimento di un disco, il gioco
si avvia automaticamente.
Uso del Controller Analogico (DUALSHOCK®2)
Per reimpostare un gioco
Il Controller Analogico (DUALSHOCK
®2) dispone di una funzione
Premere il tasto \/1 (acceso/attesa)/RESET sul lato anteriore della
sensibile alla pressione. Dispone anche di una funzione di vibrazione.
PlayStation
TM2 integrata. Evitare di premere accidentalmente il tasto @/1/
RESET durante il gioco, in quanto facendolo il gioco ricomincerebbe da
Nomi di componenti
capo.
Per terminare un gioco
Premere il tasto "/1 (attivato/standby)/RESET sul frontalino integrato
della PlayStation
TM2 integrata dopo aver salvato i dati di gioco, quindi
rimuovere il disco ( pagina 3).
RESET: premere una volta il tasto.
Standby: tenere premuto il tasto per almeno un secondo.
Tasto/Interruttore Descrizione
1 Tasto L2
2 Tasto L1
3 Tasto SELECT
(selezione)
4 Tasti direzionali
8
Riproduzione di un gioco
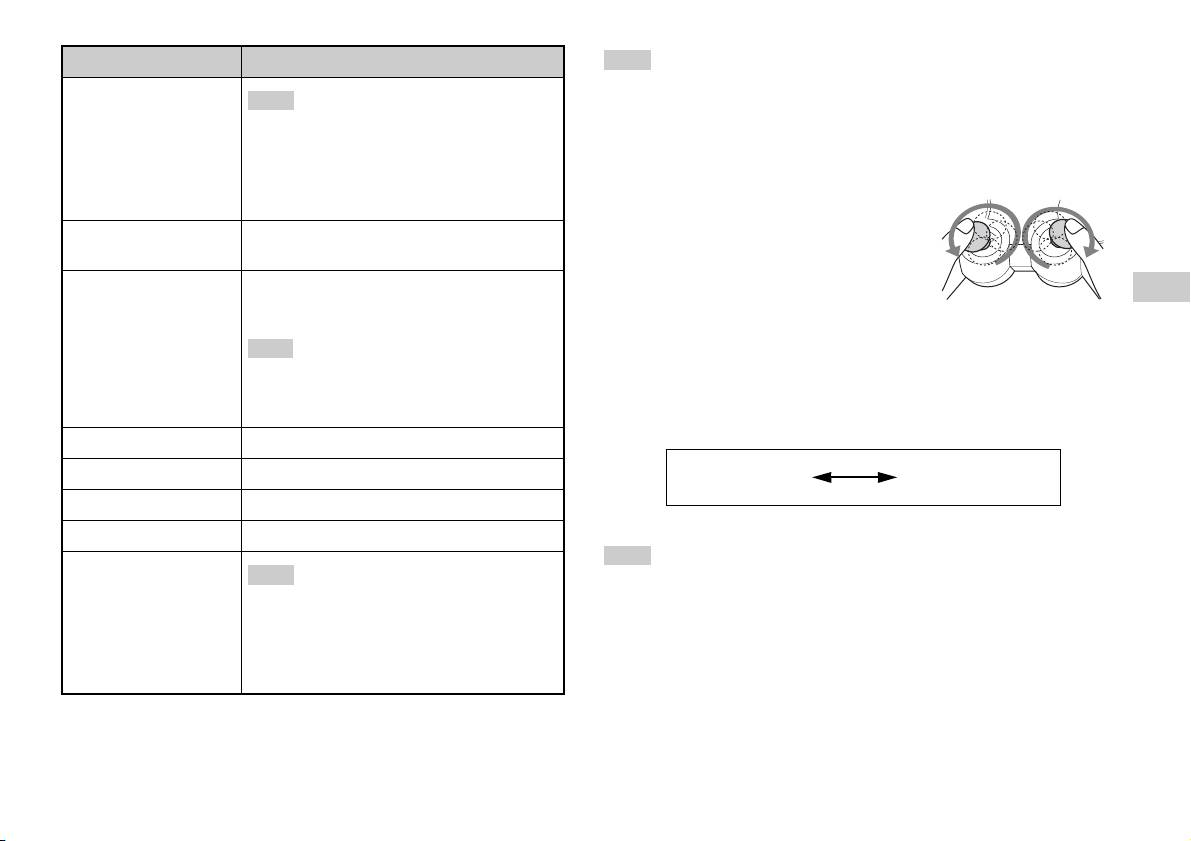
Tasto/Interruttore Descrizione
Note
• A seconda del software, i tasti utilizzabili nella modalità analogica potrebbero
5 Levetta analogica
Note
sinistra/Tasto L3
essere limitati. Fare riferimento alle istruzioni per l’uso in dotazione con il
• La levetta analogica sinistra e il tasto L3
software.
funzionano solo nella modalità analogica (spia:
• La funzione di vibrazione può essere attivata o disattivata nel menu delle opzioni
rossa).
del software. A seconda del software, la funzione di vibrazione può essere attivata
• Il tasto L3 funziona quando si preme la levetta
automaticamente.
analogica.
• Prima di usare il controller analogico
(DUALSHOCK
®2), con la PlayStationTM2
6 Tasto modalità
Consente di passare tra le modalità analogica e
integrata accesa, ruotare una volta le levette sinistra
ANALOG (analogica)
digitale.
e di destra con i pollici. Non torcere le levette
7 Spia della modalità
analogiche, ma ruotarle come per tracciare un
Modalità digitale: spia spenta.
IT
cerchio, come mostrato nella figura.
Modalità analogica: spia illuminata in rosso.
Giochi
Commutazione della modalità
Nota
Il tasto modalità ANALOG (analogica) potrebbe essere utilizzato per
A seconda del software, potrebbe non essere
commutare tra due modalità. Passare alla modalità appropriata per l’uso.
possibile commutare le modalità, anche premendo il
tasto modalità ANALOG (analogica).
Notare, tuttavia, che alcuni titoli software eseguono automaticamente
questa regolazione.
8 Tasto R2
Modalità digitale
Modalità analogica
9 Tasto R1
(spia: spenta)
(spia: rossa)
q; Tasto START (avvio)
qa Tasti f/a/×/s
Note
qs Levetta analogica
Note
destra/Tasto R3
• Quando si usa il Controller Analogico nella modalità digitale le levette analogiche
• La levetta analogica destra e il tasto R3
sinistra e destra non funzionano. Inoltre, la funzione del tasto sensibile alla
funzionano solo nella modalità analogica (spia:
pressione è disattivata.
rossa).
• A seconda del software, potrebbe non essere possibile commutare le modalità,
• Il tasto R3 funziona quando si preme la levetta
anche premendo il tasto modalità ANALOG (analogica).
analogica.
Riproduzione di un gioco
9

Controlli analogici
• Durante la riproduzione di un titolo software per PlayStationTM2, è
Informazioni sull’uso del Controller Analogico
possibile usare tutti i tasti nella modalità analogica ad eccezione dei tasti
(DUALSHOCK®) (SCPH-110 E)
START, SELECT, L3 e R3.
• Durante la riproduzione di un titolo software per PlayStation
TM, nella
Il Controller Analogico (DUALSHOCK®) (SCPH-110 E) può essere
modalità analogica possono essere utilizzate solo le levette analogiche
usato con la PlayStation
TM2 integrata, ma le funzioni dei tasti nella
sinistra e destra.
modalità analogica possono essere diverse da quelle del Controller
Analogico (DUALSHOCK®2). Nella modalità analogica possono essere
Nota
utilizzate solo le levette analogiche sinistra e destra.
A seconda del software, i tasti utilizzabili nella modalità analogica potrebbero essere
limitati. Fare riferimento alle istruzioni per l’uso in dotazione con il software.
Nota
Non tutti i titoli software per PlayStationTM2 supportano l’uso del Controller
Informazioni sulla funzione di vibrazione
Analogico (DUALSHOCK
®) (SCPH-110 E). In questi casi, va usato il Controller
Analogico (DUALSHOCK
®2).
La funzione di vibrazione può essere attivata o disattivata nel menu delle
opzioni del software.
Nota
A seconda del software, la funzione di vibrazione può essere attivata
automaticamente.
10
Riproduzione di un gioco
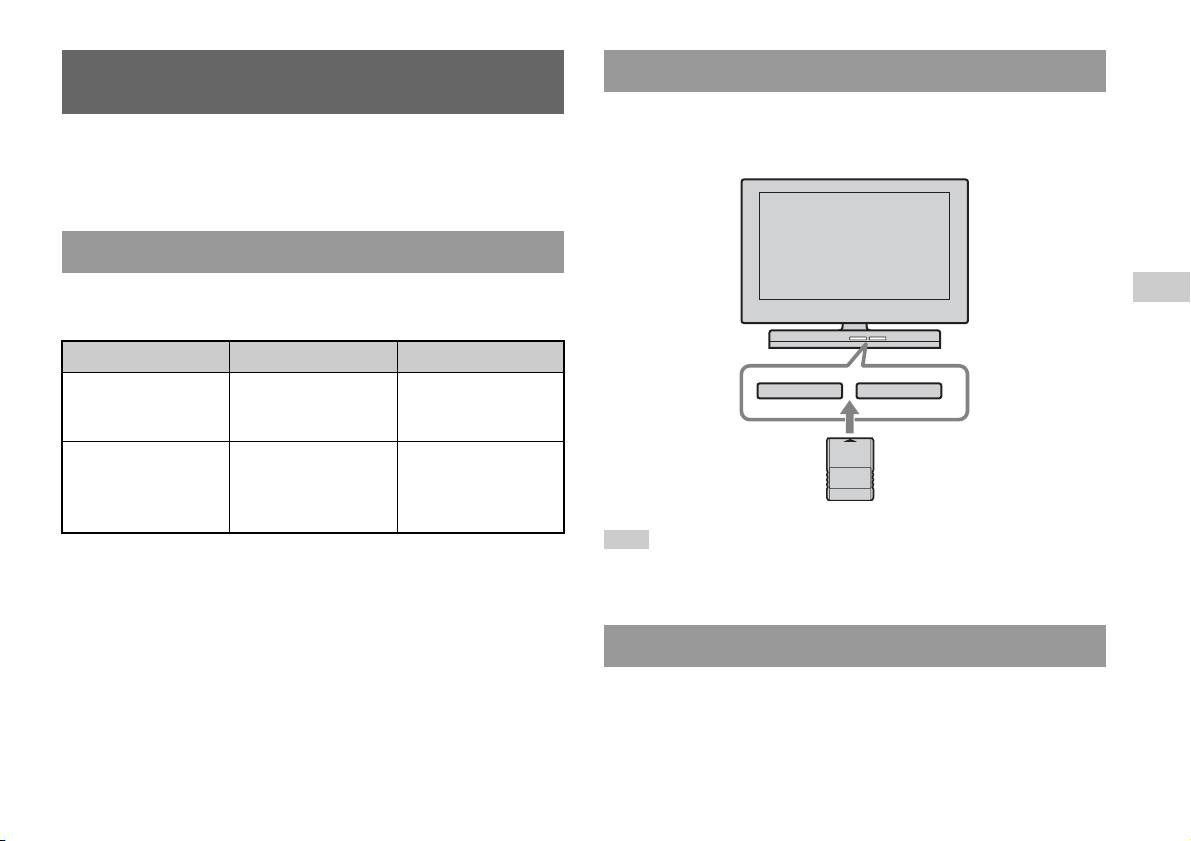
Inserimento di una Memory Card
Uso delle Memory Card
Inserire la Memory Card nell’ingresso MEMORY CARD sulla parte
anteriore della PlayStation
TM2 integrata.
È possibile salvare e caricare i dati di un gioco mediante una Memory Card
(venduta a parte). Inoltre, è possibile eliminare i dati del gioco o copiarli
PlayStationTM2 integrata - Parte anteriore
da una Memory Card all’altra.
Informazioni sui vari tipi di Memory Card
Esistono due tipi di Memory Card. Selezionare una Memory Card idonea
IT
per il software in uso.
Giochi
Tipo di Memory Card Software compatibile Quantità di memoria
Memory Card (8 MB)
Software per
Circa 8 MB
MEMORY CARDMEMORY CARD
(per PlayStation
TM2)
PlayStationTM2
(SCPH-10020 E)
Memory Card
Software per
15 blocchi di memoria
(SCPH-1020 E)*
PlayStation
TM
(circa 120 KB)
* Prodotto fuori
produzione.
Nota
MagicGate™ è un termine che designa una tecnologia di protezione del copyright
sviluppata da Sony Corporation.
Alcuni titoli software indicano un ingresso MEMORY CARD specifico da usare.
Fare riferimento alle istruzioni per l’uso in dotazione con il software.
Salvataggio o caricamento dei dati di gioco
A seconda del software, la procedura per il salvataggio o il caricamento
può variare. Fare riferimento alle istruzioni per l’uso in dotazione con il
software.
Uso delle Memory Card
11

Copia o eliminazione dei dati di gioco
È possibile eliminare i dati salvati o copiarli su un’altra Memory Card.
Utilizzare i tasti di direzione e il tasto del controller per
selezionare gli elementi.
1 Accendere la PlayStationTM2 integrata senza alcun disco
inserito, quindi inserire una Memory Card.
2 Selezionare “Browser”, quindi selezionare la Memory Card
da cui si desidera copiare o eliminare dati.
3 Selezionare l’icona relativa ai dati da copiare o eliminare,
quindi selezionare “Copia” o “Elimina”.
4 Attenersi alle istruzioni visualizzate nella schermata di
configurazione.
12
Uso delle Memory Card
CD audio
Uso del lettore CD durante la riproduzione
Riproduzione di un CD audio
Utilizzando i tasti direzionali, selezionare l’icona per il brano desiderato e
premere quindi il tasto .
Icona (Tasto*) Funzione
Riproduzione di un CD
. (Tasto L1) Passa all’inizio del brano corrente o precedente
1 Accendere la PlayStationTM2 integrata e inserire il disco
m (Tasto L2) Riproduzione rapida all’indietro
( pagina 7).
M (Tasto R2) Riproduzione rapida in avanti
Seguire la procedura ai punti da 1 a 3 in “Avvio di un gioco”.
> (Tasto R1) Passa all’inizio del brano successivo
IT
Vengono visualizzati i numeri dei brani.
CD audio
N (Tasto START
Avvia la riproduzione
(avvio))
2 Utilizzando i tasti direzionali, selezionare il numero del brano
da riprodurre, quindi premere il tasto .
X (Tasto START
Pausa riproduzione
(avvio))
Inizia la riproduzione.
x (Tasto SELECT
Interruzione della riproduzione
(selezione))
Note
• Se si accende la PlayStationTM2 integrata dopo l’inserimento di un disco, i numeri
* Può essere utilizzato direttamente premendo i tasti del controller analogico
dei brani sono visualizzati automaticamente.
(DUALSHOCK
®2) indicati tra parentesi.
• Un disco può essere avviato anche dalla schermata del Browser ( pagina 31).
Nota
È anche possibile usare il Telecomando DVD (per PlayStationTM2) (in vendita
Attenzione
separatamente).
Per riprodurre un CD audio registrato in formato DTS è necessario abbassare del
tutto il volume e collegare un dispositivo con decodificatore DTS al connettore
DIGITAL OUT (OPTICAL) ( pagina 5). È possibile che venga emesso un
Interruzione della riproduzione di un CD audio
rumore molto forte.
1 Usando i tasti direzionali, selezionare x quindi premere il
tasto .
La riproduzione si arresta. Premere il tasto OPEN nella parte anteriore
della PlayStationTM2 integrata per rimuovere il disco.
Riproduzione di un CD audio
13

5 Selezionare l’icona del CD, quindi premere il tasto .
Riproduzione in varie modalità
Vengono visualizzati i numeri dei brani e l’opzione di impostazione
È possibile impostare “Modalità di riproduzione” e “Ripetizione”.
viene visualizzata nell’angolo inferiore sinistro dello schermo.
Modalità di
Normale Riproduce i brani così come sono registrati sul
6 Selezionare il brano desiderato, quindi premere il tasto .
riproduzione
CD
Inizia la riproduzione.
Programma Riproduce i brani nell’ordine specificato
Note
Casuale Riproduce i brani in ordine casuale
• Alla schermata Opzioni riproduzione si può accedere anche dalla schermata che
Ripetizione Off Non viene effettuata la riproduzione ripetuta del
visualizza i brani, selezionando l’icona Audio CD nell’angolo superiore sinistro
CD
della schermata e premendo il tasto .
• È possibile impostare contemporaneamente “Modalità di riproduzione” e
Tutti Riproduce ripetutamente tutti i brani
“Ripetizione”.
1 Riproduce ripetutamente un brano
1 Nella schermata del Browser ( pagina 31), usare i tasti
direzionali per selezionare l’icona del CD audio e premere
quindi il tasto .
Viene visualizzata la schermata delle Opzioni di riproduzione.
2 Selezionare “Modalità di riproduzione” o “Ripetizione”,
quindi premere il tasto .
3 Selezionare l’impostazione desiderata, quindi premere il
tasto .
Se si seleziona “Programma”, viene visualizzata la schermata per
specificare l’ordine dei brani. Selezionare i brani da riprodurre.
4 Premere il tasto .
Viene visualizzata la schermata del Browser.
14
Riproduzione di un CD audio

DVD
Uso del pannello di controllo
Visione di un DVD
1 Avviare la riproduzione del DVD ( pagina 17).
2 Premere il tasto SELECT (selezione).
È possibile utilizzare il lettore DVD mediante i seguenti metodi.
Viene visualizzato il pannello di controllo. Se si preme di nuovo il
• Uso del Pannello di controllo a schermo
tasto SELECT (seleziona), il display cambia la sua posizione sullo
• Uso diretto con il Controller Analogico (DUALSHOCK
®2)
schermo.
• Uso del Telecomando DVD (per PlayStation
TM2) (in vendita
separatamente)
IT
Nelle seguenti istruzioni si presuppone che per il funzionamento del lettore
DVD
DVD si utilizzi il Pannello di controllo. Alcune operazioni potrebbero
essere diverse a seconda del metodo utilizzato.
Note
• Per ulteriori informazioni sulla riproduzione di un DVD, consultare le istruzioni
fornite con il DVD.
3 Usando i tasti direzionali, selezionare un’icona e premere
• La PlayStation
TM2 integrata riproduce il contenuto del disco registrato nel software
del DVD. Notare che non tutte le funzioni sono disponibili su tutti i DVD.
quindi il tasto .
Nota
Per disattivare il Pannello di controllo, premere il tasto SELECT (seleziona) (una o
due volte), oppure premere il tasto .
Elenco delle opzioni del Pannello di controllo
È possibile accedere alle seguenti opzioni del Pannello di controllo.
Icona Funzione
Menu Visualizza il menu DVD-Video
Menu superiore Visualizza il menu DVD-Video
Visione di un DVD
15
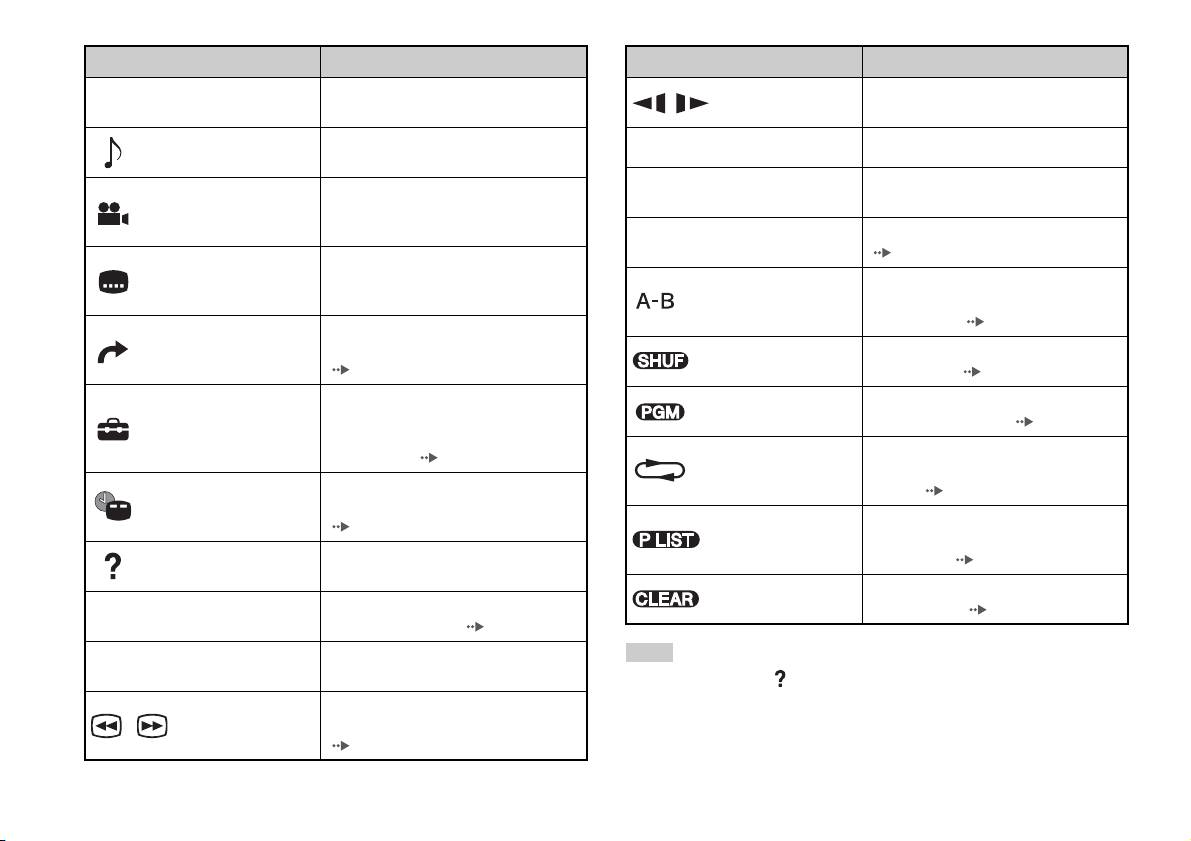
Icona Funzione
Icona Funzione
Torna alla schermata selezionata in
Passa alla riproduzione al rallentatore
O
Ritorno
/ Rallentatore
precedenza nel menu del DVD
avanti/indietro
Visualizza e cambia le opzioni audio sui
Opzioni audio
N
Riproduci Avvia la riproduzione
DVD con più tracce audio
Interrompe momentaneamente la
Visualizza e cambia gli angoli di
X
Pausa
riproduzione
Opzioni angolo
visualizzazione sui DVD registrati con
opzioni multiangolo
Interrompe la riproduzione
x
Arresto
( pagina 17)
Visualizza e cambia le opzioni per i
Opzioni sottotitoli
sottotitoli sui DVD con opzioni per i
Specifica una scena per la riproduzione e
sottotitoli
Ripetizione A-B
avvia la riproduzione della scena che è
stata impostata ( pagina 22)
Passa al titolo selezionato, al capitolo o
Vai a
all’ora specificata e inizia la riproduzione
Riproduzione
Inizia la riproduzione di titoli o capitoli in
( pagina 18)
casuale
ordine casuale ( pagina 21)
Visualizza e modifica le opzioni relative
Riproduzione
Inizia la riproduzione di titoli o capitoli in
alla lingua, alla qualità delle immagini, al
programmata
sequenza programmata ( pagina 20)
Impostazione
livello di controllo personalizzato,
all’audio, ecc. ( pagina 22)
Selezionare la riproduzione ripetuta di tutti
Riproduzione
i titoli sul disco, oppure un titolo o un
ripetuta
Visualizza il titolo o il numero del capitolo
capitolo ( pagina 21)
Visualizzazione
corrente, il tempo trascorso, ecc.
ora
( pagina 19)
Per i dischi DVD-RW (modalità VR),
Original/Play List
seleziona il contenuto Original o Play List
Visualizza le funzioni dei tasti diretti per il
da riprodurre ( pagina 19)
Aiuto
Controller Analogico (DUALSHOCK
®2)
Cancella i numeri selezionati o le modalità
Cancella
Consente di immettere il numero di un
di riproduzione ( pagina 22)
0~9
Vai al capitolo
capitolo da riprodurre ( pagina 18)
Precedente/
Torna/salta all’inizio del capitolo corrente,
Note
./>
Successivo
precedente o successivo
• È possibile utilizzare “ ” per controllare le opzioni accessibili direttamente
mediante i tasti del Controller Analogico. Per accedere direttamente alle opzioni
Consente di riprodurre all’indietro/far
mediante il controller è necessario cancellare il Pannello di controllo dallo
/Cerca
avanzare rapidamente la riproduzione
schermo.
( pagina 18)
16
Visione di un DVD

• A seconda della modalità di riproduzione, alcune opzioni potrebbero non essere
disponibili o non possono essere regolate.
Riproduzione di un DVD dall’ultimo punto di
arresto (Ripristino della riproduzione)
Riproduzione di un DVD
1 Durante la riproduzione, selezionare x nel Pannello di
controllo ( pagina 15) quindi premere il tasto .
1 Accendere la PlayStationTM2 integrata e inserire un disco
( pagina 7).
2 Selezionare N, quindi premere il tasto .
Seguire la procedura ai punti da 1 a 3 in “Avvio di un gioco”. Inizia la
La riproduzione inizia dal punto in cui si era interrotto il disco al punto
riproduzione.
1.
Note
IT
Per cancellare la funzione di Ripristino della riproduzione
• Se si accende la PlayStationTM2 integrata dopo l’inserimento di un disco, la
DVD
Dopo la fase 1, selezionare x e premere quindi il tasto .
riproduzione viene avviata automaticamente.
• Un disco può essere avviato anche dalla schermata del Browser ( pagina 31).
Interruzione della riproduzione di un DVD x
1 Durante la riproduzione, selezionare x nel Pannello di
controllo ( pagina 15) quindi premere il tasto .
La riproduzione si arresta. Premere il tasto OPEN nella parte anteriore
della PlayStation
TM2 integrata, quindi rimuovere il disco.
Visione di un DVD
17

Selezionare una scelta specifica per la
Individuazione di un punto particolare su un DVD
riproduzione
(Ricerca)
È possibile cercare rapidamente in avanti o all’indietro per individuare
Selezione di una scena per numero di capitolo
rapidamente un punto particolare su un DVD.
1 Durante la riproduzione, selezionare il numero di capitolo
1 Durante la riproduzione, selezionare o nel Pannello di
desiderato nel Pannello di controllo ( pagina 15) e premere
controllo ( pagina 15) quindi premere e tenere premuto il
quindi il tasto .
tasto .
Inizia la riproduzione del capitolo selezionato. Se si desidera
La velocità di ricerca cambia come mostrato qui di seguito quando si
riprodurre un capitolo a una sola cifra (es.: 1-9), immettere uno zero
preme il tasto direzione su o giù mentre si tiene premuto il tasto .
iniziale. Ad esempio, immettere “01”.
• Ricerca 3
• Ricerca 2
Selezione di una scena per titolo, numero di capitolo o
• Ricerca 1
specificando l’ora
• Rallentatore
1 Durante la riproduzione, selezionare nel Pannello di
2 Rilasciare il tasto dopo aver raggiunto il punto che si sta
controllo ( pagina 15) quindi premere il tasto .
cercando.
La riproduzione torna alla velocità normale.
2 Selezionare un’opzione, quindi premere il tasto .
Nota
Titolo Specifica il numero del titolo
Per usare il Controller Analogico per la ricerca durante la riproduzione, tenere
Capitolo Specifica il numero del capitolo
premuto il tasto L2 o R2 per iniziare a cercare. Usare i tasti bidirezionali per
cambiare velocità. Rilasciare il tasto L2 o R2 quando si raggiunge il punto che si sta
C XX:XX:XX
Specifica il tempo trascorso per il capitolo (o titolo)
cercando.
(o T XX:XX:XX)
3 Selezionare i numeri per le scene desiderate, quindi premere
il tasto .
Inizia la riproduzione del capitolo selezionato.
18
Visione di un DVD
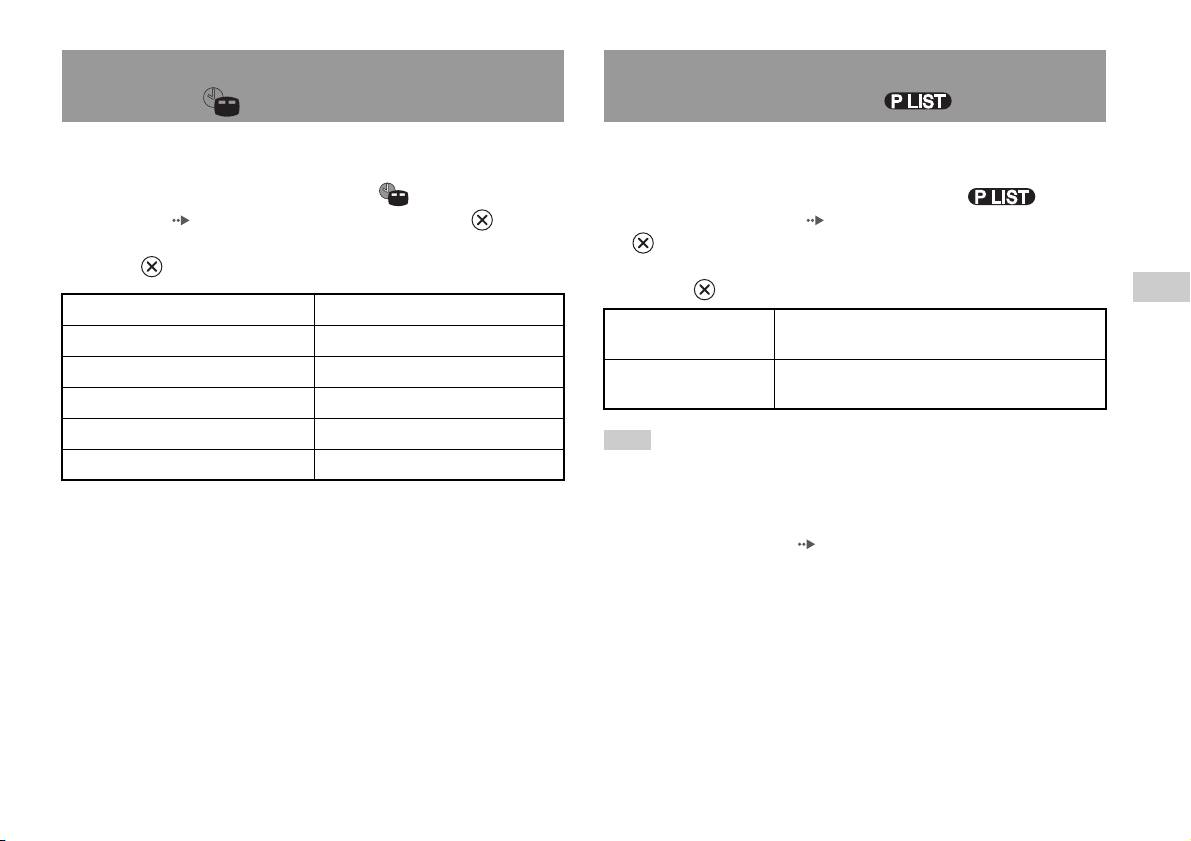
Visualizzazione delle informazioni sulla
Selezione di Original o Play List per la
riproduzione
riproduzione di un DVD-RW
È possibile visualizzare informazioni come il numero del titolo corrente o
Quando si usa un disco DVD-RW (modalità VR), è possibile selezionare
il tempo trascorso.
il tipo di titoli da riprodurre.
1 Durante la riproduzione, selezionare nel Pannello di
1 Con la riproduzione interrotta, selezionare nel
controllo ( pagina 15), quindi premere il tasto .
Pannello di controllo ( pagina 15), quindi premere il tasto
La visualizzazione cambia nel modo seguente ogni volta che si preme
.
il tasto .
Le opzioni Original e Play List verranno selezionate ad ogni pressione
del tasto .
IT
Titolo X Capitolo X Numero del titolo e del capitolo
DVD
Original Riproduce il contenuto della sequenza registrata
Titolo X Capitolo X C XX:XX:XX Tempo trascorso del capitolo corrente
originariamente
Titolo X Capitolo X C - XX:XX:XX Tempo residuo del capitolo corrente
Play List Riproduce il contenuto modificato. L’impostazione
predefinita è Play List.
Titolo X Capitolo X T XX:XX:XX Tempo trascorso del titolo corrente
Titolo X Capitolo X T - XX:XX:XX Tempo residuo del titolo corrente
Note
(Off)
• La riproduzione al rallentatore in ordine inverso non è disponibile per i dischi
DVD-RW (modalità VR).
• Non è possibile utilizzare questa funzione con la funzione di Ripristino della
riproduzione. Prima di selezionare questa funzione, disattivare la funzione di
Ripristino della riproduzione ( pagina 17).
Visione di un DVD
19
Riproduzione programmata
Uso delle modalità di
È possibile creare programmi per riprodurre titoli e capitoli in qualsiasi
riproduzione
ordine.
1 Durante la riproduzione, selezionare nel Pannello di
Usando le varie modalità di riproduzione, è possibile riprodurre titoli o
controllo ( pagina 15) quindi premere il tasto .
capitoli nell’ordine desiderato oppure riprodurre ripetutamente una scena
specifica. Ci sono quattro modalità di riproduzione:
2 Selezionare un numero di programma e premere quindi il
• Riproduzione programmata ( pagina 20)
tasto .
• Riproduzione casuale ( pagina 21)
Se non è stato impostato nessun programma, l’unica opzione sarà “1.
• Riproduzione ripetuta ( pagina 21)
Titolo”.
• Ripetizione A-B ( pagina 22)
3 Selezionare il numero del titolo e premere quindi il tasto .
Nelle seguenti istruzioni si presuppone che per il funzionamento del lettore
DVD si utilizzi il Pannello di controllo ( pagina 15).
4 Selezionare il numero del capitolo e premere quindi il tasto
.
Note
Per riprodurre tutti i capitoli, selezionare “Tutto”. Ripetere le
• È possibile riprodurre le combinazioni di Riproduzione programmata,
operazioni da 2 a 4 per impostare altri titoli o capitoli.
Riproduzione casuale, Riproduzione ripetuta. Notare, tuttavia, che alcune opzioni
di Riproduzione casuale o Riproduzione ripetuta potrebbero non essere disponibili,
a seconda della combinazione.
5 Premere il tasto START (avvio).
• La PlayStation
TM2 integrata riproduce il contenuto del disco registrato nel software
La riproduzione programmata ha inizio.
del DVD.
Nota
L’impostazione non verrà cancellata al termine della Riproduzione programmata.
20
Uso delle modalità di riproduzione
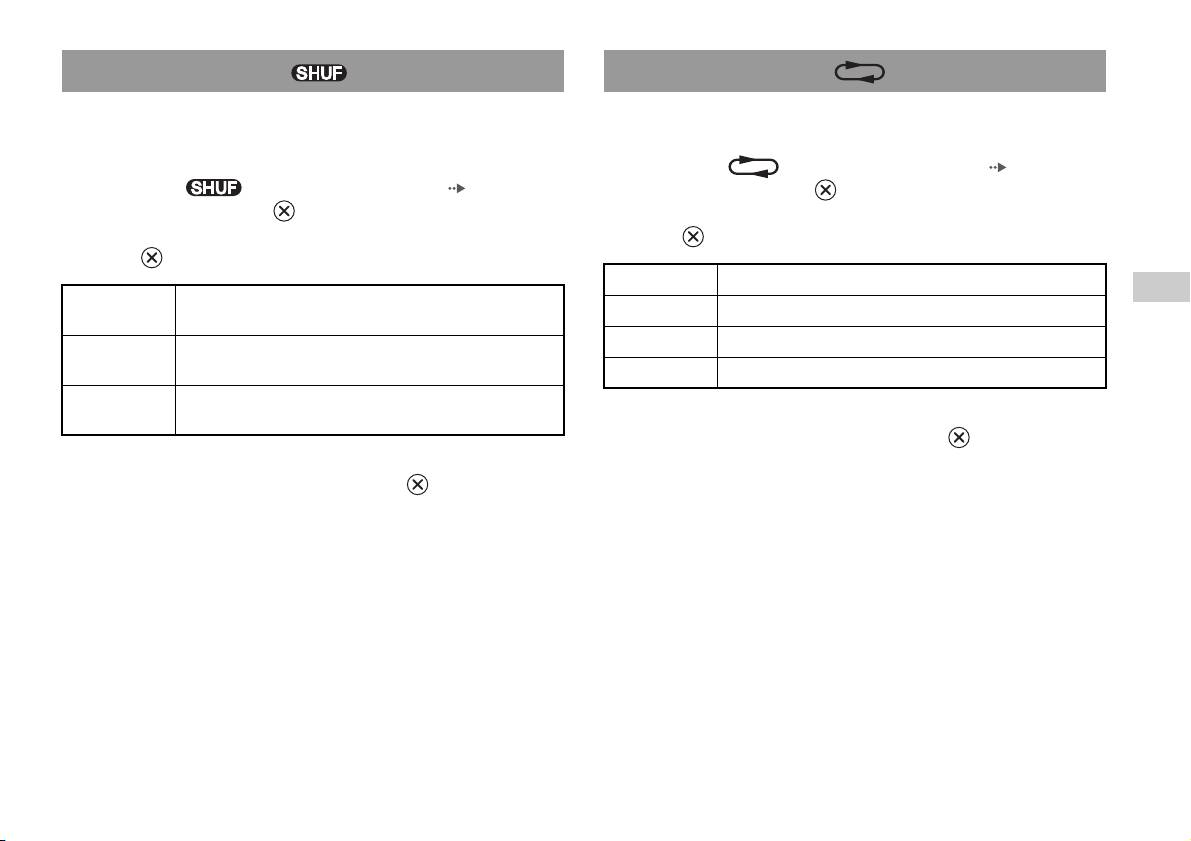
Riproduzione casuale
Riproduzione ripetuta
Questa opzione può essere impostata per la riproduzione casuale di tutti i
Questa opzione può essere impostata per visualizzare ripetutamente i titoli
titoli o i capitoli registrati su un disco. L’ordine di riproduzione sarà
o i capitoli.
diverso ad ogni utilizzo della Riproduzione in ordine casuale.
1 Selezionare nel Pannello di controllo ( pagina 15),
1 Selezionare nel Pannello di controllo ( pagina 15),
quindi premere il tasto .
quindi premere il tasto .
La visualizzazione cambia nel modo seguente ogni volta che si preme
La visualizzazione cambia nel modo seguente ogni volta che si preme
il tasto .
il tasto .
Ripeti disco Ripete la riproduzione di tutti i titoli
IT
Sequenza
Riproduce i titoli in ordine casuale
Ripeti titolo Ripete la riproduzione di un titolo
DVD
casuale titoli
Ripeti capitolo Ripete la riproduzione di un unico capitolo
Sequenza
Riproduce i capitoli in ordine casuale
casuale capitoli
Ripetizione Off Disattiva la riproduzione ripetuta
Sequenza
Disattiva la riproduzione in ordine casuale
casuale Off
2 Selezionare N, quindi premere il tasto .
2 Selezionare N, quindi premere il tasto .
Uso delle modalità di riproduzione
21

Ripetizione A-B
Regolazione delle impostazioni
È possibile impostare una scena specifica da ripetere in continuazione.
del lettore DVD
1 Durante la riproduzione, selezionare nel Pannello di
controllo ( pagina 15), quindi premere il tasto nel punto
Il Pannello di Controllo può essere utilizzato per regolare le impostazioni
in cui si desidera far iniziare la riproduzione ripetuta.
del lettore DVD, come la lingua per i sottotitoli, la lingua audio e il livello
Il punto iniziale (punto A) viene impostato.
di Protezione visione programmi.
2 Premere il tasto in corrispondenza del punto in cui si
Note
desidera far terminare la riproduzione ripetuta.
• Alcuni DVD non supportano tutte le impostazioni. La PlayStationTM2 integrata
Il punto finale (punto B) è impostato e inizia la riproduzione ripetuta
riproduce il contenuto del disco registrato nel software del DVD. Se il DVD non
della sezione dalla A alla B.
supporta le funzioni elencate, non sarà possibile modificare le impostazioni.
• Le seguenti opzioni non sono disponibili durante la riproduzione o il ripristino
della riproduzione. Prima di modificare queste impostazioni, disattivare il
Disattivazione delle modalità di riproduzione
ripristino della riproduzione ( pagina 17).
– “Menú”, “Audio” e “Sottotitoli” in Impostazione lingua
– “Formato TV” e “Scansione Progressiva” in Impostazione Schermo
Disattiva le modalità di riproduzione per consentire la normale
– “Protezione visione programmi” in Impostazione Personalizzata
riproduzione.
– “DTS” e “Selezione automatica brano” in Audio
1 Selezionare nel Pannello di controllo
È possibile modificare le impostazioni del lettore DVD utilizzando la
( pagina 15), quindi premere il tasto .
seguente procedura:
Viene visualizzato il messaggio “Annullato contenuto modalità di
1 Selezionare nel Pannello di controllo ( pagina 15),
esecuzione” e la PlayStation
TM2 integrata torna alla normale
quindi premere il tasto .
riproduzione.
Viene visualizzata la barra dell’icona di impostazione.
Nota
2 Selezionare l’icona relativa all’impostazione da modificare e
Se sono state impostate congiuntamente più modalità di riproduzione, esse vengono
tutte disattivate.
premere il tasto .
Viene visualizzata l’impostazione corrente per ciascuna opzione.
22
Regolazione delle impostazioni del lettore DVD
3 Selezionare l’opzione desiderata, quindi premere il tasto .
Impostazione delle opzioni della lingua
L’opzione di menu si attiva ed è selezionabile.
In “Impostazione lingua” è possibile scegliere la lingua per il menu del
4 Selezionare l’impostazione desiderata, quindi premere il
DVD, l’audio e i sottotitoli. Notare che se si seleziona una lingua che non
tasto .
è registrata sul DVD, una delle lingue registrate viene selezionata
L’impostazione dell’opzione è completa. Per ulteriori informazioni,
automaticamente.
consultare le istruzioni per ciascuna opzione ( pagine da 23 a 29).
Menú Seleziona la lingua del menu DVD
Note
Audio Seleziona la lingua per la traccia audio del DVD
• Le impostazioni predefinite sono sottolineate nelle spiegazioni riportate di sotto.
Sottotitoli Seleziona la lingua per i sottotitoli del DVD
• Per tornare al Pannello di controllo dopo aver definite le impostazioni, premere il
IT
tasto SELECT (selezione).
DVD
• Le impostazioni vengono salvate quando si effettua una delle seguenti operazioni:
Nota
– Interruzione della riproduzione (inclusa l’interruzione della funzione Ripristino
Se si seleziona “Segui Audio” per i sottotitoli, la lingua dei sottotitoli verrà impostata
della riproduzione)
automaticamente in modo da corrispondere alla lingua selezionata per la traccia
– Apertura del coperchio del disco
audio del DVD.
Regolazione delle impostazioni del lettore DVD
23
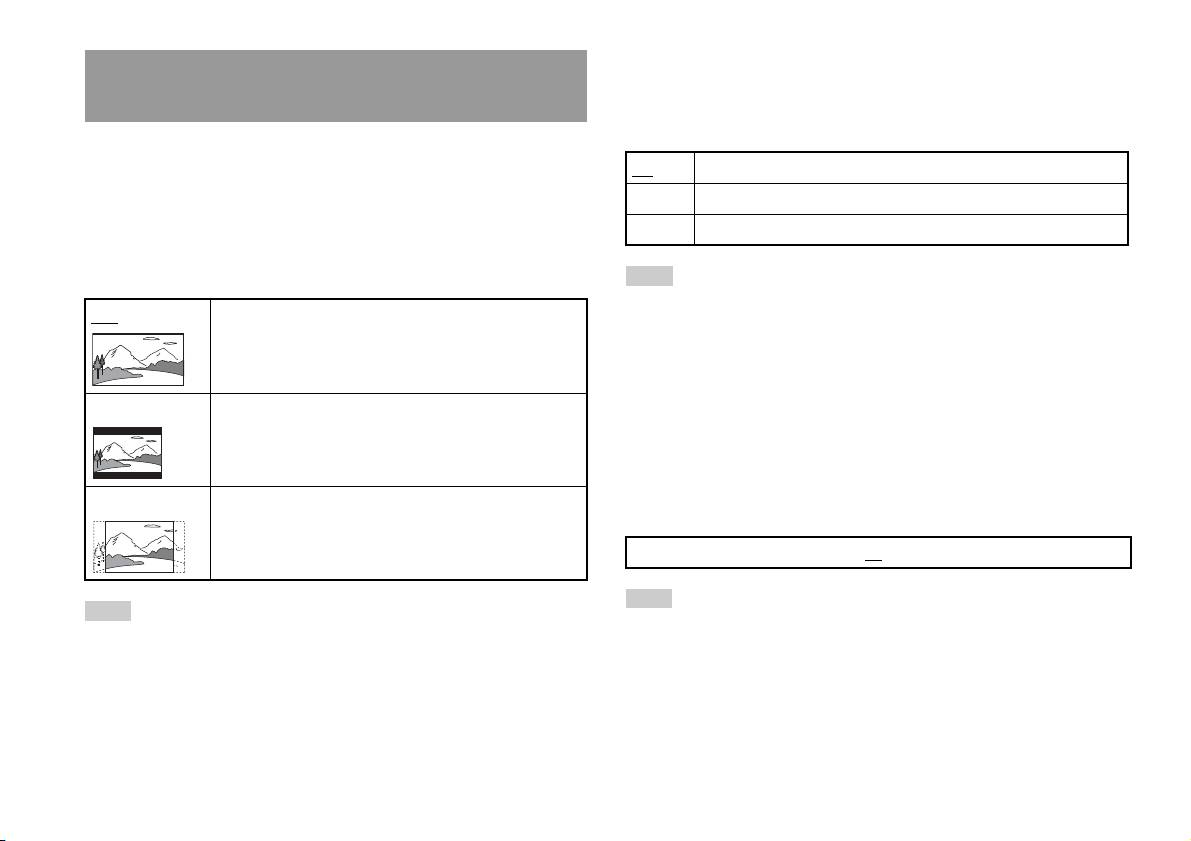
DNR (Digital Noise Reduction, riduzione del disturbo
Impostazione delle opzioni di visualizzazione del
digitale)
televisore
Questa impostazione può essere utilizzata per ridurre il disturbo delle
immagini sullo schermo e generare un’immagine più definita.
Nel menu Impostazione Schermo, è possibile impostare le dimensioni
dello schermo (rapporto di formato) e le altre opzioni che agiscono sulla
Off Il DNR non è utilizzato.
qualità delle immagini.
DNR1 Aumenta la qualità dell’immagine
Formato TV
DNR2 Aumenta la qualità dell’immagine (massimo)
È possibile impostare il rapporto di formato in modo che corrisponda al
formato dello schermo.
Note
• “DNR2” è più efficace per ridurre la turbolenza delle immagini rispetto a “DNR1”,
16:9 Formato schermo: Wide
ma in alcuni casi potrebbe venire visualizzata un’immagine doppia. In tal caso,
selezionare “Off
”.
• La funzione DNR potrebbe dare risultati limitati su alcuni DVD.
• Quando si imposta “Scansione Progressiva” su “On”, “DNR” viene
automaticamente disattivato e non può essere attivato.
4:3 LETTER BOX Formato schermo: 4:3
Questa impostazione visualizza un’immagine ampia con
Aumento Contrasto
margini sulle parti superiori e inferiori dello schermo.
È possibile accentuare o sfocare i contorni dell’immagine a schermo. Più
il valore è elevato, più il contorno è accentuato. Normalmente, selezionare
4:3 PAN SCAN Formato schermo: 4:3
“0”.
Questa impostazione visualizza un’immagine regolata in base
all’altezza dello schermo, tagliando le porzioni a sinistra e a
•-2 •-1 •0
•+1 •+2
destra che non vi rientrano.
Nota
Nota
A seconda del DVD, l’accentuazione dei contorni potrebbe dare risultati limitati.
Quando si imposta “Scansione Progressiva” su “On”, “Formato TV” viene
automaticamente impostato su “16:9”.
24
Regolazione delle impostazioni del lettore DVD

Visualizzazione
Durante la riproduzione, è possibile visualizzare le informazioni sullo stato
Impostazione delle opzioni del visualizzatore
della riproduzione nell’angolo superiore destro dello schermo, per alcuni
secondi.
Pausa
Questa opzione consente di impostare lo stato di un’immagine quando la
On Le informazioni sullo stato di riproduzione vengono visualizzate per
riproduzione viene messa in pausa.
alcuni secondi.
Off Le informazioni sullo stato di riproduzione non vengono visualizzate.
Auto Un’immagine con elementi in movimento viene visualizzata senza
tremolii. Normalmente, selezionare questa posizione.
Fotogramma Un’immagine senza elementi in movimento può essere visualizzata
Scansione Progressiva
ad alta risoluzione.
IT
È possibile visualizzare l’immagine in modo che aggiorni tutte le righe in
DVD
un’unica operazione. Nella maggior parte dei casi, questo consente di
Protezione visione programmi
ottenere un’immagine più nitida e senza sfarfallii.
In alcune regioni, la visualizzazione di parte del contenuto del DVD
potrebbe essere limitata in base all’età del visualizzatore o altri fattori. La
On Scansione progressiva (480p)*
funzione di protezione visione programmi può essere utilizzata per limitare
Off
Scansione interlacciata
il livello di contenuto visualizzabile attraverso la PlayStation
TM2 integrata.
Più basso è il valore, più rigida è la limitazione.
* La modalità di scansione progressiva del lettore DVD è disponibile solo quando
si riproduce un disco registrato nel formato NTSC e viene visualizzata su un
Impostazione della Protezione visione programmi
televisore che supporta la scansione progressiva (480p).
1 Selezionare “Protezione visione programmi”, quindi premere
Note
il tasto .
• I DVD possono contenere materiale basato su video e film, che utilizzano
Viene visualizzata la schermata per la registrazione di una password.
frequenze di fotogrammi diversi. Quando si riproduce materiale basato su video
utilizzando la scansione progressiva, alcune immagini potrebbero apparire
Se una password è già stata registrata, viene visualizzata la schermata
innaturali. In tal caso, impostare “Scansione Progressiva” su “Off
” e visualizzare
di conferma della password.
nella modalità interlacciata standard.
• Quando si imposta “Scansione Progressiva” su “On”, “Formato TV”
2 Selezionare un numero, quindi premere il tasto .
( pagina 24) viene automaticamente impostato su “16:9”.
Ripetere le operazioni al punto 2 per una password a quattro cifre. Se
• Il contenuto del disco DVD-RW (modalità VR) può essere visualizzato solo nel
si desidera cancellare un numero, premere il tasto . Durante la
formato interlacciato standard. L’opzione “Scansione Progressiva” non è
registrazione di una password, viene chiesto di reimmetterla per la
disponibile quando si riproduce questo contenuto.
conferma.
Regolazione delle impostazioni del lettore DVD
25
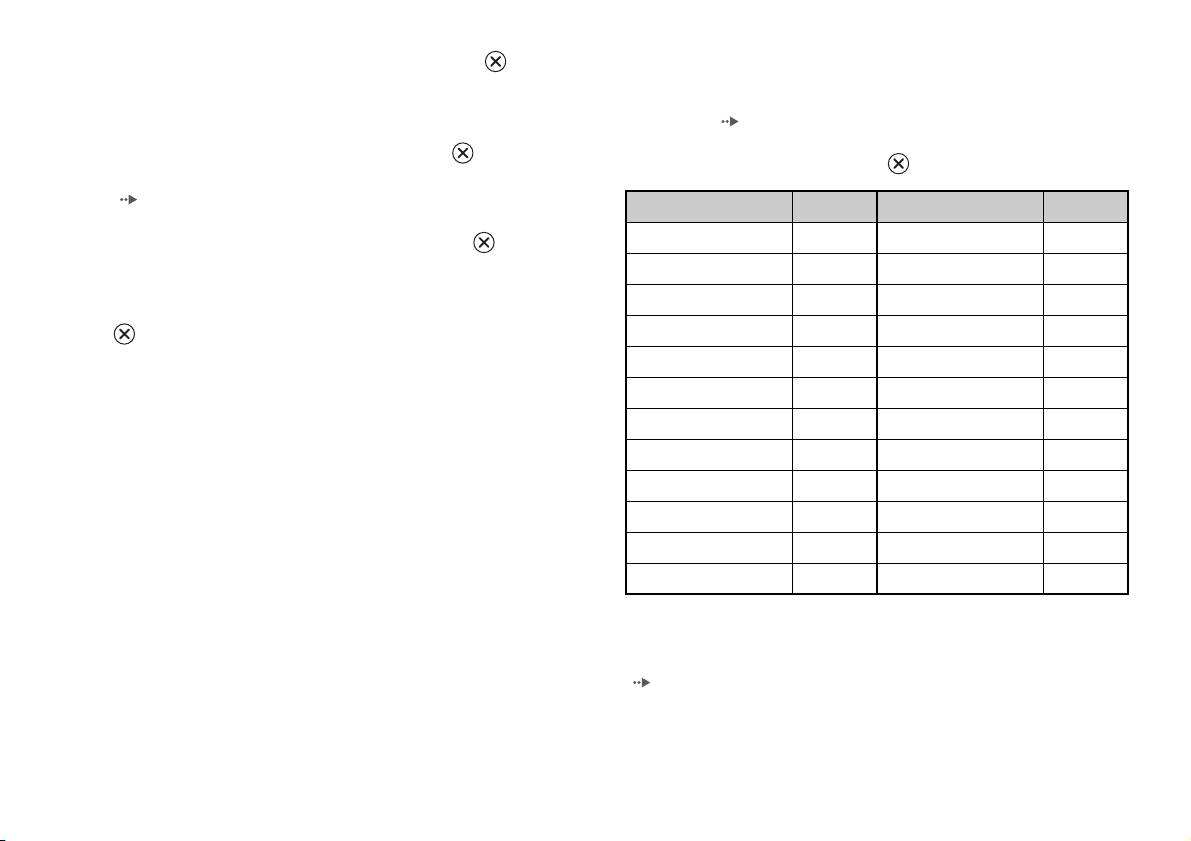
Elenco dei codici regione
3 Selezionare “Regione”, quindi premere il tasto .
Per immettere un codice regione della Protezione visione Programmi,
Viene visualizzato l’elenco di opzioni per la regione.
selezionare “Altro” al punto 4 di “Impostazione della Protezione visione
Programmi” ( pagina 25). Usare i tasti direzionali per selezionare la
4 Selezionare la regione su cui basare il livello di Protezione
prima lettera, quindi premere il tasto direzionale destro. Selezionare quindi
visione Programmi, quindi premere il tasto .
la lettera successiva e premere il tasto .
Se si seleziona “Altro”, vedere “Elenco dei codici regione”
(pagina26).
Regione Codice Regione Codice
Austria AT Norvegia NO
5 Selezionare “Livello”, quindi premere il tasto .
Viene visualizzato l’elenco di opzioni del livello.
Belgio BE Olanda NL
Danimarca DK Polonia PL
6 Selezionare un livello di limitazione, quindi premere il tasto
.
Finlandia FI Portogallo PT
Francia FR Regno Unito UK
Per rimuovere la protezione personalizzata
Germania DE Repubblica Ceca CZ
Con la riproduzione del DVD interrotta, passare al punto 6 in
“Impostazione della Protezione visione programmi” e impostare “Livello”
Grecia GR Russia RU
su “Off
”.
Irlanda IE Slovacchia SK
Israele IL Spagna ES
Italia IT Svezia SE
Lussemburgo LU Svizzera CH
Malta MT Turchia TR
Modifica della password
Al punto 2 di “Impostazione della Protezione visione programmi”
( pagina 25), procedere come segue:
26
Regolazione delle impostazioni del lettore DVD

1 Usando i tasti direzionali, selezionare “Modifica Codice”,
Note
quindi premere il tasto .
• In caso di password dimenticata, inserire un DVD senza la funzione di protezione
Viene visualizzata la schermata per cambiare la password.
visione programmi. Nel pannello di controllo, selezionare x (Arresto) per
arrestare la riproduzione, quindi selezionare di nuovo x (Arresto) per riprendere
2 Selezionare un numero, quindi premere il tasto .
la riproduzione. Selezionare “Impostazione”, quindi selezionare “Protezione
visione programmi” in “Impostazione Personalizzata” e premere il tasto .
Ripetere le operazioni al punto 2 per una password a quattro cifre.
Premere il tasto SELECT sul Controller Analogico ed immettere il numero “7444”.
Viene chiesto di reimmetterla per la conferma.
• Se non si imposta una password, non è possibile modificare le impostazioni della
Protezione visione Programmi.
Annullamento temporaneo delle limitazioni di Protezione
• Alcuni DVD con la funzione di Protezione visione Programmi non consentono
visione programmi
l’utilizzo delle modalità di riproduzione ( pagine da 20 a 22).
1 Avviare la riproduzione del DVD ( pagina 17).
IT
DVD
Verrà chiesto di cambiare temporaneamente il livello di Protezione
visione Programmi per consentire la riproduzione. Di solito, questo si
verifica immediatamente all’avvio del disco, ma potrebbe anche
avvenire in momenti diversi, a seconda del DVD.
2 Usando i tasti direzionali, selezionare “Sì”, quindi premere il
tasto .
Viene visualizzata la schermata per immettere la password.
3 Selezionare un numero, quindi premere il tasto .
Ripetere le operazioni al punto 3 per una password a quattro cifre.
Dopo aver immesso la password, ricomincerà la riproduzione. Se la
riproduzione del DVD viene interrotta, il livello di Protezione visione
Programmi torna all’impostazione originale.
Regolazione delle impostazioni del lettore DVD
27
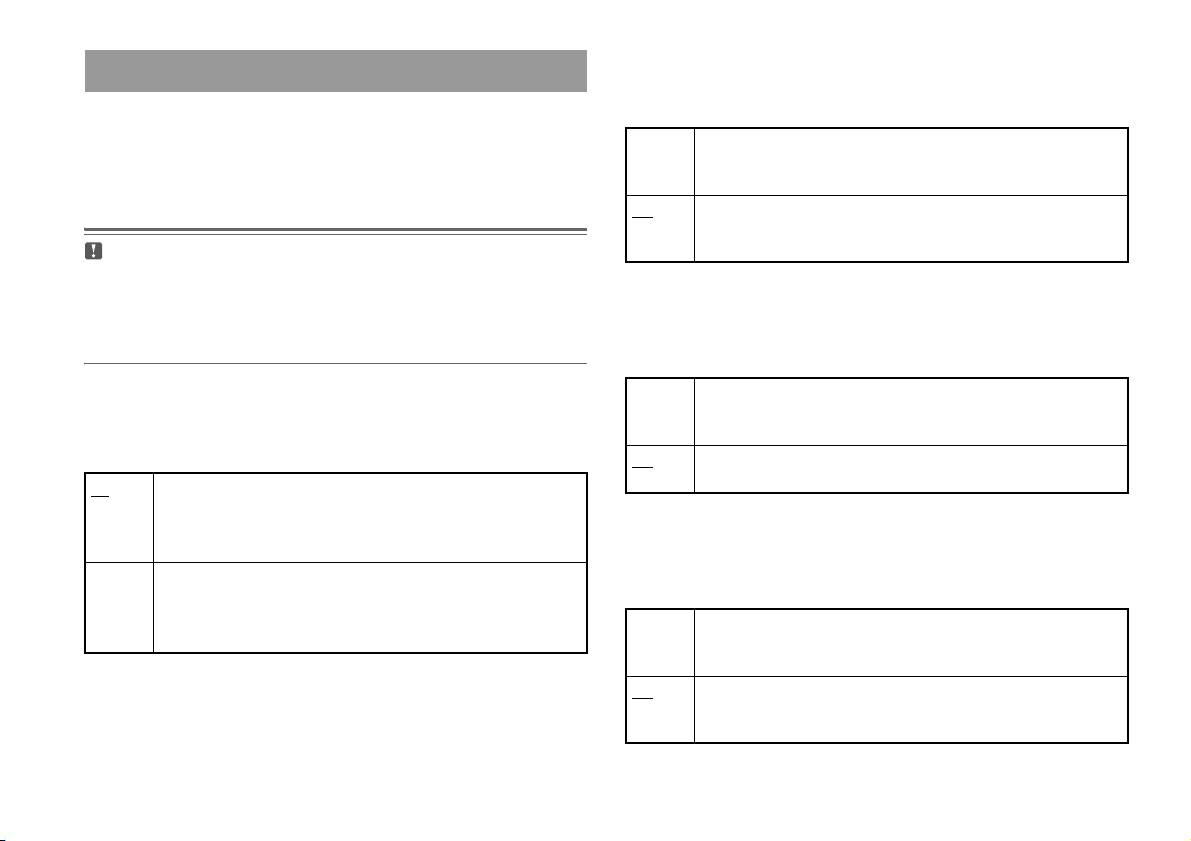
Dolby Digital
Impostazione delle opzioni audio
Questa opzione imposta Dolby Digital come segnale di uscita per il
connettore DIGITAL OUT (OPTICAL).
USCITA AUDIO DIGITALE
È possibile commutare il metodo di invio del segnale audio al momento del
On Selezionare questa posizione quando la PlayStationTM2 integrata è
collegata a un dispositivo audio dotato di decodificatore Dolby Digital
collegamento dei seguenti dispositivi audio al connettore DIGITAL OUT
incorporato.
(OPTICAL).
Off Selezionare questa posizione quando la PlayStationTM2 integrata è
collegata a un dispositivo audio privo di decodificatore Dolby Digital
incorporato.
Attenzione
Se la PlayStationTM2 integrata è collegata a un dispositivo audio senza un
decodificatore Dolby Digital, DTS o MPEG, impostare “Dolby Digital”, “DTS”
DTS
e “MPEG” su “Off
”. Se si impostano queste opzioni su “On” senza il necessario
decodificatore, potrebbe non venire emesso alcun suono oppure potrebbe venire
Questa opzione imposta DTS come segnale di uscita per il connettore
emesso un rumore estremamente forte.
DIGITAL OUT (OPTICAL).
On Selezionare questa opzione quando la PlayStation
TM2 integrata è
DIGITAL OUT (OPTICAL)
collegata a un dispositivo audio dotato di decodificatore DTS
Questa opzione imposta il tipo di uscita per il connettore DIGITAL OUT
incorporato.
(OPTICAL).
Off Selezionare questa opzione quando la PlayStationTM2 integrata è
collegata a un dispositivo audio privo di decodificatore DTS incorporato.
On Selezionare questa opzione se si desidera che i suoni (segnale audio)
vengano inviati attraverso il connettore DIGITAL OUT (OPTICAL).
Vengono visualizzate le impostazioni per “Dolby Digital”, “DTS” e
MPEG
“MPEG”.
Questa opzione imposta MPEG AUDIO come segnale di uscita per il
Off Selezionare questa opzione quando non si desidera che l’audio venga
connettore DIGITAL OUT (OPTICAL).
inviato attraverso il connettore DIGITAL OUT (OPTICAL).
Non vengono visualizzate le impostazioni per “Dolby Digital”, “DTS”
On Selezionare questa opzione quando la PlayStation
TM2 integrata è
e “MPEG”.
collegata a un dispositivo audio dotato di decodificatore MPEG
incorporato.
Off Selezionare questa opzione quando la PlayStationTM2 integrata è
collegata a un dispositivo audio privo di decodificatore MPEG
incorporato.
28
Regolazione delle impostazioni del lettore DVD
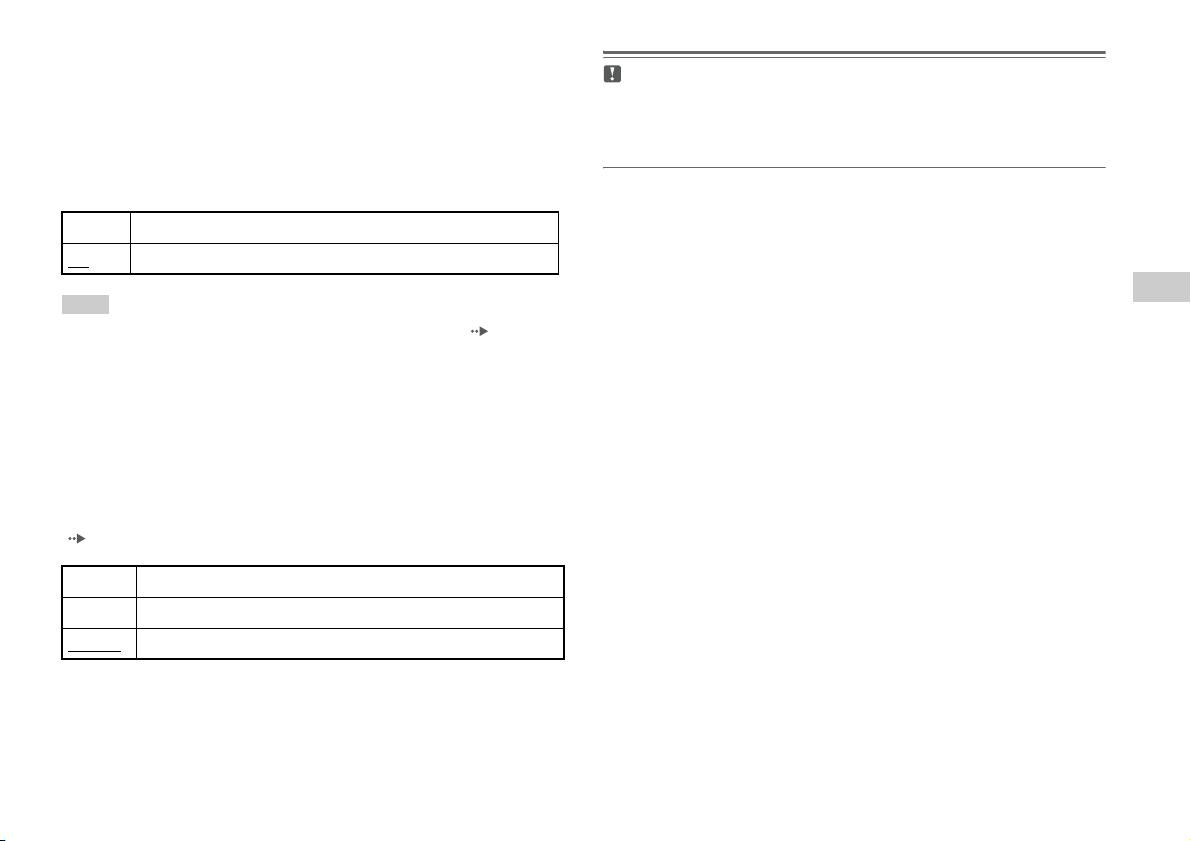
Selezione automatica brano
Questa impostazione fornisce la priorità alla traccia audio che contiene il
Attenzione
più elevato numero di canali quando si riproduce un DVD sul quale sono
Se si imposta questa opzione su “+1” o “+2”, l’audio potrebbe distorcersi. In tal
caso, modificare l’impostazione su “Normale”. Inoltre, notare che, se si imposta
registrati più formati audio (PCM, Dolby Digital, DTS o MPEG). Se i
il volume su un valore troppo elevato, si potrebbero subire lesioni all’udito o
formati PCM, Dolby Digital, DTS e MPEG hanno lo stesso numero di
danneggiare i diffusori.
canali, la PlayStationTM2 integrata seleziona le tracce audio PCM, Dolby
Digital, DTS e MPEG in quell’ordine.
On Priorità assegnata
Off
Priorità non assegnata
IT
Note
DVD
• Se si imposta “DTS” su “Off
” in “USCITA AUDIO DIGITALE” ( pagina 28),
la traccia audio DTS non viene riprodotta.
• A seconda del DVD, è possibile che il canale audio con priorità sia predeterminato.
In questo caso, la traccia audio verrà selezionata in base all’ordine di priorità del
DVD.
Volume DVD
Questa opzione può essere impostata se il livello di uscita audio del DVD
è basso. Può essere impostata solo se l’opzione “DIGITAL OUT
(OPTICAL)” è impostata su “Off
” in “USCITA AUDIO DIGITALE”
( pagina 28).
+2 Alza il volume (massimo)
+1 Alza il volume
Normale
Normalmente, selezionare questa opzione.
Regolazione delle impostazioni del lettore DVD
29

Menu principale
Nota
Se si preme PlayStation 2 POWER ON sul telecomando del televisore con un disco
inserito, il menu principale non verrà visualizzato. Per visualizzare il menu
Visualizzazione del menu
principale, premere il tasto OPEN nella parte anteriore della PlayStation
TM2 integrata
e rimuovere il disco. Premere quindi il tasto PlayStation 2 POWER ON sul
principale
telecomando del televisore.
Dal menu principale, è possibile accedere alle informazioni e cambiare le
varie impostazioni. Dal menu principale è anche possibile passare alle
seguenti schermate. Il menu principale viene visualizzato quando si
accende la PlayStation
TM2 integrata senza che sia inserito alcun disco.
• Schermata Browser ( pagina 31)
• Menu Configurazione di Sistema ( pagina 32)
• Schermata delle informazioni sulla versione ( pagina 34)
1 Premere PlayStation 2 POWER ON sul telecomando del
televisore.
Viene visualizzato il menu principale. Si noti che potrebbero essere
necessari alcuni secondi prima che venga visualizzato il menu
principale.
30
Visualizzazione del menu principale
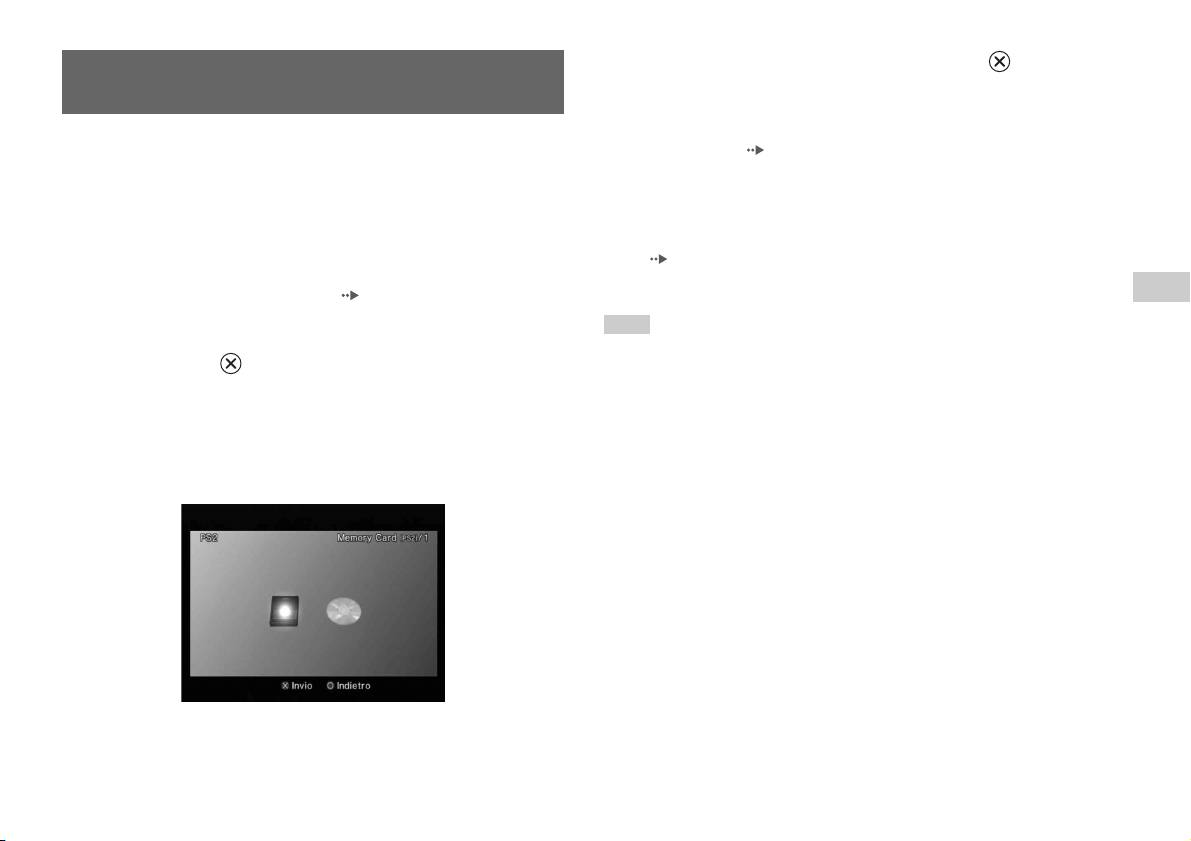
4 Selezionare un’icona, quindi premere il tasto .
Uso della schermata Browser
• Quando si seleziona l’icona Memory Card, vengono visualizzate le
icone relative ai dati salvati sulla Memory Card. Per copiare o
eliminare i dati salvati nel gioco, vedere “Copia o eliminazione dei
Dalla schermata Browser è anche possibile effettuare le seguenti
dati di gioco” ( pagina 12).
operazioni:
• Se si seleziona l’icona relativa al disco del formato per
• Copiare o eliminare i dati di gioco salvati su una Memory Card
PlayStation
TM2 o PlayStationTM, il gioco inizia.
• Avviare un gioco
• Quando si seleziona l’icona di un CD audio, vengono visualizzati i
• Avviare la riproduzione di un CD audio
brani contenuti sul CD. Vedere “Riproduzione di un CD audio”
• Avviare la riproduzione di un DVD
( pagina 13).
• Se si seleziona l’icona di un DVD, inizia la riproduzione del DVD.
IT
1 Visualizzare il menu principale ( pagina 30).
Menu principale
Nota
2 Usando i tasti direzionali, selezionare “Browser”, quindi
Quando nella PlayStationTM2 integrata non è inserita alcuna Memory Card o alcun
premere il tasto .
disco, viene visualizzato il messaggio “Non esiste alcun dato” nella schermata
Viene visualizzata la schermata del Browser.
Browser.
3 Inserire un disco o una Memory Card.
L’icona relativa all’elemento inserito viene visualizzata nella
schermata Browser.
\
Uso della schermata Browser
31

4 Selezionare l’impostazione desiderata, quindi premere il
Uso del menu Configurazione di
tasto .
Per ulteriori informazioni, vedere le istruzioni relative a ciascuna
Sistema
opzione di menu ( pagine da 32 a 34).
Note
Dal menu Configurazione di Sistema è possibile modificare le
• Le impostazioni predefinite sono sottolineate nelle spiegazioni riportate di sotto.
impostazioni per numerose opzioni, compresa la visualizzazione della
• Le modifiche a ciascuna impostazione vengono salvate e restano attive anche dopo
lingua o dell’ora, il metodo di output audio o video.
aver spento o riavviato la PlayStation
TM2 integrata.
1 Visualizzare il menu principale ( pagina 30).
Regolazione Orologio
2 Usando i tasti direzionali, selezionare “Configurazione di
Sistema”, quindi premere il tasto .
È possibile impostare la data e l’ora. Usare i tasti direzionali per impostare
Viene visualizzato il menu Configurazione di Sistema.
“Anno”, “Mese”, “Giorno”, “Ore”, “Minuti” e “Secondi”. L’impostazione
diventa operativa quando si preme il tasto .
Impostazioni opzionali
Se si preme il tasto nella schermata “Regolazione Orologio”, è
possibile impostare opzioni quali “Formato data” o “Formato ora”. Usare
i tasti direzionali e il tasto per definire ciascuna impostazione.
Formato ora Imposta l’orologio del sistema sul formato 12 ore o 24
ore
Formato data Imposta l’ordine di visualizzazione di anno, mese e
giorno
3 Selezionare un’opzione, quindi premere il tasto .
Fuso orario Imposta il fuso orario
L’opzione di menu si attiva ed è selezionabile.
Ora legale Imposta Ora solare o Ora legale. Normalmente,
selezionare “Ora solare”.
32
Uso del menu Configurazione di Sistema

Dimensioni Schermo
Telecomando
È possibile impostare la modalità di visualizzazione per il televisore.
Questa opzione può essere impostata quando si usa il Telecomando DVD
(per PlayStation
TM2) (in vendita separatamente).
4:3
Funzione Gioco On Selezionare questa opzione quando si usa il software
Schermo Intero*
per PlayStation
TM2 o PlayStationTM con il
16:9
Telecomando DVD.
* La modalità di visualizzazione “Schermo Intero” è compatibile con il menu
Funzione Gioco Off Selezionare questa opzione quando non si usa il
Configurazione di Sistema, la schermata Browser e la schermata CD audio.
software per PlayStation
TM2 o PlayStationTM con il
Telecomando DVD.
IT
Menu principale
DIGITAL OUT (OPTICAL)
Nota
Le seguenti limitazioni valgono quando si usa il Telecomando DVD con l’opzione
È possibile stabilire se inviare il segnale attraverso il connettore DIGITAL
impostata su “Funzione Gioco On”:
OUT (OPTICAL).
– A seconda del software, alcuni tasti del telecomando potrebbero non funzionare
correttamente.
On Selezionare questa opzione quando si desidera inviare
– I tasti del Telecomando DVD non funzionano quando si premono
il segnale attraverso il connettore DIGITAL OUT
contemporaneamente due o più tasti.
(OPTICAL).
– Alcuni titoli software potrebbero smettere di funzionare correttamente quando
un controller viene rimosso dall’ingresso controller 1. In tal caso, impostarlo su
Off Selezionare questa opzione quando non si desidera
“Funzione Gioco Off
”.
inviare il segnale attraverso il connettore DIGITAL
OUT (OPTICAL).
Uso del menu Configurazione di Sistema
33

Lingua
Uso della schermata delle
Questa opzione può essere utilizzata per selezionare la lingua visualizzata
su menu principale, schermata Browser, menu Configurazione di Sistema
informazioni sulla versione
e schermata delle informazioni sulla versione.
Selezionando questa opzione è possibile controllare le informazioni sulla
Inglese Visualizza i messaggi in inglese
versione per i vari componenti della PlayStation
TM2 integrata. È anche
Francese Visualizza i messaggi in francese
possibile modificare le impostazioni opzionali per alcuni elementi.
Spagnolo Visualizza i messaggi in spagnolo
1 Nel menu principale ( pagina 30), premere il tasto .
Tedesco Visualizza i messaggi in tedesco
Viene visualizzata la schermata delle informazioni sulla versione.
Italiano Visualizza i messaggi in italiano
Olandese Visualizza i messaggi in olandese
Portoghese Visualizza i messaggi in portoghese
Impostazioni opzionali
Sono disponibili impostazioni opzionali per “Unità”, “Driver
PlayStation
®” e “Lettore DVD”. L’opzione “Lettore DVD” può essere
impostata solo se l’opzione “Scansione Progressiva” del lettore DVD è
impostata su “On”.
1 Usando i tasti direzionali, selezionare un’opzione e premere
quindi il tasto .
Viene visualizzata l’impostazione corrente per l’opzione.
34
Uso della schermata delle informazioni sulla versione
2 Selezionare un’opzione, quindi premere il tasto .
Driver PlayStationTM
Vengono visualizzate le opzioni disponibili.
È possibile impostare il programma Driver PlayStationTM per ottimizzare
3 Selezionare l’impostazione desiderata, quindi premere il
le prestazioni del software per PlayStation
TM.
tasto .
Per ulteriori informazioni, consultare le istruzioni per ciascuna
Nota
opzione ( pagine da 35 a 36).
Le impostazioni tornano automaticamente ai valori predefiniti nel seguente caso:
– Quando la PlayStation
TM2 integrata viene spenta
Nota
Le impostazioni predefinite sono sottolineate nelle spiegazioni riportate di sotto.
Velocità Disco
IT
Normale Carica i dischi a velocità normale
Menu principale
Unità
Veloce Carica i dischi ad alta velocità
La PlayStationTM2 integrata regola automaticamente le proprie
impostazioni interne per una riproduzione ottimale. Quando l’opzione
Nota
“Diagnosi” è impostata su “On”, la PlayStationTM2 integrata esegue
Impostare su “Normale” nei seguenti casi:
ulteriori regolazioni.
– Quando il caricamento veloce non consente migliori risultati
– Quando si usa un software non compatibile con il caricamento veloce
Diagnosi
Texture Mapping
Off La diagnosi è disattivata.
Normale
Visualizza come normale
On La diagnosi è attivata.
Fluido Visualizza con minore disturbo le immagini sullo schermo
Nota
L’impostazione “Diagnosi” torna automaticamente ai valori predefiniti nei seguenti
Nota
casi:
Impostare su “Normale” nei seguenti casi:
– Quando inizia la riproduzione del software per PlayStation
TM2 o PlayStationTM o
– Quando la mappatura graduale della struttura non migliora i risultati
di un DVD
– Se l’immagine non viene visualizzata correttamente quando si imposta “Fluido”
– Quando la PlayStation
TM2 integrata viene reimpostata
– Quando la PlayStation
TM2 integrata viene spenta
Uso della schermata delle informazioni sulla versione
35
7 Chiudere il coperchio del disco.
Lettore DVD
Inizia la riproduzione.
Se si imposta “Scansione Progressiva” su “On” quando la PlayStationTM2
integrata è collegata a un televisore senza le necessarie caratteristiche, la
Nota
qualità dell’immagine potrebbe essere ridotta, oppure l’immagine
L’impostazione non verrà completata se 1) non si avvia un DVD dopo il punto 4
potrebbe non essere visualizzata. L’impostazione “Scansione Progressiva”
oppure 2) si riavvia o si spegne la PlayStation
TM2 integrata prima del punto 6.
può essere rimossa attenendosi alla procedura seguente.
Prima di cancellare l’impostazione, rimuovere il DVD.
Annullare Scansione Progressiva
No Lascia attivata l’impostazione “Scansione Progressiva”
Sì Disattiva l’impostazione “Scansione Progressiva”
1 Schermata delle informazioni sulla versione.
2 Usando i tasti direzionali, selezionare “Lettore DVD”, quindi
premere il tasto .
Viene visualizzata l’opzione “Annullare Scansione Progressiva”.
3 Premere il tasto .
4 Selezionare “Sì”, quindi premere il tasto .
5 Premere due volte il tasto .
Il display torna al menu principale.
6 Premere il tasto OPEN nella parte anteriore della
PlayStation
TM2 integrata, quindi inserire un DVD nella
PlayStation
TM2 integrata.
36
Uso della schermata delle informazioni sulla versione
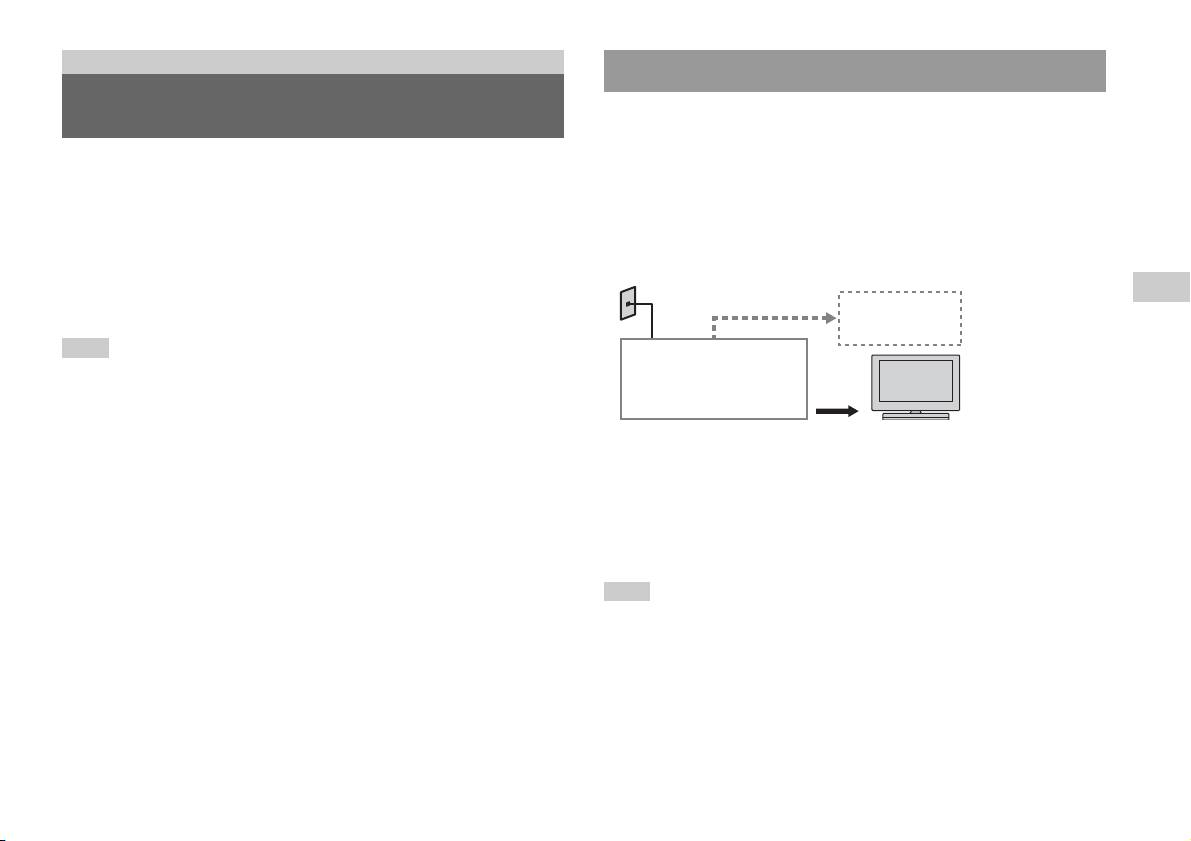
Collegamento in rete
Collegamento con un cavo Ethernet
Collegamento a una rete
È possibile collegare la PlayStationTM2 integrata a una rete usando un cavo
Ethernet collegato al connettore NETWORK nella parte posteriore. È
possibile realizzare il collegamento a una rete 100 Base-TX o 10 Base-T.
È possibile giocare in rete collegando la PlayStationTM2 a una rete a banda
Per informazioni, fare riferimento alle istruzioni per l’uso in dotazione con
larga. Per giocare con tutti i giochi in rete, è necessario quanto segue:
il dispositivo di rete.
• Un gioco per PlayStation
TM2 con modalità di gioco in rete
• Un servizio Internet a banda larga
Impostazione di rete di base
• Un cavo Ethernet disponibile in commercio
Linea di rete
• Una Memory Card (8 MB) (per PlayStation
TM2) (in vendita
IT
separatamente)
Collegamento in rete
PC
Note
• Non è possibile giocare in rete utilizzando un collegamento ad accesso remoto o
Modem, router a banda
ISDN.
larga, ecc.
• La connettività USB dal dispositivo di rete esterno al connettore USB non è
supportata.
Apparecchiatura di rete Cavo Ethernet
(non in dotazione)
• Esistono due tipi di cavi Ethernet: cavo diretto e cavo incrociato. Quando si collega
la PlayStation
TM2 alla connessione Internet a banda larga, assicurarsi di utilizzare
Linea di rete: varia a seconda del tipo di servizio a banda larga a
il tipo di cavo corretto. Per informazioni in merito, consultare il manuale di
disposizione.
istruzioni fornito con il dispositivo di rete, oppure il fornitore di servizi Internet a
banda larga.
Apparecchiatura di rete: il tipo di apparecchiatura utilizzata varia
• Non effettuare il collegamento alla LAN del televisore utilizzando il cavo Ethernet.
anche a seconda del tipo di servizio.
Nota
Quando si collegano la PlayStationTM2 integrata e un PC alla rete, potrebbe essere
necessario un dispositivo di rete come un router o un hub. Per informazioni, fare
riferimento alle istruzioni per l’uso in dotazione con il dispositivo di rete.
Collegamento a una rete
37
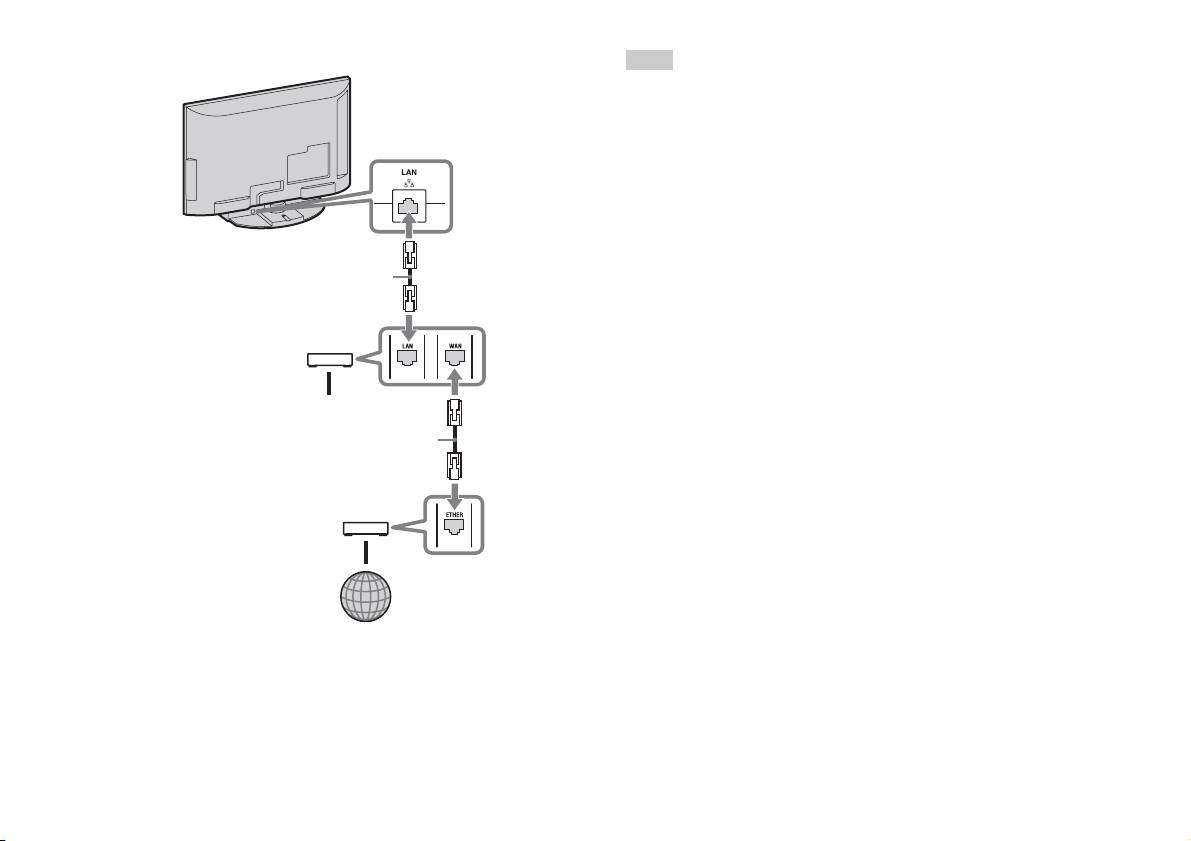
Collegamento della PlayStationTM2 integrata
Note
• Non inserire il cavo di Alimentazione AC nella presa elettrica finché non sono stati
eseguiti tutti gli altri collegamenti.
• Non collegare i cavi Ethernet o i cavi del telefono dei seguenti tipi al connettore di
PlayStation
TM2 integrata
rete; una quantità eccessiva di corrente elettrica potrebbe passare attraverso il
connettore, provocando un errore di funzionamento, calore eccessivo o incendi nel
connettore:
– Linee telefoniche residenziali standard
– I cavi Ethernet non idonei per l’uso con una rete 10Base-T/100Base-TX
– Qualsiasi telefono compatibile con linee ISDN (digitali) o linea di dati
– Linee telefoniche PBX
Cavo di rete (non in dotazione)
– Altri tipi di linee telefoniche sconosciute
Router
Ai dispositivi di rete
Cavo di rete (non in dotazione)
Modem DSL/Modem via cavo
Internet
1 Collegare il cavo Ethernet al connettore NETWORK nella
parte posteriore.
2 Collegare il cavo Ethernet al dispositivo di rete.
38
Collegamento a una rete

Creazione di impostazioni di
rete
Dopo aver collegato un cavo Ethernet alla PlayStationTM2 integrata, sarà
necessario creare e salvare le impostazioni di rete. A tal fine è necessario
un disco di accesso alla rete in dotazione a seguito della registrazione della
PlayStation
TM2. La PlayStationTM2 può essere registrata.
IT
Per creare un’impostazione di rete sono necessari i seguenti elementi:
Collegamento in rete
– Una Memory Card (8 MB) (per PlayStationTM2) (in vendita separatamente)
– Informazioni di login e impostazione di rete fornite dal fornitore di servizi
Internet a banda larga
Nota
A seconda del tipo di servizio Internet usato, potrebbe essere necessario specificare
il fornitore di servizi Internet a banda larga, insieme all’indirizzo MAC. L’indirizzo
MAC della PlayStation
TM2 è disponibile nella schermata delle informazioni sulla
versione ( pagina 34).
Creazione di impostazioni di rete
39

Netzwerkfunktionen
Inhalt
Anschließen an ein Netzwerk.......................................................37
Vornehmen von Netzwerkeinstellungen ......................................39
Vorbereitungen
Teile und Anschlüsse.....................................................................3
Anschließen digitaler Audiogeräte ................................................5
Anschließen des Controllers ..........................................................6
Ein- und Ausschalten der integrierten PlayStation
TM2 ..................6
Spiele
Spielen............................................................................................7
Die Memory Card ........................................................................ 11
Audio-CDs
Wiedergeben einer Audio-CD .....................................................13
DVDs
Wiedergeben einer DVD.............................................................. 15
Die verschiedenen Wiedergabemodi ........................................... 20
Einstellungen für den DVD-Spieler............................................. 22
Das Hauptmenü
Aufrufen des Hauptmenüs ........................................................... 30
Der Browser-Bildschirm.............................................................. 31
Das „Systemkonfiguration“-Menü............................................... 32
Der Bildschirm „Grundeinstellung“ ............................................ 34
2
Inhalt

Vorbereitungen
Anschluss an Beschreibung
3 USB-Anschluss
Sie können verschiedene USB-Geräte an die
Teile und Anschlüsse
integrierte PlayStation
TM2 anschließen, aber nicht
alle sind kompatibel. Weitere Informationen dazu
finden Sie in den mit dem USB-Gerät gelieferten
Anweisungen.
Vorderseite der integrierten PlayStationTM2
Anmerkung
Über den USB-Anschluss an der PlayStation
können keine Foto-, Musik- und Videodateien
wiedergegeben werden.
4 Disc-Fach
Drücken Sie die OPEN-Taste, so dass sich das Disc-
Fach öffnen lässt.
DE
5 OPEN-Taste
Damit öffnen Sie das Disc-Fach.
Vorbereitungen
6 "/1 (Ein/Standby)/
Damit können Sie die integrierte PlayStationTM2
RESET-Taste
einschalten, in den Standby-Modus schalten oder
zurücksetzen.
OPEN
RESET: Drücken Sie die Taste einmal.
Standby: Drücken Sie die Taste länger als eine
Sekunde.
7 "/1 (Ein/Standby)-
Leuchtet grün, wenn die integrierte PlayStationTM2
Kontroll-Leuchte
eingeschaltet ist.
Leuchtet rot, wenn sich die integrierte
Anschluss an Beschreibung
PlayStation
TM2 im Standby-Modus befindet.
1 MEMORY CARD-
Setzen Sie eine Memory Card ein ( Seite 11).
Steckplatz 1/2
2 Controller-Anschluss
Schließen Sie den Analog Controller
1/2
(DUALSHOCK®2) an einen Controller-Anschluss
der PlayStation
TM2 an ( Seite 6).
Teile und Anschlüsse
3

Rückseite der integrierten PlayStationTM2
Anschluss an Beschreibung
1 LAN
Sie können Online-Spiele spielen, wenn Sie die
PlayStation
TM2 an ein Breitband-Netzwerk
anschließen ( Seite 37).
Anmerkung
Verbinden Sie diesen Anschluss über ein Ethernet-
Kabel mit LAN am Fernsehgerät, wenn Sie
„BRAVIA“-Heimnetzwerkfunktionen nutzen
möchten ( Seite 37).
4
Teile und Anschlüsse
1 2
Anschluss an Beschreibung
2 DIGITAL AUDIO OUT
Verbinden Sie den digitalen Eingang einer
(OPTICAL)
Heimkinoanlage mit diesem Anschluss, wenn Sie
den Ton von der integrierten PlayStation
TM2 über
die Heimkinoanlage ausgeben lassen möchten.

• Bei einer Verbindung über DIGITAL AUDIO OUT (OPTICAL) wird digitaler
Ton von der integrierten PlayStation
TM2 ausgegeben.
Anschließen digitaler
Audiogeräte
Wenn Sie ein handelsübliches optisches Digitalkabel verwenden, können
Sie Raumklang mit einer Klangwirkung wie im Kino oder Konzertsaal
erzielen. Wenn Sie die integrierte PlayStationTM2 an ein Audiogerät mit
digitalen Anschlüssen anschließen, schlagen Sie auch in der
Bedienungsanleitung zum anzuschließenden Gerät nach.
Angeschlossenes Gerät
Rückseite der integrierten PlayStationTM2
DIGITAL IN
DE
Vorbereitungen
OPTICAL
Handelsübliches optisches
Digitalkabel
Anmerkungen
• Wenn Sie die integrierte PlayStationTM2 über ein optisches Digitalkabel an ein
Audiogerät anschließen, kann die Audioausgabe mancher Software im
PlayStation
TM2-Format so beeinträchtigt sein, dass kein Ton erzeugt wird.
Verwenden Sie in diesem Fall beispielsweise das Audiokabel (nicht mitgeliefert)
und schließen Sie es an AUDIO OUT am Fernsehgerät an. Verwenden Sie kein
optisches Digitalkabel.
• Wenn Sie ein digitales Audiogerät angeschlossen haben, setzen Sie die Option
„DIGITAL OUT (OPTICAL)“ im „Systemkonfiguration“-Menü auf „Ein“.
Einzelheiten dazu finden Sie unter „DIGITAL OUT (OPTICAL)“ ( Seite 33).
Anschließen digitaler Audiogeräte
5
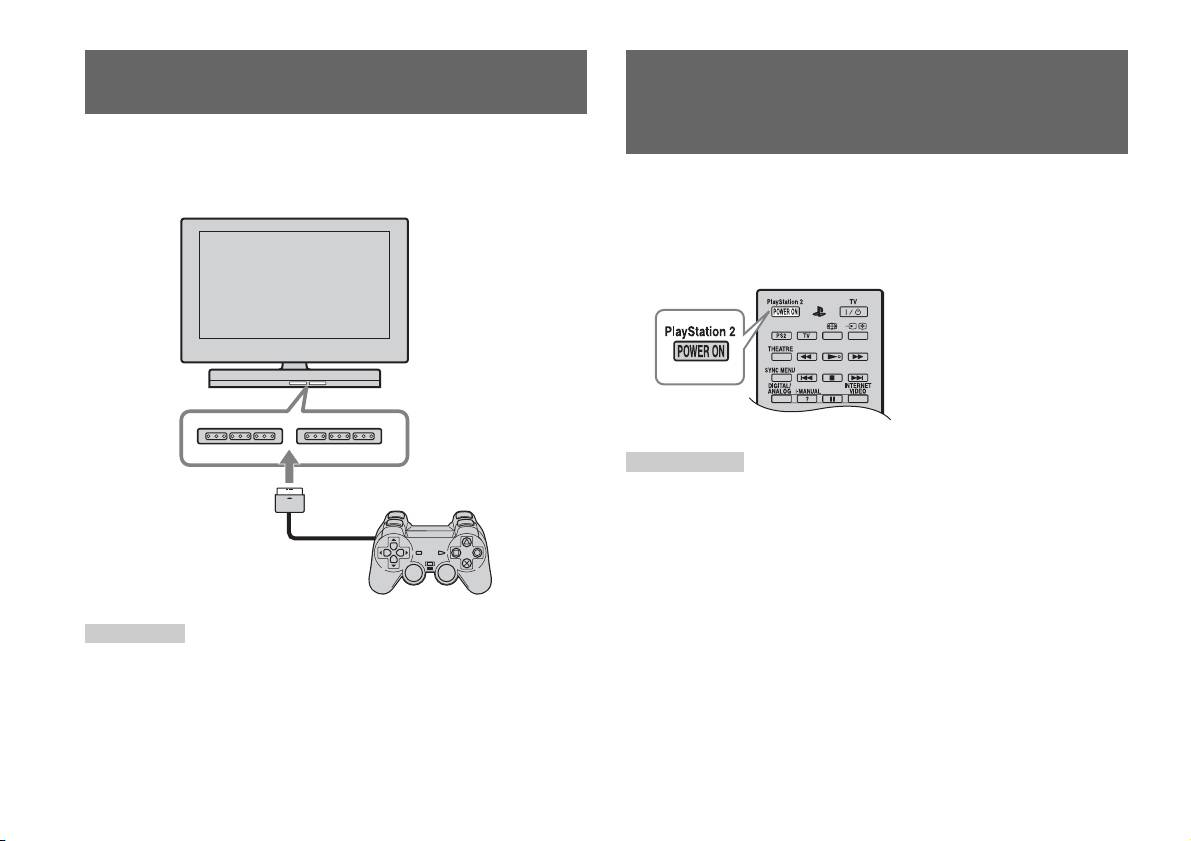
Anschließen des Controllers
Ein- und Ausschalten der
integrierten PlayStation
TM2
1 Schließen Sie den Analog Controller (DUALSHOCK®2) an einen
Controller-Anschluss der integrierten PlayStation
TM2 an.
1 Mit der Taste PlayStation 2 POWER ON auf der Fernbedienung
Vorderseite der integrierten PlayStationTM2
des Fernsehgeräts schalten Sie das Fernsehgerät und die
PlayStation
TM2 ein. (Am Fernsehgerät wird als Eingang
automatisch die PlayStation
TM2 eingestellt.)
Anmerkungen
• Wenn Sie das Fernsehgerät ausschalten, wird die PlayStationTM2 ebenfalls
ausgeschaltet. Wenn die folgenden Funktionen aktiviert sind, wird die
PlayStation
TM2 ebenfalls zusammen mit dem Fernsehgerät ausgeschaltet.
– TV-Standby nach Nichtbenutzung
Analog Controller
– Abschalttimer
(DUALSHOCK
®2)
– PC Energieverwaltung
– Erinnerung
Anmerkung
– Einschalttimer
– Bilderrahmen
Bei einigen Software-Titeln muss ein bestimmter Controller-Anschluss verwendet
werden. Einzelheiten dazu schlagen Sie bitte in den mit der Software gelieferten
• Greifen Sie nicht auf die Memory Card zu, wenn eine Warnmeldung wie z. B. „Das
Anweisungen nach.
Fernsehgerät schaltet sich in Kürze aus...“ erscheint.
6
Anschließen des Controllers

Spiele
Spielen
OPEN
DE
Spiele
Vor dem Spielen Starten eines Spiels
Vergewissern Sie sich, dass die Verbindungen zum Fernsehgerät und zum
1 Entriegeln Sie mit der OPEN-Taste die Sperre des Disc-Fachs.
Audiogerät korrekt vorgenommen und die Sicherheitsmaßnahmen
beachtet wurden.
2 Schieben Sie die Abdeckung des Disc-Fachs nach links und
• „Anschließen des Controllers“ ( Seite 6)
legen Sie die Disc mit der beschrifteten Seite nach oben ein.
Anmerkung
3 Schieben Sie die Abdeckung des Disc-Fachs zum Schließen
Wenn Sie Online-Spiele spielen wollen, müssen Sie zuerst eine Verbindung zu
nach rechts, bis sie einrastet.
einem Netzwerk herstellen und dieses konfigurieren. Einzelheiten dazu finden Sie
unter „Anschließen an ein Netzwerk“ ( Seite 37).
Anmerkungen
• Das Disc-Fach muss für die Wiedergabe einer Disc verriegelt sein.
• Sie können ein Spiel auch vom Browser-Bildschirm aus starten ( Seite 31).
Spielen
7
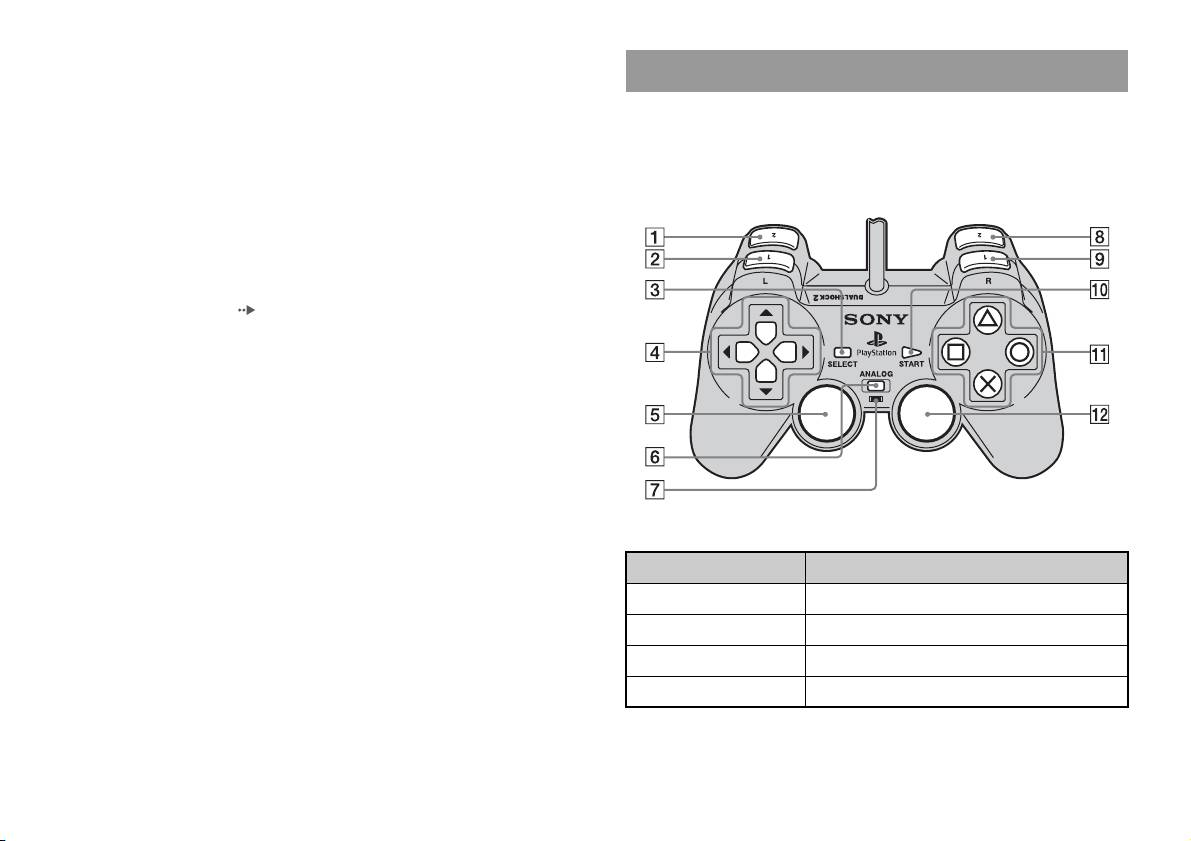
• Wenn Sie die integrierte PlayStationTM2 einschalten und bereits eine Disc eingelegt
ist, wird das Spiel automatisch gestartet.
Der Analog Controller (DUALSHOCK®2)
So setzen Sie ein Spiel zurück
Die Tasten des Analog Controller (DUALSHOCK
®2) sind
Drücken Sie die \/1 (Ein/Standby)/RESET-Taste an der Vorderseite der
druckempfindlich. Außerdem verfügt der Analog Controller
integrierten PlayStation
TM2. Drücken Sie die @/1/RESET-Taste nicht
(DUALSHOCK
®2) über eine Vibrationsfunktion.
versehentlich während eines Spiels. Andernfalls wird das Spiel
Teile und Anschlüsse
zurückgesetzt.
So beenden Sie ein Spiel
Speichern Sie die Spieldaten, drücken Sie die "/1 (Ein/Standby)/RESET-
Taste an der Vorderseite der integrierten PlayStation
TM2 und nehmen Sie
dann die Disc heraus ( Seite 3).
RESET: Einmal drücken.
Standby: Mehr als eine Sekunde lang drücken.
Taste/Schalter Beschreibung
1 L2-Taste
2 L1-Taste
3 SELECT-Taste
4 Richtungstasten
8
Spielen
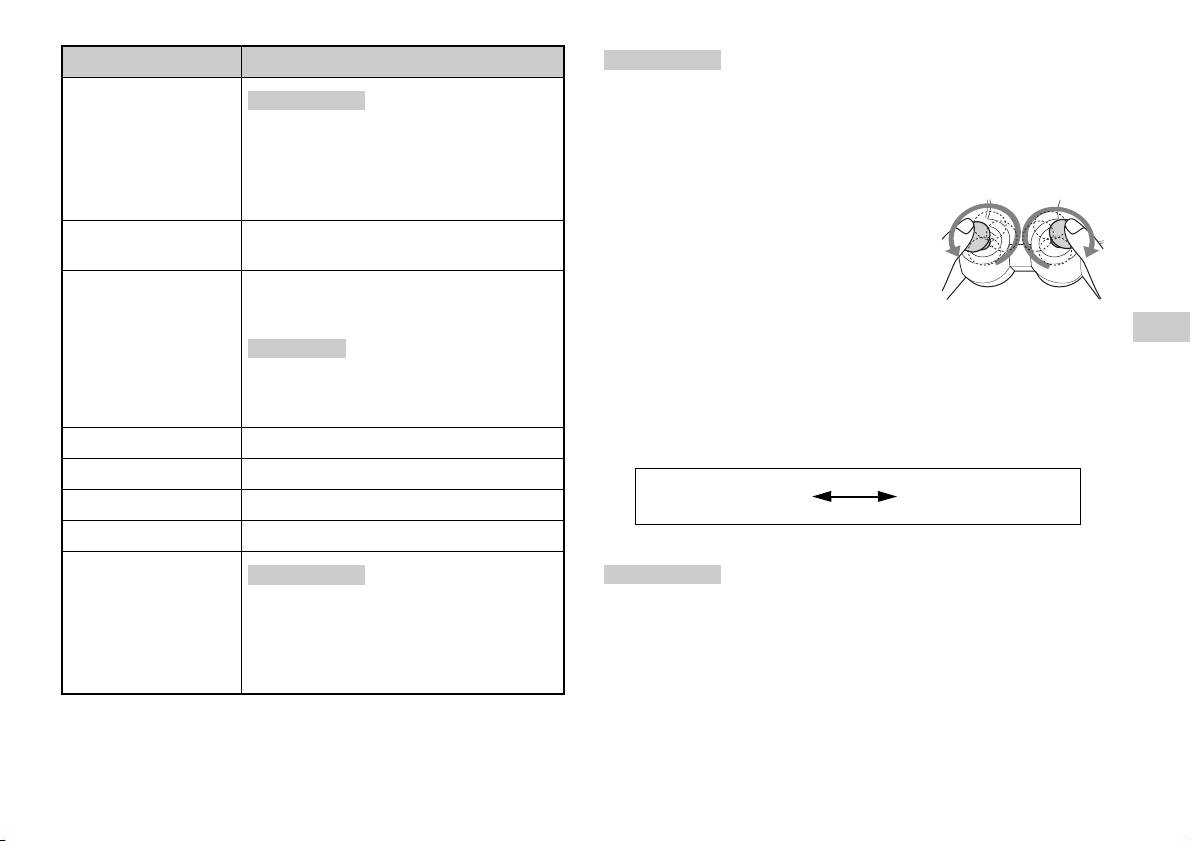
Taste/Schalter Beschreibung
Anmerkungen
• Je nach Software sind die Tasten, die im Analogmodus verwendet werden können,
5 Linker Analog-Stick/
Anmerkungen
L3-Taste
möglicherweise eingeschränkt. Einzelheiten dazu schlagen Sie bitte in den mit der
• Der linke Analog-Stick und die L3-Taste stehen
Software gelieferten Anweisungen nach.
nur im Analogmodus (Kontroll-Leuchte: rot) zur
• Die Vibrationsfunktion können Sie im Optionsmenü der Software ein- bzw.
Verfügung.
ausschalten. Je nach Software wird die Vibrationsfunktion unter Umständen
• Die L3-Taste funktioniert, wenn der Analog-Stick
automatisch eingeschaltet.
gedrückt wird.
• Bevor Sie den Analog Controller
(DUALSHOCK
®2) verwenden, schalten Sie die
6 ANALOG-Modustaste
Damit wechseln Sie zwischen Digital- und
integrierte PlayStation
TM2 ein und drehen einmal
Analogmodus.
den linken und den rechten Analog-Stick mit dem
7 Modus-Kontroll-
Daumen. Verdrehen Sie die Analog-Sticks nicht,
Digitalmodus: Leuchtet nicht.
Leuchte
sondern drehen Sie sie wie in der Abbildung
Analogmodus: Leuchtet rot.
dargestellt, als ob Sie einen Kreis zeichnen würden.
DE
Anmerkung
Spiele
Hinweis zum Umschalten des Modus
Je nach Software können Sie den Modus
Mit der ANALOG-Modustaste können Sie zwischen zwei Modi
möglicherweise auch mit der ANALOG-
umschalten. Schalten Sie den Controller jeweils in den geeigneten Modus.
Modustaste nicht wechseln.
Beachten Sie jedoch, dass die Einstellung bei manchen Software-Titeln
8 R2-Taste
automatisch erfolgt.
9 R1-Taste
Digitalmodus
Analogmodus
q; START-Taste
(Kontroll-Leuchte: aus)
(Kontroll-Leuchte: rot)
qa f/a/×/s-Tasten
qs Rechter Analog-Stick/
Anmerkungen
Anmerkungen
R3-Taste
• Der rechte Analog-Stick und die R3-Taste stehen
• Wenn Sie den Analog Controller im Digitalmodus verwenden, funktionieren der
nur im Analogmodus (Kontroll-Leuchte: rot) zur
linke und der rechte Analog-Stick nicht. Außerdem sind die Tasten in diesem
Verfügung.
Modus nicht druckempfindlich.
• Die R3-Taste funktioniert, wenn der Analog-Stick
• Je nach Software können Sie den Modus möglicherweise auch mit der ANALOG-
gedrückt wird.
Modustaste nicht wechseln.
Spielen
9

Bedienelemente im Analogmodus
• Bei der Wiedergabe eines Software-Titels im PlayStationTM2-Format
Hinweis zum Verwenden des Analog Controller
können Sie im Analogmodus alle Tasten außer der START-, SELECT-,
(DUALSHOCK®) (SCPH-110 E)
L3- und R3-Taste verwenden.
• Bei der Wiedergabe eines Software-Titels im PlayStation
TM-Format
Sie können den Analog Controller (DUALSHOCK®) (SCPH-110 E) mit
können im Analogmodus nur der linke und der rechte Analog-Stick
der integrierten PlayStation
TM2 verwenden, aber die Funktionen der Tasten
verwendet werden.
können sich im Analogmodus von denen des Analog Controller
(DUALSHOCK®2) unterscheiden. Im Analogmodus können nur der linke
Anmerkung
und der rechte Analog-Stick verwendet werden.
Je nach Software sind die Tasten, die im Analogmodus verwendet werden können,
eingeschränkt. Einzelheiten dazu schlagen Sie bitte in den mit der Software
Anmerkung
gelieferten Anweisungen nach.
Nicht alle Software-Titel im PlayStationTM2-Format unterstützen den Analog
Controller (DUALSHOCK
®) (SCPH-110 E). In solchen Fällen müssen Sie den
Hinweis zur Vibrationsfunktion
Analog Controller (DUALSHOCK
®2) verwenden.
Die Vibrationsfunktion können Sie im Optionsmenü der Software auf EIN
oder AUS setzen.
Anmerkung
Je nach Software wird die Vibrationsfunktion unter Umständen automatisch auf
„Ein“ gesetzt.
10
Spielen

Einsetzen einer Memory Card
Die Memory Card
Setzen Sie die Memory Card in einen MEMORY CARD-Steckplatz an der
Vorderseite der integrierten PlayStation
TM2 ein.
Zum Speichern und Laden von Spieldaten können Sie eine Memory Card
verwenden (separat erhältlich). Sie können Spieldaten auch löschen oder
Vorderseite der integrierten PlayStationTM2
von einer Memory Card auf eine andere kopieren.
Informationen zu den Memory Card-Typen
Es gibt zwei Memory Card-Typen. Wählen Sie die für die verwendete
Software geeignete Memory Card aus.
DE
Spiele
Memory Card-Typ Kompatible Software Speicherkapazität
Memory Card (8 MB) (für
Software im
ca. 8 MB
MEMORY CARDMEMORY CARD
PlayStation
TM2)
PlayStationTM2-Format
(SCPH-10020 E)
Memory Card
Software im
15 Speicherblöcke
(SCPH-1020 E)*
PlayStation
TM-Format
(ca. 120 KB)
* Dieses Produkt wird
nicht mehr hergestellt.
Anmerkung
MagicGate™ ist der Begriff für eine Technologie zum Schutz von Urheberrechten,
die von der Sony Corporation entwickelt wurde.
Bei einigen Software-Titeln muss ein bestimmter MEMORY CARD-Steckplatz
verwendet werden. Einzelheiten dazu schlagen Sie bitte in den mit der Software
gelieferten Anweisungen nach.
Speichern oder Laden von Spieldaten
Je nach Software kann sich das Verfahren zum Speichern bzw. Laden
unterscheiden. Einzelheiten dazu schlagen Sie bitte in den mit der
Software gelieferten Anweisungen nach.
Die Memory Card
11

Kopieren oder Löschen von Spieldaten
Sie können gespeicherte Daten löschen oder Daten auf eine andere
Memory Card kopieren. Mit den Richtungstasten und der -Taste
am Controller treffen Sie eine Auswahl.
1 Schalten Sie die integrierte PlayStationTM2 ohne eingelegte
Disc ein und setzen Sie eine Memory Card ein.
2 Wählen Sie „Browser“ und dann die Memory Card, von der
Daten kopiert oder gelöscht werden sollen.
3 Wählen Sie das Symbol für die betreffenden Daten und dann
„Kopieren“ bzw. „Löschen“.
4 Befolgen Sie die Anweisungen auf dem Einstellbildschirm.
12
Die Memory Card

Audio-CDs
Bedienen des CD-Spielers während der
Wiedergabe
Wiedergeben einer Audio-CD
Wählen Sie mit den Richtungstasten das Symbol für den gewünschten
Titel aus und drücken Sie die -Taste.
Wiedergeben einer CD
Symbol (Taste*) Funktion
1 Schalten Sie die integrierte PlayStationTM2 ein und legen Sie
. (L1-Taste) Wechseln zum Anfang des aktuellen oder des
die Disc ein ( Seite 7).
vorherigen Titels
Gehen Sie wie in Schritt 1 bis 3 unter „Starten eines Spiels“ erläutert
m (L2-Taste) Schneller Rücklauf
vor.
M (R2-Taste) Schneller Vorlauf
Die Titelnummern werden angezeigt.
DE
> (R1-Taste) Wechseln zum Anfang des nächsten Titels
Audio-CDs
2 Wählen Sie mit den Richtungstasten die Nummer des
N (START-Taste) Starten der Wiedergabe
wiederzugebenden Titels aus und drücken Sie die -Taste.
X (START-Taste) Unterbrechen der Wiedergabe
Die Wiedergabe beginnt.
x (SELECT-Taste) Stoppen der Wiedergabe
Anmerkungen
* Sie können das Gerät direkt über die in Klammern dargestellten Tasten des
• Wenn Sie die integrierte PlayStationTM2 einschalten und bereits eine Disc eingelegt
Analog Controller (DUALSHOCK
®2) bedienen.
ist, werden die Titelnummern automatisch angezeigt.
• Sie können die Wiedergabe auch vom Browser-Bildschirm aus starten
Anmerkung
(Seite31).
Sie können auch die DVD-Fernbedienung (für PlayStationTM2) (separat erhältlich)
verwenden.
Vorsicht
Zum Wiedergeben einer im DTS-Format aufgezeichneten Audio-CD müssen
Sie die Lautstärke vollständig herunterdrehen und dann ein Gerät mit DTS-
Decoder an den DIGITAL OUT (OPTICAL)-Anschluss anschließen
( Seite 5). Beachten Sie, dass möglicherweise ein sehr lautes Geräusch
ausgegeben wird.
Wiedergeben einer Audio-CD
13
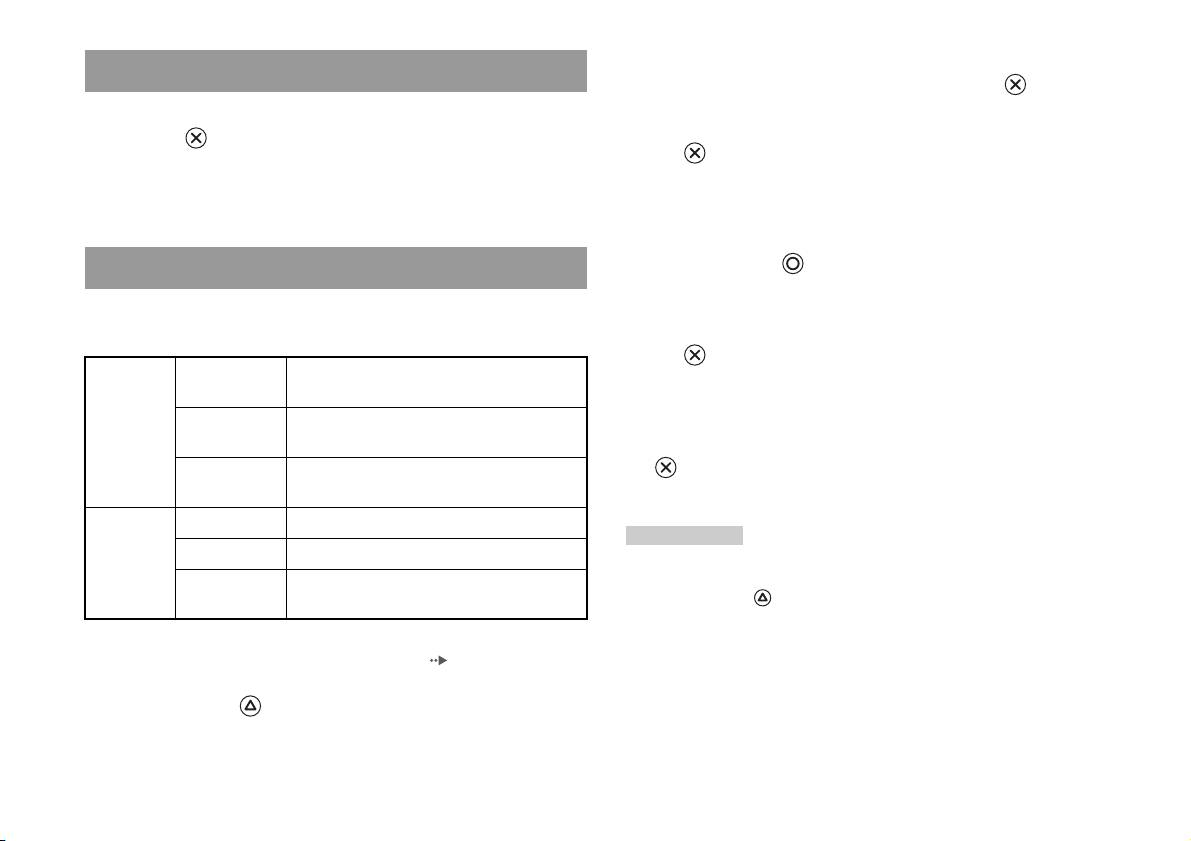
2 Wählen Sie „Wiedergabemodus“ oder
Beenden der Audio-CD-Wiedergabe
„Wiederholungsmodus“ und drücken Sie die -Taste.
1 Wählen Sie mit den Richtungstasten x aus und drücken Sie
3 Wählen Sie die gewünschte Einstellung aus und drücken Sie
dann die -Taste.
die -Taste.
Die Wiedergabe stoppt. Drücken Sie die OPEN-Taste an der
Wenn Sie „Programm“ wählen, wird der Bildschirm zum Angeben der
Vorderseite der integrierten PlayStation
TM2, wenn Sie die Disc
Titelreihenfolge angezeigt. Wählen Sie die wiederzugebenden Titel
herausnehmen wollen.
aus.
4 Drücken Sie die -Taste.
Wiedergeben in verschiedenen Modi
Der Browser-Bildschirm erscheint.
Sie können Einstellungen für den „Wiedergabemodus“ und für den
„Wiederholungsmodus“ vornehmen.
5 Wählen Sie das Symbol für die Audio-CD aus und drücken Sie
die -Taste.
Wiedergabe-
Normal Die Titel werden wie auf der CD aufgezeichnet
Die Titelnummern werden angezeigt und die Einstelloption erscheint
modus
wiedergegeben.
unten links auf dem Bildschirm.
Programm Die Titel werden in einer bestimmten
Reihenfolge wiedergegeben.
6 Wählen Sie den gewünschten Titel aus und drücken Sie die
Shuffle Die Titel werden in zufälliger Reihenfolge
-Taste.
wiedergegeben.
Die Wiedergabe beginnt.
Wiederho-
Aus Die CD wird nicht wiederholt wiedergegeben.
lungsmodus
Anmerkungen
Alle Alle Titel werden wiederholt wiedergegeben.
• Sie können die Wiedergabeoptionen auch von dem Bildschirm mit den Titeln aus
1 Ein einzelner Titel wird wiederholt
aufrufen, indem Sie das Symbol für die Audio-CD oben links auf dem Bildschirm
wiedergegeben.
auswählen und die -Taste drücken.
• Sie können „Wiedergabemodus“ und „Wiederholungsmodus“ gleichzeitig
einstellen.
1 Wählen Sie auf dem Browser-Bildschirm ( Seite 31) mit den
Richtungstasten das Symbol für die Audio-CD aus und
drücken Sie die -Taste.
Die Wiedergabeoptionen werden angezeigt.
14
Wiedergeben einer Audio-CD

DVDs
Das Kontrollmenü
Wiedergeben einer DVD
1 Starten Sie die Wiedergabe der DVD ( Seite 17).
2 Drücken Sie die SELECT-Taste.
Sie haben folgende Möglichkeiten, den DVD-Spieler zu bedienen.
Das Kontrollmenü wird angezeigt. Wenn Sie die SELECT-Taste
• Über das Kontrollmenü auf dem Bildschirm
erneut drücken, wechselt die Position der Anzeige auf dem
• Direkt über den Analog Controller (DUALSHOCK
®2)
Bildschirm.
• Über die DVD-Fernbedienung (für PlayStation
TM2) (separat erhältlich)
Bei den folgenden Anweisungen wird die Verwendung des Kontrollmenüs
zum Bedienen des DVD-Spielers zugrunde gelegt. Je nach dem
verwendeten Verfahren unterscheiden sich einige Schritte.
DE
DVDs
Anmerkungen
• Einzelheiten zum Wiedergeben einer DVD finden Sie auch in den mit der DVD
mitgelieferten Anweisungen.
• Die integrierte PlayStation
TM2 gibt den Inhalt einer DVD so wie in der DVD-
3 Wählen Sie mit den Richtungstasten ein Symbol aus und
Software aufgezeichnet wieder. Beachten Sie, dass nicht alle Funktionen bei allen
DVDs zur Verfügung stehen.
drücken Sie die -Taste.
Anmerkung
Zum Ausblenden des Kontrollmenüs drücken Sie die SELECT-Taste (ein- oder
zweimal) oder die -Taste.
Liste der Optionen im Kontrollmenü
Über das Kontrollmenü haben Sie Zugriff auf die folgenden Optionen.
Symbol Funktion
Menü Anzeigen des Menüs bei DVD-Videos
Hauptmenü Anzeigen des Menüs bei DVD-Videos
Wiedergeben einer DVD
15
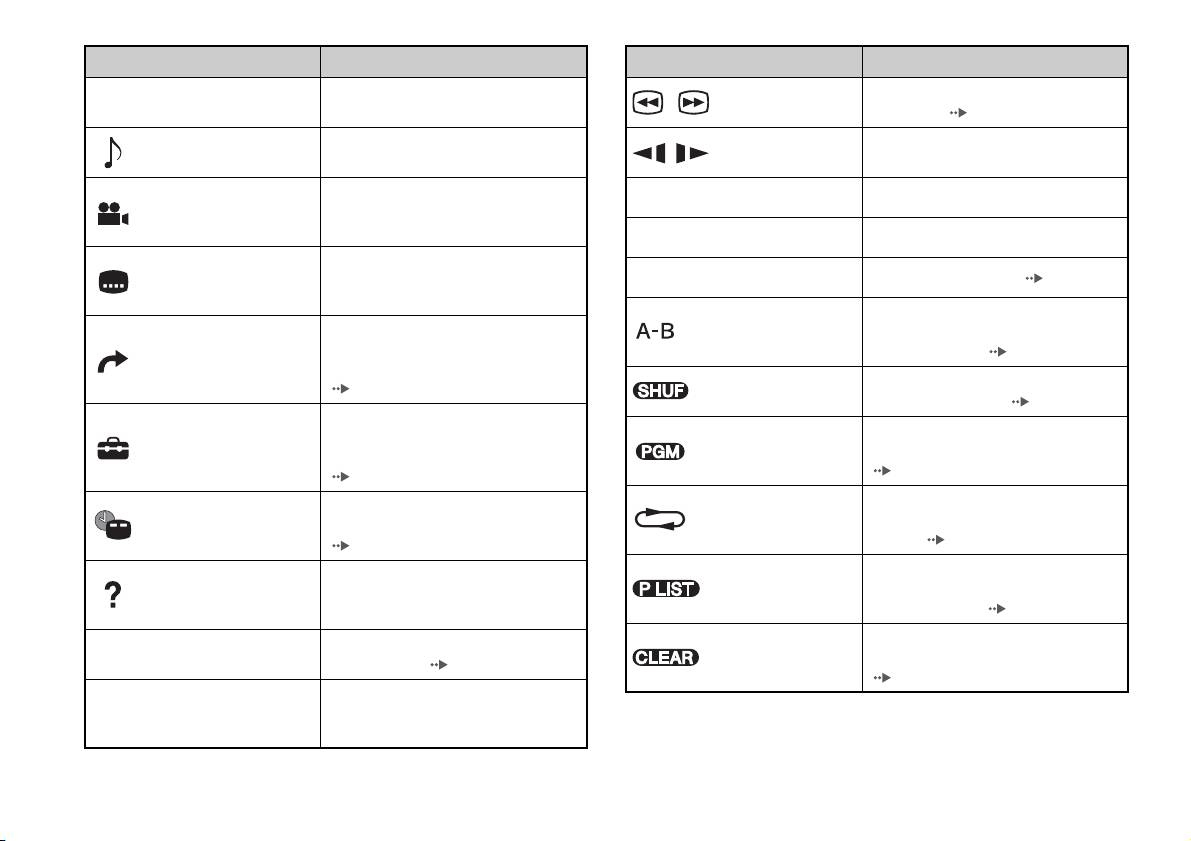
Symbol Funktion
Symbol Funktion
Zurückschalten zum zuvor ausgewählten
Schneller Rück-/Vorlauf während der
O
Zurück
/ Suche
Bildschirm im DVD-Menü
Wiedergabe ( Seite 18)
Anzeigen und Ändern der Audio-Optionen
Wiedergabe bzw. Wiedergabe rückwärts
Audio-Optionen
/ Zeitlupe
auf DVDs mit mehreren Tonspuren
in Zeitlupe
Anzeigen und Wechseln der Blickwinkel
Blickwinkel-
N
Wiedergabe Starten der Wiedergabe
auf DVDs, auf denen mehrere Blickwinkel
Optionen
aufgezeichnet sind
X
Pause Unterbrechen der Wiedergabe
Anzeigen und Ändern von Untertitel-
Untertitel-
Optionen auf DVDs mit Untertitel-
x
Stopp Stoppen der Wiedergabe ( Seite 17)
Optionen
Optionen
Festlegen einer Szene für die Wiedergabe
A-B-
Wechseln zum ausgewählten Titel, Kapitel
und Starten der Wiedergabe der
Wiederholung
oder einer bestimmten Stelle mithilfe der
festgelegten Szene ( Seite 22)
Gehe zu
Zeitangabe und Starten der Wiedergabe
Shuffle-
Wiedergeben von Titeln oder Kapiteln in
( Seite 17)
Wiedergabe
zufälliger Reihenfolge ( Seite 21)
Anzeigen und Ändern von Optionen für
Wiedergeben von Titeln oder Kapiteln in
Sprache, Bildqualität,
Programm-
Einstellungen
programmierter Reihenfolge
Kindersicherungsstufe, Ton usw.
Wiedergabe
( Seite 20)
( Seite 22)
Wiederholtes Wiedergeben aller Titel auf
Anzeigen der aktuellen Titel- oder
Wiedergabe-
der DVD, eines einzelnen Titels oder eines
Zeitanzeige
Kapitelnummer, der Spieldauer usw.
Wiederholung
Kapitels ( Seite 21)
( Seite 19)
Wählen zwischen der Wiedergabe von
Anzeigen der Funktionen der
Original/Play List
Original- oder Play List-Inhalt bei DVD-
Hilfe
Direktzugriffstasten des Analog Controller
RWs (VR-Modus) ( Seite 19)
(DUALSHOCK
®2)
Löschen von ausgewählten Nummern oder
Eingeben der Nummer eines Kapitels für
0~9
Gehe zu Kapitel
Löschen
Deaktivieren von Wiedergabemodi
die Wiedergabe ( Seite 17)
( Seite 22)
Zurück-/Weiterschalten zum Anfang des
./> Vorher/Weiter
aktuellen, vorherigen bzw. nächsten
Kapitels
16
Wiedergeben einer DVD

Anmerkungen
Fortsetzen der Wiedergabe einer DVD an der
• Mit „ “ können Sie die Optionen anzeigen lassen, auf die Sie direkt mit den
Tasten des Analog Controller zugreifen können. Um mit dem Controller direkt auf
Stelle, an der sie zuvor gestoppt wurde
die Optionen zugreifen zu können, müssen Sie zuerst das Kontrollmenü auf dem
(Fortsetzungsmodus)
Bildschirm ausblenden.
• Je nach Wiedergabemodus stehen einige Optionen möglicherweise nicht zur
1 Wählen Sie während der Wiedergabe x im Kontrollmenü
Verfügung oder können nicht eingestellt werden.
( Seite 15) und drücken Sie die -Taste.
Starten der Wiedergabe einer DVD
2 Wählen Sie N aus und drücken Sie die -Taste.
Die Wiedergabe wird an der Stelle fortgesetzt, an der Sie die DVD in
1 Schalten Sie die integrierte PlayStationTM2 ein und legen Sie
Schritt 1 gestoppt haben.
eine Disc ein ( Seite 7).
Gehen Sie wie in Schritt 1 bis 3 unter „Starten eines Spiels“ erläutert
Ausschalten des Fortsetzungsmodus
DE
DVDs
vor. Die Wiedergabe beginnt.
Wählen Sie nach Schritt 1 x und drücken Sie die -Taste.
Anmerkungen
• Wenn Sie die integrierte PlayStationTM2 einschalten und bereits eine Disc eingelegt
Auswählen einer bestimmten Szene für die
ist, wird die Wiedergabe automatisch gestartet.
Wiedergabe
• Sie können die Wiedergabe auch vom Browser-Bildschirm aus starten
(Seite31).
Auswählen einer Szene anhand der Kapitelnummer
1 Wählen Sie während der Wiedergabe die gewünschte
Beenden der DVD-Wiedergabe x
Kapitelnummer im Kontrollmenü aus ( Seite 15) und
drücken Sie die -Taste.
1 Wählen Sie während der Wiedergabe x im Kontrollmenü
Die Wiedergabe des ausgewählten Kapitels beginnt. Wenn Sie ein
( Seite 15) und drücken Sie die -Taste.
Kapitel mit einer einstelligen Nummer wiedergeben wollen (d. h. 1-9),
Die Wiedergabe stoppt. Drücken Sie die OPEN-Taste an der
geben Sie zuvor eine Null ein. Geben Sie also beispielsweise „01“ ein.
Vorderseite der integrierten PlayStation
TM2 und nehmen Sie die Disc
heraus.
Wiedergeben einer DVD
17

Auswählen einer Szene anhand der Titelnummer,
Kapitelnummer oder einer Zeitangabe
Suchen einer bestimmten Stelle auf einer DVD
(Suche)
1 Wählen Sie während der Wiedergabe im Kontrollmenü
( Seite 15) und drücken Sie die -Taste.
Sie können vorwärts oder rückwärts suchen und damit rasch eine
bestimmte Stelle auf einer DVD ansteuern.
2 Wählen Sie eine Option aus und drücken Sie die -Taste.
1 Wählen Sie während der Wiedergabe oder im
Kontrollmenü aus ( Seite 15) und halten Sie die -Taste
Titel Zum Angeben der Titelnummer
gedrückt.
Kapitel Zum Angeben der Kapitelnummer
Die Suchgeschwindigkeit wechselt wie unten dargestellt, wenn Sie die
C XX:XX:XX
Zum Auswählen der Stelle für die Wiedergabe mittels
-Taste gedrückt halten und dabei die Richtungstaste Oben oder die
(oder T XX:XX:XX)
einer Zeitangabe im Kapitel (bzw. Titel)
Richtungstaste Unten drücken.
• Suche 3
• Suche 2
3 Wählen Sie den Zahlenwert für die gewünschte Szene aus und
• Suche 1
drücken Sie die -Taste.
• Zeitlupe
Die Wiedergabe des ausgewählten Kapitels beginnt.
2 Lassen Sie die -Taste los, wenn Sie die gewünschte Stelle
gefunden haben.
Die Wiedergabe wird in normaler Geschwindigkeit fortgesetzt.
Anmerkung
Wenn Sie die Suche während der Wiedergabe mit dem Analog Controller ausführen
wollen, halten Sie zum Starten der Suche die L2- oder R2-Taste gedrückt. Die
Geschwindigkeit wechseln Sie mit den Richtungstasten. Lassen Sie die L2- bzw. R2-
Taste los, wenn Sie die gewünschte Stelle gefunden haben.
18
Wiedergeben einer DVD
Anzeigen von Wiedergabeinformationen
Auswählen von Original oder Play List für die
Wiedergabe von DVD-RWs
Sie können Informationen wie z. B. die aktuelle Titelnummer oder die
Spieldauer anzeigen lassen.
Bei DVD-RWs (VR-Modus) können Sie den Typ der wiederzugebenden
Titel auswählen.
1 Wählen Sie während der Wiedergabe im Kontrollmenü
( Seite 15) und drücken Sie die -Taste.
1 Wählen Sie bei gestoppter Wiedergabe im
Mit jedem Drücken der -Taste wechselt die Anzeige wie im
Kontrollmenü ( Seite 15) und drücken Sie die -Taste.
Folgenden angegeben.
Mit jedem Drücken der -Taste wird zwischen „Original“ und „Play
List“ umgeschaltet.
Titel X Kapitel X Titelnummer und Kapitelnummer
Original Inhalt wird in ursprünglich aufgenommener
Titel X Kapitel X C XX:XX:XX Spieldauer des aktuellen Kapitels
Reihenfolge wiedergegeben.
DE
Titel X Kapitel X C - XX:XX:XX Restspieldauer des aktuellen Kapitels
Play List Bearbeiteter Inhalt wird wiedergegeben. Play List ist
DVDs
Titel X Kapitel X T XX:XX:XX Spieldauer des aktuellen Titels
die Standardeinstellung.
Titel X Kapitel X T - XX:XX:XX Restspieldauer des aktuellen Titels
Anmerkungen
(Aus)
• Die Wiedergabe in Zeitlupe rückwärts steht bei DVD-RWs (VR-Modus) nicht zur
Verfügung.
• Diese Funktion können Sie nicht zusammen mit dem Fortsetzungsmodus
verwenden. Schalten Sie den Fortsetzungsmodus aus ( Seite 17), bevor Sie
diese Funktion auswählen.
Wiedergeben einer DVD
19
Programm-Wiedergabe
Die verschiedenen
Sie können Programme zusammenstellen und damit Titel und Kapitel in
Wiedergabemodi
beliebiger Reihenfolge wiedergeben lassen.
1 Wählen Sie während der Wiedergabe im Kontrollmenü
Mithilfe der verschiedenen Wiedergabemodi können Sie Titel oder Kapitel
( Seite 15) und drücken Sie die -Taste.
in der gewünschten Reihenfolge wiedergeben lassen oder die Wiedergabe
einer bestimmten Szene wiederholen. Es gibt vier Wiedergabemodi:
2 Wählen Sie eine Programmnummer aus und drücken Sie die
• Programm-Wiedergabe ( Seite 20)
-Taste.
• Shuffle-Wiedergabe ( Seite 21)
Wenn noch nichts programmiert wurde, ist die einzige Option „1.
• Wiedergabe-Wiederholung ( Seite 21)
Titel“.
• A-B-Wiederholung ( Seite 22)
3 Wählen Sie die Titelnummer aus und drücken Sie die
Bei den folgenden Anweisungen wird die Verwendung des Kontrollmenüs
-Taste.
( Seite 15) zum Bedienen des DVD-Spielers zugrunde gelegt.
4 Wählen Sie die Kapitelnummer aus und drücken Sie die
Anmerkungen
-Taste.
• Sie können die Programm-Wiedergabe, die Shuffle-Wiedergabe und die
Wenn alle Kapitel wiedergegeben werden sollen, wählen Sie „Alle“.
Wiedergabe-Wiederholung auch kombinieren. Beachten Sie jedoch, dass einige
Optionen der Shuffle-Wiedergabe oder Wiedergabe-Wiederholung je nach
Gehen Sie wie in Schritt 2 bis 4 erläutert vor, wenn Sie weitere Titel
Kombination unter Umständen nicht zur Verfügung stehen.
oder Kapitel programmieren wollen.
• Die integrierte PlayStation
TM2 gibt den Inhalt einer DVD so wie in der DVD-
Software aufgezeichnet wieder.
5 Drücken Sie die START-Taste.
Die Programm-Wiedergabe beginnt.
Anmerkung
Das Programm wird nicht gelöscht, wenn die Programm-Wiedergabe beendet ist.
20
Die verschiedenen Wiedergabemodi
Shuffle-Wiedergabe
Wiedergabe-Wiederholung
Mit dieser Funktion können Sie alle Titel oder Kapitel auf einer DVD in
Mit dieser Funktion können Sie Titel oder Kapitel wiederholt wiedergeben
zufälliger Reihenfolge wiedergeben lassen. Die Wiedergabereihenfolge
lassen.
ändert sich jedes Mal, wenn die Shuffle-Wiedergabe verwendet wird.
1 Wählen Sie im Kontrollmenü ( Seite 15) und
1 Wählen Sie im Kontrollmenü ( Seite 15) und
drücken Sie die -Taste.
drücken Sie die -Taste.
Mit jedem Drücken der -Taste wechselt die Anzeige wie im
Mit jedem Drücken der -Taste wechselt die Anzeige wie im
Folgenden angegeben.
Folgenden angegeben.
Wiederholung der
Wiederholte Wiedergabe aller Titel
Titel-Shuffle Wiedergabe von Titeln in zufälliger Reihenfolge
DVD
Kapitel-Shuffle Wiedergabe von Kapiteln in zufälliger Reihenfolge
Titelwiederholung Wiederholte Wiedergabe eines Titels
DE
DVDs
Shuffle Aus Ausschalten der Shuffle-Wiedergabe
Kapitelwiederholung
Wiederholte Wiedergabe eines Kapitels
Wiederholung
Ausschalten der Wiedergabe-Wiederholung
Aus
2 Wählen Sie N aus und drücken Sie die -Taste.
2 Wählen Sie N aus und drücken Sie die -Taste.
Die verschiedenen Wiedergabemodi
21
A-B-Wiederholung
Einstellungen für den DVD-
Sie können eine bestimmte Szene festlegen und wiederholt wiedergeben
lassen.
Spieler
1 Wählen Sie während der Wiedergabe im Kontrollmenü
( Seite 15) und drücken Sie die -Taste an der Stelle, an
Im Kontrollmenü können Sie Einstellungen für den DVD-Spieler
vornehmen, z. B. die Sprache für die Untertitel, die Sprache für den Ton
der die wiederholte Wiedergabe starten soll.
oder die Kindersicherungsstufe.
Damit haben Sie den Anfangspunkt (Punkt A) festgelegt.
Anmerkungen
2 Drücken Sie die -Taste an der Stelle, an der die
• Bei einigen DVDs werden nicht alle Einstellungen unterstützt. Die integrierte
wiederholte Wiedergabe enden soll.
PlayStation
TM2 gibt den Inhalt einer DVD so wie in der DVD-Software
Damit haben Sie den Endpunkt (Punkt B) festgelegt und die
aufgezeichnet wieder. Wenn die DVD die aufgelisteten Funktionen nicht
wiederholte Wiedergabe der Szene zwischen A und B wird gestartet.
unterstützt, können Sie die Einstellungen nicht ändern.
• Die folgenden Optionen stehen während der Wiedergabe oder im
Fortsetzungsmodus nicht zur Verfügung. Schalten Sie den Fortsetzungsmodus
Deaktivieren von Wiedergabemodi
( Seite 17) aus, bevor Sie diese Einstellungen ändern.
– „Menü“, „Audio“ und „Untertitel“ in „Spracheinstellungen“
Mit dieser Funktion werden die verschiedenen Wiedergabemodi
– „TV-Gerät“ und „Progressive-Modus“ in „Bildschirmeinstellungen“
deaktiviert und Sie schalten wieder in die normale Wiedergabe.
– „Kindersicherung“ in „Benutzereinstellungen“
– „DTS“ und „Autom. Auswahl von Audiotiteln“ in „Audio-Einstellungen“
1 Wählen Sie im Kontrollmenü ( Seite 15) und
drücken Sie die -Taste.
Gehen Sie zum Vornehmen von Einstellungen für den DVD-Spieler
Die Meldung „Inhalt des Wiedergabemodus gelöscht“ wird angezeigt
folgendermaßen vor:
und die integrierte PlayStation
TM2 wechselt zur normalen Wiedergabe.
1 Wählen Sie im Kontrollmenü ( Seite 15) und drücken
Anmerkung
Sie die -Taste.
Wenn mehrere Wiedergabemodi in Kombination verwendet wurden, werden alle
Die Symbolleiste mit den Einstellungen wird angezeigt.
Wiedergabemodi deaktiviert.
2 Wählen Sie das Symbol für die zu ändernde Einstellung aus
und drücken Sie die -Taste.
Die aktuelle Einstellung der einzelnen Optionen wird angezeigt.
22
Einstellungen für den DVD-Spieler
3 Wählen Sie die gewünschte Option aus und drücken Sie die
Einstellen von Sprachoptionen
-Taste.
Die Menüoption wird aktiviert und kann ausgewählt werden.
Unter „Spracheinstellungen“ können Sie die Sprache für das DVD-Menü,
den Ton und die Untertitel auswählen. Beachten Sie dabei, dass
4 Wählen Sie die gewünschte Einstellung aus und drücken Sie
automatisch eine der auf der DVD vorhandenen Sprachen ausgewählt
die -Taste.
wird, wenn Sie eine Sprache auswählen, die nicht auf der DVD vorhanden
ist.
Damit ist die Einstellung der Option vorgenommen. Weitere
Informationen dazu finden Sie in den Anweisungen zu den einzelnen
Optionen ( Seite 23 bis 29).
Menü Zum Auswählen der Sprache für das DVD-Menü.
Audio Zum Auswählen der Sprache für den Ton der DVD.
Anmerkungen
Untertitel Zum Auswählen der Sprache für die Untertitel der DVD.
• In den folgenden Erläuterungen sind die Standardeinstellungen unterstrichen.
• Wenn Sie nach dem Vornehmen von Einstellungen wieder in das Kontrollmenü
DE
schalten wollen, drücken Sie die SELECT-Taste.
Anmerkung
DVDs
• Die Einstellungen werden in folgenden Fällen gespeichert:
Wenn Sie für die Untertitel „Wie Audio“ auswählen, wird als Untertitelsprache
– Sie stoppen die Wiedergabe (einschließlich Stoppen der Wiedergabe im
automatisch die Sprache eingestellt, die für den DVD-Ton ausgewählt wurde.
Fortsetzungsmodus).
– Sie öffnen das Disc-Fach.
Einstellungen für den DVD-Spieler
23
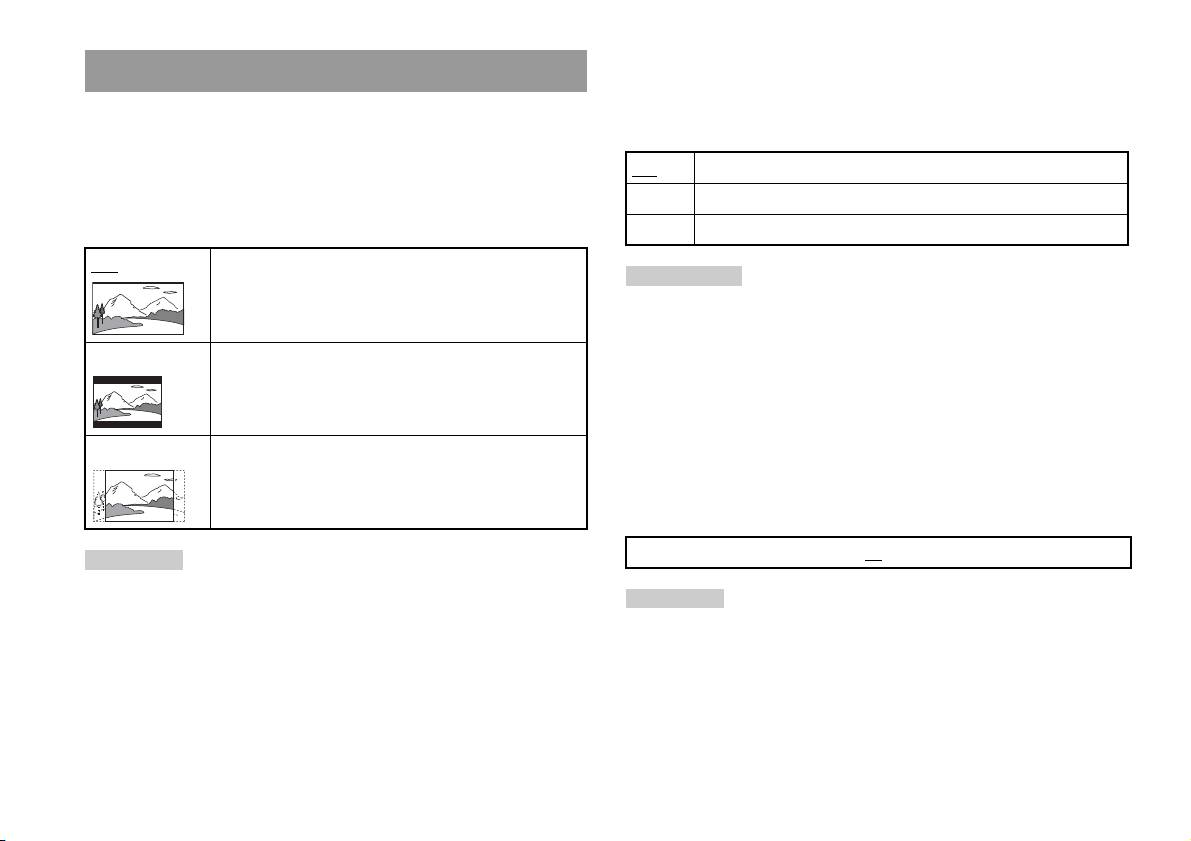
DNR (Digital Noise Reduction - digitale
Einstellen der Optionen für die Fernsehanzeige
Rauschreduzierung)
Mit dieser Einstellung können Sie Bildrauschen auf dem Bildschirm
Im Menü „Bildschirmeinstellungen“ können Sie das Bildseitenverhältnis
verringern und ein klareres Bild erzeugen.
und andere Optionen einstellen, die die Bildqualität betreffen.
Aus Die Rauschreduzierung ist deaktiviert.
TV-Gerät
Sie können das Bildseitenverhältnis entsprechend dem Bildschirmformat
DNR1 Die Bildqualität wird verbessert.
einstellen.
DNR2 Die Bildqualität wird optimal verbessert.
16:9 Bildschirmformat: Breitbild
Anmerkungen
• „DNR2“ reduziert Bildrauschen effektiver als „DNR1“, aber in einigen Fällen
können Nachbilder auftreten. In diesem Fall wählen Sie bitte „Aus“.
• Bei einigen DVDs sind die Auswirkungen der DNR-Funktion nur sehr begrenzt zu
4:3 LETTER BOX Bildschirmformat: 4:3
erkennen.
Bilder im Breitbildformat werden mit Balken am oberen und
• Wenn Sie „Progressive-Modus“ auf „Ein“, setzen, wird „DNR“ automatisch
unteren Bildschirmrand angezeigt.
ausgeschaltet und lässt sich auch nicht einschalten.
Konturenschärfe
4:3 PAN SCAN Bildschirmformat: 4:3
Sie können die Konturen des auf dem Bildschirm angezeigten Bildes
Bei dieser Einstellung wird das Bild an die Höhe des
Bildschirms angepasst und die Bereiche links und rechts, die
verstärken oder abschwächen. Je höher der Wert, desto schärfer sind die
nicht auf den Bildschirm passen, werden abgeschnitten.
Konturen. Normalerweise sollten Sie „0“ wählen.
•-2 •-1 •0
•+1 •+2
Anmerkung
Wenn Sie „Progressive-Modus“ auf „Ein“ setzen, wird „TV-Gerät“ automatisch auf
„16:9“ gesetzt.
Anmerkung
Je nach DVD werden mit „Konturenschärfe“ mehr oder weniger sichtbare
Ergebnisse erzielt.
24
Einstellungen für den DVD-Spieler

Anzeige
Während der Wiedergabe können Sie einige Sekunden lang Informationen
Einstellen von Benutzeroptionen
zum Wiedergabestatus oben rechts im Bildschirm anzeigen lassen.
Pausenmodus
Ein Die Informationen zum Wiedergabestatus werden einige Sekunden
Mit dieser Option können Sie den Status des Bildes bei unterbrochener
lang angezeigt.
Wiedergabe (Pause) einstellen.
Aus Es werden keine Informationen zum Wiedergabestatus angezeigt.
Auto Ein Bild mit bewegten Motiven wird ohne Bildzittern angezeigt.
Normalerweise sollten Sie diese Einstellung wählen.
Progressive-Modus
Standbild Ein Bild ohne bewegte Motive kann mit hoher Auflösung angezeigt
Sie können ein Bild anzeigen lassen, bei dem alle Zeilen auf einmal
werden.
aktualisiert werden. In den meisten Fällen wird dabei ein klareres,
flimmerfreies Bild erzeugt.
Kindersicherung
DE
In einigen Regionen kann die Wiedergabe von DVDs auf der Grundlage
DVDs
Ein Progressive Scan (480p)*
des Alters der Zuschauer oder anderer Faktoren eingeschränkt werden.
Aus
Interlace-Scan
Mithilfe der Kindersicherungsfunktion können Sie eine Stufe einstellen,
anhand derer die Wiedergabe mit der integrierten PlayStation
TM2
* Der Progressive Scan-Modus des DVD-Spielers steht nur zur Verfügung, wenn
eingeschränkt wird.
Sie eine im NTSC-Format aufgenommene Disc auf einem Fernsehgerät
Je niedriger der Wert, um so stärker ist die Einschränkung.
wiedergeben, das Progressive Scan (480p) unterstützt.
Einstellen der Kindersicherung
Anmerkungen
• DVDs können videobasierte und filmbasierte Software enthalten, bei denen
1 Wählen Sie „Kindersicherung“ aus und drücken Sie die
unterschiedliche Vollbildraten verwendet werden. Bei der Wiedergabe
-Taste.
videobasierter DVD-Software mit Progressive Scan erscheinen einige Bilder unter
Umständen unnatürlich. Setzen Sie „Progressive-Modus“ in diesem Fall auf „Aus“
Der Bildschirm zum Registrieren des Passworts wird angezeigt. Wenn
und lassen Sie die Bilder im normalen Interlace-Modus anzeigen.
bereits ein Passwort registriert wurde, wird der Bildschirm zum
• Wenn Sie „Progressive-Modus“ auf „Ein“ setzen, wird „TV-Gerät“ ( Seite 24)
Bestätigen des Passworts angezeigt.
automatisch auf „16:9“ gesetzt.
• Der Inhalt von DVD-RWs (VR-Modus) kann nur im normalen Interlace-Format
angezeigt werden. Die Option „Progressive-Modus“ steht für die Wiedergabe
solcher Inhalte nicht zur Verfügung.
Einstellungen für den DVD-Spieler
25

Regionalcode-Liste
2 Wählen Sie eine Ziffer und drücken Sie die -Taste.
Zum Eingeben eines Regionalcodes für die Kindersicherung wählen Sie
Geben Sie auf diese Weise alle vier Ziffern für das vierstellige
„Sonstiges“ in Schritt 4 unter „Einstellen der Kindersicherung“
Passwort ein. Wenn Sie eine Ziffer löschen wollen, drücken Sie die
( Seite 25). Wählen Sie mit den Richtungstasten den ersten Buchstaben
-Taste. Wenn Sie ein Passwort registrieren, müssen Sie es zur
aus und drücken Sie die Richtungstaste Rechts. Wählen Sie den nächsten
Bestätigung erneut eingeben.
Buchstaben aus und drücken Sie die -Taste.
3 Wählen Sie „Region“ und drücken Sie die -Taste.
Region Code Region Code
Die Liste der Regionen wird angezeigt.
Belgien BE Norwegen NO
4 Wählen Sie die Region aus, auf der die
Deutschland DE Österreich AT
Kindersicherungsstufe basieren soll, und drücken Sie die
Dänemark DK Polen PL
-Taste.
Wenn Sie „Sonstiges“ wählen, schlagen Sie unter „Regionalcode-
Finnland FI Portugal PT
Liste“ ( Seite 26) nach.
Frankreich FR Russland RU
Griechenland GR Schweden SE
5 Wählen Sie „Stufe“ und drücken Sie die -Taste.
Die Liste der verschiedenen Stufen wird angezeigt.
Irland IE Schweiz CH
Israel IL Slowakei SK
6 Wählen Sie eine Kindersicherungsstufe aus und drücken Sie
die -Taste.
Italien IT Spanien ES
Luxemburg LU Tschechische Republik CZ
So deaktivieren Sie die Kindersicherung
Malta MT Türkei TR
Gehen Sie bei gestoppter DVD-Wiedergabe wie in Schritt 6 unter
„Einstellen der Kindersicherung“ erläutert vor und setzen Sie „Stufe“ auf
Niederlande NL Vereinigtes Königreich GB
„Aus“.
26
Einstellungen für den DVD-Spieler
Ändern des Passworts
Anmerkungen
Führen Sie in Schritt 2 unter „Einstellen der Kindersicherung“
• Wenn Sie das Passwort vergessen haben, legen Sie eine DVD ohne
( Seite 25) die folgenden Schritte aus:
Kindersicherungsfunktion ein. Wählen Sie im Kontrollmenü x (Stopp), um die
Wiedergabe zu stoppen, und wählen Sie dann erneut x (Stopp), um den
1 Wählen Sie mit den Richtungstasten die Option „Passwort
Fortsetzungsmodus auszuschalten. Wählen Sie „Einstellungen“ und dann
ändern“ und drücken Sie die -Taste.
„Kindersicherung“ unter „Benutzereinstellungen“ und drücken Sie dann die
Der Bildschirm zum Ändern des Passworts wird angezeigt.
-Taste. Drücken Sie die SELECT-Taste auf dem Analog Controller und geben
Sie dann die Zahl „7444“ ein.
• Wenn Sie kein Passwort festlegen, können Sie die Einstellungen für die
2 Wählen Sie eine Ziffer und drücken Sie die -Taste.
Kindersicherung nicht ändern.
Geben Sie auf diese Weise alle vier Ziffern für das vierstellige
• Bei einigen DVDs mit Kindersicherungsfunktion können Sie die Wiedergabemodi
Passwort ein. Sie werden dazu aufgefordert, das Passwort zur
nicht verwenden ( Seite 20 bis 22).
Bestätigung erneut einzugeben.
Temporäres Überschreiben der
DE
DVDs
Kindersicherungseinstellungen
1 Starten Sie die Wiedergabe der DVD ( Seite 17).
Sie werden dazu aufgefordert, die Kindersicherungsstufe
vorübergehend zu ändern, um die Wiedergabe zu ermöglichen. Dies
erfolgt in der Regel unmittelbar am Anfang der DVD-Wiedergabe,
kann aber bei einigen DVDs auch an anderen Stellen der Fall sein.
2 Wählen Sie mit den Richtungstasten „Ja“ aus und drücken
Sie die -Taste.
Der Bildschirm zum Eingeben des Passworts wird angezeigt.
3 Wählen Sie eine Ziffer und drücken Sie die -Taste.
Geben Sie auf diese Weise alle vier Ziffern für das vierstellige
Passwort ein. Wenn Sie das Passwort eingegeben haben, wird die
Wiedergabe fortgesetzt. Wenn die DVD-Wiedergabe beendet wird,
wird die Kindersicherungsstufe wieder auf die ursprüngliche
Einstellung zurückgesetzt.
Einstellungen für den DVD-Spieler
27
Dolby Digital
Einstellen der Tonoptionen
Mit dieser Option wird „Dolby Digital“ als Ausgangssignal über den
DIGITAL OUT (OPTICAL)-Anschluss festgelegt.
Digitaler Audio-Ausgang
Sie können die Einstellung für die Ausgabe des Audiosignals wechseln,
Ein Wählen Sie diese Option, wenn die integrierte PlayStationTM2 an ein
wenn Sie folgende Audiogeräte an den DIGITAL OUT (OPTICAL)-
Audiogerät mit eingebautem Dolby Digital-Decoder angeschlossen ist.
Anschluss anschließen.
Aus
Wählen Sie diese Option, wenn die integrierte PlayStationTM2 an ein
Audiogerät ohne eingebauten Dolby Digital-Decoder angeschlossen
ist.
Vorsicht
Wenn die integrierte PlayStationTM2 an ein Audiogerät ohne Dolby Digital-,
DTS- oder MPEG-Decoder angeschlossen wird, setzen Sie „Dolby Digital“,
DTS
„DTS“ und „MPEG“ auf „Aus“. Wenn Sie diese Optionen auf „Ein“ setzen,
Mit dieser Option wird „DTS“ als Ausgangssignal über den DIGITAL
ohne dass der erforderliche Decoder vorhanden ist, wird möglicherweise kein
OUT (OPTICAL)-Anschluss festgelegt.
Ton oder aber extrem lautes Störrauschen ausgegeben.
Ein Wählen Sie diese Option, wenn die integrierte PlayStation
TM2 an ein
DIGITAL OUT (OPTICAL)
Audiogerät mit eingebautem DTS-Decoder angeschlossen ist.
Mit dieser Option wird die Ausgabe über den DIGITAL OUT
Aus
Wählen Sie diese Option, wenn die integrierte PlayStationTM2 an ein
(OPTICAL)-Anschluss festgelegt.
Audiogerät ohne eingebauten DTS-Decoder angeschlossen ist.
Ein Wählen Sie diese Option, wenn Ton (Audiosignale) über den
DIGITAL OUT (OPTICAL)-Anschluss ausgegeben werden soll.
MPEG
Die Einstellungen für „Dolby Digital“, „DTS“ und „MPEG“ werden
Mit dieser Option wird „MPEG AUDIO“ als Ausgangssignal über den
angezeigt.
DIGITAL OUT (OPTICAL)-Anschluss festgelegt.
Aus Wählen Sie diese Option, wenn der Ton nicht über den DIGITAL OUT
(OPTICAL)-Anschluss ausgegeben werden soll.
Ein Wählen Sie diese Option, wenn die integrierte PlayStation
TM2 an ein
Die Einstellungen für „Dolby Digital“, „DTS“ und „MPEG“ werden
Audiogerät mit eingebautem MPEG-Decoder angeschlossen ist.
nicht angezeigt.
Aus
Wählen Sie diese Option, wenn die integrierte PlayStationTM2 an ein
Audiogerät ohne eingebauten MPEG-Decoder angeschlossen ist.
28
Einstellungen für den DVD-Spieler

Autom. Auswahl von Audiotiteln
Mit dieser Einstellung hat bei der Wiedergabe einer DVD mit mehreren
Vorsicht
Tonformaten (PCM, Dolby Digital, DTS oder MPEG) die Tonspur mit der
Wenn Sie diese Option auf „+1“ oder „+2“ setzen, kann der Ton verzerrt sein.
Setzen Sie die Option in diesem Fall auf „Normal“. Beachten Sie außerdem,
höchsten Kanalanzahl Priorität. Wenn die PCM-, Dolby Digital-, DTS-
dass es bei zu hoch eingestellter Lautstärke zu Gehörschäden oder Schäden an
und MPEG-Tonspuren dieselbe Kanalanzahl haben, wählt die integrierte
den Lautsprechern kommen kann.
PlayStationTM2 die Tonspuren in der Reihenfolge PCM, Dolby Digital,
DTS und MPEG aus.
Ein Die Priorität wird wie erläutert festgelegt.
Aus
Es wird keine Priorität festgelegt.
Anmerkungen
• Wenn Sie „DTS“ unter „Digitaler Audio-Ausgang“ auf „Aus“ setzen
DE
( Seite 28), wird die DTS-Tonspur nicht wiedergegeben.
DVDs
• Bei manchen DVDs ist von vornherein festgelegt, welche Tonspur Vorrang hat. In
diesem Fall wird die Tonspur auf der Basis der auf der DVD festgelegten
Reihenfolge ausgewählt.
DVD-Lautstärke
Sie können diese Option einstellen, wenn der Audioausgangspegel der
DVD niedrig ist. Die Option steht nur zur Verfügung, wenn „DIGITAL
OUT (OPTICAL)“ unter „Digitaler Audio-Ausgang“ ( Seite 28) auf
„Aus“ gesetzt ist.
+2 Die Lautstärke wird maximal erhöht.
+1 Die Lautstärke wird erhöht.
Normal
Normalerweise wählen Sie diese Option aus.
Einstellungen für den DVD-Spieler
29

Das Hauptmenü
Anmerkung
Wenn eine Disc eingelegt ist und Sie PlayStation 2 POWER ON auf der
Fernbedienung des Fernsehgeräts drücken, wird das Hauptmenü nicht angezeigt.
Aufrufen des Hauptmenüs
Zum Aufrufen des Hauptmenüs drücken Sie die OPEN-Taste an der Vorderseite der
integrierten PlayStation
TM2 und nehmen die Disc heraus. Drücken Sie dann
PlayStation 2 POWER ON auf der Fernbedienung des Fernsehgeräts.
Vom Hauptmenü aus können Sie auf verschiedene Informationen
zugreifen und zahlreiche Einstellungen vornehmen. Sie können vom
Hauptmenü aus auch zu folgenden Bildschirmen wechseln. Das
Hauptmenü wird angezeigt, wenn Sie die integrierte PlayStation
TM2
einschalten, ohne dass eine Disc eingelegt ist.
• Browser-Bildschirm ( Seite 31)
• „Systemkonfiguration“-Menü ( Seite 32)
• Bildschirm „Grundeinstellung“ ( Seite 34)
1 Drücken Sie PlayStation 2 POWER ON auf der Fernbedienung
des Fernsehgeräts.
Das Hauptmenü wird angezeigt. Beachten Sie, dass es etwas dauern
kann, bis das Hauptmenü angezeigt wird.
30
Aufrufen des Hauptmenüs
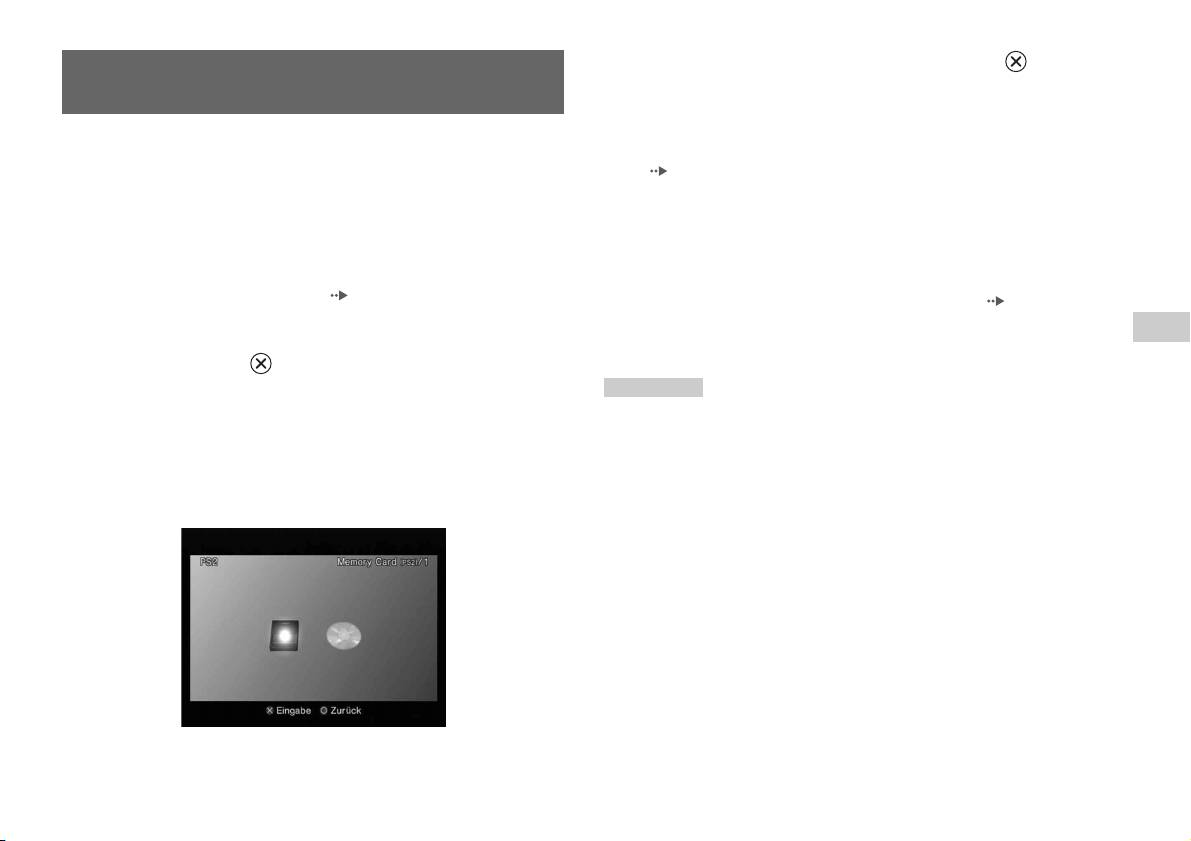
4 Wählen Sie ein Symbol aus und drücken Sie die -Taste.
Der Browser-Bildschirm
• Wenn Sie das Memory Card-Symbol auswählen, werden Symbole
für die auf der Memory Card gespeicherten Daten angezeigt.
Informationen zum Kopieren oder Löschen gespeicherter Spieldaten
Auf dem Browser-Bildschirm stehen folgende Funktionen zur Verfügung:
finden Sie unter „Kopieren oder Löschen von Spieldaten“
• Kopieren oder Löschen von auf einer Memory Card gespeicherten
(Seite12).
Spieldaten
• Wenn Sie das Symbol für eine Software-DVD/CD im
• Starten eines Spiels
PlayStation
TM2- oder PlayStationTM-Format auswählen, wird ein
• Starten der Wiedergabe einer Audio-CD
Spiel gestartet.
• Starten der Wiedergabe einer DVD
• Wenn Sie das Symbol für eine Audio-CD auswählen, werden die auf
der CD enthaltenen Titel angezeigt. Weitere Informationen dazu
1 Rufen Sie das Hauptmenü auf ( Seite 30).
finden Sie unter „Wiedergeben einer Audio-CD“ ( Seite 13).
• Wenn Sie das Symbol für eine DVD auswählen, beginnt die
DE
2 Wählen Sie mit den Richtungstasten die Option „Browser“
Wiedergabe der DVD.
Das Hauptmenü
und drücken Sie die -Taste.
Der Browser-Bildschirm erscheint.
Anmerkung
Die Meldung „Keine Daten vorhanden“ wird auf dem Browser-Bildschirm
3 Legen Sie eine DVD/CD ein oder setzen Sie eine Memory Card
angezeigt, wenn sich keine Memory Card oder Disc in der integrierten
PlayStation
TM2 befindet.
ein.
Das Symbol für den eingesetzten Datenträger wird im Browser-
Bildschirm angezeigt.
\
Der Browser-Bildschirm
31

4 Wählen Sie die gewünschte Einstellung aus und drücken Sie
Das „Systemkonfiguration“-
die -Taste.
Weitere Informationen dazu finden Sie in den Anweisungen zu den
Menü
einzelnen Menüoptionen ( Seite 32 bis 34).
Anmerkungen
Vom „Systemkonfiguration“-Menü aus können Sie Einstellungen für
• Im Folgenden sind die Standardeinstellungen unterstrichen.
zahlreiche Optionen, einschließlich der Sprache der Bildschirmanzeigen
• Änderungen an den einzelnen Einstellungen werden gespeichert und bleiben auch
oder der Uhrzeitanzeige sowie Audio- oder Videoausgabemodus,
nach dem Ausschalten oder Zurücksetzen der integrierten PlayStation
TM2 erhalten.
vornehmen.
1 Rufen Sie das Hauptmenü auf ( Seite 30).
Zeiteinstellung
2 Wählen Sie mit den Richtungstasten die Option
Hier können Sie Datum und Uhrzeit einstellen. Stellen Sie mit den
„Systemkonfiguration“ und drücken Sie die -Taste.
Richtungstasten das Jahr, den Monat, den Tag, die Stunden, die Minuten
Das „Systemkonfiguration“-Menü wird angezeigt.
und die Sekunden ein. Die Einstellung wird wirksam, wenn Sie die
-Taste drücken.
Weitere Einstellungen
Wenn Sie im Bildschirm „Zeiteinstellung“ die -Taste drücken, können
Sie Optionen wie „Datumsdarstellung“ und „Zeitdarstellung“ einstellen.
Nehmen Sie die Einstellungen jeweils mit den Richtungstasten und der
-Taste vor.
Zeitdarstellun Zum Einstellen der Anzeige der Systemuhr im 12-
Stunden- oder 24-Stunden-Format
Datumsdarstellung Zum Einstellen der Anzeigereihenfolge von Jahr,
3 Wählen Sie eine Option aus und drücken Sie die -Taste.
Monat und Tag
Die Menüoption wird aktiviert und kann ausgewählt werden.
Zeitzone Zum Einstellen der Zeitzone
Sommerzeit Zum Einstellen von „Winterzeit“ oder „Sommerzeit“.
Normalerweise ist „Winterzeit“ eingestellt.
32
Das „Systemkonfiguration“-Menü
Bildschirmgröße
Fernbedienung
Hier können Sie den Anzeigemodus auf Ihr Fernsehgerät einstellen.
Diese Option können Sie einstellen, wenn Sie die DVD-Fernbedienung
(für PlayStation
TM2) (separat erhältlich) verwenden.
4:3
Spielfunktion Ein Wählen Sie diese Option, wenn Sie Software im
Ganzer Bildschirm*
PlayStation
TM2- oder PlayStationTM-Format mit der
16:9
DVD-Fernbedienung ausführen.
* Der Anzeigemodus „Ganzer Bildschirm“ ist möglich beim
Spielfunktion Aus Wählen Sie diese Option, wenn Sie keine Software im
„Systemkonfiguration“-Menü, Browser-Bildschirm und Audio-CD-Bildschirm.
PlayStation
TM2- oder PlayStationTM-Format mit der
DVD-Fernbedienung ausführen.
DIGITAL OUT (OPTICAL)
Anmerkung
DE
Die folgenden Einschränkungen gelten, wenn die DVD-Fernbedienung verwendet
Das Hauptmenü
Hier legen Sie fest, ob das Signal über den DIGITAL OUT (OPTICAL)-
wird und die Option auf „Spielfunktion Ein“ gesetzt ist:
Anschluss ausgegeben wird.
– Bei einigen Software-Titeln funktionieren einige Tasten auf der Fernbedienung
nicht richtig.
Ein Wählen Sie diese Option, wenn Signale über den
– Die Tasten auf der DVD-Fernbedienung funktionieren nicht, wenn zwei oder
DIGITAL OUT (OPTICAL)-Anschluss ausgegeben
mehr Tasten gleichzeitig gedrückt werden.
werden sollen.
– Einige Software-Titel funktionieren möglicherweise nicht richtig, wenn ein
Controller am Controller-Anschluss 1 entfernt wird. Stellen Sie in diesem Fall
Aus Wählen Sie diese Option, wenn keine Signale über
„Spielfunktion Aus“ ein.
den DIGITAL OUT (OPTICAL)-Anschluss
ausgegeben werden sollen.
Das „Systemkonfiguration“-Menü
33
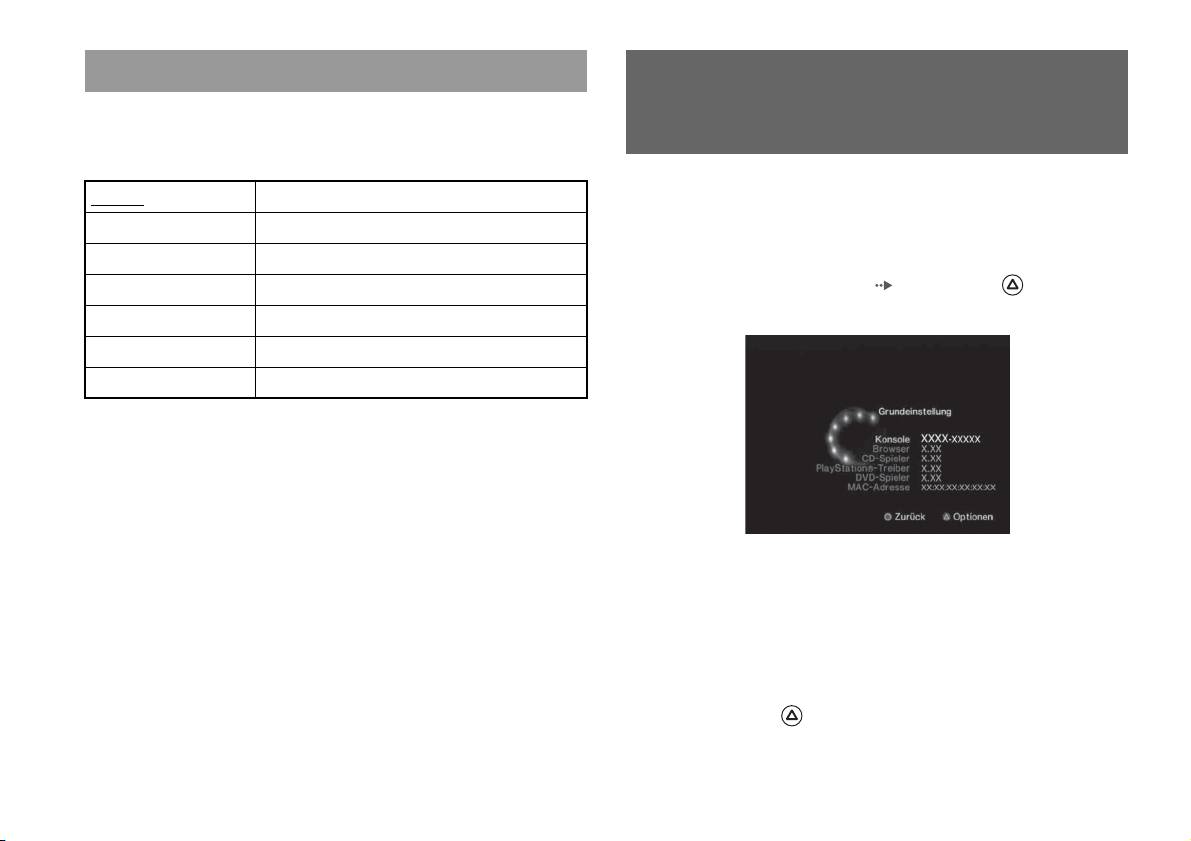
Sprache
Der Bildschirm
Mit dieser Option können Sie die Sprache wählen, in der das Hauptmenü,
der Browser-Bildschirm, das „Systemkonfiguration“-Menü und der
„Grundeinstellung“
Bildschirm „Grundeinstellung“ angezeigt werden.
Mit diesem Bildschirm können Sie die Versionsinformationen zu
Englisch Zeigt Meldungen in Englisch an.
verschiedenen Komponenten der integrierten PlayStation
TM2 anzeigen
Französisch Zeigt Meldungen in Französisch an.
lassen. Außerdem können Sie bei einigen Optionen weitere Einstellungen
vornehmen.
Spanisch Zeigt Meldungen in Spanisch an.
Deutsch Zeigt Meldungen in Deutsch an.
1 Drücken Sie im Hauptmenü ( Seite 30) die -Taste.
Der Bildschirm „Grundeinstellung“ wird angezeigt.
Italienisch Zeigt Meldungen in Italienisch an.
Holländisch Zeigt Meldungen in Holländisch an.
Portugiesisch Zeigt Meldungen in Portugiesisch an.
Weitere Einstellungen
Weitere Einstellungen stehen bei „Konsole“, „PlayStation®-Treiber“ und
„DVD-Spieler“ zur Verfügung. „DVD-Spieler“ kann nur eingestellt
werden, wenn die Option „Progressive-Modus“ des DVD-Spielers auf
„Ein“ gesetzt ist.
1 Wählen Sie mit den Richtungstasten eine Option aus und
drücken Sie die -Taste.
Die aktuelle Einstellung der Option wird angezeigt.
34
Der Bildschirm „Grundeinstellung“

2 Wählen Sie eine Option aus und drücken Sie die -Taste.
PlayStationTM-Treiber
Die verfügbaren Optionen werden angezeigt.
Sie können den PlayStationTM-Treiber so einstellen, dass die Leistung der
3 Wählen Sie die gewünschte Einstellung aus und drücken Sie
Software im PlayStation
TM-Format optimiert wird.
die -Taste.
Weitere Informationen dazu finden Sie in den Anweisungen zu den
Anmerkung
einzelnen Optionen ( Seite 35 bis 36).
Die Einstellungen werden im folgenden Fall automatisch auf die
Standardeinstellungen zurückgesetzt:
Anmerkung
– Wenn die integrierte PlayStation
TM2 ausgeschaltet wird
In den folgenden Erläuterungen sind die Standardeinstellungen unterstrichen.
DVD/CD-ROM-Geschwindigkeit
Standard DVDs/CDs werden mit normaler Geschwindigkeit geladen
Konsole
DE
Das Hauptmenü
Schnell DVDs/CDs werden mit hoher Geschwindigkeit geladen
Die integrierte PlayStationTM2-Konsole stellt sich automatisch so ein, dass
eine optimale Wiedergabe erfolgt. Wenn „Diagnose“ auf „Ein“ gesetzt
Anmerkung
wird, nimmt die integrierte PlayStationTM2 weitere Einstellungen vor.
Setzen Sie die Option in den folgenden Fällen auf „Standard“:
Diagnose
– Wenn das Laden beim schnellen Laden nicht wesentlich schneller erfolgt
– Bei einer Software, die das schnelle Laden nicht unterstützt
Aus Die Diagnose ist deaktiviert.
Texture-Mapping
Ein Die Diagnose ist aktiviert.
Standard
Normale Anzeige
Anmerkung
Fließend Bilder werden auf dem Bildschirm störungsfreier angezeigt
Die Einstellung für „Diagnose“ wird in folgenden Fällen automatisch auf die
Standardeinstellung zurückgesetzt:
– Wenn die Wiedergabe von Software im PlayStation
TM2- oder PlayStationTM-
Anmerkung
Format oder die DVD-Wiedergabe beginnt
Setzen Sie die Option in den folgenden Fällen auf „Standard“:
– Wenn die integrierte PlayStation
TM2 zurückgesetzt wird
– Wenn das Texture-Mapping keine deutliche Verbesserung bewirkt
– Wenn die integrierte PlayStation
TM2 ausgeschaltet wird
– Wenn das Bild bei der Einstellung „Fließend“ nicht ordnungsgemäß angezeigt
wird
Der Bildschirm „Grundeinstellung“
35
7 Schließen Sie das Disc-Fach.
DVD-Spieler
Die Wiedergabe beginnt.
Wenn Sie „Progressive-Modus“ auf „Ein“ setzen und die integrierte
PlayStation
TM2 an ein Fernsehgerät ohne die erforderliche Ausstattung
Anmerkung
anschließen, kann sich die Bildqualität verschlechtern oder es wird
Die Einstellung wird nicht deaktiviert, wenn Sie 1) nach Schritt 4 nicht die
möglicherweise gar kein Bild angezeigt. Sie können die Einstellung
Wiedergabe einer DVD starten oder 2) die integrierte PlayStation
TM2 vor Schritt
„Progressive-Modus“ wie unten erläutert deaktivieren.
6 zurücksetzen oder ausschalten.
Nehmen Sie vor dem Deaktivieren der Einstellung die DVD heraus.
Progressive-Modus ausschalten
Nein Die Einstellung „Progressive-Modus“ bleibt aktiviert
Ja Die Einstellung „Progressive-Modus“ wird deaktiviert
1 Rufen Sie den Bildschirm „Grundeinstellung“ auf.
2 Wählen Sie mit den Richtungstasten die Option „DVD-
Spieler“ aus und drücken Sie die -Taste.
Die Option „Progressive-Modus ausschalten“ wird angezeigt.
3 Drücken Sie die -Taste.
4 Wählen Sie „Ja“ aus und drücken Sie die -Taste.
5 Drücken Sie die -Taste zweimal.
Das Hauptmenü wird wieder angezeigt.
6 Drücken Sie die OPEN-Taste an der Vorderseite der
integrierten PlayStation
TM2 und legen Sie eine DVD in die
integrierte PlayStation
TM2 ein.
36
Der Bildschirm „Grundeinstellung“

Netzwerkfunktionen
Anschließen über ein Ethernet-Kabel
Anschließen an ein Netzwerk
Sie können die integrierte PlayStationTM2 mit einem Netzwerk verbinden,
indem Sie ein Ethernet-Kabel an den LAN-Anschluss auf der Rückseite
anschließen. Sie können die Konsole an ein 100 Base-TX- oder 10 Base-
Sie können Online-Spiele spielen, wenn Sie die PlayStationTM2 an ein
T-Netzwerk anschließen. Einzelheiten dazu schlagen Sie bitte in den mit
Breitband-Netzwerk anschließen. Für alle Online-Spiele benötigen Sie
dem Netzwerkgerät gelieferten Anweisungen nach.
Folgendes:
• ein netzwerkfähiges PlayStation
TM2-Spiel
Grundlegende Netzwerkkonfiguration
• Breitband-Internet-Service
Netzwerkleitung
• ein handelsübliches Ethernet-Kabel
• eine Memory Card (8 MB) (für PlayStation
TM2) (separat erhältlich)
PC
DE
Anmerkungen
Netzwerkfunktionen
• Über eine Wähl- oder ISDN-Verbindung können keine Online-Spiele gespielt
Breitband-Modem,
werden.
Router usw.
• USB-Konnektivität vom externen Netzwerkgerät zum USB-Anschluss wird nicht
unterstützt.
Netzwerkgerät Ethernet-Kabel
(nicht mitgeliefert)
• Es gibt zwei Typen von Ethernet-Kabeln: Kabel ohne und mit Überkreuzung.
Vergewissern Sie sich, dass Sie den richtigen Kabeltyp verwenden, wenn Sie die
Netzwerkleitung: Diese hängt vom Typ Ihres Breitband-Service ab.
PlayStation
TM2 an die Breitband-Internet-Verbindung anschließen. Weitere
Informationen dazu schlagen Sie bitte in der mit dem Netzwerkgerät gelieferten
Netzwerkgerät: Der Typ des verwendeten Geräts hängt ebenfalls vom
Bedienungsanleitung nach oder wenden Sie sich an Ihren Breitband-Internet-
Typ des Service ab.
Serviceprovider.
• Stellen Sie nicht über das Ethernet-Kabel eine Verbindung mit LAN am
Anmerkung
Fernsehgerät her.
Zum Anschließen der integrierten PlayStationTM2 und eines PCs an das Netzwerk ist
möglicherweise ein Netzwerkgerät, wie z. B. ein Router oder ein Hub, erforderlich.
Einzelheiten dazu schlagen Sie bitte in den mit dem Netzwerkgerät gelieferten
Anweisungen nach.
Anschließen an ein Netzwerk
37

Anschließen der integrierten PlayStationTM2
Anmerkungen
• Stecken Sie das Netzkabel erst in eine Netzsteckdose, wenn Sie alle anderen
Anschlüsse vorgenommen haben.
• Schließen Sie keine Ethernet-Kabel oder Telefonkabel der folgenden Typen an den
Integrierte PlayStation
TM2
Netzwerkanschluss an. Anderenfalls kann unter Umständen zu viel elektrischer
Strom den Anschluss passieren, was zu einer Fehlfunktion, übermäßiger
Wärmeentwicklung oder Feuer im Anschluss führen kann:
– Standardtelefonleitungen in Privathaushalten
– Ethernet-Kabel, die nicht für ein 10Base-T/100Base-TX-Netzwerk geeignet
sind
– ISDN-kompatible (digitale) Telefon- oder Datenleitungen
Netzwerkkabel (nicht mitgeliefert)
– Nebenstellentelefonleitungen (PBX)
– Andere unbekannte Typen von Telefonleitungen
Router
An Netzwerkgeräte
Netzwerkkabel (nicht mitgeliefert)
DSL-Modem/Kabelmodem
Internet
1 Schließen Sie das Ethernet-Kabel an den LAN-Anschluss auf
der Rückseite an.
2 Schließen Sie das Ethernet-Kabel an das Netzwerkgerät an.
38
Anschließen an ein Netzwerk

Vornehmen von
Netzwerkeinstellungen
Nachdem Sie ein Ethernet-Kabel an die integrierte PlayStationTM2
angeschlossen haben, müssen Sie Netzwerkeinstellungen vornehmen und
speichern. Dazu benötigen Sie eine Network Access Disc, die Sie erhalten,
wenn Sie Ihre PlayStation
TM2 registrieren. Sie können Ihre PlayStationTM2
registrieren.
Zum Vornehmen von Netzwerkeinstellungen benötigen Sie Folgendes:
DE
– eine Memory Card (8 MB) (für PlayStationTM2) (separat erhältlich)
Netzwerkfunktionen
– Anmelde- und Netzwerkkonfigurationsinformationen, die Sie von Ihrem
Breitband-Internet-Serviceprovider erhalten
Anmerkung
Je nach Typ des verwendeten Internet-Service müssen Sie Ihrem Breitband-Internet-
Serviceprovider Ihre MAC-Adresse mitteilen. Die MAC-Adresse Ihrer
PlayStation
TM2 ist im Bildschirm „Grundeinstellung“ aufgeführt ( Seite 34).
Vornehmen von Netzwerkeinstellungen
39

Redes
Índice
Conexión a una red.......................................................................36
Creación de la configuración de red.............................................38
Preparación
Denominación de las piezas........................................................... 3
Conexión de un equipo de audio digital ........................................ 5
Conexión del mando ......................................................................6
Encendido y apagado de la PlayStation
TM2 incorporada ............... 6
Juegos
Cómo jugar a un juego................................................................... 7
Uso de Memory Cards (Tarjetas de Memoria) ............................11
CD audio
Reproducción de un CD audio..................................................... 13
DVD
Reproducción de un DVD............................................................ 15
Uso de los modos de reproducción.............................................. 20
Ajuste de la configuración del reproductor de DVD ................... 22
Menú principal
Visualización del menú principal.................................................29
Uso de la pantalla Navegador ......................................................29
Uso del menú Configuración del Sistema.................................... 30
Uso de la pantalla Version Information (Información de
versión) .................................................................................. 33
2
Índice
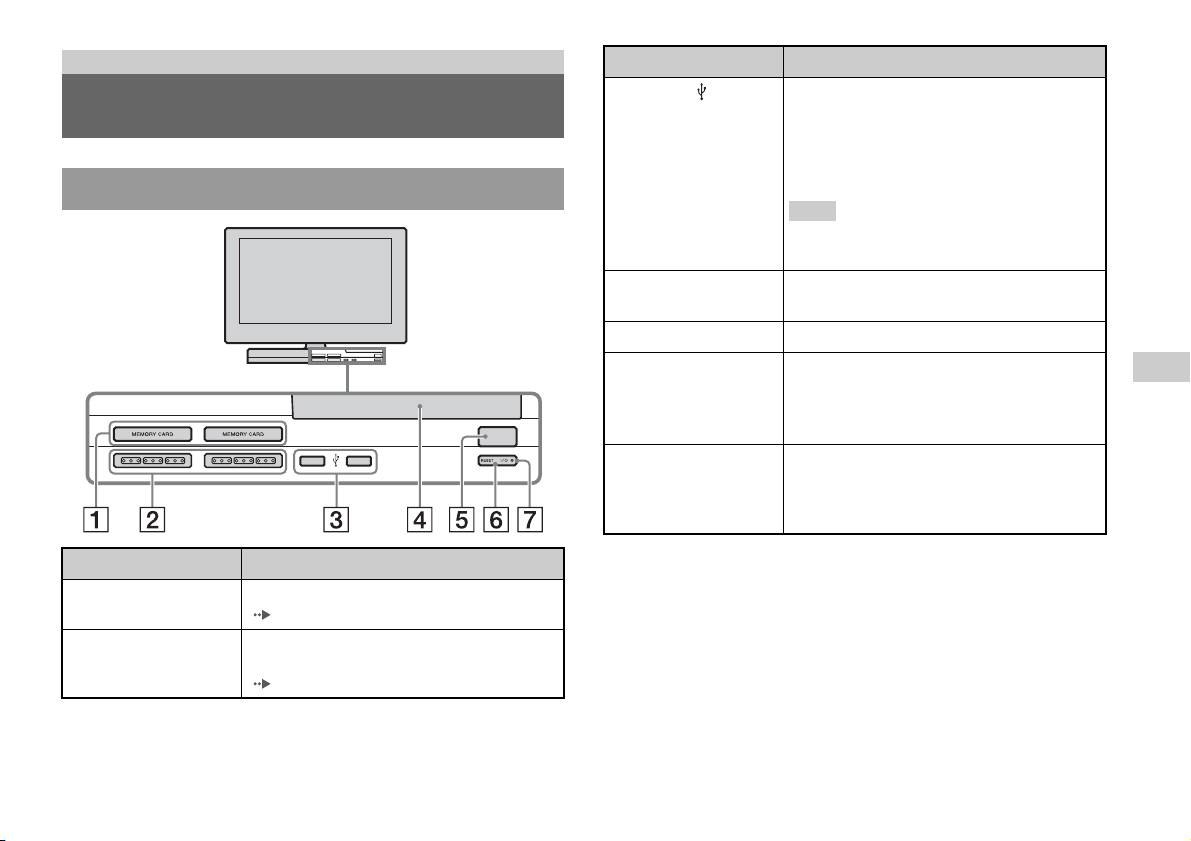
Preparación
Conexión a Descripción
3 Conector USB
Pueden conectarse varios dispositivos USB a la
Denominación de las piezas
PlayStation
TM2 incorporada, pero no todos son
compatibles. Consulte las instrucciones que
acompañan al dispositivo USB para obtener más
información.
Parte frontal de la PlayStationTM2 incorporada
Nota
No se pueden reproducir archivos de fotos, música y
vídeo mediante el conector USB de la PlayStation.
4 Cubierta del disco
Pulse el botón OPEN y la cubierta se deslizará para
abrirse.
5 Botón OPEN
Pulse este botón para abrir la cubierta del disco.
6 Botón "/1 (encendido/
Pulse este botón para encender la PlayStationTM2
ES
espera)/RESET
incorporada, entrar en el modo de espera o reiniciar.
Preparación
RESET: púlselo una vez.
Espera: púlselo durante más de un segundo.
OPEN
7 Indicador "/1
Se ilumina en verde cuando la PlayStationTM2
(encendido/espera)
incorporada está encendida.
Se ilumina en rojo cuando la PlayStation
TM2
incorporada está en el modo de espera.
Conexión a Descripción
1 Ranura para MEMORY
Inserte una Memory Card (Tarjeta de Memoria)
CARD 1/2
( página 11).
2 Puerto de mando 1/2
Inserte un Mando Analógico (DUALSHOCK®2) en
el puerto de mando de la PlayStation
TM2
(página6).
Denominación de las piezas
3
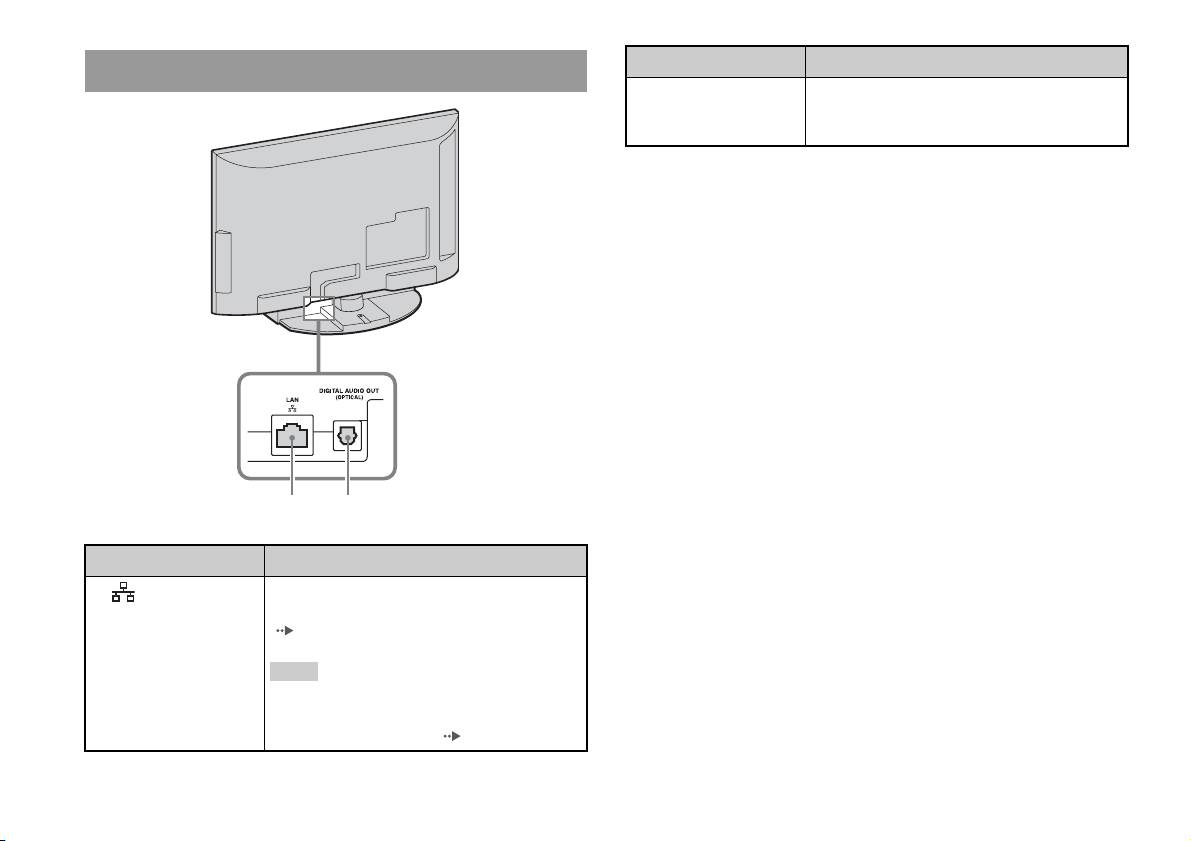
Parte trasera de la PlayStationTM2 incorporada
Conexión a Descripción
1 LAN
Puede disfrutar de juegos online si conecta la
PlayStation
TM2 a una red de banda ancha
( página 36).
Nota
Para disfrutar de las funciones de la red doméstica
“BRAVIA”, conéctese a la LAN del televisor
mediante un cable Ethernet ( página 36).
4
Denominación de las piezas
1 2
Conexión a Descripción
2 DIGITAL AUDIO OUT
Puede escuchar el sonido de la PlayStationTM2
(OPTICAL)
incorporada en un sistema de cine en casa conectado
mediante entrada digital.

• La conexión DIGITAL AUDIO OUT (OPTICAL) emite audio digital desde la
PlayStation
TM2 incorporada.
Conexión de un equipo de audio
digital
Mediante un cable digital óptico disponible en el mercado, puede disfrutar
de sonido surround como si estuviera en una sala de cine o de conciertos.
Para conectar la PlayStationTM2 incorporada al equipo de audio con
conectores digitales, consulte las instrucciones suministradas con el
dispositivo que va a conectar.
Dispositivo conectado
Parte trasera de la PlayStationTM2 incorporada
DIGITAL IN
OPTICAL
ES
Preparación
Cable digital óptico disponible
en el mercado
Notas
• La conexión de la PlayStationTM2 incorporada a un equipo de audio mediante un
cable digital óptico puede afectar a la salida de audio de determinados títulos de
software de formato PlayStation
TM2 y es posible que no se emita ningún sonido. Si
esto ocurre, utilice un cable como el Cable de audio (no suministrado) y conéctelo
al AUDIO OUT del televisor. No utilice ningún cable digital óptico.
• Tras conectar el equipo de audio digital, ajuste “DIGITAL OUT (OPTICAL)” en
“Activado” en el menú Configuración del Sistema. Para obtener información
detallada, consulte “DIGITAL OUT (OPTICAL)” ( página 31).
Conexión de un equipo de audio digital
5

Conexión del mando
Encendido y apagado de la
PlayStation
TM2 incorporada
1 Inserte un Mando Analógico (DUALSHOCK®2) en el puerto de
mando de la PlayStation
TM2 incorporada.
1 Pulse PlayStation 2 POWER ON en el mando a distancia del
Parte frontal de la PlayStationTM2 incorporada
televisor para encender el televisor y la PlayStation
TM2. (El
modo de entrada del televisor cambia automáticamente a
PlayStation
TM2.)
Notas
• Cuando apague el televisor, la PlayStationTM2 también se apagará. Además, si las
funciones que aparecen a continuación están activadas, la PlayStation
TM2 también
se apagará junto con el televisor.
– Televisor inactivo a Standby
Mando Analógico
– Desconex. Aut.
(DUALSHOCK
®2)
– Gestión de la energía del PC
– Recordatorio
Nota
– Conexión Aut.
– Fotograma
Algunos títulos de software recomiendan el uso de un puerto de mando específico.
Consulte las instrucciones que acompañan al software para obtener información
• Si aparece un mensaje de advertencia (por ejemplo, “un mensaje que indique que
detallada.
el televisor se apagará...”), no acceda a la Memory Card (Tarjeta de Memoria).
6
Conexión del mando

Juegos
Cómo jugar a un juego
OPEN
ES
Juegos
Antes de jugar a un juego Inicio del juego
Compruebe que las conexiones con el televisor y el equipo de audio son
1 Pulse el botón OPEN para desbloquear la cubierta del disco.
correctas y que se han seguido todas las precauciones.
• “Conexión del mando” ( página 6)
2 Deslice la cubierta del disco hacia la izquierda y, a
continuación, coloque el disco con el lado de la etiqueta
Nota
orientado hacia arriba.
Para jugar online, debe conectarse primero a una red y configurarla. Consulte
“Conexión a una red” ( página 36) para obtener información detallada.
3 Cierre la cubierta del disco deslizándola hacia la derecha
hasta que se bloquee.
Notas
• Asegúrese de cerrar la cubierta del disco para reproducirlo.
• También puede iniciar un juego desde la pantalla Navegador ( página 29).
Cómo jugar a un juego
7

• Si enciende la PlayStationTM2 incorporada después de insertar un disco, el juego se
iniciará automáticamente.
Uso del Mando Analógico (DUALSHOCK®2)
Para reiniciar un juego
El Mando Analógico (DUALSHOCK
®2) está equipado con una función
Pulse el botón \/1 (encendido/espera)/RESET de la parte frontal de la
de botón sensible a la presión. También presenta una función de vibración.
PlayStation
TM2 incorporada. Tenga cuidado de no pulsar el botón @/1/
RESET (reinicio) accidentalmente mientras juega, ya que el juego se
Denominación de las piezas
reiniciará.
Para finalizar un juego
Pulse el botón "/1 (encendido/en espera)/RESET en la parte frontal de la
PlayStation
TM2 incorporada tras guardar los datos del juego y, a
continuación, extraiga el disco ( página 3).
RESET: pulse este botón una vez.
Modo de espera: pulse este botón durante más de un segundo.
Botón/interruptor Descripción
1 Botón L2
2 Botón L1
3 Botón SELECT
(selección)
4 Botones de dirección
8
Cómo jugar a un juego
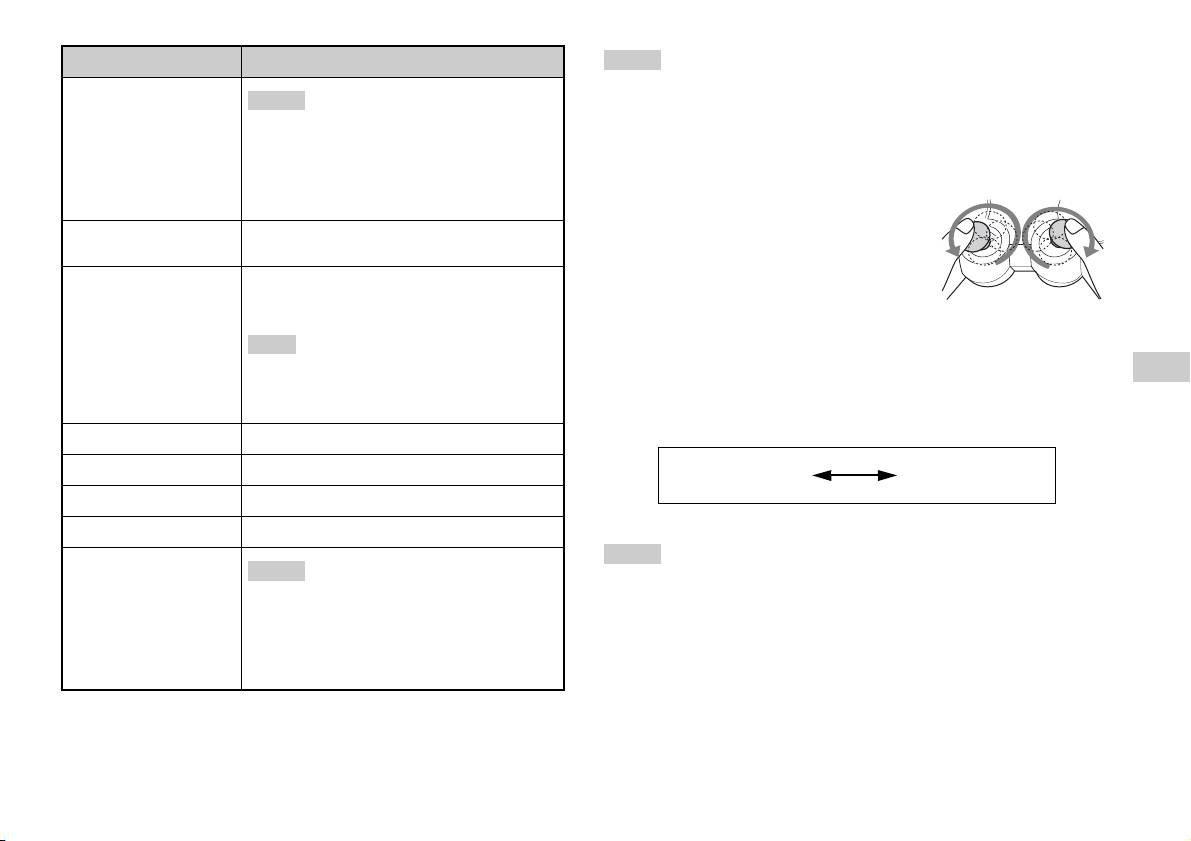
Botón/interruptor Descripción
Notas
• Según el software, los botones que se pueden utilizar en el modo analógico pueden
5 Joystick analógico
Notas
izquierdo/Botón L3
estar limitados. Consulte las instrucciones que acompañan al software para obtener
• El joystick analógico izquierdo y el botón L3
información detallada.
funcionan sólo en el modo analógico (indicador:
• La función de vibración puede activarse o desactivarse en el menú de opciones del
rojo).
software. En función del software, la función de vibración puede activarse
• El botón L3 funciona cuando se pulsa el joystick
automáticamente.
analógico.
• Antes de utilizar el Mando Analógico
(DUALSHOCK
®2), con la PlayStationTM2
6 Botón modo ANALOG
Cambie entre el modo digital y el modo analógico.
incorporada encendida, haga girar una vez los
(analógico)
joysticks analógicos izquierdo y derecho con los
7 Indicador de modo
Modo digital: luces apagadas.
pulgares. No retuerza los joysticks analógicos, sino
Modo analógico: luces encendidas en rojo.
hágalos girar como si dibujara un círculo, tal y
como se muestra en el diagrama.
Nota
Acerca del cambio de modo
Dependiendo del software, es posible que no pueda
ES
cambiar de modo aunque pulse el botón modo
El botón modo ANALOG (analógico) permite alternar entre los dos
Juegos
ANALOG (analógico).
modos. Cambie al modo que desee. No obstante, debe tener en cuenta que
algunos títulos de juego pueden realizar este ajuste automáticamente.
8 Botón R2
9 Botón R1
Modo digital
Modo analógico
(indicador: apagado)
(indicador: rojo)
q; Botón START (inicio)
qa Botones f/a/×/s
Notas
qs Joystick analógico
Notas
derecho/Botón R3
• Cuando utilice el Mando Analógico en el modo digital, los joysticks analógicos
• El joystick analógico derecho y el botón R3
derecho e izquierdo no funcionarán. Asimismo, se desactivará la función de botón
funcionan sólo en el modo analógico (indicador:
sensible a la presión.
rojo).
• Dependiendo del software, es posible que no pueda cambiar de modo aunque pulse
• El botón R3 funciona cuando se pulsa el joystick
el botón modo ANALOG (analógico).
analógico.
Cómo jugar a un juego
9

Acerca de los Mandos Analógicos
• Cuando juegue a un título de software de formato PlayStationTM2, puede
Acerca del uso del Mando Analógico
utilizar todos los botones del modo analógico, excepto los botones
(DUALSHOCK®) (SCPH-110 E)
START, SELECT, L3 y R3.
• Cuando juegue a un título de software de formato PlayStation
TM, sólo
Puede usar el Mando Analógico (DUALSHOCK®) (SCPH-110 E) con la
podrá utilizar los joysticks analógicos izquierdo y derecho en el modo
PlayStation
TM2 incorporada, pero las funciones de los botones en el modo
analógico.
analógico pueden ser distintas de las del Mando Analógico
(DUALSHOCK®2). En el modo analógico sólo se pueden utilizar los
Nota
joysticks analógicos izquierdo y derecho.
Según el software, los botones que se pueden utilizar en el modo analógico pueden
estar limitados. Consulte las instrucciones que acompañan al software para obtener
Nota
información detallada.
No todos los títulos de software de formato PlayStationTM2 admiten el uso del Mando
Analógico (DUALSHOCK
®) (SCPH-110 E). En estos casos se debe utilizar el
Acerca de la función de vibración
Mando Analógico (DUALSHOCK
®2).
La función de vibración puede ajustarse en Activada o Desactivada en el
menú de opciones del software.
Nota
Dependiendo del software, la función de vibración puede estar ajustada
automáticamente en “Activada”.
10
Cómo jugar a un juego

Inserción de la Memory Card (Tarjeta de
Uso de Memory Cards (Tarjetas
Memoria)
de Memoria)
Inserte la Memory Card (Tarjeta de Memoria) en una ranura para
MEMORY CARD de la parte frontal de la PlayStation
TM2 incorporada.
Puede guardar y cargar datos de juego utilizando una Memory Card
Parte frontal de la PlayStationTM2 incorporada
(Tarjeta de Memoria) (se vende por separado). También puede borrar datos
de juego o copiar datos de juego de una Memory Card (Tarjeta de
Memoria) a otra.
Acerca de los tipos de Memory Card (Tarjeta de
Memoria)
ES
Existen dos tipos de Memory Card (Tarjeta de Memoria). Seleccione una
Juegos
Memory Card (Tarjeta de Memoria) adecuada para el software que está
MEMORY CARDMEMORY CARD
utilizando.
Tipo de Memory Card
Software compatible Cantidad de memoria
(Tarjeta de Memoria)
Memory Card (Tarjeta de
Software de formato
Aprox. 8 MB
Memoria) (8 MB) (para
PlayStation
TM2
PlayStation
TM2)
Nota
(SCPH-10020 E)
Algunos títulos de software requieren el uso de una ranura para MEMORY CARD
Memory Card (Tarjeta de
Software de formato
15 bloques de memoria
(Tarjeta de Memoria) específica. Consulte las instrucciones que acompañan al
Memoria)
PlayStation
TM
(aprox. 120 KB)
software para obtener información detallada.
(SCPH-1020 E)*
* Este producto ya no se
fabrica.
MagicGate™ es una tecnología de protección de los derechos de autor, desarrollada
por Sony Corporation.
Uso de Memory Cards (Tarjetas de Memoria)
11

Cómo guardar o cargar datos de juego
Según el software, el procedimiento para guardar o cargar datos puede
variar. Consulte las instrucciones que acompañan al software para obtener
información detallada.
Cómo copiar o borrar datos de juego
También puede borrar datos guardados o copiar datos a otra Memory Card
(Tarjeta de Memoria). Utilice los botones de dirección y el botón
del mando para seleccionar elementos.
1 Encienda la PlayStationTM2 incorporada sin ningún disco
insertado y, a continuación, inserte una memory card
(Tarjeta de Memoria).
2 Seleccione “Navegador” y, a continuación, seleccione la
Memory Card (Tarjeta de Memoria) de la cual desea copiar o
borrar datos.
3 Seleccione el icono del elemento de datos y seleccione
“Copiar” o “Eliminar”.
4 Siga las instrucciones que aparecen en la pantalla de
configuración.
12
Uso de Memory Cards (Tarjetas de Memoria)
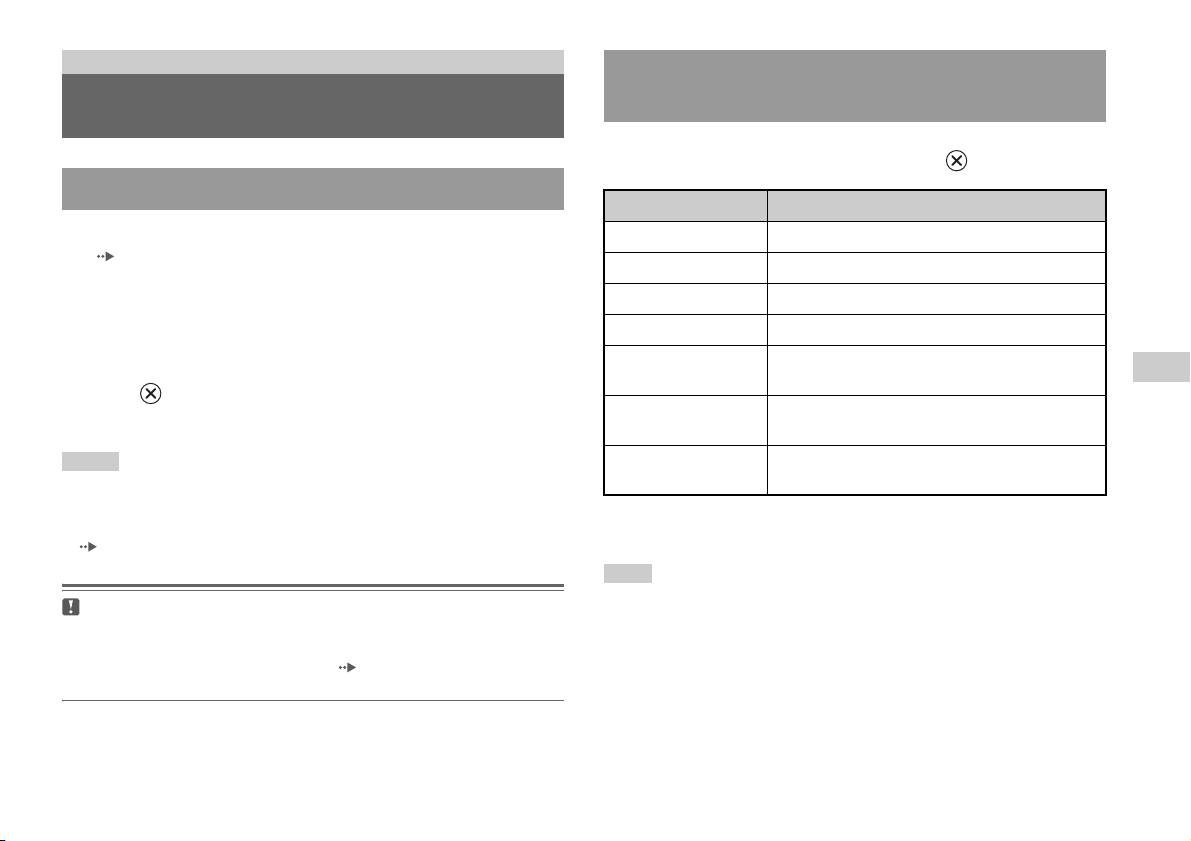
CD audio
Utilización del reproductor de CD durante la
reproducción
Reproducción de un CD audio
Utilice los botones de dirección para seleccionar el icono de la pista que
desea reproducir y, a continuación, pulse el botón .
Reproducción de un CD
Icono (botón*) Función
1 Encienda la PlayStationTM2 incorporada e inserte el disco
. (botón L1) Ir al principio de la pista actual o anterior.
( página 7).
m (botón L2) Retroceso rápido.
Siga los pasos 1 a 3 de la sección “Inicio del juego”.
Se muestran los números de pista.
M (botón R2) Avance rápido.
> (botón R1) Ir al principio de la pista siguiente.
2 Utilice los botones de dirección para seleccionar el número
N (botón START
Iniciar reproducción.
de pista que desea reproducir y, a continuación, pulse el
ES
(inicio))
botón .
CD audio
X (botón START
Detener la reproducción.
Se inicia la reproducción.
(inicio))
Notas
x (botón SELECT
Detener la reproducción.
(selección))
• Si enciende la PlayStationTM2 incorporada después de insertar un disco, los
números de pista se muestran automáticamente.
* Puede activar las opciones directamente pulsando los botones del control
• También puede iniciar la reproducción desde la pantalla Navegador
analógico (DUALSHOCK
®2) que se muestran en paréntesis.
( página 29).
Nota
También puede utilizar el Mando a Distancia de DVD (para PlayStationTM2)
Precaución
(se vende por separado).
Para reproducir un CD de audio grabado en formato DTS, debe bajar el volumen
al máximo y, a continuación, conectar un dispositivo con un decodificador DTS
al conector DIGITAL OUT (OPTICAL) ( página 5). Tenga en cuenta que es
posible que se emita un ruido extremadamente fuerte.
Reproducción de un CD audio
13
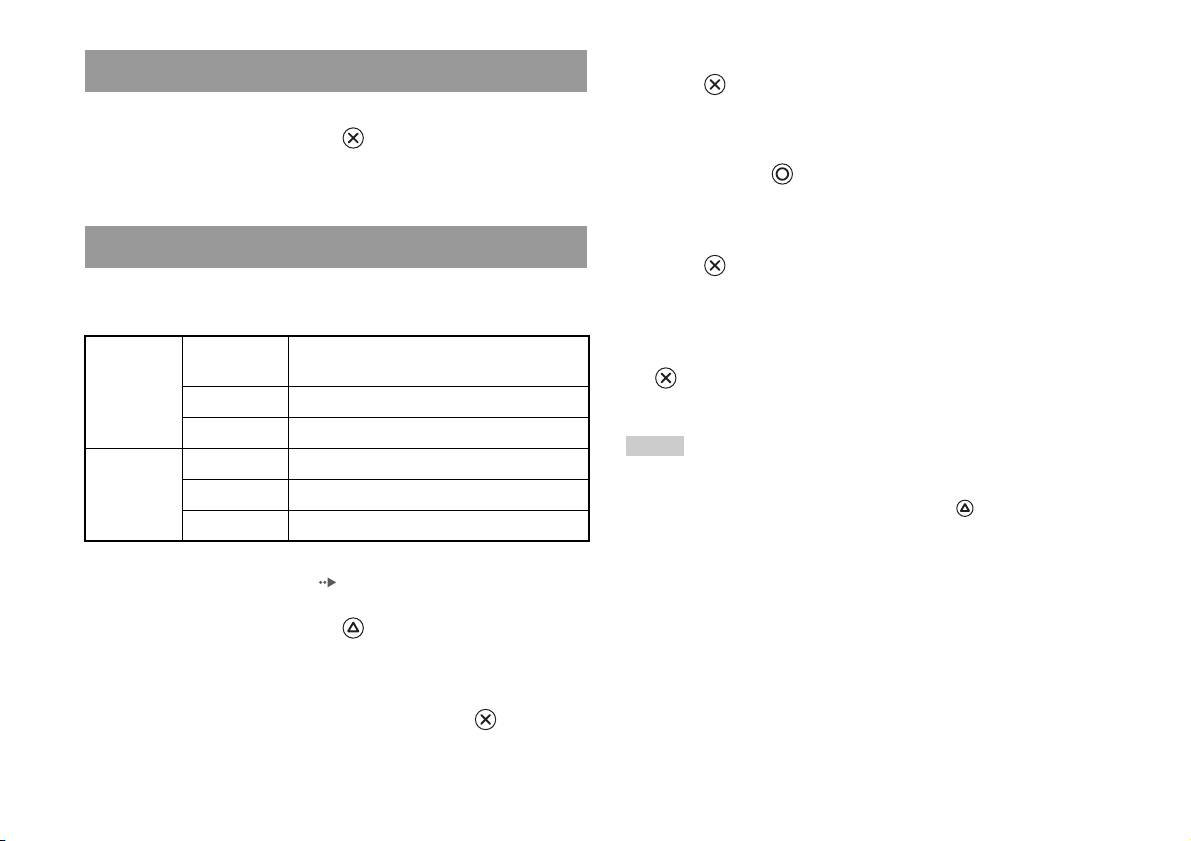
3 Seleccione el ajuste deseado y, a continuación, pulse el
Finalización de la reproducción de un CD audio
botón .
Si selecciona “Programada”, se mostrará la pantalla para especificar el
1 Utilice los botones de dirección para seleccionar x y, a
orden de las pistas. Seleccione las pistas que desea reproducir.
continuación, pulse el botón .
La reproducción se detiene. Pulse el botón OPEN en la parte frontal de
4 Pulse el botón .
la PlayStation
TM2 incorporada para extraer el disco.
Aparecerá la pantalla Navegador.
5 Seleccione el icono del CD audio y, a continuación, pulse el
Reproducción en diversos modos
botón .
Puede ajustar las opciones “Modo de Reproducción” y “Modo de
Se muestran los números de pista y la opción de ajuste aparece en la
Repetición”.
parte inferior izquierda de la pantalla.
Modo de
Normal Reproduce las pistas tal y como están grabadas
6 Seleccione la pista deseada y, a continuación, pulse el botón
Reproducción
en el CD.
.
Programada Reproduce las pistas en un orden específico.
Se inicia la reproducción.
Aleatoria Reproduce las pistas en orden aleatorio.
Notas
Modo de
Desactivado No reproduce el CD varias veces.
• También puede acceder a las Opciones de Reproducción desde la pantalla que
Repetición
Todas Reproduce todas las pistas repetidamente.
muestra las pistas seleccionando el icono de CD audio que aparece en la esquina
superior izquierda de la pantalla y pulsando el botón .
1 Reproduce una pista repetidamente.
• Puede ajustar las opciones “Modo de Reproducción” y “Modo de Repetición” al
mismo tiempo.
1 En la pantalla Navegador ( página 29), utilice los botones
de dirección para seleccionar el icono del CD de audio y, a
continuación, pulse el botón .
Se muestra la pantalla Opciones de Reproducción.
2 Seleccione “Modo de Reproducción” o “Modo de
Repetición” y, a continuación, pulse el botón .
14
Reproducción de un CD audio
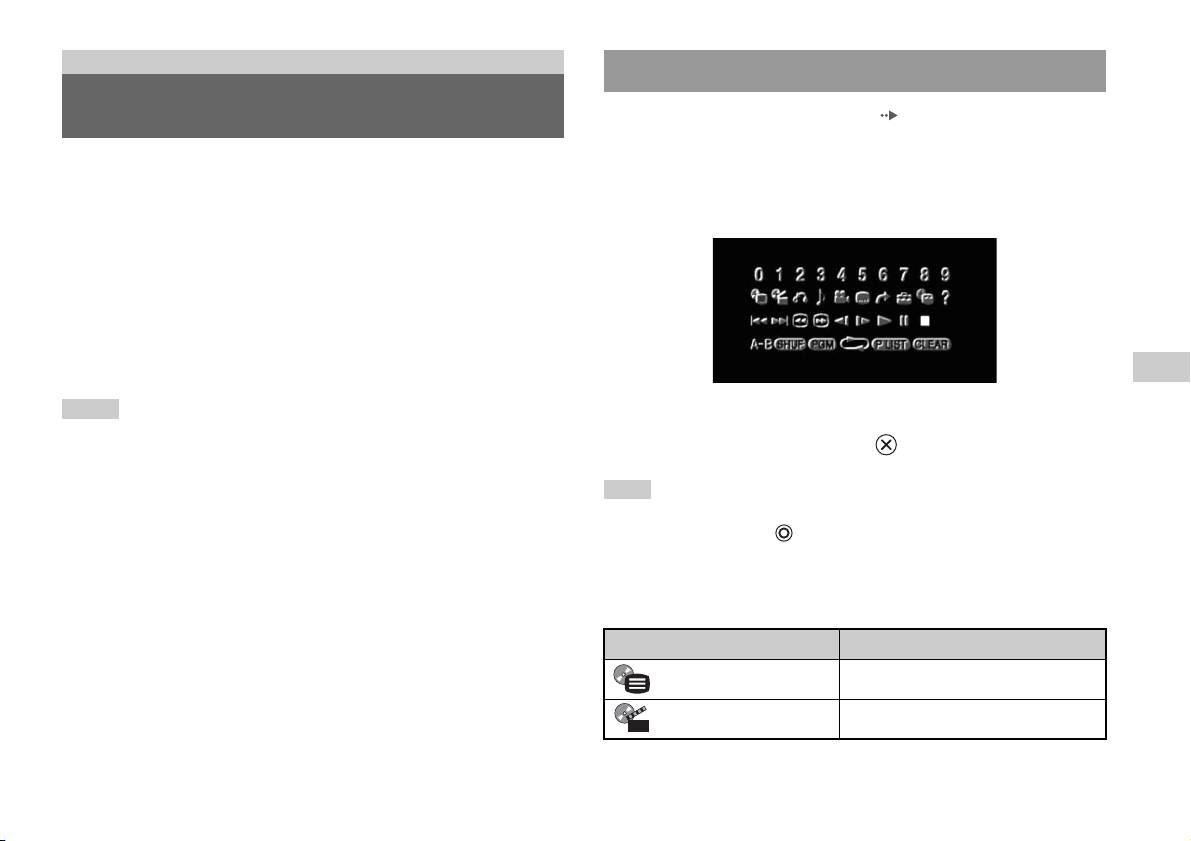
DVD
Uso del Panel de Control
Reproducción de un DVD
1 Inicie la reproducción del DVD ( página 17).
2 Pulse el botón SELECT (selección).
Puede utilizar el reproductor de DVD mediante uno de los siguientes
Aparecerá el Panel de Control. Si vuelve a pulsar el botón SELECT
métodos.
(selección), se cambiará la posición de la presentación en la pantalla.
• Mediante el Panel de Control que aparece en la pantalla.
• Mediante el Mando Analógico (DUALSHOCK
®2).
• Mediante el Mando a Distancia de DVD (para PlayStation
TM2) (se vende
por separado).
En las siguientes instrucciones se asume el uso del Panel de Control para
utilizar el reproductor de DVD. Algunas operaciones pueden ser distintas
según el método utilizado.
ES
DVD
Notas
3 Utilice los botones de dirección para seleccionar un icono y,
• Para obtener información detallada sobre la reproducción de un DVD, consulte las
a continuación, pulse el botón .
instrucciones que acompañan a dicho DVD.
• La PlayStation
TM2 incorporada reproduce el contenido del disco tal y como fue
grabado en el software DVD. Tenga en cuenta que no todas las funciones están
Nota
disponibles en todos los DVD.
Para desactivar el Panel de Control, pulse el botón SELECT (selección) (una o dos
veces) o bien pulse el botón .
Lista de elementos del Panel de Control
Desde el Panel de Control puede acceder a las siguientes opciones.
Icono Función
Menú Muestra el menú del vídeo DVD.
Menú de títulos Muestra el menú del vídeo DVD.
Reproducción de un DVD
15
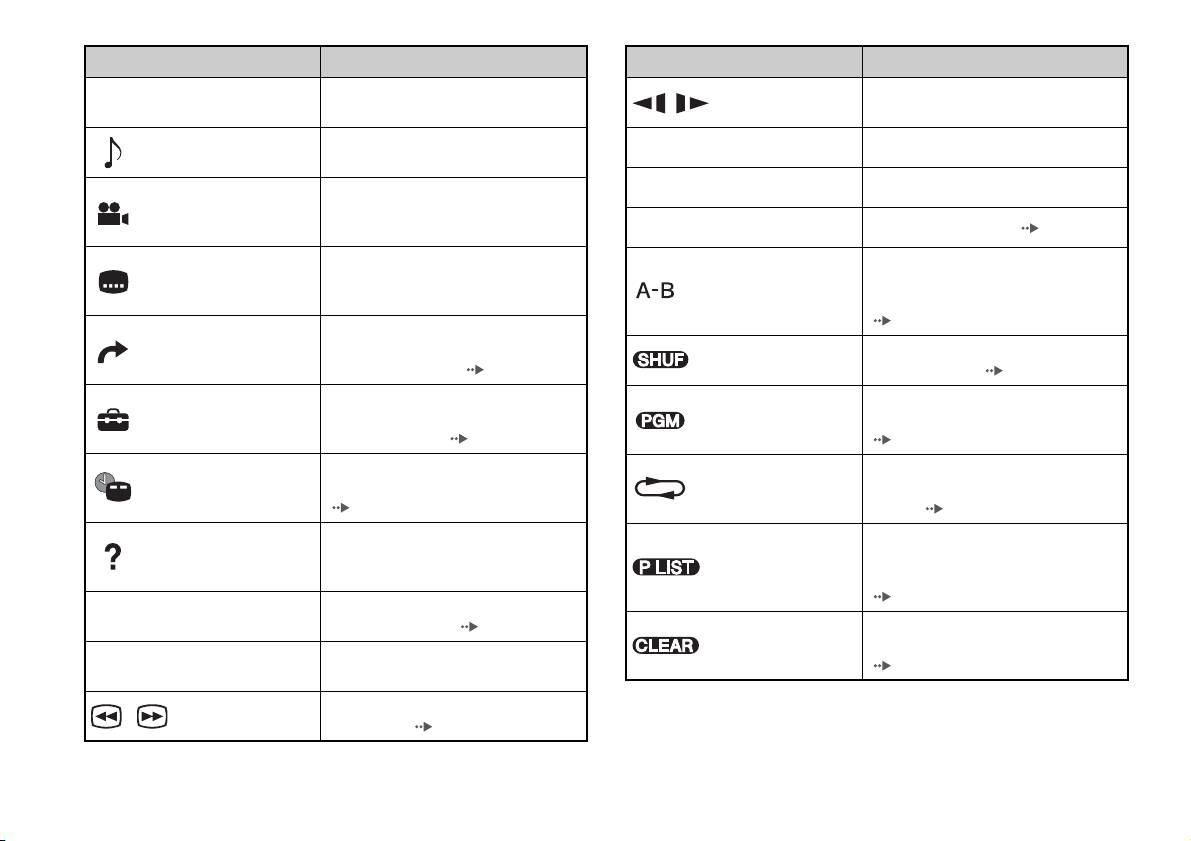
Icono Función
Icono Función
Vuelve a la pantalla seleccionada
Cambia a la reproducción/reproducción
O
Volver
/ Cámara lenta
anteriormente dentro del menú del DVD.
hacia atrás a cámara lenta.
Muestra y cambia las opciones de audio en
Opciones de audio
N
Reproducir Inicia la reproducción.
los DVD con múltiples pistas de audio.
Muestra y cambia los ángulos de visión en
X
Pausa Hace una pausa en la reproducción.
Opciones de
DVD grabados con opciones de múltiples
ángulo
ángulos.
x
Parar Detiene la reproducción ( página 17).
Muestra y cambia las opciones de
Especifica una escena para su
Opciones de
subtítulos en DVD con opciones de
reproducción e inicia la reproducción en el
subtítulos
Repetición A-B
subtítulos.
punto de la escena que se ha establecido
( página 22).
Permite avanzar al título o capítulo
Ir a
seleccionado, o al tiempo especificado, e
Reproducción
Inicia la reproducción de títulos o capítulos
inicia la reproducción ( página 18).
Aleatoria
en orden aleatorio ( página 21).
Muestra y cambia las opciones de idioma,
Inicia la reproducción de títulos o capítulos
Reproducción
Ajustar
calidad de imagen, nivel de Control
en una secuencia programada
Programada
paterno, audio, etc. ( página 22).
( página 20).
Muestra el número de título o capítulo
Selecciona la reproducción repetida de
Presentación del
Reproducción
actual, el tiempo transcurrido, etc.
todos los títulos del disco, o de un título o
tiempo
Repetida
( página 19).
capítulo ( página 21).
Muestra las funciones de los botones de
Para discos DVD-RW (modo VR),
Ayuda
acceso directo del Mando Analógico
selecciona el contenido de Original o el de
Original/Play List
(DUALSHOCK
®2).
la lista Play List que desea reproducir
( página 19).
Permite introducir el número del capítulo
0~9
Ir al capítulo
que desee reproducir ( página 18).
Borra los números o cancela los modos de
Borrar
reproducción seleccionados
Anterior/
Regresa/avanza hasta el principio del
./>
( página 22).
Siguiente
capítulo actual, anterior o siguiente.
Retrocede/avanza rápidamente la
/ Búsqueda
reproducción ( página 18).
16
Reproducción de un DVD

Notas
Reproducción de un DVD desde el último punto
• Puede usar “ ” para consultar las opciones a las que puede acceder directamente
pulsando los botones del Mando Analógico. Para acceder a las opciones
de detención (Reanudación de la Reproducción)
directamente mediante el mando, debe cerrar el Panel de Control para que
desaparezca de la pantalla.
1 Durante la reproducción, seleccione x en el Panel de
• Según el modo de reproducción, es posible que algunas opciones no estén
Control ( página 15) y, a continuación, pulse el botón .
disponibles o no se puedan ajustar.
2 Seleccione N y, a continuación, pulse el botón .
Se inicia la reproducción desde el punto en el que detuvo el disco en el
Reproducción de un DVD
paso 1.
1 Encienda la PlayStationTM2 incorporada e inserte un disco
Para cancelar la Reanudación de la Reproducción
( página 7).
Tras el paso 1, seleccione x y, a continuación, pulse el botón .
Siga los pasos 1 a 3 de la sección “Inicio del juego”. Se inicia la
reproducción.
ES
DVD
Notas
• Si enciende la PlayStationTM2 incorporada después de insertar un disco, la
reproducción comienza automáticamente.
• También puede iniciar la reproducción desde la pantalla Navegador
( página 29).
Finalización de la reproducción de un DVD x
1 Durante la reproducción, seleccione x en el Panel de
Control ( página 15) y, a continuación, pulse el botón .
La reproducción se detiene. Pulse el botón OPEN en la parte frontal de
la PlayStation
TM2 incorporada y extraiga el disco.
Reproducción de un DVD
17

Selección de una escena específica para la
Búsqueda de un punto concreto en un DVD
reproducción
(Búsqueda)
Puede buscar hacia delante o hacia atrás para localizar rápidamente un
Selección de una escena por el número de capítulo
punto concreto en un DVD.
1 Durante la reproducción, seleccione el número de capítulo
1 Durante la reproducción, seleccione o en el Panel de
que desee en el Panel de Control ( página 15) y, a
Control ( página 15) y, a continuación, pulse y mantenga
continuación, pulse el botón .
pulsado el botón .
Se inicia la reproducción del capítulo seleccionado. Si desea
La velocidad de búsqueda cambia de la forma que se indica a
reproducir un capítulo con un número de un solo dígito (es decir, 1-9),
continuación cuando se pulsa el botón de dirección hacia arriba o hacia
introduzca un cero delante. Por ejemplo, introduzca “01”.
abajo mientras se mantiene pulsado el botón .
• Búsqueda 3
Selección de una escena por el número de título, el número
• Búsqueda 2
de capítulo o especificando el tiempo
• Búsqueda 1
• Cámara lenta
1 Durante la reproducción, seleccione en el Panel de
Control ( página 15) y, a continuación, pulse el botón .
2 Suelte el botón cuando llegue al punto que está
buscando.
2 Seleccione un elemento y pulse el botón .
La reproducción vuelve a la velocidad normal.
Título Especifica el número de título.
Nota
Capítulo Especifica el número de capítulo.
Para utilizar el Mando Analógico para realizar búsquedas durante la reproducción,
pulse y mantenga pulsado el botón L2 o R2 para iniciar la búsqueda. Utilice los
C XX:XX:XX
Especifica el tiempo transcurrido del capítulo (o
botones de dirección para cambiar la velocidad. Suelte el botón L2 o R2 cuando
(o T XX:XX:XX)
título).
llegue al punto que está buscando.
3 Seleccione los números de la escena deseada y, a
continuación, pulse el botón .
Se inicia la reproducción del capítulo seleccionado.
18
Reproducción de un DVD

Visualización de la información de reproducción
Selección de Original o Play List para la
reproducción de DVD-RW
Puede visualizar información como el número de título actual o el tiempo
Cuando utilice un disco DVD-RW (modo VR), puede seleccionar el tipo
transcurrido.
de títulos que desea reproducir.
1 Durante la reproducción, seleccione en el Panel de
1 Cuando la reproducción se haya detenido, seleccione
Control ( página 15) y, a continuación, pulse el botón .
en el Panel de Control ( página 15) y, a
La presentación cambia de la forma que se indica a continuación cada
continuación, pulse el botón .
vez que se pulsa el botón .
Cada vez que pulse el botón , se seleccionará Original y Play List
de forma alternativa.
Título X Capítulo X Número de título y número de
capítulo.
Original Reproduce el contenido en la secuencia grabada
originalmente.
Título X Capítulo X C XX:XX:XX Tiempo transcurrido del capítulo
Play List Reproduce contenido editado. Play List es la opción
ES
actual.
predeterminada.
DVD
Título X Capítulo X C - XX:XX:XX Tiempo restante del capítulo actual.
Título X Capítulo X T XX:XX:XX Tiempo transcurrido del título actual.
Notas
• La reproducción a cámara lenta hacia atrás no está disponible para discos
Título X Capítulo X T - XX:XX:XX Tiempo restante del título actual.
DVD-RW (modo VR).
(Desactivada)
• No se puede usar esta función con la función de Reanudación de la reproducción.
Cancele la función de Reanudación de la Reproducción ( página 17) antes de
seleccionar esta función.
Reproducción de un DVD
19

Reproducción Programada
Uso de los modos de
Puede crear programas para reproducir títulos o capítulos en cualquier
reproducción
orden.
1 Durante la reproducción, seleccione en el Panel de
Mediante los distintos modos de reproducción, puede reproducir títulos o
Control ( página 15) y, a continuación, pulse el botón .
capítulos en el orden que desee o repetir la reproducción de una escena
específica. Existen cuatro modos de reproducción:
2 Seleccione un número de programa y, a continuación, pulse
• Reproducción Programada ( página 20).
el botón .
• Reproducción Aleatoria ( página 21).
Si no se ha determinado ningún programa, la única opción será “1.
• Reproducción Repetida ( página 21).
Título”.
• Repetición A-B ( página 22).
3 Seleccione el número de título y, a continuación, pulse el
En las siguientes instrucciones se asume el uso del Panel de Control
botón .
( página 15) para utilizar el reproductor de DVD.
4 Seleccione el número de capítulo y, a continuación, pulse el
Notas
botón .
• Puede combinar las opciones de Reproducción Programada, Aleatoria y Repetida.
Para reproducir todos los capítulos, seleccione “Todo”. Repita los
Sin embargo, puede que algunas opciones de Reproducción Aleatoria o Repetida
no estén disponibles según la combinación.
pasos 2 a 4 para ajustar otros títulos o capítulos.
• La PlayStation
TM2 incorporada reproduce el contenido del disco tal y como fue
grabado en el software DVD.
5 Pulse el botón START (inicio).
Se inicia la Reproducción Programada.
Nota
El ajuste no se borrará tras finalizar la Reproducción Programada.
20
Uso de los modos de reproducción
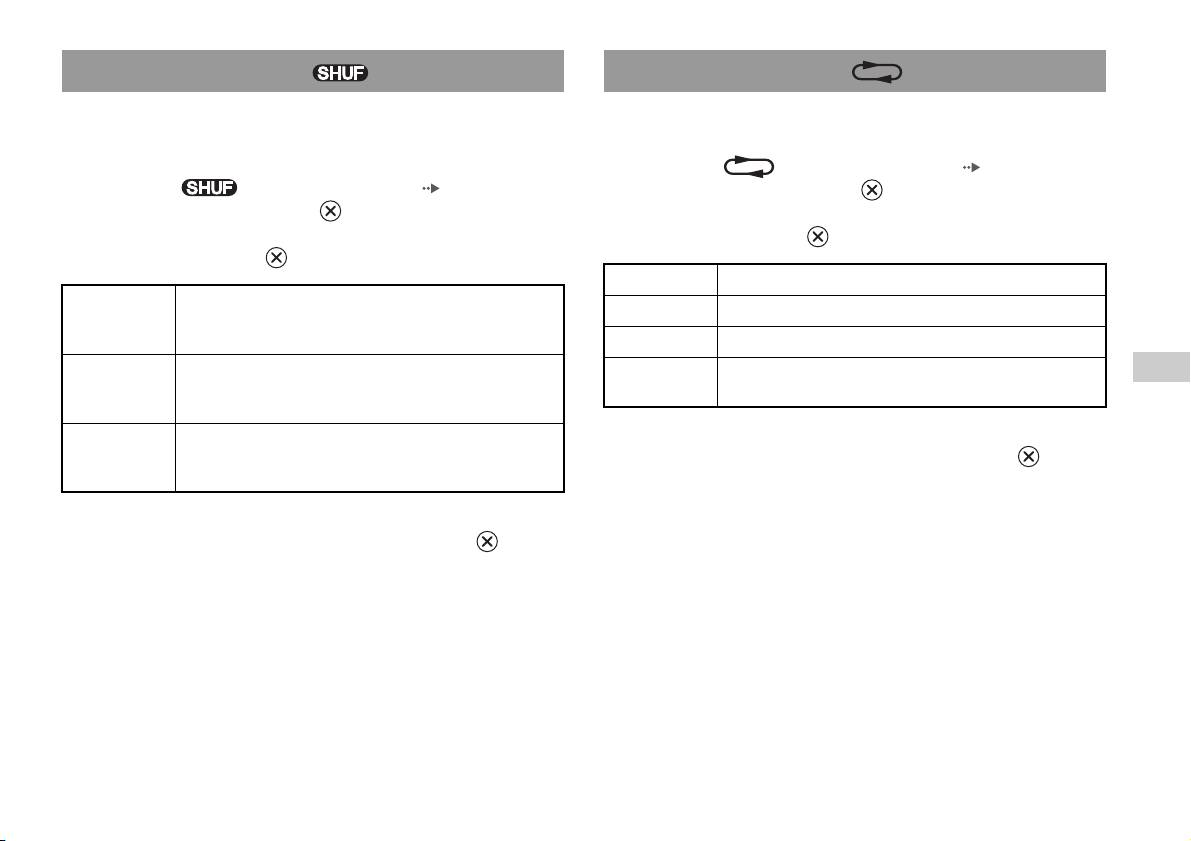
Reproducción Aleatoria
Reproducción Repetida
Puede ajustar esta opción para que se reproduzcan aleatoriamente todos los
Puede ajustar esta opción para que reproduzca títulos o capítulos
títulos o capítulos grabados en un disco. El orden de reproducción
repetidamente.
cambiará cada vez que se utilice la Reproducción Aleatoria.
1 Seleccione en el Panel de Control ( página 15) y, a
1 Seleccione en el Panel de Control ( página 15) y, a
continuación, pulse el botón .
continuación, pulse el botón .
La presentación cambia de la forma que se indica a continuación cada
La presentación cambia de la forma que se indica a continuación cada
vez que se pulsa el botón .
vez que se pulsa el botón .
Repetir disco Repite la reproducción de todos los títulos.
Selección
Reproduce los títulos en orden aleatorio.
Repetir título Repite la reproducción de un título.
aleatoria de
títulos
Repetir capítulo Repite la reproducción de un capítulo.
Selección
Reproduce los capítulos en orden aleatorio.
Repetición
Cancela la Reproducción Repetida.
ES
aleatoria de
desactivada
DVD
capítulos
Selección
Cancela la Reproducción Aleatoria.
aleatoria
2 Seleccione N y, a continuación, pulse el botón .
desactivada
2 Seleccione N y, a continuación, pulse el botón .
Uso de los modos de reproducción
21
Repetición A-B
Ajuste de la configuración del
Puede determinar una escena específica para que se reproduzca
repetidamente.
reproductor de DVD
1 Durante la reproducción, seleccione en el Panel de
Control ( página 15) y, a continuación, pulse el botón
Puede utilizar el Panel de Control para ajustar las opciones de
configuración del reproductor de DVD, como el idioma de los subtítulos,
en el punto en el que desea iniciar la reproducción repetida.
el idioma de audio y el nivel de Control paterno.
Se establece el punto de partida (punto A).
Notas
2 Pulse el botón en el punto en el que desea finalizar la
• Algunos DVD no admiten todos los ajustes. La PlayStationTM2 incorporada
reproducción repetida.
reproduce el contenido del disco tal y como fue grabado en el software DVD. Si el
Se establece el punto de finalización (punto B), y se inicia la
DVD no admite las funciones enumeradas, no podrá cambiar la configuración.
reproducción repetida de la sección comprendida entre el punto A y el
• Las siguientes opciones no están disponibles durante la reproducción o la
punto B.
Reanudación de la Reproducción. Cancele la Reanudación de la Reproducción
( página 17) antes de modificar estas opciones.
– “Menú”, “Audio” y “Subtítulos” en Selección de idioma.
Desactivación de los modos de reproducción
– “Formato TV” y “Modo progresivo” en Ajuste de la pantalla.
– “Control paterno” en Ajuste personalizado.
– “DTS” y “Modo Automático de Selección de Pistas” en Audio.
Desactiva los modos de reproducción para permitir la reproducción
normal.
Puede cambiar la configuración del reproductor de DVD mediante el
siguiente procedimiento:
1 Seleccione en el Panel de Control ( página 15) y,
1 Seleccione en el Panel de Control ( página 15) y, a
a continuación, pulse el botón .
continuación, pulse el botón .
Aparecerá el mensaje “Se han borrado los contenidos del modo de
reproducción” y la PlayStation
TM2 incorporada volverá a la
Se muestra la barra de iconos Ajustar.
reproducción normal.
2 Seleccione el icono de la opción que desee modificar y, a
Nota
continuación, pulse el botón .
Si se han combinado varios modos de reproducción, se desactivarán todos los modos
Se muestra el ajuste actual de cada elemento.
de reproducción.
22
Ajuste de la configuración del reproductor de DVD

3 Seleccione el elemento deseado y, a continuación, pulse el
Ajuste de las opciones de idioma
botón .
La opción de menú se vuelve activa y se puede seleccionar.
En “Selección de idioma”, puede elegir el idioma del menú del DVD, el
audio y los subtítulos. Recuerde que si selecciona un idioma que no está
4 Seleccione el ajuste deseado y, a continuación, pulse el
grabado en el DVD, se seleccionará automáticamente uno de los idiomas
botón .
grabados.
Se completa el ajuste del elemento. Para obtener información
detallada, consulte las instrucciones de cada elemento ( páginas 23
Menú Selecciona el idioma del menú del DVD.
a 28).
Audio Selecciona el idioma de la pista de audio del DVD.
Subtítulos Selecciona el idioma de los subtítulos del DVD.
Notas
• El ajuste predeterminado de cada menú aparece subrayado en las explicaciones
más abajo.
Nota
• Para volver al Panel de Control tras modificar la configuración, pulse el botón
Si selecciona “Seguimiento Audio” para los subtítulos, el idioma de los subtítulos
SELECT (selección).
coincidirá automáticamente con el idioma seleccionado para la pista de audio del
ES
• La configuración se guarda cuando se realiza una de las siguientes acciones:
DVD.
DVD
– Detener la reproducción (incluido detener la función Reanudación de la
Reproducción).
– Abrir la cubierta del disco.
Ajuste de la configuración del reproductor de DVD
23
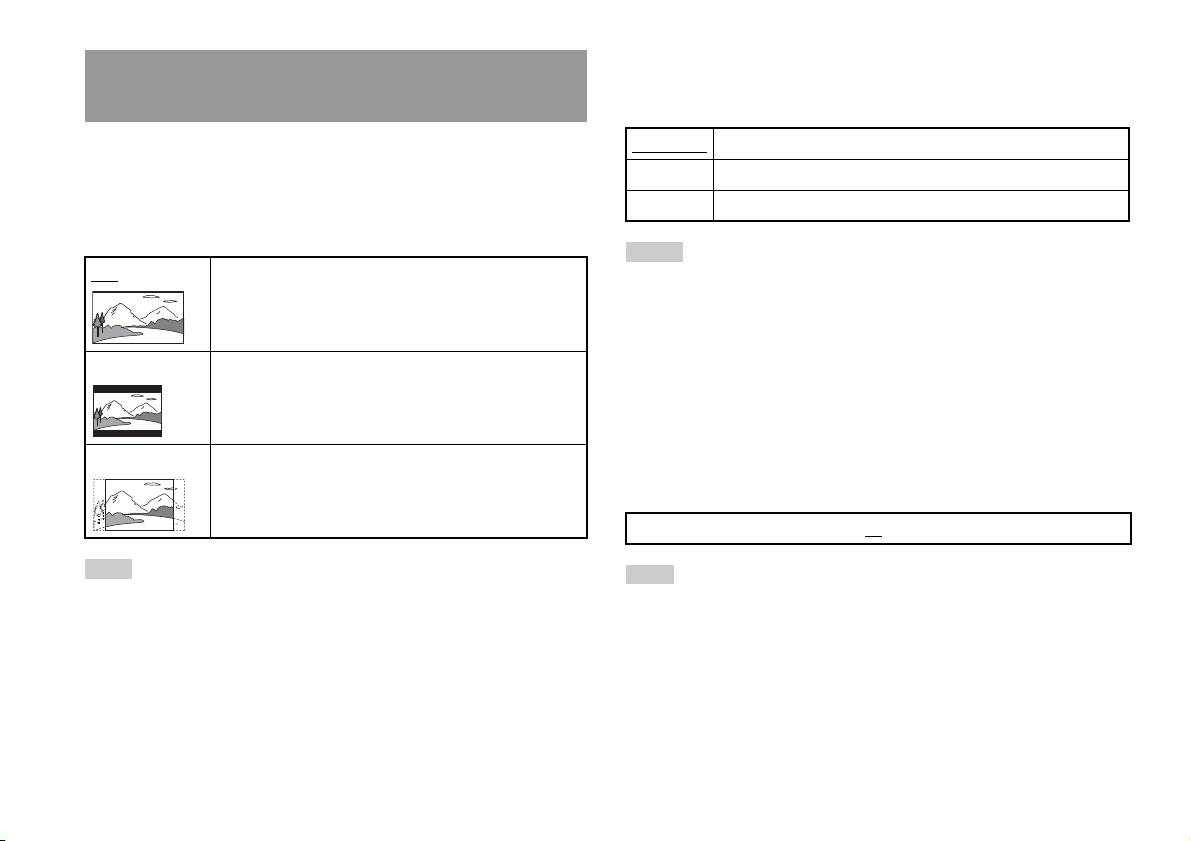
DNR (Digital Noise Reduction: Reducción del ruido digital)
Ajuste de las opciones de visualización del
Este ajuste ayuda a reducir las interferencias de la imagen en pantalla y a
televisor
visualizar una imagen más clara.
En el menú Ajuste de la pantalla, puede ajustar el tamaño de la pantalla
Desactivado No se utiliza DNR.
(formato) y otras opciones que afectan a la calidad de la imagen.
DNR1 Aumenta la calidad de la imagen.
Formato TV
DNR2 Aumenta la calidad de la imagen (máxima).
Puede ajustar el formato para que coincida con el formato de la pantalla.
Notas
16:9 Formato de la pantalla: panorámico
• La opción “DNR2” permite ver la imagen con mayor nitidez que la opción
“DNR1”, pero en algunos casos puede aparecer una imagen residual. Si ocurre
esto, seleccione “Desactivada”.
• La función DNR puede producir resultados limitados en algunos DVD.
• Cuando se ajusta la opción “Modo progresivo” en “Activado”, la opción “DNR”
4:3 Tipo buzón Formato de la pantalla: 4:3
se desactiva automáticamente y no se puede volver a activar.
Esta opción muestra una imagen panorámica con márgenes
en la parte superior e inferior de la pantalla.
Nitidez de contornos
Puede aumentar o reducir la nitidez de los contornos de la imagen que
4:3 EXPLO PAN Formato de la pantalla: 4:3
aparece en la pantalla. Cuanto mayor sea el valor, más nítidos serán los
Esta opción muestra una imagen ajustada a la altura de la
contornos. Normalmente, seleccione “0”.
pantalla, recortando las partes que no caben a izquierda y
derecha.
•-2 •-1 •0
•+1 •+2
Nota
Nota
Cuando la opción “Modo progresivo” se ajusta en “Activado”, la opción “Formato
Según el DVD, la opción Nitidez de contornos puede producir unos resultados
TV” se ajusta automáticamente en “16:9”.
limitados.
24
Ajuste de la configuración del reproductor de DVD

Presentación
Durante la reproducción, puede visualizar la información de estado de la
Ajuste de las opciones de visualización
reproducción en la esquina superior derecha durante varios segundos.
Modo Pausa
Activada La información de estado de la reproducción se muestra durante
Puede usar esta opción para ajustar un estado de la imagen cuando se haga
varios segundos.
una pausa en la reproducción.
Desactivada No se muestra la información de estado de la reproducción.
Auto Se muestra una imagen con elementos en movimiento sin parpadeo.
Normalmente se debe seleccionar esta posición.
Modo progresivo
Fotograma Se muestra una imagen sin elementos en movimiento con alta
Puede visualizar una imagen cuyas líneas se actualicen de una sola vez. En
resolución.
la mayoría de los casos, esto da lugar a una imagen más clara y sin
parpadeos.
Control paterno
En algunas regiones, la visualización de cierto contenido del DVD puede
Activado Barrido progresivo (480p)*
estar restringida según la edad del espectador u otros factores. Puede usar
ES
Desactivado
Barrido entrelazado
la función de Control paterno para restringir el nivel de contenido que se
DVD
puede visualizar con la PlayStation
TM2 incorporada.
* El modo de barrido progresivo del reproductor de DVD sólo está disponible
Cuanto menor sea el nivel, más estricta será la restricción.
cuando se reproduce un disco grabado en formato NTSC y se visualiza en un
televisor compatible con el barrido progresivo (480p).
Ajuste del Control paterno
Notas
1 Seleccione “Control paterno” y, a continuación, pulse el
• Los DVD pueden contener material de vídeo o de cine, que utilizan distintas
botón .
velocidades secuenciales. Cuando reproduzca material de vídeo mediante el
barrido progresivo, es posible que algunas imágenes no parezcan naturales. Si
Se mostrará la pantalla para registrar una contraseña. Si ya se ha
ocurre esto, ajuste la opción “Modo progresivo” en “Desactivado” y visualice la
registrado una contraseña, se mostrará la pantalla de confirmación de
imagen en el modo de entrelazado estándar.
la contraseña.
• Cuando se ajusta la opción “Modo progresivo” en “Activado”, la opción “Formato
TV” ( página 24) se ajusta automáticamente en “16:9”.
2 Seleccione un número y, a continuación, pulse el botón .
• El contenido de los discos DVD-RW (modo VR) sólo se puede ver en formato de
Repita el paso 2 para introducir una contraseña de cuatro dígitos. Si
entrelazado estándar. La opción “Modo progresivo” no está disponible cuando se
desea borrar un número, pulse el botón . Tras registrar una
reproduce dicho contenido.
contraseña, debe introducirla una vez más para confirmarla.
Ajuste de la configuración del reproductor de DVD
25
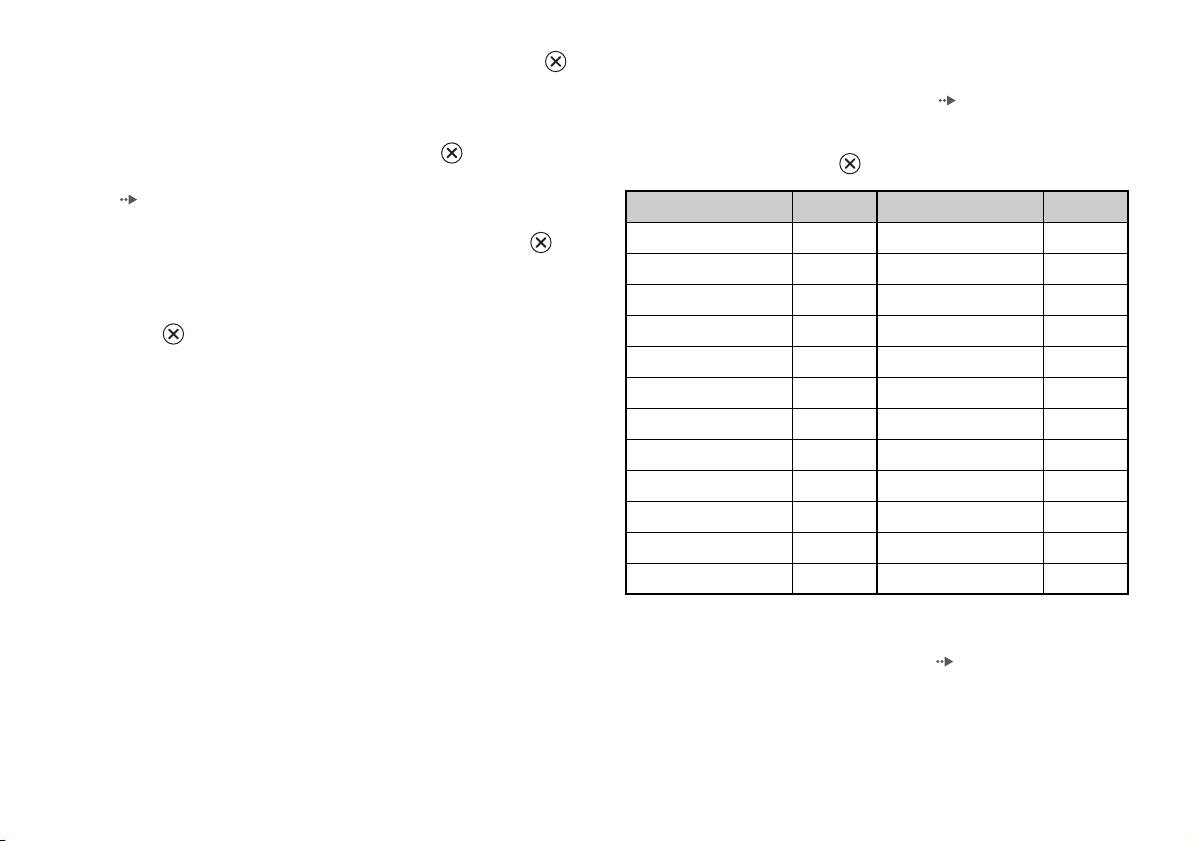
Lista de códigos de región
3 Seleccione “Región” y, a continuación, pulse el botón .
Para introducir un código de región de Control paterno, seleccione “Otros”
Se mostrará la lista de opciones de región.
en el paso 4 de “Ajuste del Control paterno” ( página 25). Utilice los
botones de dirección para seleccionar la primera letra y, a continuación,
4 Seleccione la región en la que desea basar el nivel de Control
pulse el botón de dirección hacia la derecha. A continuación, seleccione la
paterno y, a continuación, pulse el botón .
siguiente letra y pulse el botón .
Si selecciona “Otros”, consulte la “Lista de códigos de región”
(página26).
Región Código Región Código
Alemania DE Luxemburgo LU
5 Seleccione “Nivel” y, a continuación, pulse el botón .
Se mostrará la lista de opciones de nivel.
Austria AT Malta MT
Bélgica BE Noruega NO
6 Seleccione un nivel de restricción y, a continuación, pulse el
botón .
Dinamarca DK Países Bajos NL
Eslovaquia SK Polonia PL
Para cancelar el Control paterno
España ES Portugal PT
Con la reproducción del DVD detenida, vaya al paso 6 de “Ajuste del
Control paterno” y ajuste la opción “Nivel” en “Desactivada”.
Finlandia FI Reino Unido GB
Francia FR República Checa CZ
Grecia GR Rusia RU
Irlanda IE Suecia SE
Israel IL Suiza CH
Italia IT Turquía TR
Cómo cambiar la contraseña
En el paso 2 de “Ajuste del Control paterno” ( página 25), complete los
pasos siguientes:
26
Ajuste de la configuración del reproductor de DVD
1 Utilice los botones de dirección para seleccionar “Cambiar
• Si no establece una contraseña, no podrá cambiar el ajuste del Control paterno.
contraseña” y, a continuación, pulse el botón .
• Algunos DVD con la función de Control paterno no permiten el uso de modos de
reproducción ( páginas 20 a 22).
Se mostrará la pantalla para cambiar la contraseña.
2 Seleccione un número y, a continuación, pulse el botón .
Ajuste de las opciones de sonido
Repita el paso 2 para introducir una contraseña de cuatro dígitos. Debe
introducirla una vez más para confirmarla.
Salida Audio Digital
Anulación temporal de las restricciones del control paterno
Puede cambiar el método de emisión de la señal de audio cuando conecte
los siguientes dispositivos de audio al conector DIGITAL OUT
1 Inicie la reproducción del DVD ( página 17).
(OPTICAL).
Se le pedirá que cambie temporalmente el nivel de Control paterno
para permitir la reproducción. Esto suele ocurrir en cuanto se inicia el
disco, pero también puede ocurrir en otros momentos según el DVD.
Precaución
Cuando la PlayStationTM2 incorporada esté conectada a un dispositivo de audio
sin un decodificador Dolby Digital, DTS o MPEG, ajuste las opciones “Dolby
ES
2 Utilice los botones de dirección para seleccionar “Sí” y, a
Digital”, “DTS” y “MPEG” en “Desactivada”. Si ajusta estas opciones en
DVD
continuación, pulse el botón .
“Activada” sin el decodificador necesario, puede que no se emita ningún sonido
Aparecerá la pantalla para introducir la contraseña.
o que se emita un sonido extremadamente fuerte.
3 Seleccione un número y, a continuación, pulse el botón .
DIGITAL OUT (OPTICAL)
Repita el paso 3 para introducir una contraseña de cuatro dígitos. Tras
Esta opción determina el tipo de salida para el conector DIGITAL OUT
introducir la contraseña, se iniciará de nuevo la reproducción. Cuando
(OPTICAL).
se detenga la reproducción del DVD, el nivel de Control paterno
volverá al ajuste original.
Activada Seleccione esta opción si desea que el sonido (señal de audio) se
emita a través del conector DIGITAL OUT (OPTICAL).
Notas
Se muestran los ajustes de las opciones “Dolby Digital”, “DTS” y
• Si ha olvidado la contraseña, inserte un DVD sin la función de Control paterno. En
“MPEG”.
el panel de control, seleccione x (Detener) para detener la reproducción y, a
continuación, vuelva a seleccionar x (Detener) para eliminar la reanudación de la
Desactivada Seleccione esta opción si no desea que el sonido se emita a través
reproducción. Seleccione “Ajustar”, a continuación seleccione “Control paterno”
del conector DIGITAL OUT (OPTICAL).
en “Ajuste personalizado” y, finalmente, pulse el botón . Pulse el botón
No se muestran los ajustes de las opciones “Dolby Digital”, “DTS”
SELECT del Controlador analógico y, a continuación, introduzca el número
y “MPEG”.
“7444”.
Ajuste de la configuración del reproductor de DVD
27

Dolby Digital
Modo Automático de Selección de Pistas
Esta opción establece la señal Dolby Digital como el tipo de salida para el
Esta opción da prioridad a la pista de audio que contiene el mayor número
conector DIGITAL OUT (OPTICAL).
de canales cuando se reproduce un DVD en el que hay varios formatos de
audio (PCM, DTS, Dolby Digital o MPEG) grabados. Si los formatos
Activada Seleccione esta opción cuando la PlayStation
TM2 incorporada esté
PCM, Dolby Digital, DTS y MPEG tienen el mismo número de canales, la
conectada a un dispositivo de audio con un decodificador Dolby
PlayStation
TM2 incorporada selecciona las pistas de audio PCM, Dolby
Digital incorporado.
Digital, DTS y MPEG en este orden.
Desactivada
Seleccione esta opción cuando la PlayStationTM2 incorporada esté
Activada Se da prioridad.
conectada a un dispositivo de audio sin un decodificador Dolby
Digital incorporado.
Desactivada
No se da prioridad.
DTS
Notas
Esta opción establece la señal DTS como el tipo de salida para el conector
• Si ajusta la opción “DTS” en “Desactivada” en “Salida Audio Digital”
DIGITAL OUT (OPTICAL).
( página 28), la pista de audio DTS no se reproducirá.
• Según el DVD, el canal de audio con prioridad puede estar predeterminado. En este
Activada Seleccione esta opción cuando la PlayStation
TM2 incorporada esté
caso, la pista de audio se seleccionará según el orden de prioridad del DVD.
conectada a un dispositivo de audio con un decodificador DTS
Volumen DVD
incorporado.
Si el nivel de salida de audio del DVD es bajo, puede ajustar esta opción.
Desactivada
Seleccione esta opción cuando la PlayStationTM2 incorporada esté
Esta opción sólo se puede ajustar cuando la opción “DIGITAL OUT
conectada a un dispositivo de audio sin un decodificador DTS
(OPTICAL)” está ajustada en “Desactivada” en “Salida Audio Digital”
incorporado.
(página27)
.
MPEG
+2 Aumenta el volumen (máximo).
Esta opción establece la señal de MPEG AUDIO como el tipo de salida
+1 Aumenta el volumen.
para el conector DIGITAL OUT (OPTICAL).
Normal
Normalmente se debe seleccionar esta opción.
Activada Seleccione esta opción cuando la PlayStation
TM2 incorporada esté
conectada a un dispositivo de audio con un decodificador MPEG
incorporado.
Precaución
Desactivada
Seleccione esta opción cuando la PlayStationTM2 incorporada esté
Si ajusta esta opción en “+1” ó “+2”, el sonido puede verse distorsionado. Si
conectada a un dispositivo de audio sin un decodificador MPEG
ocurre esto, cambie la opción a “Normal”. Asimismo, debe tener en cuenta que
incorporado.
si sube demasiado el volumen, puede dañar sus oídos o los altavoces.
28
Ajuste de la configuración del reproductor de DVD
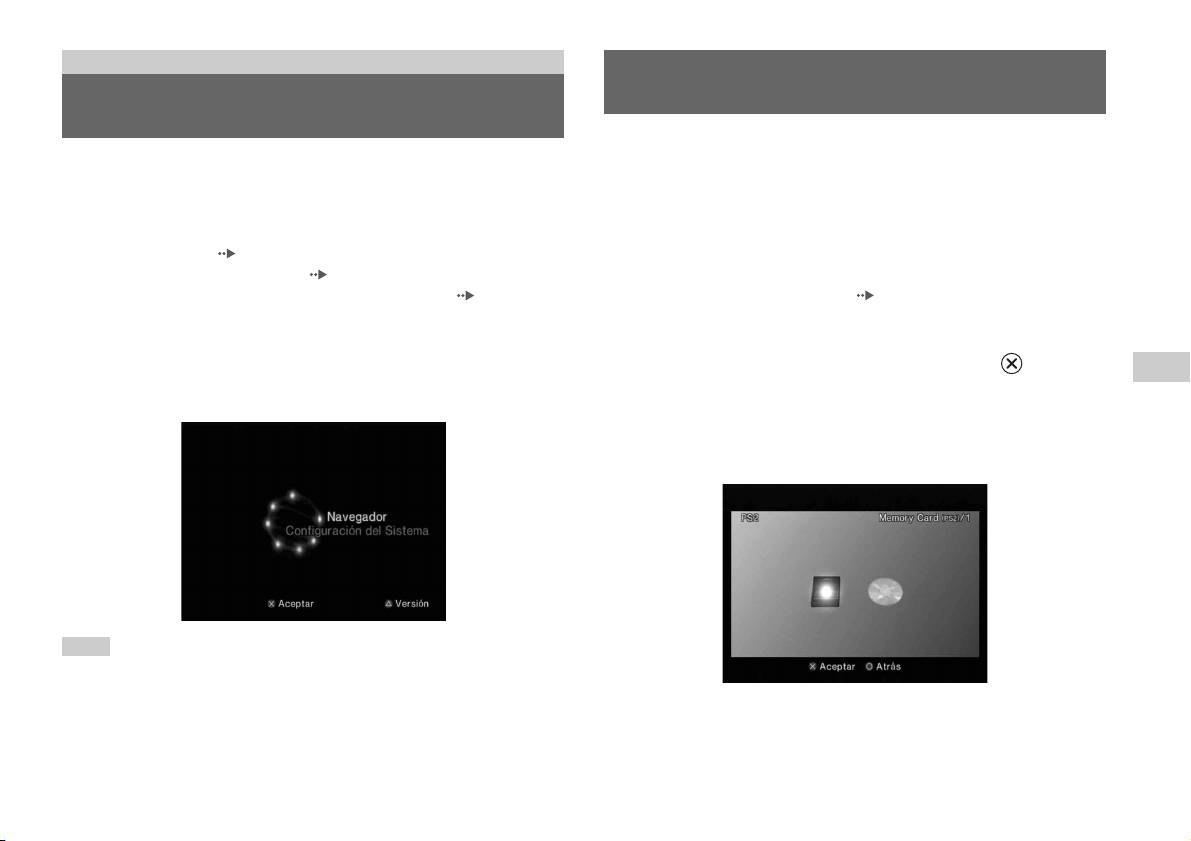
Menú principal
Uso de la pantalla Navegador
Visualización del menú principal
Desde la pantalla Navegador puede hacer lo siguiente:
Desde el menú principal, puede acceder a información y modificar
• Copiar o eliminar datos de juego guardados en una Memory Card
diversas opciones. También puede acceder a las siguientes pantallas desde
(Tarjeta de Memoria).
el menú principal. El menú principal se muestra cuando se enciende la
• Iniciar un juego.
PlayStation
TM2 incorporada sin ningún disco insertado.
• Iniciar la reproducción de un CD audio.
• Pantalla Navegador ( página 29).
• Iniciar la reproducción de un DVD.
• Menú Configuración del Sistema ( página 30).
• Pantalla Version Information (Información de versión) ( página 33).
1 Visualice el menú principal ( página 29).
1 Pulse PlayStation 2 POWER ON en el mando a distancia del
2 Utilice los botones de dirección para seleccionar
televisor.
“Navegador” y, a continuación, pulse el botón .
ES
Aparecerá el menú principal. Recuerde que el menú principal puede
Aparecerá la pantalla Navegador.
Menú principal
tardar en aparecer.
3 Inserte un disco o una Memory Card (Tarjeta de Memoria).
El icono del elemento insertado se muestra en la Pantalla Navegador.
\
Nota
Si pulsa PlayStation 2 POWER ON en el mando a distancia del televisor con un disco
insertado, no se visualizará el menú principal. Para visualizar el menú principal,
pulse el botón OPEN de la parte frontal de la PlayStation
TM2 incorporada y extraiga
el disco. A continuación, pulse PlayStation 2 POWER ON en el mando a distancia
del televisor.
Visualización del menú principal
29
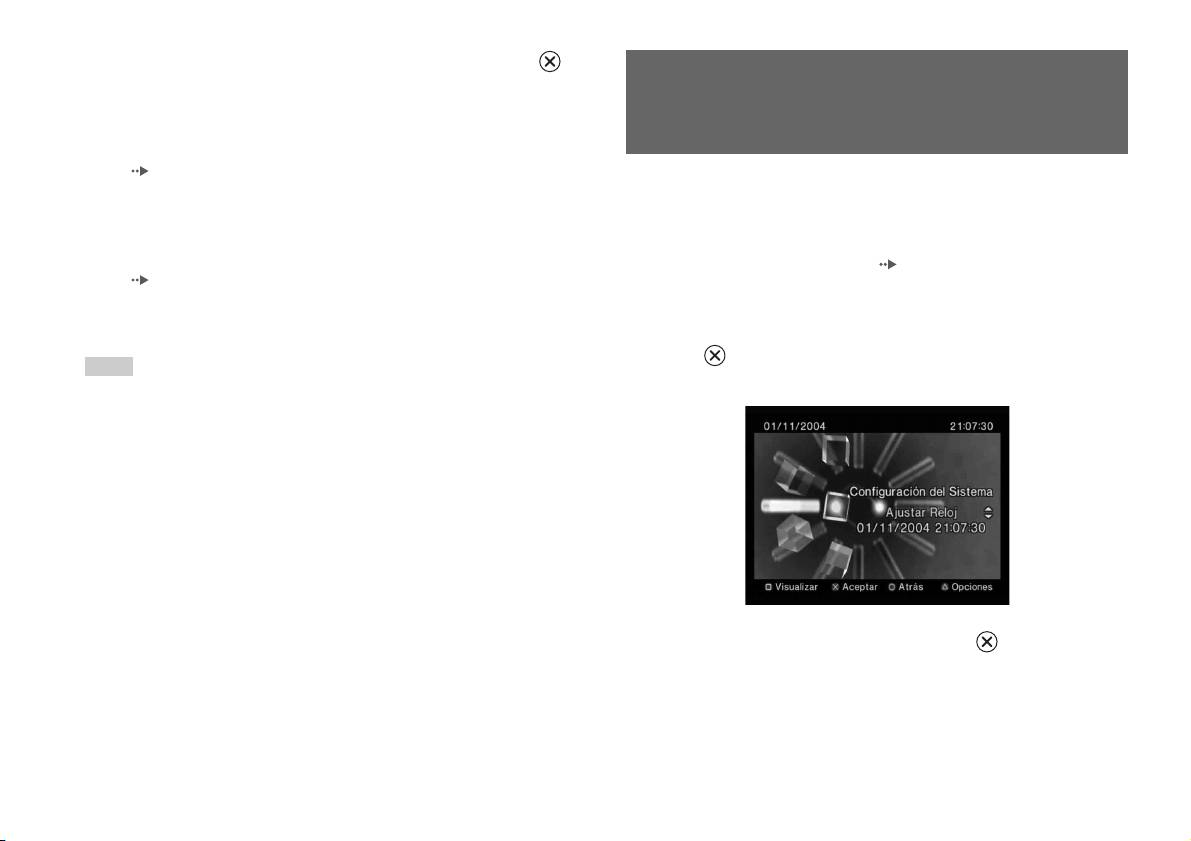
4 Seleccione un icono y, a continuación, pulse el botón .
• Al seleccionar el icono de la Memory Card (Tarjeta de Memoria), se
Uso del menú Configuración del
mostrarán los iconos de los datos guardados en esa Memory Card
(Tarjeta de Memoria). Para copiar o eliminar datos de juego
Sistema
guardados, consulte “Cómo copiar o borrar datos de juego”
(página12).
Desde el menú Configuración del Sistema, puede cambiar la configuración
• Al seleccionar el icono de un disco de software de formato
de numerosas opciones, incluyendo el idioma o la visualización de la hora,
PlayStation
TM2 o PlayStationTM, el juego se iniciará.
y el método de salida de audio o vídeo.
• Al seleccionar el icono de un disco CD audio, se mostrarán las pistas
que contenga el CD. Consulte “Reproducción de un CD audio”
1 Visualice el menú principal ( página 29).
(página13).
• Si selecciona el icono de un disco DVD, se iniciará la reproducción
2 Utilice los botones de dirección para seleccionar
del DVD.
“Configuración del Sistema” y, a continuación, pulse el
botón .
Nota
Aparecerá el menú Configuración del Sistema.
Si no hay ninguna Memory Card (Tarjeta de Memoria) o disco insertado en la
PlayStation
TM2 incorporada, aparecerá en la pantalla Navegador el mensaje “No hay
datos”.
3 Seleccione un elemento y pulse el botón .
La opción de menú se vuelve activa y se puede seleccionar.
30
Uso del menú Configuración del Sistema
4 Seleccione el ajuste deseado y, a continuación, pulse el
Tamaño de la Pantalla
botón .
Para obtener información detallada, consulte las instrucciones de cada
Puede ajustar el modo de visualización del televisor.
elemento de menú ( páginas 31 a 32).
4:3
Notas
Pantalla Completa*
• El ajuste predeterminado de cada menú aparece subrayado en las explicaciones
más abajo.
16:9
• Los cambios realizados en cada opción se guardan y permanecen activos hasta que
* El modo de visualización “Pantalla Completa” es compatible con el menú
se apaga o se reinicia la PlayStation
TM2 incorporada.
Configuración del Sistema, la pantalla Navegador y la pantalla de CD audio.
Ajustar Reloj
DIGITAL OUT (OPTICAL)
Puede ajustar la fecha y la hora. Utilice los botones de dirección para
Puede configurar la señal de salida para que se emita mediante el conector
ES
ajustar el valor de “Año”, “Mes”, “Día”, “Hora”, “Minuto” y “Segundo”.
DIGITAL OUT (OPTICAL).
Menú principal
La configuración se hace efectiva al pulsar el botón .
Activado Seleccione esta opción si desea que la señal de salida
Ajustes opcionales
se emita a través del conector DIGITAL OUT
Si pulsa el botón en la pantalla “Ajustar Reloj”, puede ajustar opciones
(OPTICAL).
como “Notación de la fecha” o “Notación de la hora”. Utilice los botones
Desactivado Seleccione esta opción si no desea que la señal de
de dirección y el botón para realizar cada uno de los ajustes.
salida se emita a través del conector DIGITAL OUT
(OPTICAL).
Notación de la hora Ajusta el reloj del sistema en el modo de 12 ó 24
horas.
Notación de la fecha Ajusta el orden de visualización del año, el mes y el
día.
Zona horaria Ajusta la zona horaria.
Horario de verano Selecciona Horario de invierno u Horario de verano.
Normalmente, seleccione “Horario de invierno”.
Uso del menú Configuración del Sistema
31

Mando a Distancia
Idioma
Ajuste esta opción cuando utilice el Mando a distancia de DVD (para
Puede utilizar esta opción para seleccionar el idioma utilizado en el menú
PlayStation
TM2) (se vende por separado).
principal, en la pantalla Navegador, en el menú Configuración del Sistema
y en la pantalla Version Information (Información de versión).
Función para jugar
Seleccione esta opción cuando utilice software de
Activada
formato PlayStation
TM2 o PlayStationTM con el Mando
Inglés Muestra los mensajes en inglés.
a distancia de DVD.
Francés Muestra los mensajes en francés.
Función para jugar
Seleccione esta opción cuando no utilice software de
Desactivada
formato PlayStation
TM2 o PlayStationTM con el Mando
Español Muestra los mensajes en español.
a distancia de DVD.
Alemán Muestra los mensajes en alemán.
Italiano Muestra los mensajes en italiano.
Nota
Las siguientes limitaciones se aplican cuando el Mando a distancia de DVD se utiliza
Holandés Muestra los mensajes en holandés.
con la opción “Función para jugar Activada” ajustada en “Activada”:
Portugués Muestra los mensajes en portugués.
– Dependiendo del software, puede que algunos botones del mando a distancia no
funcionen correctamente.
– Los botones del Mando a distancia de DVD no funcionarán cuando se pulsen dos
o más botones al mismo tiempo.
– Algunos títulos de software pueden dejar de funcionar correctamente cuando se
extrae el mando del puerto de mando 1. Si ocurre esto, ajuste la opción “Función
para jugar Desactivada”.
32
Uso del menú Configuración del Sistema

2 Seleccione un elemento y pulse el botón .
Uso de la pantalla Version
Se muestran las opciones disponibles.
Information (Información de
3 Seleccione el ajuste deseado y, a continuación, pulse el
botón .
versión)
Para obtener información detallada, consulte las instrucciones de cada
elemento ( páginas 33 a 35).
Mediante esta opción, puede consultar la información de versión de
distintos componentes de la PlayStation
TM2 incorporada. Asimismo, puede
Nota
cambiar los ajustes opcionales de algunos elementos.
El ajuste predeterminado de cada menú aparece subrayado en las explicaciones más
abajo.
1 En el menú principal ( página 29), pulse el botón .
Se muestra la pantalla Version Information (Información de versión).
Consola
ES
La PlayStationTM2 incorporada ajusta automáticamente su configuración
Menú principal
interna para lograr una reproducción óptima. Cuando la opción
“Diagnóstico” está ajustada en “Activada”, la PlayStationTM2 incorporada
realiza ajustes adicionales.
Diagnóstico
Desactivada La opción Diagnóstico se desactiva.
Activada La opción Diagnóstico se activa.
Ajustes opcionales
Existen ajustes opcionales para “Consola”, “PlayStation® Driver” y
Nota
“Reproductor de DVD”. La opción “Reproductor de DVD” sólo se puede
La opción “Diagnóstico” volverá automáticamente al valor predeterminado en los
ajustar si la opción “Modo progresivo” está ajustada en “Activado”.
casos siguientes:
– Cuando se inicia la reproducción de software de formato PlayStation
TM2 o
1 Utilice los botones de dirección para seleccionar un
PlayStation
TM o de un DVD
elemento y, a continuación, pulse el botón .
– Cuando se reinicia la PlayStation
TM2 incorporada
Se muestra el ajuste actual de cada elemento.
– Cuando se apaga la PlayStation
TM2 incorporada
Uso de la pantalla Version Information (Información de versión)
33
PlayStationTM Driver
Reproductor de DVD
Puede ajustar el programa PlayStationTM Driver para que optimice el
Si ajusta la opción “Modo progresivo” en “Activado” cuando la
rendimiento del software de formato PlayStation
TM.
PlayStation
TM2 incorporada está conectada a un televisor sin el equipo
necesario, la calidad de la imagen puede verse reducida o puede que no se
Nota
muestre la imagen. Puede desactivar el “Modo progresivo” mediante el
La configuración se revertirá automáticamente a los valores predeterminados en el
siguiente procedimiento.
caso siguiente:
Extraiga el DVD antes de desactivar el modo.
– Cuando se apaga la PlayStation
TM2 incorporada
Desactivar Modo Progresivo
Velocidad del Disco
No Deja el “Modo progresivo” activado.
Normal Carga discos a velocidad normal.
Sí Desactiva el “Modo progresivo”.
Rápida Carga discos a velocidad alta.
1 Visualice la pantalla Version Information (Información de
Nota
versión).
Ajuste la opción en “Normal” en los casos siguientes:
– Cuando la carga rápida no mejore los resultados
2 Utilice los botones de dirección para seleccionar
– Cuando utilice un software que no es compatible con la carga rápida
“Reproductor de DVD” y, a continuación, pulse el botón .
Aparecerá la opción “Desactivar Modo Progresivo” .
Diseño de Texturas
3 Pulse el botón .
Estándar
Se muestra como normal.
Suave Se muestra con menos interferencias en las imágenes en pantalla.
4 Seleccione “Sí” y, a continuación, pulse el botón .
5 Pulse el botón dos veces.
Nota
Volverá a aparecer el menú principal.
Ajuste la opción en “Estándar” en los casos siguientes:
– Cuando el diseño de texturas suave no mejore los resultados.
6 Pulse el botón OPEN situado en la parte frontal de la
– Si la imagen no se muestra correctamente cuando se ajusta en “Suave”.
PlayStation
TM2 incorporada e inserte un DVD en la
PlayStation
TM2 incorporada.
34
Uso de la pantalla Version Information (Información de versión)

7 Cierre la cubierta del disco.
Se inicia la reproducción.
Nota
La opción no se desactivará si 1) no inicia un DVD tras el paso 4, o 2) reinicia o apaga
la PlayStation
TM2 incorporada antes del paso 6.
ES
Menú principal
Uso de la pantalla Version Information (Información de versión)
35

Redes
Conexión con un cable Ethernet
Conexión a una red
Puede conectar la PlayStationTM2 incorporada a una red a través de un
cable Ethernet conectado al conector de red NETWORK de la parte
trasera. Puede conectar la consola a una red 100 Base-TX o 10 Base-T.
Puede disfrutar de juegos online conectando la PlayStationTM2 a una red de
Consulte las instrucciones que acompañan al dispositivo de red para
banda ancha. Para jugar online, necesita lo siguiente:
obtener información detallada.
• Un juego PlayStation
TM2 que permita jugar en red.
• Servicio de Internet de banda ancha.
Configuración de Red Básica
• Un cable Ethernet disponible en el mercado.
Línea de red
• Una memory card (Tarjeta de Memoria) (8 MB) (para PlayStation
TM2)
(se vende por separado).
PC
Notas
• No se puede jugar online a través de una conexión de acceso telefónico o RDSI.
Módem de banda
ancha, enrutador, etc.
• El dispositivo de red externo no se puede conectar mediante USB al conector USB.
• Existen dos tipos de cables Ethernet: cable recto y cable cruzado. Asegúrese de que
utiliza el tipo de cable adecuado cuando conecte su PlayStation
TM2 a la conexión
Equipo de red Cable Ethernet
(no suministrado)
de Internet de banda ancha. Consulte el manual de instrucciones que acompaña al
dispositivo de red o póngase en contacto con su Servicio de Internet de banda
Línea de red: Ésta variará según el tipo de servicio de banda ancha del
ancha.
que disponga.
• No conecte la LAN del televisor mediante un cable Ethernet.
Equipo de red: El tipo de equipo utilizado también variará según el tipo
de servicio.
Nota
Cuando conecte la PlayStationTM2 incorporada y un PC a la red, puede que sea
necesario el uso de un dispositivo de red como un enrutador o un concentrador.
Consulte las instrucciones que acompañan al dispositivo de red para obtener
información detallada.
36
Conexión a una red

Conexión de la PlayStationTM2 incorporada
Notas
• No enchufe el Cable de Alimentación AC (cable principal) a la toma de corriente
eléctrica hasta que no haya realizado el resto de conexiones.
• No conecte cables Ethernet ni cables telefónicos de los tipos siguientes al conector
PlayStation
TM2 incorporada
Ethernet; es posible que pase demasiada corriente eléctrica a través del conector,
lo cual puede provocar fallos, un calor excesivo o un incendio en el conector:
– Líneas telefónicas residenciales estándar.
– Cables Ethernet que no sean adecuados para el uso con una red 10Base-T/
100Base-TX.
– Cualquier línea telefónica o de datos compatible con RDSI (digital).
– Líneas telefónicas PBX.
Cable de red (no suministrado)
– Otros tipos desconocidos de líneas telefónicas.
Enrutador
ES
Redes
A los dispositivos de red
Cable de red (no suministrado)
Módem DSL/Módem por cable
Internet
1 Conecte el cable Ethernet al conector de red NETWORK de la
parte trasera.
2 Conecte el cable Ethernet en el dispositivo de red.
Conexión a una red
37

Creación de la configuración de
red
Una vez conectado un cable Ethernet a la PlayStationTM2 incorporada,
deberá crear y guardar ajustes de red. Para ello, necesitará un Disco de
Acceso a la Red, que recibirá al registrar su PlayStationTM2. Puede
registrar su PlayStation
TM2.
Para crear un ajuste de red, necesitará los elementos siguientes:
– Una Memory Card (Tarjeta de Memoria) (8MB) (para PlayStationTM2) (se vende
por separado).
– La información de inicio de sesión y configuración de red suministrada por su
proveedor de servicios de Internet de banda ancha.
Nota
Según el tipo de servicio de Internet utilizado, es posible que tenga que proporcionar
su dirección MAC al proveedor de servicios de Internet de banda ancha. Encontrará
la dirección MAC de la PlayStation
TM2 en la pantalla Version Information
(Información de versión) ( página 33).
38
Creación de la configuración de red

Ligação em rede
Índice
Ligar a uma rede...........................................................................35
Criar as definições de rede ...........................................................37
Preparação
Nomes das peças ............................................................................3
Ligar equipamento de áudio digital ...............................................5
Ligar o comando ............................................................................6
Ligar e desligar a PlayStation
TM2 incorporada .............................. 6
Jogos
Jogar um jogo.................................................................................7
Utilizar os Memory Cards (Cartões de Memória) .......................10
CDs Áudio
Reproduzir um CD áudio.............................................................12
DVDs
Ver um DVD................................................................................ 14
Utilizar os modos de reprodução .................................................18
Ajustar as definições do leitor de DVD .......................................21
Menu principal
Visualizar o menu principal.........................................................28
Utilizar o ecrã Rotina de pesquisa ............................................... 28
Utilizar o menu Configuração do Sistema...................................29
Utilizar o ecrã Informações Sobre a Versão ................................ 32
2
Índice

Preparação
Ligar a Descrição
3 Conector USB
Pode ligar vários dispositivos USB à PlayStationTM2
Nomes das peças
incorporada, mas nem todos são compatíveis.
Consulte as instruções fornecidas com o dispositivo
USB para obter mais informações.
Parte da frente da PlayStationTM2 incorporada
Nota
Não é possível reproduzir ficheiros de vídeo, música
e fotografias, utilizando o conector USB da
PlayStation.
4 Tampa do disco
Prima o botão OPEN (abrir) e a tampa abre-se.
5 Botão OPEN (abrir)
Prima para abrir a tampa do disco.
6 Botão "/1 (ligado/em
Prima para ligar a PlayStationTM2 incorporada, para
espera)/RESET
entrar no modo de espera ou reiniciar.
(recomeçar)
RESET (recomeçar): Prima uma vez.
Modo de espera: Prima durante mais de um
PT
segundo.
OPEN
Preparação
7 Indicador "/1 (ligado/
Acende-se a verde quando a PlayStationTM2
em espera)
incorporada está ligada.
Acende-se a vermelho quando a PlayStation
TM2
incorporada está no modo de espera.
Ligar a Descrição
1 Ranhura MEMORY
Introduza um memory card (cartão de memória)
CARD 1/2
( página 11).
2 Porta do comando 1/2
Insira o Comando Analógico (DUALSHOCK®2)
numa porta do comando da PlayStation
TM2
(página6).
Nomes das peças
3
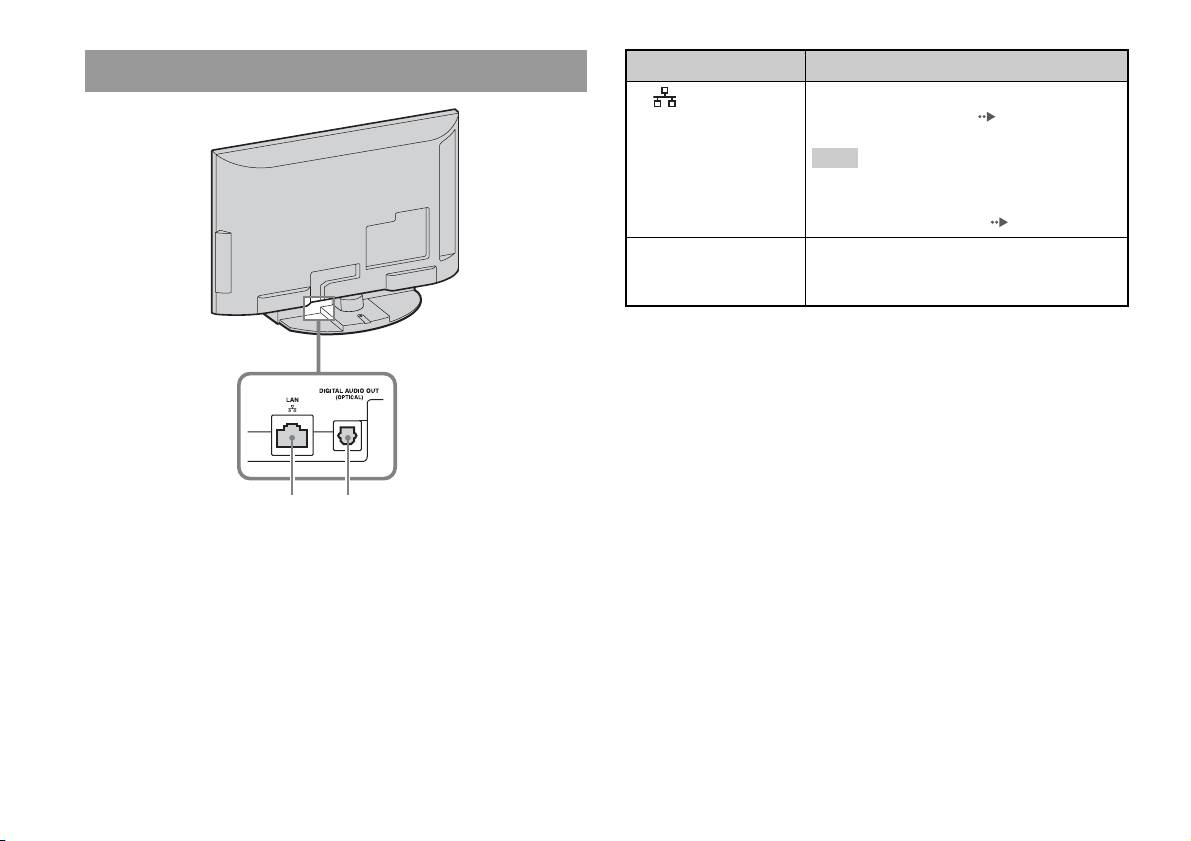
Parte traseira da PlayStationTM2 incorporada
4
Nomes das peças
1 2
Ligar a Descrição
1 LAN
Pode apreciar jogos online, ligando a PlayStationTM2
a uma rede de banda larga ( página 35).
Nota
Para desfrutar das funcionalidades da rede
doméstica “BRAVIA”, ligue à LAN do televisor,
utilizando um cabo Ethernet ( página 35).
2 DIGITAL AUDIO OUT
Pode ouvir o som da PlayStationTM2 incorporada
(OPTICAL)
num sistema Home theatre ligado através da entrada
digital.

Notas
Ligar equipamento de áudio
• Se ligar a PlayStationTM2 incorporada ao equipamento de áudio, utilizando um
cabo digital óptico, poderá afectar a saída de áudio de algum software do formato
digital
PlayStation
TM2, fazendo com que não seja produzido qualquer som. Caso isto
aconteça, utilize um cabo, como um cabo de Áudio (não fornecido) e ligue-o a
AUDIO OUT do televisor. Não utilize um cabo digital óptico.
Utilizando um cabo digital óptico disponível, pode desfrutar do som
• Depois de ligar o equipamento de áudio digital, defina “DIGITAL OUT
(OPTICAL)” para “On” no menu Configuração do Sistema. Para mais detalhes,
surround com o efeito de uma sala de cinema ou sala de espectáculos. Ao
consulte “DIGITAL OUT (OPTICAL)” ( página 30).
ligar a PlayStationTM2 incorporada ao equipamento de áudio com
• A ligação DIGITAL AUDIO OUT (OPTICAL) emite áudio digital a partir da
conectores digitais, consulte as instruções fornecidas com o dispositivo a
PlayStation
TM2 incorporada.
ser ligado.
Parte traseira da PlayStationTM2 incorporadaDispositivo ligado
DIGITAL IN
OPTICAL
PT
Preparação
Cabo digital óptico disponível
no mercado
Ligar equipamento de áudio digital
5
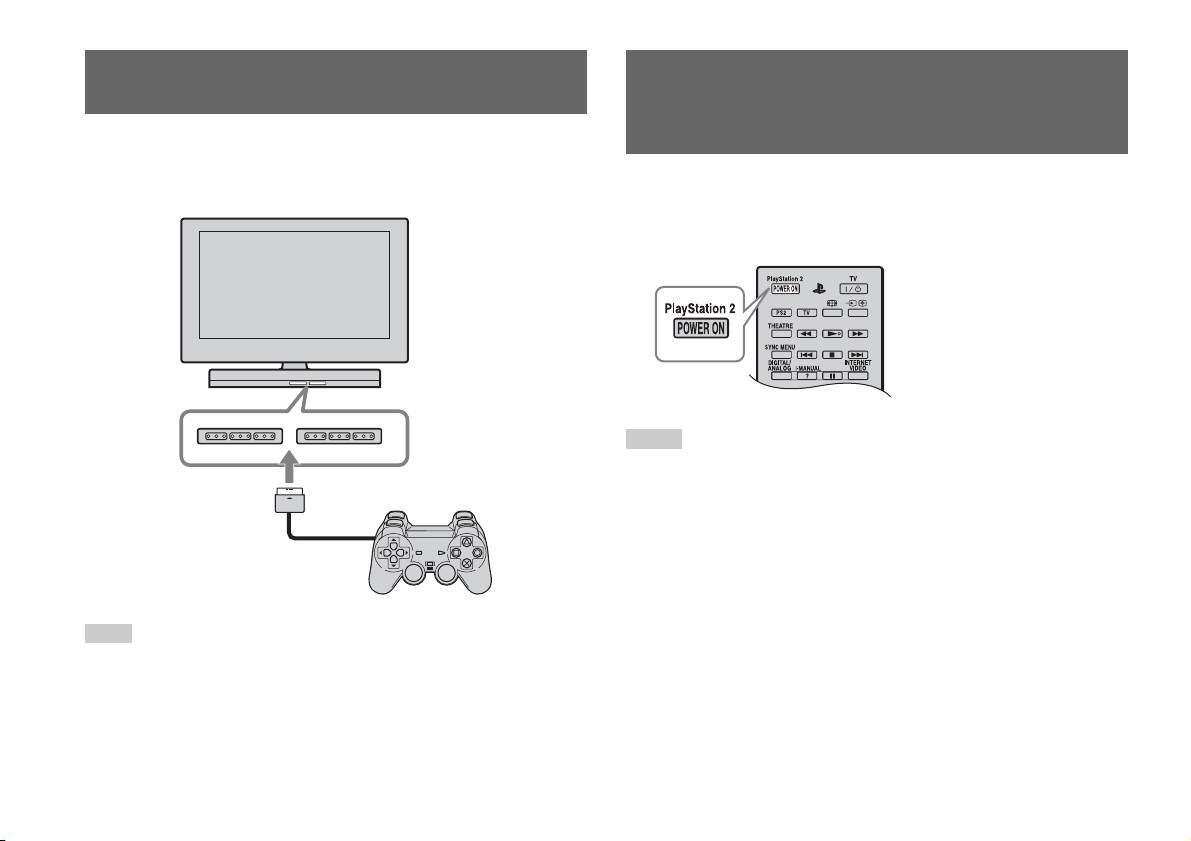
Ligar o comando
Ligar e desligar a PlayStationTM2
incorporada
1 Insira o Comando Analógico (DUALSHOCK®2) numa porta do
comando da PlayStation
TM2 incorporada.
1 Prima PlayStation 2 POWER ON no telecomando do televisor
Parte da frente da PlayStationTM2 incorporada
para ligar o televisor e a PlayStation
TM2. (O modo de entrada
do televisor muda automaticamente para PlayStationTM2.)
Notas
• Quando desliga o televisor, a PlayStationTM2 é também desligada. Para além disso,
quando as funções abaixo estão activadas, a PlayStation
TM2 será desligada
juntamente com o televisor.
– Modo espera de televisor inactivo
–Temp. Desligar
Comando Analógico
– Gestão de Energia do PC
(DUALSHOCK
®2)
– Lembrete
– Temp. Ligar
– Fotograma de Imagem
Nota
• Não aceda ao memory card (cartão de memória) quando for apresentada uma
Alguns títulos de software designam uma porta do comando específica a ser
mensagem de aviso (como “o televisor desligar-se-á em breve...”).
utilizada. Consulte as instruções fornecidas com o software para mais detalhes.
6
Ligar o comando
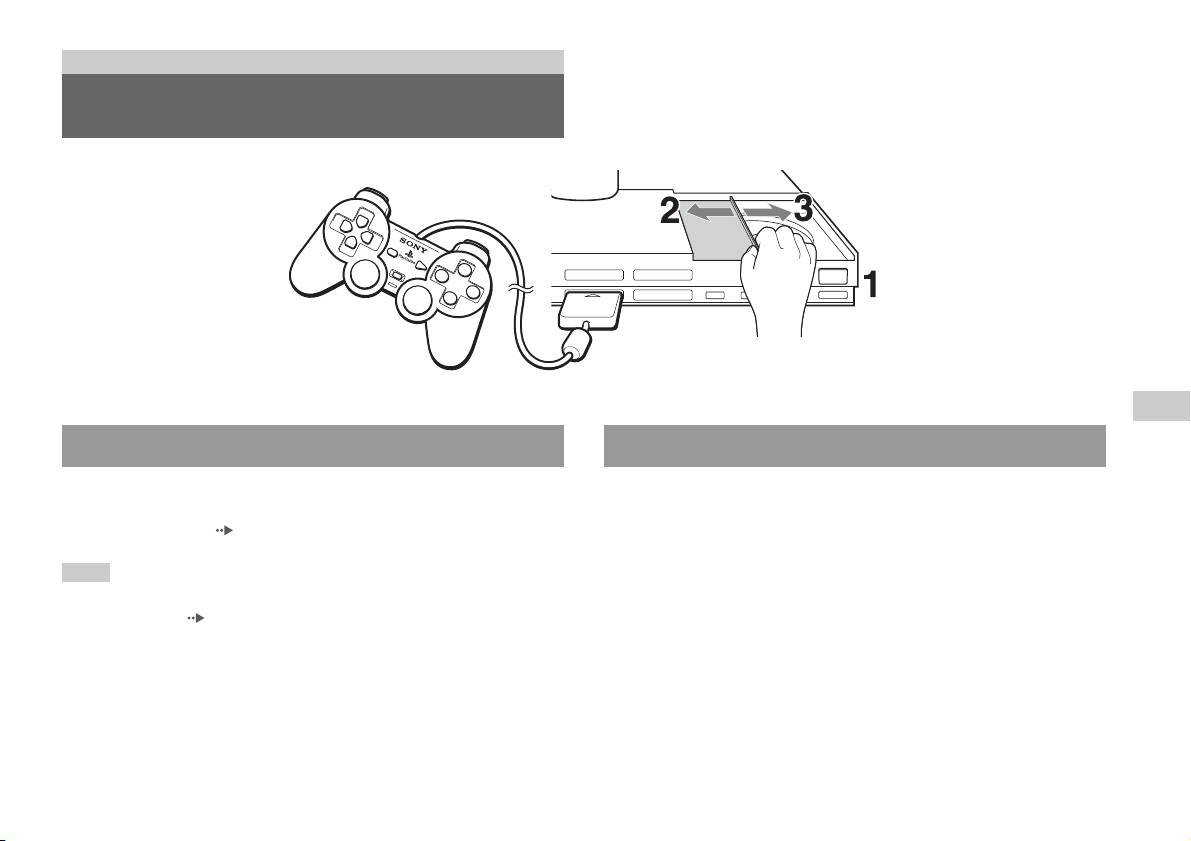
Jogos
Jogar um jogo
OPEN
PT
Jogos
Antes de jogar um jogo Começar um jogo
Verifique se as ligações do televisor e do equipamento de áudio estão
1 Carregue no botão OPEN para soltar o bloqueio da tampa do
correctas e se foram seguidas as precauções.
disco.
• “Ligar o comando” ( página 6)
2 Desloque a tampa do disco para a esquerda e, em seguida,
Nota
coloque o disco com o lado da etiqueta virado para cima.
Para jogar jogos online, deve em primeiro lugar ligar e configurar a rede. Consulte
“Ligar a uma rede” ( página 35) para mais detalhes.
3 Feche a tampa do disco, deslocando-a para a direita até que
fique bloqueada.
Jogar um jogo
7

Notas
Utilizar o Comando Analógico (DUALSHOCK®2)
• Bloqueie a tampa do disco para reproduzir um disco.
• Também pode começar um jogo a partir do ecrã de Rotina de pesquisa
O Comando Analógico (DUALSHOCK
®2) está equipado com uma
( página 28).
função de botões sensíveis ao toque. Também inclui a função de vibração.
• Caso ligue a PlayStation
TM2 incorporada depois de inserir um disco, o jogo começa
automaticamente.
Nomes das peças
Para recomeçar um jogo
Prima o botão \/1 (ligado/em espera)/RESET (recomeçar) na parte da
frente da PlayStation
TM2 incorporada. Não prima inadvertidamente o botão
@/1/RESET (recomeçar) enquanto joga um jogo, pois pode fazer com que
este seja recomeçado.
Para terminar um jogo
Carregue no botão "/1 (ligado/em espera)/RESET na parte da frente da
PlayStation
TM2 incorporada após guardar os dados do jogo e, em seguida,
retire o disco ( página 3).
RESET: Carregue uma vez.
Espera: Carregue durante mais de um segundo.
Botão/Interruptor Descrição
1 Botão L2
2 Botão L1
3 Botão SELECT
(seleccionar)
4 Botões de direcções
8
Jogar um jogo
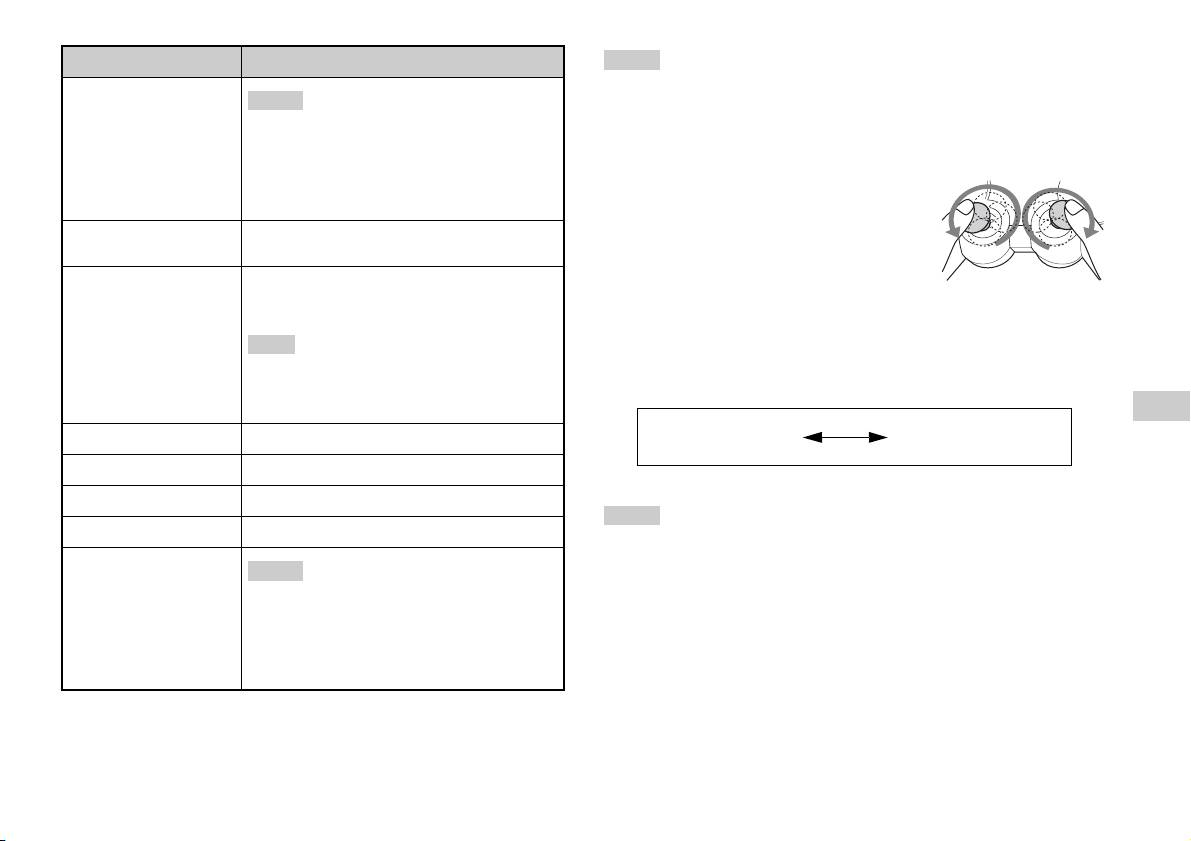
Botão/Interruptor Descrição
Notas
• Dependendo do software, os botões para utilizar no modo analógico podem ser
5 Manípulo analógico
Notas
esquerdo/botão L3
limitados. Consulte as instruções fornecidas com o software para mais detalhes.
• O manípulo analógico esquerdo e o botão L3
• A função de vibração pode ser activada ou desactivada no menu de opções do
funcionam apenas no modo analógico (indicador:
software. Dependendo do software, a função de vibração pode ser activada
vermelho).
automaticamente.
• O botão L3 funciona quando o manípulo
• Antes de utilizar o Comando Analógico
analógico é premido.
(DUALSHOCK
®2), com a PlayStationTM2
incorporada ligada, rode os manípulos analógicos
6 Botão do modo
Alterna entre o modo digital e o modo analógico.
esquerdo e direito com os polegares. Não torça os
ANALOG (analógico)
manípulos analógicos, rode-os como se estivesse a
7 Indicador de modo
Modo digital: Apaga-se.
desenhar um círculo como mostrado no diagrama.
Modo analógico: Acende-se a vermelho.
Sobre a alternação dos modos
Nota
O botão do modo ANALOG (analógico) pode ser utilizado para alternar
Dependendo do software, não poderá alternar os
entre modos. Mude para o modo adequado a utilizar. No entanto, note que
modos mesmo que prima o botão do modo
alguns títulos de software efectuam este ajuste automaticamente.
ANALOG (analógico).
PT
Modo digital
Modo analógico
Jogos
8 Botão R2
(indicador: apagado)
(indicador: vermelho)
9 Botão R1
q; Botão START (iniciar)
Notas
qa Botões f/a/×/s
• Sempre que utilizar o Comando Analógico no modo digital, os manípulos
qs Manípulo analógico
analógicos esquerdo e direito não funcionam. Além disso, o botão sensível ao
Notas
direito/botão R3
toque fica desactivado.
• O manípulo analógico direito e o botão R3
• Dependendo do software, não poderá alternar os modos mesmo que prima o botão
funcionam apenas no modo analógico (indicador:
do modo ANALOG (analógico).
vermelho).
• O botão R3 funciona quando o manípulo
Acerca dos comandos analógicos
analógico é premido.
• Ao reproduzir um título de software do formato PlayStationTM2, pode
utilizar todos os botões no modo analógico, excepto os botões START
(iniciar), SELECT (seleccionar), L3 e R3.
Jogar um jogo
9
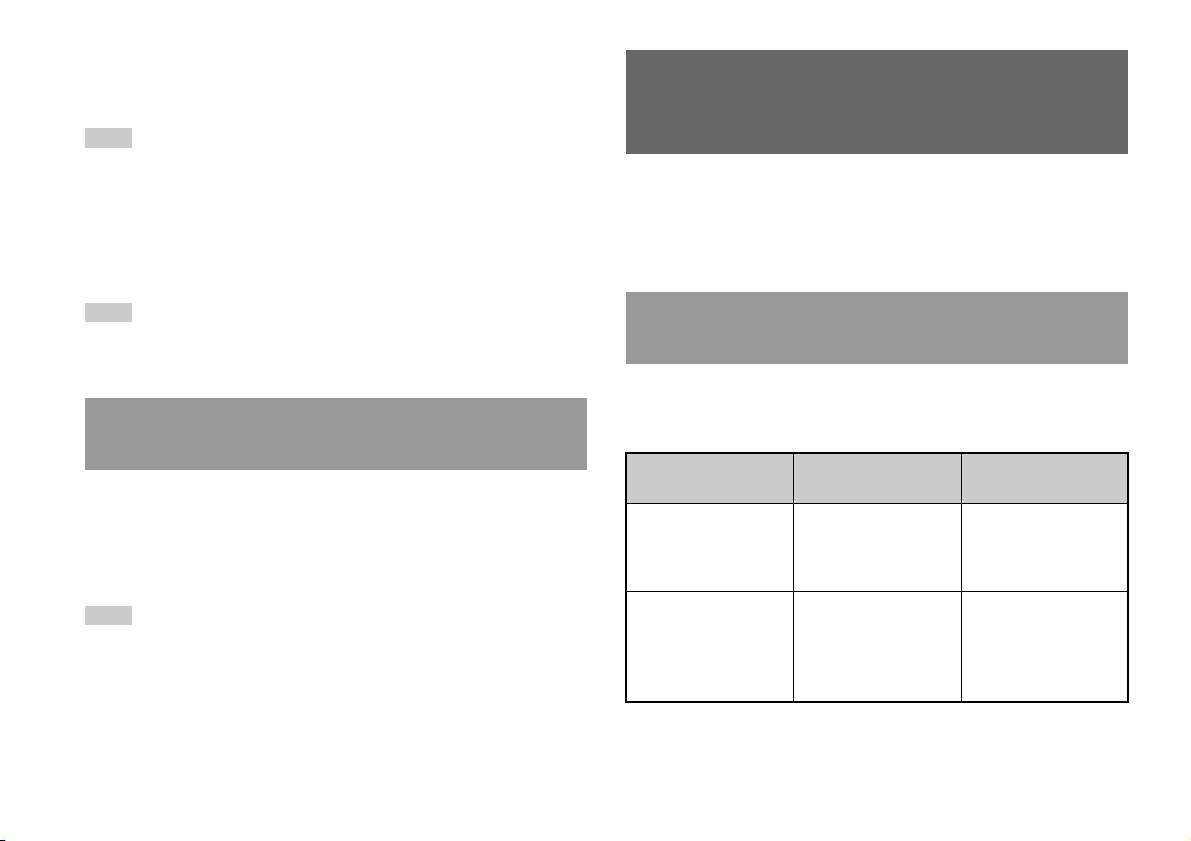
• Ao reproduzir um título de software do formato PlayStationTM, apenas os
manípulos analógicos esquerdo e direito podem ser utilizados no modo
Utilizar os Memory Cards
analógico.
(Cartões de Memória)
Nota
Dependendo do software, os botões para utilizar no modo analógico podem ser
limitados. Consulte as instruções fornecidas com o software para mais detalhes.
Pode guardar e carregar os dados de jogos, utilizando um Memory Card
(Cartão de Memória) (vendido separadamente). Também pode eliminar os
Acerca da função de vibração
dados de jogos ou copiá-los de um Memory Card (Cartão de Memória)
A função de vibração pode ser definida para ON ou OFF no menu de
para outro.
opções do software.
Nota
Acerca dos tipos de Memory Card (Cartão de
Dependendo do software, a função de vibração pode ser definida para “On”
Memória)
automaticamente.
Existem dois tipos de Memory Cards (Cartões de Memória). Seleccione
um Memory Card (Cartão de Memória) adequado ao software que está a
Acerca da utilização do Comando Analógico
ser utilizado.
(DUALSHOCK®) (SCPH-110 E)
Tipo de Memory Card
Software compatível Quantidade de
Pode utilizar o Comando Analógico (DUALSHOCK®) (SCPH-110 E)
(Cartão de Memória)
memória
com a PlayStation
TM2 incorporada, mas as funções dos botões no modo
Memory Card (Cartão de
Software do formato
Cerca de 8 MB
analógico podem diferir das funções do Comando Analógico
Memória) (8 MB) (para
PlayStation
TM2
(DUALSHOCK®2). Apenas podem ser utilizados os manípulos
PlayStation
TM2)
analógicos esquerdo e direito no modo analógico.
(SCPH-10020 E)
Memory Card (Cartão de
Software do formato
15 blocos de memória
Nota
Memória)
PlayStation
TM
(cerca de 120 KB)
Nem todos os títulos de software do formato PlayStationTM2 suportam a utilização do
(SCPH-1020 E)*
Comando Analógico (DUALSHOCK
®) (SCPH-110 E). O Comando Analógico
* Este produto já não é
(DUALSHOCK
®2) deverá ser utilizado nesses casos.
fabricado.
MagicGate™ é um termo de tecnologia de protecção de direitos de autor
desenvolvido pela Sony Corporation.
10
Utilizar os Memory Cards (Cartões de Memória)

Introduzir o Memory Card (Cartão de Memória)
Copiar ou eliminar dados de jogos
Introduza o Memory Card (Cartão de Memória) na ranhura para o
Pode eliminar os dados guardados ou copiar dados para outro memory card
MEMORY CARD na parte da frente da PlayStation
TM2 incorporada.
(cartão de memória). Utilize os botões de direcções e o botão do
comando para seleccionar os itens.
Parte da frente da PlayStationTM2 incorporada
1 Ligue a PlayStationTM2 incorporada sem um disco inserido e,
em seguida, introduza um memory card (cartão de memória).
2 Seleccione “Rotina de pesquisa” e, em seguida, seleccione
o memory card (cartão de memória) do qual pretende copiar
ou eliminar dados.
3 Seleccione o ícone do item de dados e seleccione “Copiar”
ou “Eliminar”.
MEMORY CARDMEMORY CARD
PT
4 Siga as instruções apresentadas no ecrã de configuração.
Jogos
Nota
Alguns títulos de software designam uma ranhura MEMORY CARD (Cartão de
Memória) específica para utilização. Consulte as instruções fornecidas com o
software para mais detalhes.
Guardar ou carregar dados de jogos
Dependendo do software, o procedimento para guardar ou carregar pode
variar. Consulte as instruções fornecidas com o software para mais
detalhes.
Utilizar os Memory Cards (Cartões de Memória)
11
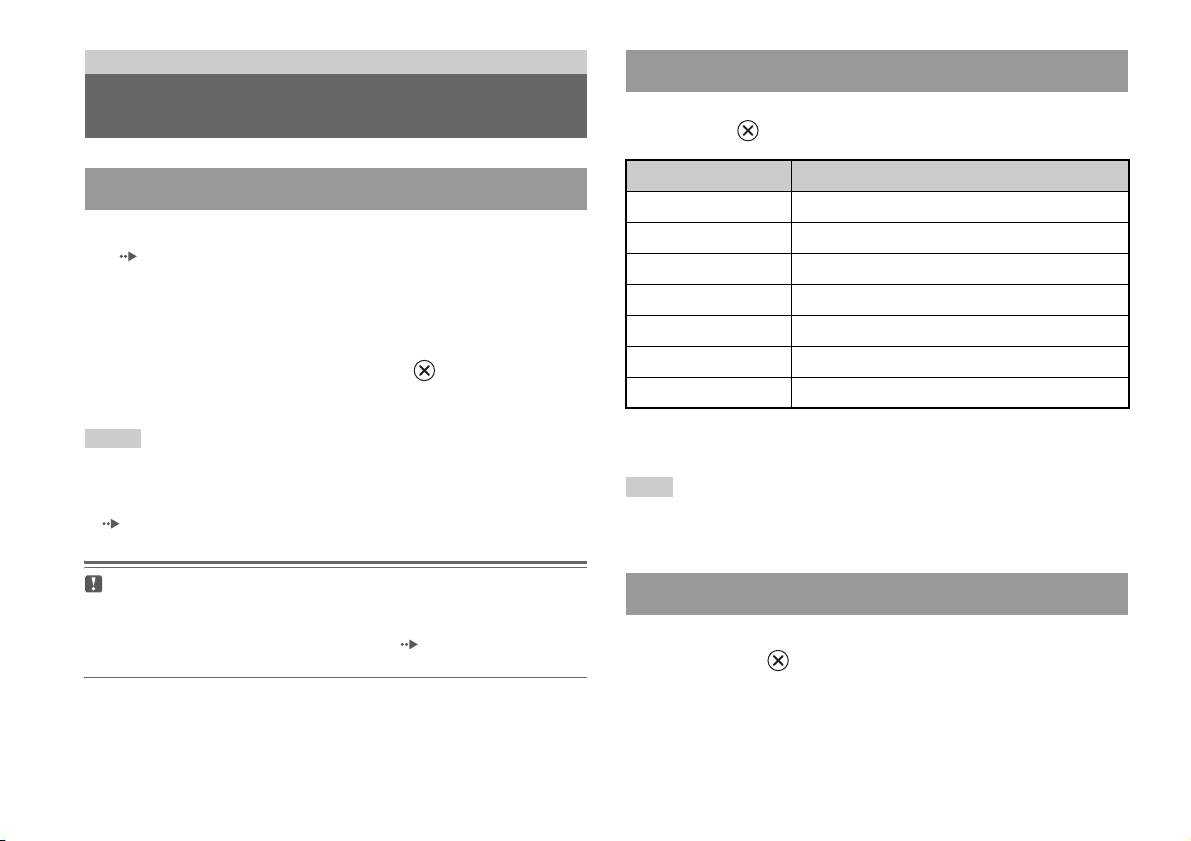
CDs Áudio
Operar o leitor de CD durante a reprodução
Reproduzir um CD áudio
Utilizando os botões de direcções, seleccione o ícone para a faixa desejada
e prima o botão .
Ícone (botão*) Função
Reproduzir um CD
. (Botão L1) Ir para o início da faixa actual ou da faixa anterior
1 Ligue a PlayStationTM2 incorporada e insira o disco
m (Botão L2) Retrocesso rápido
( página 7).
M (Botão R2) Avanço rápido
Siga os passos 1 a 3 de “Começar um jogo”.
Aparece o número da faixa.
> (Botão R1) Ir para o início da faixa seguinte
N (Botão START) Iniciar a reprodução
2 Utilize os botões de direcções, seleccione o número da faixa
X (Botão START) Fazer pausa
que deseja reproduzir e prima o botão .
A reprodução inicia-se.
x (Botão SELECT) Parar a reprodução
* Pode operar directamente, premindo os botões do comando analógico
Notas
(DUALSHOCK
®2) mostrados entre parêntesis.
• Se ligar a PlayStationTM2 incorporada depois de inserir um disco, aparece
automaticamente o número de faixas.
Nota
• Também pode iniciar a reprodução a partir do ecrã da Rotina de pesquisa
Também pode utilizar o Controlo Remoto de DVD (para PlayStationTM2) (vendido
( página 28).
separadamente).
Avisos
Finalizar a reprodução de CD áudio
Para reproduzir um CD de áudio gravado no formato DTS, deve reduzir o
volume na totalidade e, em seguida, ligar um dispositivo com descodificador
DTS ao conector DIGITAL OUT (OPTICAL) ( página 5). Tenha em
1 Utilizando os botões de direcções, seleccione x e depois
atenção que pode ser emitido um som extremamente alto.
prima o botão .
A reprodução pára. Prima o botão OPEN (abrir) na parte da frente da
PlayStation
TM2 incorporada para remover o disco.
12
Reproduzir um CD áudio

5 Seleccione o ícone do CD áudio e prima o botão .
Reproduzir em vários modos
É visualizado o número das faixas e as opções de definição são
Pode definir para “Modo de Leitura” e “Modo de Repetição”.
exibidas no canto inferior esquerdo do ecrã.
Modo de
Normal Reproduz o CD pela ordem em que foi gravado
6 Seleccione a faixa desejada e prima o botão .
Leitura
A reprodução inicia-se.
Programa Reproduz as faixas numa ordem especificada
Alternar Reproduz as faixas numa ordem aleatória
Notas
Modo de
Desligado Não reproduz o CD repetidamente
• Também pode aceder ao ecrã de opções de reprodução a partir do ecrã que
Repetição
apresenta as faixas, seleccionado o ícone do CD Áudio no canto superior esquerdo
Tudo Reproduz todas as faixas repetidamente
do ecrã e premindo o botão .
• Pode definir o “Modo de Leitura” e o “Modo de Repetição” ao mesmo tempo.
1 Reproduz uma faixa repetidamente
1 No ecrã da Rotina de pesquisa ( página 28), utilize os
botões de direcções para seleccionar o ícone do CD de áudio
e prima o botão .
PT
CDs Áudio
Aparece o ecrã de opções de reprodução.
2 Seleccione o “Modo de Leitura” ou o “Modo de Repetição” e
prima o botão .
3 Seleccione a definição desejada e depois prima o botão .
Se seleccionar “Programa”, aparece o ecrã para especificar a ordem de
faixas. Seleccione as faixas que deseja reproduzir.
4 Prima o botão .
Aparece o ecrã da Rotina de pesquisa.
Reproduzir um CD áudio
13
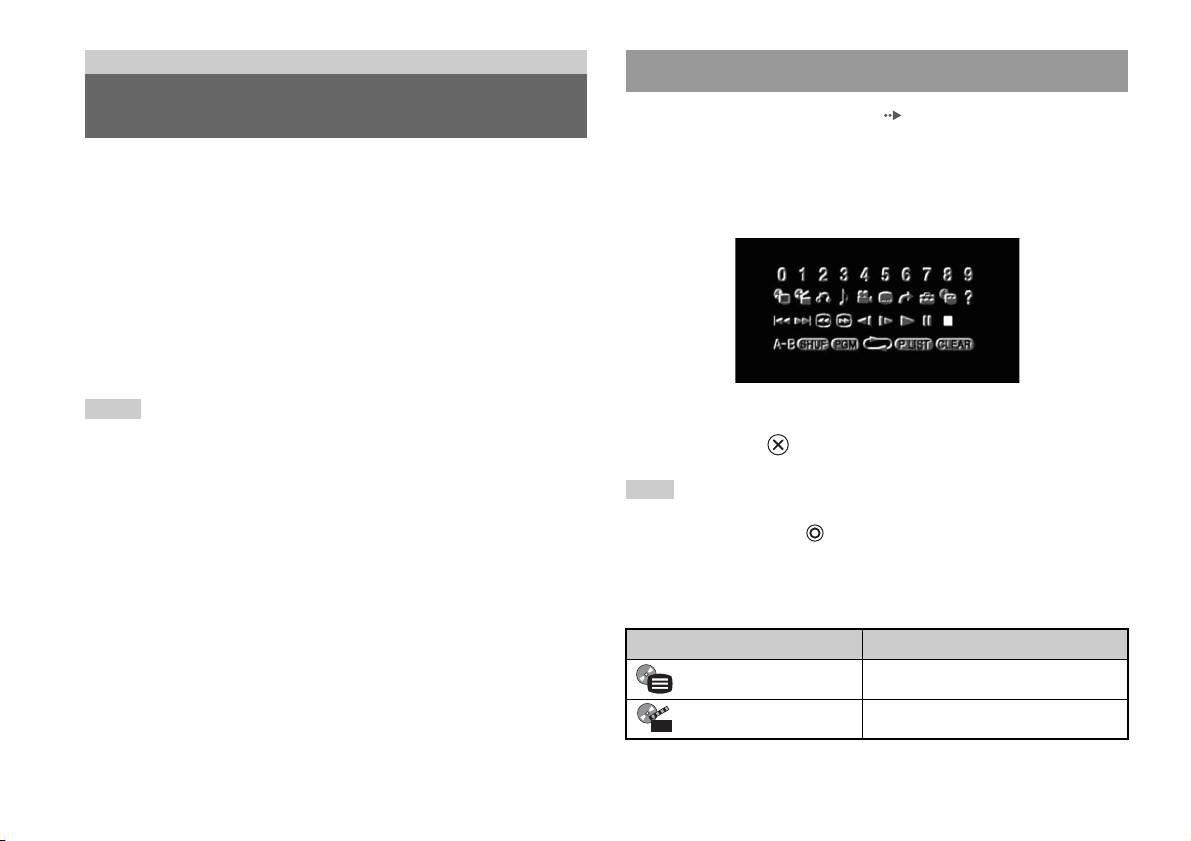
DVDs
Utilizar o Painel de Controlo
Ver um DVD
1 Iniciar a reprodução do DVD ( página 16).
2 Prima o botão SELECT (seleccionar).
Pode utilizar o leitor de DVD através dos seguintes métodos.
O Painel de Controlo é visualizado. Se premir novamente o botão
• Utilizar o Painel de Controlo no ecrã
SELECT (seleccionar), o visor altera a sua posição no ecrã.
• Utilizar directamente através do Comando Analógico
(DUALSHOCK
®2)
• Utilizar o Controlo Remoto de DVD (para PlayStation
TM2) (vendido
separadamente)
As instruções que se seguem pressupõem a utilização do Painel de
Controlo para utilizar o leitor de DVD. Algumas operações podem ser
diferentes dependendo do método utilizado.
Notas
3 Através dos botões de direcções, seleccione um ícone e
• Para mais detalhes sobre a reprodução de um DVD, consulte as instruções
prima o botão .
fornecidas com o DVD.
• A PlayStation
TM2 incorporada reproduz o conteúdo do disco conforme gravado no
software do DVD. Note que nem todas as funções se encontram disponíveis em
Nota
todos os DVDs.
Para desligar o Painel de Controlo, prima o botão SELECT (seleccionar) (uma ou
duas vezes) ou prima o botão .
Lista de itens do Painel de Controlo
Pode aceder às seguintes opções no Painel de Controlo.
Ícone Função
Menu Apresenta o menu do DVD-Vídeo
Menu de Títulos Apresenta o menu do DVD-Vídeo
14
Ver um DVD
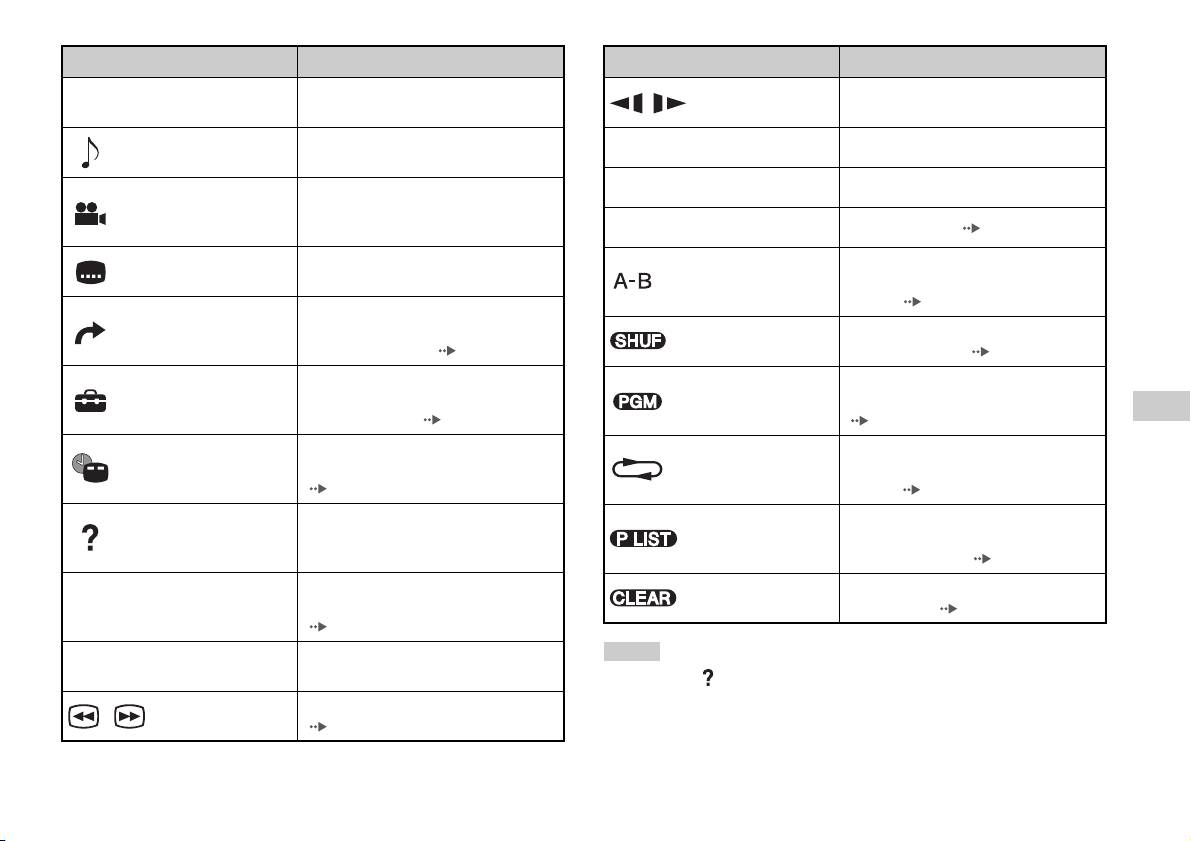
Ícone Função
Ícone Função
Regressa ao ecrã anteriormente
Muda para a reprodução/retorno em
O
Voltar Atrás
/ Câmara Lenta
seleccionado no menu do DVD
movimento lento
Visualiza e altera as opções de som de
Opções de Som
N
Reproduzir Inicia a reprodução
DVDs com várias faixas de áudio
X
Pausa Pausa a reprodução
Apresenta e altera o ângulo de visualização
Opções de Ângulo
em DVDs gravados com opções de vários
ângulos
x
Parar Pára a reprodução ( página 16)
Opções de
Apresenta e altera as opções de legendas
Especifica uma cena para reproduzir e
Legendas
em DVDs com opções de legendas
A-B Repetição
inicia a reprodução da cena que foi
definida ( página 20)
Avança para o título ou capítulo
Ir Para
seleccionado ou para o tempo especificado
Reprodução
Inicia a reprodução de títulos ou capítulos
e inicia a reprodução ( página 16)
Aleatória
por ordem aleatória ( página 19)
Apresenta e altera as opções de idioma,
Inicia a reprodução de títulos ou capítulos
Reprodução
Configuração:
qualidade de imagem, nível de Controlo
numa sequência programada
Programada
PT
Paternal, som, etc. ( página 21)
(página19)
DVDs
Apresenta o número do título ou do
Selecciona a reprodução repetida de todos
Reprodução
Visor do Tempo
capítulo actual, o tempo decorrido, etc.
os títulos no disco ou de um título ou
Repetida
(página17)
capítulo ( página 20)
Apresenta as funções dos botões de
Para discos DVD-RW (modo VR),
Ajuda
direcções do Comando Analógico
Original/Play List
selecciona o conteúdo Original ou Play
(DUALSHOCK
®2)
List para reproduzir ( página 18)
Utilizado para introduzir o número de um
Apaga números seleccionados ou modos
Apagar
0~9
Ir para o Capítulo
capítulo que pretende reproduzir
de reprodução ( página 20)
(página16)
Retorna/avança para o início do capítulo
Notas
./> Anterior/Seguinte
actual, anterior ou seguinte
• Pode utilizar “ ” para verificar as opções a que pode aceder directamente
utilizando os botões do Comando Analógico. Para aceder directamente às opções
Avanço/retorno rápido da reprodução
/Busca
utilizando o comando, deve apagar o Painel de Controlo do ecrã.
(página17)
• Dependendo do modo de reprodução, algumas opções podem não estar disponíveis
ou pode não ser possível ajustá-las.
Ver um DVD
15
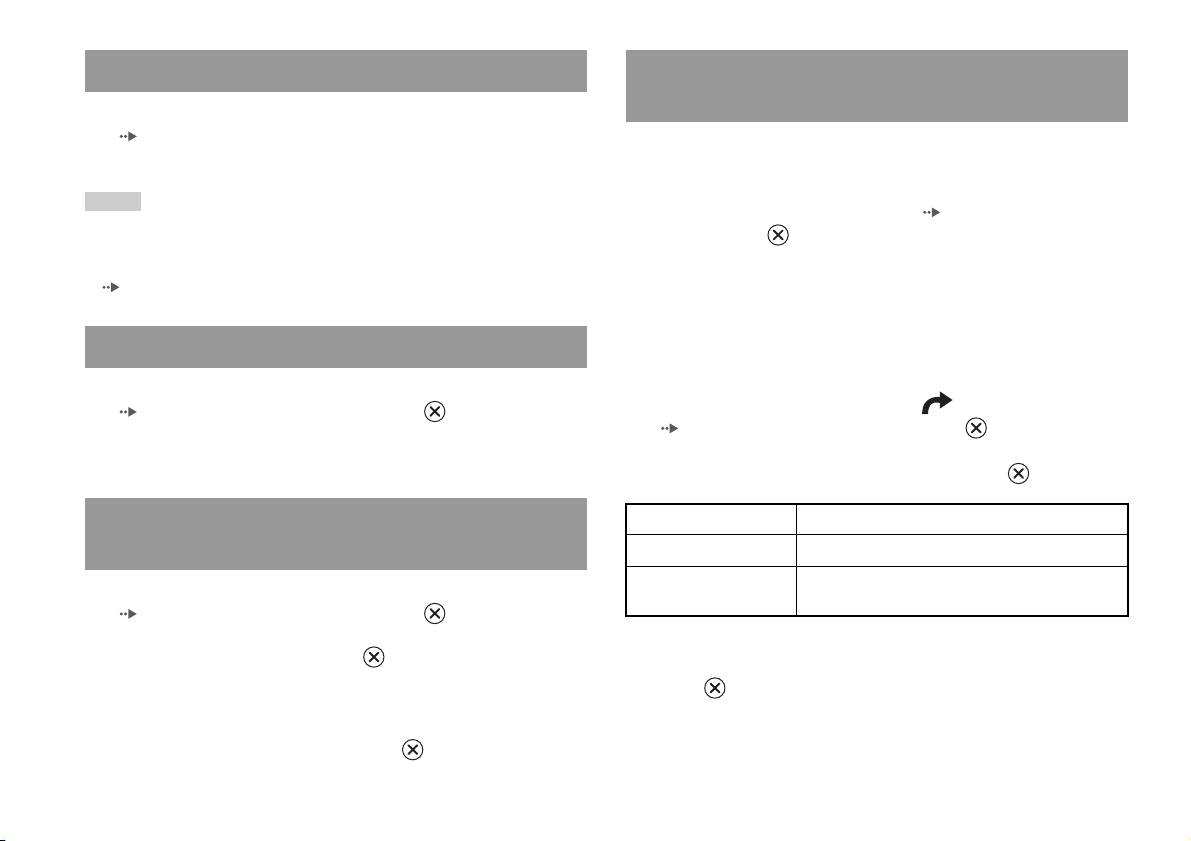
Reproduzir um DVD
Seleccionar uma cena específica para
reprodução
1 Ligue a PlayStationTM2 incorporada e insira um disco
( página 7).
Seleccionar uma cena por número de capítulo
Siga os passos 1 a 3 de “Começar um jogo”. A reprodução inicia-se.
1 Durante a reprodução, seleccione o número do capítulo
Notas
pretendido no Painel de Controlo ( página 14) e a seguir
• Caso ligue a PlayStationTM2 incorporada depois de inserir um disco, a reprodução
prima o botão .
começa automaticamente.
A reprodução do capítulo seleccionado começa. Se pretender
• Também pode iniciar a reprodução a partir do ecrã da Rotina de pesquisa
( página 28).
reproduzir um capítulo com um número de dígitos único (isto é, de 1
a 9), introduza um zero antes. Por exemplo, introduza como “01”.
Seleccionar uma cena através do número do título, número
Terminar a reprodução do DVD x
do capítulo ou da especificação do tempo
1 Durante a reprodução, seleccione x no Painel de Controlo
1 Durante a reprodução, seleccione no Painel de Controlo
( página 14) e a seguir prima o botão .
( página 14) e a seguir prima o botão .
A reprodução pára. Prima o botão OPEN (abrir) na parte da frente da
PlayStation
TM2 incorporada e, em seguida, retire o disco.
2 Seleccione um item e a seguir prima o botão .
Reproduzir um DVD a partir do último ponto de
Título Especifica o número do título
paragem (Retomar a reprodução)
Capítulo Especifica o número do capítulo
C XX:XX:XX
Especifica o tempo decorrido para o capítulo (ou
1 Durante a reprodução, seleccione x no Painel de Controlo
(ou T XX:XX:XX)
título)
( página 14) e a seguir prima o botão .
2 Seleccione N e prima o botão .
3 Seleccione os números para a cena pretendida e prima o
A reprodução começa a partir do ponto onde parou o disco no passo 1.
botão .
A reprodução do capítulo seleccionado começa.
Para cancelar a função Retomar a reprodução
Após o passo 1, seleccione x e prima o botão .
16
Ver um DVD

Procurar um ponto em particular num DVD
Visualizar informações da reprodução
(Busca)
Pode visualizar informações como o número do título actual ou o tempo
decorrido.
Pode procurar para a frente e para trás para localizar rapidamente um ponto
em particular num DVD.
1 Durante a reprodução, seleccione no Painel de Controlo
( página 14) e a seguir prima o botão .
1 Durante a reprodução, seleccione ou no Painel de
O visor muda conforme mostrado a seguir e sempre que premir o botão
Controlo ( página 14) e a seguir mantenha premido o botão
.
.
A velocidade de busca altera-se conforme é mostrado a seguir quando
Título X Capítulo X Número do título e número do capítulo
premir o botão de direcção para cima ou para baixo enquanto mantém
premido o botão .
Título X Capítulo X C XX:XX:XX Tempo decorrido do capítulo actual
• Busca 3
Título X Capítulo X C - XX:XX:XX Tempo restante do capítulo actual
• Busca 2
• Busca 1
Título X Capítulo X T XX:XX:XX Tempo decorrido do título actual
• Câmara Lenta
Título X Capítulo X T - XX:XX:XX Tempo restante do título actual
PT
DVDs
2 Quando atingir o ponto que pretende, liberte o botão .
(Off)
A reprodução regressa à velocidade normal.
Nota
Para utilizar o Comando Analógico para a Busca durante a reprodução, prima e
mantenha premido o botão L2 ou R2 para começar a busca. Utilize os botões de
direcções para alterar as velocidades. Quando atingir o ponto que pretende, liberte o
L2 ou R2.
Ver um DVD
17
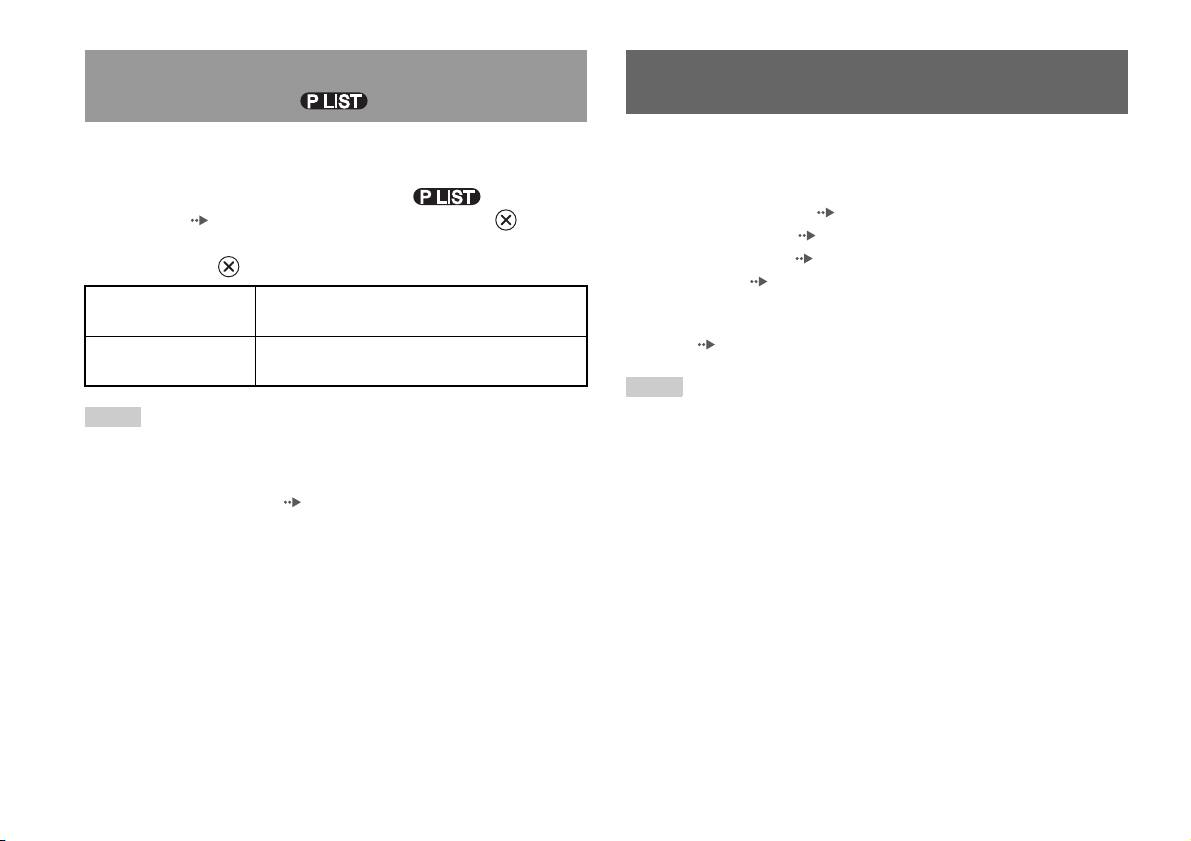
Seleccionar Original ou Play List para a
Utilizar os modos de reprodução
reprodução DVD-RW
Quando utilizar um disco DVD-RW (modo VR), pode seleccionar o tipo
Ao utilizar os vários modos de reprodução, pode reproduzir títulos ou
de título que pretende reproduzir.
capítulos pela ordem que pretender ou repetir a reprodução de uma cena
específica. Existem quatro modos de reprodução:
1 Com a reprodução parada, seleccione no Painel de
• Reprodução Programada ( página 19)
Controlo ( página 14) e a seguir prima o botão .
• Reprodução Aleatória ( página 19)
Original e Play List serão seleccionados alternadamente cada vez que
• Reprodução Repetida ( página 20)
premir o botão .
• A-B Repetição ( página 20)
Original Reproduz o conteúdo na sequência originalmente
gravada
As instruções que se seguem pressupõem a utilização do Painel de
Controlo ( página 14) para utilizar o leitor de DVD.
Play List Reproduz o conteúdo editado. Play List é a
predefinição.
Notas
• Pode reproduzir combinações de Reprodução Programada, Reprodução Aleatória
Notas
e Reprodução Repetida. Note, contudo, que algumas opções da Reprodução
• A Reprodução em câmara lenta (em retrocesso) não se encontra disponível para
Aleatória e da Repetição Repetida podem não estar disponíveis dependendo da
discos DVD-RW (modo VR).
combinação.
• Não é possível utilizar esta função com a função Retomar a reprodução. Cancele a
• A PlayStation
TM2 incorporada reproduz o conteúdo do disco conforme gravado no
função Retomar a reprodução ( página 16) antes de seleccionar esta função.
software do DVD.
18
Utilizar os modos de reprodução

Reprodução Programada Reprodução Aleatória
É possível criar programas para reproduzir títulos e capítulos em qualquer
É possível definir esta opção para reproduzir aleatoriamente todos os
ordem.
títulos ou capítulos gravados num disco. A ordem da reprodução será
diferente cada vez que utilizar a Reprodução Aleatória.
1 Durante a reprodução, seleccione no Painel de
Controlo ( página 14) e a seguir prima o botão .
1 Seleccione no Painel de Controlo ( página 14) e
prima o botão .
2 Seleccione um número de programa e a seguir prima o botão
O visor muda conforme mostrado a seguir e sempre que premir o botão
.
.
Se não tiverem sido definidos quaisquer programas, a única opção será
“1. Título”.
Selecção
Reproduz títulos aleatoriamente
aleatória de
títulos
3 Seleccione o número do título e a seguir prima o botão .
Selecção
Reproduz capítulos aleatoriamente
aleatória de
4 Seleccione o número do capítulo e a seguir prima o botão .
capítulos
PT
Para reproduzir todos os capítulos, seleccione “Todas”. Repita os
DVDs
passos 2 a 4 para definir outros títulos ou capítulos.
Selecção
Cancela a Reprodução Aleatória
aleatória: off
5 Prima o botão START (iniciar).
A Reprodução Programada inicia-se.
2 Seleccione N e prima o botão .
Nota
A definição só será apagada depois de a Reprodução Programada terminar.
Utilizar os modos de reprodução
19
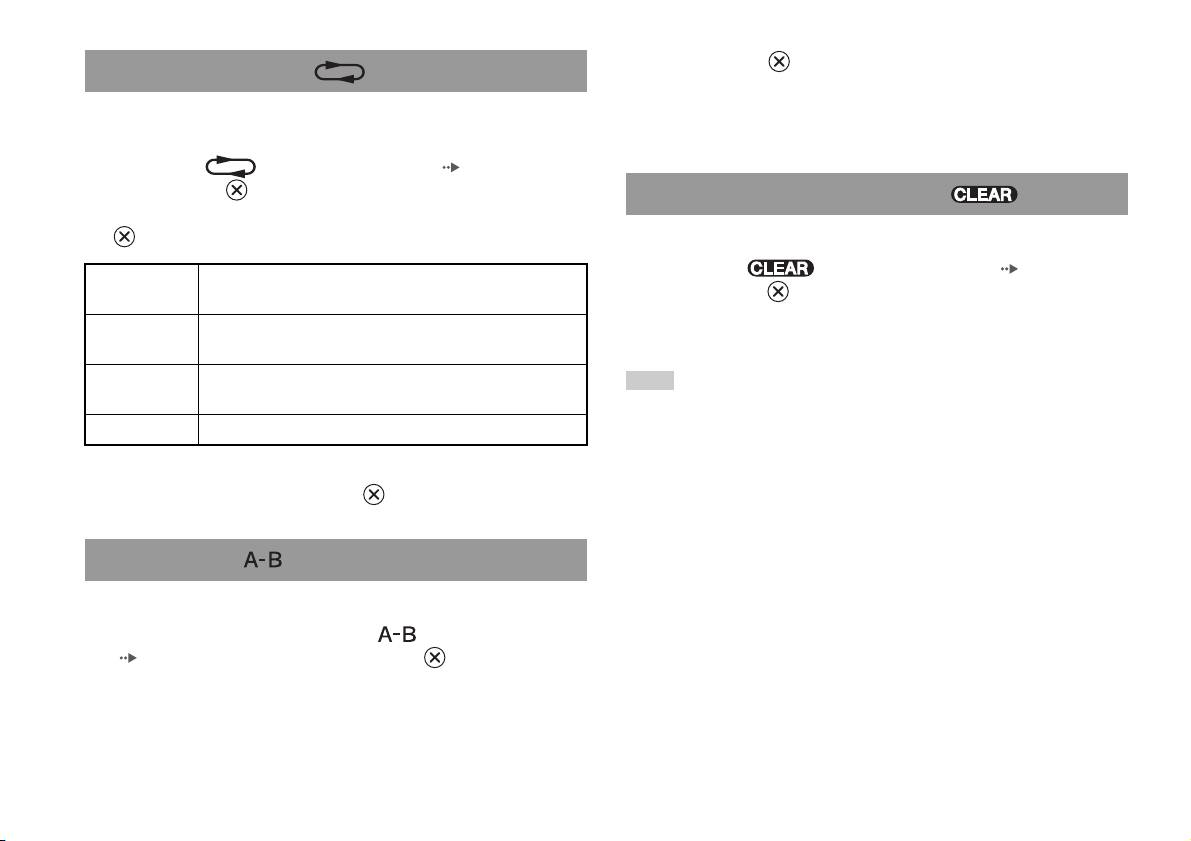
2 Prima o botão no ponto em que pretende terminar a
Reprodução Repetida
reprodução repetida.
É possível definir esta opção para reproduzir títulos ou capítulos
O ponto final (ponto B) é definido e a reprodução repetida da secção
repetidamente.
A até à secção B começa.
1 Seleccione no Painel de Controlo ( página 14) e
prima o botão .
Cancelar modos de reprodução
O visor muda conforme mostrado a seguir e sempre que premir o botão
.
Cancela os modos de reprodução para permitir a reprodução normal.
1 Seleccione no Painel de Controlo ( página 14) e
Repetição do
Repete a reprodução de todos os títulos
prima o botão .
disco
É visualizada a mensagem “Escolhas limpas” e a PlayStationTM2
Repetição de
Repete a reprodução de um título
incorporada regressa à reprodução normal.
título
Repetição de
Repete a reprodução de um capítulo
Nota
capítulo
Se tiverem sido definidos vários modos de reprodução numa combinação, todos os
Repetição: Off Cancela a Reprodução Repetida
modos de reprodução são cancelados.
2 Seleccione N e prima o botão .
A-B Repetição
É possível definir uma cena específica para ser reproduzida repetidamente.
1 Durante a reprodução, seleccione no Painel de Controlo
( página 14) e a seguir prima o botão no ponto em que
pretende iniciar repetidamente a reprodução.
O ponto de início (ponto A) é definido.
20
Utilizar os modos de reprodução
3 Seleccione o item pretendido e a seguir prima o botão .
Ajustar as definições do leitor de
A opção do menu fica activada e pode ser seleccionada.
DVD
4 Seleccione a definição desejada e depois prima o botão .
A definição do item é concluída. Para mais detalhes, consulte as
instruções para cada item ( páginas 21 até 27).
Pode utilizar o Painel de Controlo para ajustar as definições do leitor de
DVD, tais como o idioma para as legendas, o idioma do som e o nível de
Notas
Controlo Paternal.
• As programações predefinidas para cada item do menu estão sublinhadas nas
explicações abaixo.
Notas
• Para regressar ao Painel de Controlo depois de efectuar as definições, prima o
• Alguns DVDs não suportam todas as definições. A PlayStationTM2 incorporada
botão SELECT (seleccionar).
reproduz o conteúdo do disco conforme gravado no software do DVD. Se o DVD
• As definições são guardadas ao efectuar uma das seguintes operações:
não suportar as funções enumeradas, não será possível alterar as definições.
– Parar a reprodução (incluindo a paragem da função Retomar a reprodução)
• As funções que se seguem não se encontram disponíveis durante a reprodução ou
– Abrir a tampa do disco
a função Retomar a reprodução. Cancele a função Retomar a reprodução
( página 16) antes de alterar estas definições.
PT
– “Menu”, “Áudio” e “Legendas” em Selecção de idioma
DVDs
– “Formato Ecrã” e “Modo Scan Progressivo” em Configurar Ecrã
Configurar opções de idioma
– “Controlo Paternal” em Configuração personalizada
Em “Selecção de idioma” pode escolher o idioma para o menu do DVD,
– “DTS” e “Modo de selecção de Faixa de Som” em Áudio
som e legendas. Note que se seleccionar um idioma que não se encontre
gravado no DVD, um dos idiomas gravados é automaticamente
Pode alterar as definições do leitor de DVD através do seguinte
seleccionado.
procedimento:
1 Seleccione no Painel de Controlo ( página 14) e prima
Menu Selecciona o idioma para o menu do DVD
o botão .
Áudio Selecciona o idioma para a faixa de som do DVD
A barra do ícone Setup é visualizada.
Legendas Selecciona o idioma para as legendas do DVD
2 Seleccione o ícone para a definição que deseja alterar e
Nota
prima o botão .
Se seleccionar “Áudio/Seguir” para as legendas, o idioma das legendas é
A definição actual para cada item é visualizada.
automaticamente definido para coincidir com o idioma seleccionado para a faixa de
som do DVD.
Ajustar as definições do leitor de DVD
21

DNR (Digital Noise Reduction)
Configurar as opções de visualização do
Pode utilizar esta configuração para ajudar a reduzir os ruídos da imagem
televisor
no ecrã e produzir uma imagem mais nítida.
No Menu Configurar Ecrã, pode configurar o tamanho do ecrã (relação de
Off DNR não é utilizada.
aspecto) e outras opções que afectam a qualidade da imagem.
DNR1 Aumenta a qualidade da imagem
Formato Ecrã
DNR2 Aumenta a qualidade da imagem (máximo)
Pode configurar a relação de aspecto para coincidir com o formato do ecrã.
Notas
16:9 Formato do Ecrã: Expandido
• “DNR2” é mais eficaz para reduzir o ruído da imagem do que “DNR1”, mas em
alguns casos poderá aparecer uma imagem residual. Se isto ocorrer, seleccione
“Off
”.
• A função DNR poderá produzir resultados limitados em alguns DVDs.
• Quando o “Modo Scan Progressivo” é definido para “On”, “DNR” é
4:3 LETTER BOX Formato do Ecrã: 4:3
automaticamente desligado e não pode ser ligado.
Esta configuração apresenta uma imagem ampla com
margens nas partes superior e inferior do ecrã.
Avivar Contornos
Pode avivar ou suavizar o contorno da imagem. Quanto mais alto for o
4:3 PAN SCAN Formato do Ecrã: 4:3
valor, mais avivado é o contorno. Normalmente, seleccione “0”.
Esta configuração mostra uma imagem ajustada à altura do
ecrã, cortando as partes na esquerda e na direita que não se
•-2 •-1 •0
•+1 •+2
encaixam.
Nota
Nota
Dependendo do DVD, a função Avivar Contornos pode produzir resultados
Quando configura “Modo Scan Progressivo” para “On”, o “Formato Ecrã” é
limitados.
automaticamente definido para “16:9”.
22
Ajustar as definições do leitor de DVD

Visor
Durante a reprodução, pode visualizar informações sobre o estado de
Configurar opções personalizadas
reprodução no canto superior direito do ecrã durante alguns segundos.
Modo de Pausa
On As informações sobre o estado da reprodução são visualizadas durante
Pode seleccionar esta opção para definir o estado de uma imagem no modo
alguns segundos.
de pausa.
Off As informações sobre o estado da reprodução não são visualizadas.
Auto Uma imagem contendo elementos em movimento é visualizada sem
tremor. Seleccione normalmente esta posição.
Modo Scan Progressivo
Fotograma Uma imagem sem elementos em movimento pode ser visualizada em
Pode visualizar uma imagem na qual a imagem actualiza todas as linhas de
alta resolução.
uma vez. Na maior parte dos casos, isto resulta numa imagem mais nítida,
sem cintilação.
Controlo Paternal
Em algumas regiões, é possível restringir a visualização do conteúdo de
On Scan progressivo (480p)*
alguns DVDs com base na idade do utilizador ou outros factores. É
Off
Scan entrelaçado
possível utilizar a função Controlo Paternal para limitar o nível do
conteúdo que pode ser visualizado na sua PlayStation
TM2 incorporada.
PT
* O modo scan progressivo do leitor de DVD só se encontra disponível durante a
DVDs
Quanto mais baixo for o valor, maior será a limitação.
reprodução de um disco gravado no formato NTSC e visualizado num televisor
que suporte o modo scan progressivo (480p).
Definir o Controlo Paternal
Notas
1 Seleccione “Controlo Paternal” e a seguir prima o botão .
• Os DVDs podem conter materiais baseados em vídeo ou filme, que utilizam
Aparece o ecrã para registar um código. Se já tiver sido registado um
diferentes frequências de imagem. Quando reproduzir materiais baseados em vídeo
código, aparece o ecrã para confirmar o código.
utilizando o modo scan progressivo, algumas imagens vídeo podem não parecer
naturais. Se isto ocorrer, defina o “Modo Scan Progressivo” para “Off
” e visualize
no modo entrelaçado normal.
2 Seleccione um número e a seguir prima o botão .
• Quando define o “Modo Scan Progressivo” para “On”, o “Formato Ecrã”
Repita o passo 2 para introduzir um código de quatro dígitos. Se
( página 22) é automaticamente ajustado para “16:9”.
pretender apagar um número, prima o botão . Quando registar um
• O conteúdo de um disco DVD-RW (modo VR) só pode ser visualizado no formato
código, é-lhe pedido para o introduzir novamente para confirmação.
entrelaçado normal. A opção “Modo Scan Progressivo” não se encontra disponível
quando reproduzir um conteúdo desse tipo.
3 Seleccione “Região” e a seguir prima o botão .
A lista de opções de região é visualizada.
Ajustar as definições do leitor de DVD
23

Lista de códigos de região
4 Seleccione a região para a base do nível de Controlo Paternal
Para introduzir um código de região de Controlo Paternal, seleccione
e prima o botão .
“Outros” no passo 4 de “Definir o Controlo Paternal” ( página 23).
Se seleccionar “Outros”, consulte “Lista de códigos de região”
Utilize os botões de direcções para seleccionar a primeira letra e prima o
(página24).
botão de direcção para a direita. A seguir, seleccione a letra seguinte e
prima o botão .
5 Seleccione “Nível” e a seguir prima o botão .
A lista de opções de nível é visualizada.
Região Código Região Código
Alemanha DE Itália IT
6 Seleccione um nível de limitação e a seguir prima o botão
.
Áustria AT Luxemburgo LU
Bélgica BE Malta MT
Para apagar o Controlo Paternal
Com a reprodução do DVD parada, vá para o passo 6 em “Definir o
Dinamarca DK Noruega NO
Controlo Paternal” e defina o “Nível” para “Off
”.
Eslováquia SK Polónia PL
Espanha ES Portugal PT
Finlândia FI Reino Unido GB
França FR República Checa CZ
Grécia GR Rússia RU
Holanda NL Suécia SE
Irlanda IE Suíça CH
Israel IL Turquia TR
Alterar o seu código
No passo 2 em “Definir o Controlo Paternal” ( página 23), efectue os
passos seguintes:
24
Ajustar as definições do leitor de DVD
1 Através dos botões de direcções, seleccione “Alterar
• Se não configurar um código, não pode alterar as definições do Controlo Paternal.
código” e prima o botão .
• Alguns DVDs com a função de Controlo Paternal não permitem a utilização de
modos de reprodução ( páginas 18 até 20).
Aparece o ecrã para alterar o código.
2 Seleccione um número e a seguir prima o botão .
Definir opções de som
Repita o passo 2 para introduzir um código de quatro dígitos. É-lhe
pedido para introduzir novamente o código para confirmação.
ÁUDIO SAÍDA DIGITAL
Cancelamento temporário das limitações de controlo paternal
É possível comutar o método de saída do sinal de áudio quando ligar os
seguintes dispositivos de áudio ao conector DIGITAL OUT (OPTICAL).
1 Iniciar a reprodução do DVD ( página 16).
Ser-lhe-á pedido para alterar temporariamente o nível de Controlo
Paternal para permitir a reprodução. Isto normalmente acontece
Avisos
automaticamente durante o arranque do disco, mas também pode
Se a PlayStationTM2 incorporada se encontra ligada a um dispositivo de áudio
acontecer em momentos diferentes, dependendo do DVD.
sem descodificador de Dolby Digital, DTS ou MPEG, defina “Dolby Digital”,
“DTS” e “MPEG” para “Off
”. Se definir estas opções para “On” sem o
descodificador necessário, pode não obter som ou pode ser emitido um som
2 Através dos botões de direcções, seleccione “Sim” e prima o
extremamente alto.
PT
botão .
DVDs
O ecrã para introduzir o código é visualizado.
DIGITAL OUT (OPTICAL)
Esta opção define o tipo de saída para o conector DIGITAL OUT
3 Seleccione um número e a seguir prima o botão .
(OPTICAL).
Repita o passo 3 para introduzir o código de quatro dígitos. Depois de
introduzir o código, a reprodução começa. Quando a reprodução do
On Seleccione esta opção se pretender que o som (sinal de áudio) seja
DVD é parada, o nível de Controlo Paternal retorna à definição
emitido através do conector DIGITAL OUT (OPTICAL).
original.
As definições para “Dolby Digital”, “DTS” e “MPEG” são
visualizadas.
Notas
Off Seleccione esta opção se não pretender que o som seja emitido através
• Se se esqueceu da palavra-passe, insira um DVD sem a funcionalidade do controlo
do conector DIGITAL OUT (OPTICAL).
paternal. No painel de controlo, seleccione x (Parar) para parar a reprodução e, em
As definições para “Dolby Digital”, “DTS” e “MPEG” não são
seguida, seleccione x (Parar) novamente para apagar o regresso à reprodução.
visualizadas.
Seleccione “Configuração:” e, em seguida, seleccione “Controlo Paternal” em
“Configuração personalizada”, depois carregue no botão . Carregue no botão
SELECT no Comando Analógico e, em seguida, introduza o número “7444”.
Ajustar as definições do leitor de DVD
25
Dolby Digital
MPEG
Esta opção define o sinal Dolby Digital como o sinal de saída para o
Esta opção define o sinal MPEG AUDIO como o sinal de saída para o
conector DIGITAL OUT (OPTICAL).
conector DIGITAL OUT (OPTICAL).
On Seleccione esta opção se a PlayStation
TM2 incorporada estiver ligada
On Seleccione esta opção se a PlayStationTM2 incorporada estiver ligada
a um dispositivo de áudio que tenha um descodificador Dolby Digital
a um dispositivo de áudio que tenha um descodificador MPEG
incorporado.
incorporado.
Off
Seleccione esta opção se a PlayStationTM2 incorporada estiver ligada
Off
Seleccione esta opção se a PlayStationTM2 incorporada estiver ligada
a um dispositivo de áudio que não tenha um descodificador Dolby
a um dispositivo de áudio que não tenha um descodificador MPEG
Digital incorporado.
incorporado.
DTS
Modo de selecção automática de faixa de som
Esta opção define o sinal DTS como o sinal de saída para o conector
Esta definição dá prioridade à faixa de som que contém o maior número de
DIGITAL OUT (OPTICAL).
canais quando reproduzir um DVD no qual se encontram gravados vários
formatos de áudio (PCM, Dolby Digital, DTS ou MPEG). Se PCM, Dolby
On Seleccione esta opção se a PlayStation
TM2 incorporada estiver ligada
Digital, DTS e MPEG possuírem o mesmo número de canais, a
a um dispositivo de áudio que tenha um descodificador DTS
PlayStation
TM2 incorporada selecciona faixas de som PCM, Dolby Digital,
incorporado.
DTS e MPEG nessa ordem.
Off
Seleccione esta opção se a PlayStationTM2 incorporada estiver ligada
On Prioridade dada.
a um dispositivo de áudio que não tenha um descodificador DTS
incorporado.
Off
Prioridade não dada.
Notas
• Se definir “DTS” para “Off
” em “ÁUDIO SAÍDA DIGITAL” ( página 26), a
faixa de som DTS não é reproduzida.
• Dependendo do DVD, o canal de áudio com prioridade pode ser predeterminado.
Neste caso, a faixa de som será seleccionada com base na ordem de prioridade do
DVD.
26
Ajustar as definições do leitor de DVD

Volume do DVD
Pode definir esta opção se o nível de saída do som do DVD for baixo. Só
pode definir esta função quando “DIGITAL OUT (OPTICAL)” estiver
definido para “Off
” em “ÁUDIO SAÍDA DIGITAL” (página25).
+2 Aumenta o volume (máximo)
+1 Aumenta o volume
Standard
Seleccione normalmente esta opção.
Avisos
Se definir esta opção para “+1” ou “+2”, o som pode ficar distorcido. Se isto
acontecer, altere a definição para “Standard”. Tenha também em atenção que se
definir o volume para demasiado alto, pode prejudicar a sua audição ou
danificar as colunas.
PT
DVDs
Ajustar as definições do leitor de DVD
27
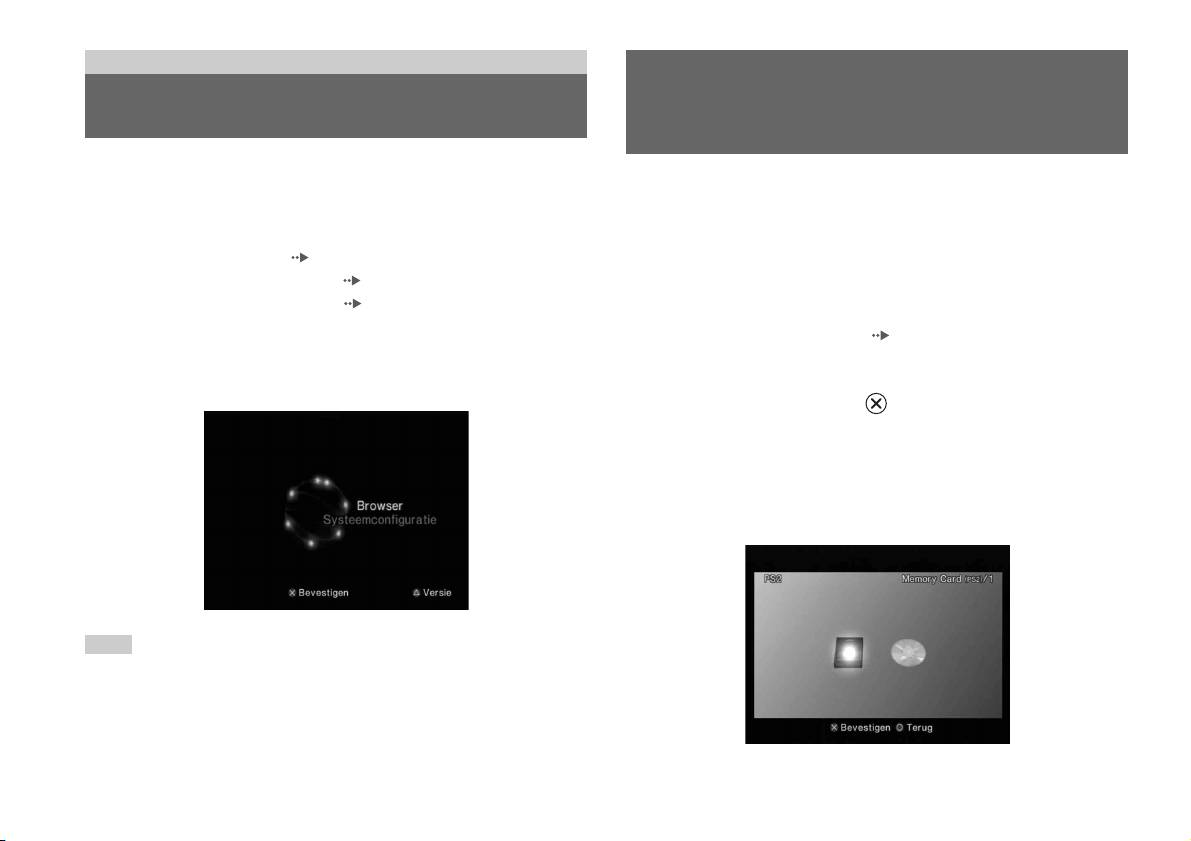
Menu principal
Utilizar o ecrã Rotina de
Visualizar o menu principal
pesquisa
A partir do menu principal, pode aceder às informações e alterar várias
definições. Também é possível deslocar-se para os seguintes ecrãs a partir
Pode efectuar as seguintes operações a partir do Ecrã Rotina de pesquisa:
do menu principal. O menu principal é visualizado quando liga a
• Copiar ou eliminar dados de jogos guardados num Memory Card (Cartão
PlayStation
TM2 incorporada sem um disco inserido.
de Memória)
• Ecrã de Rotina de pesquisa ( página 28)
• Iniciar um jogo
• Menu da Configuração do Sistema ( página 29)
• Iniciar a reprodução de um CD áudio
• Menu Informações Sobre a Versão ( página 32)
• Iniciar a reprodução de um DVD
1 Prima PlayStation 2 POWER ON no telecomando do televisor.
1 Visualize o menu principal ( página 28).
O menu principal é visualizado. Note que pode demorar algum tempo
até o menu principal ser visualizado.
2 Através dos botões de direcções, seleccione “Rotina de
pesquisa” e prima o botão .
Aparece o ecrã da Rotina de pesquisa.
3 Insira um disco ou um Memory Card (Cartão de Memória).
O ícone para o item inserido será visualizado no ecrã Rotina de
Pesquisa.
\
Nota
Se premir PlayStation 2 POWER ON no telecomando do televisor com um disco
inserido, o menu principal não será visualizado. Para visualizar o menu principal,
prima o botão OPEN (abrir) na parte da frente da PlayStation
TM2 incorporada e retire
o disco. A seguir, prima PlayStation 2 POWER ON no telecomando do televisor.
28
Visualizar o menu principal

4 Seleccione um ícone e a seguir prima o botão .
• Quando seleccionar o ícone do Memory Card (Cartão de Memória),
Utilizar o menu Configuração do
os ícones para os dados guardados no Memory Card (Cartão de
Memória) são visualizados. Para copiar ou eliminar os dados
Sistema
guardados, consulte “Copiar ou eliminar dados de jogos”
( página 11).
A partir do menu Configuração do Sistema, é possível alterar as definições
• Se seleccionar o ícone para um disco de software do formato
para inúmeras opções, incluindo o idioma ou a visualização da hora e o
PlayStation
TM2 ou PlayStationTM, o jogo começa.
método de saída áudio ou vídeo.
• Se seleccionar o ícone para um CD áudio, as faixas contidas no CD
são visualizadas. Consulte “Reproduzir um CD áudio”
1 Visualize o menu principal ( página 28).
( página 12).
• Se seleccionar o ícone de um DVD, a reprodução do DVD vai
2 Através dos botões de direcções, seleccione “Configuração
começar.
do Sistema” e prima o botão .
O menu Configuração do Sistema é visualizado.
Nota
A mensagem “Não há dados” é visualizada no ecrã Rotina de pesquisa quando não
existe qualquer Memory Card (Cartão de Memória) ou disco inserido na
PT
PlayStation
TM2 incorporada.
Menu principal
3 Seleccione um item e a seguir prima o botão .
A opção do menu fica activada e pode ser seleccionada.
4 Seleccione a definição desejada e depois prima o botão .
Para mais detalhes, consulte as instruções para cada item do menu
( páginas 30 até 31).
Utilizar o menu Configuração do Sistema
29
Notas
Dimensões do Ecrã
• As programações predefinidas para cada item do menu estão sublinhadas nas
explicações abaixo.
É possível ajustar o modo de visualização para o televisor.
• As alterações a cada programação são guardadas e permanecem em vigor, mesmo
quando desliga ou reinicia a PlayStation
TM2 incorporada.
4:3
Completo*
Ajuste do Relógio
16:9
É possível ajustar a data e a hora. Utilize os botões de direcções para
* O modo de visualização “Completo” é compatível com o menu Configuração do
ajustar o “Ano”, “Mês”, “Dia”, “Hora”, “Minutos” e “Segundos”. A
Sistema, o ecrã Rotina de pesquisa e o ecrã CD áudio.
definição entra em vigor quando premir o botão .
Definições opcionais
DIGITAL OUT (OPTICAL)
Se premir o botão no ecrã “Ajuste do Relógio”, pode ajustar opções
Pode programar a saída do sinal através do conector DIGITAL OUT
como “Notação de data” ou “Notação de hora”. Utilize os botões
(OPTICAL).
direccionais e o botão para efectuar cada programação.
On Seleccione esta opção se pretender a saída do sinal
Notação de hora Programa o relógio do sistema para a visualização de
através do conector DIGITAL OUT (OPTICAL).
12 horas ou 24 horas
Off Seleccione esta opção se não pretender a saída do
Notação de data Programa a ordem de visualização de ano, mês e dia
sinal através do conector DIGITAL OUT
Zona horária Programa a zona horária
(OPTICAL).
Horário de Verão Programa o Horário Normal ou o Horário de Verão.
Normalmente, seleccione “Horário Normal”.
30
Utilizar o menu Configuração do Sistema
Controlo Remoto
Idioma
Pode programar esta opção quando utilizar o Controlo Remoto de DVD
Pode utilizar esta função para seleccionar o idioma visualizado no menu
(para PlayStation
TM2) (vendido separadamente).
principal, ecrã Rotina de Pesquisa, menu Configuração do Sistema e ecrã
Informações Sobre a Versão.
Função Jogar On Seleccione esta opção quando operar software do
formato PlayStation
TM2 ou PlayStationTM, utilizando
Inglês Visualiza mensagens em Inglês
o Controlo Remoto de DVD.
Francês Visualiza mensagens em Francês
Função Jogar Off Seleccione esta opção quando não operar software do
formato PlayStation
TM2 ou PlayStationTM, utilizando
Espanhol Visualiza mensagens em Espanhol
o Controlo Remoto de DVD.
Alemão Visualiza mensagens em Alemão
Italiano Visualiza mensagens em Italiano
Nota
As limitações que se seguem aplicam-se quando o Controlo Remoto de DVD é
Holandês Visualiza mensagens em Holandês
utilizado com a “Função Jogar On”:
Português Visualiza mensagens em Português
– Dependendo do software, alguns botões do controlo remoto podem não
funcionar correctamente.
PT
– Os botões do Controlo Remoto de DVD não funcionam quando dois ou mais
Menu principal
botões são premidos ao mesmo tempo.
– Alguns títulos de software podem deixar de funcionar correctamente quando um
comando é removido da porta do comando 1. Se isto acontecer, programe para
“Função Jogar Off ”.
Utilizar o menu Configuração do Sistema
31
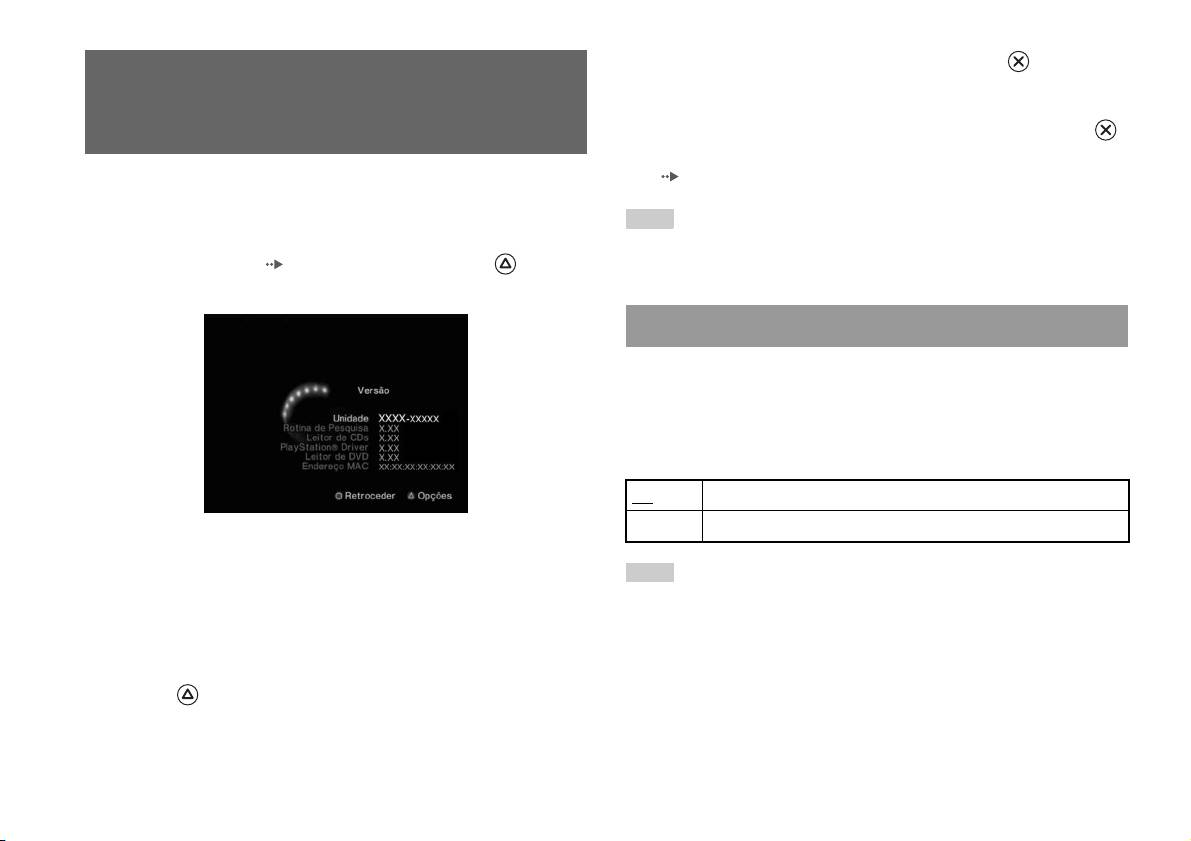
2 Seleccione um item e a seguir prima o botão .
Utilizar o ecrã Informações Sobre
As opções disponíveis são visualizadas.
a Versão
3 Seleccione a definição desejada e depois prima o botão .
Para mais detalhes, consulte as instruções para cada item
( páginas 32 até 34).
Através da selecção desta opção, é possível verificar as informações sobre
a versão de vários componentes da PlayStation
TM2 incorporada. Também
Nota
pode alterar definições opcionais para alguns itens.
As programações predefinidas para cada item do menu estão sublinhadas nas
1 No menu principal ( página 28), prima o botão .
explicações abaixo.
O ecrã Informações Sobre a Versão é visualizado.
Unidade
A PlayStationTM2 incorporada ajusta automaticamente as suas definições
internas para uma reprodução óptima. Quando “Diagnóstico” está ajustado
para “On”, a PlayStationTM2 incorporada efectua definições adicionais.
Diagnóstico
Off O Diagnóstico está desligado.
On O Diagnóstico está ligado.
Definições opcionais
As definições opcionais encontram-se disponíveis para “Unidade”,
Nota
“PlayStation
® Driver” e “Leitor de DVD”. O “Leitor de DVD” só pode ser
A programação de “Diagnóstico” regressa automaticamente à predefinição nos
programado se a opção “Modo Scan Progressivo” do Leitor de DVD
seguintes casos:
estiver ajustada para “On”.
– Quando começa a reprodução de software do formato PlayStation
TM2 ou
PlayStation
TM
1 Através dos botões de direcções, seleccione um item e prima
– Quando a PlayStationTM2 incorporada é reiniciada
o botão .
– Quando a PlayStation
TM2 incorporada é desligada
A definição actual para o item é visualizada.
32
Utilizar o ecrã Informações Sobre a Versão
PlayStationTM Driver
Leitor de DVD
Pode ajustar o programa PlayStationTM Driver para optimizar o
Se ajustar o “Modo Scan Progressivo” para “On” quando a PlayStationTM2
desempenho do software do formato PlayStation
TM.
incorporada estiver ligada a um televisor sem o equipamento necessário, a
qualidade da imagem pode ser reduzida ou a imagem pode não ser
Nota
visualizada. Pode apagar a definição “Modo Scan Progressivo”, seguindo
As definições regressam automaticamente às predefinições nos seguintes casos:
o procedimento em baixo.
– Quando a PlayStation
TM2 incorporada é desligada
Retire o DVD antes de apagar a definição.
Velocidade do Disco
Apagar Ajuste Modo Scan Progressivo
Normal Carrega discos à velocidade normal
Não Deixa a definição “Modo Scan Progressivo” activada
Rápido Carrega discos a grande velocidade
Sim Apaga a definição “Modo Scan Progressivo”
Nota
1 Visualize o ecrã Informações Sobre a Versão.
Defina para “Normal” nos seguintes casos:
PT
– Quando o carregamento rápido não produz resultados melhores
Menu principal
2 Através dos botões de direcções, seleccione “Leitor de DVD”
– Quando utilizar um software que não seja compatível com o carregamento
e prima o botão .
rápido
A opção “Apagar Ajuste Modo Scan Progressivo” é visualizada.
Técnica de 3D “Texture Mapping”
3 Prima o botão .
Standard
Visualiza normalmente
4 Seleccione “Sim” e, de seguida, prima o botão .
Suave Visualiza com ruído reduzido nas imagens
5 Prima duas vezes o botão .
Nota
O ecrã regressa ao menu principal.
Defina para “Standard” nos seguintes casos:
– Quando a técnica de 3D suave não produz resultados melhores
6 Prima o botão OPEN (abrir) na parte da frente da
– Se a imagem não é correctamente visualizada quando definida para “Suave”
PlayStation
TM2 incorporada e coloque um DVD na
PlayStation
TM2 incorporada.
Utilizar o ecrã Informações Sobre a Versão
33

7 Feche a tampa do disco.
A reprodução inicia-se.
Nota
A definição não será apagada se 1) não iniciar um DVD após o passo 4 ou 2) reiniciar
ou desligar a PlayStation
TM2 incorporada antes do passo 6.
34
Utilizar o ecrã Informações Sobre a Versão

Ligação em rede
Ligar com um cabo Ethernet
Ligar a uma rede
Pode ligar a PlayStationTM2 incorporada a uma rede, utilizando um cabo
Ethernet ligado ao conector NETWORK na parte traseira. Pode ligar a uma
rede 100 Base-TX ou 10 Base-T. Consulte as instruções fornecidas com o
Pode apreciar jogos online, ligando a PlayStationTM2 a uma rede de banda
dispositivo de rede para mais detalhes.
larga. Para jogar jogos online, precisa do seguinte:
• Um jogo PlayStation
TM2 compatível com rede
Configuração de rede básica
• Serviço de Internet de banda larga
Linha de rede
• Um cabo Ethernet disponível no mercado
• Um memory card (cartão de memória) (8 MB) (para PlayStation
TM2)
PC
(vendido separadamente)
Notas
Modem de banda larga,
router, etc.
• Não pode jogar jogos online, utilizando uma ligação de acesso telefónico ou ISDN.
• Não é suportada uma ligação USB ao dispositivo de rede externo.
Equipamento de rede Cabo Ethernet
PT
• Existem dois tipos de cabo Ethernet: cabo directo e cabo cruzado. Certifique-se de
(não fornecido)
que utiliza o tipo de cabo correcto ao ligar a PlayStation
TM2 à sua ligação de
Ligação em rede
Internet de banda larga. Consulte o manual de instruções do dispositivo de rede ou
Linha de rede: Esta varia de acordo com o tipo de serviço de banda larga
o seu fornecedor de acesso Internet de banda larga para mais detalhes.
de sua casa.
• Não ligue à LAN do televisor, utilizando o cabo Ethernet.
Equipamento de rede: O tipo de equipamento utilizado também varia
de acordo com o tipo de serviço.
Nota
Quando ligar a PlayStationTM2 incorporada e um PC à rede, pode ser necessário um
dispositivo de rede, como um router ou um hub. Consulte as instruções fornecidas
com o dispositivo de rede para mais detalhes.
Ligar a uma rede
35

Ligar a PlayStationTM2 incorporada
Notas
• Não ligue o cabo de alimentação CA à tomada eléctrica antes de efectuar todas as
outras ligações.
• Não ligue cabos Ethernet ou cabos de telefone aos seguintes tipos de conector de
PlayStation
TM2 incorporada
rede. Pode passar muita corrente pelo conector e causar mau funcionamento,
aquecimento excessivo ou incêndio no conector:
– Cabos de telefone domésticos
– Cabos Ethernet não adequados a uma rede 10Base-T/100Base-TX
– Qualquer linha de telefone ou dados RDIS (digital)
– Linha de telefone PBX
– Outros tipos de linhas de telefone desconhecidas
Cabo de rede (não fornecido)
Router
Aos dispositivos de rede
Cabo de rede (não fornecido)
Modem DSL/Modem de cabo
Internet
1 Ligue o cabo Ethernet ao conector NETWORK na parte
traseira.
2 Ligue o cabo Ethernet ao dispositivo de rede.
36
Ligar a uma rede

Criar as definições de rede
Após ter ligado um cabo Ethernet à PlayStationTM2 incorporada, precisa de
criar e guardar as definições de rede. Para o fazer, necessita de um disco de
acesso à rede, fornecido ao registar a PlayStationTM2. Pode registar a sua
PlayStation
TM2.
Para criar uma definição de rede, precisa dos seguintes itens:
– Um Memory Card (Cartão de Memória) (8 MB) (para PlayStationTM2) (vendido
separadamente)
– Informação de utilizador e palavra-passe do fornecedor de acesso à Internet de
banda larga
Nota
Dependendo do tipo de serviço Internet utilizado, pode precisar de fornecer ao seu
PT
fornecedor de acesso Internet de banda larga o seu Endereço MAC. Pode encontrar
Ligação em rede
o Endereço MAC para a sua PlayStation
TM2 no ecrã Informações Sobre a Versão
( página 32).
Criar as definições de rede
37

Netwerk
Inhoudsopgave
Aansluiting op een netwerk..........................................................34
Netwerkinstellingen......................................................................36
Voorbereiding
Onderdelen..................................................................................... 3
Aansluiting op digitale audio-apparatuur.......................................5
De controller aansluiten................................................................. 5
De ingebouwde PlayStation
TM2 in- en uitschakelen...................... 6
Spelletjes
Een spel spelen...............................................................................7
Gebruik van Memory Cards (geheugenkaarten)..........................10
Audio-CD's
Een audio-CD afspelen ................................................................ 12
DVD's
Een DVD bekijken....................................................................... 14
Gebruik van de afspeelmodi ........................................................ 18
De DVD-speler instellen..............................................................21
Hoofdmenu
Hoofdmenuweergave ................................................................... 27
Gebruik van het Browser-scherm ................................................ 27
Gebruik van het Systeemconfiguratiemenu................................. 28
Gebruik van het Versie-informatiescherm................................... 31
2
Inhoudsopgave

Voorbereiding
Aansluiten op Beschrijving
3 USB-aansluiting
U kunt verschillende USB-apparaten aansluiten op
Onderdelen
de ingebouwde PlayStation
TM2-console, maar niet
alle apparatuur is compatibel. Raadpleeg de
gebruiksaanwijzing van het USB-apparaat voor
meer informatie.
Ingebouwde PlayStationTM2 voorzijde
Opmerking
U kunt geen foto-, muziek- of videobestanden
afspelen via de USB-aansluiting van de PlayStation.
4 Disc-deksel
Druk op de OPEN-toets en het deksel schuift open.
5 OPEN-toets
Druk hierop om het disc-deksel te openen.
6 "/1 (aan/stand-by)/
Druk hierop om de ingebouwde PlayStationTM2 om
RESET-toets
naar de wachtstand te gaan of om te resetten.
RESET: eenmaal drukken.
Stand-by: langer dan een seconde drukken.
OPEN
7 "/1 (aan/stand-by)-
Dit licht groen op als de ingebouwde PlayStationTM2
NL
indicator
ingeschakeld is.
Voorbereiding
Dit licht rood op als de ingebouwde PlayStation
TM2
zich in de wachtstand bevindt.
Aansluiten op Beschrijving
1 MEMORY CARD
Plaats een memory card ( pagina 11).
(geheugenkaart)-
aansluiting 1/2
2 Controller-aansluiting
Sluit de Analoge Controller (DUALSHOCK®2)
1/2
aan op een controller-aansluiting van de
PlayStation
TM2 ( pagina 5).
Onderdelen
3

Ingebouwde PlayStationTM2 achterzijde
4
Onderdelen
1 2
Aansluiten op Beschrijving
1 LAN
U kunt online games spelen door de PlayStationTM2
aan te sluiten op een breedbandnetwerk
( pagina 34).
Opmerking
Om te genieten van "BRAVIA"-
thuisnetwerkfuncties maakt u verbinding met het
LAN van de TV met behulp van een Ethernet-kabel
( pagina 34).
2 DIGITAL AUDIO OUT
U kunt luisteren naar het geluid van de ingebouwde
(OPTICAL)
PlayStation
TM2 op een thuisbioscoopsysteem dat
aangesloten is via een digitale ingang.
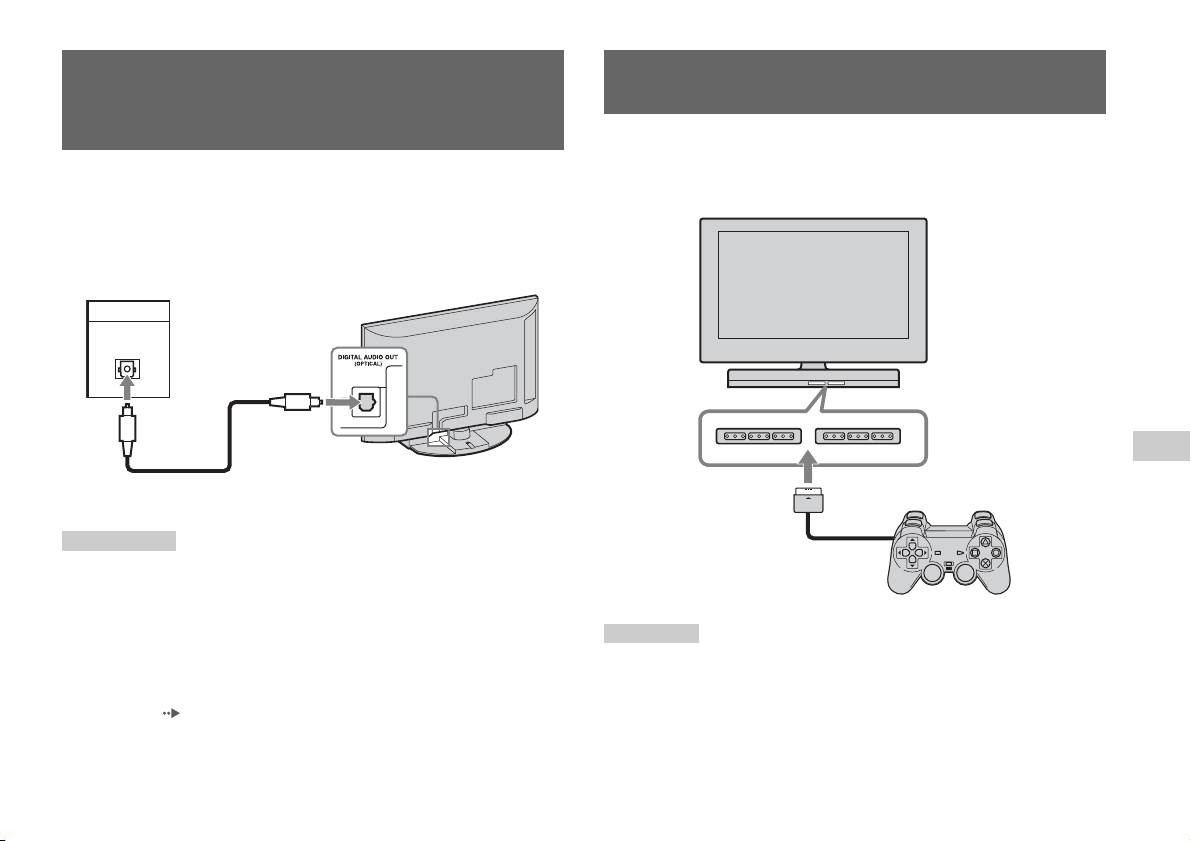
Aansluiting op digitale audio-
De controller aansluiten
apparatuur
1 Sluit de Analoge Controller (DUALSHOCK®2) aan op een
controller-aansluiting van de ingebouwde PlayStation
TM2.
Met behulp van een in de handel verkrijgbare optische digitale kabel kunt
u genieten van surround sound zoals in een bioscoop of concertzaal.
Ingebouwde PlayStationTM2 voorzijde
Raadpleeg de gebruiksaanwijzing van het aangesloten toestel wanneer u de
ingebouwde PlayStation
TM2 aansluit op audio-apparatuur met digitale
aansluitingen.
Aangesloten apparaat
Ingebouwde PlayStationTM2 achterzijde
DIGITAL IN
OPTICAL
NL
Voorbereiding
In de handel verkrijgbare
optische digitale kabel
Opmerkingen
• Wanneer u de ingebouwde PlayStationTM2 met behulp van een optische digitale
Analoge Controller
kabel aansluit op audio-apparatuur, kan dit de audio-uitvoer van bepaalde
(DUALSHOCK
®2)
PlayStation
TM2-software beïnvloeden met als resultaat dat er geen geluid hoorbaar
is. Gebruik als dit gebeurt een kabel zoals een audiokabel (niet meegeleverd) en
sluit hem aan op de AUDIO OUT-uitgang van de TV. Gebruik geen optische
Opmerking
digitale kabel.
Sommige softwaretitels werken met een specifieke controller-aansluiting.
• Zet "DIGITAL OUT (OPTICAL)" in het Systeemconfiguratiemenu op "Aan" na
Raadpleeg de gebruiksaanwijzing van de software voor meer details.
het aansluiten van digitale audio-apparatuur. Voor details, zie "DIGITAL OUT
(OPTICAL)" ( pagina 29).
• De DIGITAL AUDIO OUT (OPTICAL)-aansluiting voert digitale audio uit vanaf
de ingebouwde PlayStation
TM2.
Aansluiting op digitale audio-apparatuur
5

De ingebouwde PlayStationTM2
in- en uitschakelen
1 Druk op PlayStation 2 POWER ON op de afstandsbediening van
de TV om de TV en de PlayStation
TM2 in te schakelen. (De
ingangsmode van de TV wordt automatisch overgeschakeld
naar PlayStation
TM2.)
Opmerkingen
• Als u de TV uitschakelt, wordt de PlayStationTM2 ook uitgeschakeld. De
PlayStation
TM2 wordt ook samen met de TV uitgeschakeld als de onderstaande
functies worden geactiveerd.
– Inactiviteit TV Stand-by
– Sleep Timer
– PC-power management
– Herinnering
– Timer Aan
– Fotokader
• Gebruik de memory card niets als er een waarschuwingsbericht (zoals "de TV
wordt binnenkort uitgeschakeld") verschijnt.
6
De ingebouwde PlayStationTM2 in- en uitschakelen

Spelletjes
Een spel spelen
OPEN
Voor u een spel speelt Een spel starten
NL
Spelletjes
Controleer of de console goed is aangesloten op de TV en audio-
1 Druk op de OPEN-toets om de vergrendeling van het
apparatuur en alle voorzorgsmaatregelen in acht zijn genomen.
disc-deksel vrij te geven.
• "De controller aansluiten" ( pagina 5)
2 Schuif het disc-deksel naar links en plaats vervolgens de
Opmerking
disc met de kant met het label naar boven gericht.
Om online te kunnen spelen, moet u eerst aangesloten zijn op een netwerk. Zie
"Aansluiting op een netwerk" ( pagina 34) voor meer details.
3 Sluit het disc-deksel door het naar rechts te schuiven totdat
het vergrendeld is.
Een spel spelen
7

Opmerkingen
Gebruik van de Analoge Controller
• Zorg ervoor dat het disc-deksel gesloten is wanneer u een disc afspeelt.
• Een spel kan ook worden gestart via het Browser-scherm ( pagina 27).
(DUALSHOCK®2)
• Wanneer de ingebouwde PlayStation
TM2 wordt ingeschakeld nadat een disc werd
ingebracht, start het spel automatisch.
De Analoge Controller (DUALSHOCK
®2) is uitgerust met een
drukgevoelige toetsfunctie. Hij heeft ook een trilfunctie.
Een spel herstarten
Onderdelen
Druk op de \/1 (aan/stand-by)/RESET-toets vooraan op de ingebouwde
PlayStation
TM2. Let op dat u tijdens het spelen niet per ongeluk op de @/1/
RESET-toets drukt, want dan begint het spel opnieuw.
Een spel beëindigen
Druk op de "/1 (aan/stand-by)/RESET-toets op de voorzijde van de
ingebouwde PlayStation
TM2 na het opslaan van de spelgegevens, en
verwijder vervolgens de disc ( pagina 3).
RESET: druk één keer.
Stand-by: druk minstens één seconde.
Toets/schakelaar Beschrijving
1 L2-toets
2 L1-toets
3 SELECT-toets
4 Richtingstoetsen
8
Een spel spelen
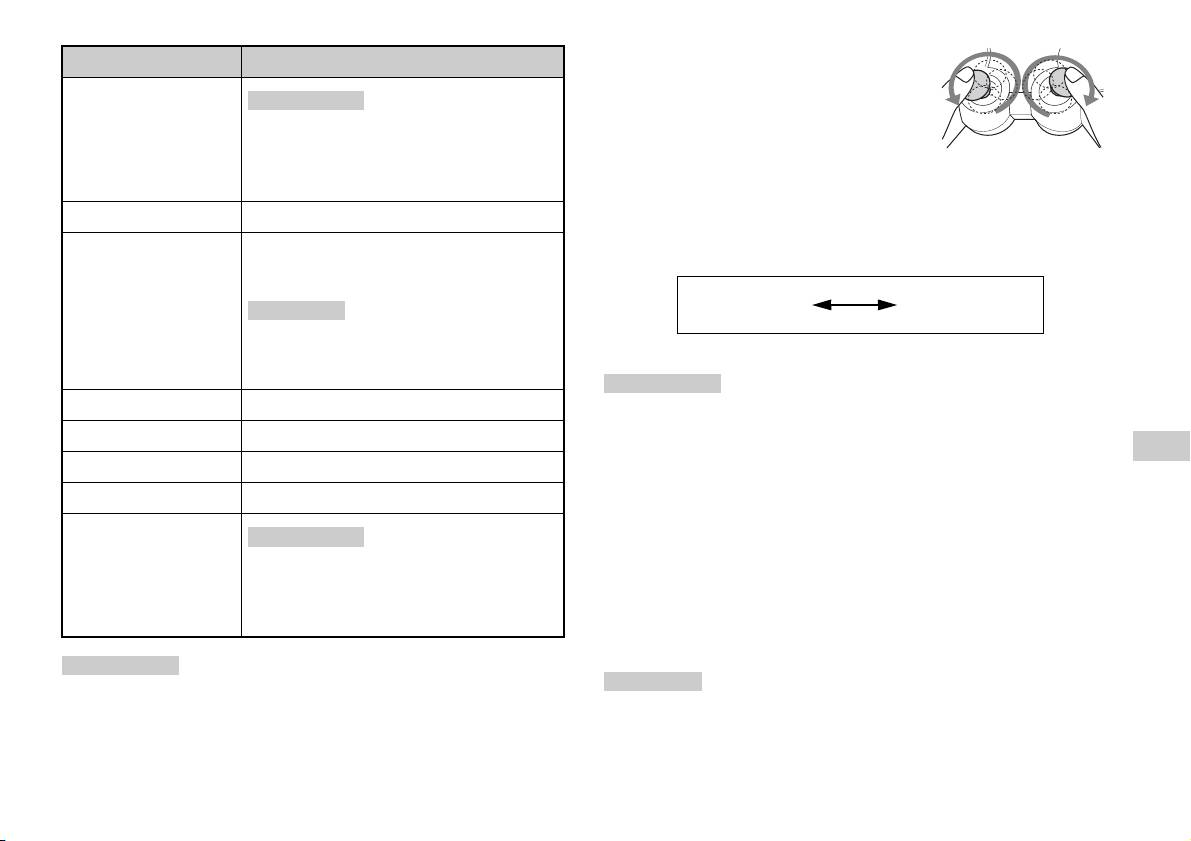
• Voor u de Analoge Controller (DUALSHOCK
®2)
Toets/schakelaar Beschrijving
gaat gebruiken en de ingebouwde PlayStation
TM2 is
5 Linker analoge
ingeschakeld, draait u de linker en rechter analoge
Opmerkingen
joystick/ L3-toets
joysticks eenmaal met de duimen. Verwring de
• De linker analoge joystick en L3-toets werken
analoge joysticks niet maar maak een soepele
alleen in analoge mode (indicator: rood).
cirkelvormige beweging zoals hiernaast afgebeeld.
• De L3-toets werkt alleen als de analoge joystick
ingedrukt is.
Mode kiezen
6 ANALOG-modeknop
Schakelen tussen digitale en analoge mode.
Met de ANALOG-modeknop kan worden omgeschakeld tussen twee
modes. Schakel over naar de geschikte mode. Merk evenwel op dat
7 Mode-indicator
Digitale mode: licht niet op.
sommige software deze instelling automatisch kiest.
Analoge mode: licht rood op.
Digitale mode
Analoge mode
Opmerking
(indicator: uit)
(indicator: rood)
Bij sommige software kan niet tussen modes worden
omgeschakeld, ook al wordt de ANALOG-
modeknop ingedrukt.
Opmerkingen
8 R2-toets
• Wanneer de Analoge Controller in digitale mode wordt gebruikt, werken de linker
en rechter analoge joysticks niet. Ook de drukgevoelige toetsfunctie is dan
9 R1-toets
uitgeschakeld.
NL
q; START-toets
• Bij sommige software kan niet tussen modes worden omgeschakeld, ook al wordt
Spelletjes
de ANALOG-modeknop ingedrukt.
qa f/a/×/s-toetsen
qs Rechter analoge
Analoge bediening
Opmerkingen
joystick/ R3-toets
• Bij het afspelen van software in PlayStationTM2-formaat kunt u alle
• De rechter analoge joystick en R3-toets werken
toetsen gebruiken in de analoge mode, met uitzondering van de
alleen in analoge mode (indicator: rood).
START-, SELECT-, L3- en R3-toetsen.
• De R3-toets werkt alleen als de analoge joystick
ingedrukt is.
• Bij het afspelen van software in PlayStation
TM-formaat werken alleen de
linker en rechter joysticks in de analoge mode.
Opmerkingen
Opmerking
• Bij bepaalde software zijn de beschikbare toetsen in de analoge mode beperkt.
Raadpleeg de gebruiksaanwijzing van de software voor meer details.
Bij sommige software zijn de beschikbare toetsen in de analoge mode beperkt.
• De trilfunctie kan met de software in- of uitgeschakeld worden via het software-
Raadpleeg de gebruiksaanwijzing van de software voor meer details.
optiemenu. Bij bepaalde software wordt de trilfunctie automatisch ingeschakeld.
Een spel spelen
9

Trilfunctie
De trilfunctie kan met de software in- of uitgeschakeld worden via het
Gebruik van Memory Cards
software-optiemenu.
(geheugenkaarten)
Opmerking
Bij sommige software wordt de trilfunctie automatisch ingeschakeld.
Spelgegevens kunnen worden opgeslagen en geladen met behulp van een
Memory Card (geheugenkaart, apart verkrijgbaar). Spelgegevens kunnen
Betreffende het gebruik van de Analoge
ook worden gewist of van de ene Memory Card (geheugenkaart) naar de
andere worden gekopieerd.
Controller (DUALSHOCK®) (SCPH-110 E)
U kunt de Analoge Controller (DUALSHOCK®) (SCPH-110 E)
gebruiken met de ingebouwde PlayStation
TM2 maar de toetsfuncties in de
Soorten Memory Cards (geheugenkaarten)
analoge mode kunnen verschillen van die van de Analoge Controller
Er zijn twee types Memory Cards (geheugenkaarten). Gebruik een
(DUALSHOCK®2). Alleen de linker en rechter analoge joysticks kunnen
geschikte Memory Card (geheugenkaart) voor de software.
in de analoge mode worden gebruikt.
Type Memory Card
Compatibele software Geheugenruimte
Opmerking
(geheugenkaart)
Niet alle software in PlayStationTM2-formaat is compatibel met de Analoge
Controller (DUALSHOCK
®) (SCPH-110 E). Gebruik dan de Analoge Controller
Memory Card
Software in
Ong. 8 MB
(DUALSHOCK
®2).
(geheugenkaart) (8MB)
PlayStation
TM2-formaat
(voor PlayStation
TM2)
(SCPH-10020 E)
Memory Card
Software in
15 geheugenblokken
(geheugenkaart)
PlayStation
TM-formaat
(ong. 120 KB)
(SCPH-1020 E)*
* Dit product wordt niet
langer gefabriceerd.
MagicGate™ is een term voor copyrightbeschermingstechnologie ontwikkeld door
de Sony Corporation.
10
Gebruik van Memory Cards (geheugenkaarten)
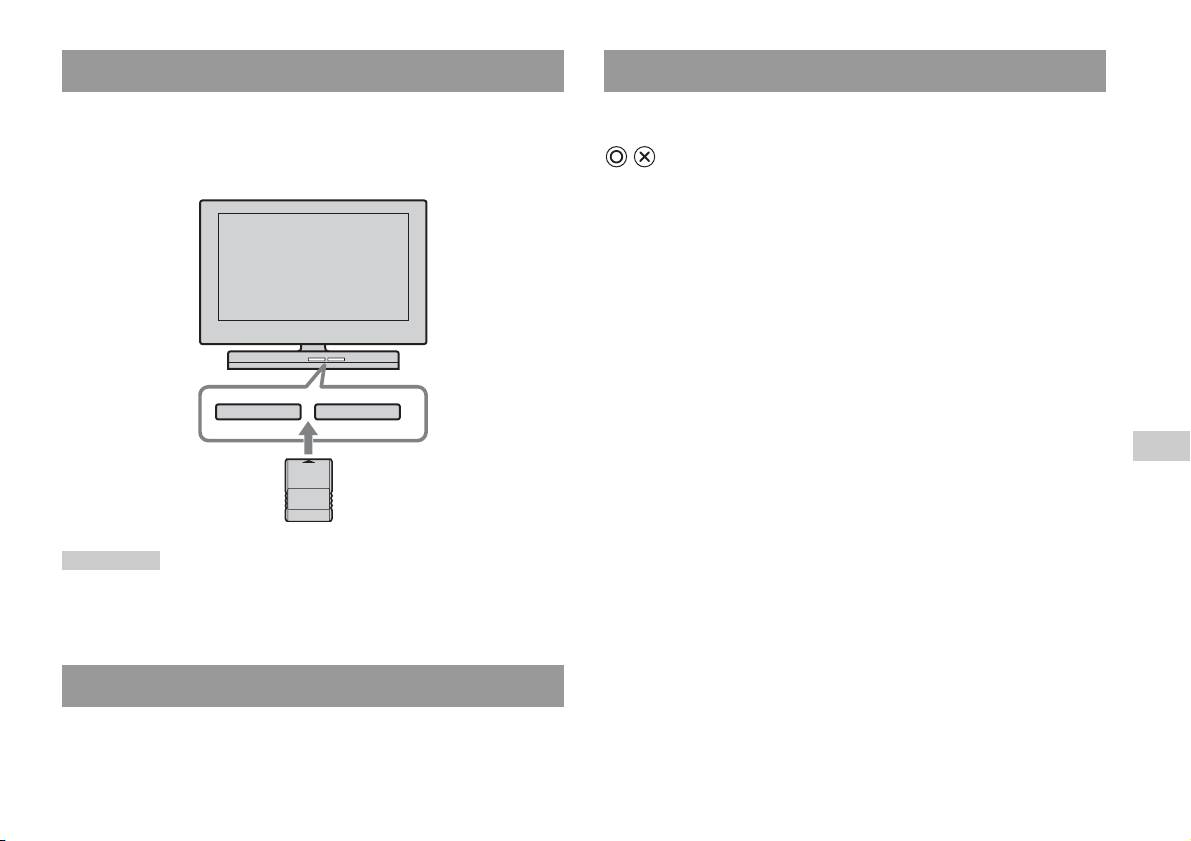
Een Memory Card (geheugenkaart) plaatsen
Spelgegevens kopiëren of wissen
Steek de Memory Card (geheugenkaart) in een MEMORY CARD
U kunt opgeslagen gegevens verwijderen of gegevens naar een andere
(geheugenkaart)-aansluiting aan de voorzijde van de ingebouwde
memory card (geheugenkaart) kopiëren. Gebruik de richtingstoetsen en de
PlayStation
TM2.
-toets van de controller om items te selecteren.
Ingebouwde PlayStationTM2 voorzijde
1 Schakel de ingebouwde PlayStationTM2 in zonder dat er een
disc geplaatst is en plaats vervolgens een memory card
(geheugenkaart).
2 Selecteer "Browser" en selecteer vervolgens de memory card
(geheugenkaart) waarvan of waarnaar u gegevens wilt
kopiëren.
3 Selecteer het pictogram voor het gegevensitem en selecteer
"Kopiëren" of "Verwijderen".
MEMORY CARDMEMORY CARD
4 Volg de instructies die verschijnen op het
NL
instellingenscherm.
Spelletjes
Opmerking
Bij sommige software moet een specifieke MEMORY CARD (geheugenkaart)-
aansluiting worden gebruikt. Raadpleeg de gebruiksaanwijzing van de software voor
meer details.
Spelgegevens opslaan/laden
De procedure voor het opslaan of laden verschilt per software. Raadpleeg
de gebruiksaanwijzing van de software voor meer details.
Gebruik van Memory Cards (geheugenkaarten)
11

Audio-CD's
Bediening van de CD-speler tijdens de weergave
Een audio-CD afspelen
Kies de gewenste track met de richtingstoetsen en druk vervolgens op de
-toets.
Pictogram (toets*) Functie
Een CD afspelen
. (L1-toets) Naar het begin van de huidige of vorige track
1 Schakel de ingebouwde PlayStationTM2 in en plaats de disc
m (L2-toets) Snel achteruit
( pagina 7).
M (R2-toets) Snel vooruit
Verricht stap 1 t/m 3 van "Een spel starten".
De tracknummers verschijnen.
> (R1-toets) Naar het begin van de volgende track
N (START-toets) Afspelen starten
2 Kies het tracknummer dat u wilt beluisteren met behulp van
X (START-toets) Pauzeren
de richtingstoetsen en druk vervolgens op de -toets.
Het afspelen begint.
x (SELECT-toets) Afspelen stoppen
* U bedient de CD-speler rechtstreeks met de toetsen van de Analoge Controller
Opmerkingen
(DUALSHOCK
®2) die tussen haakjes worden weergegeven.
• Wanneer de ingebouwde PlayStationTM2 wordt ingeschakeld nadat een disc werd
ingebracht, verschijnen de tracknummers automatisch.
Opmerking
• De weergave kan ook worden gestart via het Browser-scherm ( pagina 27).
U kunt ook de DVD-Afstandsbediening (voor PlayStationTM2) gebruiken (apart
verkrijgbaar).
Opgelet
Om een audio-CD opgenomen in DTS-indeling te kunnen afspelen, moet u het
Het afspelen van een audio-CD beëindigen
volume volledig stil zetten en vervolgens een apparaat met DTS-decoder
aansluiten op de DIGITAL OUT (OPTICAL)-aansluiting ( pagina 5). Merk
op dat er extreem luid lawaai kan weerklinken.
1 Selecteer x met de richtingstoetsen en druk op de -toets.
De weergave stopt. Druk op de OPEN-toets aan de voorzijde van de
ingebouwde PlayStation
TM2 om de disc te verwijderen.
12
Een audio-CD afspelen
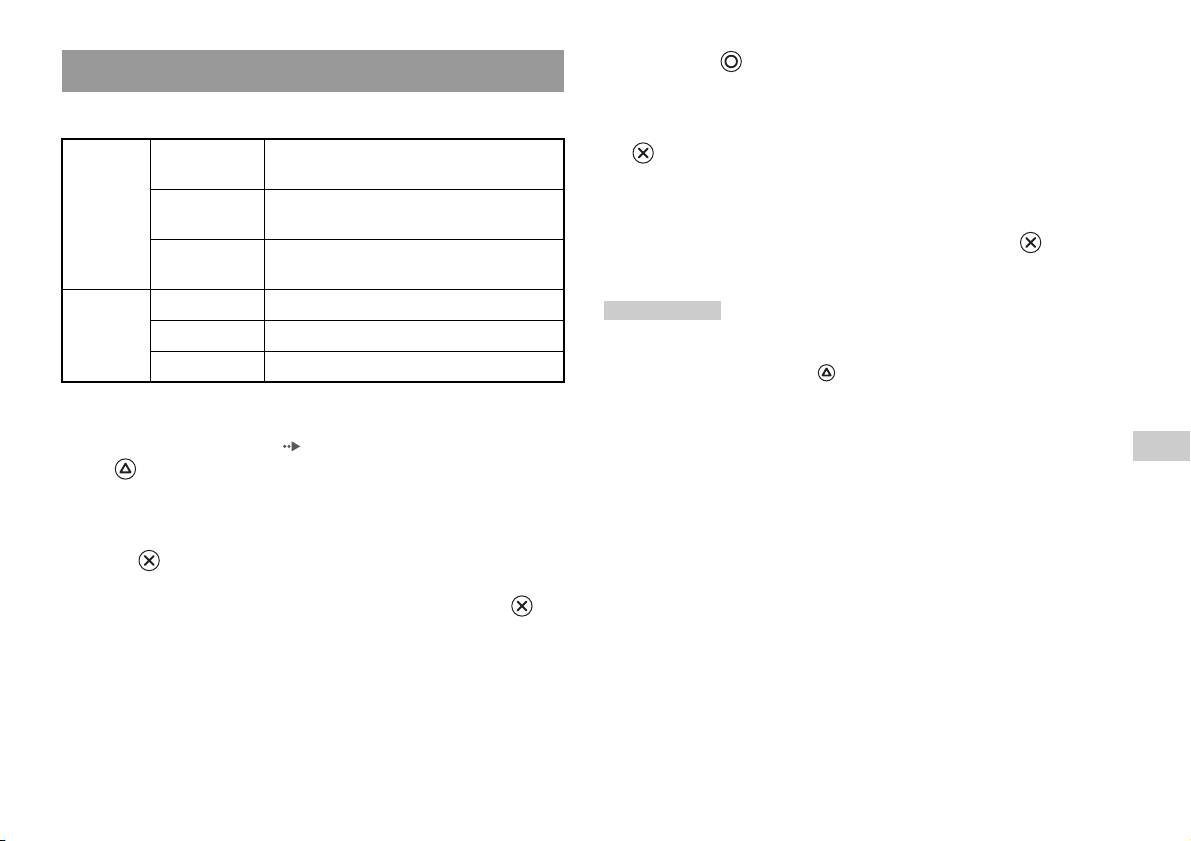
4 Druk op de -toets.
Afspeelmogelijkheden
Het Browser-scherm verschijnt.
U kunt kiezen uit "Afspeel modus" en "Herhalen".
5 Kies het pictogram audio-CD en druk vervolgens op de
Afspeel
Normaal De tracks worden afgespeeld in de volgorde
-toets.
modus
waarop ze op de CD staan
De tracknummers verschijnen en de instelmogelijkheid wordt links
onderaan het scherm weergegeven.
Programmeren De tracks worden in een bepaalde volgorde
afgespeeld
6 Kies de gewenste track en druk vervolgens op de -toets.
Willekeurige
De tracks worden afgespeeld in willekeurige
Het afspelen begint.
volgorde
volgorde
Herhalen Uit De CD wordt niet herhaald
Opmerkingen
Alle Alle tracks worden herhaald
• U kunt het scherm Play Options (afspeelmogelijkheden) ook opvragen vanuit het
trackweergavescherm door het audio-CD-pictogram in de linker bovenhoek van
1 Een track wordt herhaald
het scherm te selecteren en op de -toets te drukken.
• "Afspeel modus" en "Herhalen" kunnen tegelijkertijd worden ingesteld.
1 Selecteer het pictogram audio-CD met de richtingstoetsen
via het Browser-scherm ( pagina 27) en druk vervolgens op
NL
de -toets.
Audio-CD's
Het scherm afspeelmogelijkheden verschijnt.
2 Selecteer "Afspeel modus" of "Herhalen" en druk vervolgens
op de -toets.
3 Kies de gewenste instelling en druk vervolgens op de -
toets.
Wanneer u "Programmeren" selecteert, verschijnt het scherm waarop
de trackvolgorde kan worden bepaald. Kies de tracks die u wilt
afspelen.
Een audio-CD afspelen
13
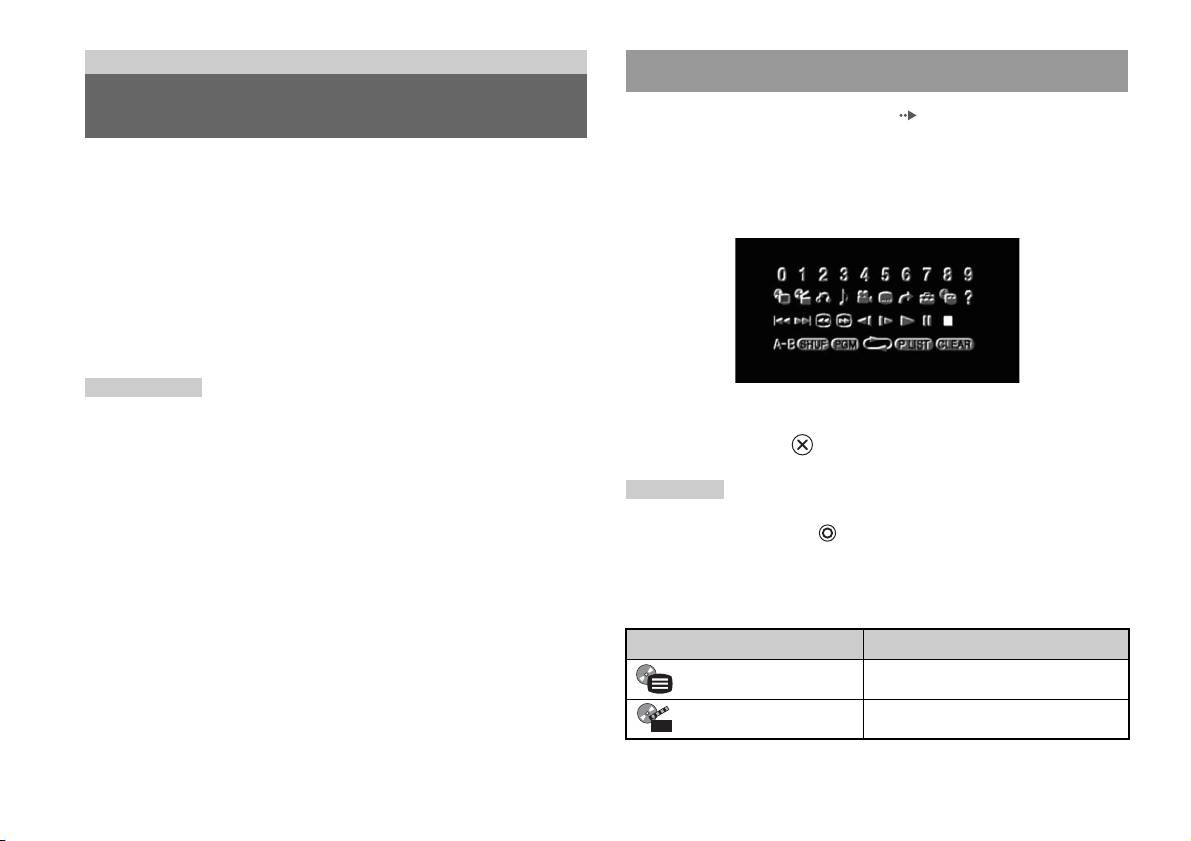
DVD's
Met behulp van het bedieningspaneel
Een DVD bekijken
1 Start de weergave van de DVD ( pagina 16).
2 Druk op de SELECT-toets.
U kunt de DVD-speler bedienen op de volgende manieren.
Het bedieningspaneel verschijnt. Wanneer u nogmaals op de
• Met behulp van het schermbedieningspaneel
SELECT-toets drukt, verandert de weergavepositie op het scherm.
• Rechtstreeks met behulp van de Analoge Controller (DUALSHOCK
®2)
• Met behulp van de DVD-Afstandsbediening (voor PlayStation
TM2)
(apart verkrijgbaar)
Bij de volgende instructies wordt verondersteld dat de DVD-speler wordt
bediend via het schermbedieningspaneel. Sommige handelingen
verschillen naargelang van de gebruikte methode.
Opmerkingen
• Raadpleeg de instructies die bij de DVD zijn geleverd voor meer details over het
3 Kies een pictogram met de richtingstoetsen en druk
afspelen van een DVD.
vervolgens op de -toets.
• De ingebouwde PlayStation
TM2 geeft de disc weer zoals die is opgenomen met
DVD-software. Merk op dat niet alle functies beschikbaar zijn op alle DVD's.
Opmerking
Om het bedieningspaneel uit te schakelen, drukt u (eenmaal of tweemaal) op de
SELECT-toets of drukt u op de -toets.
Bedieningspaneellijst
Via het bedieningspaneel kunnen de volgende opties worden gekozen.
Pictogram Functie
Menu Toont het DVD-Videomenu
Topmenu Toont het DVD-Videomenu
14
Een DVD bekijken

Pictogram Functie
Pictogram Functie
Om terug te keren naar het vorige scherm
Terugkeren
/ Langzaam Vertraagde weergave vooruit/achteruit
O
in het DVD-menu
Om de audio opties van DVD's met
N
Afspelen Weergave starten
Audio opties
meertalige geluidssporen te tonen en te
wijzigen
X
Pauzeren Weergave onderbreken
Om de beeldhoekopties te tonen en te
Hoekopties
x
Stop Weergave stoppen ( pagina 16)
wijzigen op DVD's met meerhoeksopties
Om een bepaalde scène te selecteren en die
Om de DVD-ondertitelingsopties weer te
A-B Herhalen
Ondertitelingsopties
af te spelen ( pagina 20)
geven en te wijzigen
Om titels of hoofdstukken in een
Om naar een gekozen titel, hoofdstuk of
Willekeurige
willekeurige volgorde af te spelen
Ga naar
tijd te gaan en de weergave te starten
weergave
(pagina19)
(pagina16)
Om titels of hoofdstukken in een
Om de opties voor taal, beeldkwaliteit,
Programma-
geprogrammeerde volgorde af te spelen
Instellingen
kinderbeveiliging, audio, enz. te tonen en
weergave
(pagina18)
te wijzigen ( pagina 21)
Om alle titels op de disc of één titel of één
Om het huidige titel- en
NL
Herhaalde weergave
hoofdstuk herhaaldelijk af te spelen
Speelduurweergave
hoofdstuknummer, de verstreken tijd, enz.
DVD's
(pagina20)
te tonen ( pagina 17)
Om bij DVD-RW-discs (VR mode) te
Om de directe toetsfuncties van de
Original/Play List
kiezen tussen de weergave van originele of
Help
Analoge Controller (DUALSHOCK
®2) te
zelf gemonteerde inhoud ( pagina 18)
tonen
Om geselecteerde nummers of
Om het nummer te kiezen van een
Wissen
afspeelmodi te wissen ( pagina 20)
0~9
Ga naar hoofdstuk
hoofdstuk dat u wilt afspelen
(pagina16)
Opmerkingen
Om naar het begin van het huidige, vorige
./> Vorige/Volgende
• Met " " kunt u controleren welke opties rechtstreeks kunnen worden bediend met
of volgende hoofdstuk te gaan
behulp van de toetsen op de Analoge Controller. Hiervoor moet u eerst het
bedieningspaneel van het scherm halen.
/ Zoeken Snel terug-/vooruitgaan ( pagina 17)
• In sommige weergavestanden zijn bepaalde opties niet beschikbaar of instelbaar.
Een DVD bekijken
15

Een DVD afspelen
Een specifieke scène selecteren voor weergave
1 Schakel de ingebouwde PlayStationTM2 in en plaats een disc
Een scène selecteren op hoofdstuknummer
( pagina 7).
Verricht stap 1 t/m 3 van "Een spel starten". Het afspelen begint.
1 Selecteer tijdens de weergave het gewenste
hoofdstuknummer in het bedieningspaneel ( pagina 14) en
Opmerkingen
druk vervolgens op de -toets.
• Wanneer de ingebouwde PlayStationTM2 wordt ingeschakeld nadat een disc werd
De weergave van het geselecteerde hoofdstuk begint. Om een
ingebracht, start het afspelen automatisch.
hoofdstuk af te spelen met één enkel cijfer (d.w.z. van 1 tot 9), voert u
• De weergave kan ook worden gestart via het Browser-scherm ( pagina 27).
eerst een nul in. Bijvoorbeeld "01".
Een scène selecteren op titelnummer, hoofdstuknummer of
De weergave van een DVD beëindigen x
tijd
1 Selecteer tijdens de weergave x in het bedieningspaneel
1 Selecteer tijdens de weergave in het bedieningspaneel
( pagina 14) en druk vervolgens op de -toets.
( pagina 14) en druk vervolgens op de -toets.
De weergave stopt. Druk op de OPEN-toets aan de voorzijde van de
ingebouwde PlayStation
TM2 en verwijder vervolgens de disc.
2 Kies een item en druk vervolgens op de -toets.
Titel Het titelnummer
De weergave hervatten vanaf het laatste
Hoofdstuk Het hoofdstuknummer
stoppunt (Weergave hervatten)
C XX:XX:XX
De verstreken tijd voor het hoofdstuk (of de titel)
1 Selecteer tijdens de weergave x in het bedieningspaneel
(of T XX:XX:XX)
( pagina 14) en druk vervolgens op de -toets.
3 Selecteer de nummers voor de gewenste scène en druk
2 Selecteer N en druk vervolgens op de -toets.
vervolgens op de -toets.
De weergave begint vanaf het punt waar u de disc hebt gestopt in stap
1.
De weergave van het geselecteerde hoofdstuk begint.
"Weergave hervatten" wissen
Selecteer na stap 1 x en druk vervolgens op de -toets.
16
Een DVD bekijken
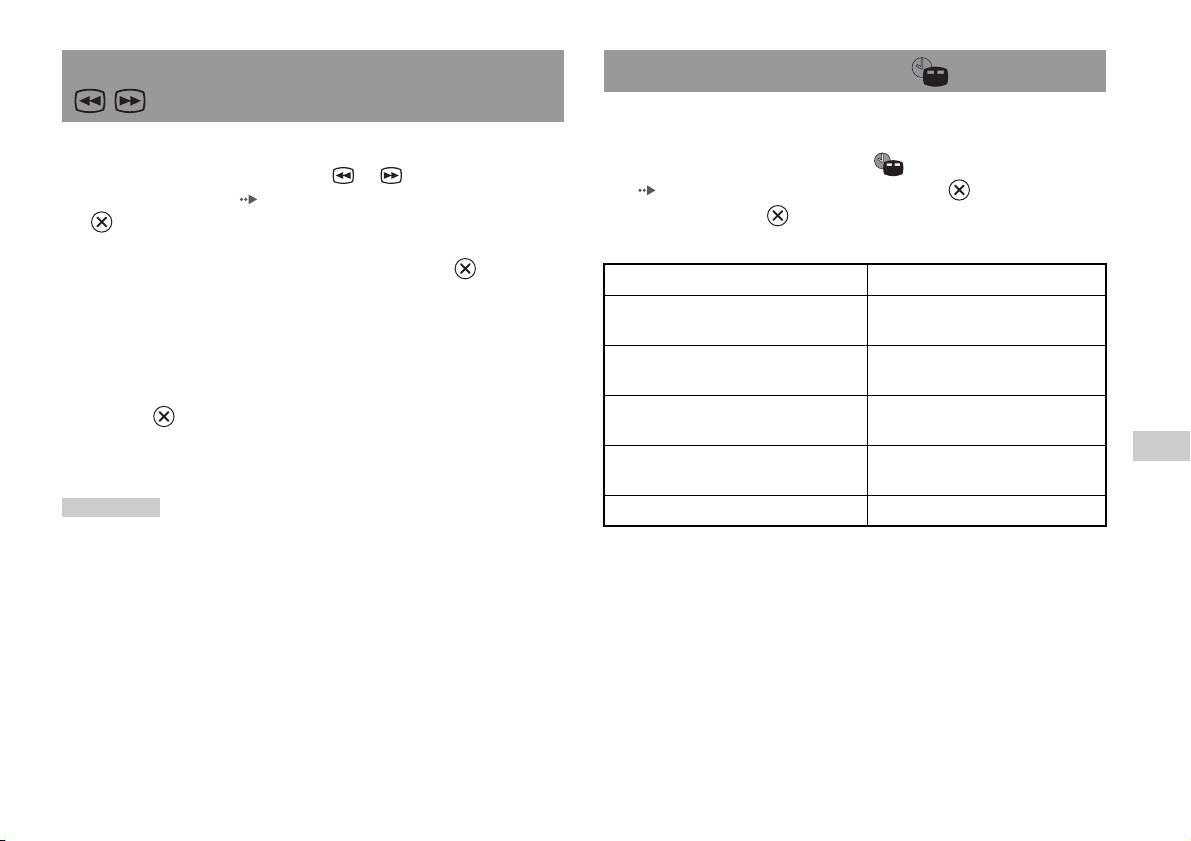
Een bepaald punt op een DVD vinden (Zoeken) Afspeelinformatie weergeven
U kunt informatie weergeven zoals het huidige titelnummer of de
verstreken speelduur.
U kunt snel voor- of achteruit om een bepaald punt op een DVD te vinden.
1 Selecteer tijdens de weergave in het bedieningspaneel
1 Selecteer tijdens de weergave of in het
( pagina 14) en druk vervolgens op de -toets.
bedieningspaneel ( pagina 14) en druk vervolgens op de
Bij elke druk op de -toets verandert de weergave zoals hieronder
-toets.
vermeld.
De zoeksnelheid verandert zoals hieronder vermeld wanneer u de
richtingstoets omhoog of omlaag indrukt terwijl u de -toets
Titel X Hoofdstuk X Titelnummer en hoofdstuknummer
ingedrukt houdt.
• Zoeken 3
Titel X Hoofdstuk X C XX:XX:XX Verstreken speelduur huidig
• Zoeken 2
hoofdstuk
• Zoeken 1
Titel X Hoofdstuk X C - XX:XX:XX Resterende speelduur van het huidige
• Langzaam
hoofdstuk
Titel X Hoofdstuk X T XX:XX:XX Verstreken speelduur van de huidige
2 Laat de -toets los wanneer u het gewenste punt hebt
titel
gevonden.
NL
De weergave gebeurt weer met de normale snelheid.
Titel X Hoofdstuk X T - XX:XX:XX Resterende speelduur van de huidige
DVD's
titel
Opmerking
(Uit)
Om tijdens de weergave te zoeken met behulp van de Analoge Controller, houdt u de
L2- of R2-toets ingedrukt om het zoeken te starten. Wijzig de snelheid met behulp
van de richtingstoetsen. Laat de L2- of R2-toets los wanneer u het gewenste punt hebt
gevonden.
Een DVD bekijken
17
Original of Play List kiezen voor het afspelen van
Gebruik van de afspeelmodi
een DVD-RW
Bij een DVD-RW-disc (VR mode) kunt u bepalen welk soort titels u wilt
Met de afspeelmodi kunt u titels of hoofdstukken afspelen in een bepaalde
afspelen.
volgorde of een bepaalde scène herhalen. Er zijn vier afspeelmodi:
• Programma-weergave ( pagina 18)
1 Stop de weergave, selecteer in het
• Willekeurige weergave ( pagina 19)
bedieningspaneel ( pagina 14) en druk vervolgens op de
• Herhaalde weergave ( pagina 20)
-toets.
• A-B Herhalen ( pagina 20)
Original en Play List worden afwisselend geselecteerd bij elke druk op
de -toets.
Bij de volgende instructies wordt verondersteld dat de DVD-speler wordt
Original Weergave in originele volgorde
bediend via het schermbedieningspaneel ( pagina 14).
Play List Geprogrammeerde weergave. Play List is standaard
Opmerkingen
ingesteld.
• U kunt programma-weergave, willekeurige weergave en herhaalde weergave
combineren. Willekeurige of herhaalde weergave is mogelijk niet beschikbaar
Opmerkingen
afhankelijk van de combinatie.
• Vertraagde weergave achteruit kan niet met DVD-RW-discs (VR mode).
• De ingebouwde PlayStation
TM2 geeft de disc weer zoals die is opgenomen met
• Deze functie werkt niet met Weergave hervatten. Wis Weergave hervatten
DVD-software.
( pagina 16) voor u deze functie gebruikt.
Programma-weergave
U kunt de weergave van titels en hoofdstukken zelf programmeren in een
bepaalde volgorde.
1 Selecteer tijdens de weergave in het
bedieningspaneel ( pagina 14) en druk vervolgens op de
-toets.
18
Gebruik van de afspeelmodi
2 Kies een programmanummer en druk vervolgens op de -
Willekeurige weergave
toets.
Wanneer er geen programma's zijn ingesteld, is "1. Titel" de enige
U kunt deze optie gebruiken voor de willekeurige weergave van alle titels
keuzemogelijkheid.
of hoofdstukken op een disc. De afspeelvolgorde verandert telkens
wanneer Willekeurige weergave wordt gebruikt.
3 Kies een titelnummer en druk vervolgens op de -toets.
1 Selecteer in het bedieningspaneel ( pagina 14) en
druk vervolgens op de -toets.
4 Kies een hoofdstuknummer en druk vervolgens op de -
Bij elke druk op de -toets verandert de weergave zoals hieronder
toets.
vermeld.
Kies "Alles" om alle hoofdstukken af te spelen. Herhaal stap 2 t/m 4
om andere titels of hoofdstukken te kiezen.
Titels in
Titels afspelen in willekeurige volgorde
willekeurige
5 Druk op de START-toets.
volgorde
Programma-weergave start.
afspelen
Hoofdstukken in
Hoofdstukken afspelen in willekeurige volgorde
Opmerking
willekeurige
Na afloop van de programma-weergave wordt de instelling niet gewist.
volgorde
afspelen
NL
DVD's
In gewone
Wist afspelen in willekeurige volgorde
volgorde
afspelen
2 Selecteer N en druk vervolgens op de -toets.
Gebruik van de afspeelmodi
19
Herhaalde weergave
A-B Herhalen
U kunt deze optie kiezen om titels of hoofdstukken herhaaldelijk af te
U kunt een bepaalde scène herhaaldelijk afspelen.
spelen.
1 Selecteer tijdens het afspelen in het bedieningspaneel
1 Selecteer in het bedieningspaneel ( pagina 14) en
( pagina 14) en druk op de -toets op het punt waar u de
druk vervolgens op de -toets.
herhaalde weergave wilt starten.
Bij elke druk op de -toets verandert de weergave zoals hieronder
Het beginpunt (punt A) is ingesteld.
vermeld.
2 Druk op de -toets op het punt waar u de herhaalde
Disc herhalen Alle titels herhaaldelijk afspelen
weergave wilt laten stoppen.
Titel herhalen Eén titel herhaaldelijk afspelen
Het eindpunt (punt B) is ingesteld en de herhaalde weergave van A tot
B start.
Hoofdstuk
Eén hoofdstuk herhaaldelijk afspelen
herhalen
Niet herhalen Herhaaldelijk afspelen gewist
Afspeelmodi wissen
Om terug te keren naar normale weergave.
2 Selecteer N en druk vervolgens op de -toets.
1 Selecteer in het bedieningspaneel ( pagina 14)
en druk vervolgens op de -toets.
De melding "Inhoud afspeelstand gewist" verschijnt en de normale
weergave van de ingebouwde PlayStation
TM2 is hersteld.
Opmerking
Bij een combinatie van afspeelmodi worden alle modi gewist.
20
Gebruik van de afspeelmodi

4 Kies de gewenste instelling en druk vervolgens op de -
De DVD-speler instellen
toets.
Het item is ingesteld. Voor details, zie de instructies voor elk item
( pagina's 21 tot 26).
De DVD-speler kan worden ingesteld via het bedieningspaneel (b.v.
ondertiteltaal, audiotaal en kinderbeveiliging).
Opmerkingen
• De standaardinstellingen voor elk menu-item zijn in de aanwijzingen hieronder
Opmerkingen
onderstreept.
• Sommige DVD's werken niet met alle instellingen. De ingebouwde PlayStationTM2
• Druk op de SELECT-toets om na het verrichten van de instellingen terug te keren
geeft de disc weer zoals die is opgenomen met DVD-software. Wanneer de DVD
naar het bedieningspaneel.
niet compatibel is met de vermelde functies, kunnen de instellingen niet worden
• De instellingen worden opgeslagen wanneer u het volgende doet:
gewijzigd.
– Weergave stoppen (met inbegrip van het stoppen van Weergave hervatten)
• De volgende mogelijkheden zijn niet beschikbaar tijdens het afspelen of Weergave
– Disc-deksel openen
hervatten. Wis Weergave hervatten ( pagina 16) alvorens deze instellingen te
wijzigen.
– "Menu", "Audio" en "Ondertiteling" bij Taalinstelllingen
Taalopties instellen
– "TV Type" en "Progressief" bij Scherminstellingen
– "Kinderbeveiliging" bij Individuele instellingen
Bij "Taalinstellingen" kunt u de taal kiezen voor het DVD-menu, de audio
– "DTS" en "Auto-selectie audiotrack" bij Audio
en de ondertitels. Merk op dat indien u een taal kiest die niet is opgenomen
NL
op de DVD, één van de opgenomen talen automatisch wordt geselecteerd.
DVD's
De instellingen van de DVD-speler kunnen als volgt worden gewijzigd:
Menu De taal van het DVD-menu selecteren
1 Selecteer in het bedieningspaneel ( pagina 14) en
druk vervolgens op de -toets.
Audio De taal van het DVD-geluidsspoor selecteren
Het instellingspictogrambalkje verschijnt.
Ondertiteling De taal van de DVD-ondertitels selecteren
2 Selecteer het pictogram voor de instelling die u wilt wijzigen
Opmerking
en druk vervolgens op de -toets.
Wanneer u "Als Audio" kiest voor de ondertitels, wordt de taal van de ondertitels
De huidige instelling voor elk item verschijnt.
automatisch afgestemd op de taal die is gekozen voor het DVD-geluidsspoor.
3 Kies het gewenste item en druk vervolgens op de -toets.
De menu-optie wordt actief en kan worden geselecteerd.
De DVD-speler instellen
21

DNR (Digital Noise Reduction)
TV-weergavemogelijkheden instellen
Deze instelling kan de ruwheid van het beeld verminderen en de kwaliteit
van het beeld verbeteren.
Via het menu Scherminstellingen kunt u de breedte/hoogte-verhouding en
andere opties instellen die de beeldkwaliteit beïnvloeden.
Uit DNR wordt niet gebruikt.
TV Type
DNR1 hogere beeldkwaliteit
U kunt de breedte/hoogte-verhouding instellen zodat deze geschikt is voor
DNR2 nog hogere beeldkwaliteit (maximum)
het schermformaat.
Opmerkingen
16:9 Schermformaat: breed
• "DNR2" is efficiënter om de ruwheid van het beeld te verminderen dan "DNR1"
maar soms kan er een nabeeld verschijnen. Kies in dat geval "Uit".
• De DNR-functie werkt minder goed bij sommige DVD's.
• Wanneer u "Progressief" op "Aan" zet, wordt "DNR" automatisch uitgeschakeld
4:3 LETTER BOX Schermformaat: 4:3
en kan het niet meer worden aangeschakeld.
Deze instelling toont een breedbeeld met zwarte stroken aan
de boven- en onderkant van het scherm.
Scherpte uitlijnen
U kunt de beeldomtrek verscherpen of verzachten met deze instelling. Hoe
hoger de waarde, hoe scherper de omtrek. Kies normaal "0".
4:3 PAN&SCAN Schermformaat: 4:3
Deze instelling toont een beeld dat de volledige hoogte van
het scherm beslaat en links en rechts is afgesneden.
•-2 •-1 •0
•+1 •+2
Opmerking
Opmerking
Met sommige DVD's werkt Scherpte uitlijnen niet goed.
Wanneer u "Progressief" op "Aan" zet, wordt "TV Type" automatisch ingesteld op
"16:9".
Display
Tijdens de weergave kunt u weergavestatusinformatie gedurende enkele
seconden laten verschijnen in de rechterbovenhoek van het scherm.
Aan
De weergavestatusinformatie verschijnt gedurende enkele seconden.
Uit De weergavestatusinformatie verschijnt niet.
22
De DVD-speler instellen

Progressief
Met deze beeldweergave worden alle beeldlijnen ineens bijgewerkt. Dit
Eigen opties instellen
geeft meestal een helderder, knippervrij beeld.
Pauze stand
Aan Progressieve scan (480p)*
Hiermee kan een beeldstatus worden ingesteld in de pauzestand.
Uit
Geïnterlinieerde scan
Auto Een beeld met bewegende elementen wordt trillingsvrij weergegeven.
* De progressive scan mode van de DVD-speler is alleen beschikbaar bij het
Kies normaal deze instelling.
afspelen van een disc opgenomen in NTSC-indeling en weergave op een televisie
die compatibel is met progressive scan (480p).
Beeld Een beeld zonder bewegende elementen wordt met hoge resolutie
weergegeven.
Opmerkingen
Kinderbeveiliging
• DVD's kunnen video- en filmmateriaal met een verschillend aantal beelden per
seconde bevatten. Bij weergave van videomateriaal met progressive scan kunnen
In sommige streken kan het bekijken van sommige DVD's beperkt zijn,
sommige beelden onnatuurlijk ogen. Zet "Progressief" dan op "Uit" en kijk in de
afhankelijk van de leeftijd van de kijker of andere factoren. Met de
standaard interlace mode.
Kinderbeveiligingsfunctie kunt u beperkingen instellen met betrekking tot
• Wanneer u "Progressief" op "Aan" zet, wordt "TV Type" ( pagina 22)
de inhoud die met uw ingebouwde PlayStation
TM2 kan worden bekeken.
automatisch ingesteld op "16:9".
Hoe lager de waarde, hoe strenger de beperking.
• DVD-RW-discs (VR mode) kunnen alleen worden bekeken in de standaard
interlace mode. De optie "Progressief" is dan niet beschikbaar.
NL
Kinderbeveiliging instellen
DVD's
1 Kies "Kinderbeveiliging" en druk vervolgens op de -toets.
Het wachtwoordregistratiescherm verschijnt. Indien er al een
wachtwoord is geregistreerd, verschijnt het
wachtwoordbevestigingsscherm.
2 Kies een nummer en druk vervolgens op de -toets.
Herhaal stap 2 om een viercijferig wachtwoord in te voeren. Druk op
de -toets om een nummer te wissen. Om een wachtwoord te
registreren, moet u het nogmaals invoeren ter bevestiging.
3 Kies "Regio" en druk vervolgens op de -toets.
De lijst met regio-opties verschijnt.
De DVD-speler instellen
23
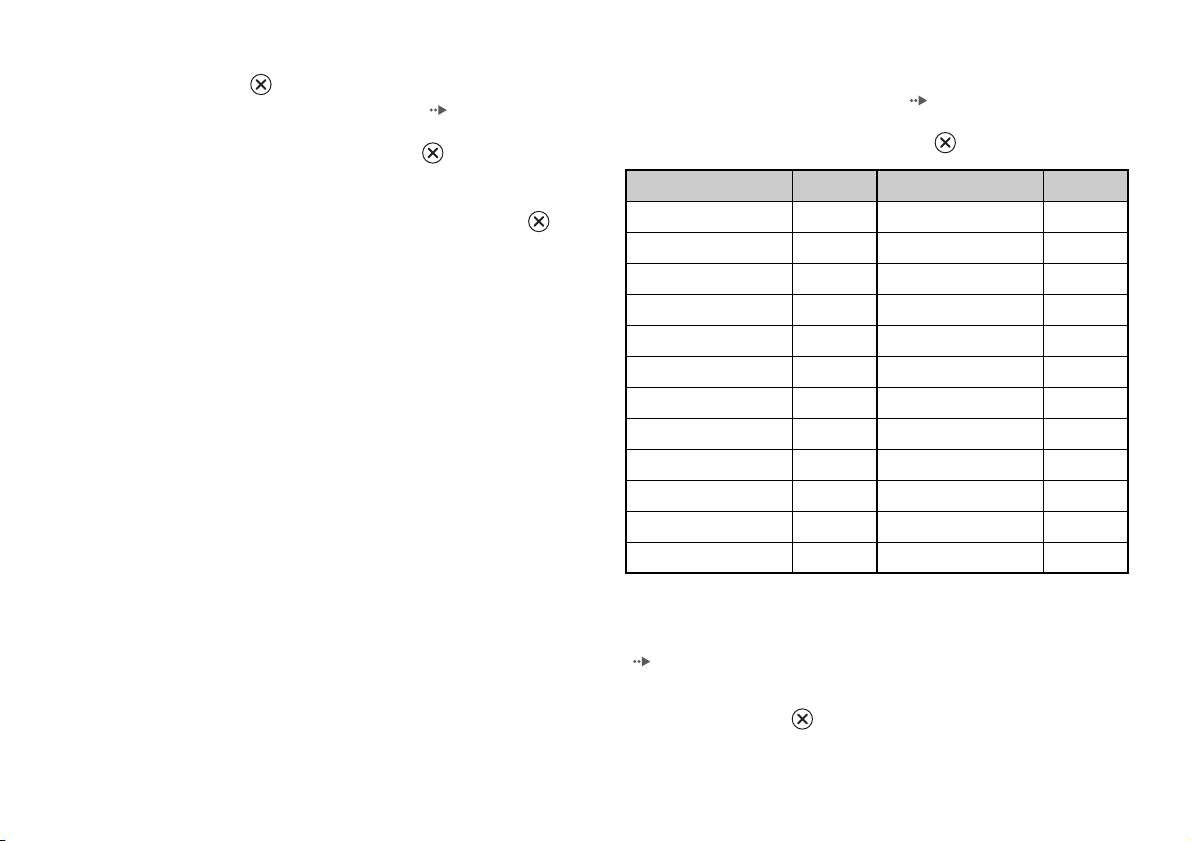
Regiocodelijst
4 Kies de regio voor het Kinderbeveiligingsniveau en druk
Om een regiocode voor Kinderbeveiliging in te stellen, kiest u "Andere" in
vervolgens op de -toets.
stap 4 van "Kinderbeveiliging instellen" ( pagina 23). Kies de eerste
Indien u "Andere" kiest, zie "Regiocodelijst" ( pagina 24).
letter met de richtingstoetsen en druk vervolgens op de richtingstoets
rechts. Kies de volgende letter en druk op de -toets.
5 Kies "Niveau" en druk vervolgens op de -toets.
De lijst met niveau-opties verschijnt.
Regio Code Regio Code
België BE Nederland NL
6 Kies een beperkingsniveau en druk vervolgens op de -
toets.
Denemarken DK Noorwegen NO
Duitsland DE Oostenrijk AT
Kinderbeveiliging wissen
Stop de DVD-weergave, ga naar stap 6 van "Kinderbeveiliging instellen"
Finland FI Polen PL
en zet "Niveau" op "Uit".
Frankrijk FR Portugal PT
Griekenland GR Rusland RU
Groot-Brittannië GB Slowakije SK
Ierland IE Spanje ES
Israël IL Tsjechië CZ
Italië IT Turkije TR
Luxemburg LU Zweden SE
Malta MT Zwitserland CH
Uw wachtwoord wijzigen
Doe het volgende in stap 2 van "Kinderbeveiliging instellen"
( pagina 23):
1 Kies "Code wijzigen" met de richtingstoetsen en druk
vervolgens op de -toets.
Het wachtwoordwijzigingsscherm verschijnt.
24
De DVD-speler instellen

• Bij sommige DVD's met Kinderbeveiligingsfunctie zijn de afspeelmodi niet
2 Kies een nummer en druk vervolgens op de -toets.
beschikbaar ( pagina's 18 tot 20).
Herhaal stap 2 om een viercijferig wachtwoord in te voeren. Voer het
nogmaals in ter bevestiging.
Audio-opties instellen
Tijdelijk opheffen van kinderbeveiligingsbeperkingen
1 Start de weergave van de DVD ( pagina 16).
Digitale uitgang
U wordt gevraagd het Kinderbeveiligingsniveau tijdelijk te wijzigen
U kunt de methodes kiezen voor het uitvoeren van audiosignalen als u de
om weergave mogelijk te maken. Dit gebeurt meestal bij het starten
volgende audio-apparatuur aansluit op DIGITAL OUT (OPTICAL).
van de disc maar bij sommige DVD's mogelijk ook op andere
momenten.
Opgelet
Wanneer de ingebouwde PlayStationTM2 is aangesloten op audio-apparatuur
2 Kies "Ja" met behulp van de richtingstoetsen en druk op de
zonder Dolby Digital, DTS- of MPEG-decoder, zet u "Dolby Digital", "DTS"
-toets.
en "MPEG" op "Uit". Wanneer u deze opties instelt op "Aan" zonder de vereiste
Het wachtwoordinvoerscherm verschijnt.
decoder, kan er ofwel geen geluid ofwel een zeer hard geluid worden
geproduceerd.
3 Kies een nummer en druk vervolgens op de -toets.
Herhaal stap 3 om het viercijferige wachtwoord in te voeren. De
DIGITAL OUT (OPTICAL)
NL
weergave begint opnieuw nadat het wachtwoord is ingevoerd.
Deze optie stelt de uitvoersignalen voor DIGITAL OUT (OPTICAL) in.
DVD's
Wanneer de DVD-weergave wordt gestopt, keert het
Kinderbeveiligingsniveau terug naar de oorspronkelijke instelling.
Aan Kies deze optie wanneer u geluid (audiosignalen) wilt uitvoeren via een
DIGITAL OUT (OPTICAL)-aansluiting.
Opmerkingen
De instellingen voor "Dolby Digital", "DTS" en "MPEG" verschijnen
• Als u uw wachtwoord vergeten bent, plaatst u een DVD zonder
op het scherm.
kinderbeveiligingsfunctie. Selecteer x (stoppen) op het bedieningspaneel om de
Uit Kies deze optie wanneer u geen geluid wilt uitvoeren via een DIGITAL
weergave te stoppen, en selecteer vervolgens opnieuw x (stoppen) om afspelen
OUT (OPTICAL)-aansluiting.
hervatten te annuleren. Selecteer "Instellingen", selecteer vervolgens
"Kinderbeveiliging" bij "Individuele instellingen" en druk daarna op de -toets.
De instellingen voor "Dolby Digital", "DTS" en "MPEG" verschijnen
Druk op de knop SELECT op de analoge controller en voer vervolgens het getal
niet op het scherm.
"7444" in.
• Als u geen wachtwoord instelt, kunt u de Kinderbeveiligingsinstellingen niet
wijzigen.
De DVD-speler instellen
25
Dolby Digital
Auto-selectie audiotrack
Deze optie stelt Dolby Digital in als uitvoersignaal voor de DIGITAL OUT
Deze instelling geeft het geluidsspoor met het grootste aantal kanalen
(OPTICAL)-aansluiting.
voorrang bij het afspelen van een DVD met verschillende geluidsformaten
(PCM, Dolby Digital, DTS of MPEG). Als PCM, Dolby Digital, DTS en
Aan Kies deze optie wanneer de ingebouwde PlayStation
TM2 is aangesloten
MPEG evenveel kanalen hebben, kiest de ingebouwde PlayStation
TM2
op audio-apparatuur met ingebouwde Dolby Digital-decoder.
PCM-, Dolby Digital-, DTS- en MPEG-geluidssporen in deze volgorde.
Uit
Kies deze optie wanneer de ingebouwde PlayStationTM2 is aangesloten
Aan Voorrang toegekend
op audio-apparatuur zonder ingebouwde Dolby Digital-decoder.
Uit
Geen voorrang toegekend
DTS
Opmerkingen
Deze optie stelt DTS in als uitvoersignaal voor de DIGITAL OUT
• Wanneer u "DTS" bij "Digitale uitgang" ( pagina 26) op "Uit" zet, wordt het
(OPTICAL)-aansluiting.
DTS-geluidsspoor niet weergegeven.
• Bij sommige DVD's kan de voorrang vooraf zijn bepaald. In dat geval wordt het
Aan Kies deze optie wanneer de ingebouwde PlayStation
TM2 is aangesloten
geluidsspoor gekozen op basis van de prioriteitsvolgorde van de DVD.
op audio-apparatuur met ingebouwde DTS-decoder.
Uit
Kies deze optie wanneer de ingebouwde PlayStationTM2 is aangesloten
Volume DVD
op audio-apparatuur zonder ingebouwde DTS-decoder.
Gebruik deze optie wanneer het volume van een DVD te laag is. Dit kan
alleen worden ingesteld wanneer "DIGITAL OUT (OPTICAL)" bij
"Digitale uitgang" ( pagina 25) op "Uit" staat.
MPEG
Deze optie stelt MPEG AUDIO in als uitvoersignaal voor de DIGITAL
+2 Het volume verhogen (maximum)
OUT (OPTICAL)-aansluiting.
+1 Het volume verhogen
Aan Kies deze optie wanneer de ingebouwde PlayStation
TM2 is aangesloten
Normaal
Kies normaal deze instelling.
op audio-apparatuur met ingebouwde MPEG-decoder.
Uit
Kies deze optie wanneer de ingebouwde PlayStationTM2 is aangesloten
op audio-apparatuur zonder ingebouwde MPEG-decoder.
Opgelet
Wanneer dit op "+1" of "+2" staat, kan het geluid zijn vervormd. Kies in dat
geval "Normaal". Indien u het volume te hoog zet, kan dit uw gehoor of de
luidsprekers beschadigen.
26
De DVD-speler instellen
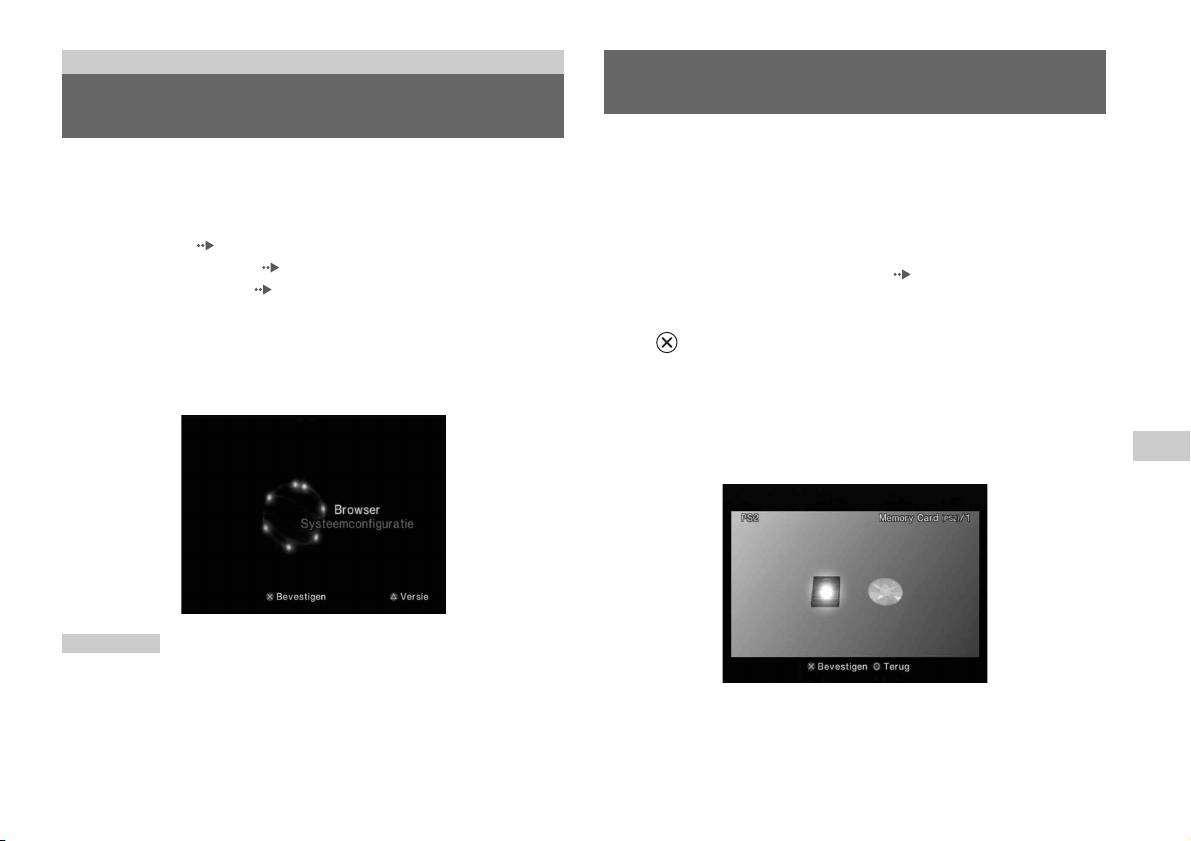
Hoofdmenu
Gebruik van het Browser-scherm
Hoofdmenuweergave
Via het Browser-scherm kunt u de volgende handelingen verrichten:
Vanuit het hoofdmenu kunt u informatie opvragen en diverse instellingen
• Spelgegevens op een Memory Card (geheugenkaart) kopiëren of wissen
wijzigen. U kunt vanuit het hoofdmenu ook naar de volgende schermen
• Een spel starten
gaan. Het hoofdmenu verschijnt wanneer u de ingebouwde PlayStation
TM2
• Een audio-CD afspelen
inschakelt zonder dat er een disc in zit.
• Een DVD afspelen
• Browser-scherm ( pagina 27)
• Systeemconfiguratiemenu ( pagina 28)
1 Laat het hoofdmenu verschijnen ( pagina 27).
• Versie-informatiescherm ( pagina 31)
1 Druk op PlayStation 2 POWER ON op de afstandsbediening van
2 Kies "Browser" met de richtingstoetsen en druk vervolgens op
de TV.
de -toets.
Het hoofdmenu verschijnt. Merk op dat het enige tijd kan duren
Het Browser-scherm verschijnt.
vooraleer het hoofdmenu verschijnt.
3 Breng een disc of Memory Card (geheugenkaart) in.
Het pictogram voor de geplaatste component verschijnt op het
NL
Browser-scherm.
\
Hoofdmenu
Opmerking
Als u drukt op PlayStation 2 POWER ON op de afstandsbediening van de TV met
een disc geplaatst, wordt het hoofdmenu niet weergegeven. Om het hoofdmenu te
laten verschijnen, drukt u op de OPEN-toets op de voorzijde van de ingebouwde
PlayStation
TM2 en verwijdert u de disc. Druk vervolgens op PlayStation 2 POWER
ON op de afstandsbediening van de TV.
Hoofdmenuweergave
27

4 Kies een pictogram en druk vervolgens op de -toets.
• Wanneer u het Memory Card (geheugenkaart)-pictogram kiest,
Gebruik van het
verschijnen de pictogrammen voor gegevens op de Memory Card
(geheugenkaart). Zie "Spelgegevens kopiëren of wissen"
Systeemconfiguratiemenu
( pagina 11) om spelgegevens te kopiëren of te verwijderen.
• Wanneer u het pictogram voor een PlayStation
TM2- of PlayStationTM-
Vanuit het Systeemconfiguratiemenu kunt u diverse instellingen wijzigen
softwaredisc kiest, start het spel.
zoals taal of tijdweergave en audio- of videouitvoermethode.
• Wanneer u het pictogram voor een audio-CD kiest, verschijnen de
tracks op de CD. Zie "Een audio-CD afspelen" ( pagina 12).
1 Laat het hoofdmenu verschijnen ( pagina 27).
• Wanneer u het pictogram voor een DVD kiest, start de weergave van
de DVD.
2 Kies "Systeemconfiguratie" met de richtingstoetsen en druk
op de -toets.
Opmerking
Het Systeemconfiguratiemenu verschijnt.
De melding "Er zijn geen data" verschijnt op het Browser-scherm wanneer er geen
Memory Card (geheugenkaart) of disc in de ingebouwde PlayStation
TM2 zit.
3 Kies een item en druk vervolgens op de -toets.
De menu-optie wordt actief en kan worden geselecteerd.
4 Kies de gewenste instelling en druk vervolgens op de
-toets.
Voor details, zie de instructies voor elk menu-item ( pagina's 29 tot
30).
28
Gebruik van het Systeemconfiguratiemenu
Opmerkingen
Beeldformaat
• De standaardinstellingen voor elk menu-item zijn in de aanwijzingen hieronder
onderstreept.
U kunt het beeldformaat van de TV instellen.
• Gewijzigde instellingen worden opgeslagen en blijven geldig, ook na het
uitschakelen of resetten van de ingebouwde PlayStation
TM2.
4:3
Volledig*
Klok instellen
16:9
U kunt datum en tijd instellen. Gebruik de richtingstoetsen om "Jaar",
* "Volledig" is compatibel met het Systeemconfiguratiemenu, Browser-scherm en
"Maand", "Dag", "Uren", "Minuten" en "Seconden" in te stellen. Deze
audio-CD-scherm.
instelling wordt geldig wanneer u op de -toets drukt.
Optionele instellingen
DIGITAL OUT (OPTICAL)
Door op de -toets te drukken vanuit het scherm "Klok instellen",
U kunt bepalen of het signaal wordt uitgevoerd via de DIGITAL OUT
kunnen opties zoals "Datumweergave" of "Tijdweergave" worden
(OPTICAL)-aansluiting.
ingesteld. Gebruik de richtingstoetsen en de -toets om instellingen te
verrichten.
Aan Kies deze optie wanneer u een signaal wilt uitvoeren
NL
via de DIGITAL OUT (OPTICAL)-aansluiting.
Tijdweergave Stelt de systeemklok in voor 12- of 24-uursweergave
Hoofdmenu
Uit Kies deze optie wanneer u geen signaal wilt uitvoeren
Datumweergave Stelt de weergavevolgorde van jaar, maand en dag in
via de DIGITAL OUT (OPTICAL)-aansluiting.
Tijdzone Stelt de tijdzone in
Zomertijd Stelt Wintertijd of Zomertijd in. Kies normaal
"Wintertijd".
Gebruik van het Systeemconfiguratiemenu
29

Italiaans Meldingen verschijnen in het Italiaans
Afstandsbediening
Nederlands Meldingen verschijnen in het Nederlands
U kunt deze optie ook instellen bij gebruik van de DVD-afstandsbediening
Portugees Meldingen verschijnen in het Portugees
(voor PlayStation
TM2) (los verkrijgbaar).
Spelfunctie Aan Kies deze optie bij gebruik van PlayStationTM2- of
PlayStation
TM-software met de DVD-
afstandsbediening.
Spelfunctie Uit Kies deze optie zonder gebruik van PlayStation
TM2-
of PlayStation
TM-software met de DVD-
afstandsbediening.
Opmerking
De volgende beperkingen gelden wanneer de DVD-afstandsbediening wordt
gebruikt met de optie "Spelfunctie Aan":
– Sommige afstandsbedieningstoetsen werken niet goed met bepaalde software.
– De toetsen van de DVD-afstandsbediening werken niet wanneer er twee of meer
tegelijk worden ingedrukt.
– Sommige software werkt niet meer naar behoren wanneer een controller wordt
losgekoppeld van controller-aansluiting 1. Kies in dat geval "Spelfunctie Uit".
Taal
Hiermee kan de taal van het hoofdmenu, Browser-scherm,
Systeemconfiguratiemenu en Versie-informatiescherm worden gekozen.
Engels Meldingen verschijnen in het Engels
Frans Meldingen verschijnen in het Frans
Spaans Meldingen verschijnen in het Spaans
Duits Meldingen verschijnen in het Duits
30
Gebruik van het Systeemconfiguratiemenu

2 Kies een item en druk vervolgens op de -toets.
Gebruik van het Versie-
De beschikbare opties verschijnen.
informatiescherm
3 Kies de gewenste instelling en druk vervolgens op de
-toets.
Voor details, zie de instructies voor elk item ( pagina's 31 tot 33).
Met deze optie kunt u de versie van diverse componenten van de
ingebouwde PlayStation
TM2 controleren. Voor sommige items kunnen ook
Opmerking
optionele instellingen worden gewijzigd.
De standaardinstellingen voor elk menu-item zijn in de aanwijzingen hieronder
1 Druk vanuit het hoofdmenu ( pagina 27) op de -toets.
onderstreept.
Het Versie-informatiescherm verschijnt.
Unit
De ingebouwde PlayStationTM2 kiest automatisch de interne instellingen
voor optimale weergave. Wanneer "Diagnose" is ingesteld op "Aan",
verricht de ingebouwde PlayStationTM2 extra instellingen.
Diagnose
NL
Hoofdmenu
Uit Diagnose is uitgeschakeld.
Aan Diagnose is aangeschakeld.
Optionele instellingen
Optionele instellingen zijn beschikbaar voor "Unit", "PlayStation®
Opmerking
Driver" en "DVD-speler". "DVD-speler" kan alleen worden ingesteld als
"Diagnose" keert automatisch terug naar de standaardinstelling in de volgende
de optie "Progressief" van de DVD-speler op "Aan" staat.
gevallen:
– Als het afspelen van software in PlayStation
TM2- of PlayStationTM-formaat of
1 Kies een item met de richtingstoetsen en druk vervolgens op
een DVD begint
de -toets.
– Als de ingebouwde PlayStation
TM2 wordt gereset
De huidige instelling voor het item verschijnt.
– Als de ingebouwde PlayStation
TM2 wordt uitgeschakeld
Gebruik van het Versie-informatiescherm
31
PlayStationTM Driver
DVD-speler
U kunt het PlayStationTM Driver-programma instellen om software in
Wanneer u "Progressief" op "Aan" zet terwijl de ingebouwde
PlayStation
TM-formaat optimaal te laten presteren.
PlayStation
TM2 is aangesloten op een TV zonder de nodige uitrusting, kan
de beeldkwaliteit lager zijn of kan er mogelijk geen beeld verschijnen. U
Opmerking
kunt de instelling "Progressief" als volgt wissen.
De instellingen keren automatisch terug naar de standaardinstelling in het volgende
Verwijder de DVD alvorens de instelling te wissen.
geval:
– Als de ingebouwde PlayStation
TM2 wordt uitgeschakeld
Progressieve mode uitschakelen
Disc snelheid
Nee "Progressief" blijft ingeschakeld
Ja "Progressief" wordt gewist
Normaal Discs worden met normale snelheid geladen
Snel Discs worden met hoge snelheid geladen
1 Weergave van het Versie-informatiescherm.
Opmerking
2 Kies "DVD-speler" met de richtingstoetsen en druk vervolgens
Kies "Normaal" in de volgende gevallen:
op de -toets.
– Wanneer snel laden geen betere resultaten geeft
De optie "Progressieve mode uitschakelen" verschijnt.
– Wanneer de software niet compatibel is met snel laden
Texture mapping
3 Druk op de -toets.
Normaal
Normale weergave
4 Kies "Ja" en druk vervolgens op de -toets.
Vloeiend Minder ruwe weergave
5 Druk tweemaal op de -toets.
Het hoofdmenu verschijnt weer.
Opmerking
Kies "Normaal" in de volgende gevallen:
6 Druk op de OPEN-toets aan de voorzijde van de ingebouwde
– Wanneer "Vloeiend" geen betere resultaten geeft
PlayStation
TM2 en plaats een DVD in de ingebouwde
– Wanneer het beeld niet goed wordt weergegeven met de instelling "Vloeiend"
PlayStation
TM2.
32
Gebruik van het Versie-informatiescherm

7 Sluit het disc-deksel.
Het afspelen begint.
Opmerking
De instelling wordt niet gewist wanneer 1) u geen DVD start na stap 4 of 2) u de
ingebouwde PlayStation
TM2 voor stap 6 reset of uitschakelt.
NL
Hoofdmenu
Gebruik van het Versie-informatiescherm
33

Netwerk
Aansluiting met een Ethernet-kabel
Aansluiting op een netwerk
U kunt de ingebouwde PlayStationTM2 aansluiten op een netwerk met
behulp van een Ethernet-kabel die wordt aangesloten op de NETWORK-
aansluiting aan de achterzijde. U kunt de console aansluiten op een 100
U kunt online games spelen door de PlayStationTM2 aan te sluiten op een
Base-TX- of 10 Base-T-netwerk. Raadpleeg de gebruiksaanwijzing van
breedbandnetwerk. Om alle online games te spelen, hebt u het volgende
het netwerkapparaat voor meer details.
nodig:
• Een PlayStation
TM2-spel dat geschikt is voor netwerkgebruik
Basisnetwerkopstelling
• Breedbandinternet
Netwerklijn
• Een in de handel verkrijgbare Ethernet-kabel
• Een memory card (geheugenkaart) (8MB) (voor PlayStation
TM2) (apart
PC
verkrijgbaar)
Opmerkingen
Breedbandmodem,
router, enz.
• Er kunnen geen online games worden gespeeld via een inbel- of ISDN-verbinding.
• Het aansluiten van een extern netwerkapparaat op de USB-aansluiting wordt niet
ondersteund.
Netwerkapparatuur Ethernet-kabel
(niet meegeleverd)
• Er zijn twee typen Ethernet-kabel: recht en gekruist. Gebruik het juiste type kabel
om de PlayStation
TM2 aan te sluiten op uw breedbandverbinding. Raadpleeg de
Netwerklijn: Hangt af van het soort breedbandservice bij u thuis.
gebruiksaanwijzing van het netwerkapparaat of uw provider van breedbandinternet
Netwerkapparatuur: Het type apparatuur hangt eveneens af van het
voor meer details.
type service.
• Maak geen verbinding met het LAN van de TV via de Ethernet-kabel.
Opmerking
Om de ingebouwde PlayStationTM2 en een PC aan te sluiten op een netwerk, kan een
netwerkapparaat zoals een router of hub zijn vereist. Raadpleeg de
gebruiksaanwijzing van het netwerkapparaat voor meer details.
34
Aansluiting op een netwerk

De ingebouwde PlayStationTM2 aansluiten
Opmerkingen
• Steek de stekker van het netsnoer pas in een stopcontact nadat u alle andere
aansluitingen hebt verricht.
• Sluit geen Ethernet-kabels of telefoonsnoeren van de volgende typen aan op de
Ingebouwde PlayStation
TM2
NETWORK-aansluiting op de achterzijde. Er kan dan te veel stroom door de
aansluiting gaan waardoor er een defect, overdreven warmte of brand kan ontstaan:
– Gewone telefoonkabels
– Ethernet-kabels die niet compatibel zijn met een 10Base-T/100Base-TX-
netwerk
– ISDN (digitaal)-compatibele telefoon- of datalijn
– PBX-telefoonlijnen
Netwerkkabel (niet meegeleverd)
– Andere onbekende typen telefoonlijnen
Router
Naar netwerkapparaten
Netwerkkabel (niet meegeleverd)
NL
Netwerk
DSL-modem/kabelmodem
Internet
1 Sluit de Ethernet-kabel aan op de NETWORK-aansluiting aan
de achterzijde.
2 Sluit de Ethernet-kabel aan op het netwerkapparaat.
Aansluiting op een netwerk
35

Netwerkinstellingen
Nadat u een Ethernet-kabel hebt aangesloten op de ingebouwde
PlayStation
TM2, moeten netwerkinstellingen worden verricht en
opgeslagen. Hiervoor hebt u een Network Access Disc nodig die wordt
geleverd door uw PlayStationTM2 te registreren. U kunt uw PlayStationTM2
registreren.
U hebt de volgende items nodig om netwerkinstellingen te verrichten:
– Een Memory Card (geheugenkaart) (8MB) (voor PlayStationTM2) (apart
verkrijgbaar)
– Login en netwerksetupinformatie van uw provider van breedbandinternet
Opmerking
Afhankelijk van uw internetservice moet u uw provider van breedbandinternet ook
uw MAC-adres geven. Het MAC-adres voor uw PlayStation
TM2 staat vermeld in het
Versie-informatiescherm ( pagina 31).
36
Netwerkinstellingen

Работа в сети
Содержание
Подключение к сети................................................................37
Сетевые настройки..................................................................39
Подготовительные операции
Названия компонентов............................................................. 3
Подсоединение цифрового аудиооборудования................. 5
Подключение контроллера..................................................... 6
Включение и выключение встроенной приставки
PlayStationTM2 ....................................................................... 6
Игры
Игры ............................................................................................. 7
Использование Memory Card................................................11
Аудио CD
Воспроизведение аудио CD................................................... 13
Диски DVD
Воспроизведение DVD-видео............................................... 15
Использование режимов воспроизведения........................ 20
Нaстройкa установок DVD-проигрывателя...................... 23
Главное меню
Вызов главного меню............................................................. 30
Использование экрана браузера .......................................... 31
Использование меню “Конфигурация системы” ............. 32
Использование экрана “Информация о версии”.............. 34
2
Содержание
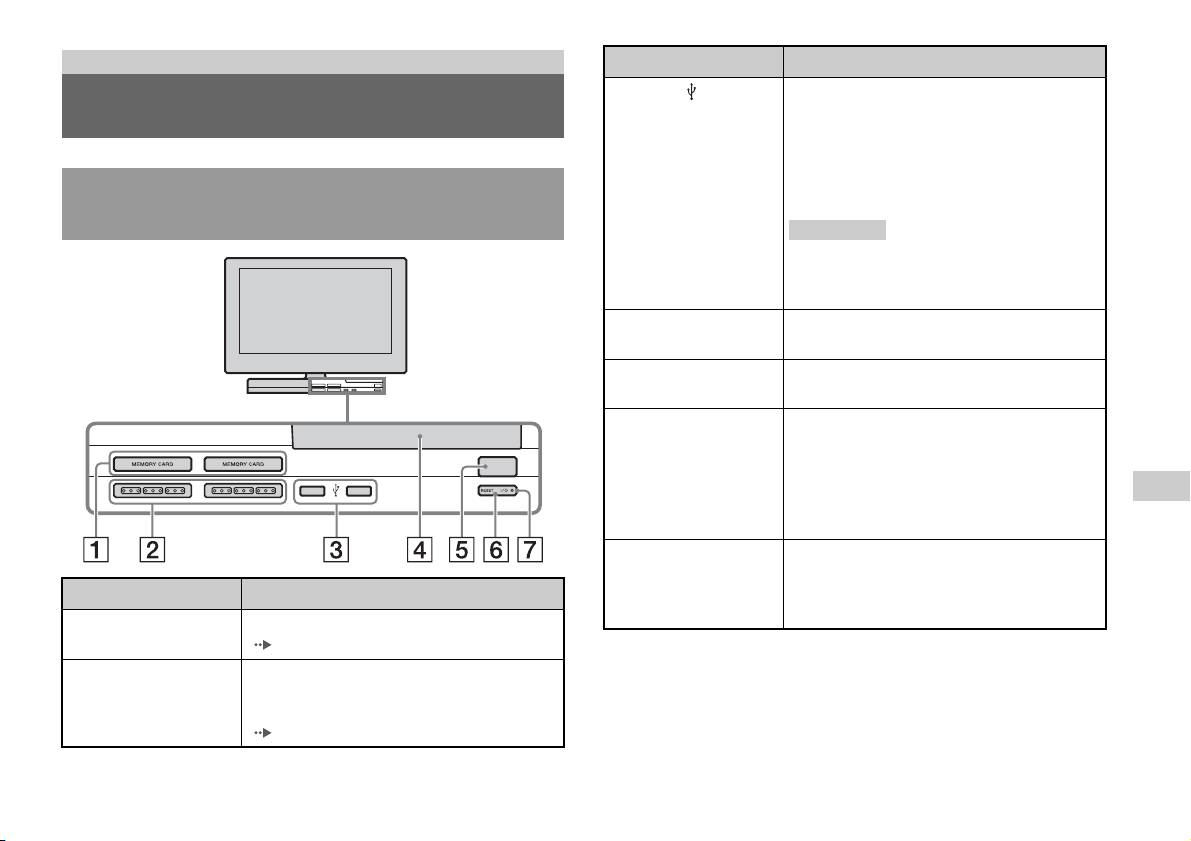
Подготовительные операции
Подключение Описание
3 Разъем USB
Можно подключать различные устройства
Названия компонентов
USB к встроенной приставке PlayStation
TM2,
но не все из них совместимы с ней. Для
получения более подробной информации см.
инструкцию по эксплуатации, прилагаемую
Передняя панель встроенной приставки
к USB-устройству.
PlayStationTM2
Подсказка
Не удастся воспроизвести фотографии,
музыку или видеофайлы с помощью разъема
USB приставки PlayStation.
4 Крышка отсека для
Нажмите кнопку OPEN, и крышка
дисков
откроется.
5 Кнопка OPEN
Используется для открывания крышки
отсека для дисков.
6 Кнопка "/1
Используется для включения встроенной
(включение/ожидание)/
приставки PlayStation
TM2, перехода в режим
RESET
OPEN
ожидания или выполнения сброса.
RESET: нажмите один раз.
RU
Режим ожидания: нажмите и удерживайте
Подготовительные операции
более одной секунды.
7 Индикатор "/1
Горит зеленым, если встроенная приставка
(включение/ожидание)
PlayStation
TM2 включена.
Подключение Описание
Горит красным, если встроенная приставка
PlayStation
TM2 в режиме ожидания.
1 Гнездо MEMORY
Используется для установки memory card
CARD 1/2
( стр. 11).
2 Порт игрового
Используется для установки аналогового
контроллера 1/2
контроллера (DUALSHOCK®2) в порт
игрового контроллера PlayStation
TM2
(стр.6).
Названия компонентов
3

Задняя панель встроенной приставки
PlayStationTM2
4
Названия компонентов
1 2
Подключение Описание
1 LAN
Можно играть в интерактивные игры,
подключив приставку PlayStation
TM2 к
широкополосной сети ( стр. 37).
Подсказка
Для использования функций домашней сети
“BRAVIA” подключитесь к порту LAN
телевизора с помощью кабеля Ethernet
( стр. 37).
2 DIGITAL AUDIO OUT
Используя цифровой вход, можно выводить
(OPTICAL)
звук встроенной приставки PlayStation
TM2
через подсоединенную систему домашнего
кинотеатра.
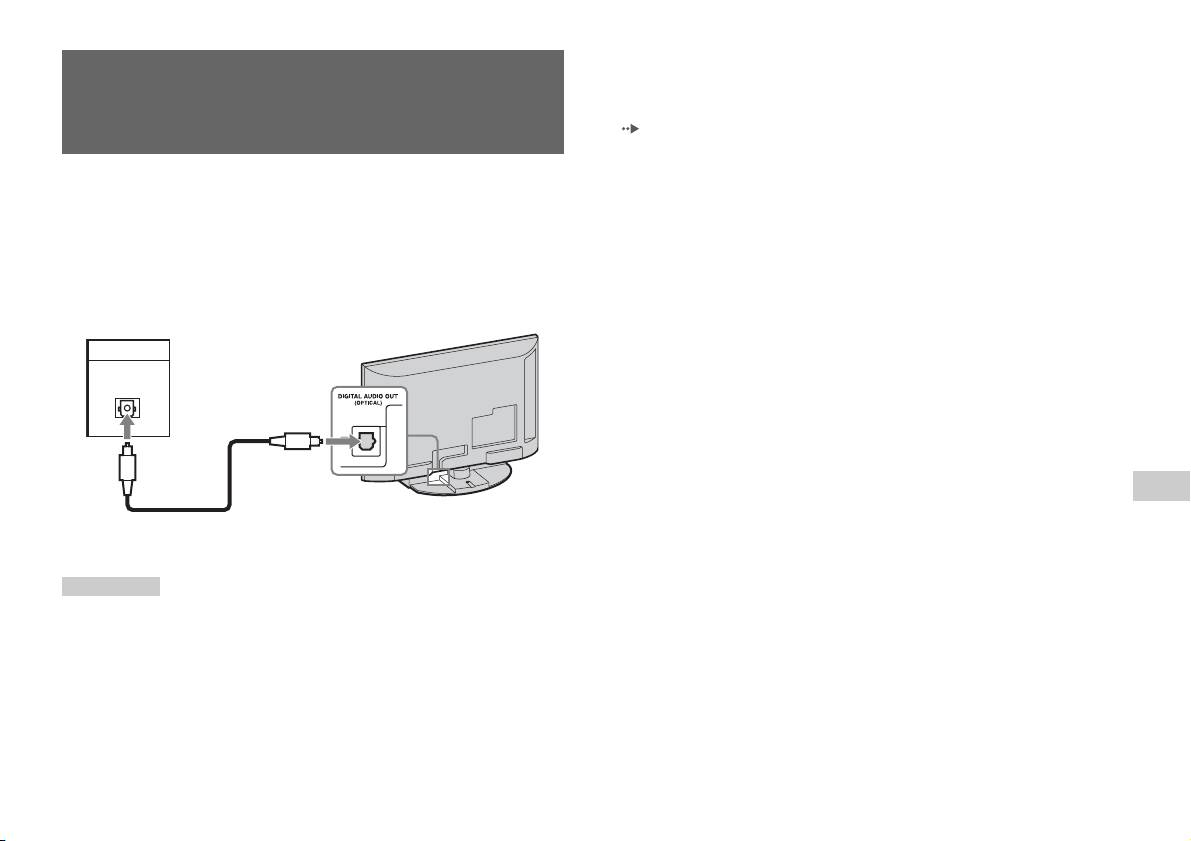
• После подключения цифрового аудиооборудования установите для
параметра “DIGITAL OUT (OPTICAL) (цифровой оптический
Подсоединение цифрового
выход)” значение “Вкл.” в меню “Конфигурация системы”. Подробнее
см. “DIGITAL OUT (OPTICAL) (цифровой оптический выход)”
аудиооборудования
( стр. 33).
• Подсоединение к разъему DIGITAL AUDIO OUT (OPTICAL)
обеспечивает вывод звука в цифровом качестве co встроенной
Используя продающийся отдельно цифровой оптический
приставки PlayStation
TM2.
кабель, можно воспроизводить объемный звук с эффектами,
аналогичными прослушиванию в кинотеатре или концертном
зале. При подключении встроенной приставки PlayStation
TM2 к
аудиооборудованию с цифровыми разъемами см. инструкцию
по эксплуатации, прилагаемую к подключаемому устройству.
Подключаемое устройство
Задняя панель встроенной приставки
PlayStation
TM2
DIGITAL IN
OPTICAL
RU
Подготовительные операции
Имеющийся в продаже оптический
цифровой кабель
Подсказки
• При подключении встроенной приставки PlayStationTM2 к
аудиооборудованию с помощью оптического цифрового кабеля на
аудиовыходе может отсутствовать звук при использовании
определенного программного обеспечения формата PlayStation
TM2. В
таком случае используйте кабель, например аудиокабель (не
прилагается), и подсоедините его к разъему AUDIO OUT телевизора.
Не используйте оптический цифровой кабель.
Подсоединение цифрового аудиооборудования
5
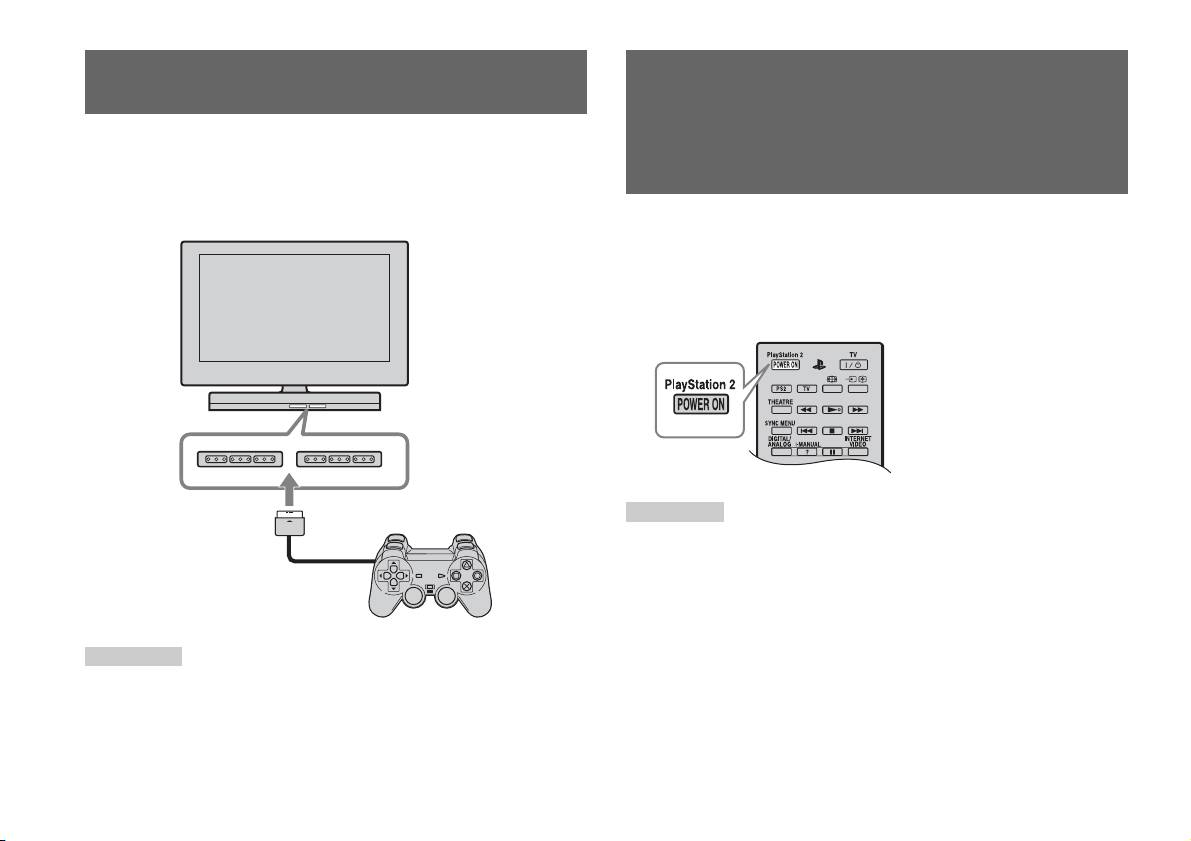
Подключение контроллера
Включение и выключение
встроенной приставки
1 Используется для установки аналогового контроллера
(DUALSHOCK
®2) в порт игрового контроллера встроенной
PlayStation
TM2
приставки PlayStation
TM2.
Передняя панель встроенной приставки PlayStationTM2
1 Нажмите кнопку PlayStation 2 POWER ON на пульте
дистанционного управления телевизора, чтобы
включить телевизор и PlayStation
TM2. (Для режима ввода
телевизора автоматически будет установлено значение
PlayStation
TM2.)
Подсказки
• При выключении телевизора приставка PlayStationTM2 также
выключается. Кроме того, при использовании следующих функций
также происходит выключение приставки PlayStation
TM2 вместе с
Аналоговый контроллер
телевизором.
(DUALSHOCK
®2)
– Отключение неиспользуемого телевизора
– Таймер сна
– Управление питанием с ПК
Подсказка
– Напоминание
Некоторые приложения требуют использования конкретного порта
– Таймер включения
контроллера. Для получения более подробной информации см.
– Режим Фоторамка
инструкцию по эксплуатации, прилагаемую к программному
• Не обращайтесь к memory card, если отображается предупреждающее
обеспечению.
сообщение (например, о скором выключении телевизора).
6
Подключение контроллера
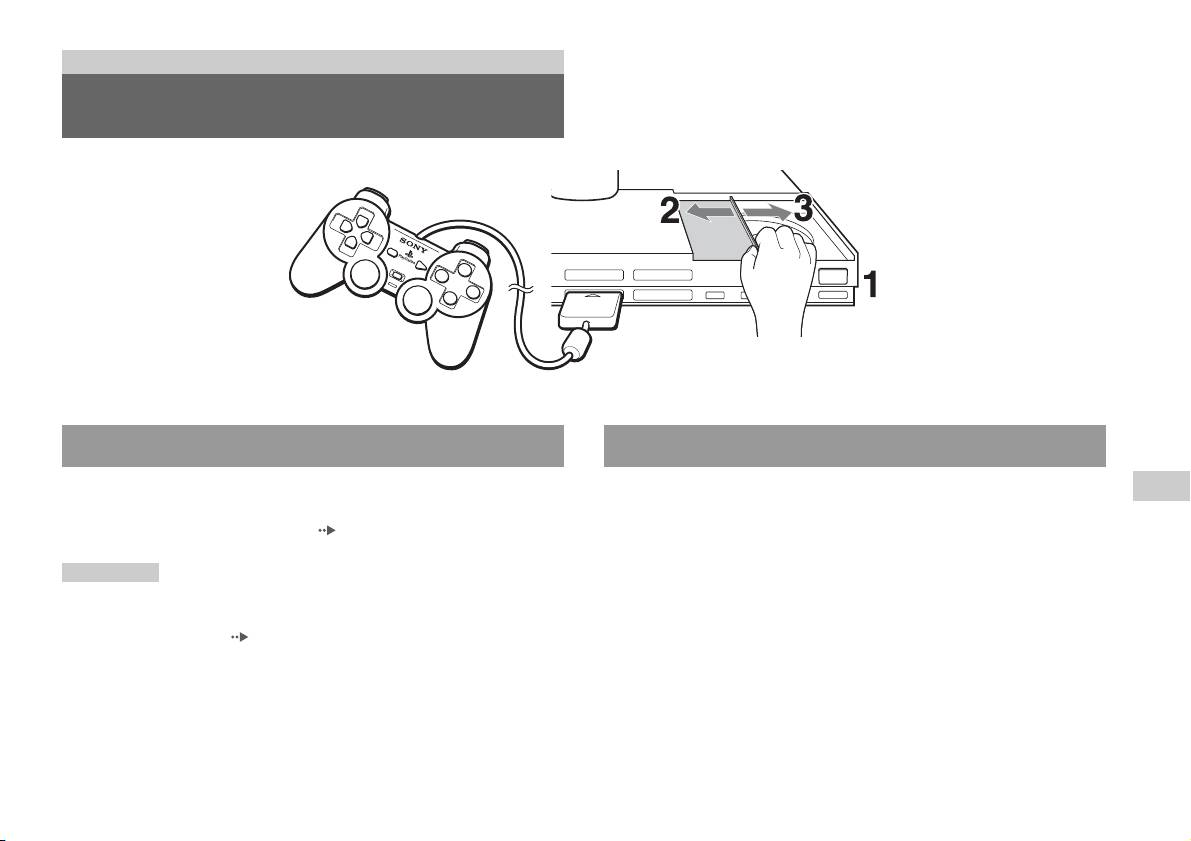
Игры
Игры
OPEN
Перед началом игры Запуск игры
Убедитесь в том, что телевизор и аудиооборудование
1 Нажмите кнопку OPEN, чтобы разблокировать крышку
RU
подключены верно и все меры безопасности соблюдены.
Игры
отсека для дисков.
• “Подключение контроллера” ( стр. 6)
2 Сдвиньте крышку отсека для дисков влево и установите
Подсказка
диск этикеткой вверх.
Чтобы играть в интерактивные игры, сначала необходимо подключиться
к сети и настроить ее. Дополнительную информацию см. в разделе
3 Закройте крышку отсека для дисков, сдвинув ее вправо
“Подключение к сети” ( стр. 37).
до фиксации.
Игры
7

Подсказки
Использование aналогового контроллера
• Перед воспроизведением диска обязательно зафиксируйте крышку
отсека для дисков.
(DUALSHOCK®2)
• Игру можно также запустить с экрана браузера ( стр. 31).
• При включении встроенной приставки PlayStation
TM2 с вставленным
Кнопки aналогового контроллера (DUALSHOCK
®2)
диском игра запустится автоматически.
чувствительны к силе нажатия. Он также поддерживает
функцию вибрации.
Перезапуск игры
Названия компонентов
Нажмите кнопку \/1 (включение/ожидание)/RESET на
передней панели встроенной приставки PlayStation
TM2.
Случайно не нажмите кнопку @/1/RESET во время игры,
поскольку в этом случае игра будет запущена заново.
Завершение игры
После сохранения данных игры нажмите кнопку
"/1 (включение/ожидание)/RESET на передней панели
встроенной приставки PlayStationTM2, затем извлеките диск
(стр.3).
RESET: нажмите один раз.
Режим ожидания: нажмите и удерживайте более одной секунды.
Кнопка/переключатель Описание
1 Кнопка L2
2 Кнопка L1
3 Кнопка SELECT
4 Кнопки
направления
8
Игры

Кнопка/переключатель Описание
Подсказки
• В зависимости от программного обеспечения число кнопок, доступных
5 Левый аналоговый
Подсказки
джойстик/кнопка L3
в аналоговом режиме, может быть ограничено. Для получения более
• Левый аналоговый джойстик и кнопка L3
подробной информации см. инструкцию по эксплуатации, прилагаемую
используются только в аналоговом режиме
к программному обеспечению.
(индикатор: красный).
• Функцию вибрации можно включить или выключить в меню
• Кнопка L3 срабатывает при нажатии на
параметров программного обеспечения. В зависимости от
аналоговый джойстик.
программного обеспечения функция вибрации может быть включена
автоматически.
6 Кнопка режима
Используется для переключения между
• Перед использованием aналогового
ANALOG
цифровым и аналоговым режимом.
контроллера (DUALSHOCK
®2) после
7 Индикатор режима
включения встроенной приставки
Цифровой режим: индикаторы выключены.
PlayStation
TM2 поверните левый и правый
Аналоговый режим: горит красным.
аналоговые джойстики большими пальцами
на один оборот. Не крутите аналоговые
Подсказка
джойстики, а вращайте их, как бы рисуя круг
При использовании некоторого
(см. рисунок).
программного обеспечения переключать
режимы невозможно даже при нажатии
Переключение режимов
кнопки ANALOG (аналогового режима).
Аналоговый контроллер можно переключать из цифрового
8 Кнопка R2
режима в аналоговый и наоборот путем нажатия кнопки
ANALOG (аналогового режима). Переключитесь в
9 Кнопка R1
RU
подходящий для пользования режим. Следует иметь в виду, что
Игры
q; Кнопка START
некоторое программное обеспечение будет выполнять такое
переключение автоматически.
qa Кнопки f/a/×/s
qs Правый аналоговый
Цифровой режим
Аналоговый режим
Подсказки
джойстик/кнопка R3
(индикатор: выкл.)
(индикатор: красный)
• Правый аналоговый джойстик и кнопка R3
используются только в аналоговом режиме
(индикатор: красный).
• Кнопка R3 срабатывает при нажатии на
аналоговый джойстик.
Игры
9

Подсказки
Использование aналогового контроллера
• При использовании aналогового контроллера в цифровом режиме
левый и правый аналоговые джойстики не работают. Функция
(DUALSHOCK®) (SCPH-110 E)
чувствительности кнопок к силе нажатия также отключена.
• При использовании некоторого программного обеспечения
Аналоговый контроллер (DUALSHOCK®) (SCPH-110 E) можно
переключать режимы невозможно даже при нажатии кнопки
использовать co встроенной приставкой PlayStation
TM2, но
ANALOG (аналогового режима).
функции кнопок в аналоговом режиме могут отличаться от
функций в аналоговом контроллере (DUALSHOCK ®2). В
Управление в аналоговом режиме
аналоговом режиме могут использоваться только левый и
• При воспроизведении программного обеспечения формата
правый аналоговые джойстики.
PlayStation
TM2 в аналоговом режиме можно использовать все
кнопки, кроме START и SELECT, L3 и R3.
Подсказка
• При воспроизведении программного обеспечения формата
Не все элементы программного обеспечения формата PlayStationTM2
PlayStation
TM в аналоговом режиме можно использовать
поддерживают использование aналогового контроллера
только левый и правый аналоговые джойстики.
(DUALSH OCK
®) (SCPH-110 E). В таких случаях необходимо
использовать аналоговый контроллер (D UALSHOCK
®2).
Подсказка
В зависимости от программного обеспечения использование кнопок в
аналоговом режиме может быть ограничено. Для получения более
подробной информации см. инструкцию по эксплуатации, прилагаемую к
программному обеспечению.
Функция вибрации
Функцию вибрации можно включать или выключать в меню
параметров программного обеспечения.
Подсказка
В зависимости от программного обеспечения функция вибрации может
включаться (ВКЛ.) автоматически.
10
Игры

Вставка Memory Card
Использование Memory Card
Вставьте Memory Card в гнездо MEMORY CARD на передней
панели встроенной приставки PlayStation
TM2.
Можно сохранять и загружать игровые данные, используя карту
Memory Card (продается отдельно). Можно также удалить
Передняя панель встроенной приставки PlayStationTM2
игровые данные или скопировать их с одной карты Memory Card
на другую.
Типы Memory Card
Существует два типа карт Memory Card. Выберите тип Memory
Card, совместимый с используемым программным
обеспечением.
MEMORY CARDMEMORY CARD
Типы карт Memory
Совместимое
Объем памяти
Card
программное
обеспечение
Memory Card (8MБ)
Программное
Прибл. 8 МБ
(для PlayStation
TM2)
обеспечение формата
RU
(SCPH-10020 E)
PlayStation
TM2
Игры
Memory Card
Программное
15 блоков памяти
Подсказка
(SCPH-1020 E)*
обеспечение формата
(прибл. 120 КБ)
Некоторые игры поддерживают использование только определенных
* Данный продукт
PlayStation
TM
гнезд MEMORY CARD. Для получения более подробной информации
больше не
см. инструкцию по эксплуатации, прилагаемую к программному
производится.
обеспечению.
Термином MagicGate™ обозначается технология защиты авторских
прав, разработанная корпорацией Sony
Использование Memory Card
11

Сохранение или загрузка игровых данных
В зависимости от программного обеспечения процедура
сохранения или загрузки может варьироваться. Для получения
более подробной информации см. инструкцию по эксплуатации,
прилагаемую к программному обеспечению.
Копирование или удаление игровых данных
Можно удалить сохраненные данные или скопировать данные
на другую карту memory card. Для выбора элементов
используйте кнопки направления и кнопку игрового
контроллера.
1 Включите встроенную приставку PlayStationTM2, не
устанавливая диск, и вставьте memory card.
2 Выберите пункт “Браузер”, затем карту memory card, с
которой требуется скопировать или удалить данные.
3 Выберите значок элемента данных, а затем выберите
вариант “Копирование” или “Удаление”.
4 Следуйте указаниям, появляющимся на экране
настройки.
12
Использование Memory Card

Аудио CD
Управление проигрывателем CD во время
воспроизведения
Воспроизведение аудио CD
Используя кнопки направлений, выберите значок требуемой
композиции и нажмите кнопку .
Воспроизведение аудио CD
Значок (кнопка*) Функция
1 Включите встроенную приставку PlayStationTM2 и
. (Кнопка L1) Перейти к началу текущей или предыдущей
вставьте диск ( стр. 7).
композиции
Выполните пункты с 1 по 3 раздела “Запуск игры”.
m (Кнопка L2) Ускоренная перемотка назад
Отобразятся номера композиций.
M (Кнопка R2) Ускоренная перемотка вперед
2 Используя кнопки направлений, выберите номер
> (Кнопка R1) Перейти к началу следующей композиции
композиции для прослушивания и нажмите кнопку .
N (Кнопка
Начало воспроизведения
Начнется воспроизведение.
START (пуск))
X (Кнопка
Пауза
Подсказки
START (пуск))
• При включении встроенной приставки PlayStationTM2 с вставленным
диском номера композиций отобразятся автоматически.
x (Кнопка
Остановка воспроизведения
RU
• Воспроизведение можно также включить с экрана браузера
SELECT
Аудио CD
( стр. 31).
(выбор))
* Проигрывателем CD можно управлять непосредственно кнопками
аналогового контроллера (DUALSHOCK
®2), указанными в скобках.
Пpeдyпpeждeниe
Чтобы воспроизвести аудио CD, записанный в формате DTS,
Подсказка
необходимо полностью уменьшить громкость, а затем подключить
Проигрывателем CD можно также управлять с помощью пульта
устройство с декодером DTS к разъему DIGITAL OUT (OPTICAL)
дистанционного управления DVD (для PlayStation
TM2) (продается
( стр. 5). Обратите внимание, что при этом может возникнуть
отдельно).
очень громкий шум.
Воспроизведение аудио CD
13

1 На экране браузера ( стр. 31) с помощью кнопок
Завершение воспроизведения аудио CD
направлений выберите значок аудио CD и нажмите
кнопку .
1 Используя кнопки направлений, выберите x, затем
Отобразится экран “Варианты воспроизведения”.
нажмите кнопку .
Воспроизведение завершится. Нажмите кнопку OPEN на
2 Выберите “Режим воспроизведения” или “Повтор”,
передней панели встроенной приставки PlayStation
TM2,
затем нажмите кнопку .
чтобы извлечь диск.
3 Выберите желаемое значение, затем нажмите кнопку
.
Воспроизведение в различных режимах
При выборе “Программа” отобразится экран для указания
Можно настроить параметры “Режим воспроизведения” и
порядка композиций. Выберите композиции для
“Повтор”.
воспроизведения.
Режим
Обычный Воспроизводит композиции в порядке
4 Нажмите кнопку .
воспроизве-
их расположения на компакт-диске
Отобразится экран браузера.
дения
Программа Воспроизведение композиций в
указанном порядке
5 Выберите значок аудио CD, затем нажмите кнопку .
Отобразятся номера композиций, и в левом нижнем углу
Произвольное
Воспроизведение композиций в
экрана появится вариант настройки.
воспроизведение
случайной последовательности
Повтор Выкл. Не воспроизводит CD повторно
6 Выберите желаемую композицию, затем нажмите
Все Повторное воспроизведение всех
кнопку .
композиций
Начнется воспроизведение.
1 Повторное воспроизведение одной
композиции
Подсказки
• К экрану “Варианты воспроизведения” можно также перейти с экрана,
отображающего композиции, выбрав в верхнем левом углу экрана
значок Audio CD и нажав кнопку .
• “Режим воспроизведения” и “Повтор” можно настроить одновременно.
14
Воспроизведение аудио CD

Диски DVD
Использование Панели управления
Воспроизведение DVD-видео
1 Воспроизвести DVD ( стр. 17).
2 Нажмите кнопку SELECT (выбор).
Проигрывателем DVD можно управлять следующими
Появится изображение Панели управления. Повторное
способами.
нажатие кнопки SELECT (выбор) изменит положение
• С экрана Панели управления
Панели на экране.
• Непосредственно с помощью аналогового контроллера
(DUALSHOCK
®2)
• С помощью пульта дистанционного управления DVD (для
PlayStation
TM2) (продается отдельно)
Ниже приведены инструкции по управлению проигрывателем
DVD с помощью Панели управления. Некоторые операции
могут разниться в зависимости от используемого метода.
Подсказки
3 Используя кнопки направлений, выберите значок, затем
• Для получения более подробной информации см. инструкцию по
нажмите кнопку .
эксплуатации, прилагаемую к DVD.
RU
• Встроенная приставка PlayStation
TM2 воспроизводит содержимое диска
Подсказка
Диски DVD
в том виде, в котором оно записано в программном обеспечении DVD.
Некоторые функции могут быть недоступны для отдельных DVD.
Для отключения Панели управления нажмите кнопку SELECT (выбор)
один или два раза или нажмите кнопку .
Список элементов Панели управления
С Панели управления можно получить доступ к следующим
элементам.
Значок Функция
Вызывает на экран меню диска
Меню
DVD-видео
Воспроизведение DVD-видео
15
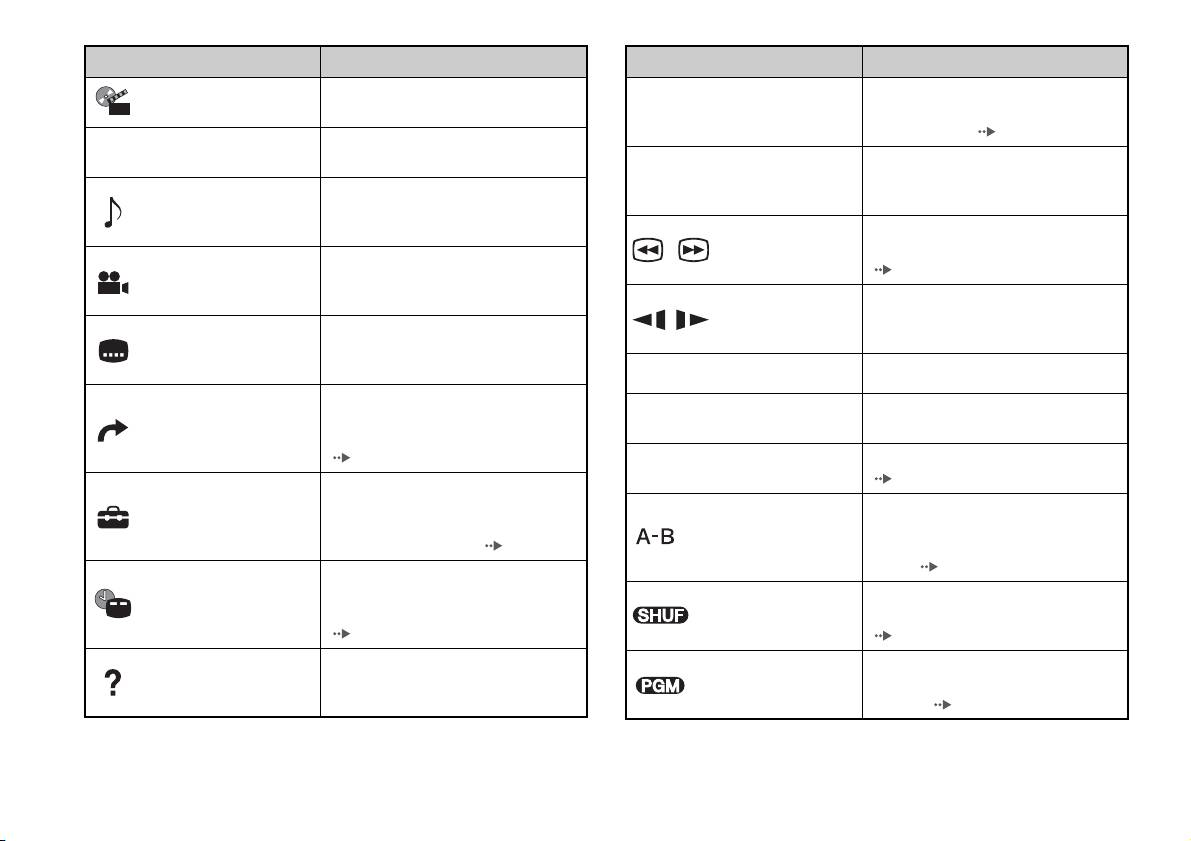
Значок Функция
Значок Функция
Вызывает на экран меню диска
Используйте для ввода номера
Главное меню
Переход к
DVD-видео
0~9
раздела, который необходимо
разделу
воспроизвести ( стр. 18)
Возвращает к ранее выбранному
O
Возврат
экрану меню DVD
Возврат/переход к началу текущего,
Предыдущий/
./>
предыдущего или следующего
Вызывает на экран и меняет
Следующий
Варианты
раздела
параметры звука DVD с
звука
несколькими звуковыми дорожками
Ускоренное воспроизведение или
/Поиск
быстрая перемотка назад
Вызывает на экран и меняет
Варианты
( стр. 19)
варианты ракурсов DVD,
ракурсов
записанных с разных ракурсов
Переходит к воспроизведению
/ Медленно
вперед/назад в режиме замедленного
Вызывает на экран и меняет
Варианты
воспроизведения
варианты субтитров DVD с
субтитров
функцией субтитров
N
Воспроизведение
Запускает воспроизведение
Переходит к выбранной главе,
Приостанавливает и вновь запускает
разделу или указанному значению
X
Пауза
Переход
воспроизведение
времени и начинает воспроизведение
( стр. 18)
Останавливает воспроизведение
x
Стоп
( стр. 17)
Вызывает на экран и меняет
установки языка, качества
Выбирает сцену для
Установка
изображения, уровня Родительского
воспроизведения и начинает
Повтор A-В
контроля, звука и т.д. ( стр. 23)
воспроизведение установленной
сцены ( стр. 22)
Вызывает на экран номер текущей
Индикация
главы или раздела, время,
Начинает воспроизведение глав и
Произвольное
времени
прошедшее от начала диска, и т.д.
разделов в произвольном порядке
воспроизведение
( стр. 19)
( стр. 21)
Вызывает на экран изображение
Начинает воспроизведение глав и
Справка
прямых функций aналогового
Программа
разделов в запрограммированном
контроллера (DUALSHOCK
®2)
порядке ( стр. 21)
16
Воспроизведение DVD-видео
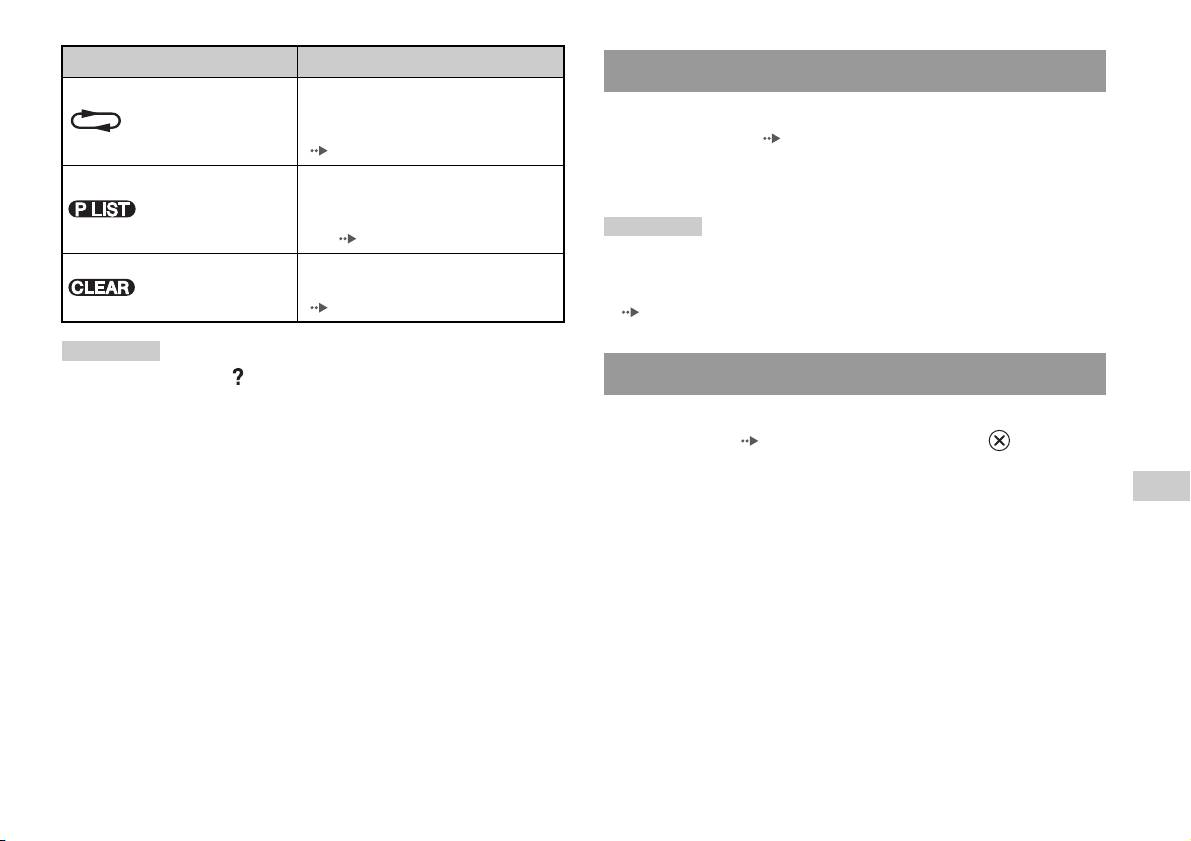
Значок Функция
Воспроизведение диска DVD
Выбирает повторное
Повторное
воспроизведение всех глав на диске,
1 Включите встроенную приставку PlayStationTM2 и
воспроизведение
одной главы или одного раздела
вставьте диск ( стр. 7).
( стр. 22)
Выполните пункты с 1 по 3 раздела “Запуск игры”. Начнется
Для дисков DVD-RW, записанных в
воспроизведение.
Original/Play
режиме VR, выбирает
List
воспроизведение Original или Play
Подсказки
List ( стр. 20)
• При включении встроенной приставки PlayStationTM2 с вставленным
Удаляет из памяти выбранные
диском воспроизведение начнется автоматически.
Очистить
номера или режим воспроизведения
• Воспроизведение можно также включить с экрана браузера
( стр. 22)
( стр. 31).
Подсказки
• Можно использовать “ ” для проверки элементов, которыми можно
Завершение воспроизведения DVD x
управлять непосредственно кнопками аналогового контроллера.
Чтобы управлять элементами непосредственно с помощью
1 Во время воспроизведения выберите x на Панели
контроллера, необходимо удалить Панель управления с экрана.
управления ( стр. 15) и нажмите кнопку .
• В зависимости от режима воспроизведения некоторые функции могут
Воспроизведение завершится. Нажмите кнопку OPEN на
быть недоступны или неизменяемы.
передней панели встроенной приставки PlayStation
TM2, а
RU
затем извлеките диск.
Диски DVD
Воспроизведение DVD-видео
17
Воспроизведение с места, где диск был
Выбор определенной сцены для
остановлен ранее (Возобновление
воспроизведения
воспроизведения)
Выбор сцены по номеру раздела
1 Во время воспроизведения выберите x на Панели
1 Во время воспроизведения выберите желаемый номер
управления ( стр. 15) и нажмите кнопку .
раздела на Панели управления ( стр. 15) и нажмите
кнопку .
2 Выберите N, затем нажмите кнопку .
Начнется воспроизведение выбранного раздела. Если вы
Проигрыватель начнет воспроизведение с места, где был
хотите воспроизвести раздел с однозначным номером
остановлен диск в пункте 1.
(т.е. 1-9), введите перед ним ноль. Например, “01”.
Чтобы отключить режим “Возобновление
Выбор сцены по номеру главы, раздела или указанию
воспроизведения”
времени
После выполнения пункта 1 выберите x и нажмите кнопку .
1 Во время воспроизведения выберите на Панели
управления ( стр. 15) и нажмите кнопку .
2 Выберите элемент, затем нажмите кнопку .
Глава Номер главы
Раздел Номер раздела
C XX:XX:XX
Bремя, прошедшее с начала раздела (или
(или Т XX:XX:XX)
главы)
3 Выберите номер желаемой сцены, затем нажмите
кнопку .
Начнется воспроизведение выбранного раздела.
18
Воспроизведение DVD-видео

Поиск определенного места на диске (Поиск) Отображение информации о
воспроизведении
Поиск можно вести вперед или назад, чтобы найти
Можно вызвать на экран такую информацию, как номер
определенное место на диске DVD.
текущей главы или время, прошедшее от начала
воспроизведения.
1 Во время воспроизведения выберите или на
Панели управления ( стр. 15), затем нажмите и
1 Во время воспроизведения выберите на Панели
удерживайте нажатой кнопку .
управления ( стр. 15) и нажмите кнопку .
При нажатии кнопок направлений с одновременно нажатой
При каждом нажатии кнопки изображение на экране
кнопкой скорость поиска меняется в следующем порядке.
будет меняться в следующем порядке.
• Поиск 3
• Поиск 2
Глава Х Раздел Х Номер главы и номер раздела
• Поиск 1
Глава Х Раздел Х С XX:XX:XX Время, прошедшее от начала
• Медленно
текущего раздела
Глава Х Раздел Х C - XX:XX:XX Время, оставшееся до окончания
2 Отпустите кнопку , когда искомая сцена найдена.
текущего раздела
Воспроизведение пойдет с обычной скоростью.
Глава Х Раздел Х T XX:XX:XX Время, прошедшее от начала
Подсказка
текущей главы
RU
Чтобы использовать аналоговый контроллер для поиска во время
Глава Х Раздел Х T - XX:XX:XX Время, оставшееся до окончания
Диски DVD
воспроизведения, нажмите и удерживайте кнопку L2 или R2. Для
текущей главы
изменения скорости при поиске используйте кнопки направлений.
Отпустите кнопку L2 или R2, когда искомая сцена найдена.
(Выкл.)
Воспроизведение DVD-видео
19

Выбор Original или Play List при
Использование режимов
воспроизведении DVD-RW
воспроизведения
Для дисков DVD-RW (режим VR) можно выбирать тип глав для
воспроизведения.
Используя различные режимы воспроизведения, вы можете
1 Остановив воспроизведение, выберите на
воспроизводить главы или разделы в желаемом порядке или
Панели управления ( стр. 15) и нажмите кнопку .
повторно воспроизводить определенные сцены. Существует
При каждом нажатии кнопки поочередно выбирается
четыре режима воспроизведения:
Original или Play List.
• Программа ( стр. 21)
• Произвольное воспроизведение ( стр. 21)
Original Воспроизведение первоначального списка
• Повторное воспроизведение ( стр. 22)
Play List Воспроизведение отредактированного списка.
• Повтор А-В ( стр. 22)
Play List является установкой по умолчанию
для этого параметра.
Ниже приведены инструкции по управлению проигрывателем
DVD с помощью Панели управления. ( стр. 15).
Подсказки
• Замедленное воспроизведение назад недоступно для дисков DVD-RW
Подсказки
(в режиме VR).
• Можно сочетать режимы “Программа”, “Произвольное
• Этот параметр недоступен в режиме “Возобновление
воспроизведение” и “Повторное воспроизведение”. Однако следует
воспроизведения”. Отключите “Возобновление воспроизведения”
иметь в виду, что некоторые параметры произвольного и повторного
( стр. 18), прежде чем выбрать эту функцию.
воспроизведения могут быть недоступны в разных сочетаниях.
• Встроенная приставка PlayStation
TM2 воспроизводит содержимое диска
в том виде, в котором оно записано в программном обеспечении DVD.
20
Использование режимов воспроизведения
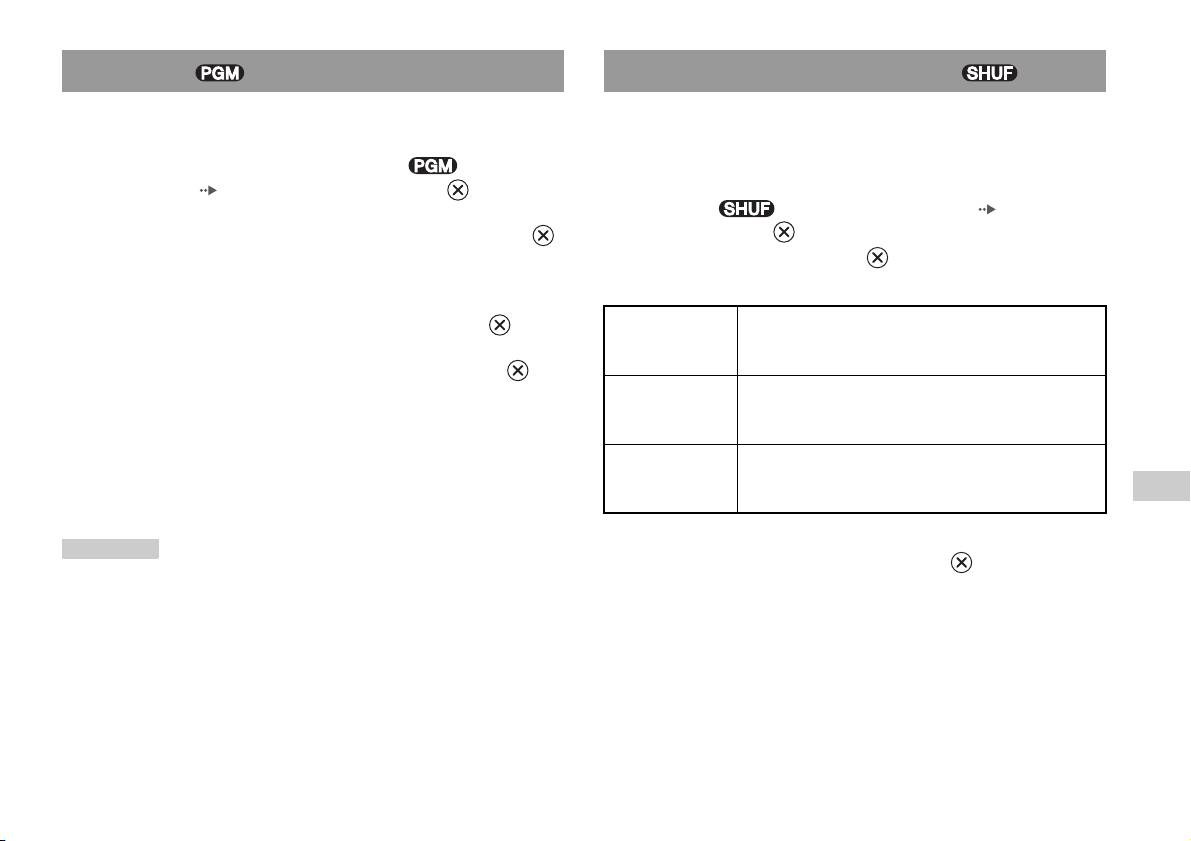
Программа Произвольное воспроизведение
Можно создать программу для воспроизведения глав и разделов
Вы можете настроить этот параметр для воспроизведения в
в желаемом порядке.
произвольном порядке всех глав и разделов, записанных на
диске. Порядок воспроизведения будет отличаться при каждом
1 Во время воспроизведения выберите на Панели
использовании режима произвольного воспроизведения.
управления ( стр. 15) и нажмите кнопку .
1 Выберите на Панели управления ( стр. 15) и
2 Выберите номер программы, затем нажмите кнопку .
нажмите кнопку .
Если программы не были установлены, единственный
При каждом нажатии кнопки изображение на экране
вариант - “1. Глaвa”.
будет меняться в следующем порядке.
3 Выберите номер главы, затем нажмите кнопку .
Произвольное
Воспроизведение глав в произвольном порядке
воспроизведение
глав
4 Выберите номер раздела, затем нажмите кнопку .
Для воспроизведения всех разделов нажмите “Все”.
Произвольное
Воспроизведение разделов в произвольном порядке
воспроизведение
Повторите пункты 2-4 для установки других глав или
разделов
разделов.
Произвольное
Выключить произвольное воспроизведение
5 Нажмите кнопку START (Пуск).
воспроизведение
RU
Выкл.
Начнется воспроизведение в режиме “Программа”.
Диски DVD
Подсказка
2 Выберите N, затем нажмите кнопку .
Установки программы сохраняются даже после завершения
воспроизведения.
Использование режимов воспроизведения
21
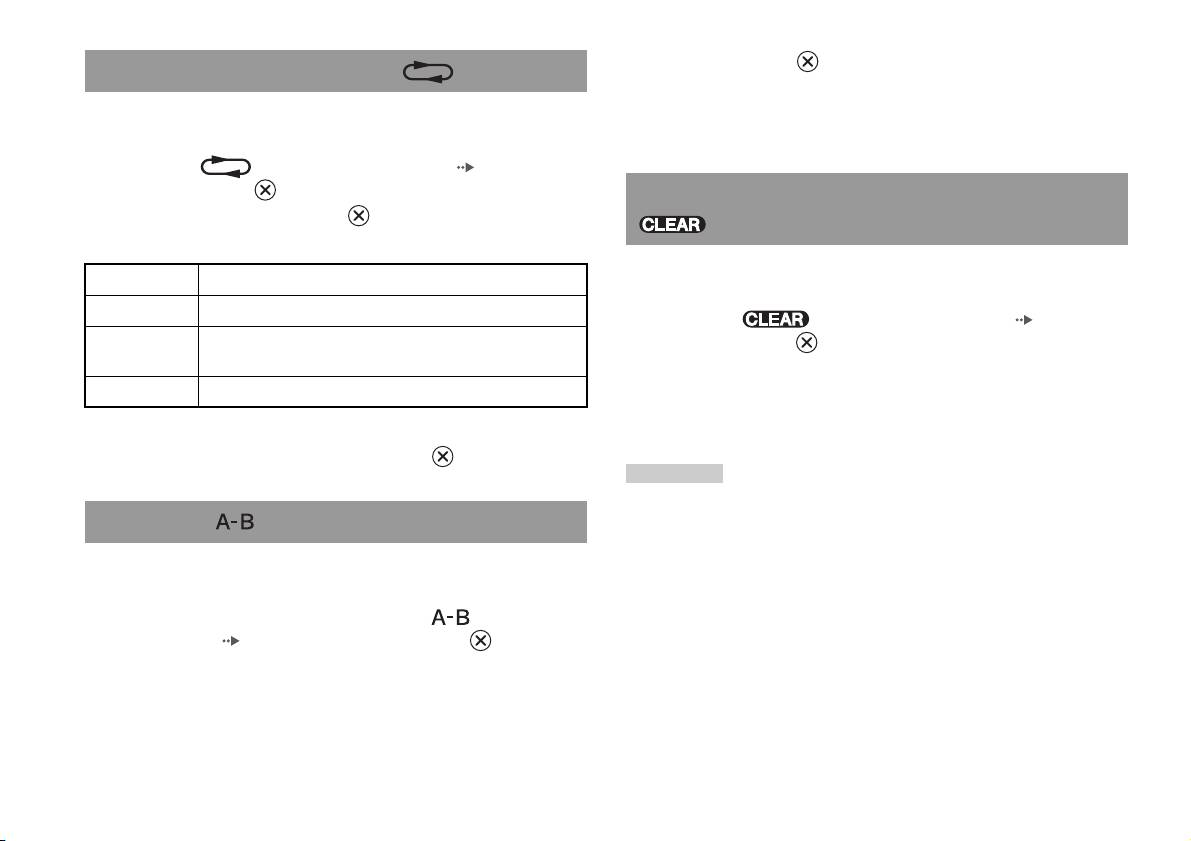
2 Нажмите кнопку в том месте, где повторное
Повторное воспроизведение
воспроизведение необходимо закончить.
С помощью этого режима главы или разделы диска могут быть
Будет установлена конечная точка воспроизведения В, и
воспроизведены многократно.
начнется повторное воспроизведение части диска от А до В.
1 Выберите на Панели управления ( стр. 15) и
нажмите кнопку .
Отключение режимов воспроизведения
При каждом нажатии кнопки изображение на экране
будет меняться в следующем порядке.
Отключает режимы воспроизведения и включает нормальное
Повтор диска Повторное воспроизведение всех глав
воспроизведение.
Повтор главы Повторное воспроизведение главы
1 Выберите на Панели управления ( стр. 15) и
Повтор
Повторное воспроизведение раздела
нажмите кнопку .
раздела
Отображается сообщение “Настройки режима
Повтор Выкл. Выключить повторное воспроизведение
воспроизведения сброшены”, и встроенная приставка
PlayStationTM2 возвращается к нормальному режиму
воспроизведения.
2 Выберите N, затем нажмите кнопку .
Подсказка
Если была установлена комбинация из нескольких режимов
воспроизведения, все они будут удалены.
Повтор A-В
Определенную часть диска можно воспроизводить
многократно.
1 Во время воспроизведения выберите на Панели
управления ( стр. 15) и нажмите кнопку в том
месте, с которого необходимо начать повторное
воспроизведение.
Будет установлена начальная точка воспроизведения A.
22
Использование режимов воспроизведения

2 Выберите значок искомого параметра и нажмите кнопку
Нaстройкa установок DVD-
.
Появится текущее значение каждого элемента.
проигрывателя
3 Выберите желаемый элемент, затем нажмите кнопку
.
С помощью Панели управления можно управлять DVD и
Параметр меню активизируется, и его можно выбрать.
регулировать настройки DVD-проигрывателя, такие как язык
субтитров, язык звука и уровень Родительского контроля.
4 Выберите желаемое значение, затем нажмите кнопку
Подсказки
.
• Некоторые диски DVD не поддерживают все настройки. Встроенная
Настройка элемента завершена. Подробные сведения см. в
приставка PlayStation
TM2 воспроизводит содержимое диска в том виде, в
инструкции для каждого элемента ( стр. 24 - 29).
котором оно записано в программном обеспечении DVD. Если DVD не
поддерживает перечисленные функции, изменить настройки будет
Подсказки
невозможно.
• В нижеприведенных объяснениях установки по умолчанию для
• Следующие параметры недоступны во время воспроизведения или при
каждого элемента меню подчеркнуты.
возобновлении воспроизведения. Отключите возобновление
• Чтобы вернуться к Панели управления после настройки, нажмите
воспроизведения ( стр. 18) перед изменением этих настроек.
кнопку SELECT (Выбор).
– “Меню”, “Звук” и “Субтитры” в меню “Настройка языков”
• Настройки сохраняются, если вы выполняете одно из следующих
– “Тип TB экрана” и “Прогрессивный режим” в меню “Настройка
действий:
экрана”
RU
– Завершение воспроизведения (в том числе отключение
Диски DVD
– “Родительский контроль” в меню “Пользовательские установки”
возобновления воспроизведения)
– “DTS” и “Режим автоматического выбора звуковой дорожки” в
– Открытие лотка для диска.
меню “Настройка звука”
Установки проигрывателя DVD можно менять следующим
образом:
1 Выберите на Панели управления ( стр. 15) и
нажмите кнопку .
Появится панель значков “Установки”.
Нaстройкa установок DVD-проигрывателя
23
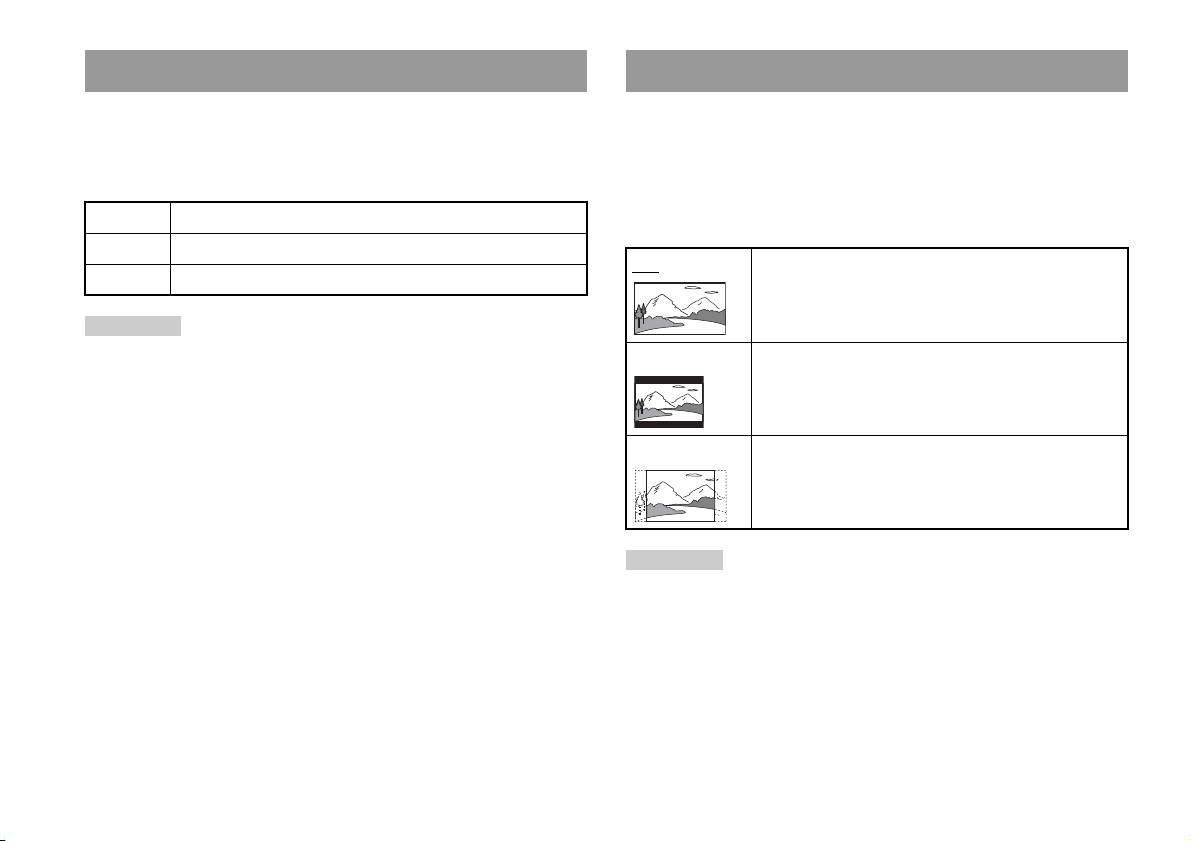
Установка параметров языка
Установка режима изображения телевизора
Настройка языков позволяет выбрать язык для меню DVD,
“Настройка экрана” позволяет устанавливать форматное
звука и субтитров. Если выбрать язык, который не записан на
соотношение экрана и другие параметры изображения.
диске DVD, автоматически будет выбран один из записанных
языков.
Тип ТВ экрана
Можно установить форматное соотношение в соответствии с
Меню Выбор языка для меню диска DVD.
форматом экрана.
Звук Выбор языка звуковой дорожки.
16:9 Формат экрана: широкоэкранный
Субтитры Выбор языка субтитров диска DVD.
Подсказка
Если выбрать параметр “Как и звук” для субтитров, язык субтитров
4:3 Формат экрана: 4:3
автоматически изменится, чтобы соответствовать языку, выбранному
С этой установкой широкоэкранное изображение
для звуковой дорожки.
отображается с границами в верхней и нижней части
экрана.
4:3 СКАН Формат экрана: 4:3
С этой установкой широкоэкранное изображение
отображается во весь экран, а те его части, которые
не умещаются, обрезаются.
Подсказка
При установке “Прогрессивный режим” на “Вкл.” “Тип TB экрана”
автоматически устанавливается на 16:9.
24
Нaстройкa установок DVD-проигрывателя
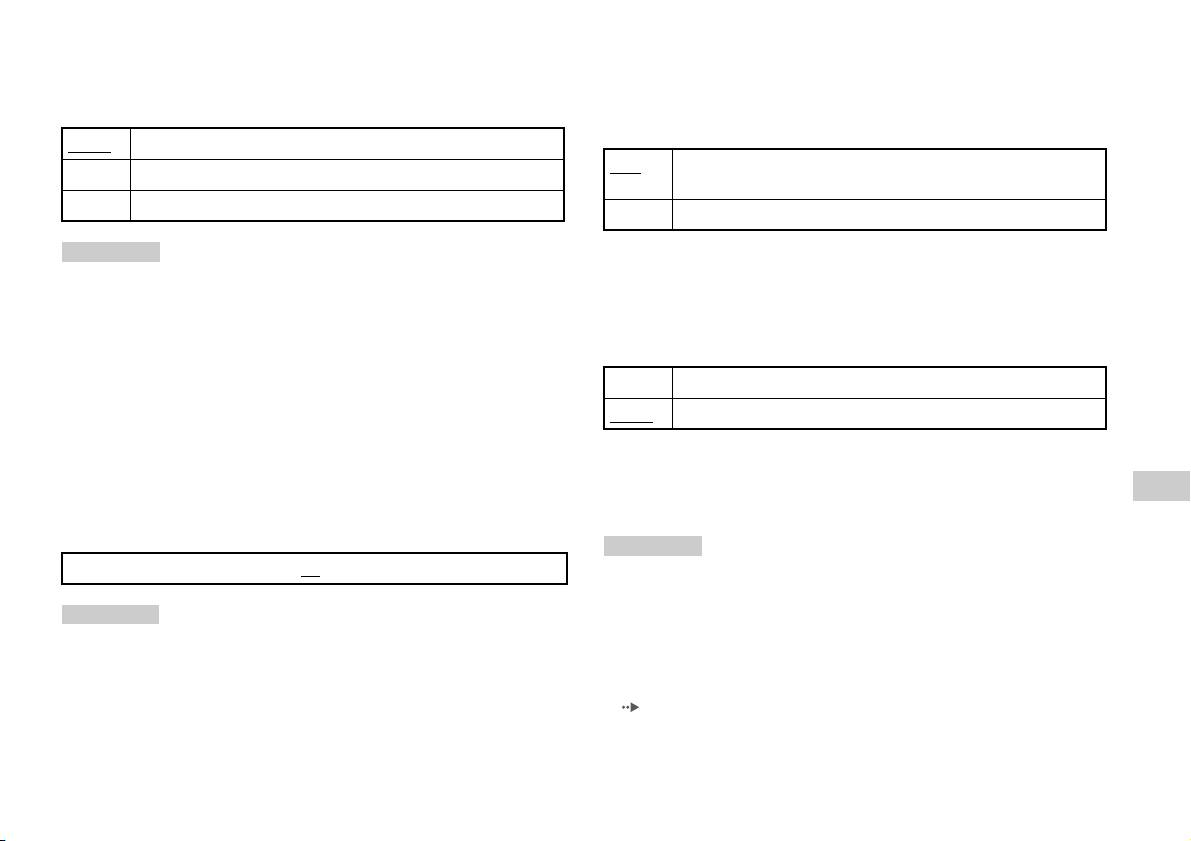
DNR
Индикация
С помощью этого параметра можно уменьшить помехи
Во время воспроизведения можно на несколько секунд в правом
изображения на экране и сделать его четче.
верхнем углу экрана отобразить сведения о состоянии
воспроизведения.
Выкл.
DNR не используется.
Вкл. Сведения о состоянии воспроизведения отображаются в
DNR1 Увеличивает четкость изображения
течение нескольких секунд.
DNR2 Увеличивает четкость изображения (максимум)
Выкл. Сведения о состоянии воспроизведения не отображаются.
Подсказки
Прогрессивный режим
• “DNR2” более эффективен для уменьшения помех, чем “DNR1”, но в
некоторых случаях может появиться остаточное изображение. Если
Этот режим дает изображение, в котором все строчки
это происходит, выберите “Выкл.”.
обновляются за один проход. В большинстве случаев это дает
• На некоторых дисках DVD результат использования функции DNR
более четкое изображение без мерцания.
может быть малозаметным.
• При установке “Прогрессивный режим” на “Вкл.” DNR автоматически
Вкл. Прогрессивное сканирование (480p)*
отключается и не может быть включен.
Выкл.
Чересстрочная развертка
Резкость контура
* Режим прогрессивного сканирования проигрывателя DVD доступен
С помощью этого параметра можно сделать контур
только при воспроизведении дисков, записанных в формате NTSC и
изображения более резким или размытым. Чем больше
воспроизведенных на экране телевизора, поддерживающего
RU
значение, тем больше резкость контура. Обычно выбирается
прогрессивное сканирование (480р).
Диски DVD
значение “0”.
Подсказки
•-2 •-1 •0
•+1 •+2
• Диски DVD могут содержать видеоматериалы и фильмы с разной
частотой смены кадров. При воспроизведении видеоматериала с
помощью прогрессивной развертки некоторые изображения могут
Подсказка
показаться неестественными. Если это происходит, установите
На некоторых дисках DVD результат использования функции “Резкость
“Прогрессивный режим” на “Выкл.” и воспользуйтесь стандартным
контура” может быть малозаметным.
режимом.
• При установке “Прогрессивный режим” на “Вкл.” “Тип TB экрана”
( стр. 24) автоматически устанавливается на “16:9”.
Нaстройкa установок DVD-проигрывателя
25
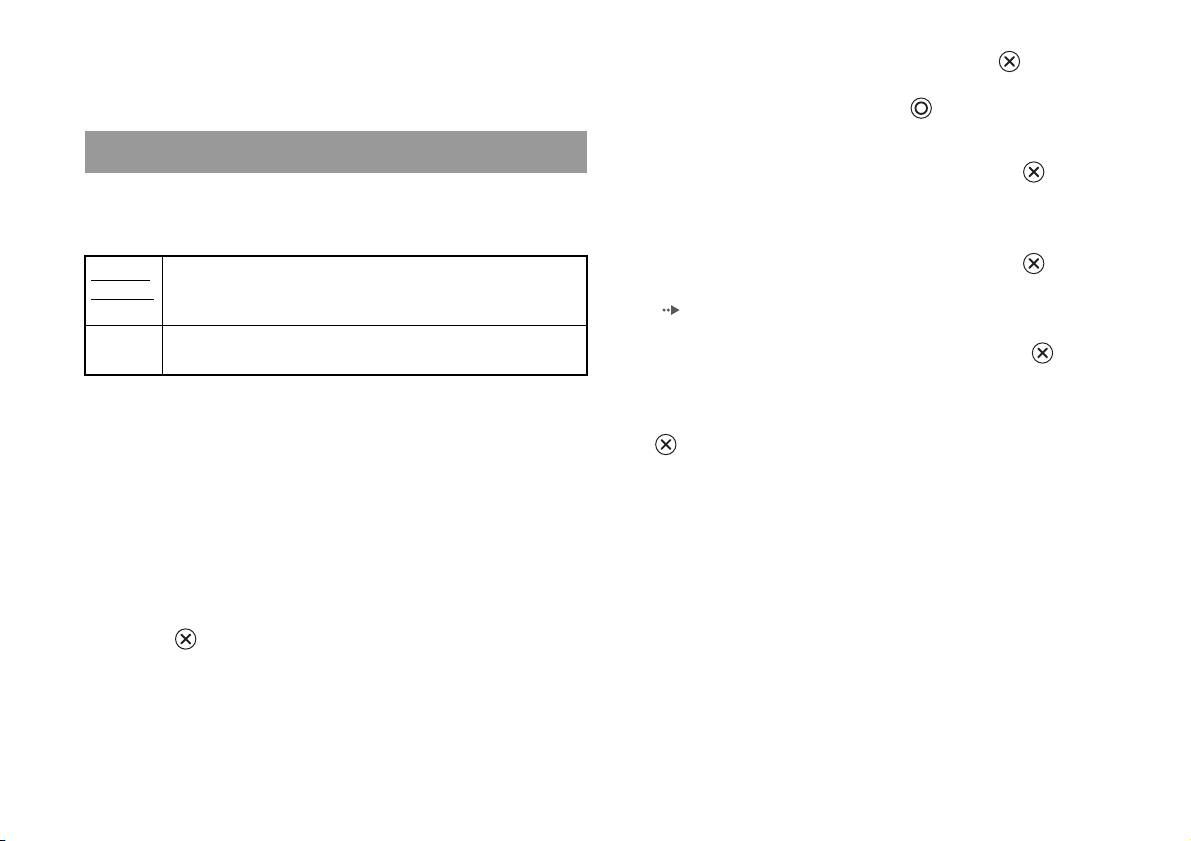
• Диск DVD-RW, записанный в режиме VR, может воспроизводиться
2 Выберите цифру, затем нажмите кнопку .
только в стандартном чересстрочном режиме. “Прогрессивный
режим” недоступен при воспроизведении такого диска.
Повторите пункт 2, чтобы ввести 4-значный пароль. Чтобы
стереть цифру, нажмите кнопку . При установке пароля
необходимо ввести его еще раз для подтверждения.
Установка параметров просмотра
3 Выберите “Регион”, затем нажмите кнопку .
Появится список регионов.
Режим паузы
Устанавливает состояние изображения в режиме паузы.
4 Выберите регион для определения уровня
Родительского контроля и нажмите кнопку .
Автома-
Изображение со множеством движущихся элементов может
тический
отображаться без дрожания. Обычно выбирается это
Если выбран “Другие”, см. “Список региональных кодов”
положение.
( стр. 27).
Рамка Изображение без движущихся элементов отображается с
высоким разрешением.
5 Выберите “Уровень”, затем нажмите кнопку .
Появится список уровней ограничения.
Родительский контроль
6 Выберите уровень ограничения, затем нажмите кнопку
Просмотр содержимого некоторых дисков DVD может быть
ограничен в некоторых регионах, исходя из возраста зрителя
.
или других факторов. Функцию “Родительский контроль”
Чтобы отключить Родительский контроль
можно использовать для ограничения уровня материалов,
воспроизводимых на встроенной приставке PlayStationTM2.
Остановите воспроизведение диска DVD, перейдите к пункту 6
Чем меньше значение, тем строже ограничение.
“Установка Родительского контроля” и установите “Уровень”
на “Выкл.”.
Установка Родительского контроля
1 Выберите “Родительский контроль”, затем нажмите
кнопку .
Появится изображение экрана установки пароля. Если
пароль был установлен, появится изображение экрана
подтверждения пароля.
26
Нaстройкa установок DVD-проигрывателя
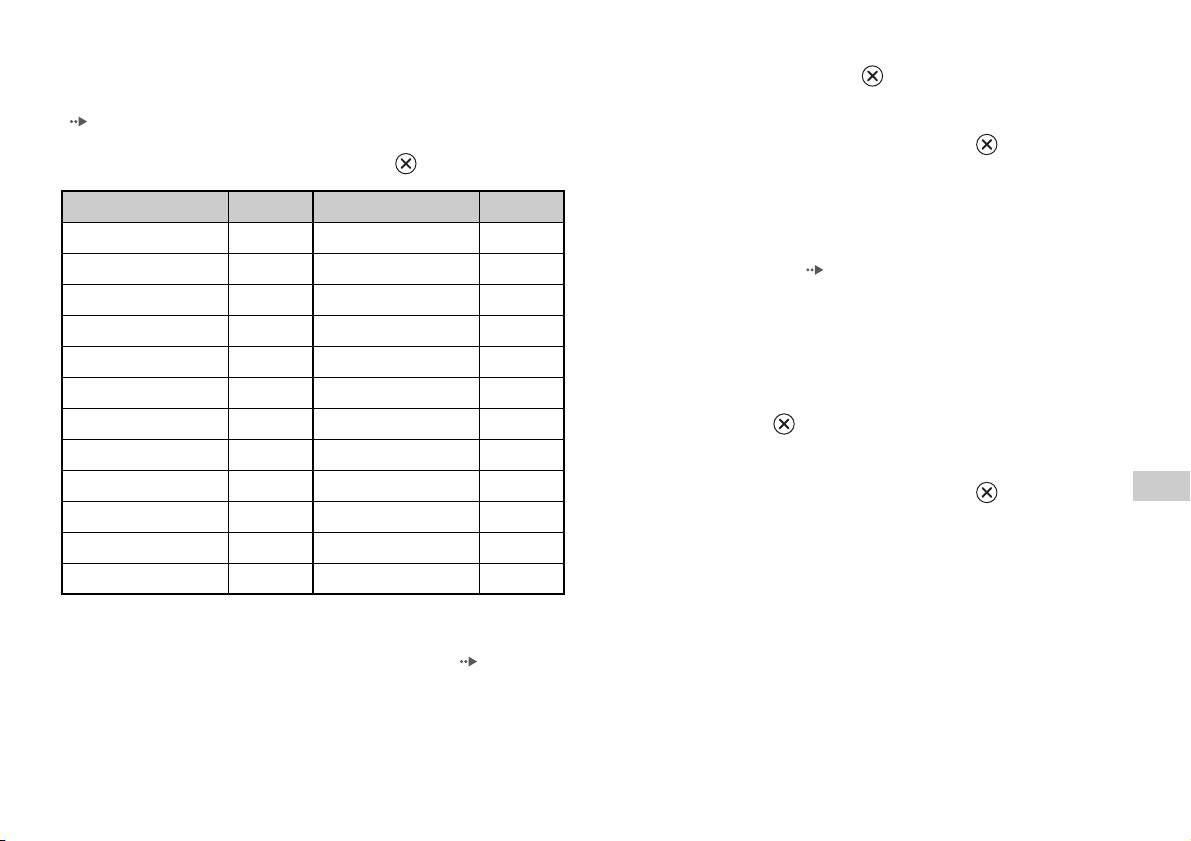
Список региональных кодов
1 С помощью кнопок направлений выберите “Изменение
Для ввода кода региона Родительского контроля выберите
пароля” и нажмите кнопку .
“Другие” в пункте 4 “Установкa Родительского контроля”
Появится изображение экрана для изменения пароля.
( стр. 26). Выберите первую букву с помощью кнопок
направления и нажмите кнопку направления вправо. Выберите
2 Выберите цифру, затем нажмите кнопку .
следующую букву, затем нажмите кнопку .
Повторите пункт 2, чтобы ввести 4-значный пароль. Чтобы
подтвердить пароль, введите его еще раз.
Регион Код Регион Код
Временная отмена ограничений родительского контроля
Австрия AT Нидерланды NL
Бельгия BE Норвегия NO
1 Воспроизвести DVD ( стр. 17).
Великобритания GB Польша PL
Вам будет предложено изменить уровень Родительского
контроля. Это обычно происходит в начале
Германия DE Португалия PT
воспроизведения, но может также случиться в другое время,
Греция GR Россия RU
в зависимости от диска.
Дания DK Словакия SK
2 Используя кнопки направлений, выберите “Да”, затем
Ирландия IE Турция TR
нажмите кнопку .
Откроется экран ввода пароля.
Испания ES Финляндия FI
Италия IT Франция FR
RU
3 Выберите цифру, затем нажмите кнопку .
Диски DVD
Израиль IL Чешская Республика CZ
Повторите пункт 3, чтобы ввести 4-значный пароль. После
введения пароля воспроизведение возобновится. Когда
Люксембург LU Швеция SE
воспроизведение диска DVD завершится, уровень
Мальта MT Швейцария CH
Родительского контроля вернется к исходному значению.
Чтобы изменить пароль
В пункте 2 “Установка Родительского контроля” ( стр. 26)
выполните следующие действия:
Нaстройкa установок DVD-проигрывателя
27
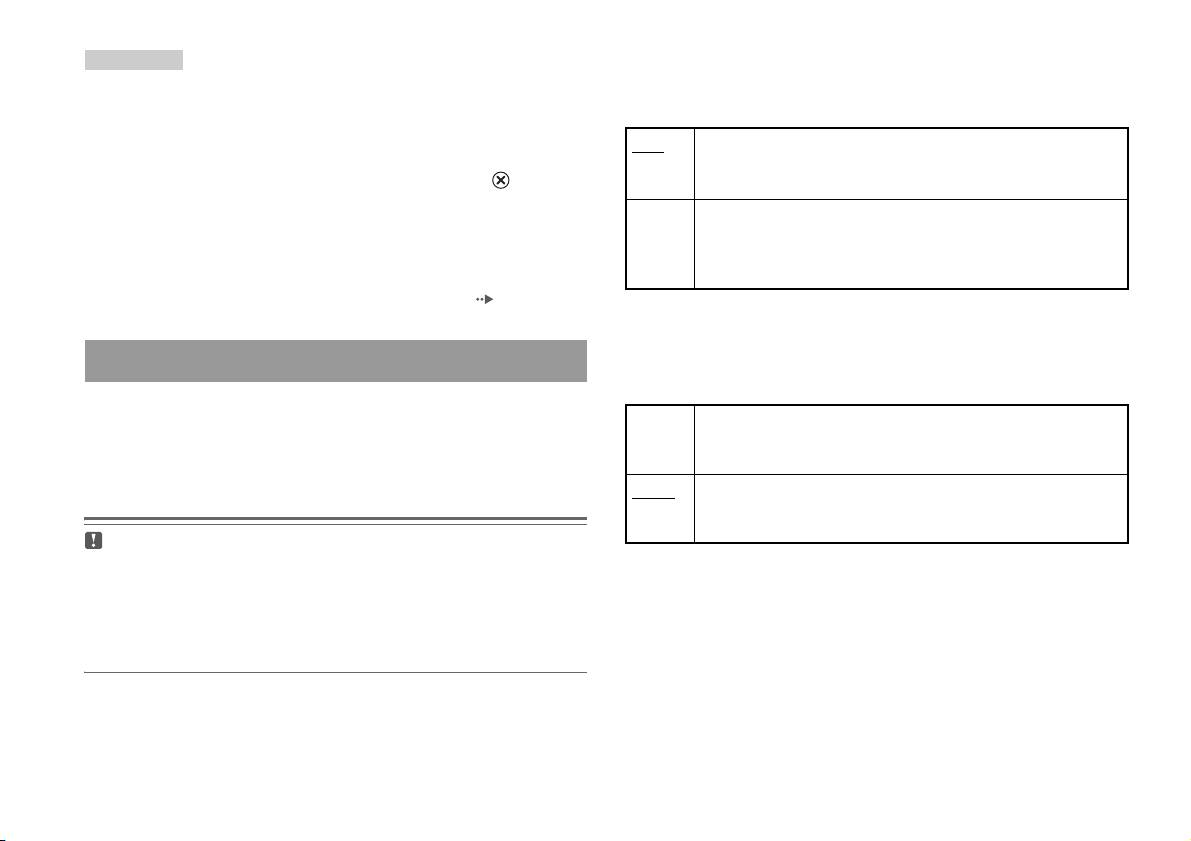
DIGITAL OUT (OPTICAL) (цифровой оптический выход)
Подсказки
Возможность вывода сигнала через разъем DIGITAL OUT
• Если пароль забыт, вставьте диск DVD без функции родительского
контроля. На панели управления нажмите кнопку x (Стоп) для
(OPTICAL).
остановки воспроизведения, а затем снова нажмите x (Стоп), чтобы
сбросить точку возобновленного воспроизведения. Выберите
Вкл. Выберите это значение, если требуется, чтобы звуковой
“Установка”, выберите “Родительский контроль” в меню
сигнал выводился через разъем DIGITAL OUT (OPTICAL).
“Пользовательские установки”, а затем нажмите кнопку . Нажмите
Появятся настройки для “Dolby Digital”, “DTS” и “MPEG”.
кнопку SELECT на аналоговом контроллере, а затем введите число
“7444”.
Выкл. Выберите это значение, если не требуется, чтобы звуковой
сигнал выводился через разъем DIGITAL OUT (OPTICAL).
• Если пароль не установлен, изменить настройки функции
Родительского контроля невозможно.
Настройки для “Dolby Digital”, “DTS” и “MPEG” не
отображаются.
• Некоторые диски DVD с функцией Родительского контроля не
разрешают использование режимов воспроизведения ( стр. 20 - 22).
Dolby Digital
Выбор вывода сигнала в формате Dolby Digital через разъем
Установка параметров звука
DIGITAL OUT (OPTICAL).
Цифровой выход звука
Вкл. Выберите это значение, если встроенная приставка
Способы вывода аудиосигналов можно переключать при
PlayStation
TM2 подключена к аудиоустройству со встроенным
подключении следующих аудиоустройств к разъему DIGITAL
декодером Dolby Digital.
OUT (OPTICAL).
Выкл.
Выберите это значение, если встроенная приставка
PlayStation
TM2 подключена к аудиоустройству без
встроенного декодера Dolby Digital.
Пpeдyпpeждeниe
Если встроенная приставка PlayStationTM2 подсоединена к
аудиоустройству без декодера Dolby Digital, DTS или MPEG,
установите для параметров “Dolby Digital”, “DTS” и “MPEG”
значение “Выкл.”. Если они установлены на “Вкл.” без
необходимого декодера, динамики начнут воспроизводить сильный
шум или не будут воспроизводить ничего.
28
Нaстройкa установок DVD-проигрывателя

DTS
Вкл. Приоритет установлен
Выбор вывода сигналов в формате DTS через разъем DIGITAL
OUT (OPTICAL).
Выкл.
Приоритет не установлен
Вкл. Выберите это значение, если встроенная приставка
Подсказки
PlayStation
TM2 подключена к аудиоустройству со встроенным
• Если параметр “DTS” установлен на “Выкл.” в меню “Цифровой выход
декодером DTS.
звука” ( стр. 29), звуковая дорожка DTS не будет воспроизводиться.
Выкл.
Выберите это значение, если встроенная приставка
• Для некоторых дисков DVD приоритетный звуковой канал может
PlayStation
TM2 подключена к аудиоустройству без
быть установлен заранее. В этом случае звуковая дорожка будет
встроенного декодера DTS.
выбираться на основе приоритетов диска.
Громкость DVD
MPEG
Параметр устанавливается, если уровень громкости звука на
Выбор вывода сигналов в формате MPEG AUDIO через разъем
диске DVD низкий. Это настройка возможна только в том
DIGITAL OUT (OPTICAL).
случае, если для параметра “DIGITAL OUT (OPTICAL)
(цифровой оптический выход)” установлено значение “Выкл.” в
Вкл. Выберите это значение, если встроенная приставка
меню “Цифровой выход звука” (стр.28).
PlayStation
TM2 подключена к аудиоустройству со встроенным
декодером MPEG.
+2 Увеличивает громкость (максимум)
Выкл.
Выберите это значение, если встроенная приставка
+1 Увеличивает громкость
PlayStation
TM2 подключена к аудиоустройству без
RU
встроенного декодера MPEG.
Стандартная
Обычно выбирается это положение.
Диски DVD
Режим автоматического выбора звуковой дорожки
При воспроизведении диска DVD, аудиозапись на котором
Пpeдyпpeждeниe
Если для этого параметра установлено значение “+1” или “+2”, звук
выполнена в нескольких звуковых форматах (PMC, Dolby
может искажаться. При искажении звука выберите значение
Digital, DTS или MPEG), приоритет отдается звуковой дорожке,
“Стандартная”. Обратите внимание, что слишком большая
содержащей наибольшее число каналов. Если звуковые
громкость может привести к повреждению слуха или поломке
дорожки в формате PCM, Dolby Digital, DTS и MPEG имеют
динамиков.
одинаковое число каналов, встроенная приставка PlayStation
TM2
выбирает дорожки в перечисленном порядке.
Нaстройкa установок DVD-проигрывателя
29

Главное меню
Подсказка
Если кнопку PlayStation 2 POWER ON на пульте дистанционного
управления телевизора нажать, когда загружен диск, основное меню не
Вызов главного меню
отобразится. Чтобы отобразить главное меню, нажмите кнопку OPEN
на передней панели встроенной приставки PlayStation
TM2 и извлеките
диск. Затем нажмите кнопку PlayStation 2 POWER ON на пульте
Из главного меню можно получать доступ к информации и
дистанционного управления телевизора.
изменять разнообразные настройки. Из главного меню можно
также перейти к следующим экранам. Главное меню
отображается при включении встроенной приставки
PlayStationTM2 без вставленного диска.
• Экран браузера ( стр. 31)
• Меню “Конфигурация системы” ( стр. 32)
• Экран информации о версии ( стр. 34)
1 Нажмите кнопку PlayStation 2 POWER ON на пульте
дистанционного управления телевизора.
На экране появится главное меню. Обратите внимание, что
отображение главного меню может занять некоторое время.
30
Вызов главного меню

4 Выберите значок, затем нажмите кнопку .
Использование экрана браузера
• После выбора значка Memory Card появляются значки
данных, сохраненных на Memory Card. О копировании и
удалении игровых данных см. “Копирование или удаление
С помощью экрана браузера можно выполнять следующие
игровых данных” ( стр. 12).
операции:
• При выборе значка для диска с программным
• Копировать или удалять игровые данные на Memory Card
обеспечением формата PlayStation
TM2 или PlayStationTM
• Запускать игры
запускается игра.
• Воспроизводить аудио CD
• При выборе значка аудио CD отображаются композиции
• Воспроизводить DVD
компакт-диска. См. “Воспроизведение аудио CD”
( стр. 13).
1 Отобразите главное меню ( стр. 30).
• При выборе значка диска DVD-видео начнется
воспроизведение DVD.
2 Используя кнопки направлений, выберите “Браузер”,
затем нажмите кнопку .
Подсказка
Отобразится экран браузера.
Если в встроенной приставке PlayStationTM2 отсутствует Memory Card
или диск, на экране браузера отображается сообщение “Нет данных”.
3 Вставьте диск или Memory Card.
Значок вставленного диска отображается на экране
браузера.
\
RU
Главное меню
Использование экрана браузера
31

4 Выберите желаемое значение, затем нажмите кнопку
Использование меню
.
Подробные сведения см. в инструкции для каждого элемента
“Конфигурация системы”
меню ( стр. 32 - 34).
Подсказки
С помощью меню “Конфигурация системы” вы можете
• В нижеприведенных объяснениях установки по умолчанию для
изменить настройки множества параметров, включая язык,
каждого элемента меню подчеркнуты.
время и способ воспроизведения аудио- и видеоданных.
• Изменения каждой настройки сохраняются даже после отключения
или перезагрузки встроенной приставки PlayStation
TM2.
1 Отобразите главное меню ( стр. 30).
2 С помощью кнопок направлений выберите
Настройка часов
“Конфигурация системы” и нажмите кнопку .
Появится меню “Конфигурация системы”.
Вы можете установить дату и время. Используйте кнопки
направлений для установок “Год”, “Месяц”, “День”, “Час”,
“Минута” и “Секунда”. Установки вступают в силу при нажатии
кнопки .
Дополнительные параметры
При нажатии кнопки на экране “Настройка часов” можно
установить такие параметры, как “Формат даты” или “Формат
времени”. Используйте кнопки направлений и кнопку для
установки каждого параметра.
Формат времени Устанавливает системные часы в 12-часовой
или 24-часовой формат
3 Выберите элемент, затем нажмите кнопку .
Указанный пункт меню станет доступным для выбора.
Формат даты Устанавливает порядок отображения года,
месяца и дня
Часовой пояс Устанавливает часовой пояс
Летнее время Устанавливает зимнее или летнее время. По
умолчанию установлено “зимнее время”.
32
Использование меню “Конфигурация системы”
Размер экрана
Пульт дистанционного управления
Выбор режима отображения в зависимости от подключаемого
Настройте этот параметр при использовании пульта
телевизора.
дистанционного управления DVD (для PlayStation
TM2)
(продается отдельно).
4:3
Функция игры Вкл. Выберите это значение, если с помощью
Весь экран*
пульта дистанционного управления DVD
16:9
осуществляется управление программным
обеспечением формата PlayStation
TM2 или
* Режим “Весь экран” совместим с меню “Конфигурация системы”,
PlayStation
TM.
экраном браузера и экраном аудио CD.
Функция игры Выкл. Выберите это значение, если с помощью
пульта дистанционного управления DVD не
осуществляется управление программным
DIGITAL OUT (OPTICAL) (цифровой оптический
обеспечением формата PlayStation
TM2 или
PlayStation
TM.
выход)
Возможность вывода сигнала через разъем DIGITAL OUT
Подсказка
(OPTICAL).
Когда параметр “Пульт дистанционного управления” установлен в
значении “Функция игры Вкл.”, действуют следующие ограничения:
Вкл. Выберите это значение, если необходимо
– В зависимости от программного обеспечения некоторые кнопки
RU
выводить сигнал через разъем DIGITAL OUT
пульта дистанционного управления могут работать некорректно.
Главное меню
(OPTICAL).
– Пульт дистанционного управления DVD не срабатывает, если
нажаты одновременно две или более кнопок.
Выкл. Выберите это значение, если не требуется,
чтобы звуковой сигнал выводился через
– Некоторые диски с программным обеспечением могут перестать
разъем DIGITAL OUT (OPTICAL).
работать при отключении контроллера от порта контроллера 1. Если
это происходит, установите значение “Функция игры Выкл.”.
Использование меню “Конфигурация системы”
33
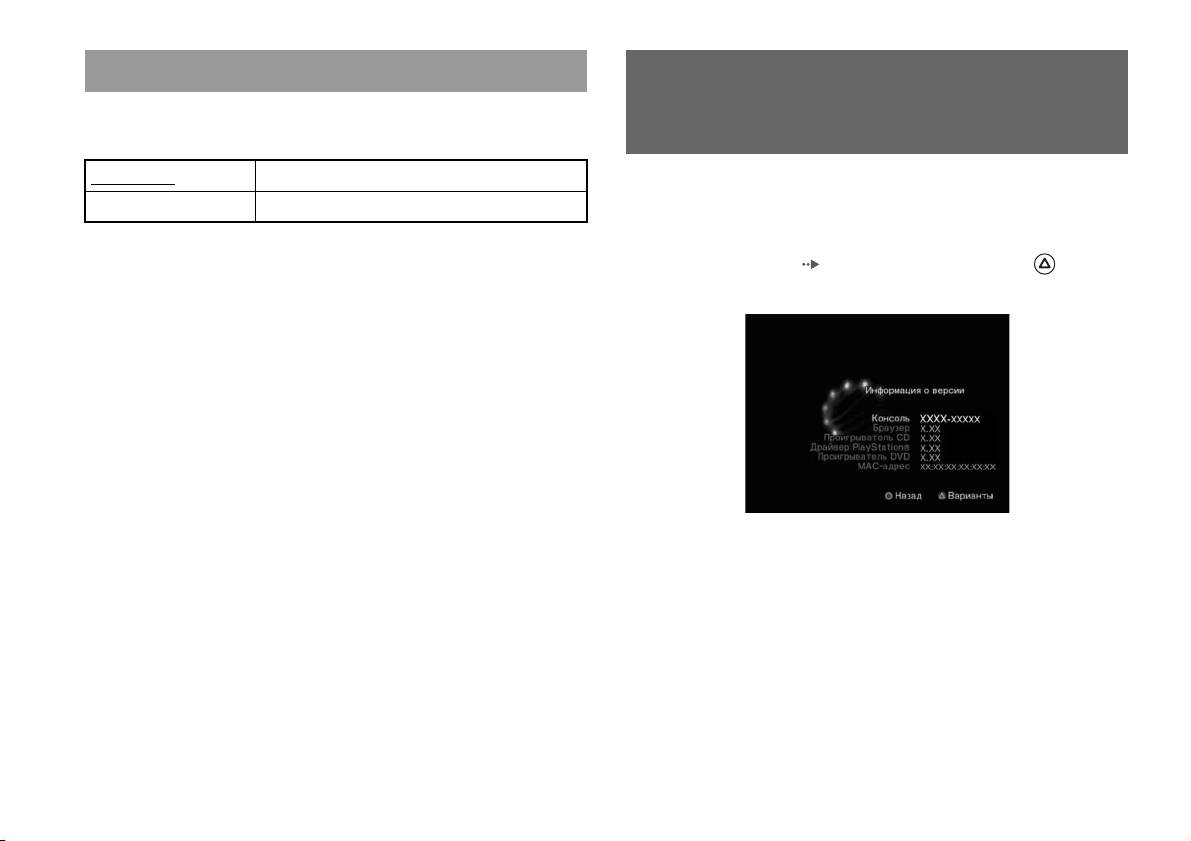
Язык
Использование экрана
Выбор языка для главного меню, экрана браузера, меню
“Конфигурация системы” и экрана “Информация о версии”.
“Информация о версии”
Английский Отображает сообщения на английском языке
Выбрав этот параметр, можно получить информацию о версиях
Русский Отображает сообщения на русском языке
различных компонентов встроенной приставки PlayStation
TM2, а
также изменить установки различных функций.
1 В главном меню ( стр. 30) нажмите кнопку .
Появится экран “Информация о версии”.
Дополнительные параметры
Дополнительные параметры доступны для элементов
“Консоль”, “Драйвер PlayStation
®” и “Проигрыватель DVD”.
“Проигрыватель DVD” может быть установлен только в
случае, если для параметра “Прогрессивный режим”
проигрывателя DVD выбрано значение “Вкл.”.
34
Использование экрана “Информация о версии”

1 Используя кнопки направлений, выберите элемент,
Подсказка
затем нажмите кнопку .
Параметр “Диагностика” автоматически возвращается к значению
Появится текущее значение элемента.
“Выкл.” (параметр по умолчанию) в следующих случаях:
– При начале воспроизведения программного обеспечения формата
2 Выберите элемент, затем нажмите кнопку .
PlayStation
TM2 или PlayStationTM или диска DVD.
Появятся доступные параметры.
– При перезагрузке встроенной приставки PlayStation
TM2.
– При выключении встроенной приставки PlayStation
TM2.
3 Выберите желаемое значение, затем нажмите кнопку
.
Драйвер PlayStationTM
Подробные сведения см. в инструкции для каждого элемента
( стр. 35 - 36).
Настройка программы “Драйвер PlayStationTM” позволяет
оптимизировать работу программного обеспечения формата
Подсказка
PlayStationTM.
В нижеприведенных объяснениях установки по умолчанию для каждого
элемента меню подчеркнуты.
Подсказка
Параметры автоматически возвращаются к значениям по умолчанию в
следующих случаях:
Консоль
– При выключении встроенной приставки PlayStation
TM2.
Встроенная приставка PlayStationTM2 автоматически
Скорость диска
настраивает параметры для наилучшего качества
RU
воспроизведения диска. Когда для параметра “Диагностика”
Главное меню
Стандартная Загружает диски при нормальной скорости
установлено значение “Вкл.”, встроенная приставка
PlayStationTM2 выполняет дополнительные настройки.
Быстрая Загружает диски при большой скорости
Диагностика
Подсказка
Установите значение “Стандартная” в следующих случаях:
Выкл. Диагностика отключена.
– Если быстрая загрузка не улучшает результаты
Вкл. Диагностика включена.
– Если используется программное обеспечение, несовместимое с
быстрой загрузкой
Использование экрана “Информация о версии”
35
Отображение текстуры
2 Используя кнопки направлений, выберите
“Проигрыватель DVD”, затем нажмите кнопку .
Стандартное
Обычное отображение
Появится параметр “Отключение прогрессивного режима”.
Гладкое Уменьшает зернистость изображения на экране
3 Нажмите кнопку .
Подсказка
Установите значение “Стандартное” в следующих случаях:
4 Выберите “Да”, затем нажмите кнопку .
– Если гладкое отображение текстуры не улучшает результаты
– Если при выборе значения “Гладкое” изображение отображается
5 Дважды нажмите кнопку .
неправильно
Дисплей вернется к главному меню.
6 Нажмите кнопку OPEN на передней панели встроенной
Проигрыватель DVD
приставки PlayStation
TM2 и вставьте диск DVD в
встроенную приставку PlayStation
TM2.
Когда встроенная приставка PlayStationTM2 подключена к
телевизору, не имеющему необходимого оборудования, при
установке для параматра “Прогрессивный режим” значения
7 Закройте крышку лотка для диска.
“Вкл.” изображение может отсутствовать или его качество
Начнется воспроизведение.
будет низким. В этом случае отключите “Прогрессивный
режим”, выполнив следующую процедуру.
Подсказка
Перед отключением прогрессивного режима извлеките DVD.
Настройка не будет сброшена, если: 1) после выполнения пункта 4 не
начать воспроизведение DVD или 2) встроенная приставка PlayStation
TM2
Отключение прогрессивного режима
перезагружена или отключена до выполнения пункта 6.
Нет Сохраняет “Прогрессивный режим” включенным
Да Отключает “Прогрессивный режим”
1 Отображение экрана “Информация о версии”.
36
Использование экрана “Информация о версии”
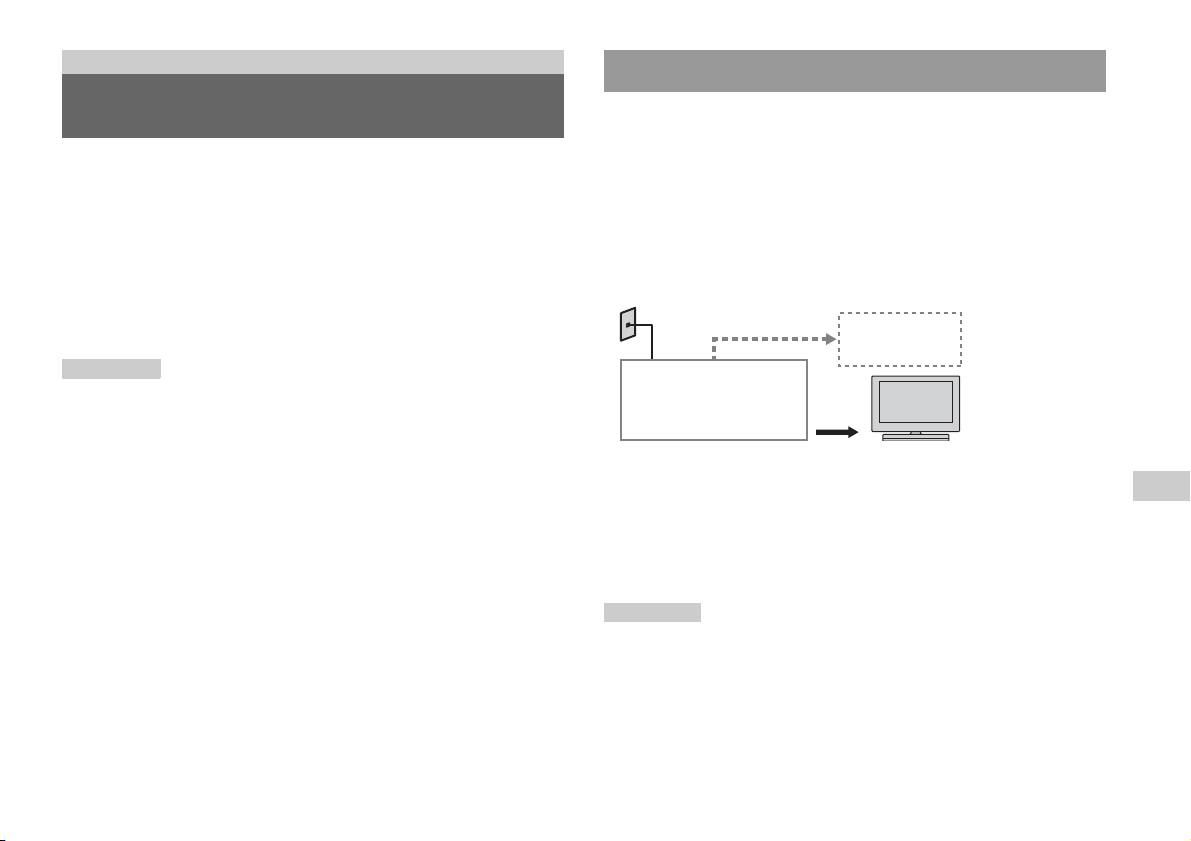
Работа в сети
Подключение с помощью кабеля Ethernet
Подключение к сети
Можно подключить встроенную приставку PlayStationTM2 к сети
с помощью кабеля Ethernet, подсоединив его к разъему
NETWORK на задней панели. Можно подключиться к сети 100
Можно играть в интерактивные игры, подключив приставку
Base-TX или 10 Base-T. Для получения более подробной
PlayStation
TM2 к широкополосной сети. Чтобы играть во все
информации см. инструкцию по эксплуатации, прилагаемую к
интерактивные игры, необходимо следующее:
сетевому устройству.
• Игра для PlayStation
TM2 с поддержкой сетевого режима
• Широкополосное соединение с сетью Интернет
Базовая настройка сети
• Имеющийся в продаже кабель Ethernet
Сетевая линия
• Карта memory card (8 MБ) (для PlayStation
ТМ2) (продается
отдельно)
ПК
Подсказки
Широкополосный
• Интерактивный режим игр недоступен при использовании
модем, маршрутизатор
коммутируемого соединения или соединения ISDN.
и т.д.
• Подключение USB от внешнего сетевого устройства к разъему USB не
поддерживается.
Сетевое оборудование Кабель Ethernet
(не прилагается)
• Существует два типа кабелей Ethernet: прямой и кроссированный.
Убедитесь, что при подключении приставки PlayStation
TM2 к
RU
Сетевая линия: зависит от типа широкополосного доступа,
широкополосному каналу доступа в Интернет используется
Работа в сети
предоставляемого в доме проживания.
правильный тип кабеля. Для получения дополнительной информации
см. инструкцию по эксплуатации, прилагаемую к сетевому устройству,
Сетевое оборудование: тип используемого оборудования
или обратитесь к своему поставщику услуг широкополосного доступа в
также может отличаться в зависимости от типа доступа.
Интернет.
• Не используйте кабель Ethernet для подключения к порту LAN
Подсказка
телевизора.
При подключении встроенной приставки PlayStationTM2 и ПК к сети,
возможно, потребуется сетевое устройство, например маршрутизатор
или концентратор. Для получения более подробной информации см.
инструкцию по эксплуатации, прилагаемую к сетевому устройству.
Подключение к сети
37

Подключение встроенной приставки PlayStationTM2
Подсказки
• Не подсоединяйте кабель питания переменного тока к электрической
розетке до выполнения всех остальных подключений.
Встроенная приставка
• Не подключайте к сетевому разъему кабели Ethernet или телефонные
PlayStation
TM2
шнуры следующих типов; слишком большая сила тока, проходящего
через разъем, может вызвать повреждение, сильный нагрев или
возгорание кабеля.
– Стандартные домашние телефонные линии
– Кабели Ethernet, непригодные к использованию с сетью 10Base-T/
100Base-TX
– Любая телефонная линия или канал передачи данных, совместимые с
Сетевой кабель (не прилагается)
ISDN (цифровая)
– Телефонные линии мини-АТС
– Прочие неизвестные типы телефонных проводов
Маршрутизатор
К сетевым устройствам
Сетевой кабель (не прилагается)
DSL-модем/Кабельный модем
Интернет
1 Подсоедините кабель Ethernet к разъему NETWORK на
задней панели.
2 Подключите кабель Ethernet к сетевому устройству.
38
Подключение к сети

Сетевые настройки
Подсоединив кабель Ethernet к встроенной приставке
PlayStation
TM2, необходимо выполнить и сохранить настройки
сети. Для этого требуется диск для доступа к сети,
предоставляемый при регистрации приставки PlayStationTM2.
Можно зарегистрировать приставку PlayStation
TM2.
Для выполнения настроек сети потребуются следующие
компоненты.
– Карта Memory Card (8 MБ) (для PlayStationТМ2) (продается отдельно)
– Информация о настройке сети и регистрации в ней, предоставляемая
вашим провайдером широкополосного интернет-доступа
Подсказка
В зависимости от типа используемых интернет-услуг может возникнуть
необходимость предоставления провайдеру широкополосного интернет-
доступа вашего адреса МАС. MAC-адрес PlayStation
TM2 можно найти в
списке на экране информации о версии ( стр. 34).
RU
Работа в сети
Сетевые настройки
39
“ ”, “PlayStation”, “ ”, “DUALSHOCK” and “ ” are trademarks of Sony Computer Entertainment Inc.
“SONY” and “ ” are registered trademarks and “MagicGate” is a trademark of Sony Corporation.
« », « PlayStation », « », « DUALSHOCK » et « » sont des marques de Sony Computer Entertainment Inc.
« SONY » et « » sont des marques déposées et « MagicGate » est une marque commerciale de Sony Corporation.
“ ”, “PlayStation”, “ ”, “DUALSHOCK” e “ ” sono marchi di Sony Computer Entertainment Inc.
“SONY” e “ ” sono marchi registrati e “MagicGate” è un marchio di Sony Corporation.
„ “, „PlayStation“, „ “, „DUALSHOCK“ und „ “ sind Marken der Sony Computer Entertainment Inc.
„SONY“ und „ “ sind eingetragene Marken und „MagicGate“ ist eine Marke der Sony Corporation.
“ ”, “PlayStation”, “ ”, “DUALSHOCK” y “ ” son marcas comerciales de Sony Computer Entertainment Inc.
“SONY” y “ ” son marcas comerciales registradas y “MagicGate” es una marca comercial de Sony Corporation.
“ ”, “PlayStation”, “ ”, “DUALSHOCK” e “ ” são marcas comerciais da Sony Computer Entertainment Inc.
“SONY” e “ ” são marcas comerciais registadas e “MagicGate” é uma marca comercial da Sony Corporation.
" ", "PlayStation", " ", "DUALSHOCK" en " " zijn handelsmerken van Sony Computer Entertainment Inc.
"SONY" en "" zijn geregistreerde handelsmerken en "MagicGate" is een handelsmerk van Sony Corporation.
“ ”, “PlayStation”, “ ”, “DUALSHOCK” и “ ” являются товарными знаками компании Sony Computer Entertainment Inc.
“SONY” и “ ” являютcя зapeгиcтpиpовaнными товapными знаками, a “MagicGate” являeтcя товapным знaком компaнии Sony Corporation.
© 2010 Sony Computer Entertainment Inc. All rights reserved.


