Sony MZ-B100: Playing an MD right away!
Playing an MD right away!: Sony MZ-B100
Playing an MD right away!
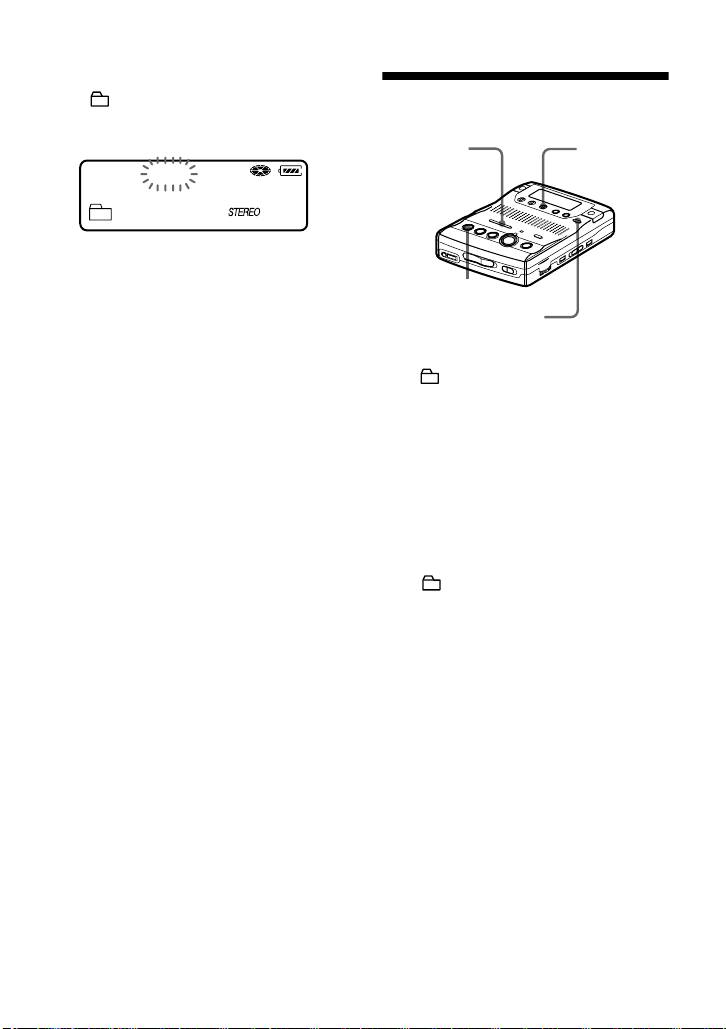
You can play recordable MDs or premastered MDs. Sound output
from the built-in speaker is monaural, but stereo listening is possible
through the supplied headphones with a remote control.
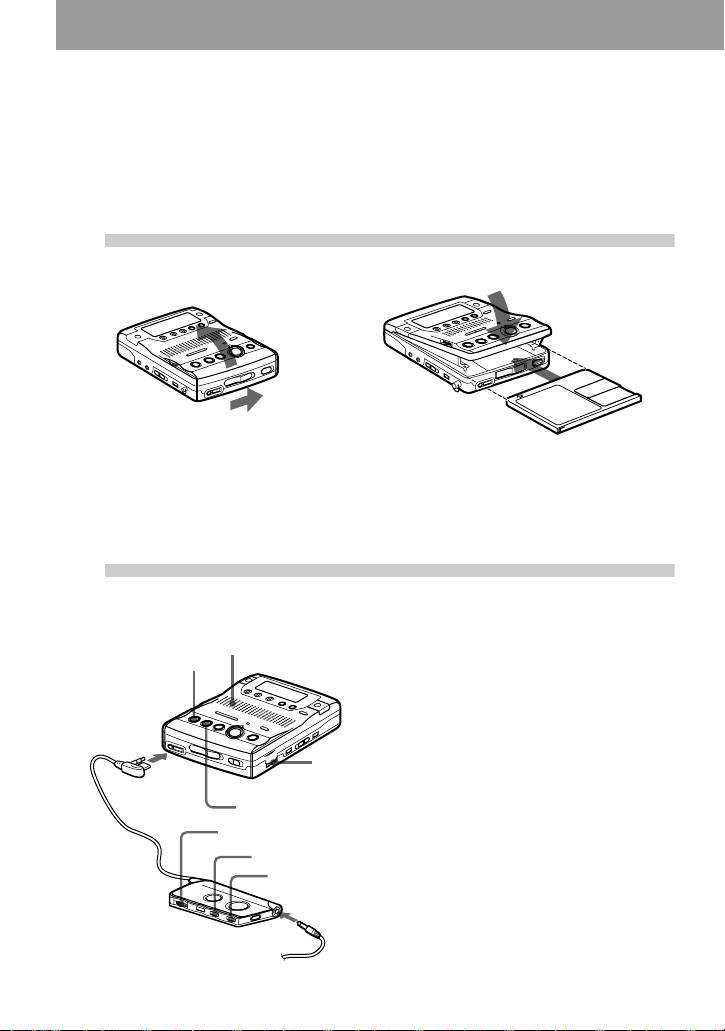
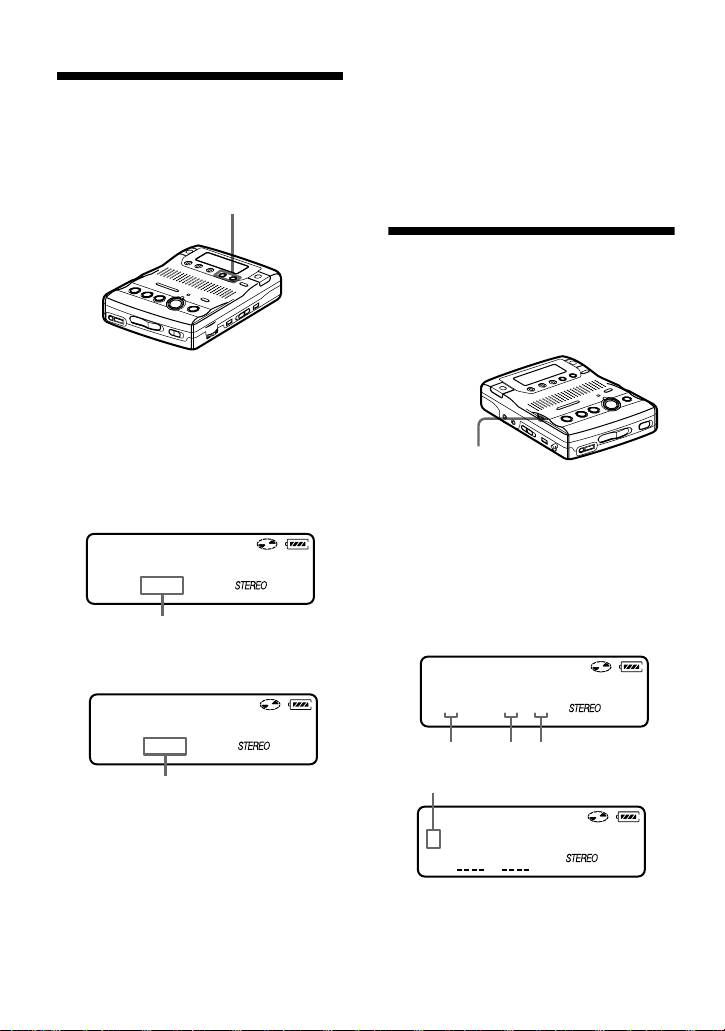
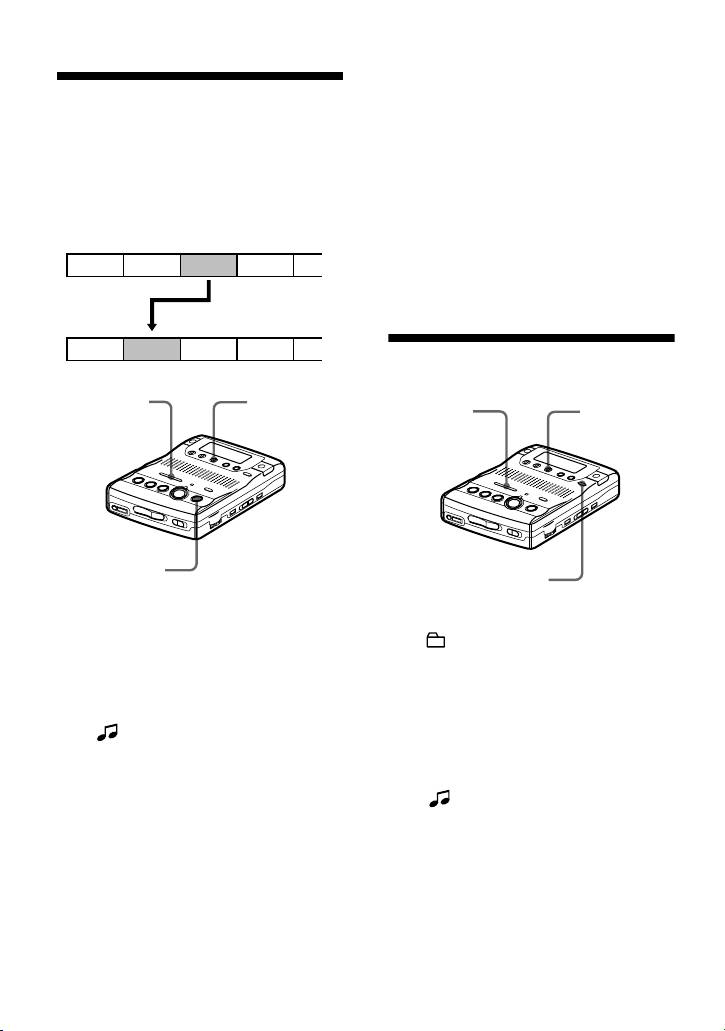
1
Insert an MD.
1 Slide OPEN to open the lid. 2 Insert an MD with the label side facing
up, and press down on the lid (at the
center of the front edge as shown
above) to close it firmly.
2
Play an MD.
spea
1 Press NPLAY.
xSTOP
2 Turn VOL to adjust the volume.
The volume will be shown in the
display.
To stop play, press xSTOP.
VOL
Playback starts from the point you last stopped
playing.
After you press the
xSTOP button to stop the
recorder, the recorder will automatically turn
off after about 10 seconds (when using an
VOL
alkaline dry battery), or 5 minutes (when using
>N
the AC power adaptor).
On the remote control, use the >N button
to start playback, the xSTOP button to stop the
recorder, and the VOL control to adjust the
volume. If you are using the remote control,
you will hear short beeps whenever you press
the >N button, and a long beep whenever
you press the xSTOP button.
14-GB
k
er
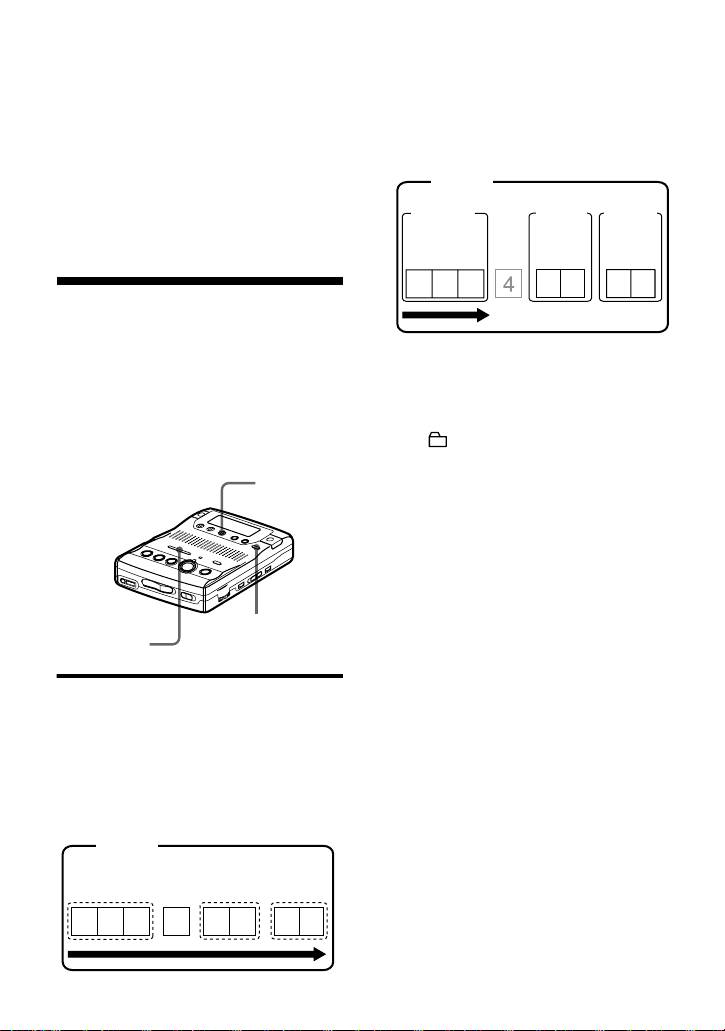
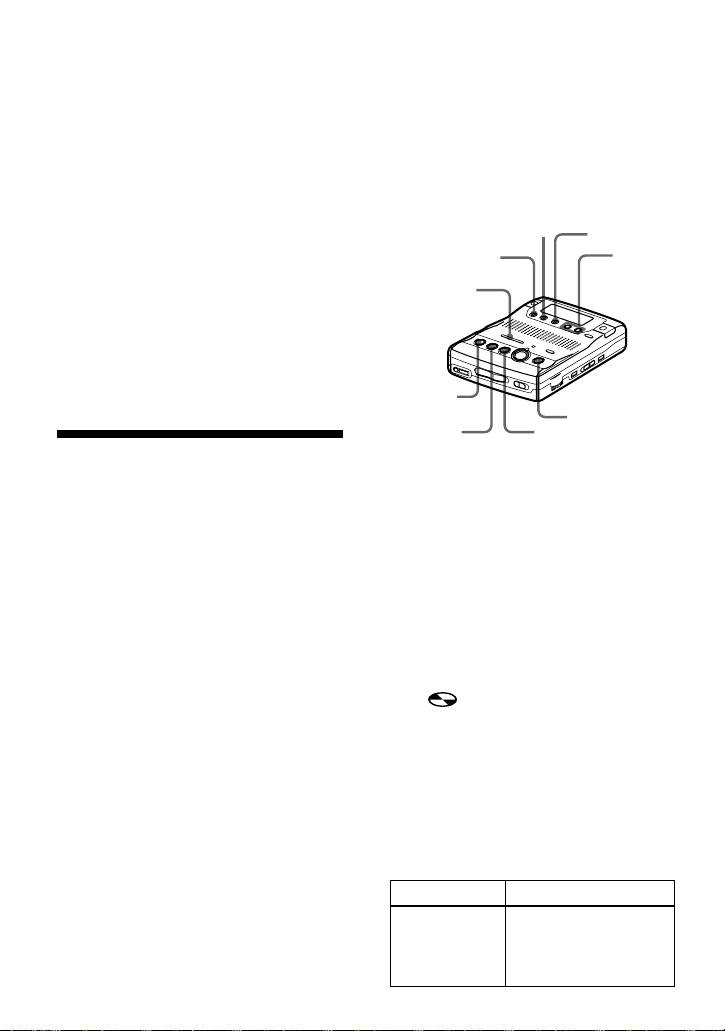
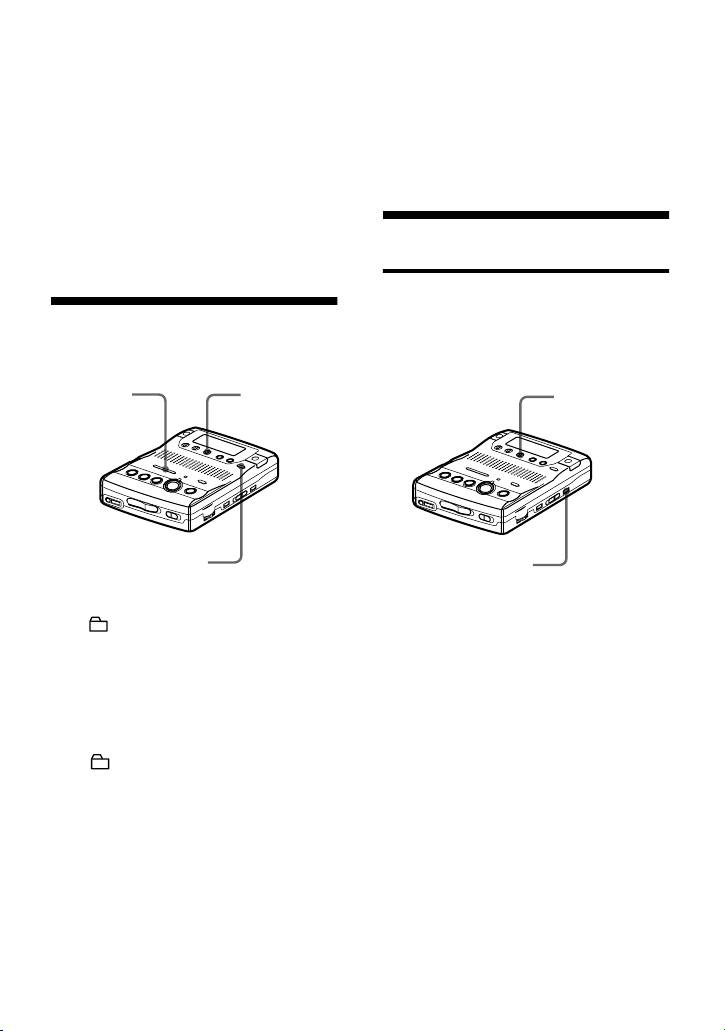
Connect
firmly to i
NPLAY
x
Connect firmly to i
To listen in stereo
Connect the supplied headphones with a remote control to the i jack on the recorder.
To Operation on the recorder Operation on the remote
control (Beeps in the
headphones)
Find the beginning of
Press .REVIEW/AMS.
Press .. (Three short beeps)
the current track or a
Press .REVIEW/AMS
Press . repeatedly until you
1)
previous track
repeatedly until you reach the
reach the beginning of the
beginning of the desired track.
desired track.
Find the beginning of
Press >CUE/AMS. Press >N. (Two short
2)
the next track
beeps)
Pause Press XPAUSE. Press
Press X on the remote control.
XPAUSE again to resume
(Continuous short beeps) Press
play.
X again to resume play.
Go backwards while
Press and hold .REVIEW/
Press and hold ..
playing
AMS.
Go forward while
Press and hold >CUE/
Press and hold >N .
playing
AMS.
Remove the MD Press xSTOP and open the
Press x. (One short beep)
3)
lid.
1)
If you press .REVIEW/AMS during the first track of the disc, the recorder goes to the beginning
of the last track on the disc.
2)
If you press >CUE/AMS during the last track of the disc, the recorder goes to the beginning of the
first track on the disc.
3)
Once you open the lid, the point to start play will change to the beginning of the first track.
If the play does not start
Make sure the recorder is not locked (pages 9
and 41).
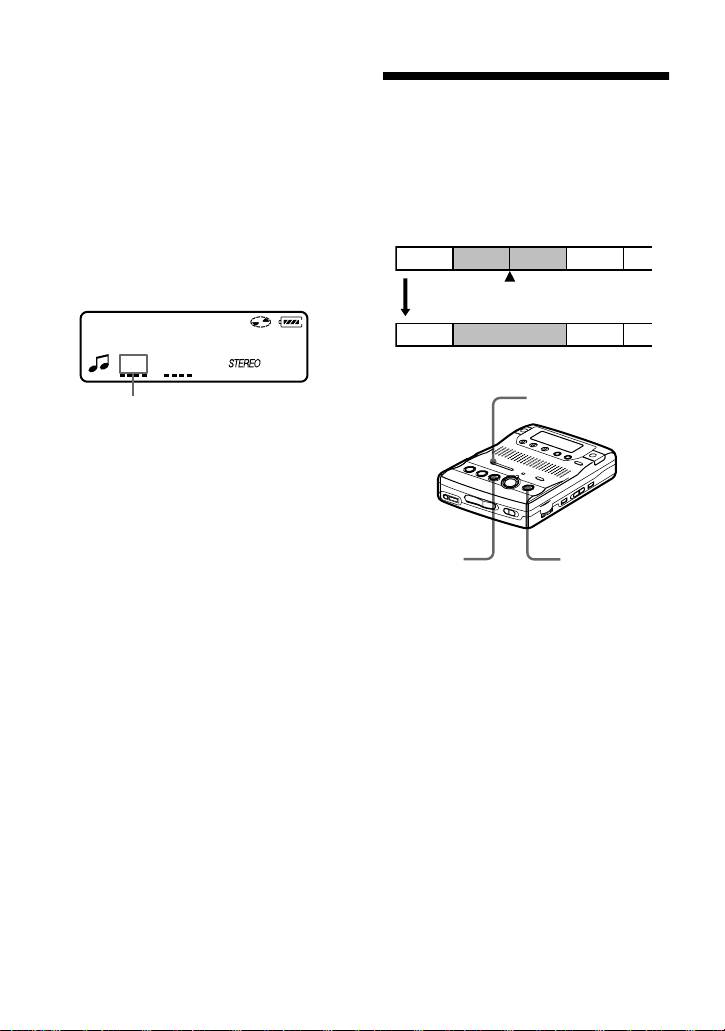
To locate a point quickly
Use the EASY SEARCH +/– buttons (page 28).
z
Playback will switch automatically between
stereo and monaural according to the sound
source.
Notes
• The sound may skip during playback when the
recorder is exposed to continuous vibration,
such as while jogging.
• If the power supply is disrupted (i.e. the
batteries are removed or become exhausted or
the optional AC power adaptor is
disconnected) when the recorder is operating,
the lid may not open until the power is
restored.
15-GB
Various ways of recording
Recording
A Recording
Recording for long
1)
3)
mode
time
times
LP2 stereo LP2 approx. 160
min.
Select each recording mode according to
the recording time that you want.
LP4 stereo LP4 approx. 320
Stereo recording is possible at 2 times
min.
(LP2) or 4 times (LP4) the normal
2)
Monaural
MONO approx. 160
(stereo) recording time. Monaural
min.
recording at 2 times normal recording
1)
speed is also possible.
For better sound quality, record in normal
stereo or LP2 stereo mode.
MDs recorded in monaural, LP2
2)
If you record a stereo source in monaural, the
stereo, or LP4 stereo mode can be
sounds from left and right will be mixed.
played back only on MD players or
3)
When using an 80-minute recordable MD
recorders with monaural, LP2
stereo, or LP4 stereo playback
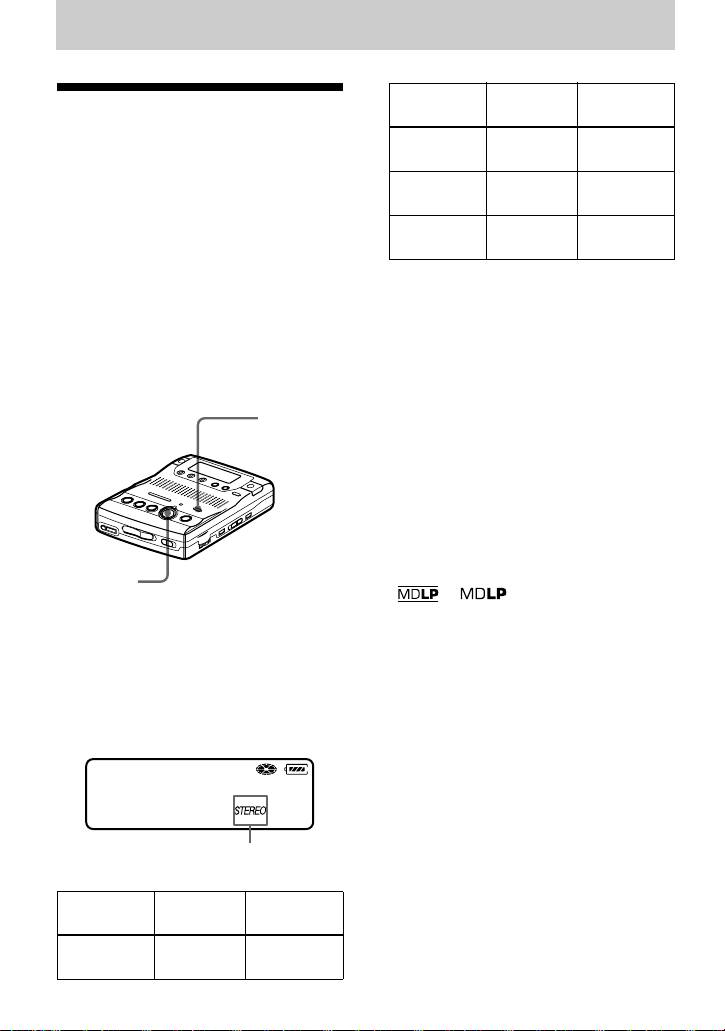
3 Press zREC.
mode.
For other operations on recording, see
“Recording an MD right away!”
REC MODE
(page 11).
To stop recording, press x.
The recorder switches back to stereo
recording when you record the next time.
z
• Audio components that support the LP2 stereo
or LP4 stereo modes are indicated by the
zREC
or logo marks.
• The recording mode can be changed during
1 Insert a recordable disc.
recording pause. When you change the
recording mode, a track mark is automatically
2 Press REC MODE repeatedly until
added at that point.
desired recording mode lights up in
the display.
Each time you press the button, A
changes as follows.
007
30:03
A
Recording
A Recording
1)
3)
mode
time
Stereo STEREO approx. 80
min.
16-GB
Notes
2 Press REC MODE repeatedly until
• “LP:” will be added at the beginning of the
“STEREO”, “LP2”, “LP4”, or
track name of a track recorded in MDLP
“MONO” lights up in the display.
mode.
For details on the recording mode, see
• It is recommended that you use the supplied
“Recording for long times” (page 16).
AC power adaptor for long recordings.
• During monaural recording of a stereo sound
3 Press zREC.
source connected through the digital (optical)
input jack, you can still monitor the recorded
4 Press VOR.
sound in stereo by using headphones or
VOR turns on.
earphones connected to the i/LINE OUT
“VOR” appears in the display and the
jack.
• When you record in LP4 mode, momentary
VOR indicator lights up when the
noise may be produced on very rare occasions
recorder is recording. Both “VOR”
with certain sound sources. This is because of
and the VOR indicator flash when the
the special digital audio compression
recorder is not recording.
technology that enables a recording time 4
times longer than normal. If noise is produced,
To cancel VOR while recording
it is recommended that you record in normal
stereo or LP2 mode to obtain better sound
Press VOR again.
quality.
“VOR” and the VOR indicator goes off
and the recorder changes to normal
recording mode.
z
VOR (Voice Operated
• VOR automatically turns off when you press
Recording)
the xSTOP button to stop recording.
• You can change the recording mode when
VOR causes the recorder to automatically
VOR is on and the recorder is not recording
record when there is sound, and to pause
(while “VOR” and VOR indicator flash). A
when there is no sound. This allows you
track mark is added each time you press the
to record without troublesome button
REC MODE button.
operations.
Notes
built-in
built-in
• You cannot record with the built-in
microphones
microphones
microphones while an optional microphone is
MIC SENS
connected to the MIC (PLUG IN POWER)
jack or an optical cable (not supplied) is
connected to the LINE IN (OPTICAL) jack.
• VOR is sensitive to the surrounding sound
conditions. Set the MIC SENS switch to H or
REC
L to suit the conditions. If you cannot get the
MODE
desired recording results, cancel VOR and
record in manual mode.
zREC
• Power from the batteries is consumed as long
VOR
VOR
as VOR is on, even when recording is not
indicator
taking place (i.e., when “VOR” and the VOR
indicator flash.)
1 Insert a recordable disc and slide MIC
SENS to H (high) or L (low).
17-GB
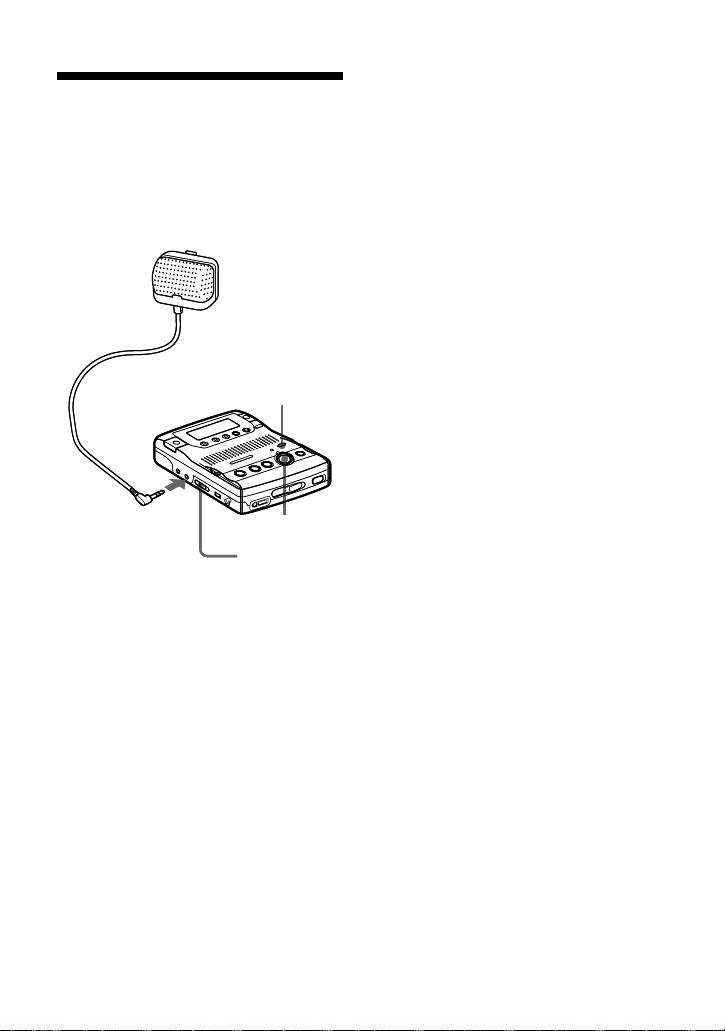
z
Recording from a
When using a plug-in-power microphone, no
battery is needed for the microphone since
microphone
power is supplied by the recorder.
If you are using the optional stereo microphone
Connect a stereo microphone (ECM-717,
ECM-717, set the switch on the microphone to
etc.; not supplied) to the MIC (PLUG IN
OFF to allow the recorder to provide power to
POWER) jack. The recorder input
the microphone. It is recommended that you set
automatically switches to the externally
the switch on the microphone to OFF during
connected microphone input.
use.
Stereo
Notes
microphone
• You cannot record through the externally
(not supplied)
connected microphone while an optical cable
is connected to the LINE IN (OPTICAL) jack.
The recorder automatically selects the
recorder input in the following order of
priority; optical input, externally connected
microphone input, analog (line) input, and
REC MODE
built-in microphones input.
• The microphone may pick up the operating
sound of the recorder itself (such as the sound
of the motor). Use the microphone away from
the recorder in such cases. Do not use a
microphone with a short connector, as this
may cause the operating sound of the recorder
to MIC (PLUG IN
to be picked up.
zREC
POWER)
MIC SENS
1 Insert a recordable disc and slide MIC
SENS to H (high) or L (low).
2 Press REC MODE repeatedly until
“STEREO”, “LP2”, “LP4”, or
“MONO” lights up in the display.
For details on the recording mode, see
“Recording for long times” (page 16).
3 Press zREC.
For other operations on recording, see
“Recording an MD right away!”
(page 11).
18-GB

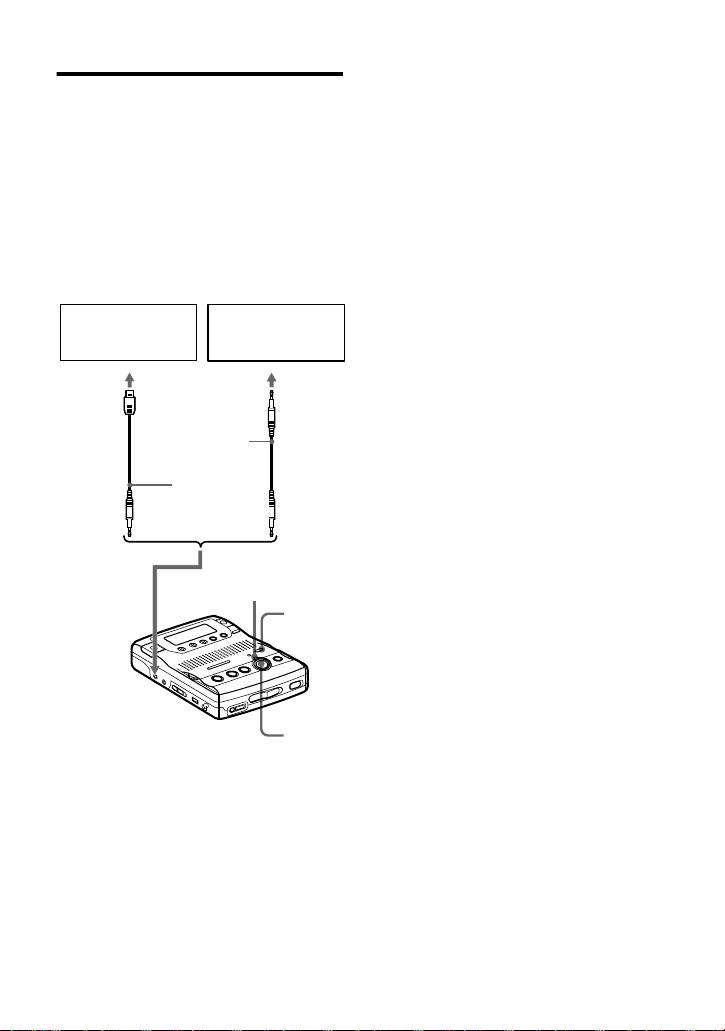
Recording from externally connected equipment
The input jack of this recorder works as both digital and analog input jacks. Connect the
recorder to a CD player or a cassette recorder using either digital (optical) input or analog
(line) input. To record, see “Recording with digital (optical) input (optical cable required)”
(page 20) to record using digital (optical) input and “Recording with analog (line) input
(line cable required)” (page 21) to record using analog (line) input.
LINE IN (OPTICAL) jack is for both digital and analog input.
The recorder automatically recognizes the type of line cable and switches to digital or analog input.
Difference between digital (optical) and analog (line) inputs
Difference Digital (optical) input Analog (line) input
Connectable
Equipment with an digital (optical)
Equipment with an analog
source
output jack
(line) output jack
Usable cord Optical cable (with an optical or an
Line cable (with 2 phono plugs
optical-mini plug)(page 20)
or a stereo-mini plug)(page 21)
Signal from the
Digital Analog
source
Even when a digital source
(such as a CD) is connected, the
signal sent to the recorder is
analog.
Recorded track
Marked (copied) automatically
Marked automatically
numbers
• at the same positions as the source
• after more than 2 seconds of
(when the sound source is a CD or
blank or low-level segment.
an MD).
• when the recorder is paused
• after more than 2 seconds of blank
while recording.
or low-level segment (with a sound
You can erase unnecessary
source other than a CD or an MD)
marks after recording (“Erasing
(page 53).
a track mark”, page 33).
• when the recorder is paused while
recording (the recorder pauses
automatically when it encounters a
section with no audio signal for 3
seconds or more) (page 53).
You can erase unnecessary marks
after recording. (“Erasing a track
mark”, page 33).
Recorded
Same as the source. Adjusted automatically.
sound level
Note
Track marks may be copied incorrectly:
• when you record from some CD players or multi disc players using digital (optical) input.
• when the source is in shuffle or program play mode while recording using digital (optical) input. In
this case, play the source in normal play mode.
• when recording BS or CS programs through digital (optical) input.
19-GB
3 Press zREC.
Recording with digital
“REC” appears in the display, the
(optical) input (optical cable
REC indicator lights up, and the
required)
recording starts.
Connect to a digital source using an
4 Play the source sound.
optical cable (not supplied) to make
For other operations on recording, see
digital recordings. Digital recording is
“Recording an MD right away!”
possible even from digital equipment with
(page 11).
different sampling rates, such as a DAT
deck or a BS tuner, using the built-in
z
sampling rate converter.
When recording from digital media, track
marks in the original are copied automatically
CD player, MD
to the MD.
Portable CD
player, digital
player, etc.
Notes
amplifier, etc.
• You can make a digital recording with an
optical cable only from an optical type output.
Optical
Optical
• When recording from a portable CD player,
plug
mini-
play it on AC power and disable the anti-skip
POC-15B etc.
plug
function (such as ESP*).
(not supplied)
• When recording from a portable CD player,
pause the CD player before doing the
POC-15AB etc.
recording procedure.
(not supplied)
• Digital output may be disabled on some
portable CD players when the AC power
adaptor is not connected to the player.
• A track mark is added at the point where you
REC
press the XPAUSE button again to resume
recording while pausing recording; thus the
indicator
remainder of the track will be counted as a
REC
new track.
MODE
∗ Electronic Shock Protection
to LINE IN
(OPTICAL)
zREC
1 Insert a recordable disc.
2 Press REC MODE repeatedly until
“STEREO”, “LP2”, “LP4”, or
“MONO” lights up in the display.
For details on the recording mode, see
“Recording for long times” (page 16).
20-GB
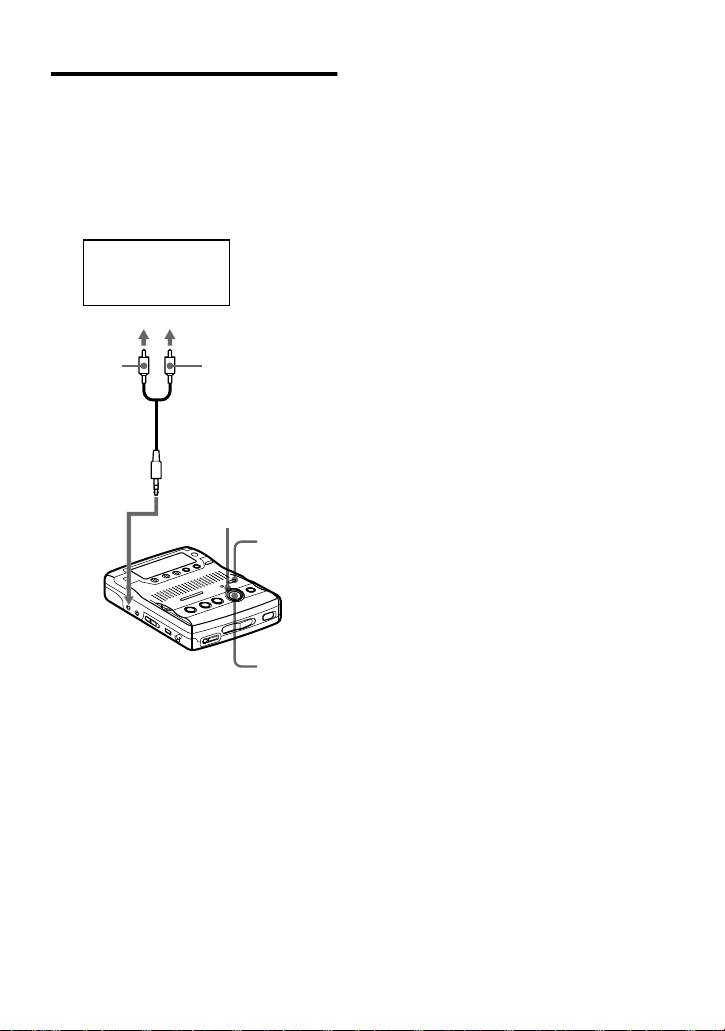
3 Press zREC.
Recording with analog (line)
“REC” appears in the display, the
input (line cable required)
REC indicator lights up, and the
recording starts.
Connect the recorder with a line cable
(not supplied) to make analog recording.
4 Play the source sound.
The sound will be sent from the
For other operations on recording, see
connected equipment as analog signal but
“Recording an MD right away!”
will be sent recorded digitally on the disc.
(page 11).
CD player,
Note
cassette recorder,
A track mark is added at the point where you
etc.(source)
press the XPAUSE button again to resume
recording while pausing recording; thus the
to LINE OUT
remainder of the track will be counted as a new
track.
L (white)
R (red)
Line cable (RK-G129HG,
not supplied)*
REC
indicator
REC
MODE
to LINE IN
(OPTICAL)
zREC
∗ Use the connecting cords without an
attenuator. To connect to a portable CD
player having a stereo mini-jack, use the
RK-G136HG connecting cord (not
supplied).
1 Insert a recordable disc.
2 Press REC MODE repeatedly until
“STEREO”, “LP2”, “LP4”, or
“MONO” lights up in the display.
For details on the recording mode, see
“Recording for long times” (page 16).
21-GB
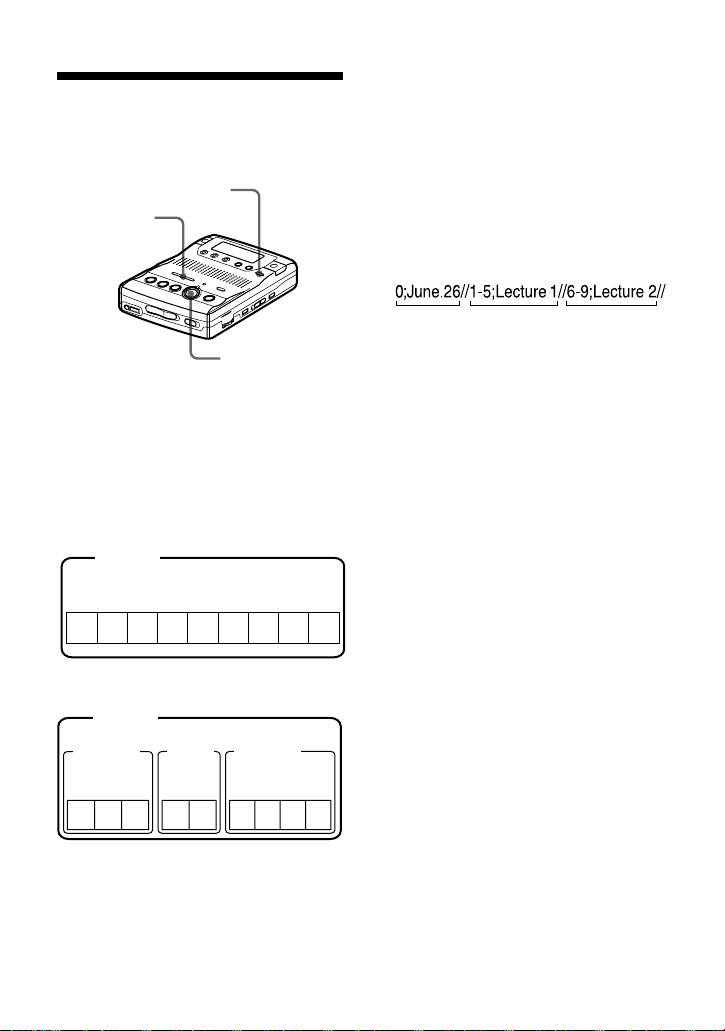
How is group information
Recording tracks using
recorded?
the Group Function
When recording in group mode, the group
(Group mode recording)
information is written to the disc name
recording area.
This information consists of text strings
GROUP
that are written as shown in the following
./>
example.
Disc name recording area
Example
123
1 Disc name: “June.26”
zREC
2 Group name for tracks 1 to 5:
“Lecture 1”
What is the group function
3 Group name for tracks 6 to 9:
(group mode)?
“Lecture 2”
It is a function that allows you to separate
Therefore, the above character string is
tracks on a disc into different groups for
displayed in its entirety as the disc name
playback, recording and editing.
if you load an MD recorded in group
mode into a system that does not support
When the Group mode is OFF.
group mode, or if you try to edit the
Disc
contents of a disc on this recorder with the
group mode turned off.
Track number
Note that if you perform the
123456
7
89
procedure for “To relabel
recordings” of “Labeling
recordings” (page 35) and rewrite
When the Group mode is ON.
this character string by mistake,
Disc
you may be unable to use the
group function of that MD.
Group 1
Group 2
Group 3
Note
Track
Track
Track
number
number
number
In group mode, the recorder treats all tracks
without group settings as belonging to the last
123
12
1234
group on the disc. The last group is indicated in
the display window on the recorder as “Group -
-”. Within a group, the tracks appear in their
order on the disc, not their order within the
It is convenient for managing multiple
group.
CD albums recorded in MDLP (LP2
stereo/LP4 stereo) mode onto a single
MD.
22-GB

To activate the group mode
Recording a track into an
(Group mode recording)
existing group
To record tracks in group mode, you must
1 While the recorder is stopped, press
first turn the group mode on before the
GROUP for 2 seconds or more.
start of recording.
“” lights up in the display and the
group mode turns on.
1 Press GROUP for 2 seconds or more.
“” lights up in the display and the
2 Press GROUP slightly.
group mode turns on.
“” flashes in the display and you
To cancel the group mode, press
can select a group directly (group
GROUP for 2 seconds or more again.
skip mode) (page 31).
Note
3 Within 5 seconds, press
The group function setting will be canceled
.REVIEW/AMS or >CUE/
when you eject the MD.
AMS repeatedly until the group you
want the track to belong to appears.
Recording a track into a new
4 Press zREC.
group
5 Play the source sound.
1 While the recorder is stopped, press
Note
GROUP for 2 seconds or more.
The group skip mode turns off automatically in
“” lights up in the display and the
step 3 if nothing is done within 5 seconds. To
group mode turns on.
continue the procedure, do step 2 again.
2 Press zREC.
z
• The track will be added at the end of the
3 Play the source sound.
group.
• For details on the group skip mode, see page
31.
To stop recording, press x.
• To add a track that is playing to a group, stop
The material that was recorded up until x
playing the track first, and then do the
was pressed is entered as a new group.
procedure from step 4.
• If you select “Group --” in step 2, the recorded
To record a track into another
material will be automatically stored as
new group.
“Group01”.
Turn the group mode off, and then follow
steps 1 to 3
23-GB
3 Press zREC.
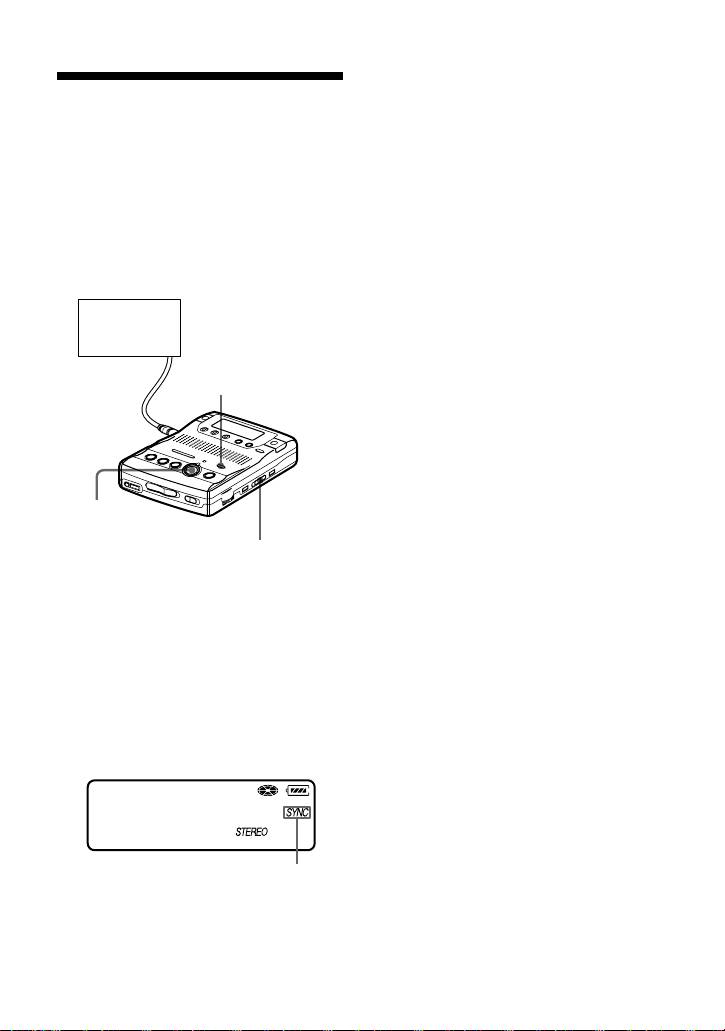
To start/stop recording
The recorder stands by for recording.
in sync with the source
4 Play the source sound.
player
The recorder starts recording when it
(Synchro-recording)
receives the playing sound.
You can easily make digital recordings of
a digital source on an MD.
To stop recording
Before synchro-recording, make
Press xSTOP.
connections to the digital source with a
z
digital cable, and insert a recordable MD.
• You cannot pause manually during synchro-
recording.
CD players,
• When there is no sound from the player for
etc.
more than 3 seconds during synchro-
recording, the recorder goes into the standby
mode automatically (page 53). When the
REC MODE
sound comes from the player again, the
recorder resumes synchro-recording. If the
recorder is kept in the standby mode for 5
minutes or longer, the recorder stops
automatically.
Notes
• Do not switch the SYNCHRO REC switch
zREC
after step 3. Recording may not be done
properly.
SYNCHRO REC
• The recording mode setting (stereo, LP2
stereo,
LP4 stereo, or monaural) cannot be
changed during synchro-recording.
1 Press REC MODE repeatedly until
• Even when there is no recorded sound on the
“STEREO”, “LP2”, “LP4”, or
sound source (page 53), there may be cases
“MONO” lights up in the display.
when recording does not pause automatically
during synchro-recording due to the noise
For details on the recording mode, see
level emitted from the sound source.
“Recording for long times” (page 16).
• If a silent portion is encountered for 2 seconds
or more during synchro-recording, a new track
2 Slide SYNCHRO REC to ON.
mark is automatically added at the point
“SYNC” appears in the display.
where the silent portion ends (page 53).
• Synchro-recording cannot be done if the
connecting cord is not an optical cable, or if
the cable is connected to the MIC (PLUG IN
007
POWER) jack.
30:03
• You cannot change the recording mode during
recording.
Synchro-recording indication
“SYNC” doesn’t appear if optical
cable is not connected to the LINE IN
(OPTICAL) jack on the recorder.
24-GB
If you make a mistake while
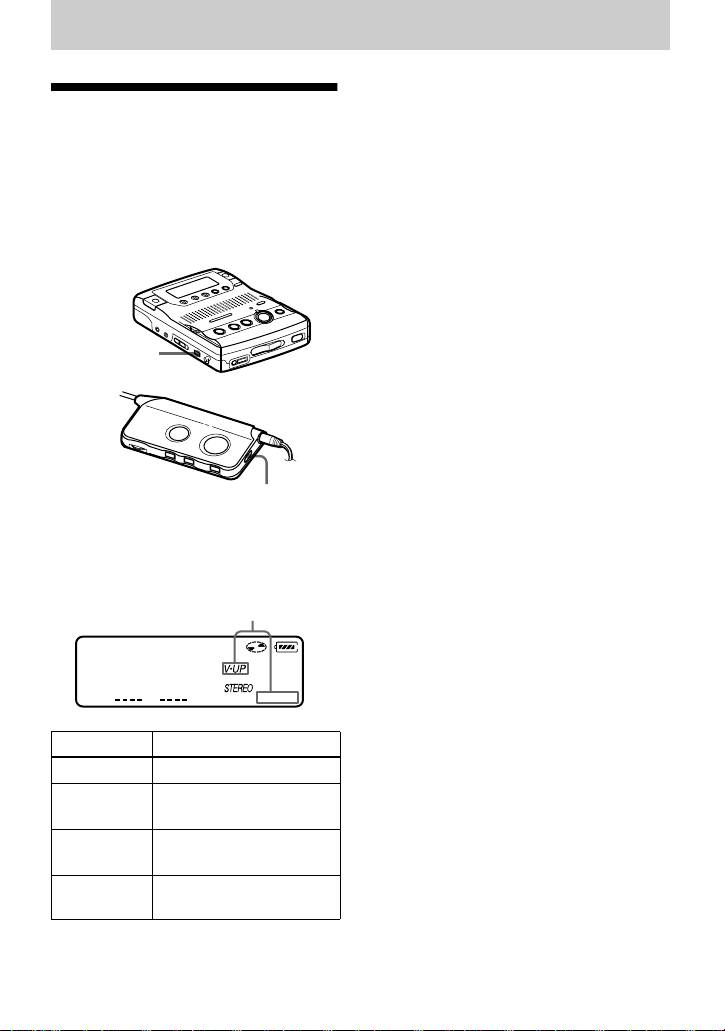
Setting the clock to
setting the clock
stamp the recorded
Press xSTOP, and set the clock again
time
from step 1. You can skip a step by
pressing NPLAY.
To stamp the date and time on the MD
when you record, you first need to set the
To display the current time
clock.
When the recorder is not operating or
while recording, press DISPLAY
./>
repeatedly until the current time appears
in the display.
xSTOP
To display the time in the 24-
hour system
While setting the clock, press XPAUSE.
To display the time in the 12-hour system,
CLOCK SET
press XPAUSE again.
(bottom)
NPLAY
z
You can also use the SPEED CONTROL dial to
set the clock. Turn the dial instead of ./>
1 Press CLOCK SET at the button of
in step 2, and press the dial instead of NPLAY
the recorder.
in step 3.
Use a pointed object.
Notes
The digits of the year flash.
• Make sure the time is correctly set if you want
the time stamp to be accurately recorded for
01y 1m 1d
an important recording.
12:00am
• Under normal conditions, the clock may vary
Clock
by about plus or minus 2 minutes per month.
2 Change the current year by pressing
. or >.
To change the digits rapidly, keep
pressing . or >.
3 Press NPLAY to enter the year.
The digit of the month flashes.
4 Repeat step 2 and 3 to enter the
current month, date, hour, and
minute.
When you press NPLAY to enter
the minute, the clock starts operating.
25-GB
In stop mode
Checking the remaining
ABC
time or the recording
Track
Elapsed
—
position
number
time
You can check the remaining time, track
Track name Remaining
RecRemain
number, etc. when recording or during
time for
stop.
recording
Items related to the group function appear
Group name Remaining
GP Remain
when you play and then stop a track with
time in the
group settings.
group
DISPLAY
Disc name Remaining
AllRemain
time after
the current
location
Current date Current
Clock
time
Note
Items may appear differently or may not be
REC indicator
selectable, depending on the group mode’s on/
off status, the recorder’s operating status, or the
recorder settings.
1 Press DISPLAY while the recorder is
recording or stopped.
To know the recording
Each time you press the button, the
condition
display changes as follows.
The REC indicator lights up or flashes
according to the recording condition.
A
B
Recording
REC indicator
C
condition
While recording lights up
While recording
Recording standby flashes
AB C
Less than 3
flashes slowly
minutes’
Track
Elapsed time —
recording time
number
available
Track
Remaining
RecRemain
A track mark has
goes off
number
time for
been added (when
momentarily
recording
controlling by the
Current
Current time Clock
recorder only)
date
z
If you want to check the playing position or
track name while playing, see page 29.
26-GB
Various ways of playback
1)
During stereo playback, the Voice Up function
Changing the sound
emphasizes the left-right orientation of
setting
individual voices, making them easier to
distinguish and hear. You cannot use the Voice
You can select your desired sound when
Up function when monaural recording.
playing.
This function is effective when
To cancel the sound setting
using the supplied headphones to
Press SOUND repeatedly until nothing
listen to stereo recordings.
appears in the display
.
Notes
• The use of the Voice Up function is not
recommended when playing a music disc.
• You cannot set the Voice Up function on
monaural recording.
SOUND
• If sound distortion occurs when you turn the
volume up while “SOUND 1” or “SOUND 2”,
turn the volume down again or change the
play mode.
• The setting of “SOUND 1” or “SOUND 2”
does not affect the sound being recorded.
SOUND
1 Press SOUND repeatedly.
Each time you press the button, A
changes as follows.
A
003
20:51
A Sound setting
— (none) Factory setting
SOUND 1 Strong bass
(Digital Mega Bass 1)
SOUND 2 Stronger bass
(Digital Mega Bass 2)
1)
V-UP
Enhancing voice clarity
(Voice Up function)
27-GB
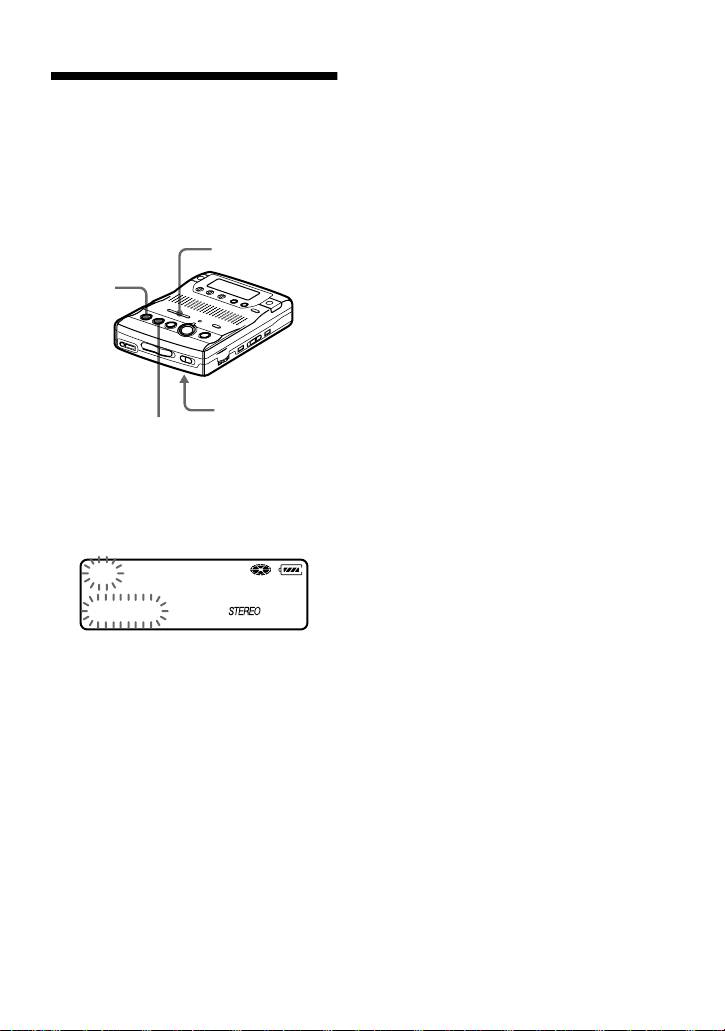
• If you reach the beginning of the disc while
using the Easy Search function, the recorder
Finding a point quickly
will start playing automatically. If you reach
(Easy Search)
the end of the disc while using the Easy
Search function, “END” will appear in the
Use the Easy Search function to find a
display. If this happens, press the xSTOP
particular point quickly.
button to stop the recorder.
EASY SEARCH +/–
Changing the playback
speed (Speed Control)
The playback speed can be adjusted in 7
steps (80%, 85%, ...100%, 105%, 110%).
1 Press EASY SEARCH + or – while
the recorder is playing or stopped.
Each press of the + button moves the
playback point ahead by about one
minute. Each press of the – button
moves the playback point back about
one minute.
1 Turn the SPEED CONTROL dial
while the recorder is playing.
003
Each turn changes the playback
02:31
speed. Select your desired speed
+01
while listening. “S” appears in the
display when playback speed is
When the + button was pressed once.
changed.
(Playback position moves one minute ahead.
003
00:31
-01
z
• The + and – buttons can be pressed up to 20
times each.
To switch to normal playback
Press the SPEED CONTROL dial.
To change the playback speed again, turn
the dial.
28-GB
)
SPEED CONTROL
SPEED
CONTROL
S----+--F
80% 100%110%
Fast Playback indication
When the – button was pressed once.
(Playback position moves one minute
behind.)
002
S 03:40

z
You can pause or find track marks pressing the
Checking the remaining
XPAUSE, .REVIEW/AMS or >CUE/
time or the playing
AMS button during Fast Playback.
position
You can check the track name, disc name,
etc. during playback.
Playing tracks
Items related to the group function appear
repeatedly
only when the recorder is playing a track
with group settings.
You can play tracks repeatedly in two
DISPLAY
ways — all repeat and single repeat.
PLAY MODE
1 Press DISPLAY while the recorder is
playing.
Each time you press the button, the
1 Press PLAY MODE while the
display changes as follows.
recorder is playing.
Each time you press the button, the
A
play mode indication changes as
B
follows.
C
Play mode indication
AB C
Track
Elapsed time — (none)
003
number
20:51
Track
Remaining
1 Remain
name
time of the
current track
Indication Play mode
Group
Remaining
GP
— All the tracks are
name
time after the
Remain
played once.
current location
in the group
All the tracks are
played repeatedly.
Disc
Remaining
AllRemain
name
time after the
1
A single track is
current location
played repeatedly.
1)
Recorded
Recorded time RecDate
z
date
You can specify the playback mode for a
selected group when the group mode is on. To
1)
The recording mode (page 16) of the track
activate the group mode, see “Selecting and
appears momentaly after “RecDate”
playing groups (Group skip mode)” (page 31).
disappears from the display.
29-GB
Note
Items may appear differently or may not be
Playback when the group mode is on:
selectable, depending on the group mode’s on/
Playback of the selected group starts with
off status, the recorder’s operating status, or the
the first track in the group, and stops with
recorder settings.
the last track in the group.
z
Disc
If you want to check the remaining time or the
Group 1
Group 2
Group 3
recording position while recording or in stop
mode, see page 26.
Track
Track
Track
number
number
number
123
12
12
Using the Group
Function (Group mode)
The recorder can operate various
1 Insert a disc which has group settings
playback with a disc which has group
into the recorder and play the disc.
setting. For more information on the
group mode, see “Recording tracks using
2 Press GROUP for 2 seconds or more.
the Group Function (Group mode
“” and “GROUP ON” light in the
recording)” (page 22).
display up and the group mode turns
EDIT/ENTER
on.
Playback stops at the end of the last
track in the selected group.
For details on selecting another
group, see “Selecting and playing
groups (Group skip mode)”
(page 31).
z
GROUP
You can also play the tracks repeatedly in the
./>
selected group. After the procedures here,
follow the steps of “Playing tracks repeatedly”
(page 29).
Listening to tracks using the
group mode (group mode
To turn off the Group function
playback)
Press GROUP for 2 seconds or more
Playback when the group mode is off:
again.
Playback starts with the first track in the
Note
disc, and stops with the last track in the
In group mode, the recorder treats all tracks
disc.
without group settings as belonging to the last
Disc
group on the disc. The last group is indicated in
the display window on the recorder as “Group -
Track number
-”. Within a group, the tracks appear in their
order on the disc, not their order within the
group.
123
4
56
78
30-GB
z
Selecting and playing groups
The group skip mode operates regardless of
(Group skip mode)
whether the group mode is on or off.
When playing a disc with group settings,
Notes
the group skip mode allows you to jump
• If no operation is performed within 5 seconds
from the currently playing group to any
after step 1, the group skip mode will be
canceled and you will not be able to perform
other group on the MD. The group skip
step 2 thereafter. To continue with step 1 at
mode can be used at any time during
this point, repeat from the beginning of the
playback, regardless of whether the player
procedure.
is in group mode on or not.
• The group skip mode cannot be used with a
disc that has no group settings.
When the group mode is off:
Disc
Track number
123
56
78
4
Skip
Skip Skip
When the group mode is on:
Disc
Group 1
Group 2
Group 3
Track
Track
Track
number
number
number
123
12
12
Skip Skip Skip
1 Insert a disc which has group settings
into the recorder and play the disc,
and then press GROUP slightly.
“” flashes in the display and the
group skip mode turns on.
2 Within 5 seconds, press
.REVIEW/AMS/>CUE/AMS
until your desired group appears, and
then press EDIT/ENTER.
The recorder starts playing from the
first track in the group.
31-GB
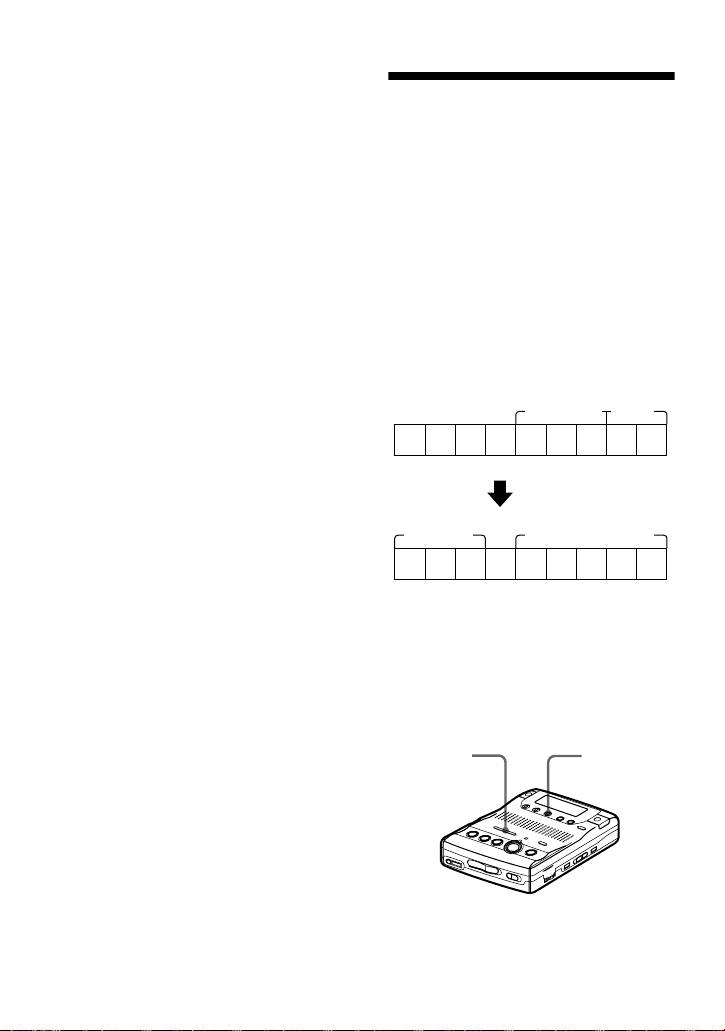
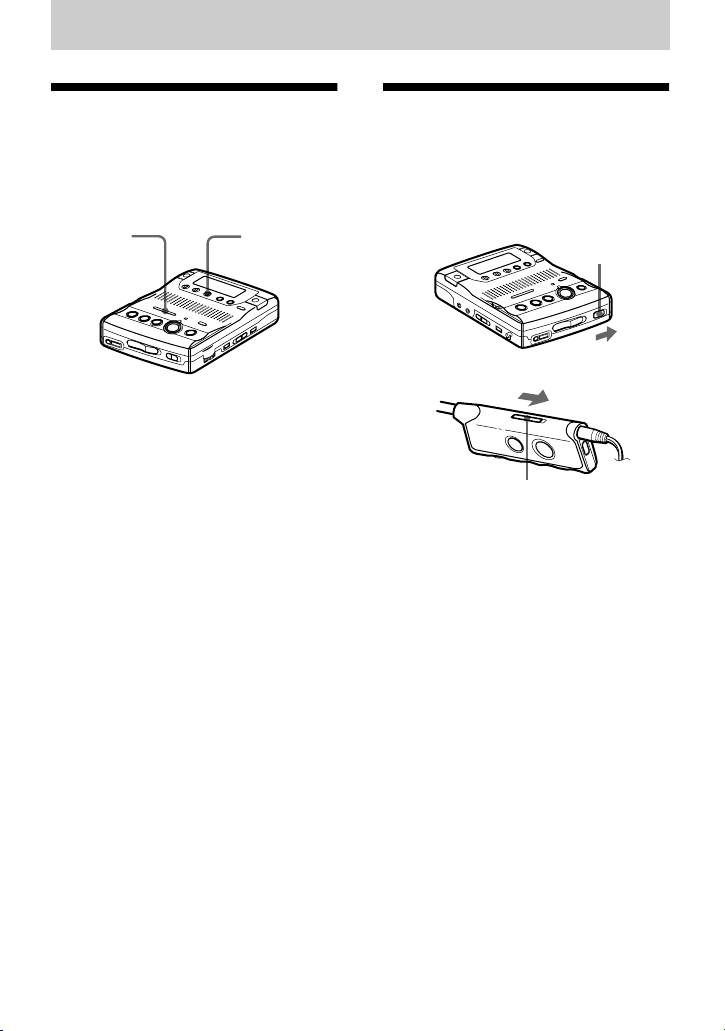
Editing recorded tracks
You can edit your recordings by adding/
Track marking to divide a
erasing track marks or labeling tracks and
MDs. Premastered MDs cannot be edited.
recording
You can add track marks so that the part
Notes on editing
after the new track mark is counted as a
• You cannot edit tracks on an MD that is
record-protected. Before editing tracks, close
new track.
the tab on the side of the MD (page 54).
The track numbers will increase as
• If you perform an editing operation while
follows.
playing, be sure not to turn the power off until
“TOC Edit” disappears in the display.
1 3 42
• Do not move or jog the recorder while “TOC
Edit”* is flashing in the display.
Track marking
• The lid will not open until “TOC Edit”
disappears in the display after editing.
• When the group mode is on, editing can be
231 4 5
performed only for the tracks registered into
Track numbers increase
the selected group.
∗ TOC = Table of Contents
1 While recording, playing or pausing
an MD, press TRACK MARK at the
point you want to mark.
“MARK ON” appears in the display,
Adding a track mark
and a track mark is added. The track
You can add two kinds of track marks:
number will increase by one.
regular track marks and special track
marks. A total of 254 track marks can be
Track marking important
added on one disc.
points
While recording, not only can you add
regular track marks, you can also add
special track marks (“TT”), to mark the
position of important points.
321 4 5678
TRACK MARK
TRACK MARK
Regular track
Special track
marks
marks
1 Press TRACK MARK on the remote
for 2 seconds or more at the desired
point while recording.
A special track mark is added and the
track number will increase by one.
“!MARK ON!” appears in the display
and “TT” is automatically added at
the beginning of a track name.
32-GB
Note
Make sure to press the TRACK MARK button
Erasing a track mark
for 2 seconds or more, if not, a regular track
mark will be added.
When you erase a regular track mark or a
special track mark, the track numbers will
To locate special track marks
change as follows.
during playback
Example
While pressing down VOR, momentarily
When combining track 2 and track 3
press .REVIEW/AMS or >CUE/
AMS.
1 3 42
The track number appears after the
special track mark indication (“TT”).
Erase a track mark
002
1 32
00:40
:TT
Track numbers decrease
.REVIEW/AMS
Special track mark indication
Press .REVIEW/AMS repeatedly to
go to previous special track marks. Press
>CUE/AMS repeatedly to go to
succeeding special track marks.
To change a regular track
mark to a special track mark
TRACK MARKXPAUSE
After the completion of recording, add
“TT” at the beginning of the name of the
1 While playing the track with the track
track you want to change.
mark you want to erase, press
XPAUSE to pause.
To change a special track
To erase the third track mark, play the
mark to a regular track mark
third track and press XPAUSE.
After the completion of recording, erase
“TT” at the beginning of the track name
2 Find the track mark by pressing
or change the name of the track.
.REVIEW/AMS slightly.
Find the beginning of the third track.
“00:00” appears in the display.
“MARK” appears in the display for 2
seconds.
3 Press TRACK MARK to erase the
mark.
“MARK OFF” appears in the display.
The track mark is erased and the two
tracks are combined.
33-GB
z
• When labeling a disc which has been recorded
When you erase a track mark, the date, time,
using the group function, be sure to turn the
and name assigned to the mark are also erased.
group function on to avoid misoverwrite the
group information.
Notes
• If you enter the symbol “//” between the
• When you erase a track mark between the two
characters in disc names such as “abc//def”,
consecutive tracks that are registered to
you may be unable to use the group function.
different groups, the second track is re-
registered into the group containing the first
EDIT/
PLAY MODE
track. In addition, if you combine a track that
ENTER
is registered to a group with a track that is not
DISPLAY
EASY
(consecutive tracks), the second track takes
the same registration setting as the first track.
SEARCH
./>
For example, if the first track is registered to a
+/–
group, the second track will be registered to
the same group as the first track.
• You cannot erase track marks according to the
system limitations. For details, see “System
limitations” (page 49).
xSTOP
TRACK MARK
N
X
Labeling recordings
Labeling a disc during stop
You can name tracks during playback,
discs during stop, and both during
To label a disc that contains group
recording. Each name can be as long as
settings, you must turn the group mode on
200 letters.
before doing the labeling procedure
Each disc can hold up to 1700
(page 23).
alphanumeric letters during playback or
stop.
1 Insert a disc.
You can enter about 500 alphanumeric
When a disc is already inserted, make
characters and symbols during the
sure the recorder is stopped.
recording of each track.
2 Press EDIT/ENTER.
Available characters
“ :Name” flashes in the display.
• Capital and small letters of the English
3 Press EDIT/ENTER again.
alphabet
The disc is ready to be labeled.
• Numbers 0 to 9
• !
" # $ % & ( ) * . ; < = > ?
4 Press . or > repeatedly to
@ _ ` + – ' , / : _ (space)
select a letter and press N to enter.
The selected letter stops flashing and
Notes
the cursor moves to the next input
• “NAME FULL” appears when you try to enter
position.
more than 1,700 characters on a disc. Enter a
shorter name for the track, group, or disc, or
Press/Turn Functions
delete “LP:” from the track name recorded in
MDLP mode.
X To switch between
capital letters, small
letters, and marks /
numbers.
34-GB
3 To label a track, press EDIT/ENTER
Press/Turn Functions
while “ :Name” is flashing.
./> To change the letter to
To label a group, press . or >
the one before / next
repeatedly until “ :Name” flashes
one.
in the display, and then press EDIT/
SPEED
To move the cursor to
ENTER.
CONTROL
the right (Press
The track or group is ready to be
slightly)
labeled.
To enter the phrase
(Press 1.5 seconds or
4 Follow steps 4 to 6 of “Labeling a
more)
disc during stop”.
To select a letter
(Turn)
Labeling a track or a disc
during recording
EASY
To move the cursor to
SEARCH +/–
the left or right.
To label a group, you must first turn the
group mode on before the start of
DISPLAY To insert a blank space
recording (page 23).
to type in a new letter.
PLAY MODE To delete a letter and
1 While recording, press EDIT/
move back all
ENTER.
following letters to the
“ :Name” flashes in the display.
left.
xSTOP Cancel labeling.
2 To label a track, press EDIT/ENTER
while “ :Name” is flashing.
5 Repeat step 4 and enter all characters
To label a group, press . or >
of the label name.
repeatedly until “ :Name” flashes
6 Press EDIT/ENTER.
in the display, then press EDIT/
ENTER.
The track or disc is labeled.
To label a disc, press . or >
repeatedly until “ :Name”
Labeling a track during
flashes in the display, then press
playback
EDIT/ENTER.
The track, group, or disc is ready to
1 To label a track, insert a disc and play
be labeled.
the track you want to label.
To label a group, insert a disc, turn the
3 Follow steps 4 to 6 of “Labeling a
group mode on, and play the group
disc during stop”.
you want to label (page 30).
To cancel labeling
2 Press EDIT/ENTER.
Press xSTOP.
The recorder plays the selected track
repeatedly.
To relabel recordings
Follow the steps corresponding to the
labeling method until the track, group, or
disc is ready to be labeled. Enter a new
character over the one you want to
change, then press the EDIT/ENTER
button.
35-GB
z
You can also use the SPEED CONTROL dial to
Registering tracks or
select and then enter the menu. Turn the dial
groups as a new group
(instead of ./>) to show the menu items
(Group setting)
one by one and press the dial (instead of EDIT/
ENTER) to enter the selected menu.
Do the following procedure to register
Notes
tracks (or groups). A series of tracks (or
• “LP:” has been added at the beginning of the
groups) can be registered by selecting the
track name of the track recorded in MDLP
starting and ending tracks (or groups).
mode.
The tracks (or groups) must, however, be
• When the recording is stopped while labeling
sequential. If the desired tracks (or
a track or a disc during recording, or when the
groups) are not consecutive, you must
playback moves on to the next track while
move them to make them consecutive
labeling a track, the input at that point is
before you can register them (“Moving
entered automatically.
• When recording through the built-in
recorded tracks”, page 38). This function
microphones, the sound of the recorder
can be used at any time, whether group
operations, such as the pressing of buttons,
mode is on or off.
will also be recorded. To avoid this, it is
Group
Group
recommended to label a disc or a track after
completing the recording.
123456
7
89
• You cannot relabel parametrized MDs or label
MDs that have not been recorded.
Making a new
Making a new group
• The recorder is able to display, but cannot
group with
label using Japanese “Katakana” characters.
with 2 groups.
tracks 1 to 3.
• The recorder cannot rewrite a disc or track
name of more than 200 letters that was created
Group
Group
by another device.
123456
7
89
• Registration of non-consecutive tracks
is not possible (for example, the 1, 3, 2,
4, 3, 5, 6, 6, 8 and then 9).
• Tracks always appear according to their
order on the disc, not their order within
the group (even when group mode is
on).
./>
EDIT/
ENTER
1 While the recorder is stopped, press
EDIT/ENTER.
36-GB
filename[\\Ww001\WW001\ON GOING\MZ-
B100\3235455111\3235455111MZB100\02GB-MZB100UCE\040OPE.fm]
masterpage:Right
020REG.book Page 37 Thursday, September 13, 2001 6:36 PM
2 Press . or > repeatedly until
“ : Set” flashes in the display, and
To release a group
then press EDIT/ENTER.
setting
“001” flashes in the display.
./>
EDIT/ENTER
STR:001
END:001
:
3 Press . or > repeatedly until
the number or name of the desired
xSTOP
first track flashes in the display, and
then press EDIT/ENTER.
GROUP
This selects the first track of the new
1 Press GROUP for 2 seconds or more.
group.
Even when the group mode is on,
“ ” lights up in the display and the
track numbers appear according to
group mode turns on.
their order on the disc, not their order
2 Follow steps 1 and 2 of “Selecting
within the group.
and playing groups (Group skip
4 Press . or > repeatedly until
mode)” (page 31) and check the
the number or name of the desired
contents of the group you want to
last track flashes in the display, and
release. Then press xSTOP.
then press EDIT/ENTER.
3 Press EDIT/ENTER.
This selects the last track of the new
group.
4 Press . or > repeatedly until
“ : Release” flashes in the display,
5 Follow steps 4 to 6 of “Labeling
and press EDIT/ENTER.
recordings” (page 34) to label a
“Release?” appears and
group.
“PushENTER” flashes in the display.
z
5 Press EDIT/ENTER.
You can also use the SPEED CONTROL dial to
select and then enter the menu. Turn the dial
The group setting of the selected
(instead of ./>) to show the menu items
group is released.
one by one and press the dial (instead of EDIT/
ENTER) to enter the selected menu.
z
You can also use the SPEED CONTROL dial to
Notes
select and then enter the menu. Turn the dial
• In step 3, the first track must either be the first
(instead of ./>) to show the menu items
track of an existing group or a track that does
one by one and press the dial (instead of EDIT/
not belong to a group.
ENTER) to enter the selected menu.
• When selecting the last track in step 4, make
sure the track comes after the one selected in
step 3. The last track must either be the last
track of an existing group or a track that does
not belong to a group.
37-GB
model name1[MZ-B100] model name2[MZ------]
[3-235-455-11(1)]
5 Press EDIT/ENTER again.
Moving recorded tracks
The track moves to the selected
destination track.
You can change the order of the recorded
tracks.
To cancel moving
Example
Press xSTOP.
Move track C from the third to the second
z
track.
You can also use the SPEED CONTROL dial to
Before moving
select and then enter the menu. Turn the dial
(instead of ./>) to show the menu items
A C DB
one by one and press the dial (instead of EDIT/
ENTER) to enter the selected menu.
A B DC
Moving a track to a
After moving
different group
./>
EDIT/ENTER
./>
EDIT/ENTER
TRACK MARK
GROUP
1 Press GROUP for 2 seconds or more.
1 While playing the track you want to
move, press EDIT/ENTER.
“” lights up in the display the
group mode turns on.
The recorder plays the selected track
repeatedly.
2 While playing the track you want to
move, press EDIT/ENTER.
2 Press . or > repeatedly until
“ : Move” flashes in the display.
The recorder plays the selected track
repeatedly.
3 Press EDIT/ENTER again.
3 Press . or > repeatedly until
The selected track number or name of
“ : Move” flashes in the display,
the group that the selected track
and then press EDIT/ENTER.
belongs (when the group mode is
turned on) flashes in the display.
4 Press . or > repeatedly until
the destination group flashes in the
4 Press . or > repeatedly to
display, and then press EDIT/
select the destination track number.
ENTER.
For the example above, “MV 003 t
002” appears in the display.
38-GB
5 Press . or > repeatedly until
z
the number of the destination track
You can also use the SPEED CONTROL dial to
select and then enter the menu. Turn the dial
within the group flashes in the
(instead of ./>) to show the menu items
display, and then press EDIT/
one by one and press the dial (instead of EDIT/
ENTER.
ENTER) to enter the selected menu.
z
You can also use the SPEED CONTROL dial to
select and then enter the menu. Turn the dial
(instead of ./>) to show the menu items
Erasing tracks
one by one and press the dial (instead of EDIT/
ENTER) to enter the selected menu.
To erase a track
Note that once a recording has
Changing the order of a
been erased, you cannot retrieve it.
group on a disc (Group
Be sure to verify the contents of
move)
the track you want to erase.
./>
EDIT/ENTER
EDIT/ENTER
GROUP
ERASE
1 Press GROUP for 2 seconds or more.
1 While playing the track you want to
“” lights up in the display and the
erase, press ERASE.
group mode turns on.
“Erase OK?” and “PushENTER”
appear alternately in the display and
2 While playing a track within a group
the recorder plays the selected track
whose order you want to change,
repeatedly.
press EDIT/ENTER.
2 Press EDIT/ENTER.
3 Press . or > repeatedly until
“ : Move” flashes in the display,
The track is erased and the next track
and then press EDIT/ENTER.
starts to play. All the tracks after the
one erased are automatically
You can now move the selected
renumbered.
group.
4 Press . or > repeatedly to
To cancel erasing
select the destination point on the
Press xSTOP.
disc, and then press EDIT/ENTER.
39-GB

To erase a small section of a
To erase a group
track
Pause playback at the point where you
Note that once a recording has
want to start erasing. Then do steps 1 and
been erased, you cannot retrieve it.
2.
Be sure to check the contents of
the group before you erase it.
To erase a part of a track
Add track marks at the beginning and the
1 Press GROUP for 2 seconds or more.
end of the part you want to erase, then
“” lights up in the display and the
erase the part.
group mode turns on.
2 Follow steps 1 and 2 of the procedure
To erase the whole disc
described in “Selecting and playing
groups (Group skip mode)” (page 31)
Note that once a recording has
to check the contents of the group you
been erased, you cannot retrieve it.
want to erase. Then press xSTOP.
Be sure to verify the contents of
the disc you want to erase.
3 While the recorder is stopped, press
EDIT/ENTER, press . or >
1 Play the disc you want to erase, verify
repeatedly until “EDIT” flashes in the
its contents, and then press xSTOP.
display, and then press EDIT/ENTER
again.
2 While the recorder is stopped, press
ERASE.
4 Press . or > repeatedly until
“ :Erase” flashes in the display,
“All Erase?” and “PushENTER”
and then press EDIT/ENTER.
appear alternately in the display.
The group name and “GP Erase?”
3 Press . or > repeatedly until
appear and “PushENTER” flashes in
“ :Erase” flashes in the display,
the display. To cancel erasing, press
and then press EDIT/ENTER.
CANCEL.
Track name and “All Erase?” light up
5 Press EDIT/ENTER again.
and “PushENTER” flashes in the
display.
The group is erased.
4 Press EDIT/ENTER.
z
You can also use the SPEED CONTROL dial to
“TOC Edit” flashes in the display,
select and then enter the menu. Turn the dial
and all the tracks will be erased.
(instead of ./>) to show the menu items
When erasing is complete,
one by one and press the dial (instead of EDIT/
“BLANKDISC” appears in the
ENTER) to enter the selected menu.
display.
To cancel erasing,
Press xSTOP.
40-GB
Other operations
Adjusting the contrast
Locking the controls
of the display window
(HOLD)
(Contrast adjustment)
To prevent the buttons from being
You can adjust the contrast of the display
accidentally operated when you carry the
window on the recorder.
recorder, use this function.
./>
EDIT/
ENTER
HOLD
1 While the recorder is stopped, press
EDIT/ENTER.
2 Press . or > repeatedly until
“CONTRAST” flashes in the display,
HOLD
and then press EDIT/ENTER.
3 Press . or > repeatedly to
adjust the contrast, and then press
1 Slide HOLD to the direction of the
EDIT/ENTER.
..
On the recorder, slide HOLD to lock
z
the controls of the recorder. On the
You can also use the SPEED CONTROL dial to
remote control, slide HOLD to lock
select and then enter the menu. Turn the dial
(instead of ./>) to show the menu items
the controls of the remote control.
one by one and press the dial (instead of EDIT/
Slide HOLD in the opposite direction
ENTER) to enter the selected menu.
of the arrow to unlock the controls.
41-GB
Power sources
4)
You can power the recorder not only with
Measured in accordance with the JEITA
(Japan Electronics and Information
alkaline dry battery (not supplied) but also
Technology Industries Association) standard.
with house current. You cannot, however,
1)
use manganese dry battery.
When playing
2)
(Unit: approx.hours)(JEITA
)
3)
4)
Recording
Speaker
Headphones
mode
When to replace the
Stereo 25.5 34.5
batteries
LP2 Stereo 27 39.5
You can check the battery condition with
LP4 Stereo 30 43
the battery indication which is displayed
while using the player. The battery
MONO 30 43
indicator changes as the table below due
1)
When using a Sony LR6 (SG) “STAMINA”
to the battery condition.
alkaline dry battery (produced in Japan).
The battery level indicator is approximate.
2)
Measured in accordance with the JEITA
(Japan Electronics and Information
Battery
Condition
Technology Industries Association) standard.
indicator
3)
When played using the built-in speaker.
4)
t Battery power decreasing.
When played using headphones.
r
Weak battery.
Notes
(flashing)
• Stop the recorder before replacing batteries.
• An optional AC power adaptor is
e
The battery has gone out.
recommended for long recording.
(flashing)
“LOW BATT” flashes in
the display on the remote
control, and the power
goes off.
1)
Battery life
2)3)
When recording
4)
(Unit: approx.hours)(JEITA
)
Recording mode Approx. hours
Stereo 9
LP2 Stereo 12.5
LP4 Stereo 15
MONO 12
1)
The battery life may be shorter due to
operating conditions and the temperature of
the location.
2)
When using a Sony LR6 (SG) “STAMINA”
alkaline dry battery (produced in Japan).
Recording time may differ according to the
alkaline batteries.
3)
When recorded with the built-in microphones.
42-GB
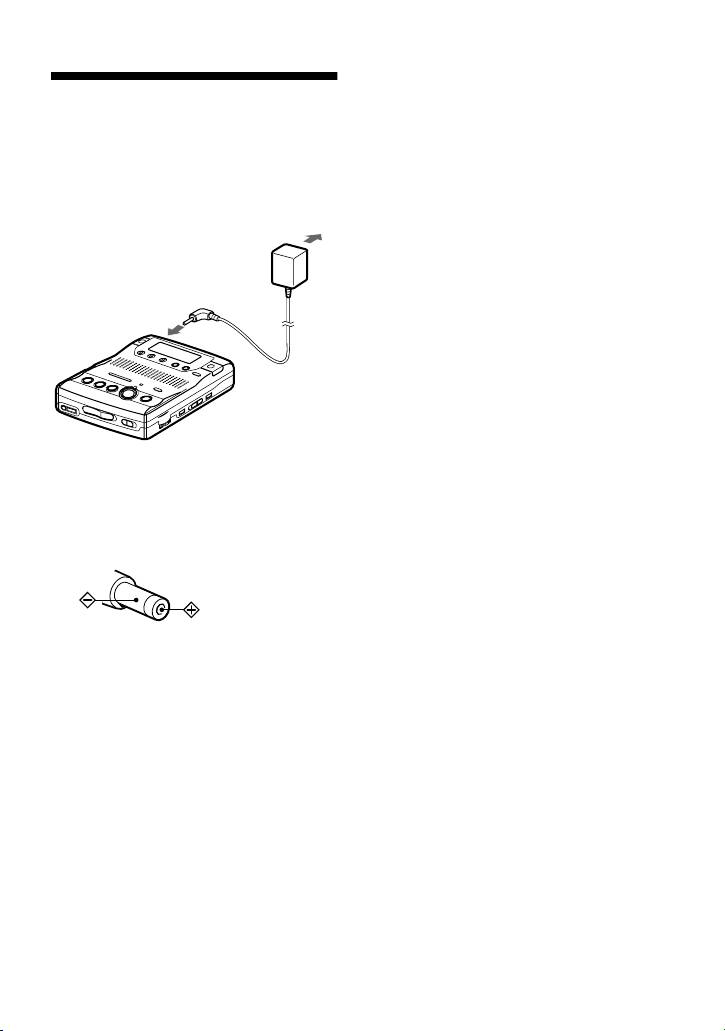
Using house current
1 Connect the AC power adaptor AC-
E30HG (not supplied) to DC IN 3V.
2 Connect the AC power adaptor (not
supplied) to the wall outlet.
to wall outlet
to DC IN 3V
AC power
adaptor (not
supplied)
Notes
• For use in your house: Use the AC power
adaptor AC-E30HG (not supplied). Do not use
any other AC power adaptor since it may
cause the recorder to malfunction.
Polarity of the
plug
• There are regional differences in AC-E30HG
specifications. For this reason, you should
verify that the power requirements and plug
configuration are appropriate for your area
before you purchase the recorder.
• Make sure to connect the AC power adaptor to
a wall outlet that is within easy reach, and
disconnect it quickly if an unusual condition
arises.
43-GB

Additional information
On the headphones
Precautions
Road safety
Do not use the headphones while driving,
On safety
cycling, or operating any motorized vehicle. It
Do not put any foreign objects in the DC IN 3V
may create a traffic hazard and is illegal in
jack.
many areas. It can also be potentially dangerous
to play your recorder at high volume while
On power sources
walking, especially at pedestrian crossings. You
should exercise extreme caution or discontinue
• Use LR6 (size AA) batteries, house current, or
use in potentially hazardous situations.
car battery.
• The recorder is not disconnected from the AC
Preventing hearing damage
power source (mains) as long as it is
Avoid using he headphones at high volume.
connected to the wall outlet, even if the
Hearing experts advise against continuous, loud
recorder itself has been turned off.
and extended play. If you experience a ringing
• If you are not going to use this recorder for a
in your ears, reduce the volume or discontinue
long time, be sure to disconnect the power
use.
supply (an optional AC power adaptor, dry
batteries, or car battery cord). To remove the
Caring for others
AC power adaptor (not supplied) from the
Keep the volume at a moderate level. This will
wall outlet, grasp the adaptor plug itself; never
allow you to hear outside sounds and to be
pull the cord.
considerate of the people around you.
On heat build-up
On the MiniDisc cartridge
Heat may build up in the recorder if it is used
• When carrying or storing the MiniDisc, keep
for an extended period of time. In this case,
it in its case.
leave the recorder turned off until it cools down.
• Do not break open the shutter.
• Do not place the cartridge where it will be
On installation
subject to light, extreme temperatures,
• Never use the recorder where it will be
moisture or dust.
subjected to extremes of light, temperature,
• Attach the supplied MD label only in the
moisture or vibration.
space designated for it on the disc. Do not
• Never wrap the recorder in anything when it is
stick it on any other disc surface.
being used with the AC power adaptor (not
supplied). Heat build-up in the recorder may
On cleaning
cause malfunction or damage.
• Clean the recorder casing with a soft cloth
• Never carry the recorder together with a hard
slightly moistened with water or a mild
object within the supplied carrying pouch.
detergent solution. Do not use any type of
Friction with the object may cause flacking or
abrasive pad, scouring powder or solvent such
scratching on the recorder’s painted surface.
as alcohol or benzene as it may mar the finish
of the casing.
• Wipe the disc cartridge with a dry cloth to
remove dirt.
• Dust on the lens may prevent the unit from
operating properly. Be sure to close the disc
compartment lid after inserting or ejecting an
MD.
44-GB
Notes on batteries
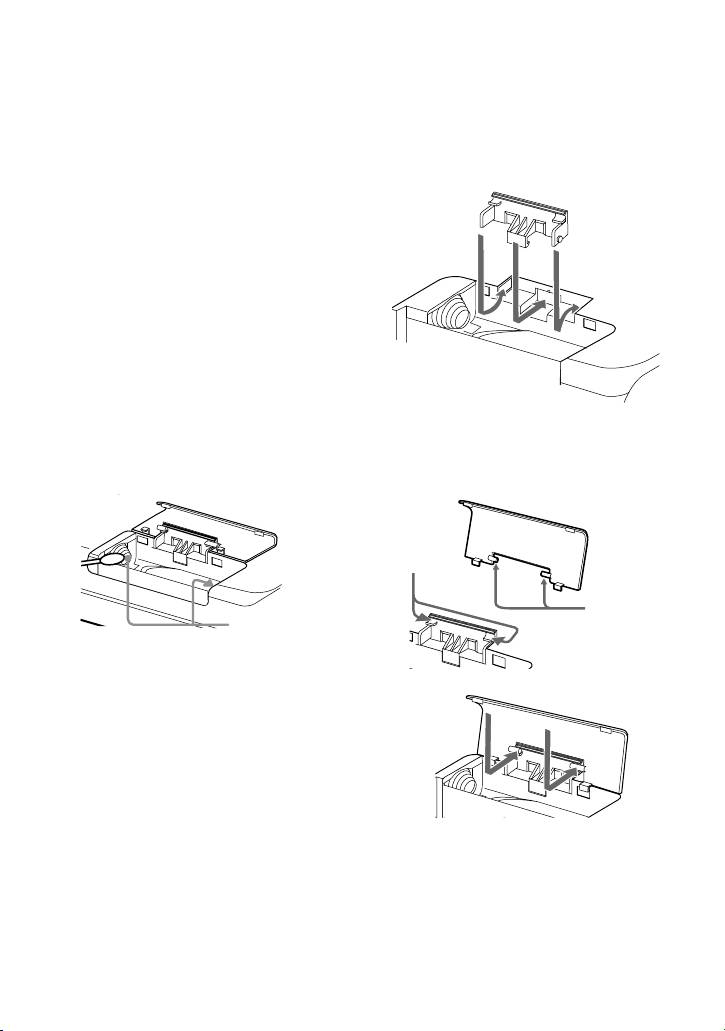
On the battery compartment
Incorrect battery usage may lead to leakage of
lid
battery fluid or bursting batteries. To prevent
The battery compartment lid is designed to
such accidents, observe the following
detach from the recorder when it is handled
precautions:
with great force. Do the following steps to
• Insert the + and – poles of the batteries
reattach the lid.
correctly.
• Do not try to recharge dry batteries.
• When the recorder is not to be used for a long
time, be sure to remove the batteries.
• If a battery leak should develop, carefully and
thoroughly wipe away battery fluid from the
battery compartment before inserting new
ones.
Note on mechanical noise
The recorder gives off mechanical noise while
operating, which is caused by the power-saving
system of the recorder and it is not a problem.
1 Insert the projections on the PUSH OPEN
Note on maintenance
tab firmly into the slots on the recorder one
Clean the terminals periodically with a cotton
at a time.
swab or a soft cloth as illustrated.
Terminals
If you have any questions or problems
concerning your recorder, please consult your
nearest Sony dealer. (If a trouble occurred when
the disc was in the recorder, we recommend that
the disc be left in the recorder when you consult
your Sony dealer so that the cause of trouble
may be better understood.)
2 Insert the projections on the lid firmly into
the slots on the PUSH OPEN tab one at a
time.
45-GB
1
2
1
2
Slots
Projections

Troubleshooting
Should any problem persist after you have made these checks, consult your nearest Sony
dealer.
Symptom Cause/Solution
The recorder does
• Audio sources may not be securely connected.
not work or works
, Disconnect the audio sources once and connect them again
poorly.
(pages 20, 21).
• The HOLD function is turned on (“HOLD” appears in the display
when you press an operation button on the recorder).
, Disable HOLD by sliding the HOLD switch in the opposite
direction of the arrow (page 41).
• Moisture has condensed inside the recorder.
, Take the MD out and leave the recorder with the lid opened in a
warm place for several hours until the moisture evaporates.
• The dry battery is weak (r or “LOW BATT” flashes).
, Replace the dry battery (pages 9, 42).
• The dry battery have been inserted incorrectly.
, Insert the battery correctly (page 9).
• You pressed a button while the disc indication was rotating quickly.
, Wait until the indication becomes normal.
• When recording digitally from a portable CD player, you did not
use AC power or did not disable the anti-skip function such as ESP
(page 20).
, Use the portable CD player with AC power or disable the anti-
skip function such as ESP.
• The analog recording was made using a connecting cord with an
attenuator.
, Use a connecting cord without an attenuator (page 21).
• The AC power adaptor (not supplied) was unplugged during
recording or a power outage occurred.
• While operating, the recorder received a mechanical shock, too
much static, abnormal power voltage caused by lightning, etc.
, Restart the operation as follows.
1 Take out the batteries or disconnect all the power sources.
2 Leave the recorder for about 30 seconds.
3 Insert the batteries or connect the power source.
• The disc is damaged or does not contain proper recording or editing
data.
, Reinsert the disc. If this fails, rerecord.
• The lid is not firmly closed.
, Open the lid and close it again, pressing hard so that it closes
firmly.
• A disc with no track is inserted (“BLANKDISC” appears when
playing or editing).
, Replace to another disc.
• The record protect tab is opened.
, Slide the record protect tab closed.
46-GB

Symptom Cause/Solution
The recorder does
• The premastered MD is inserted.
not record or edit.
, Replace to the recordable MD.
• The power source was disrupted during recording or editing.
, Rerecord or reedit again.
The zREC
• The batteries have been exhausted or the power sources have been
button does not
disconnected during recording or editing.
come up. The lid
, Replace the exhausted batteries with new ones or connect the
does not open.
power source again.
No sound comes
• The headphones plug is not firmly connected.
through the
, Plug in the plug of the headphones firmly to the remote control.
headphones.
Plug in the plug of the remote control firmly to i.
• Volume is too low.
, Adjust the volume by turning VOL.
• Dirty plugs.
, Clean the plug on the end of the headphones cord and the plug
on the end of the remote control cord.
An MD is not
• Disc playing stopped before it came to the last track.
played from the
, Press .REVIEW/AMS repeatedly or open and close the lid
first track.
once to go back to the beginning of the disc, and restart playing
after checking the track number in the display.
The recorder does
• Repeat play is selected.
not play normally.
, Press PLAY MODE repeatedly until the indication
disappears from the display.
Playback sound
• The recorder is placed where it receives continuous vibration.
skips.
, Put the recorder on a stable place.
• A very short track may cause sound to skip.
, Try not to create tracks under one second long.
Sound has a lot of
• Strong magnetism from a television or such device is interfering
static.
with operation.
, Move the recorder away from the source of strong magnetism.
Cannot find the
• You pressed XPAUSE after pressing .REVIEW/AMS or
track marks.
> CUE/AMS.
, Press XPAUSE before pressing .REVIEW/AMS or
>CUE/AMS.
The clock loses
• The built-in battery for the clock is weak. Note that the clock may
time or the
gain or lose up to about 2 minutes per month under normal
display flashes.
condition.
The recording
, Insert new dry batteries and leave them for about more than two
hours to charge the built-in battery. After charging, set the clock
date was not
again (page 25).
stamped onto the
• The clock is not set.
disc.
, Set the clock (page 25).
47-GB

Symptom Cause/Solution
The disc cannot
• The component does not support LP2 stereo or LP4 stereo.
edit on other
, Edit on other component that support LP2 stereo or LP4 stereo.
component.
Momentary noise
• Due to the special digital audio compression technology used in
is heard.
LP4 stereo mode, momentary noise may occur on very rare
occasions with certain sound sources.
, Record in normal stereo or LP2 stereo mode.
The group
• While using a disc that has no group information, an attempt was
function (group
made to turn the group mode on (“No Group” appears).
mode/group skip
, Use a disc with a group information.
mode) does not
operate.
The display
• The recorder was disconnected from the power source.
window is not
, Let the recorder sit for a while, or disconnect the power source,
normal.
reconnect it, and then press any of the operating buttons.
The recorder
• The group skip mode is on.
skips tracks when
, The group skip mode automatically turns off if no operation is
you press ./
made for 5 seconds.
> .
48-GB

System limitations
The recording system in your MiniDisc recorder is radically different from those used in
cassette and DAT decks and is characterized by the limitations described below. Note,
however, that these limitations are due to the inherent nature of the MD recording system
itself and not to mechanical causes.
Symptom Cause
“TR FULL” appears
When 254 tracks have been recorded on the disc, “TR FULL”
even before the disc
appears regardless of the total recorded time. More than 254
has reached the
tracks cannot be recorded on the disc. To continue recording,
maximum recording
erase unnecessary tracks.
time (60, 74, or 80
minutes).
“TR FULL” appears
Repeated recording and erasing may cause fragmentation and
even before the disc
scattering of data. Although those scattered data can be read,
has reached the
each fragment is counted as a track. In this case, the number of
maximum track
tracks may reach 254 and further recording is not possible. To
number or recording
continue recording, erase unnecessary tracks.
time.
Track marks cannot be
When the data of a track is fragmented, the track mark of a
erased.
fragment under 12 seconds long (recorded in stereo), 24 seconds
The remaining
long (recorded in LP2 stereo mode or monaural mode), or 48
recording time does
seconds long (recorded in LP4 stereo mode) cannot be erased.
not increase even after
You cannot combine a track recorded in stereo and a track
erasing numerous short
recorded in monaural; nor can you combine a track recorded
tracks.
with digital connection and a track recorded with analog
connection.
Tracks of under 12 seconds, 24 seconds, 48 seconds in length
are not counted and so erasing them may not lead to an increase
in the recording time.
The total recorded time
Normally, recording is done in minimum units of approximately
and the remaining time
2 seconds (in stereo), 4 seconds (in LP2 stereo mode or
on the disc may not
monaural mode), or 8 seconds (in LP4 stereo mode). When
total the maximum
recording is stopped, the last unit of recording always uses this
recording time (60, 74,
unit of 2 seconds, 4 seconds, or 8 seconds even if the actual
or 80 minutes).
recording is shorter. Likewise, when recording is restarted after
the stop, the recorder will automatically insert a blank space
amounting to 2 seconds, 4 seconds, or 8 seconds before the next
recording. (This is to prevent accidental erasing of a previous
track whenever a new recording is started). Therefore, the actual
recording time will decrease whenever a recording is stopped; a
maximum of 6 seconds, 12 seconds, or 24 seconds compared to
the potential recording time for each stop.
The edited tracks may
The fragmentation of data may cause sound dropout while
exhibit sound dropout
searching because the tracks are played in higher speed than
during search
normal playback.
operations.
49-GB
Messages
If the following messages flash in the display window, check the chart below.
Error message Meaning/Remedy
BLANKDISC • An MD with no recording on it is inserted.
, Insert a recorded MD.
BUSY • You tried to operate the recorder while it was accessing the
recorded data.
, Wait until the message goes out (in rare cases, it may take 2–3
minutes).
Data Save • The MD player is recording information (sounds) from the
memory to the disk.
, Wait until this process is completed. Do not expose the player
to any physical shock, nor disrupt power supply.
DISC ERR • The disc is damaged or does not contain proper recording or
editing data.
, Reinsert the disc. If this fails, rerecord.
DISC FULL • There is no more space to record on the disc (less than 12 seconds
available).
, Replace the disc.
EDITING • You pressed a key on the recorder while editing on the remote
control.
Hi DC in • Voltage of the power supply is too high (The recommended AC
power adaptor or the recommended car battery cord is not used).
, Use the recommended AC power adaptor (not supplied) or the
car battery cord (not supplied).
HOLD • The recorder is locked.
, Slide HOLD against the arrow to unlock the recorder
(page 41).
LOW BATT • Batteries are weak.
, Replace the dry batteries (pages 9, 42).
MEM OVER • You tried to record with the recorder placed where it receives
continuous vibration.
, Put the recorder on a stable place, and start recording again.
MENU • You pressed a key on the remote control while selecting a menu on
the recorder.
NAME FULL • You tried to enter more than 200 letters to label a single track or
disc.
• You tried to enter a total of more than 1700 letters for track or disc
names during playback or stop.
, Enter a shorter name for the track, group, or disc (page 34), or
delete “LP:” from the track name recorded in MDLP mode.
50-GB

Error message Meaning/Remedy
NO COPY • You tried to make a copy from a disc that is protected by the Serial
Copy Management System. You cannot make copies from a
digitally connected source which was itself recorded using digital
connection.
, Use analog connection instead (page 21).
NO DISC • You tried to play or record with no disc in the recorder.
, Insert an MD.
No Group • You tried to turn the group function on with a disc witch has no
group information.
, Use a disc witch the group information has been recorded.
NO SIGNAL • The recorder could not detect digital input signals.
, Make sure that the source is connected firmly (page 20).
P/B ONLY • You tried to record or edit on a premastered MD (P/B stands for
“playback”).
, Insert a recordable MD.
PROTECTED • You tried to record or edit on a MD with the tab in the record-
protect position (page 54).
, Slide the tab back.
SORRY • You tried to erase the track mark at the beginning of the first track.
• You tried to erase a track mark to combine tracks the recorder
cannot combine (a track recorded in stereo and in mono, for
example).
• You tried to press XPAUSE or TRACK MARK during synchro-
recording.
• You tried to release the group for “Group --”.
TEMP OVER • Heat has built up in the recorder.
, Let the recorder cool down.
TOC Edit • The MD player is recording information (track start and end
position) from the memory to the disk.
, Wait until this process is completed. Do not expose the player
to physical shock, nor disrupt power supply.
TR FULL • There is no more space for new data when you are editing the MD.
, Erase unnecessary tracks (page 39).
TrPROTECT • You tried to record or edit a write-protected track that was recorded
on other device.
, Record or edit on other tracks.
51-GB

Outputs
Specifications
i: stereo mini-jack (dedicated remote control
jack)
2)
Maximum output (DC)
System
Headphones: 5 mW + 5 mW (16 ohm)
Audio playing system
Speaker: 70 mW
MiniDisc digital audio system
Laser diode properties
General
Material: GaAlAs
Wavelength:
λ = 790 nm
Power requirements
Emission duration: continuous
DC 3V
Laser output: less than 44.6 µW
LR6 (size AA) alkaline dry battery (world
(This output is the value measured at a distance
model only)
of 200 mm from the lens surface on the optical
Battery operation time
pick-up block with 7 mm aperture.)
See “Battery life” (page 42)
Recording and playback time
Dimensions
When using MDW-80
Approx. 105.7 × 80.0 × 24.9 mm (w/h/d)
1
1
Maximum 160 min. in monaural.
(4
/4 × 3
/8 × 1 in.) not incl. projecting parts and
Maximum 320 min. in stereo
controls.
Revolutions
Mass
350 rpm to 2,800 rpm (CLV)
Approx. 160 g (5.7 oz) (main unit only)
Error correction
Supplied accessories
ACIRC (Advanced Cross Interleave Reed
Remote control (1)
Solomon Code)
Headphones (1)
Sampling frequency
Carrying pouch (1)
44.1 kHz
Hand strap (1)
Sampling rate converter
Sony LR6 (size AA) alkaline dry battery (world
Input: 32 kHz/44.1 kHz/48 kHz
model only) (1)
1)
Coding
The LINE IN (OPTICAL) jack is used to
connect either a digital (optical) cable or a line
ATRAC (Adaptive TRansform Acoustic
(analog) cable.
Coding)
2)
Measured in accordance with JEITA.
AT RAC 3 — LP2/LP4
Modulation system
Optional accessories
EFM (Eight to Fourteen Modulation)
AC power adaptor AC-E30HG
Speaker
1
Optical Cable POC-15B, POC-15AB
28 mm (1
/8 in.) dia.
Line Cable RK-G129HG, RK-G136HG
Frequency response (digital/analog
Stereo Microphones ECM-717
input)
Recordable MDs MDW-series
20 to 20,000 Hz ± 3 dB
Foot control unit FS-85B50
Wow and Flutter
Headphones* MDR-EX70LP, MDR-E838LP
Below measurable limit
* When using optional headphones, use only
Inputs
headphones with stereo mini plugs. You
Microphone: stereo mini-jack
cannot use headphones with micro plugs.
(minimum input level 0.25 mV)
1)
Line in
:
Your dealer may not handle some of the above
stereo mini-jack for analog input
listed accessories. Please ask the dealer for
(minimum input level 39 mV)
detailed information about the accessories in
optical (digital) mini-jack for optical
your country.
(digital) input
US and foreign patents licensed from Dolby
Laboratories.
Design and specifications are subject to change
without notice.
52-GB
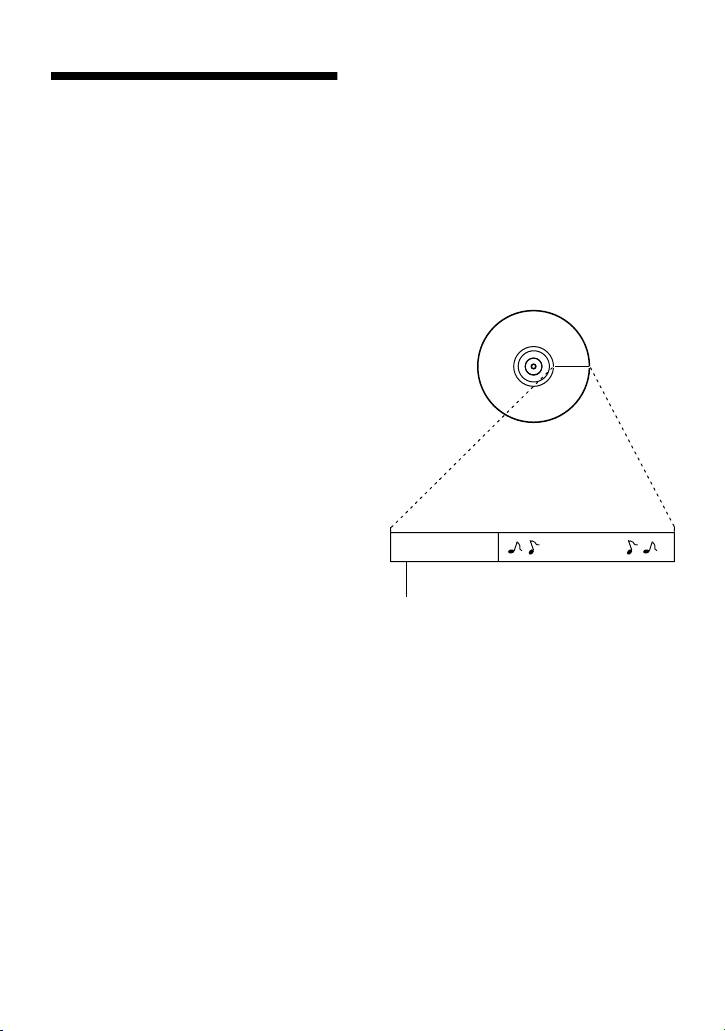
Recordable MDs are manufactured with a
Explanations
“User TOC Area” to contain the order of the
music. The TOC (Table of Contents) system
is similar to the “directory management
What is the newly developed
system” of floppy disks. In other words,
DSP TYPE-R for ATRAC?
starting and ending addresses for all music
“TYPE-R” is a high-level Sony specification
tracks recorded on the disc are stored in this
used in the Digital Signal Processor (DSP),
area. This lets you randomly access the
which is heart of the MiniDisc sound. This
beginning of any track as soon as you enter
technology gives the MiniDisc recorder
the track number (AMS), as well as label the
twice the signal processing capability as
location with a track name as you would a
previous MiniDisc Walkman models,
file on a diskette.
producing a sound quality close to that of
MiniDisc decks.
How the MiniDisc got so small
The 2.5-inch MiniDisc, encased in a plastic
cartridge that looks like a 3.5-inch diskette
(see illustration on the left column), uses a
new digital audio compression technology
called ATRAC (Adaptive TRansform
Acoustic Coding). To store more sound in
less space, ATRAC extracts and encodes
only those frequency components actually
audible to the human ear.
The meaning of “no sound”
User TOC Area
Music Data
“No sound” describes a recorder condition in
which the input level is about 4.8 mV during
analog input or less than –89 dB during
Contains the order and start/end
optical (digital) input (with 0 dB as full bit
points of the music.
(the maximum recordable level for a
MiniDisc)).
Shock-Resistant Memory
One major drawback of optical read systems
Quick Random Access
is that they can skip or mute when subjected
Like CDs, MDs offer instantaneous random
to vibration. The MD system resolves this
access to the beginning of any music track.
problem by using a buffer memory that
Premastered MDs are recorded with location
stores audio data.
addresses corresponding to each music
selection.
53-GB

To protect a recorded MD
To record-protect an MD, slide open the tab at
Microphone, record player, tuner, etc (with
the side of the MD. In this position, the MD
analog output jacks).
cannot be recorded. To record again, slide the
tab back so the tab is visible.
When the disc is record-protected
Analog recording
Tab
Home-recorded MD
Digital recording
Back of the MD
Record-protect
Note on digital recording
Recordable
No
Recordable
This recorder uses the Serial Copy
MD
digital
MD
Management System, which allows only first-
recording
generation digital copies to be made from
premastered software. You can only make
If you have any questions or problems
copies from a home-recorded MD by using the
concerning your recorder, please consult your
analog (line out) connections.
nearest Sony dealer. (If a trouble occurred when
the disc was in the recorder, we recommend that
Premastered software such as CDs or
the disc be left in the recorder when you consult
MDs.
your Sony dealer so that the cause of trouble
may be better understood.)
Digital recording
Home-
No
Recordable
recorded
digital
MD
MD
recording
54-GB

55-GB

Grabador, Reproductor de
Minidisco portátil
POR FAVOR LEA
DETALLADAMENTE ESTE
MANUAL DE INSTRUCCIONES
ANTES DE CONECTAR Y OPERAR
ESTE EQUIPO.
RECUERDE QUE UN MAL USO DE
SU APARATO PODRÍA ANULAR
LA GARANTÍA.
Precaución
El uso de instrumentos ópticos con este
producto incrementa el riesgo de lesiones
oculares.
PRECAUCIÓN: RADIACIÓN LÁSER
INVISIBLE CUANDO LA UNIDAD
ESTÁ ABIERTA
EVITE LA EXPOSICIÓN AL HAZ
LÁSER
Información
EL VENDEDOR NO SERÁ
RESPONSABLE EN NINGÚN
CASO DE LOS DAÑOS DIRECTOS,
INCIDENTALES O
CONSECUENCIALES DE
CUALQUIER NATURALEZA, O DE
LAS PÉRDIDAS O GASTOS
RESULTANTES DE UN
PRODUCTO DEFECTUOSO O DEL
USO DE UN PRODUCTO.
En algunos países se regula la eliminación
de las pilas como las que sirven para
suministrar energía a este producto.
Obtendrá más información de las
autoridades locales.
2
-ES

ES
3
-ES

Contenidos
Controles ........................................................... 6
Preparación de la fuente de alimentación .......9
Grabación de un MD ....................................... 11
Reproducción de un MD .................................. 14
Opciones de grabación ................................... 16
Grabación de larga duración .................................................................16
VOR (Grabación accionada por la voz) ................................................17
Grabación con un micrófono ...................................................................18
Grabación con un equipo conectado externamente .................................19
Grabación con entrada digital (óptica) (requiere cable óptico) ........20
Grabación con entrada analógica (línea) (requiere cable
de línea) .............................................................................21
Grabación de pistas con la función de grupo (grabación en modo
de grupo) ............................................................................................22
Para activar el modo de grupo (grabación en modo de grupo) .........23
Grabación de una pista en un grupo nuevo .......................................23
Grabación de una pista en un grupo existente ..................................23
Cómo iniciar y detener la grabación sincronizada con el
reproductor fuente (grabación sincronizada) .....................................24
Ajuste del reloj para incluir la hora de grabación ...................................25
Comprobación del tiempo restante o de la posición de grabación ..........26
Opciones de reproducción ............................. 27
Cómo cambiar el ajuste de sonido ........................................................27
Cómo encontrar un punto concreto rápidamente (Easy Search) .............28
Cómo cambiar la velocidad de reproducción (control de velocidad) .....28
Reproducción de pistas de forma repetida ............................................29
Comprobación del tiempo restante o de la posición de reproducción ....29
Uso de la función de grupo (modo de grupo) .......................................30
Cómo escuchar pistas con el modo de grupo (reproducción
del modo de grupo) ...........................................................30
Selección y reproducción de grupos (función de salto de grupo) .....31
4
-ES

Edición de pistas grabadas ............................ 32
Adición de una marca de pista ............................................................. 32
Marcas de pista para dividir una grabación ..................................... 32
Marcas de pista en puntos importantes ............................................ 32
Borrado de una marca de pista ............................................................... 33
Etiquetado de grabaciones ...................................................................... 34
Registro de pistas o grupos como un grupo nuevo (ajuste de grupo) ..... 36
Para cambiar el ajuste de grupo .............................................................. 37
Cambio de orden de pistas grabadas ...................................................... 38
Cambio de una pista a un grupo distinto .............................................. 38
Cambio de orden de un grupo en un disco (cambio de grupo) ............ 39
Borrado de pistas .................................................................................. 39
Cómo borrar una pista ...................................................................... 39
Cómo borrar todo el disco ................................................................ 40
Cómo borrar un grupo ...................................................................... 40
Otras operaciones .......................................... 41
Ajuste del contraste del visor (ajuste del contraste) ............................. 41
Bloqueo de los controles (HOLD) .......................................................... 41
Fuentes de alimentación ................................ 42
Cuándo hay que sustituir las pilas ........................................................ 42
Duración de la pila ........................................................................... 42
Uso de corriente de la red .................................................................... 43
Información adicional ..................................... 44
Precauciones ......................................................................................... 44
Solución de problemas ........................................................................... 46
Limitaciones del sistema ........................................................................ 49
Mensajes ................................................................................................. 50
Especificaciones ..................................................................................... 52
Explicaciones .......................................................................................... 53
5
-ES
Оглавление
- MZ-B100
- Looking at the controls
- Preparing a power source
- Recording an MD right away!
- Playing an MD right away!
- Controles
- Preparación de la fuente de alimentación
- Grabación de un MD
- Reproducción de un MD
- Обзор управления
- Подготовка источника питания
- Выполните запись на минидиск прямо сейчас
- Прослушайте минидиск прямо сейчас
