Sony CPD-E220E: Customizing Your Monitor
Customizing Your Monitor: Sony CPD-E220E

6
LANGUAGE/
LANGUAGE / I NFOR
M
A
T
I
O
N
Customizing Your Monitor
INFORMATION
ENGL ISH FRANÇAI S
(page 7, 14)
DEUTSCH I TAL I ANO
You can make numerous adjustments to your monitor using the
Select the LANGUAGE/
ESPAÑOL NEDERLAN SD
SVENSKA
on-screen menu.
INFORMATION menu to
SELECT EXI T
choose the on-screen menu’s
language and display this
Navigating the menu
monitor’s information box.
Press the center of the control button to display the main MENU
on your screen. See page 9 for more information on using the
x
Displaying the current input signal
control button.
The horizontal and vertical frequencies of the current input signal
are displayed under the BRIGHTNESS/CONTRAST menu. If the
MENU
signal matches one of this monitor’s factory preset modes, the
resolution is also displayed.
BRIGHTNESS/CONTRAST
26 26
H
:
6
8
.7kHz V
:
85Hz
MENU
1024X768
EXI T
SIZE/CENTER
GEOMETRY
SCREEN
COLOR
LANGUAGE / I NFORMAT NOI
SELECT
Use the control button to select one of the following menus.
1
EXIT
Select EXIT to close the menu.
2
SIZE/CENTER (page 9)
SIZE/CENTER
Select the SIZE/CENTER
menu to adjust the picture’s
H-CENTER
centering, size or zoom.
26
SELECT EXI T
3
GEOMETRY (page 10)
GE
OM
ET
R
Y
Select the GEOMETRY
menu to adjust the picture’s
ROTATION
rotation and shape.
26
SELECT EXI T
4
SCREEN (page 11)
SCREEN
Select the SCREEN menu to
degauss the screen and adjust
DEGAUSS
the moire cancellation level.
ON
SELECT EXI T
5
COLOR (page 10)
COLOR
Select the COLOR menu to
USER
5000 6500 9300
KKK
adjust the picture’s color
R50
G50
temperature. You can use this
B50
to match the monitor’s colors
SELECT EXI T
to a printed picture’s colors.
8
the horizontal
the reso
lution
and vertical
of the current
frequencies of
in
put signal
the current
input signal
01GB01COV AEP.book
Page
8
Friday,
August
18,
2000
3:01
PM
x
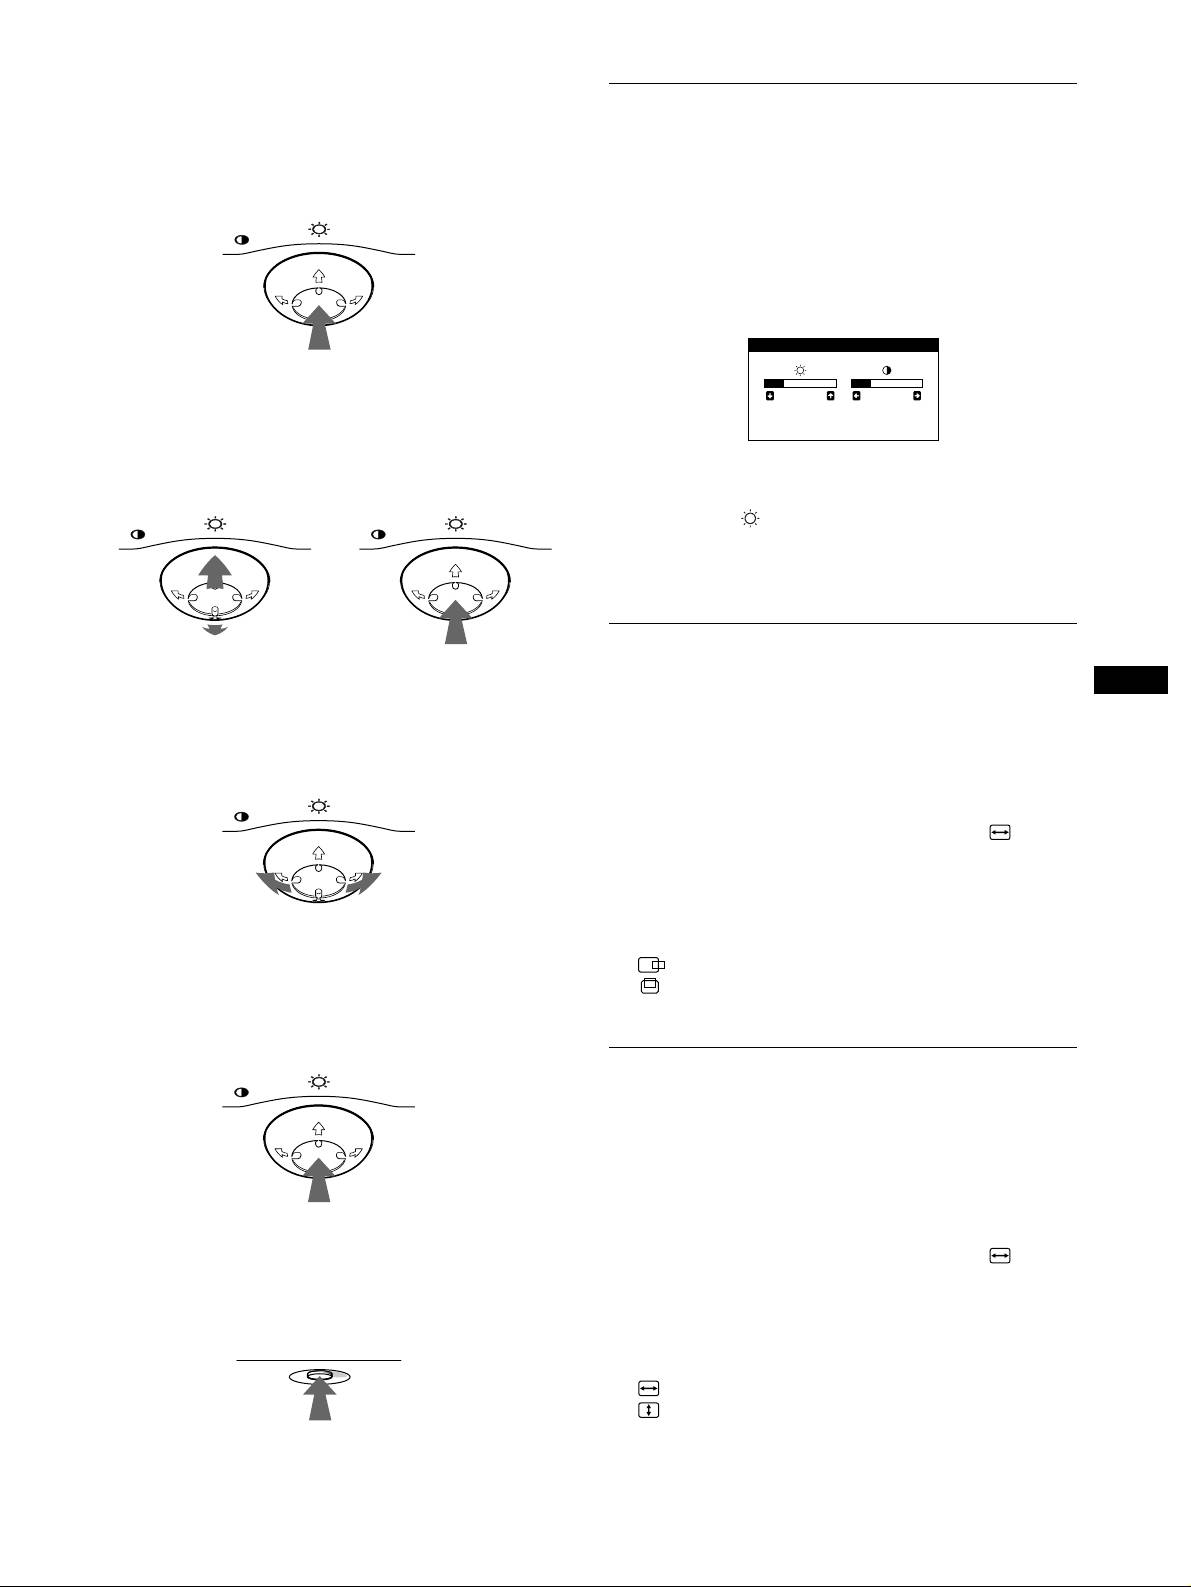
Using the control button
Adjusting the brightness and
1
Display the main MENU.
contrast
Press the center of the control button to display the main
MENU on your screen.
Brightness and contrast adjustments are made using a separate
BRIGHTNESS/CONTRAST menu.
MENU
These settings are stored in memory for all input signals.
1
Move the control button in any direction.
The BRIGHTNESS/CONTRAST menu appears on the
screen.
2
Select the menu you want to adjust.
Highlight the desired menu by moving the control button
towards the rear to go up (
M
), towards the front to go down
(
m
), and left (
<
) or right (
,
) to move sideways.
FRONT
2
Move the control button
m
/
M
to adjust the
MENU MENU
brightness ( ), and
<
/
,
to adjust the contrast
(
6
).
The menu automatically disappears after about 3 seconds.
Adjusting the centering of the
REAR
picture (CENTER)
GB
3
Adjust the menu.
This setting is stored in memory for the current input signal.
Move the control button left (
<
) or right (
,
) to make the
adjustment.
1
Press the center of the control button.
MENU
The main MENU appears on the screen.
2
Move the control button
m
/
M
to highlight SIZE/
CENTER and press the center of the control button
again.
The SIZE/CENTER menu appears on the screen.
4
Close the menu.
3
First move the control button
m
/
M
to select
Press the center of the control button once to return to the
(H-CENTER) for horizontal adjustment, or
main MENU, and twice to return to normal viewing. If no
(V-CENTER) for vertical adjustment. Then move
buttons are pressed, the menu closes automatically after about
the control button
<
/
,
to adjust the centering.
30 seconds.
MENU
Adjusting the size of the picture
(SIZE)
This setting is stored in memory for the current input signal.
1
Press the center of the control button.
The main MENU appears on the screen.
x
Resetting the adjustments
2
Move the control button
m
/
M
to highlight SIZE/
Press the RESET button. See page 11 for more information on
CENTER and press the center of the control button
resetting the adjustments.
again.
The SIZE/CENTER menu appears on the screen.
RESET
3
First move the control button
m
/
M
to select
(H-SIZE) for horizontal adjustment, or
(V-SIZE) for vertical adjustment. Then move the
control button
<
/
,
to adjust the size.
9
BRIGHTNESS/CONTRAST
26 26
H
:
68.7kHz V
:
85Hz
1024X768
01GB01COV AEP.book
Page
9
Friday,
August
18,
2000
3:01
PM
Enlarging or reducing the picture
Adjusting the color of the picture
(ZOOM)
(COLOR)
This setting is stored in memory for the current input signal.
The COLOR settings allow you to adjust the picture’s color
temperature by changing the color level of the white color field.
1
Press the center of the control button.
Colors appear reddish if the temperature is low, and bluish if the
The main MENU appears on the screen.
temperature is high. This adjustment is useful for matching the
monitor’s colors to a printed picture’s colors.
2
Move the control button
m
/
M
to highlight SIZE/
This setting is stored in memory for all input signals.
CENTER and press the center of the control button
again.
1
Press the center of the control button.
The SIZE/CENTER menu appears on the screen.
The main MENU appears on the screen.
3
Move the control button
m
/
M
to select (ZOOM),
2
Move the control button
m
/
M
to highlight COLOR
and move
<
/
,
to enlarge or reduce the picture.
and press the center of the control button again.
The COLOR menu appears on the screen.
Adjusting the shape of the picture
3
Move the control button
<
/
,
to select a color
temperature.
(GEOMETRY)
The preset color temperatures are 5000K, 6500K, and 9300K.
Since the default setting is 9300K, the whites will change
The GEOMETRY settings allow you to adjust the rotation and
from a bluish hue to a reddish hue as the temperature is
shape of the picture.
lowered to 6500K and 5000K.
The (ROTATION) setting is stored in memory for all input
signals. All other settings are stored in memory for the current
4
If necessary, fine tune the color temperature.
input signal.
First move the control button
<
/
,
to select USER. Then
move the control button
m
/
M
to select R (red), G (green), or
1
Press the center of the control button.
B (blue) and move the control button
<
/
,
to make the
The main MENU appears on the screen.
adjustment.
2
Move the control button
m
/
M
to highlight
GEOMETRY and press the center of the control
button again.
The GEOMETRY menu appears on the screen.
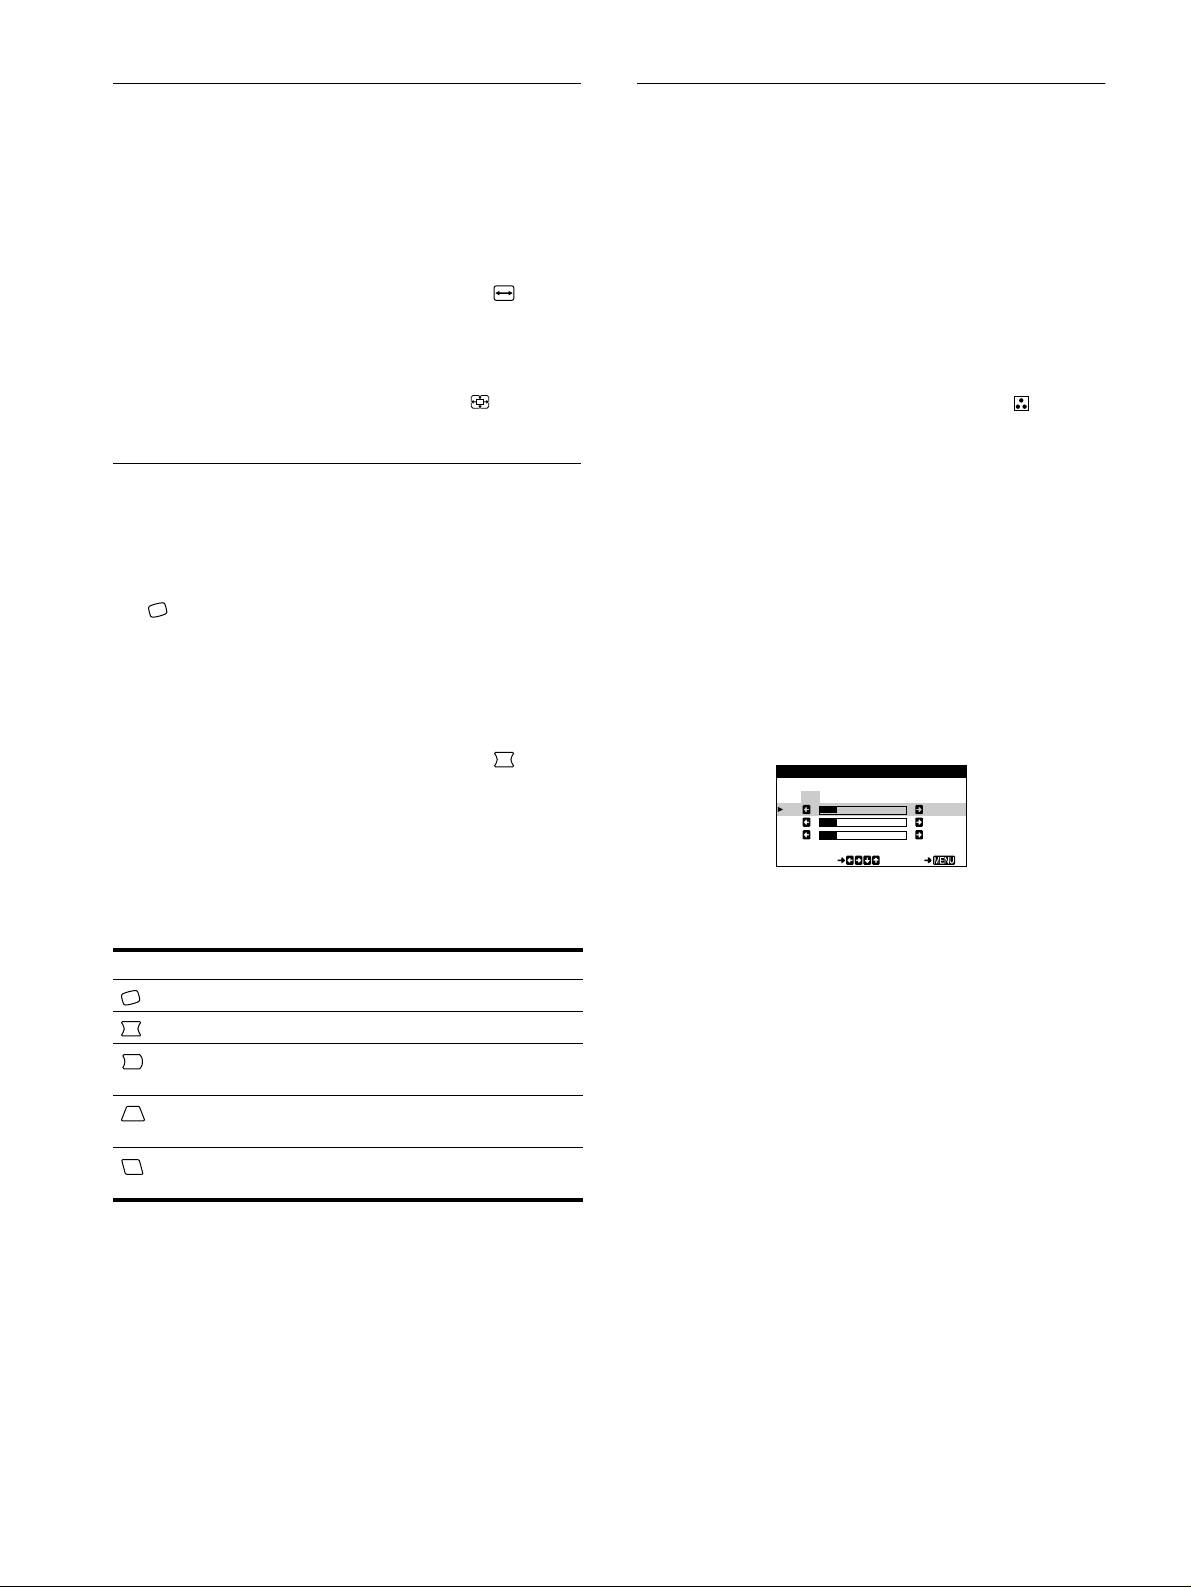
3
First move the control button
m
/
M
to select the
desired adjustment item. Then move the control
If you fine tune the color temperature, the new color settings
button
<
/
,
to make the adjustment.
are stored in memory and recalled whenever you select
USER.
Select To
(ROTATION)
rotate the picture
(PIN)
expand or contract the picture sides
(PIN BALANCE)
shift the picture sides to the left or
right
(KEY)
adjust the picture width at the top of
the screen
(KEY BALANCE)
shift the picture to the left or right at
the top of the screen
10
COLOR
USER
5000 6500 9300
KKK
R50
G50
B50
SELECT EXI T
01GB01COV AEP.book
Page
10
Friday,
August
18,
2000
3:01
PM
Additional settings (SCREEN)
Resetting the adjustments
You can manually degauss (demagnetize) the screen, and adjust
This monitor has the following three reset methods. Use the
the moire cancellation level.
RESET button to reset the adjustments.
1
Press the center of the control button.
The main MENU appears on the screen.
2
Move the control button
m
/
M
to highlight
SCREEN and press the center of the control button
again.
x
Resetting a single adjustment item
The SCREEN menu appears on the screen.
Use the control button to select the adjustment item you want to
3
Move the control button
m
/
M
to select the desired
reset, and press the RESET button.
adjustment item.
Adjust the selected item according to the following
x
Resetting all of the adjustment data for the
instructions.
current input signal
Press the RESET button when no menu is displayed on the screen.
x
Degaussing the screen
Note that the following items are not reset by this method:
The monitor is automatically demagnetized when the power is
• on-screen menu language (page 7)
turned on.
• picture’s rotation (page 10)
To manually degauss the monitor, first move the
control button
m
/
M
to select (DEGAUSS). Then move
x
Resetting all of the adjustment data for all
the control button
,
.
input signals
The screen is degaussed for about 5 seconds. If a second degauss
Press and hold the RESET button for more than two seconds. All
cycle is needed, allow a minimum interval of 20 minutes for the
of the adjustment data (except for the USER settings in the
best result.
GB
COLOR menu) is reset to the factory preset levels.
x
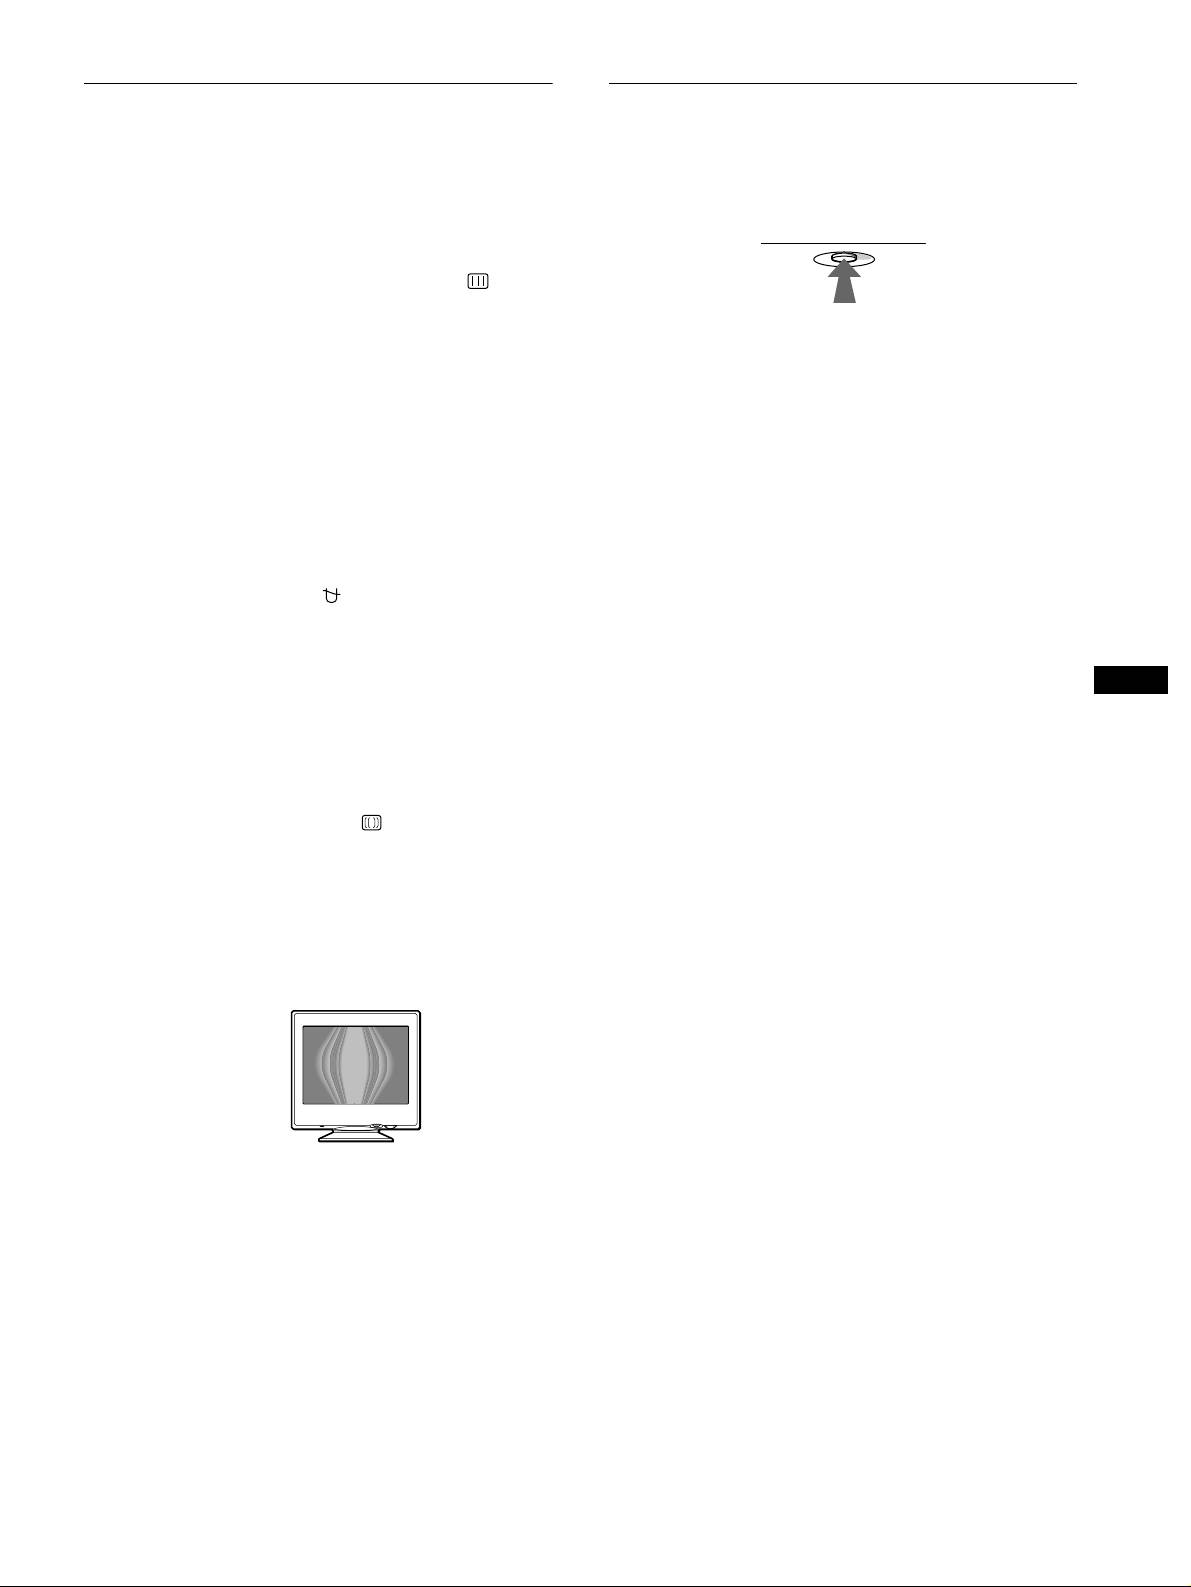
Adjusting the moire
*
If elliptical or wavy patterns appear on the screen, adjust the
moire cancellation level.
To adjust the amount of moire cancellation, first move
the control button
m
/
M
to select (CANCEL MOIRE).
Then move the control button
<
/
,
until the moire
effect is at a minimum.
* Moire is a type of natural interference which produces soft, wavy lines
on your screen. It may appear due to interference between the pattern
of the picture on the screen and the phosphor pitch pattern of the
monitor.
Example of moire
11
RESET
01GB01COV AEP.book
Page
11
Friday,
August
18,
2000
3:01
PM
Оглавление
- CPD-E220E
- Table of Contents
- Setup
- Customizing Your Monitor
- Technical Features Troubleshooting
- Specifications
- Table des Matières
- Installation
- Personnalisation de votre
- Caractéristiques Dépannage techniques
- Spécifications
- Inhalt
- Anschließen des Geräts
- Einstellen des Monitors
- Technische Merkmale Störungsbehebung
- Technische Daten
- Índice
- Instalación
- Personalización del
- Características técnicas Solución de problemas
- Especificaciones
- Indice
- Installazione
- Personalizzazione del
- Caratteristiche Guida alla soluzione dei problemi
- Caratteristiche tecniche
- Содержание
- Подготовка к работе
- Подстройка монитора
- Технические особенности Устранение неисправностей
- Технические
- Innehåll
- Installera bildskärmen
- Anpassa bildskärmen
- Tekniska egenskaper Felsökning
- Tekniska data
- Inhoud
- Opstelling
- Uw monitor persoonlijk
- Technische kenmerken Storingzoeken
- Specificaties
- Appendix
