Sony GDM-F420: Troubleshooting
Troubleshooting: Sony GDM-F420
x Letters and lines show red or blue shadows at the
edges
Troubleshooting
• Adjust the convergence.
x No picture
x USB peripherals do not function
If the ! (power) indicator is not lit
• Check that the appropriate USB connectors are securely connected.
• Check that the power cord is properly connected.
• Turn the monitor OFF and then ON again, then reconnect USB cable.
• Check that the ! (power) switch is in the “on” position.
• If you connect a keyboard or mouse to the USB connectors and then
boot your computer for the first time, the peripheral devices may not
The ! (power) indicator is orange
function. First connect the keyboard and mouse directly to the
• Check that the video signal cable is properly connected and all plugs
computer and set up the USB compliant devices. Then connect them
are firmly seated in their sockets.
to this monitor.
• Check that the INPUT switch setting is correct.
• Install the latest version of the device driver on your computer.
• Check that the HD15 video input connector’s pins are not bent or
Contact your device’s manufacturer for information about the
pushed in.
appropriate device driver.
• Check that the computer’s power is “on”.
• The computer is in power saving mode. Try pressing any key on the
x A hum is heard right after the power is turned on
computer keyboard or moving the mouse.
• This is the sound of the auto-degauss cycle. When the power is
• Check that the graphic board is completely seated in the proper bus
turned on, the monitor is automatically degaussed for a few seconds.
slot.
* If a second degauss cycle is needed, allow a minimum interval of
If the ! (power) indicator is green or flashing orange
20 minutes for the best result. A humming noise may be heard, but this is
not a malfunction.
• Use the Self-diagnosis function.
x Picture flickers, bounces, oscillates, or is scrambled
• Isolate and eliminate any potential sources of electric or magnetic
On-screen messages
fields such as other monitors, laser printers, electric fans, fluorescent
lighting, or televisions.
IIONNFORMAT
• Move the monitor away from power lines or place a magnetic shield
MON I I I NGS WORKTOR
near the monitor.
I
NPUT
2:NO
S
GNALI
ACT
IVATE
BY
COMPUTER
W
• Try plugging the monitor into a different AC outlet, preferably on a
CHECK
S GNAL CABLEI
R
CHECK
I NPUT SELECTOR
G
different circuit.
B
• Try turning the monitor 90° to the left or right.
• Check your graphics board manual for the proper monitor setting.
• Confirm that the graphics mode and the frequency of the input signal
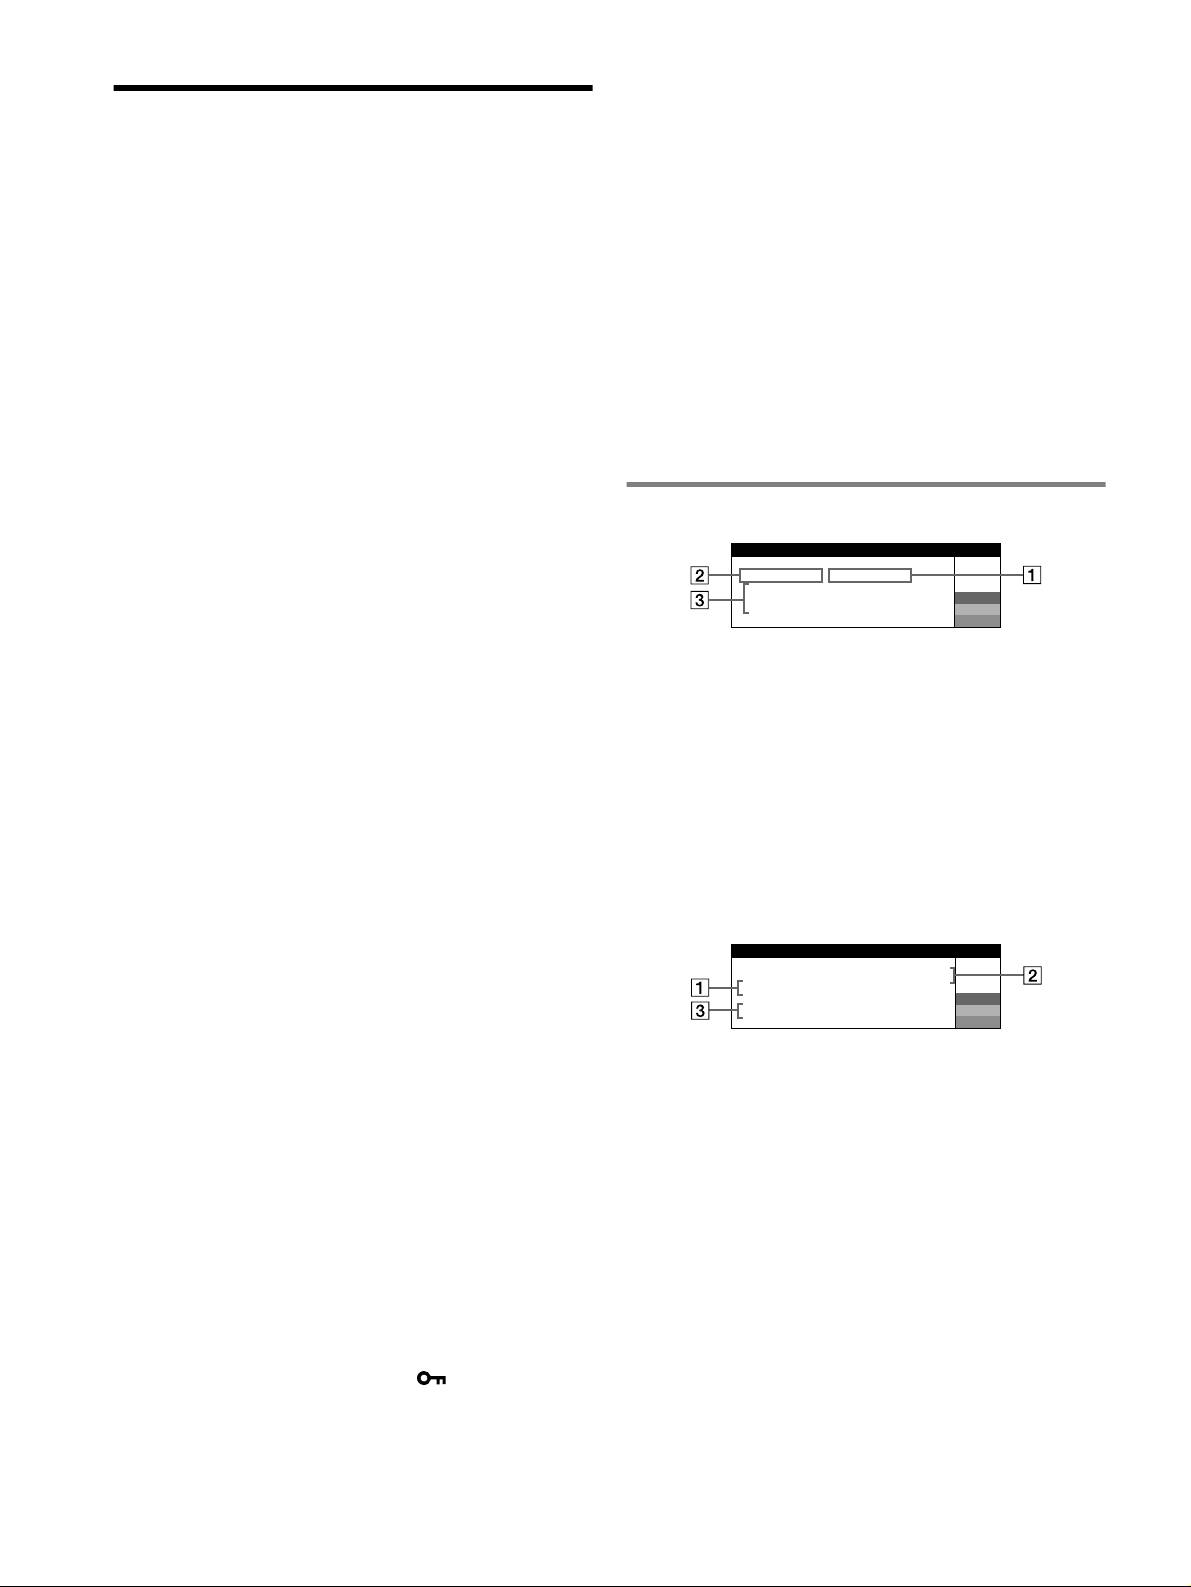
1 If “NO SIGNAL” appears:
are supported by this monitor (see “Preset mode timing table” on
This indicates that no signal is input from the selected connector.
page i). Even if the frequency is within the proper range, some
graphics board may have a sync pulse that is too narrow for the
2 Shows the currently selected connector.
monitor to sync correctly.
3 Shows the remedies.
• Adjust the computer’s refresh rate (vertical frequency) to obtain the
• If ACTIVATE BY COMPUTER appears on the screen, try
best possible picture.
pressing any key on the computer or moving the mouse, and
x Picture is fuzzy
confirm that your computer’s graphic board is completely seated
• Adjust the contrast, brightness, and PICTURE EFFECT.
in the correct bus slot.
• Degauss the monitor.*
• If CHECK SIGNAL CABLE appears on the screen, check that
• Adjust the degree of moire cancellation until the moire is minimal,
the monitor is correctly connected to the computer.
or set CANCEL MOIRE to OFF.
• If CHECK INPUT SELECTOR appears on the screen, try
x Picture is ghosting
changing the input signal.
• Eliminate the use of video cable extensions and/or video switch
boxes.
IIONNFORMAT
• Check that all plugs are firmly seated in their sockets.
MON I I I NGS WORKTOR
I1:.200 0 /kHz 85Hz
NPUT
x Picture is not centered or sized properly
OUT OF SCAN
RANGE
W
R
• Perform the Auto Size Center function.
CHANGE
S GNAL TIIINGM
G
• Adjust the size or centering. Note that with some input signals and/
B
or graphics board the periphery of the screen is not fully utilized.
• Just after turning on the power switch, the size/center may take a
1 If “OUT OF SCAN RANGE” appears:
while to adjust properly.
This indicates that the input signal is not supported by the monitor’s
x Edges of the image are curved
specifications.
• Adjust the geometry.
2 Shows the input signal frequency.
x Wavy or elliptical pattern (moire) is visible
3 Shows the remedies.
• Adjust the degree of moire cancellation until the moire is minimal.
• Change your desktop pattern.
CHANGE SIGNAL TIMING appears on the screen. If you are
replacing an old monitor with this monitor, reconnect the old
x Color is not uniform
monitor. Then adjust the computer’s graphic board so that the
• Degauss the monitor.* If you place equipment that generates a
magnetic field, such as a speaker, near the monitor, or if you change
horizontal frequency is between 30 – 137 kHz (GDM-F520),
the direction the monitor faces, color may lose uniformity.
30 – 115 kHz (GDM-F420), and the vertical frequency is between
• Adjust the landing.
48 – 170 Hz.
x White does not look white
• Adjust the color temperature.
• Check that the 5 BNC connectors are connected in the correct order.
x Monitor buttons do not operate ( appears on the
screen)
• If the control lock is set to ON, set it to OFF.
6
Оглавление
- GDM-F520 GDM-F420
- Setup
- Adjustments
- Troubleshooting
- Specifications
- Precautions
- Configuration
- Réglages
- Dépannage
- Spécifications
- Précautions
- Anschließen des Monitors
- Einstellen des Monitors
- Störungsbehebung
- Technische Daten
- Sicherheitsmaßnahmen
- Configuración
- Ajustes
- Solución de problemas
- Especificaciones
- Precauciones
- Installazione
- Regolazioni
- Guida alla soluzione dei
- Caratteristiche tecniche
- Precauzioni
- Подготовка к работе
- Регулировка
- Устранение неисправностей
- Технические
- Меры предосторожности
- Installation
- Inställningar
- Felsökning
- Specifikationer
- Försiktighetsåtgärder
- Opstelling
- Regelingen
- Verhelpen van storingen
- Technische gegevens
- Voorzorgsmaatregelen
- Appendix