Sony GDM-F520: Adjustments
Adjustments: Sony GDM-F520

Adjustments
Navigating the menu
Adjusting the picture quality
(PICTURE EFFECT)
1 Press the MENU button to display the main menu.
You can select the most appropriate picture mode from among 3
CONTRAST
/IBR GHT
preset modes by pressing the PICTURE EFFECT button
repeatedly.
CONTRAST
MENU
,
x PROFESSIONAL
50
For accurate and consistent display color. Choose this for
professional desktop publishing and graphic applications.
1024x768 / 85Hz
Main
Sub
x STANDARD
menu
menu
For images with high contrast and brightness. Choose this mode for
commonly used applications, such as spreadsheets, word
2 Move the control button m/M to highlight the main
processing, E-mail, or WEB surfing.
menu you want to adjust and press the control button.
x DYNAMIC
SZE
/I CENTER
For extremely vivid and photo-realistic images. Bright than
“STANDARD” mode, choose this for intense entertainment
OK
,,
OK
software such as games, or DVD playback.
45
E
XIT
:
MENU
Main
Sub
menu
menu
3 Select the sub menu you want to adjust and press the
control button.
4 Adjust with the control button.
On-Screen menu adjustments
Main menu icons and adjustment
Sub menu icons and adjustment items
items
Adjusting the contrast and
Contrast
brightness
*
1
Brightness
Horizontal position
Horizontal size
Adjusting the size or centering of
the picture
*
1
Vertical position
Vert ical size
Auto Size Center
Rotating the picture
Expanding or contracting the picture sides
*
1
Shifting the picture sides to the left or right*
1
Adjusting the shape of the picture
Adjusting the picture width at the top of the screen*
1
Shifting the picture to the left or right at the top of the screen*
1
0 RESET: Returns all settings to their factory default settings.
Horizontally shifts red or blue shadows
Vertically shifts red or blue shadows
Adjusting the convergence
*
2
T
Vertically shifts red or blue shadows at the top of the screen
B
Vertically shifts red or blue shadows at the bottom of the screen
0 RESET: Returns all settings to their factory default settings.
DEGAUSS: demagnetizes the monitor.
Adjusting the picture quality
CANCEL MOIRE: adjusts the degree of moire cancellation until the moire is at a minimum.
*
1
LANDING: reduces any color irregularities in the screen’s top left corner to a minimum.*
2
Example of Moire
LANDING: reduces any color irregularities in the screen’s top right corner to a minimum.*
2
LANDING: reduces any color irregularities in the screen’s bottom left corner to a minimum.*
2
LANDING: reduces any color irregularities in the screen’s bottom right corner to a minimum.*
2
0 RESET: Returns all settings to their factory default settings.
4
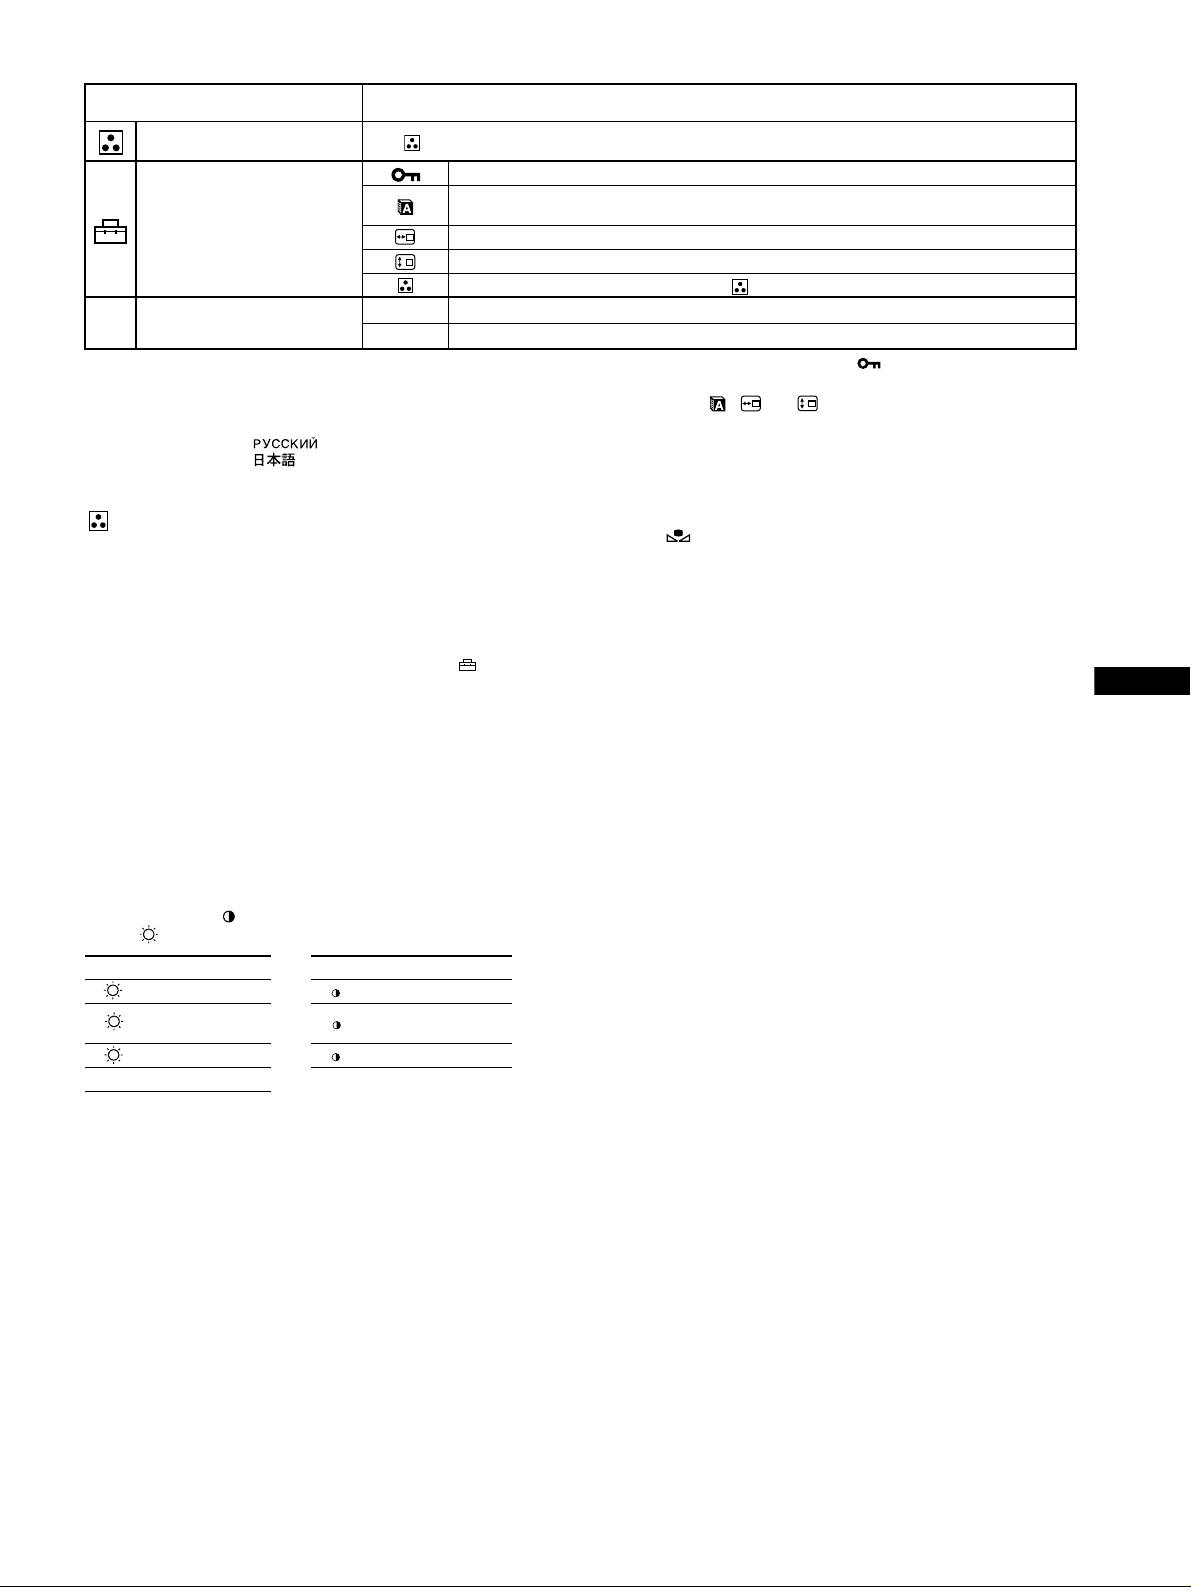
Main menu icons and adjustment
Sub menu icons and adjustment items
items
Adjusting the color of the picture See “ : To adjust the color of the picture”.
Protecting adjustment data (CONTROL LOCK)
*
4
Selecting the on-screen menu language/Confirming the monitor’s information LANGUAGE/
INFORMATION
*
3
Additional settings
Changing the menu’s position for horizontal adjustment
Changing the menu’s position for vertical adjustment
Selecting the color adjustment mode (See “ : To adjust the color of the picture.”)
01
*
1
Resetting all the adjustment data for the current input signal.*
5
Select “OK”.
0 Resetting the adjustments
02
*
2
Resetting all of the adjustment data for all input signals. Select “OK”.
1
4
*
This adjustment is effective for the current input signal.
*
Only the ! (power) switch, EXIT, and (CONTROL LOCK) menu
2
*
This adjustment is effective for all input signals.
will operate.
3
*
Language Menu
5
*
The menu items , and are not reset by this method.
• ENGLISH • NEDERLANDS: Dutch
• FRANÇAIS: French • SVENSKA: Swedish
• DEUTSCH: German • : Russian
• ESPAÑOL: Spanish • : Japanese
• ITALIANO: Italian
: To adjust the color of the picture
To restore the color from the EASY, PRESET, or sRGB
modes ( IMAGE RESTORATION)
The COLOR settings allow you to adjust the picture’s color
You can restore the color to the original factory quality levels. Before using
temperature by changing the color level of the white color field.
this feature, the monitor must have been in normal operation mode (green
Colors appear reddish if the temperature is low, and bluish if the
power indicator on) for at least 30 minutes. You may need to adjust your
temperature is high. This adjustment is useful for matching the
computer’s power saving settings. If the monitor has not been on for at least
monitor’s color to a printed picture’s colors.
30 minutes, the “AVAILABLE AFTER WARM UP” message will appear.
Select one of the color temperature setting modes from among
Also, this function may gradually lose its effectiveness due to the natural
4 modes; EASY, PRESET, EXPERT, and sRGB on (OPTION)
aging of the Trinitron picture tube.
menu.
GB
x EASY (Default setting)
You can adjust the color temperature from 5000K to 11000K.
x PRESET
You can select the preset color temperature from 5000K, 6500K, or
9300K. The default setting is 9300K.
x EXPERT
You can make additional fine adjustments to the color by selecting
this mode. GAIN ( ) adjusts the bright areas of the screen, while
BIAS ( ) adjusts the dark areas of the screen.
Select for Select for
R R (Red) BIAS R R (Red) GAIN
G (Green)
G
G G (Green) GAIN
BIAS
B B (Blue) BIAS B B (Blue) GAIN
0 RESET
x sRGB
The sRGB color setting is an industry standard color space protocol
designed to correlate the colors displayed on the monitor and those
printed. In order to display the sRGB colors correctly (γ = 2.2,
6500K), select the sRGB mode and set the PROFESSIONAL mode
of PICTURE EFFECT (page 4) and your connected computer to the
sRGB profile. If you select sRGB, you cannot operate the
CONTRAST/BRIGHT menu adjustments.
5
Оглавление
- GDM-F520 GDM-F420
- Setup
- Adjustments
- Troubleshooting
- Specifications
- Precautions
- Configuration
- Réglages
- Dépannage
- Spécifications
- Précautions
- Anschließen des Monitors
- Einstellen des Monitors
- Störungsbehebung
- Technische Daten
- Sicherheitsmaßnahmen
- Configuración
- Ajustes
- Solución de problemas
- Especificaciones
- Precauciones
- Installazione
- Regolazioni
- Guida alla soluzione dei
- Caratteristiche tecniche
- Precauzioni
- Подготовка к работе
- Регулировка
- Устранение неисправностей
- Технические
- Меры предосторожности
- Installation
- Inställningar
- Felsökning
- Specifikationer
- Försiktighetsåtgärder
- Opstelling
- Regelingen
- Verhelpen van storingen
- Technische gegevens
- Voorzorgsmaatregelen
- Appendix
