Sony 2(sl).St.Pin – страница 2
Инструкция к Sony Playstation Sony 2(sl).St.Pin
Оглавление
- ПPEДУПPEЖДEHИE
- Содержание
- Меры предосторожности Здоровье Безопасность Использование и управление
- Примечания по технике безопасности при использовании аналогового контроллера Использование адаптера AC (переменного тока) и шнура питания AC (переменного тока) Подключение с помощью сетевого кабеля
- При подключении консоли к плазменному или проекционному* телевизору. Обращение с дисками Конденсация влаги Очистка Запрещается разбирать консоль и прилагаемые дополнительные устройства Защита от внешних повреждений
- Установка консоли Начало работы Проверка содержимого упаковки
- Крышка диска
- Подсоединение к телевизору Перед подключением Подсоединение к телевизору используя прилагаемый Кабель AV (интегрированный аудио/видео)
- Предупреждение Подсоединение к телевизору с разъемом Euro-AV (аудио/видео) с помощью Соединительного разъема Euro-AV (аудио/ видео)
- Шкала качества изображения Использование кабелей, продаваемых отдельно
- Подсоединение цифрового аудиооборудования
- Подсоединение адаптера AC (переменного тока) и шнура питания AC (переменного тока)
- Передняя панель консоли
- Кнопка =/1/RESET Передняя панель консоли Индикатор =/1
- Игры Перед началом игры Запуск игры
- Завершение игры
- Использование Аналогового контроллера (DUALSHOCK®2)
- Использование Аналогового контроллера (DUALSHOCK®) (SCPH-110 E)
- Передняя панель консоли
- Сохранение или загрузка игровых данных Копирование или удаление игровых данных
- Управление проигрывателем CD во время воспроизведения Воспроизведение аудио CD Воспроизведение аудио CD
- Завершение воспроизведения аудио CD Воспроизведение в различных режимах
- Использование Панели управления Воспроизведение DVD-видео
- Значок Функция Значок Функция
- Значок Функция Завершение воспроизведения DVD x Воспроизведение с места, где диск был остановлен ранее (Возобновление воспроизведения) Воспроизведение диска DVD
- Выбор определенной сцены для Поиск определенного места на диске (Поиск) воспроизведения
- Отображение информации о Выбор Original или Play List при воспроизведении воспроизведении DVD-RW
- Использование режимов воспроизведения Произвольное воспроизведение Программа
- Повтор A-В Повторное воспроизведение Отключение режимов воспроизведения
- Нaстройкa установок DVD проигрывателя Установка параметров языка
- DNR Установка режима изображения телевизора Тип ТВ экрана Резкость контура
- Индикация Прогрессивный режим
- Установка параметров просмотра Режим паузы Родительский контроль Список региональных кодов
- Воспроизведение диска, защищенного функцией Родительского контроля Чтобы изменить пароль
- Установка параметров звука Цифровой выход звука
- Режим автоматического выбора звуковой дорожки Громкость DVD
- Использование экрана браузера Вызов главного меню 3 Вставьте диск или MEMORY CARD (карту памяти).
- 4 Выберите значок, затем нажмите кнопку . Использование меню Конфигурация системы 1 Отображать главное меню ( стр. 90).
- 4 Выберите желаемое значение, затем нажмите кнопку Размер экрана Настройка часов
- DIGITAL OUT (OPTICAL) (цифровой оптический выход) Пульт дистанционного управления Компонентный видео выход
- Использование экрана Информация о версии Язык Дополнительные параметры 1 Используя кнопки направлений, выберите элемент, затем нажмите кнопку .
- 2 Выберите элемент, затем нажмите кнопку . Драйвер PlayStation® 3 Выберите желаемое значение, затем нажмите кнопку Консоль
- Проигрыватель DVD Сбросить прогрессивный режим
- Подключение с помощью сетевого кабеля Подключение к сети
- Подсоединение консоли
- Сетевые настройки Необходимое оборудование
- Совместимое программное обеспечение
- Аксессуары Аксессуары, не совместимые с этой моделью консоли PlayStation®2
- Примечания относительно пульта ГАРАНТИЯ дистанционного управления DVD (для PlayStation®2) Multitap (разветвители)
- Технические характеристики
- Экспортный контроль Защита от копирования Управление доступом
- Устранение неисправностей На изображении имеются помехи. Прежде всего убедитесь, что: Изображение Изображение отсутствует. На экране появляется сообщение “Ошибка чтения диска”.
- При воспроизведении DVD изображение отсутствует или на нем Размер видеоизображения не соответствует экрану телевизора. имеются помехи. Звук Звук отсутствует. Форматное соотношение экрана не меняется даже при воспроизведении DVD с настроенными параметрами формата экрана и (или) воспроизведении изображений формата 16:9 с DVD.
- Низкое качество звука. При воспроизведении диска DVD-видео, содержащего звуковую дорожку в формате Dolby Digital, эффект объемного звучания отсутствует. Звук отсутствует или качество звука цифрового Работа аудиооборудования низкое. Контроллер не работает. Консоль не распознает MEMORY CARD (карту памяти). Данные не удается сохранить или копировать на MEMORY CARD (карту памяти).
- Диск DVD не воспроизводится. Забыли пароль. Сохраненные на MEMORY CARD (карте памяти) данные повреждены. Консоль не работает должным образом. Не выполняются некоторые функции. Индикатор @/1 мигает красным, и консоль не работает. Консоль гудит или вибрирует.
- Некоторые установки DVD невозможно изменить. Работа в сети Подключение к сети не выполняется.

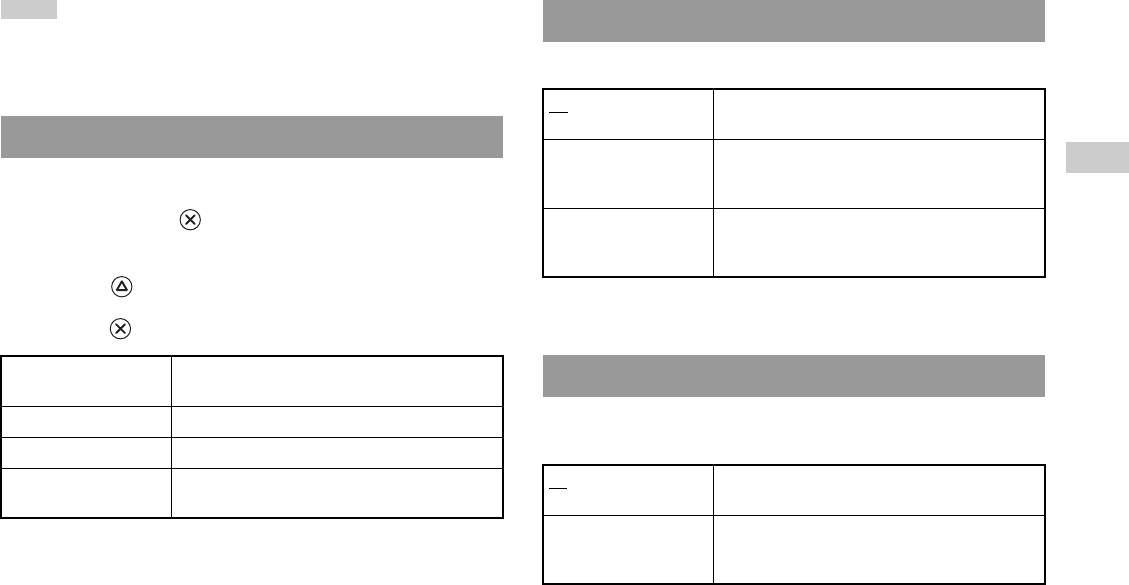
5 Select the audio CD icon, and then press the button.
Playing in various modes
The track numbers are displayed, and the setting option is shown in the
You can set for "Play Mode" and "Repeat".
lower left of the screen.
Play Mode Normal Plays tracks as recorded on the CD
6 Select the desired track, and then press the button.
Playback begins.
Program Plays tracks in a specified order
GB
Shuffle Plays tracks in a random order
Notes
Audio CDs
Repeat Off Does not play the CD repeatedly
• You can also access the Play Options screen from the screen displaying the tracks
by selecting the Audio CD icon in the upper left corner of the screen and pressing
All Plays all tracks repeatedly
the button.
• You can set "Play Mode" and "Repeat" at the same time.
1 Plays a track repeatedly
1 At the Browser screen ( page 35), use the directional
buttons to select the audio CD icon and then press the
button.
The Play Options screen is displayed.
2 Select "Play Mode" or "Repeat", and then press the
button.
3 Select the desired setting, and then press the button.
If you select "Program", the screen for specifying track order will be
displayed. Select the tracks you want to play.
4 Press the button.
The Browser screen is displayed.
Playing an audio CD
21

DVDs
Using the Control Panel
Watching a DVD
1 Start playback of the DVD ( page 24).
2 Press the SELECT button.
You can operate the DVD player using the following methods.
The Control Panel is displayed. If you press the SELECT button again,
• Using the on-screen Control Panel
the display will change its position on the screen.
• Operating directly using the Analog Controller (DUALSHOCK®2)
• Using the DVD Remote Control (for PlayStation®2) (sold separately)
The following instructions assume use of the Control Panel to operate the
DVD player. Some operations may be different depending on the method
used.
Notes
• For details about playing a DVD, refer to the instructions supplied with the DVD.
• The PlayStation®2 console plays disc content as recorded in the DVD software.
3 Using the directional buttons, select an icon and then press
Note that not all features are available on all DVDs.
the button.
Note
To turn off the Control Panel, press the SELECT button (once or twice), or press the
button.
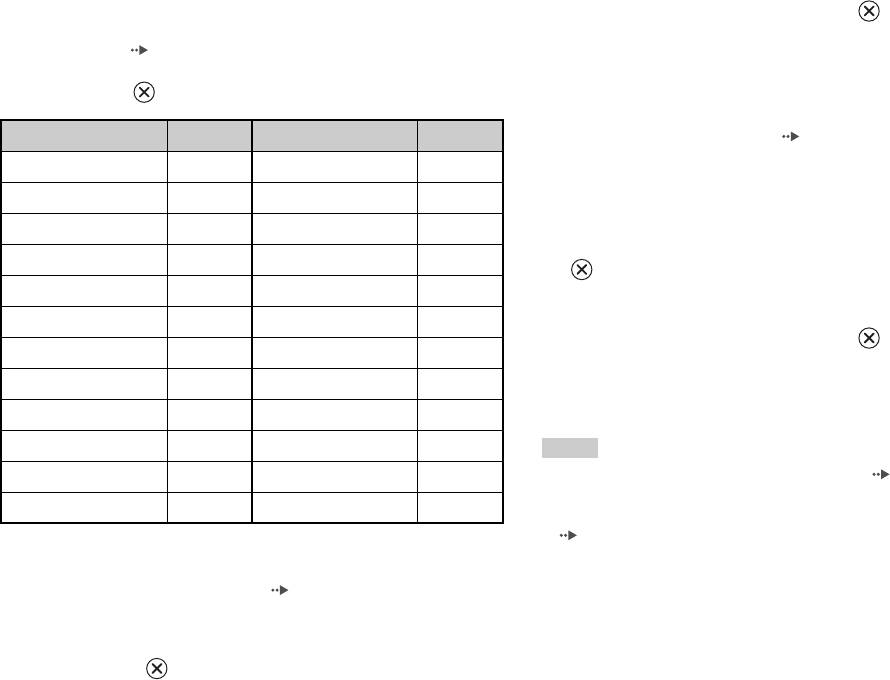
Control Panel item list
You can access the following options in the Control Panel.
Icon Function
Menu Displays the DVD-Video menu
Top Menu Displays the DVD-Video menu
22
Watching a DVD
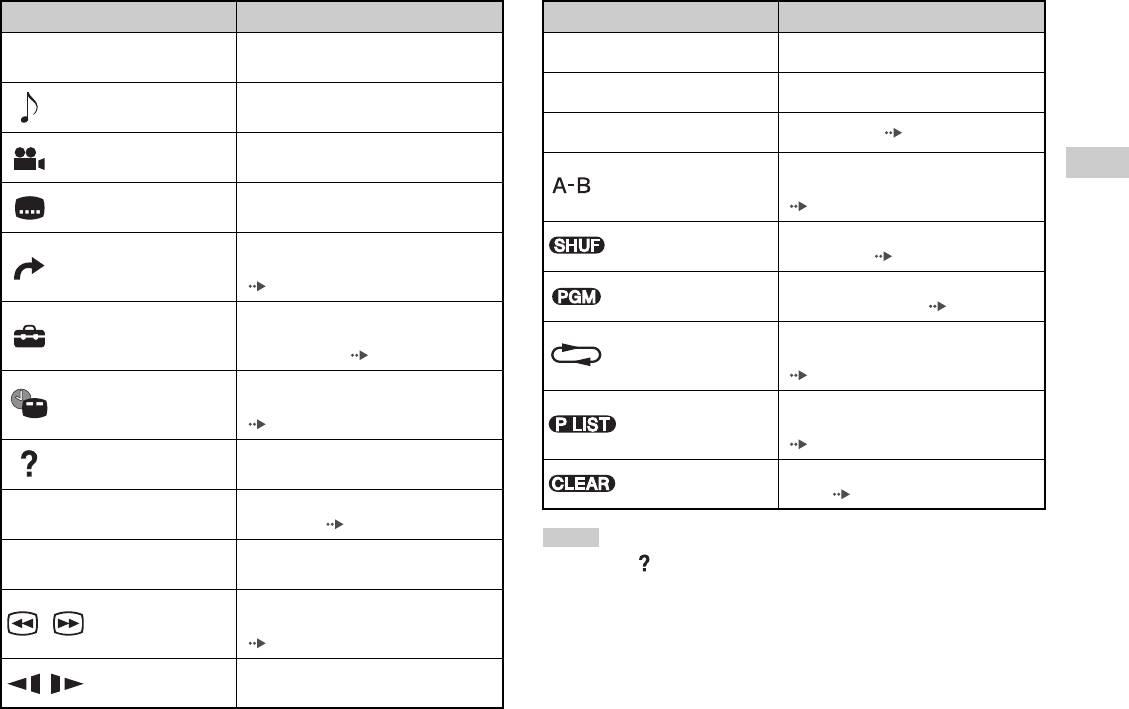
Icon Function
Icon Function
Returns to the previously selected screen
N
Play Starts playback
O
Return
within the DVD's menu
Displays and changes audio options on
X
Pause Pauses playback
Audio Options
DVDs with multiple audio tracks
x
Stop Stops playback ( page 24)
Displays and changes viewing angles on
Angle Options
DVDs recorded with multi-angle options
Specifies a scene for playback, and starts
GB
A-B Repeat
playback of the scene that has been set
DVDs
Displays and changes subtitle options on
Subtitle Options
( page 27)
DVDs with subtitle options
Begins playback of titles or chapters in a
Skips to the selected title, chapter or the
Shuffle Play
random order ( page 27)
Go To
specified time, and starts playback
( page 24)
Begins playback of titles or chapters in a
Program Play
programmed sequence ( page 26)
Displays and changes options for
Setup
language, picture quality, Parental Control
Selects repeated playback of all the titles
level, audio, etc. ( page 28)
Repeat Play
on the disc, or one title or one chapter
( page 27)
Displays the current title or chapter
Time Display
number, the elapsed time, etc.
For DVD-RW discs (VR mode), selects
( page 25)
Original/Play List
Original or Play List content to play
( page 26)
Displays the direct button functions of the
Help
Analog Controller (DUALSHOCK®2)
Clears selected numbers or playback
Clear
modes ( page 28)
Used to enter the number of a chapter you
0~9
Go to Chapter
want to play ( page 24)
Notes
Returns/skips to the beginning of the
./> Previous/Next
• You can use " " to check the options that can be accessed directly using the
current, previous or next chapter
buttons of the Analog Controller. To access the options directly using the
Fast reverses/forwards playback on the
controller, you must clear the Control Panel from the screen.
/Search
screen to help you find a particular scene
• Depending on the playback mode, some options may not be available or cannot be
( page 25)
adjusted.
Changes to playback/reverse playback in
/Slow
slow-motion
Watching a DVD
23

Playing a DVD
Selecting a specific scene for playback
1 Turn on the console and insert a disc ( page 15).
Selecting a scene by chapter number
Follow steps 1 to 4 of "Starting a game". Playback begins.
1 During playback, select the desired chapter number in the
Notes
Control Panel ( page 22) and then press the button.
• If you turn on the console after inserting a disc, playback will begin automatically.
Playback of the selected chapter begins. If you want to play a chapter
• You can also start playback from the Browser screen ( page 35).
with a single digit number (i.e. 1-9), enter a leading zero. For example,
enter as "01".
Ending DVD playback x
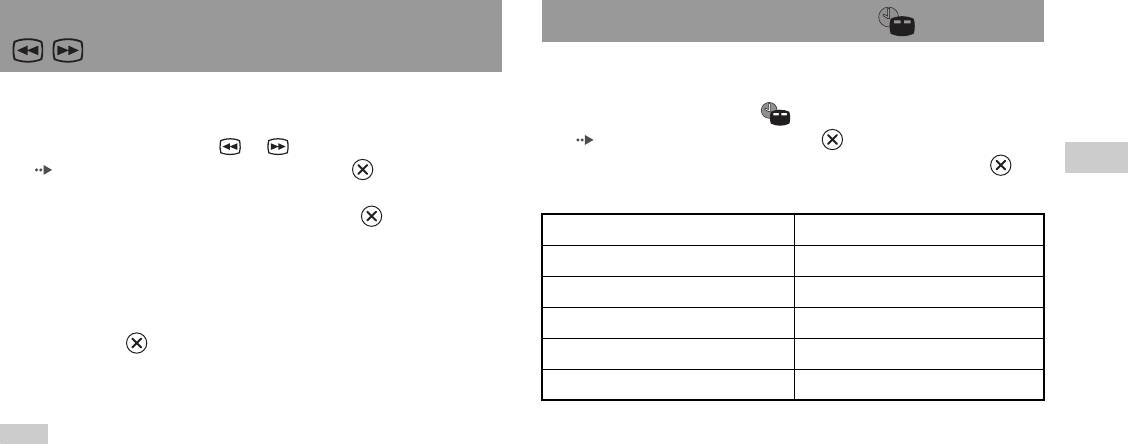
Selecting a scene by title number, chapter number or by
specifying the time
1 During playback, select x in the Control Panel ( page 22)
1 During playback, select in the Control Panel
and then press the button.
( page 22) and then press the button.
Playback stops. Press the A (open) button on the console front, and
then remove the disc.
2 Select an item, and then press the button.
Playing a DVD from the last stopping point
Title Specifies the title number
(Resume Play)
Chapter Specifies the chapter number
C XX:XX:XX
Specifies the elapsed time for the chapter (or title)
1 During playback, select x in the Control Panel ( page 22)
(or T XX:XX:XX)
and then press the button.
2 Select N, and then press the button.
3 Select the numbers for the desired scene, and then press the
Playback begins from the point where you stopped the disc in step 1.
button.
Playback of the selected chapter begins.
To clear Resume Play
After step 1, select x and then press the button.
24
Watching a DVD
Finding a particular point on a DVD (Search) Displaying playback information
You can display information such as the current title number or elapsed
time.
You can search either forwards or backwards to quickly locate a particular
point on a DVD.
1 During playback, select in the Control Panel
( page 22) and then press the button.
1 During playback, select or in the Control Panel
The display changes as shown below each time you press the
GB
( page 22) and then press and hold the button.
button.
DVDs
Search speed changes as shown below when you press either the up or
down directional button while holding down the button.
Title X Chapter X Title number and chapter number
• Search 3
• Search 2
Title X Chapter X C XX:XX:XX Elapsed time of current chapter
• Search 1
Title X Chapter X C - XX:XX:XX Remaining time of current chapter
•Slow
Title X Chapter X T XX:XX:XX Elapsed time of current title
2 Release the button when you reach the point you are
Title X Chapter X T - XX:XX:XX Remaining time of current title
searching for.
(Off)
Playback returns to normal speed.
Note
To use the Analog Controller to Search during playback, press and hold down the L2
or R2 button to begin searching. Use the directional buttons to change speeds.
Release the L2 or R2 button when you reach the point you are searching for.
Watching a DVD
25
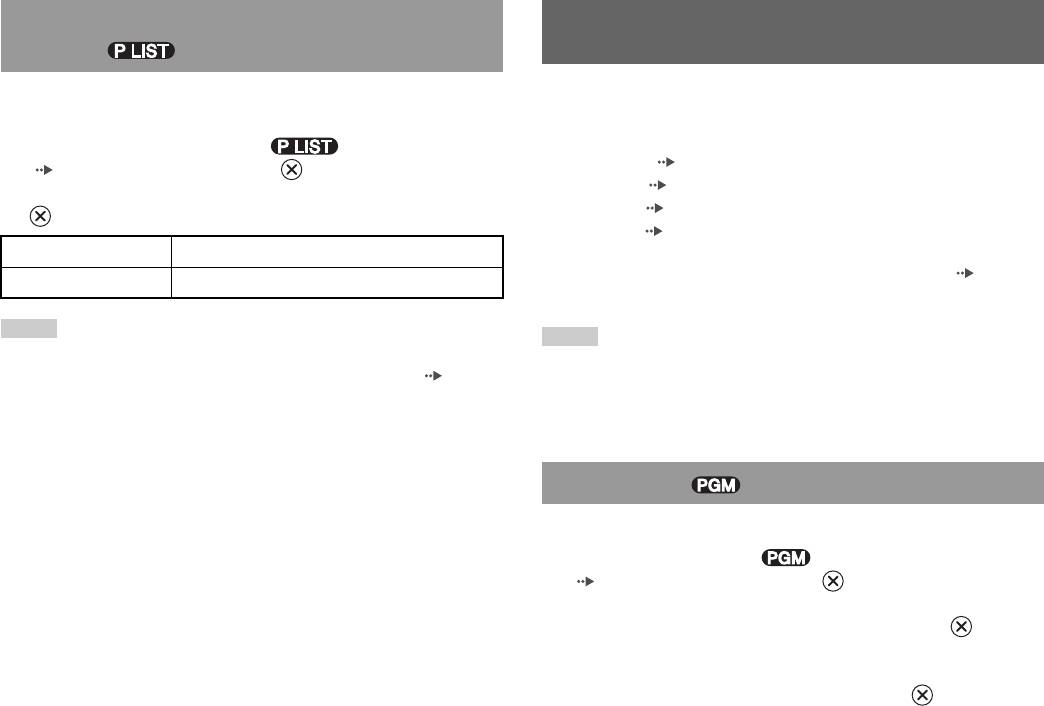
Selecting Original or Play List for DVD-RW
Using the playback modes
playback
When using a DVD-RW disc (VR mode), you can select the type of titles
Using the various playback modes, you can play titles or chapters in the
you want to play.
order you want or repeat playback of a specific scene. There are four
playback modes:
1 With playback stopped, select in the Control Panel
• Program Play ( page 26)
( page 22) and then press the button.
• Shuffle Play ( page 27)
Original and Play List will be selected in turn each time you press the
• Repeat Play ( page 27)
button.
• A-B Repeat ( page 27)
Original Plays content in the originally recorded sequence
The following instructions assume use of the Control Panel ( page 22)
Play List Plays edited content. Play List is the default setting.
to operate the DVD player.
Notes
Notes
• Slow-motion play in reverse is not available for DVD-RW discs (VR mode).
• You can play combinations of Program Play, Shuffle Play, and Repeat Play. Note,
• You cannot use this function with Resume Play. Clear Resume Play ( page 24)
however, that some Shuffle Play or Repeat Play options may not be available
before selecting this feature.
depending on the combination.
• The PlayStation®2 console plays disc content as recorded in the DVD software.
Program Play
You can create programmes to play titles and chapters in any order.
1 During playback, select in the Control Panel
( page 22) and then press the button.
2 Select a programme number, and then press the button.
If no programmes have been set, the only option will be "1. Title".
3 Select the title number, and then press the button.
26
Using the playback modes
4 Select the chapter number, and then press the button.
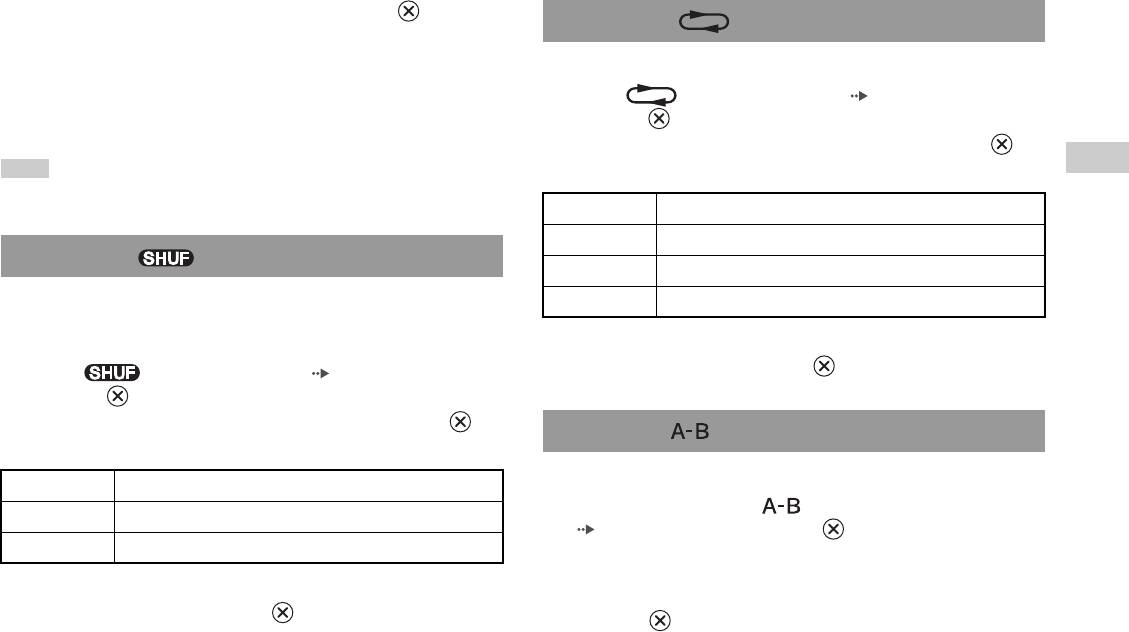
Repeat Play
To play all the chapters, select "All". Repeat steps 2 to 4 to set other
titles or chapters.
You can set this option to play titles or chapters repeatedly.
5 Press the START button.
1 Select in the Control Panel ( page 22), and then
press the button.
Program Play begins.
The display changes as shown below each time you press the
button.
GB
Note
DVDs
The setting will not be cleared after Program Play finishes.
Disc Repeat Repeats playback of all titles
Title Repeat Repeats playback of one title
Shuffle Play
Chapter Repeat Repeats playback of one chapter
You can set this option for random playback of all titles or chapters
Repeat Off Clears Repeat Play
recorded on a disc. Playback order will be different each time Shuffle Play
is used.
2 Select N, and then press the button.
1 Select in the Control Panel ( page 22), and then
press the button.
The display changes as shown below each time you press the
A-B Repeat
button.
You can set a specific scene to be played repeatedly.
Title Shuffle Plays titles in random order
1 During playback, select in the Control Panel
Chapter Shuffle Plays chapters in random order
( page 22) and then press the button at the point you
Shuffle Off Clears Shuffle Play
want to start repeated playback.
The starting point (point A) is set.
2 Select N, and then press the button.
2 Press the button at the point you want to end repeated
playback.
The ending point (point B) is set, and repeated playback of the section
from A to B begins.
Using the playback modes
27
Clearing playback modes
Adjusting DVD player settings
Clears playback modes to allow normal playback.
1 Select in the Control Panel ( page 22), and then
You can use the Control Panel to adjust DVD player settings, such as the
press the button.
language for subtitles, audio language, and Parental Control level.
A message stating, "Play mode contents cleared", is displayed and the
console returns to normal playback.
Notes
• Some DVDs do not support all settings. The PlayStation®2 console plays disc
Note
content as recorded in the DVD software. If the DVD does not support the features
listed, you will not be able to change the settings.
If multiple playback modes have been set in a combination, all playback modes are
• The following options are not available during playback or Resume Play
cleared.
( page 24). Clear Resume Play before changing these settings.
– "Menu", "Audio" and "Subtitles" in Language Setup
– "TV Type" and "Progressive" in Screen Setup
– "Parental Control" in Custom Setup
– "DTS" and "Audio Track Auto Select Mode" in Audio Setup
You can change DVD player settings using the following procedure:
1 Select in the Control Panel ( page 22), and then press
the button.
The Setup icon bar is displayed.
2 Select the icon for the setting you want to change, and then
press the button.
The current setting for each item is displayed.
3 Select the desired item, and then press the button.
The menu option becomes active and can be selected.
28
Adjusting DVD player settings

4 Select the desired setting, and then press the button.
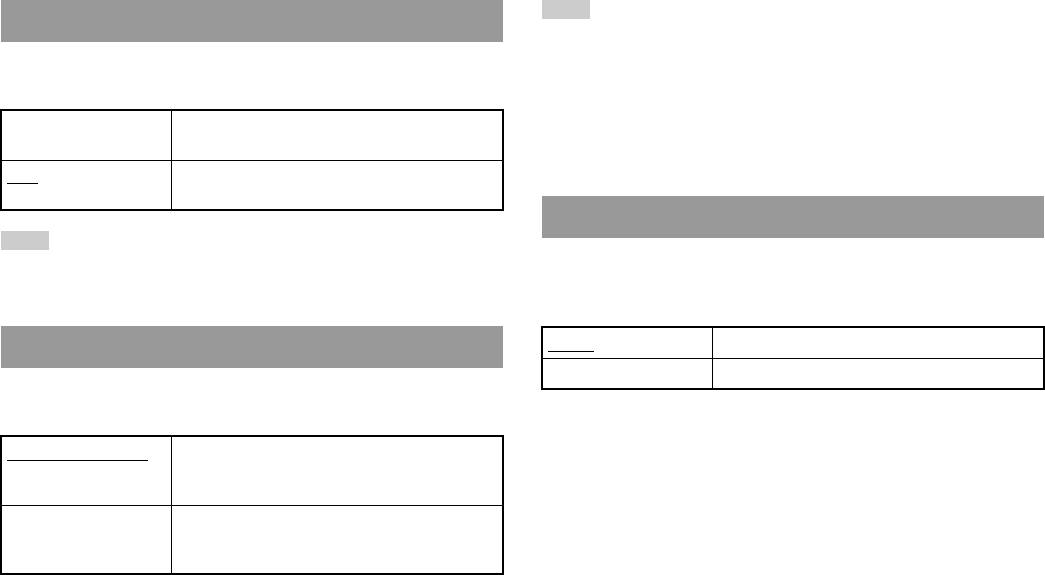
Setting TV display options
The setting of the item is completed. For details, see the instructions
for each item ( pages 29 to 34).
In the Screen Setup menu, you can set the screen size (aspect ratio) and
other options that affect picture quality.
Notes
• The default setting for each menu item is underlined in the explanations below.
TV Type
• To return to the Control Panel after making settings, press the SELECT button.
You can set the aspect ratio to match the screen of the connected TV.
GB
• Settings are saved when you do any of the following:
DVDs
– Stop playback (including stopping Resume Play)
16:9 Select this option when using a wide-screen TV or a standard
– Open the disc cover
TV with special 16:9/wide-screen functionality.
Setting language options
4:3 Letter Box Select this option when using a standard TV. This setting
displays a wide picture with margins on the upper and lower
In "Language Setup" you can choose the language for the DVD's menu,
portions of the screen.
audio and subtitles. Note that if you select a language that is not recorded
on the DVD, one of the recorded languages is selected automatically.
4:3 PAN SCAN Select this option when using a standard TV. This setting
Menu Selects the language for the DVD's menu
displays a picture adjusted to the height of the screen, cutting
off portions at left and right that do not fit.
Audio Selects the language for the DVD's audio track
Subtitles Selects the language for the DVD's subtitles
Note
Note
When you set "Progressive" to "On", "TV Type" is automatically set to "16:9".
If you select "Audio Follow" for subtitles, the subtitle language will automatically be
set to match the language selected for the DVD's audio track.
Adjusting DVD player settings
29
DNR (Digital Noise Reduction)
Progressive
You can use this setting to help reduce roughness in the on-screen image
You can display an image in which the picture updates all the lines in one
and produce a cleaner picture.
pass. In most cases, this results in a clearer, flicker-free image. This feature
is available only if your TV and AV Cable* support progressive scan
Off
DNR is not used.
(480p).
* The Component AV Cable (for PlayStation®2) (sold separately) is compatible
DNR1 Increases picture quality
with progressive scan.
DNR2 Increases picture quality (maximum)
On Select this option when the console is connected to a TV that supports
progressive scan (480p).*
Notes
• "DNR2" is more effective for reducing image roughness than "DNR1", but in some
Off
Select this option when the console is connected to a standard TV.
cases an afterimage may appear. If this occurs, select "Off".
* The DVD player's progressive scan mode is only available when playing a disc
• The DNR function may produce limited results on some DVDs.
recorded in NTSC format, and viewed on a TV that supports progressive scan
• When you set "Progressive" to "On", "DNR" is automatically turned off and cannot
(480p).
be turned on.
Notes
Outline Sharpening
• If picture quality is reduced or no image is displayed, set "Progressive" to "Off"
You can sharpen or soften the outline of the on-screen image. The higher
when the console is connected to a TV without the necessary equipment. If you
the value, the sharper the outline. Normally, select "0".
accidentally set this option to "On" for such a TV, picture quality may be reduced
or the picture may not be displayed. To clear the setting, follow these steps:
•-2 •-1 •0
•+1 •+2
1
Check that you have a DVD in the console.
2
Press the \/1 (on/standby)/RESET button on the console front.
Note
Then press and hold down the START button of the Analog Controller
(DUALSHOCK®2) in controller port 1 until the DVD picture is displayed.
Depending on the DVD, Outline Sharpening may produce limited results.
The "Progressive" setting is returned to "Off", allowing the DVD-Video to
be displayed as normal. You can also cancel this setting using the "Clear
Display
Progressive Setting" ( page 40) option in the Version Information
During playback, you can display playback status information in the top
screen.
right corner of the screen for a few seconds.
• DVDs can contain video-based and film-based material, which use different frame
rates. When playing video-based material using progressive scan, some images
On
Playback status information is displayed for a few seconds.
may appear unnatural. If this occurs, set "Progressive" to "Off" and view in
standard interlace mode.
Off Playback status information is not displayed.
• When you set "Progressive" to "On", "TV Type" ( page 29) is automatically set
to "16:9".
30
Adjusting DVD player settings
• DVD-RW disc (VR mode) content can only be viewed in standard interlace format.
3 Select "Region".
The "Progressive" option is not available when playing such content.
The list of region options is displayed.
Setting viewer options
4 Select the region to base the Parental Control level on, and
then press the button.
If you select "Other", see "Region code list" ( page 32).
Pause mode
You can use this option to set the picture status when playback is paused.
GB
5 Select "Level", and then press the button.
DVDs
The list of level options is displayed.
Auto A picture with moving elements is displayed without jitter. Normally
select this position.
6 Select a restriction level, and then press the button.
Frame A picture without moving elements can be displayed at high resolution.
To clear Parental Control
Parental Control
With DVD playback stopped, go to step 6 in "Setting Parental Control" and
In some regions, the viewing of some DVD content may be restricted
set "Level" to "Off".
based on viewer age or other factors. You can use the Parental Control
feature to restrict the level of content that may be viewed through your
console.
The lower the value, the stricter the restriction.
Setting Parental Control
1 Select "Parental Control", and then press the button.
The screen for registering a password is displayed. If a password has
already been registered, the screen for confirming the password is
displayed.
2 Select a number, and then press the button.
Repeat step 2 to enter a four-digit password. If you want to clear a
number, press the button. When registering a password, you are
required to enter it again for confirmation.
Adjusting DVD player settings
31
Region code list
2 Select a number, and then press the button.
To enter a Parental Control region code, select "Other" in step 4 of "Setting
Repeat step 2 to enter a four-digit password. You are required to enter
Parental Control" ( page 31). Use the directional buttons to select the
it again for confirmation.
first letter, and then press the right directional button. Then select the next
letter and press the button.
Playing a disc restricted by Parental Control
Region Code Region Code
1 Start playback of the DVD ( page 24).
Austria AT Malta MT
You will be prompted to temporarily change the Parental Control level
to allow playback. This usually occurs immediately at disc start-up but
Belgium BE Netherlands NL
may also occur at different times depending on the DVD.
Czech Republic CZ Norway NO
2 Using the directional buttons, select "Yes" and then press the
Denmark DK Poland PL
button.
Finland FI Portugal PT
The screen for entering the password is displayed.
France FR Russia RU
3 Select a number, and then press the button.
Germany DE Slovakia SK
Repeat step 3 to enter the four-digit password. After entering the
Greece GR Spain ES
password, playback will begin again. When DVD playback is stopped,
the Parental Control level returns to the original setting.
Ireland IE Sweden SE
Israel IL Switzerland CH
Notes
Italy IT Turkey TR
• If you forget your password, see "Troubleshooting" ( page 51).
• If you do not set a password, you cannot change the Parental Control settings.
Luxembourg LU United Kingdom GB
• Some DVDs with the Parental Control feature do not allow use of playback modes
( pages 26 to 27).
Changing your password
In step 2 of "Setting Parental Control" ( page 31), complete the
following steps:
1 Using the directional buttons, select "Change Password" and
then press the button.
The screen for changing the password is displayed.
32
Adjusting DVD player settings
Dolby Digital
Setting sound options
This option sets Dolby Digital as the output signal for the DIGITAL OUT
(OPTICAL) connector.
Audio Digital Out
You can switch the method of outputting the audio signal when you
On Select this option when the console is connected to an audio device
with a built-in Dolby Digital decoder.
connect the following audio devices to the DIGITAL OUT (OPTICAL)
connector.
Off
Select this option when the console is connected to an audio device
without a built-in Dolby Digital decoder.
GB
DVDs
Caution
When the console is connected to an audio device without a Dolby Digital, DTS
DTS
or MPEG decoder, set "Dolby Digital", "DTS" and "MPEG" to "Off". If you set
This option sets DTS as the output signal for the DIGITAL OUT
these options to "On" without the necessary decoder, you may have no sound or
(OPTICAL) connector.
an extremely loud noise may be emitted.
On Select this option when the console is connected to an audio device
Digital Out (Optical)
with a built-in DTS decoder.
This option sets the type of output for the DIGITAL OUT (OPTICAL)
Off
Select this option when the console is connected to an audio device
connector.
without a built-in DTS decoder.
On Select this option when you want sound (audio signal) to be output
through the DIGITAL OUT (OPTICAL) connector.
MPEG
Settings for "Dolby Digital", "DTS" and "MPEG" are displayed.
This option sets MPEG AUDIO as the output signal for the DIGITAL
OUT (OPTICAL) connector.
Off Select this option when you do not want sound to be output through the
DIGITAL OUT (OPTICAL) connector.
Settings for "Dolby Digital", "DTS" and "MPEG" are not displayed.
On Select this option when the console is connected to an audio device
with a built-in MPEG decoder.
Off
Select this option when the console is connected to an audio device
without a built-in MPEG decoder.
Adjusting DVD player settings
33
Audio Track Auto Select Mode
This setting gives priority to the audio track that contains the highest
number of channels when you play a DVD on which multiple audio
formats (PCM, Dolby Digital, DTS or MPEG) are recorded. If PCM,
Dolby Digital, DTS and MPEG have the same number of channels, the
console selects PCM, Dolby Digital, DTS and MPEG audio tracks in that
order.
On Priority given
Off
No priority given
Notes
• If you set "DTS" to "Off" in "Audio Digital Out" ( page 33), the DTS audio
track is not played.
• Depending on the DVD, the audio channel with priority may be predetermined. In
this case, the audio track will be selected based on the DVD's order of priority.
DVD Volume
You can set this option if the audio output level of the DVD is low. You
can set this only when "Digital Out (Optical)" is set to "Off" in "Audio
Digital Out" ( page 33).
+2 Turns up the volume (maximum)
+1 Turns up the volume
Standard
Normally select this option.
Caution
If you set this option to "+1" or "+2", the sound may become distorted. If this
happens, change the setting to "Standard". Also note that if you set the volume
too high, it may harm your hearing or damage the speakers.
34
Adjusting DVD player settings
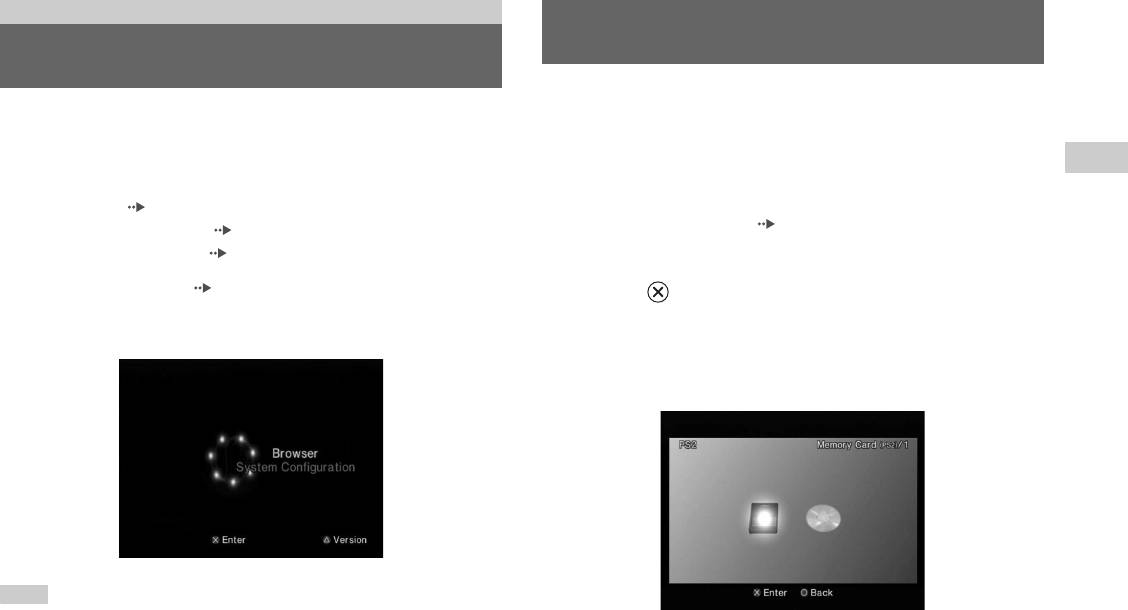
Main menu
Using the Browser screen
Displaying the main menu
You can do the following from the Browser screen:
From the main menu, you can access information and change various
• Copy or delete game data saved on a Memory Card
settings. You can also move to the following screens from the main menu.
•Start a game
The main menu is displayed when you turn on the console without a disc
GB
• Start playback of an audio CD
inserted.
Main menu
• Start playback of a DVD
• Browser screen ( page 35)
• System Configuration menu ( page 36)
1 Display the main menu ( page 35).
• Version Information screen ( page 39)
2 Using the directional buttons, select "Browser" and then
1 Turn on the console ( page 14).
press the button.
The main menu is displayed. Note that it may take some time for the
The Browser screen is displayed.
main menu to be displayed.
3 Insert a disc or Memory Card.
The icon for the inserted item is displayed on the Browser screen.
\
Note
If you turn on the console with a disc inserted, the main menu will not be displayed.
To display the main menu, press the A (open) button on the console front and
remove the disc. Then press the =/1 (on/standby)/RESET button to reset the console.
Displaying the main menu
35
4 Select an icon, and then press the button.
• When you select the Memory Card icon, icons for data saved on the
Using the System Configuration
Memory Card are displayed. To copy or delete saved game data, see
"Copying or deleting game data" ( page 19).
menu
• If you select the icon for a PlayStation®2 or PlayStation® format
software disc, the game will start.
From the System Configuration menu, you can change settings for
• When you select the icon for an audio CD disc, the tracks contained
numerous options including language or time display, and audio or video
on the CD are displayed. See "Playing an audio CD" ( page 20).
output method.
• If you select the icon for a DVD disc, playback of the DVD will
begin.
1 Display the main menu ( page 35).
Note
2 Using the directional buttons, select "System Configuration"
The message "There is no data" is displayed on the Browser screen when no Memory
and then press the button.
Card or disc is inserted in the console.
The System Configuration menu is displayed.
3 Select an item, and then press the button.
The menu option becomes active and can be selected.
4 Select the desired setting, and then press the button.
For details, see the instructions for each menu item ( pages 37 to
38).
36
Using the System Configuration menu
Notes
Screen Size
• The default setting for each menu item is underlined in the explanations below.
• Changes to each setting are saved and remain in effect even after you turn off or
You can set the display mode for the TV.
reset the console.
4:3 Select this option when using a standard TV with the
console.
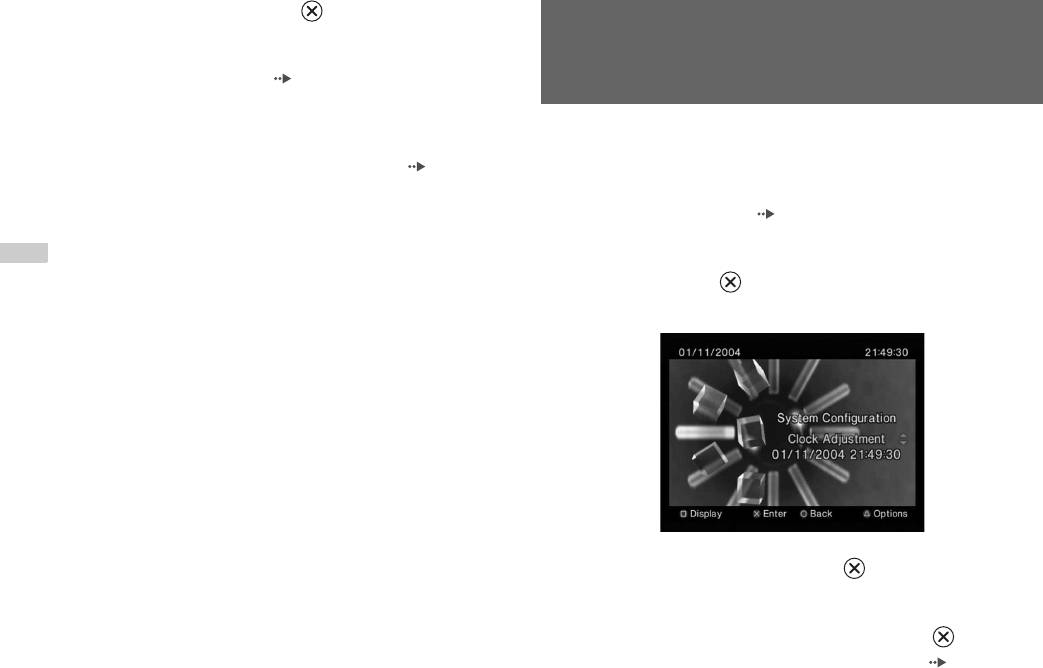
Clock Adjustment
Full* Select this option when using a standard TV with the
GB
You can set the date and time. Use the directional buttons to set "Year",
console. The black margins on the upper and lower
Main menu
portions of the screen are cut off.
"Month", "Day", "Hour", "Minute" and "Second". The setting goes into
effect when you press the button.
16:9 Select this option when using a wide-screen TV or a
standard TV with special 16:9/wide-screen
Optional settings
functionality.
If you press the button at the "Clock Adjustment" screen, you can set
* "Full" display mode is compatible with the System Configuration menu, Browser
options such as "Date Format" or "Time Format". Use the directional
screen and audio CD screen.
buttons and the button to make each setting.
Time Format Sets the system clock to either 12-hour or 24-hour
Digital Out (Optical)
clock display
You can set whether to output the signal through the DIGITAL OUT
Date Format Sets the display order of year, month and day
(OPTICAL) connector.
Time Zone Sets the time zone
Daylight Savings Time Sets Standard or Daylight Savings (Summer Time).
On Select this option when you want to output signal
Normally select "Standard".
through the DIGITAL OUT (OPTICAL) connector.
Off Select this option when you do not want to output
signal through the DIGITAL OUT (OPTICAL)
connector.
Using the System Configuration menu
37
Note
Component Video Out
The following limitations apply when the DVD Remote Control is set to "Gameplay
Function On":
When using the Component AV Cable (for PlayStation®2) (sold
– Depending on the software, some remote control buttons may not work properly.
separately), you must set the mode to match the input jacks on your TV.
– The buttons of the DVD Remote Control will not work when two or more
buttons are pressed at the same time.
Y Cb/Pb Cr/Pr Select this option when connecting the console to
– Some software titles may stop operating properly when a controller is removed
component video input connectors.
from controller port 1. If this happens, set to "Gameplay Function Off".
RGB
Select this option when connecting the console to
RGB input connectors.
Language
Note
You can use this option to select the language displayed on the main menu,
The "RGB" setting is only for PlayStation®2 and PlayStation® format software.
Browser screen, System Configuration menu, and Version Information
When you watch a DVD, the mode automatically switches to "Y Cb/Pb Cr/Pr".
screen.
English Displays messages in English
Remote Control
Russian Displays messages in Russian
You can set this option when using the DVD Remote Control (for
PlayStation®2) (sold separately).
Gameplay Function On Select this option when operating PlayStation®2 or
PlayStation® format software with the DVD Remote
Control.
Gameplay Function Off Select this option when not operating PlayStation®2
or PlayStation® format software with the DVD
Remote Control.
38
Using the System Configuration menu
3 Select the desired setting, and then press the button.
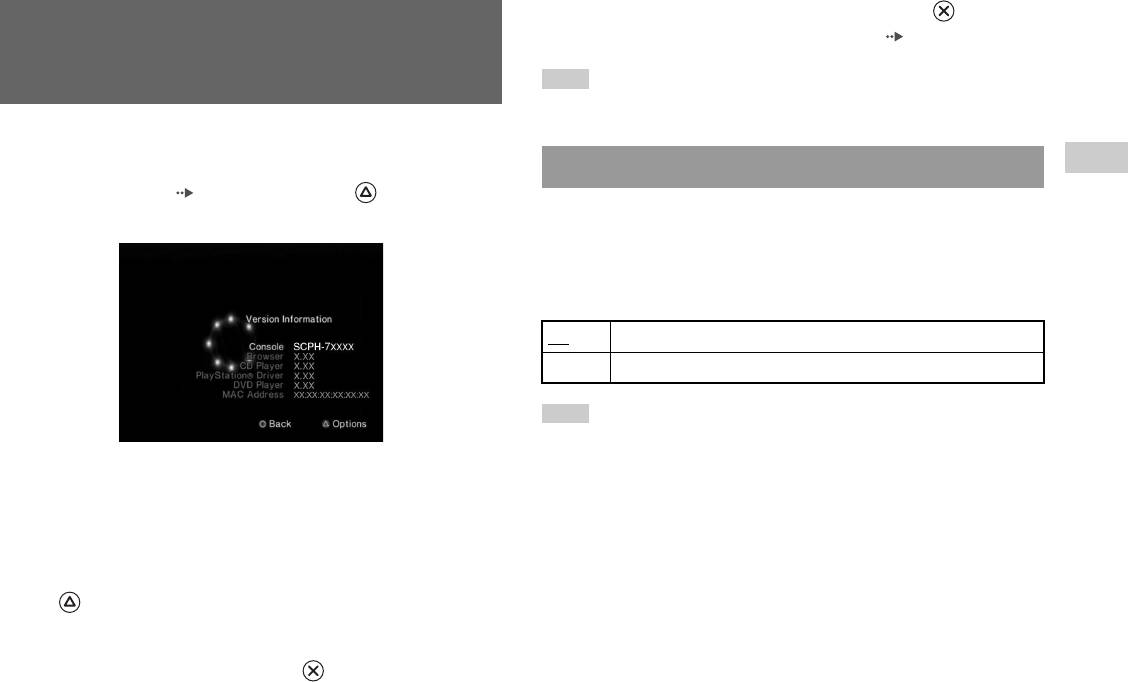
Using the Version Information
For details, see the instructions for each item ( pages 39 to 41).
screen
Note
The default setting for each menu item is underlined in the explanations below.
You can check version information for various console components by
selecting this option. You can also change optional settings for some items.
GB
Console
Main menu
1 At the main menu ( page 35), press the button.
The PlayStation®2 console automatically adjusts its internal settings for
The Version Information screen is displayed.
optimal playback. When "Diagnosis" is set to "On", the console makes
additional adjustments.
Diagnosis
Off Diagnosis is turned off.
On Diagnosis is turned on.
Note
The "Diagnosis" setting will automatically return to the default setting in the
following cases:
Optional settings
– When playback of PlayStation®2 or PlayStation® format software or a DVD
Optional settings are available for "Console", "PlayStation® Driver" and
begins
"DVD Player". "DVD Player" can be set only if the DVD player's
– When the console is reset
"Progressive" option is set to "On".
– When the console is turned off
1 Using the directional buttons, select an item and then press
the button.
The current setting for the item is displayed.
2 Select an item, and then press the button.
The available options are displayed.
Using the Version Information screen
39
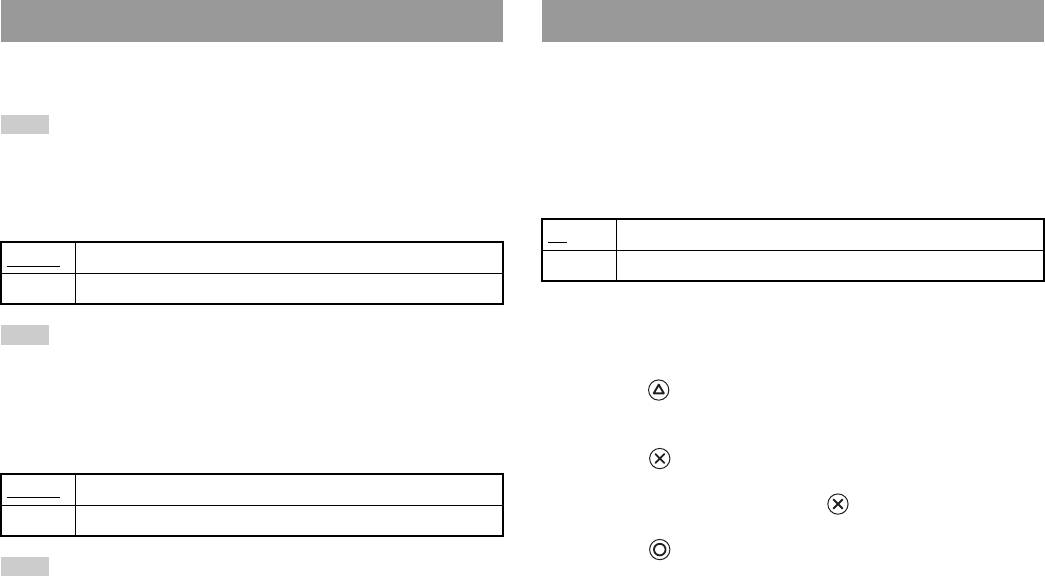
PlayStation® Driver
DVD Player
You can set the PlayStation® Driver programme to optimise performance
If you set "Progressive" to "On" when the console is connected to a TV
of PlayStation® format software.
without the necessary equipment, the picture quality may be reduced or the
picture may not be displayed. You can clear the "Progressive" setting by
Note
following the procedure below.
The settings will automatically return to the default settings in the following case:
Remove the DVD before clearing the setting.
– When the console is turned off
Clear Progressive Setting
Disc Speed
No Leaves the "Progressive" setting on
Standard Loads discs at normal speed
Yes Clears the "Progressive" setting
Fast Loads discs at high speed
1 Display the Version Information screen.
Note
Set to "Standard" in the following cases:
2 Using the directional buttons, select "DVD Player" and then
– When fast loading does not produce improved results
press the button.
– When using a software title that is not compatible with fast loading
The "Clear Progressive Setting" option is displayed.
Texture Mapping
3 Press the button.
Standard
Displays as normal
4 Select "Yes", and then press the button.
Smooth Displays with reduced roughness in on-screen images
5 Press the button twice.
Note
The display returns to the main menu.
Set to "Standard" in the following cases:
– When smooth texture mapping does not produce improved results
6 Press the A (open) button on the console front, and place a
– If the picture does not display properly when set to "Smooth"
DVD in the console.
40
Using the Version Information screen


