Sony KV-SR29: x Operating optional components
x Operating optional components: Sony KV-SR29
x Operating optional components
You can use the supplied remote to operate Sony audio/video equipment.
Setting up the remote to work with other connected equipment
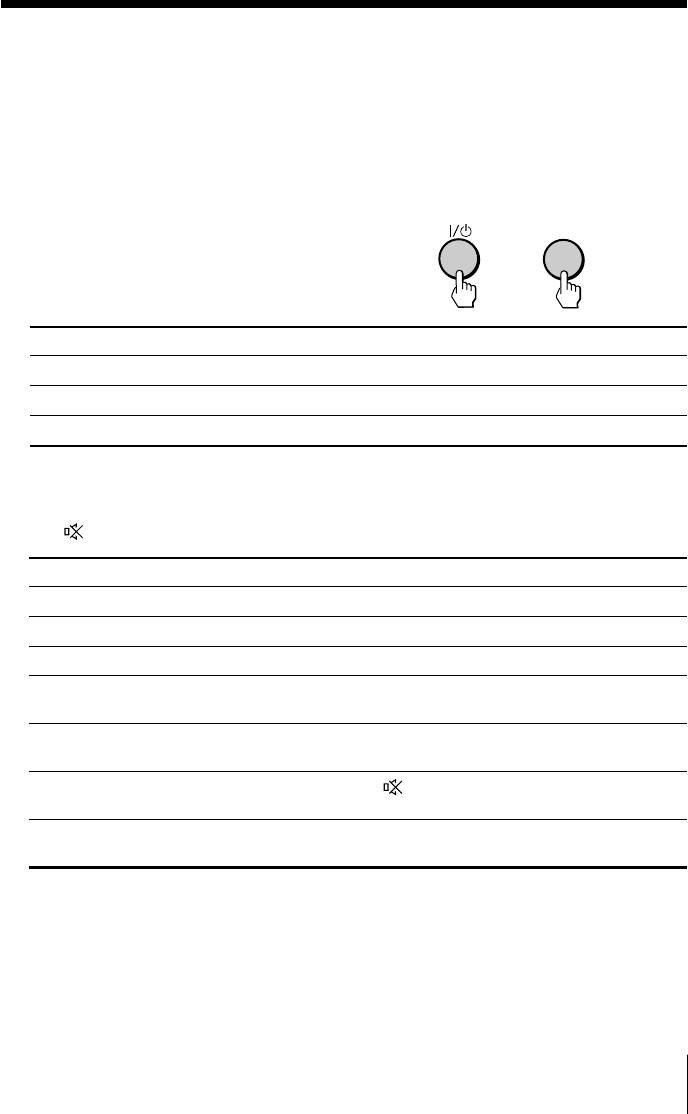
While keeping VIDEO ?/1 For example, to operate a
pressed, press the corresponding Sony 8 mm VCR:
number button for the desired
VIDEO
equipment (see the chart
below).
8
+
To control Hold down VIDEO ?/1 and press
Audio System 1, 1x, 2 or 3 0, 1, 2, or 3
DVD 1, 2 or 3 4, 5 or 6
VTR1 (Beta), VTR2 (8 mm) or VTR3 (VHS) 7, 8 or 9
Operating audio/video equipment
Press VIDEO ?/1 or while keeping OPTION pressed, press N , x , ., > ,
X ,
or 2 +/– (see the chart below).
To Press
turn on/off VIDEO ?/1
play N while keeping OPTION pressed.
stop x while keeping OPTION pressed.
fast forward/ step forward or rewind/ > or . while keeping OPTION
step backward pressed.
pause X while keeping OPTION pressed.
Press again to resume normal playback.
mute the sound while keeping OPTION pressed.
(Audio System 1, 1x, 2 or 3 only)
adjust volume 2 +/– while keeping OPTION pressed.
(Audio System 1, 1x, 2 or 3 only)
Notes
• If the equipment does not have a certain function, the corresponding button on the remote
will not operate.
• Some equipment might not respond properly to buttons on TV’s remote. In this case, use the
equipment’s own remote control.
Advanced Operations
17
Menu Adjustment
x Introducing the menu system
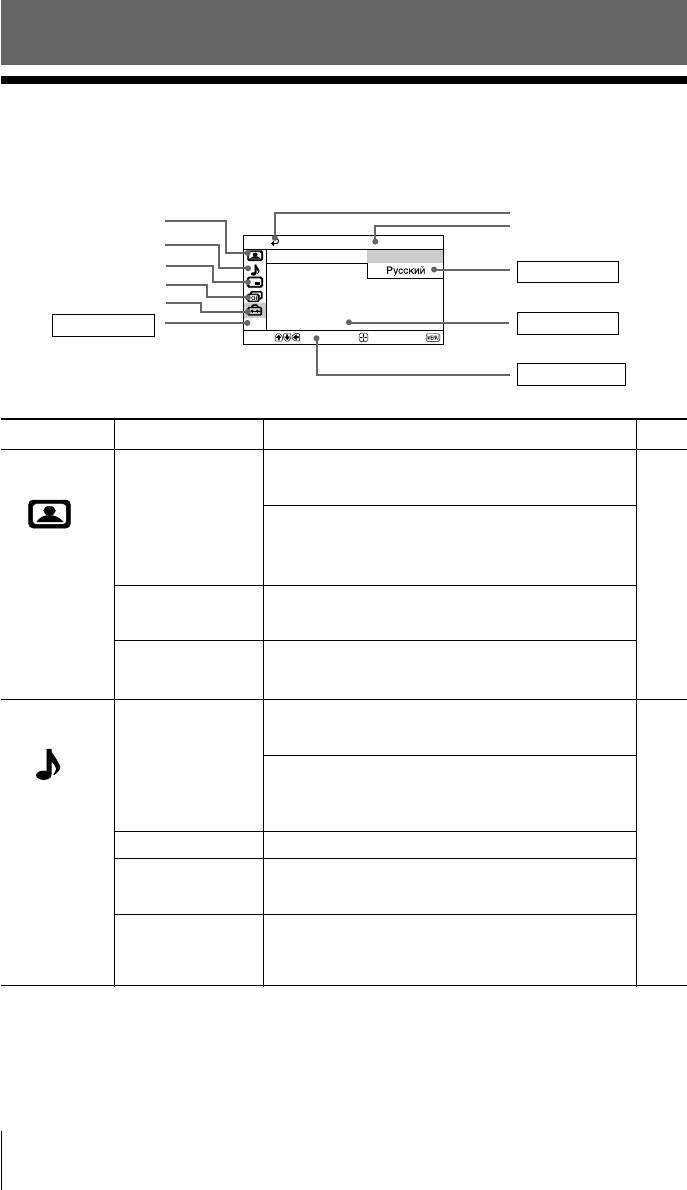
The MENU button lets you open a menu and change the settings of your TV.
The following is an overview of the menu system.
Return icon
Picture icon
Name of the current
Sound icon
Setup
menu
Language: English
PIP icon
Picture Position
Menu level 3
Channel Setup icon
Party Mode Setup
Wide Mode:
Setup icon
Video Label
Color System:
Menu level 1
Menu level 2
Select
Confirm
End
User Guidance
Level 1
Level 2
Level 3/Function
Page
“Picture”
“Mode”
Select the picture mode:
21
“Dynamic” t “Standard” t “Soft” t “Personal”
“Picture Adjustment”
Adjust the “Personal” option:
“Picture” t “Brightness” t “Color” t
“Hue” t “Sharpness” t “Reset”
“Color Temperature”
Adjust white color tint:
“Cool” t “Neutral” t “Warm”
“3D Intelligent
Optimize picture quality:
Picture”
“On” t “Off”
“Sound”
“Mode”
Select the sound mode:
23
“Dynamic” t “Drama” t “Soft” t “Personal”
“Sound Adjustment”
Adjust sound frequency settings of “Personal”
option:
“Adjust” t “Reset”
“Balance”
Select to emphasize the left and right speakers.
“Intelligent Volume”
Adjust volume automatically:
“On” t “Off”
“Surround”
Select the surround mode:
“TruSurround” t “WOW” t “Simulated” t
“Off”
18 Menu Adjustment
Level 1
Level 2
Level 3/Function
Page
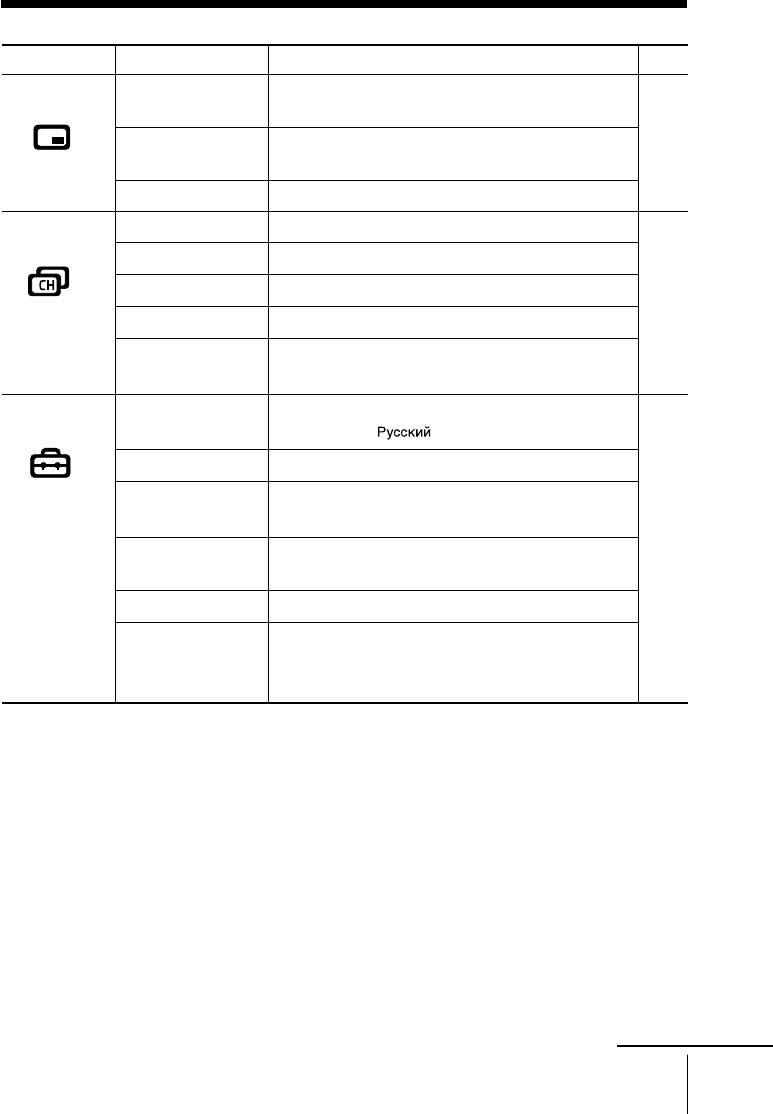
“PIP”
“PIP”
Display a sub screen within the main picture:
25
“On” t “Off”
“Swap”
Exchange pictures between main screen and sub
screen.
“Position”
Change the position of the sub screen
“Channel Setup”
“Auto Program”
Preset channels automatically.
26
“Manual Program”
Preset channels manually.
“Program Label”
Label the program number.
“Program Block”
Block unwanted programs.
“Program Sorting”
Change the order in which the channels appear on
the screen.
“Setup”
“Language”
Change the menu language:
28
“English” t “
” (Russian)
“Picture Position”
Adjust the picture position.
“Party Mode
Adjust your TV for Party Mode.
Setup”
“Wide Mode”
Change the picture size:
“On” (16:9 wide-mode) t “Off”
“Video Label”
Label the connected equipment.
“Color System”
Select the color system:
“Auto” t “PAL” t “SECAM” t
“NTSC3.58” t “NTSC4.43”
continue
Menu Adjustment
19
continued
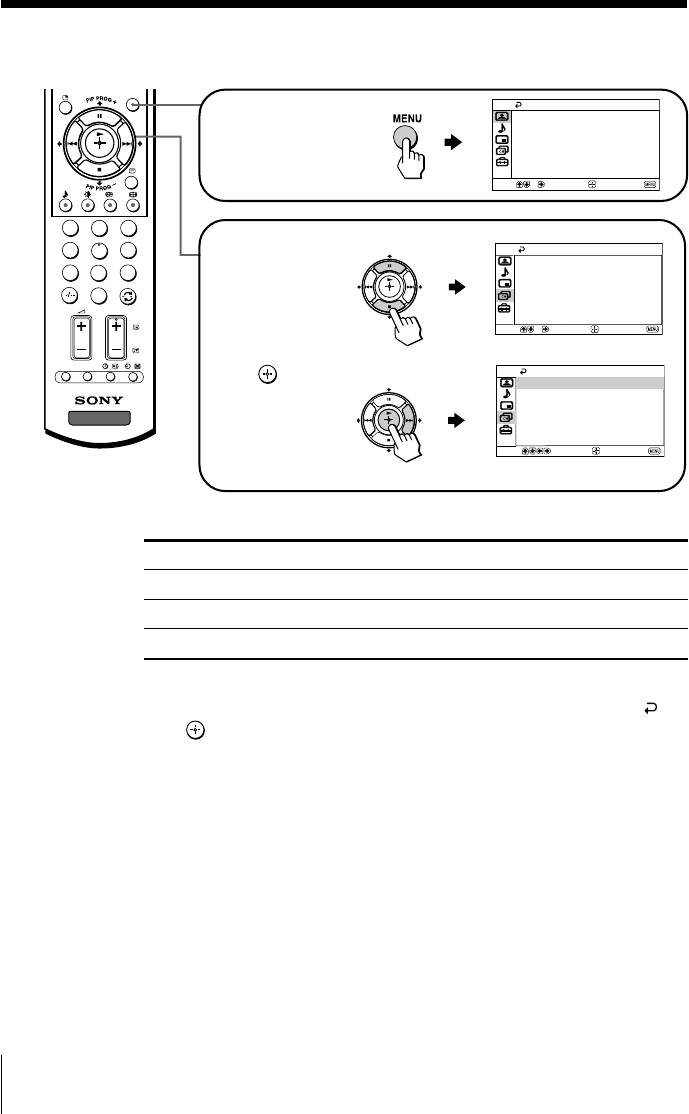
How to use the menu
MENU
Picture
Press MENU to
Mode: Dynamic
Picture Adjustment
display the menu.
Color Temperature: Cool
3D Intelligent Picture: On
Select
Confirm
End
1
2
3
Press V or v to select
4
5
6
Channel Setup
the desired item.
Auto Program
7
8
9
Manual Program
Program Label
0
Program Block
PR
OG
Program Sorting
Select
Confirm
End
OPTION RESET
Channel Setup
Press
(or b) to
Auto Program
confirm your
Manual Program
Program Label
TV
selection and
Program Block
Program Sorting
go to the next
Select
Confirm
End
level.
Other menu operations
To
Press
Adjust the setting value
V, v, B or b .
Move to the next/previous menu level
B or b.
Cancel the menu
MENU.
Tips
• If you want to exit from Menu level 2 to Menu level 1, press V or v until the return icon ( ) is
highlighted, then press
.
• The MENU, t and 2 +/– buttons on the TV front panel can also be used for the operations
above (see page 9).
Note
• When a feature is dimmed in the menu, it is not selectable.
20 Menu Adjustment
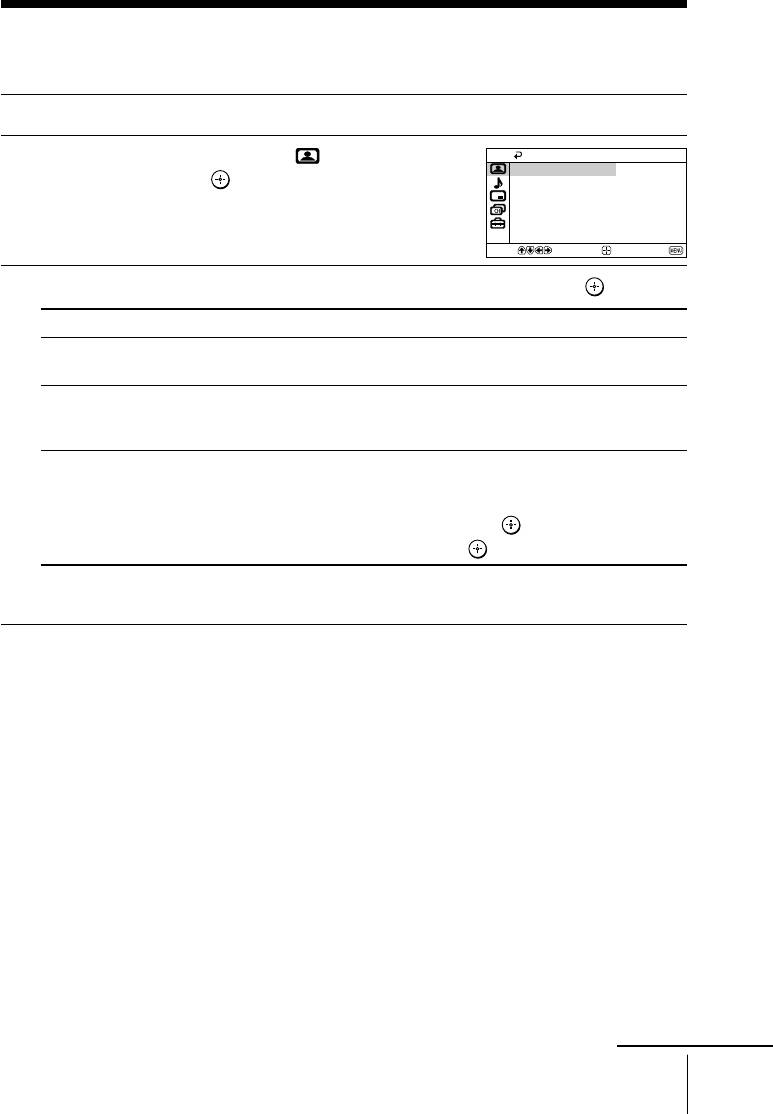
x Changing the “Picture” setting
The “Picture” menu allows you to adjust the picture settings.
Press MENU.
1
Make sure the “Picture” icon (
) is
Picture
2
Mode: Dynamic
selected, then press
.
Picture Adjustment
Color Temperature: Cool
3D Intelligent Picture: On
Select
Confirm
End
Press V or v to select the desired item (e.g., “Mode”), then press
.
3
Select To
“Mode” choose either “Dynamic”, “Standard”, “Soft” or “Personal”*
(see page 12).
“Color Temperature” adjust white color tint.
Choose either “Cool” (blue tint), “Neutral” (neutral tint) or
“Warm” (red tint).
“3D Intelligent Picture” optimize picture quality.
Automatically, the picture will become clearer and sharper if the
signal is good and noise will be reduced if the signal is noisy.
Press V or v to select “On”, then press
.
To cancel, select “Off”, then press .
* You can adjust the setting to your personal preference in the “Picture Adjustment” and
“Color Temperature” options only when the “Personal” mode is selected (see page 22).
Note
• For NTSC 3.58 color system, “3D Comb Filter : On” or “3D–NR : On” display will appear
when “3D Intelligent Picture” changes from one mode to the other. For PAL color system,
Digital Comb Filter and 3D-NR are also available.
continue
Menu Adjustment
21

continued
Adjusting the “Picture Adjustment” items under
“Personal” mode
Press V or v to select either “Picture” (contrast), “Brightness”, “Color”,
1
“Hue” (color tones) or “Sharpness”, then press
.
Selecting “Reset” will set your TV to the factory setting.
Press V,v,B or b to adjust the setting of your selected item, then press
.
2
Repeat the above steps to adjust other items.
3
The adjusted settings will be received when you select “Personal”.
Notes
• “Hue” can be adjusted for the NTSC color system only.
• Reducing “Sharpness” can also reduce picture noise.
22 Menu Adjustment
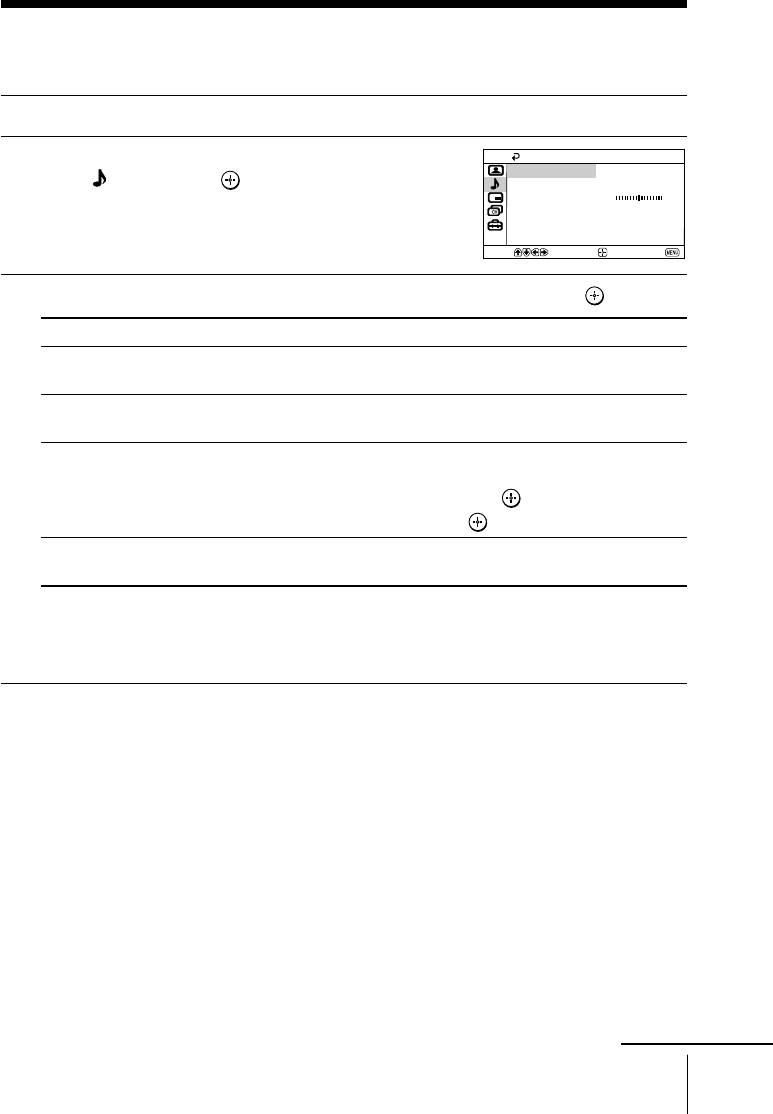
x Changing the “Sound” setting
The “Sound” menu allows you to adjust the sound settings.
Press MENU.
1
Press V or v to select the “Sound”
2
icon (
), then press .
Press V or v to select the desired item (e.g., “Mode”), then press
.
3
Select To
“Mode” choose either “Dynamic”, “Drama”, “Soft” or “Personal”*
(see page 12).
“Balance” Press v or B to emphasize the left speaker.
Press V or b to emphasize the right speaker.
“Intelligent Volume” adjust the volume of all program numbers and video inputs
automatically.
Press V or v to select “On”, then press
.
To cancel, select “Off”, then press .
“Surround” choose either “TruSurround”, “WOW”**, “Simulated” or “Off”
(see page 10).
* You can adjust the setting to your personal preference in the “Sound Adjustment”
option only when the “Personal” mode is selected (see page 24).
** BBE High Definition Sound is fully activated maximizing the sound effect in the WOW
mode.
Note
• “Intelligent Volume” is not selectable when “TruSurround” is selected or when the
microphone input terminal is connected.
Menu Adjustment
23
Sound
Mode:
Dynamic
Sound Adjustment
Balance
Intelligent Volume:
Off
Surround:
Off
Select
Confirm
End
continue
24 Menu Adjustment
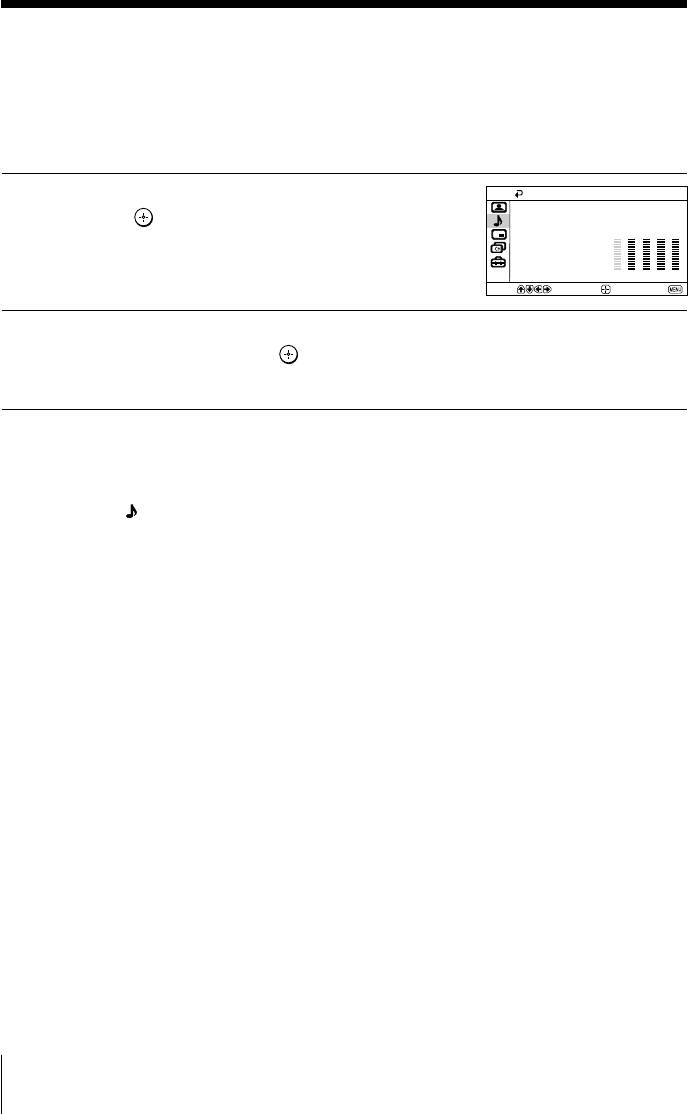
Adjustment: Personal
Adjust
Reset
100 300 1k 3k 8k
Select
Confirm
End
continued
Adjusting the “Sound Adjustment” item under
“Personal” mode
The 5-Band Graphic Equalizer feature allows you to adjust sound frequency settings
of “Personal” mode in the menu.
Make sure that “Adjust” is selected,
1
then press
.
Selecting “Reset” will set your TV to
the factory setting.
Press B or b to select the desired sound frequency, then press V or v to
2
adjust the setting and press
.
The adjusted settings will be received when you select “Personal”.
Notes
• Adjusting higher frequency will affect higher pitched sound and adjusting lower frequency
will affect lower pitched sound.
• You may display the settings directly using the SOUND MODE button on the TV front panel
(see page 9) or
button on the remote control (see page 10).
Оглавление
- KV-SR29
- x TV front and rear panels
- x Using the remote control and basic
- x Selecting the picture and sound
- x Watching Picture-in-Picture (PIP)
- x Operating optional components
- x Changing the Picture-in-Picture
- x Troubleshooting
- x Specifications
- x Передняя и задняя панели
- x Использование пульта ДУ
- x Bыбор режимов воспроизведения
- x
- x Использование дополнительных
- x Изменение настройки функции
- x Технические характеристики


