Sony KV-29FQ65K: Operation
Operation: Sony KV-29FQ65K
Operation
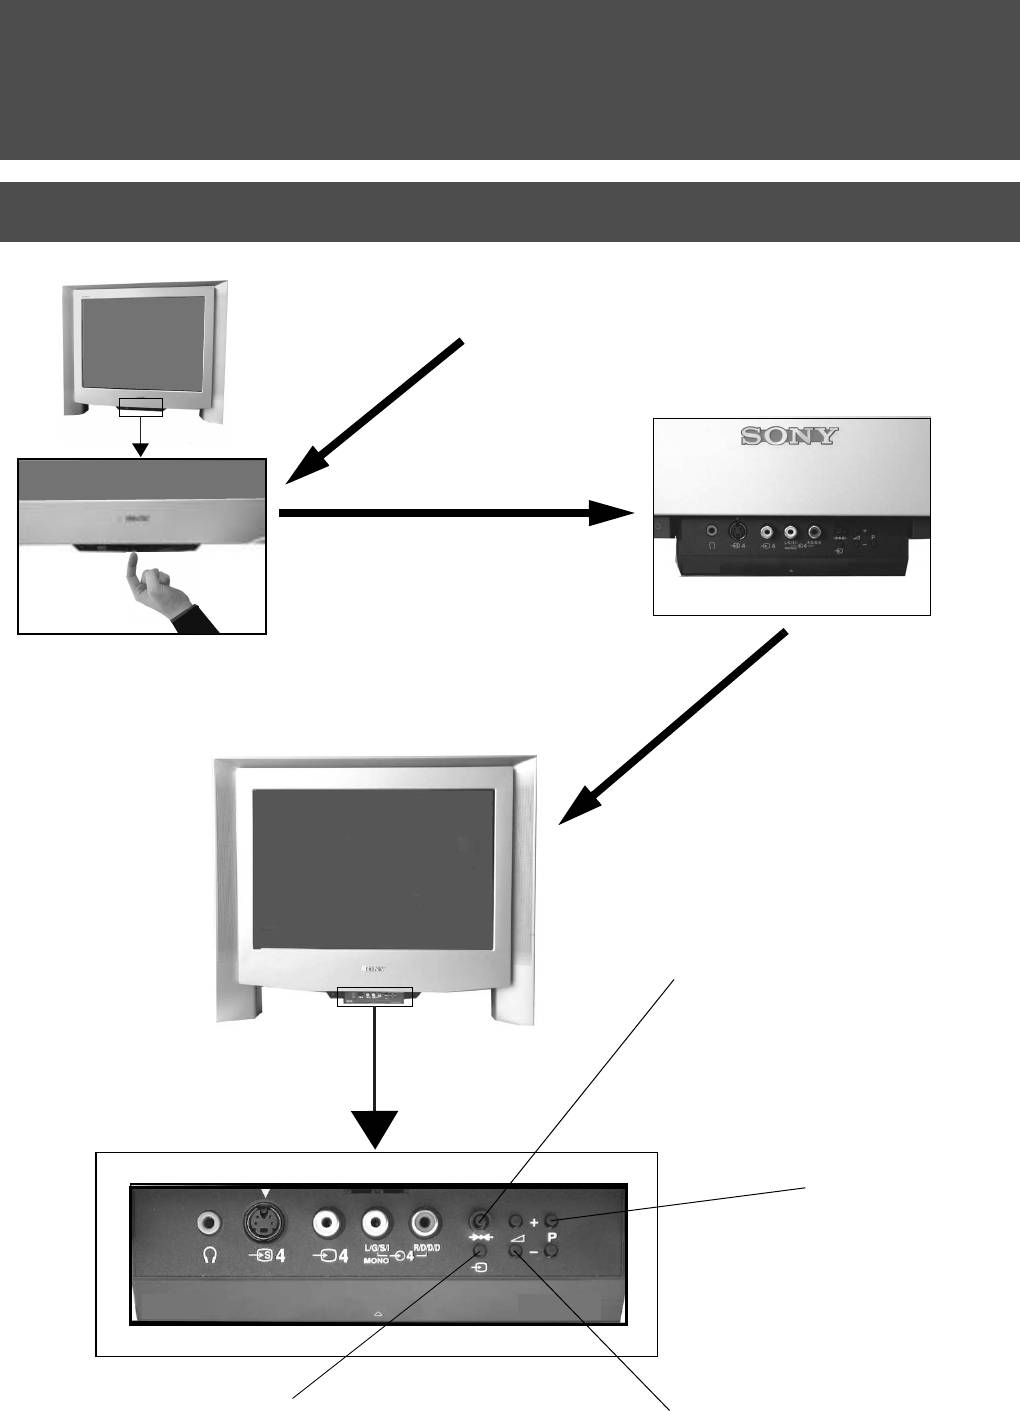
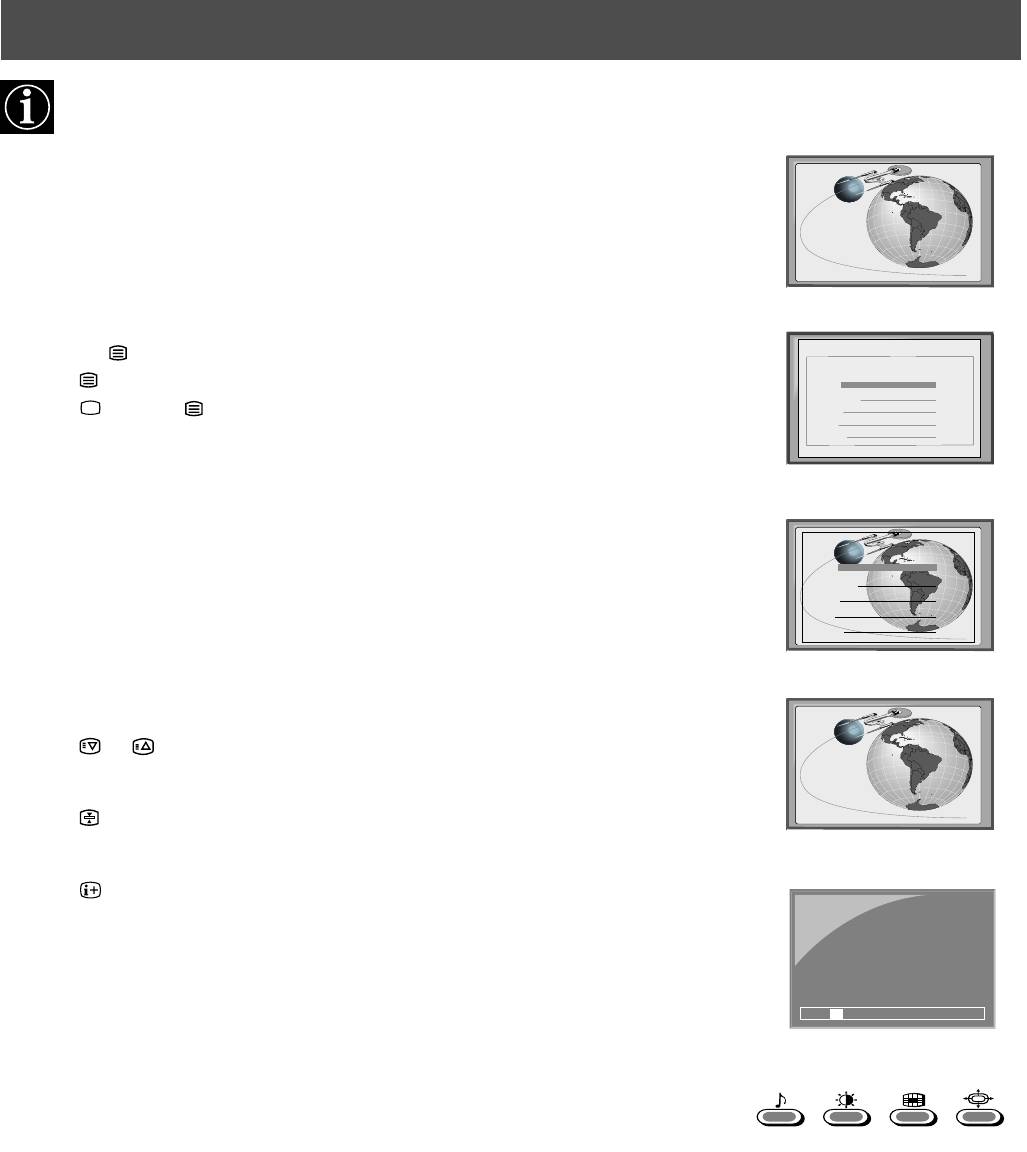
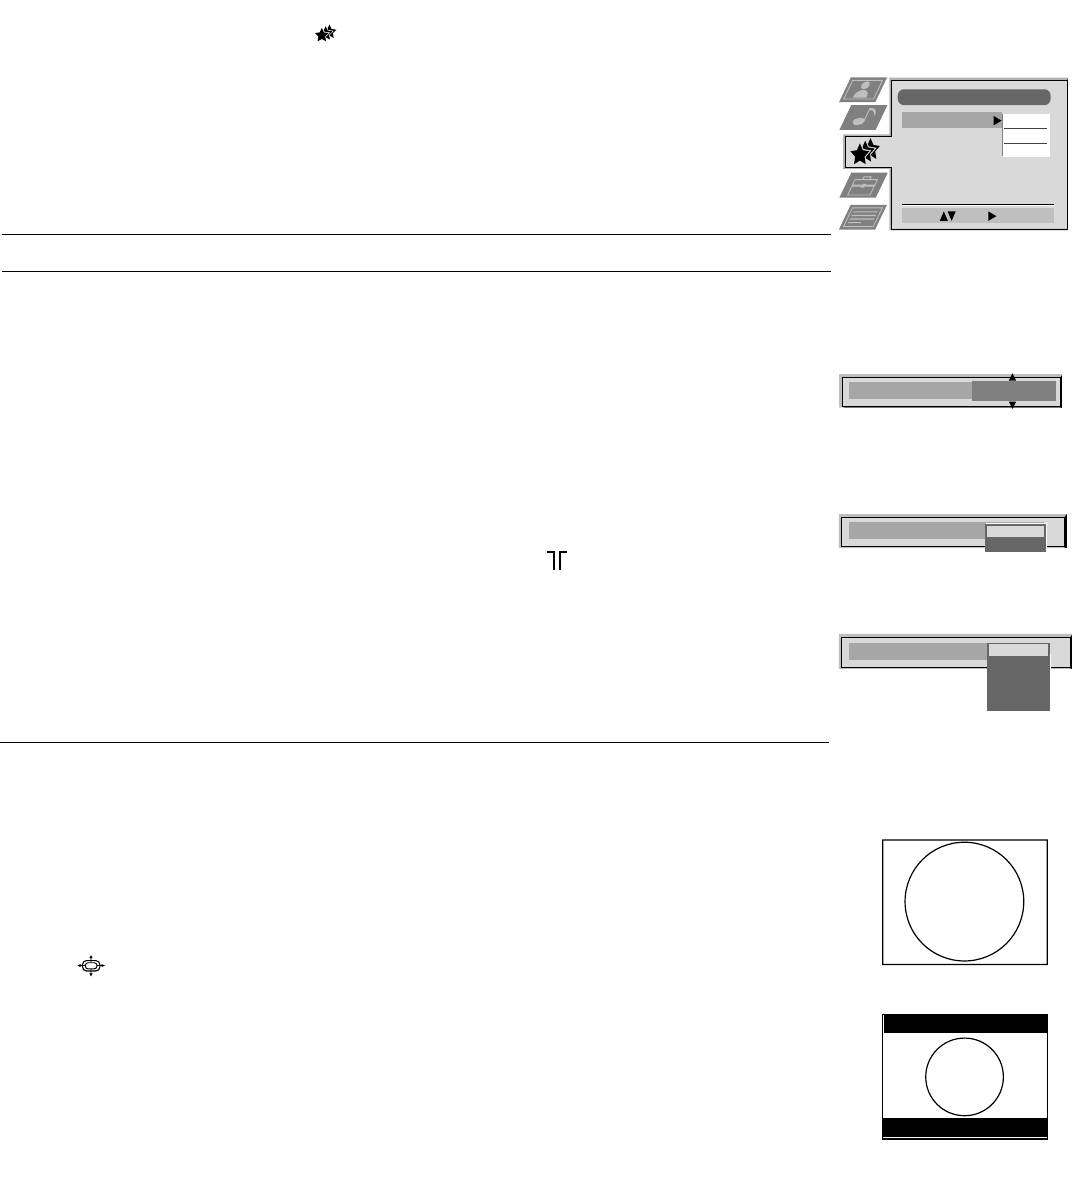
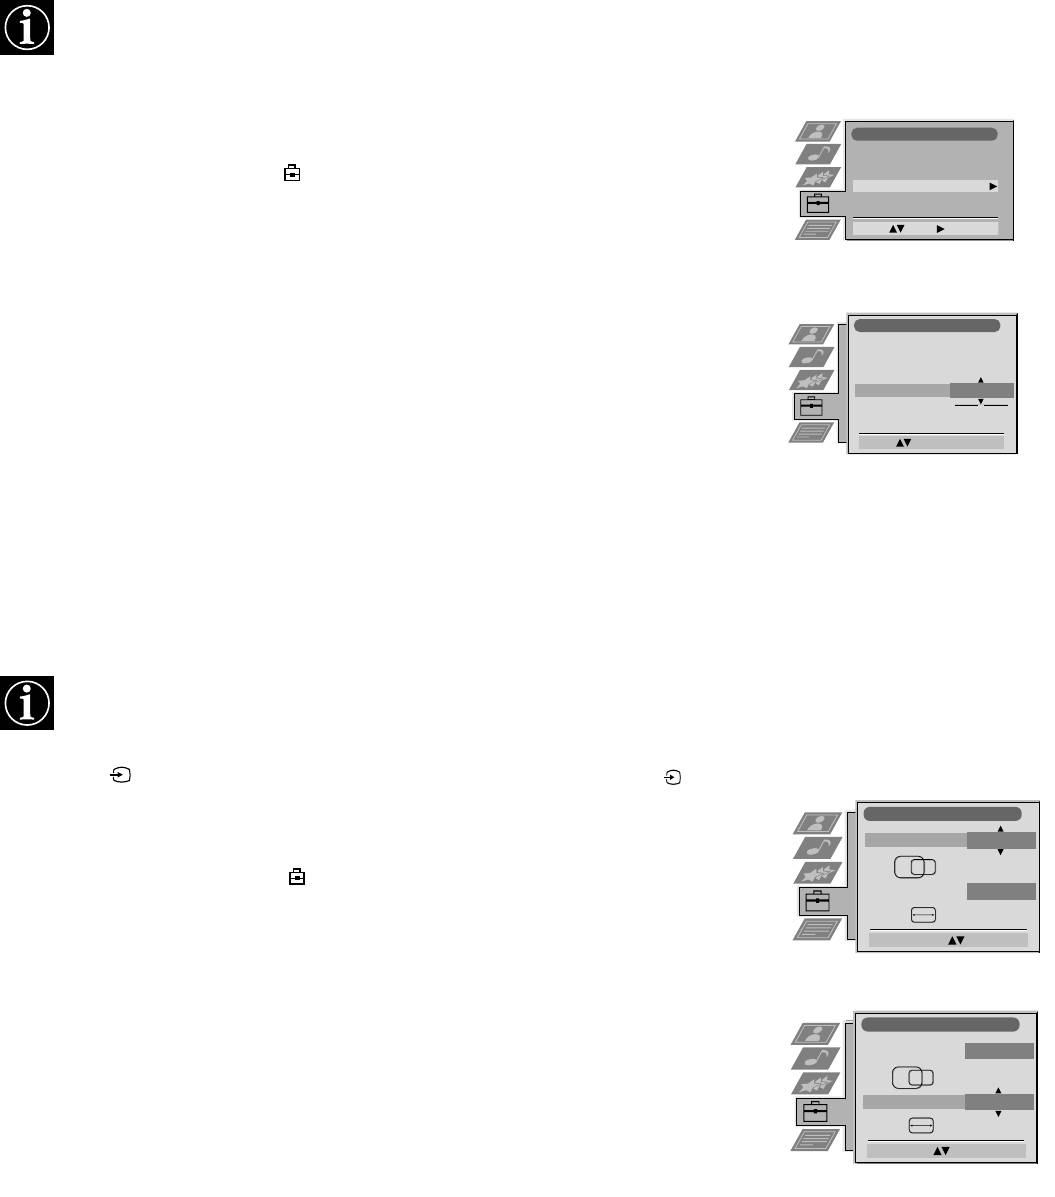
Overview of the TV set buttons
Push up on the control panel (as shown)
to access the front input sockets and TV
buttons.
The control panel drops down.
100Hz
Master Reset button.
Press to return the picture and sound
levels to factory settings. The Sony logo
will appear on the screen followed by the
‘Autotune’ screen. If you do not wish to
retune your TV, press the b button on
your remote control.
Programme Up (+) or
Down (-) buttons.
Press to select TV
channels.
100Hz
Video input button.
Volume control buttons.
Press to select the input
Press to increase (+) /decrease
signals from VCR etc.
(-) volume.
6
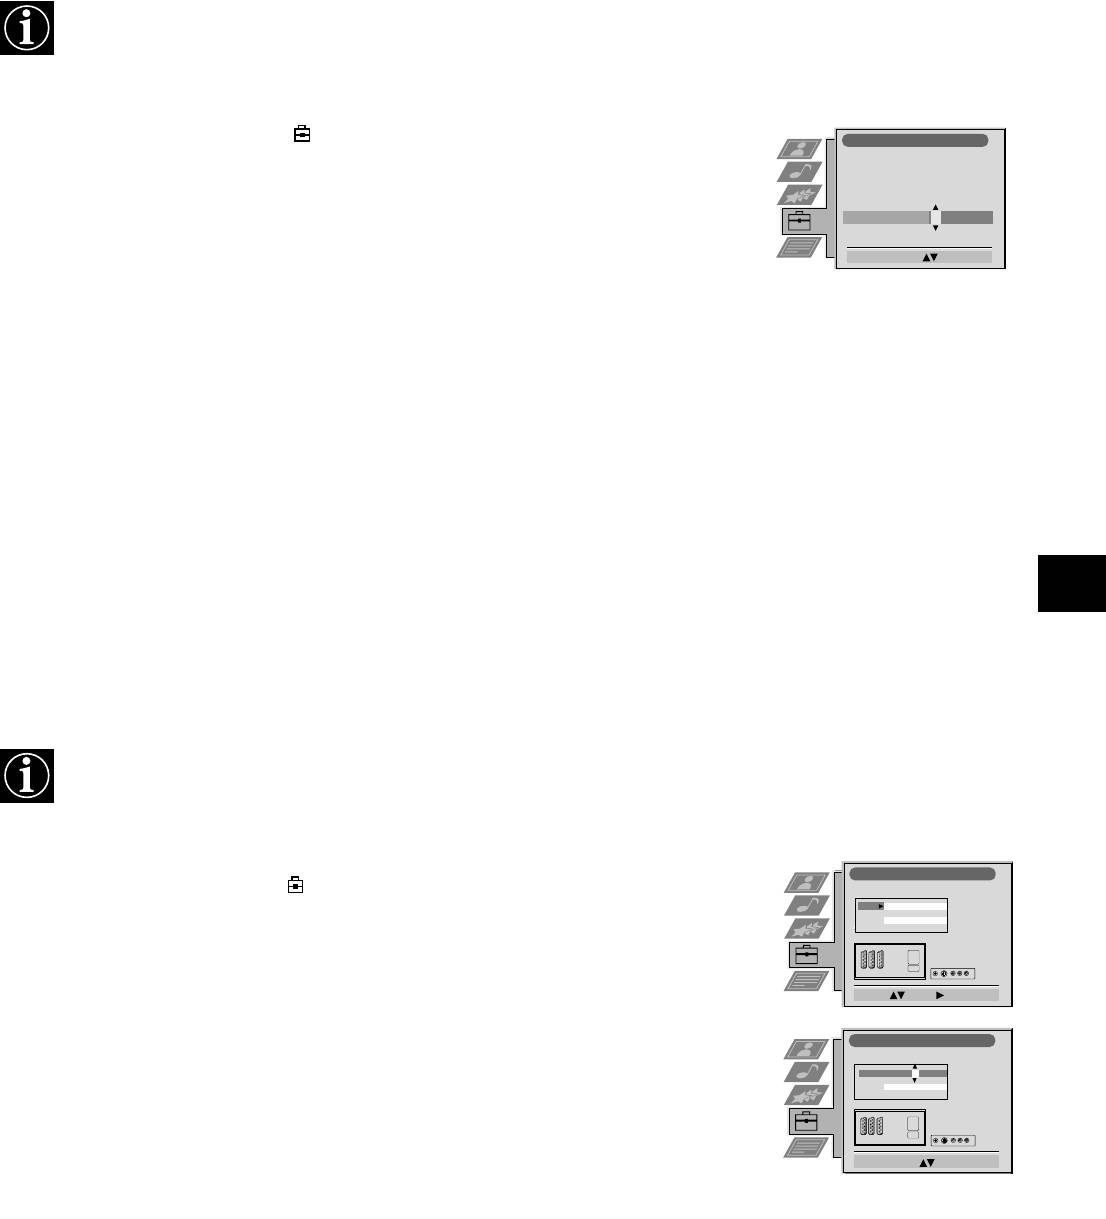
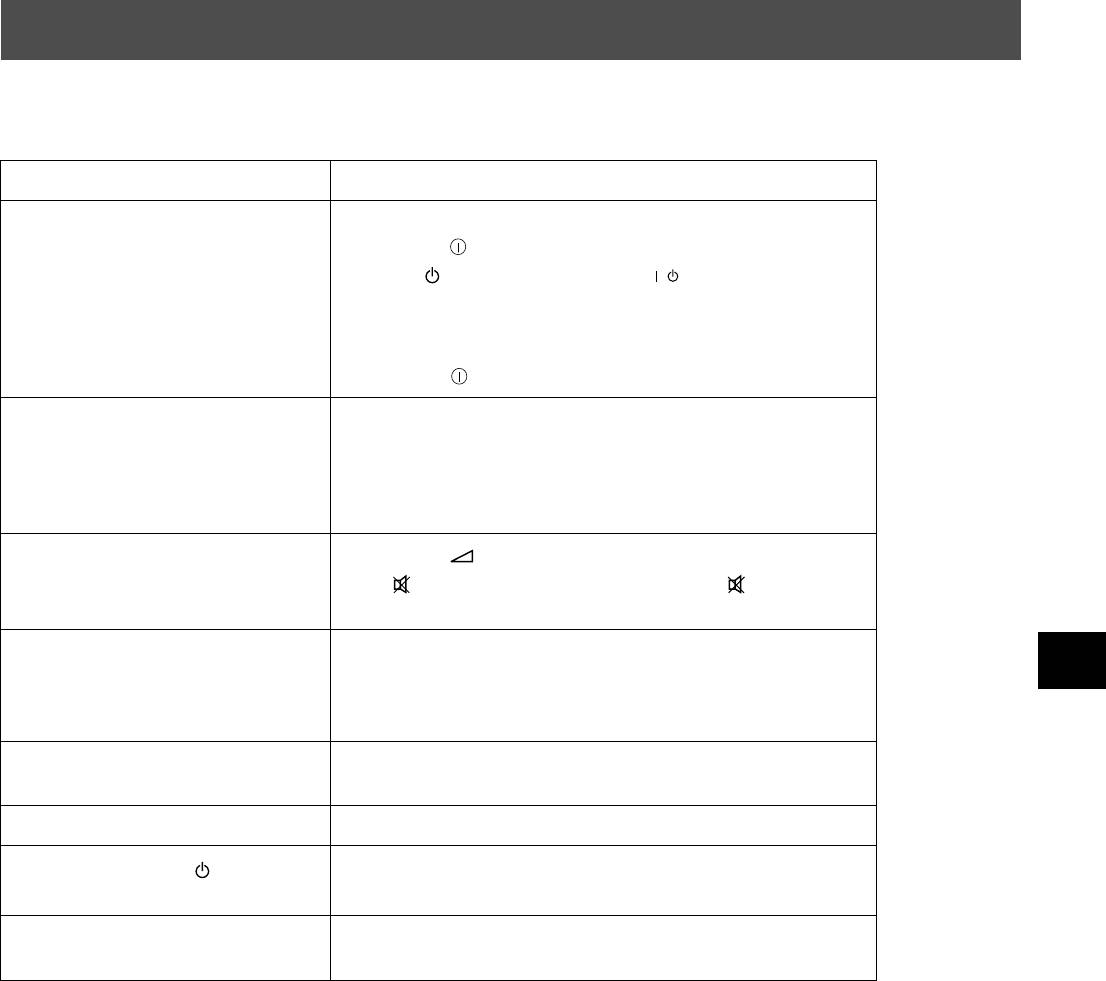
Operation
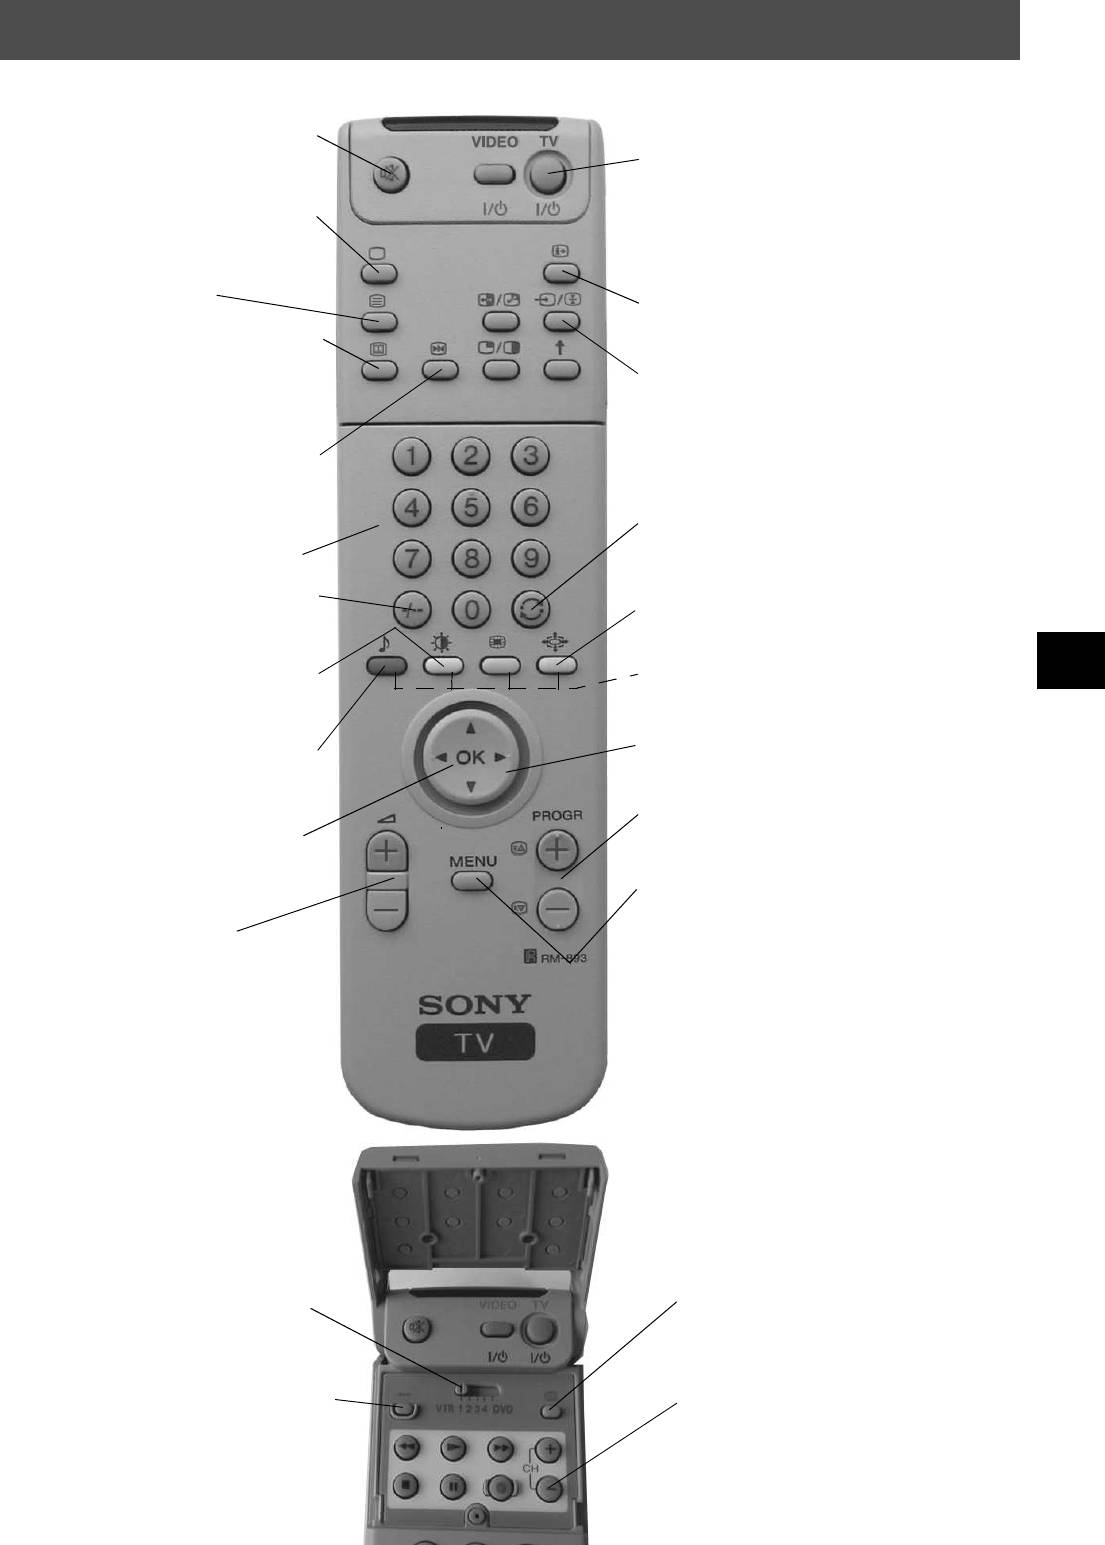
Overview of the remote control buttons
To mute sound
To temporarily switch off TV
Press to mute TV sound. Press again to restore the
Press to temporarily switch off TV. Press again to switch on
sound.
from standby mode. To save energy, we recommend
switching off completely when TV is not in use.
To return to TV mode
NOTE: After 15-30 minutes without a TV signal and without
Press to return to the normal operation from teletext
any button being pressed, the TV switches automatically into
mode or standby mode.
standby mode.
To select Teletext
To reveal on screen information
Press to switch Teletext on and off.
Press to reveal all on-screen indications. Press again to
cancel. In Teletext mode, press to reveal the index page
To select Electronic Programme Guide
(normally page 100).
(EPG)
Press to switch EPG on and off.
To select input signal or freeze teletext
Press to select inputs from the TV sockets (see Using
Optional Equipment section). In Teletext mode, press to
To freeze the picture
freeze the displayed page. Press once again to cancel.
Press if you wish to make a note of some
information on the TV screen eg a telephone
number. Press again to return to normal TV mode.
To return to previous channel
Press to return to the previous channel you were watching.
To select channels
Note: This can be done only after watching the present
Press the numbered buttons to select channels.
channel for 5 seconds.
For double digit programme numbers, e.g.23, press
To change screen format
-/-- first, then the buttons 2 and 3.
Press repeatedly to select 4:3 mode or 16:9 mode (imitation
of wide screen format).
To display picture menu
Press to change the picture settings. Press the OK
Fastext keys
button to remove the display.
See Teletext section of manual for details.
To display sound menu
To select menu items
Press to change the sound settings. Press the OK
Use the OK button and arrow keys to select the options
button to remove the display.
available in the menu system of this TV.
To display the Channel Table
To select channels
Press the OK button. Press v or V to select the
Press to select channels.
desired channel then press B to confirm.
To display the menu
Press if you wish to use the TV menu system. Press again to
To adjust TV volume
remove the menu from the TV screen.
Press to adjust the volume of the TV.
To operate other Sony equipment.
Open the remote control lid and set the selector VTR 1234
DVD according to the equipment you want to control:
VTR 1: Beta VCR
VTR 2: 8mm VCR
VTR 3: VHS VCR
VTR 4 Digital Video (DCR-VX 1000/9000E, VHR-1000)
To display the time.
DVD Digital Video Disk
Open the remote control lid and press to display the
Use the buttons on the remote control to operate the
time on screen. Press again to cancel.
equipment.
To reset to factory set levels.
Open the remote control lid and press to return
To operate video equipment
picture and sound settings to factory-set levels.
Open the remote control lid and press these buttons to
After the ‘Installation’ menu has appeared on
operate your video equipment (please refer to your
the TV screen, refer to the ‘Selecting Language
VCR manual).
and Country’ section of the instruction manual
to change your choice of language and country
if desired.
7
Operation
NexTView*
* depending on availability of service
NexTView is an electronic programme guide with up to 1 week* of programme information on those channels included
in the selected provider.
*If the data exceeds the memory of NexTView, you will get information on less than 7 days.
When looking for information you can search by theme (sports, art etc.), date or time (e.g. broadcasts between 8 and 9
p.m.). When you’ve found a programme you can go directly to this programme, use the timer to remind you of it or preset
your VCR with Smartlink.
The NexTView provider is responsible for the contents of the guide. The TV set is responsible for the presentation, that
is the menu structure and the navigation, if there is none from the provider. If there is a navigation from the provider the
basic operation with the joystick is the same as described in the Sony navigation.
At first you need to select a channel providing a NexTView service. In this case the indication “NexTView” is displayed
as soon as all data is available. When you later change the channel you can still select this NexTView service.
Operation using the Sony navigation
1. Press to switch NexTView on and off.
2. Use the joystick buttons as follows
• moving up or downwards within a column: Use v or V.
• going to the left columns time and date: Use b.
• going to the right column icons: Use B.
• Confirming a selection: Press OK.
(a) while in the columns date, time or icon (themes), the programme list changes according to the selection.
(b) while in the programme list, confirming a running broadcast brings you directly to the TV programme or confirming
a future programme brings you to the long info menu.
07 Tue
12:38
Index
SWISS
TXT TPS / RINGIER
Tue 07. 04 .98
7
Star Wars
Tu e
full list of selection
Super RTL
10:35 - 12:45
8
personal selection
Wed
Werner - Beinhart
Pro 7
10:20 - 12:00
news broadcasts
9
movies
Thu
Flui grüsst den Rest der Welt
12
Kabel 1
10:45 - 10:50
sports
10
Fri
Once upon a time in the West
entertainment
Euronews
11:00 - 11:20
children
11
Sat
International News
return to last menu
RTL Plus
11:45 - 12:50
12
Sun
Fantasy film, USA, 1996
13
Mon
8
Operation
NexTView*
Individual Setting
When you select there will be no personal pre-selection. lets you make your own individual selection of
themes, limiting the search to the marked ones.
1. Select using v or V. Push B to enter.
The menu Individual Settings is displayed.
2. Select the item you wish to mark using v or V. Confirm by pressing OK.
Repeat step 2 for all the items you wish to have in your list.
3. When finished with the list, select using B and press OK.
Using the ‘Long Info’ menu
1. Select a future programme in the column programme list using v or V. Press OK.
The long info menu is displayed.
First nextTView/EPG-Providers in Europe
07 Tue
SWISS TXT TPS / RINGIER nexTView
12:38
Tue 07. 04 .98
Address Mapping
The position of the addresses in the
OSDA is shown in the following diagram.
The position values of the DPW are set
to '0'.
If other values are set, the complete
combination will be scrolled.
Example:
if the DPWC is set to '63', the char-
This channel has been set for a timer
VPS/PDC
On
Speed
SP
Timer Prog
VCR1
You may wish to record the selected programme with your VCR.
(only with Smartlink VCRs)
VPS/PDC
On
Speed
SP
VCR Setup
VCR1
2. Select using b and press OK.
This information is transferred to the VCR connected to your set.
Setting up your VCR
3. Select VPS/PDC by pushing b repeatedly.
With this setting on, you have the guaranteed recording of the whole broadcast
should there be a change in the TV programme. This only works if the selected
channel broadcasts a VPS/PDC signal.
• Select On or Off using OK.
4. Select Speed using V.
Select between standardplay (SP) or longplay (LP) mode.With longplay you can
record twice as much on a videotape. The picture quality, however, may suffer.
• Select SP or LP using OK.
5. Select VCR Setup using V.
Select which of the connected Smartlink VCRs you wish to programme.
• Select VCR 1 or 2 using OK.
6. Select using B. Press OK.
You are back in the last menu.
9
Operation
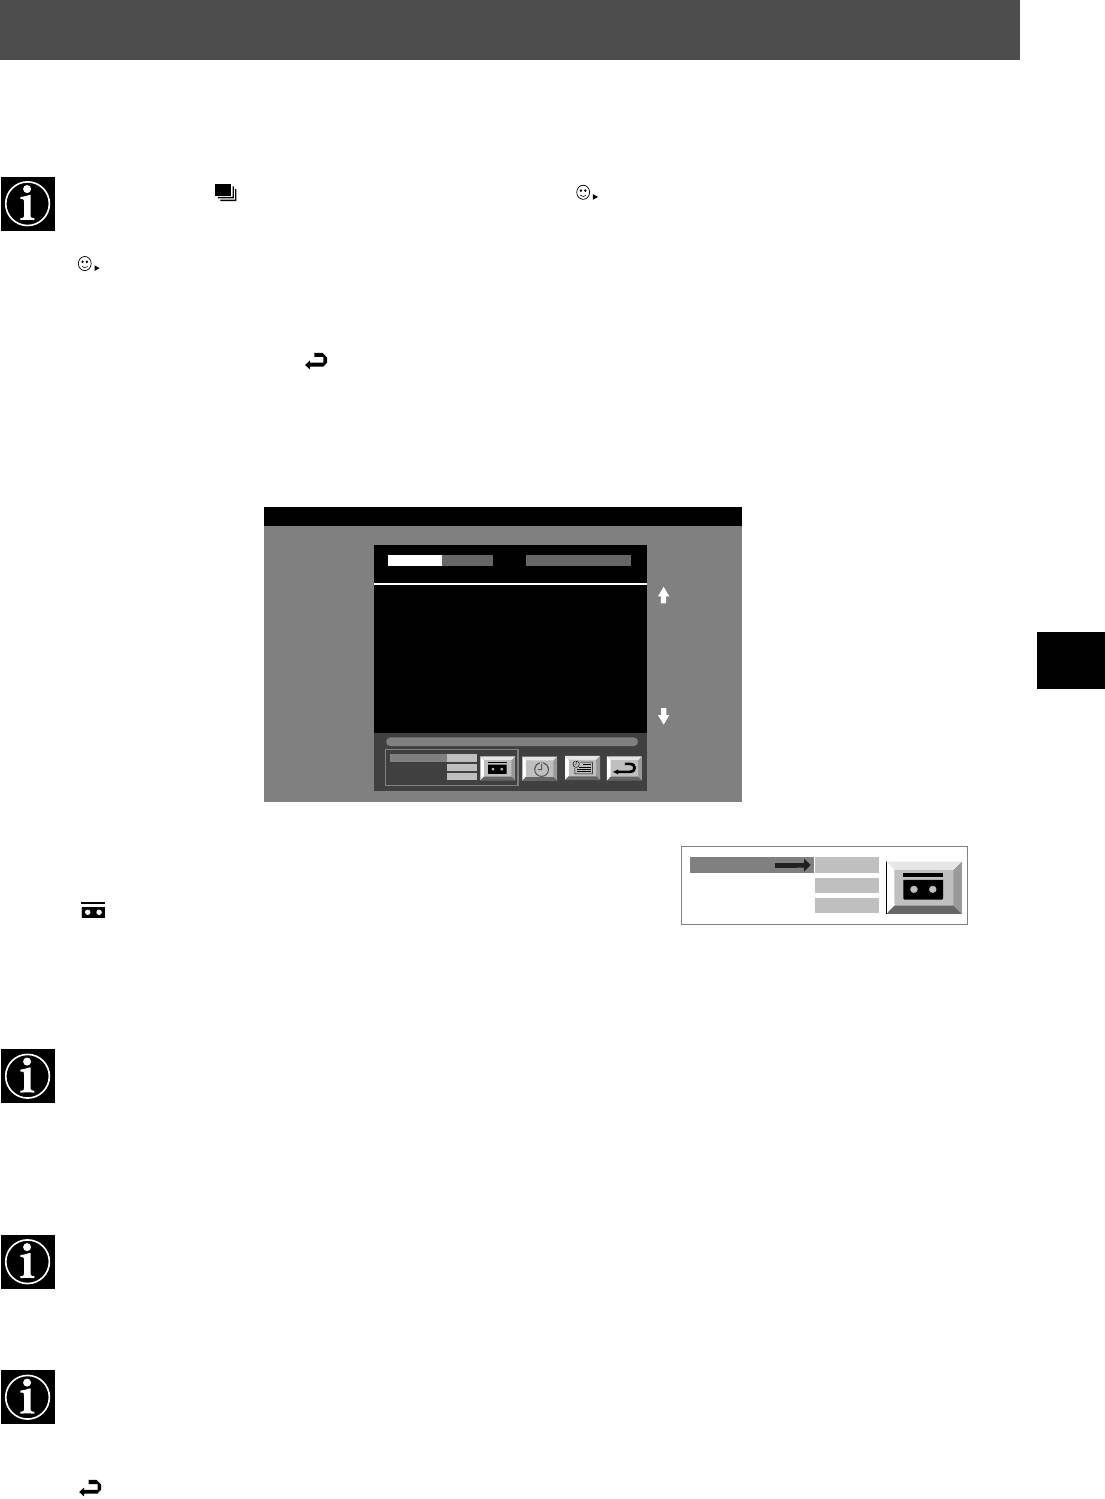
Teletext
Most TV channels broadcast information via Teletext. The index page of the teletext service (usually page 100) gives
you information on how to use the service. Please use a TV channel with a strong signal, otherwise there may be Teletext
errors.
Switching Teletext on and off
m
1. Select the TV channel which carries the teletext service you want to view.
2. Press the button once to get Teletext only.
TELETEXT
3. Press twice for Mix mode.
Index
Programme
25
4. Press or press a third time to switch off Teletext.
News
153
Sport
101
Weather
98
Selecting a Teletext page
m
Input three digits for the page number using the numbered buttons on the remote control. If
TELETEXT
Index
you make a mistake, type in any three digits then re-enter the correct page number.
Programme
25
News
153
Sport
101
Weather
98
Using Other Teletext Functions
m
Selecting the next or preceding page
Press the or buttons on the remote control to select the previous or next page.
To freeze a Teletext page
Press the button to freeze the page. Press again to cancel the freeze.
Revealing the index page
Press the button to reveal the index page (normally page 100).
216-02
Selecting a sub page
A teletext page may consist of several sub pages. In this case an information line is displayed,
showing the number of subpages. It may take a few seconds for the information line to appear.
Select the sub page by pressing v or V.
01 03 04 05 06 07 0802
Using colour buttons to access pages (Fastext)
(only available if the TV station broadcasts Fastext signals)
When the colour coded menu appears at the bottom of a page, press a coloured button on the
remote control (green, red, yellow or blue) to access the corresponding page.
Using the feature ‘Page Catching’
1. Press the numbered buttons on the remote control to select a teletext page which has
several page numbers on it (eg the index page).
2. Press the OK button.
3. Press v or V to select the desired page number then press the OK button. The requested
page is displayed after some seconds.
10
Operation
Teletext
Using the Teletext menu
1. With Teletext switched on, press the MENU button on the remote control to display the
Teletext
menu on the TV screen.
Top / Bottom / Full
Text Clear
2. Press v or V to select your chosen item on the screen then press B to display the relevant
Reveal
sub menu.
Time Page
Page Overview
3. To remove the Teletext menu from the screen, press the MENU button.
Select: Enter Menu:
Top/Bottom/Full
The Top/Bottom/Full sub menu allows you to enlarge different sections of the Teletext page.
Press v to enlarge the upper half of the screen, Press V to enlarge the lower half. Press the OK
Top: Bottom: Full: OK
button to restore the page to normal size. Press b to return to the Teletext menu screen.
Text Clear
Text Clear is a function that displays a TV channel while a Teletext page is being searched for.
1. Press the button on the remote control twice to select full screen text.
2. Press the MENU button to display the ‘Teletext’ menu.
3. Press v or V to highlight ‘Text Clear’ and press B to select.
4. The current TV channel is displayed. Once the text page has been found a blue
symbol will appear in the top left hand corner of the screen.
5. Press the button on the remote control to view the page.
Reveal
Some Teletext pages contain hidden information (eg for a quiz), which can be revealed.
1. In text mode press the MENU button on the remote control to access the ‘Teletext’ menu.
2. Press v or V to highlight ‘Reveal’ and press B to select. The hidden information is
displayed on the screen.
Time Page*
*depending on availability of service.
Time Page allows a time-coded Teletext page (such as an alarm page), to be displayed at a set
time.
1. In Text mode press the MENU button on the remote control to access the ‘Teletext’
menu.
2. Press v or V to highlight ‘Time Page’ and press B to select. The ‘Time Page’ sub menu
is displayed.
Time Page
PAGE TIME
3. Enter the desired page number using the numbered buttons on the remote control.
- - : - -– – –
4. Enter the desired time using the remote control.
5. Press OK to confirm the settings. The TV will exit Teletext mode and the time will be
displayed in the top left hand corner of the screen. At the requested time the desired page
Select Page: 0-9 Next:
is displayed.
Page Overview*
*only available if TOP-Text is transmitted by the TV station.
In this menu the TOP-Text pages are divided into two columns, the first column showing
‘blocks’ of pages and the second showing ‘groups’ of pages.
1. Press b or B to select the first or second column.
2. Press v or V to select the relevant ‘group’ or ‘block’ of pages.
3. Press the OK button to display the chosen pages.
11
Operation
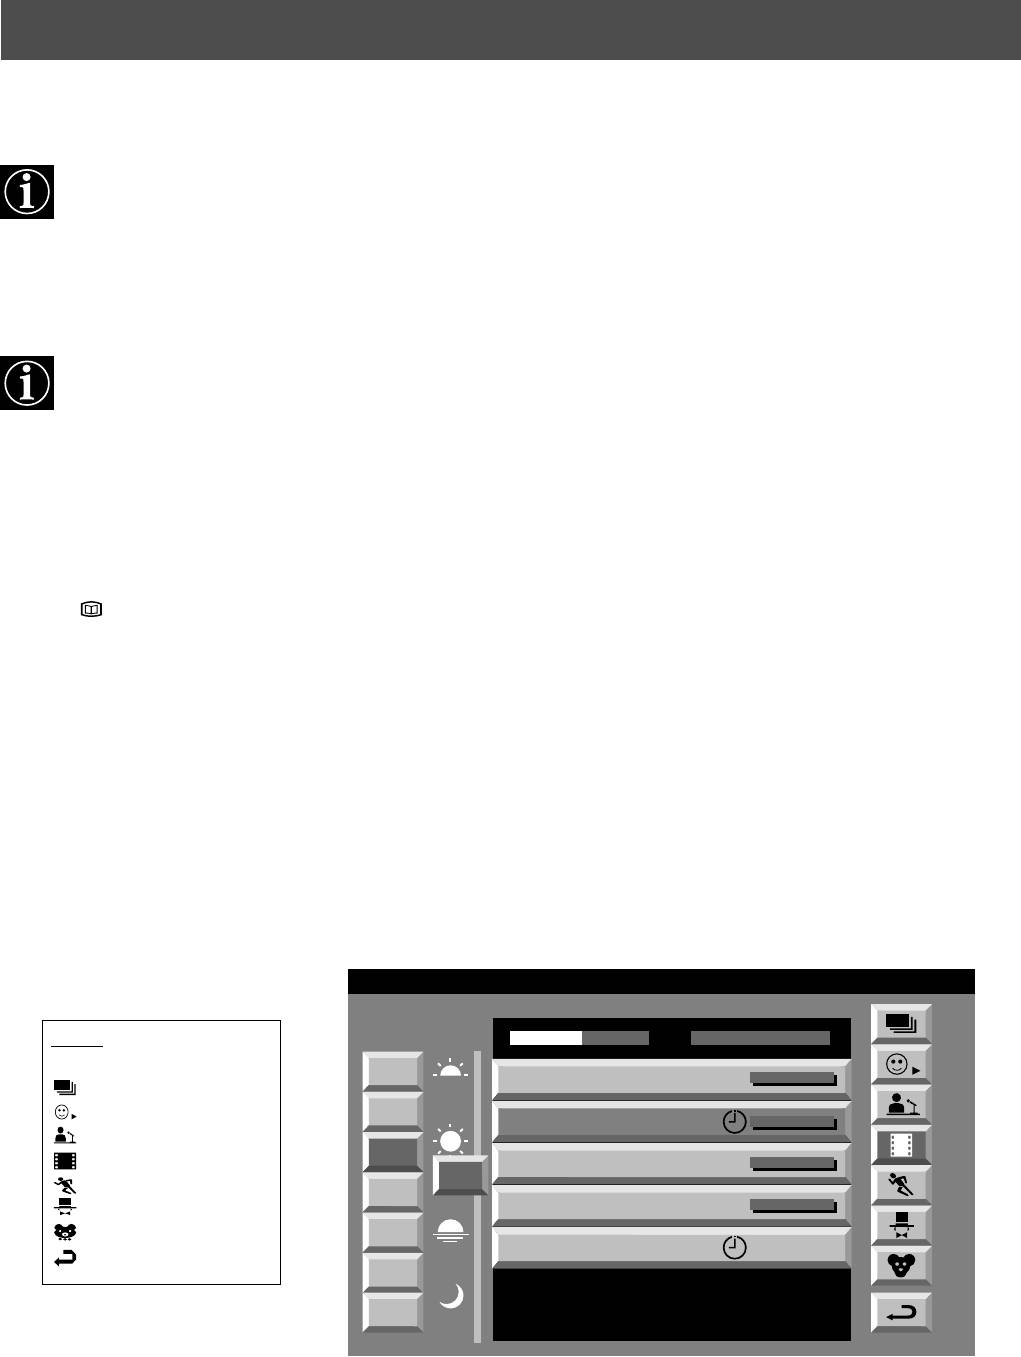
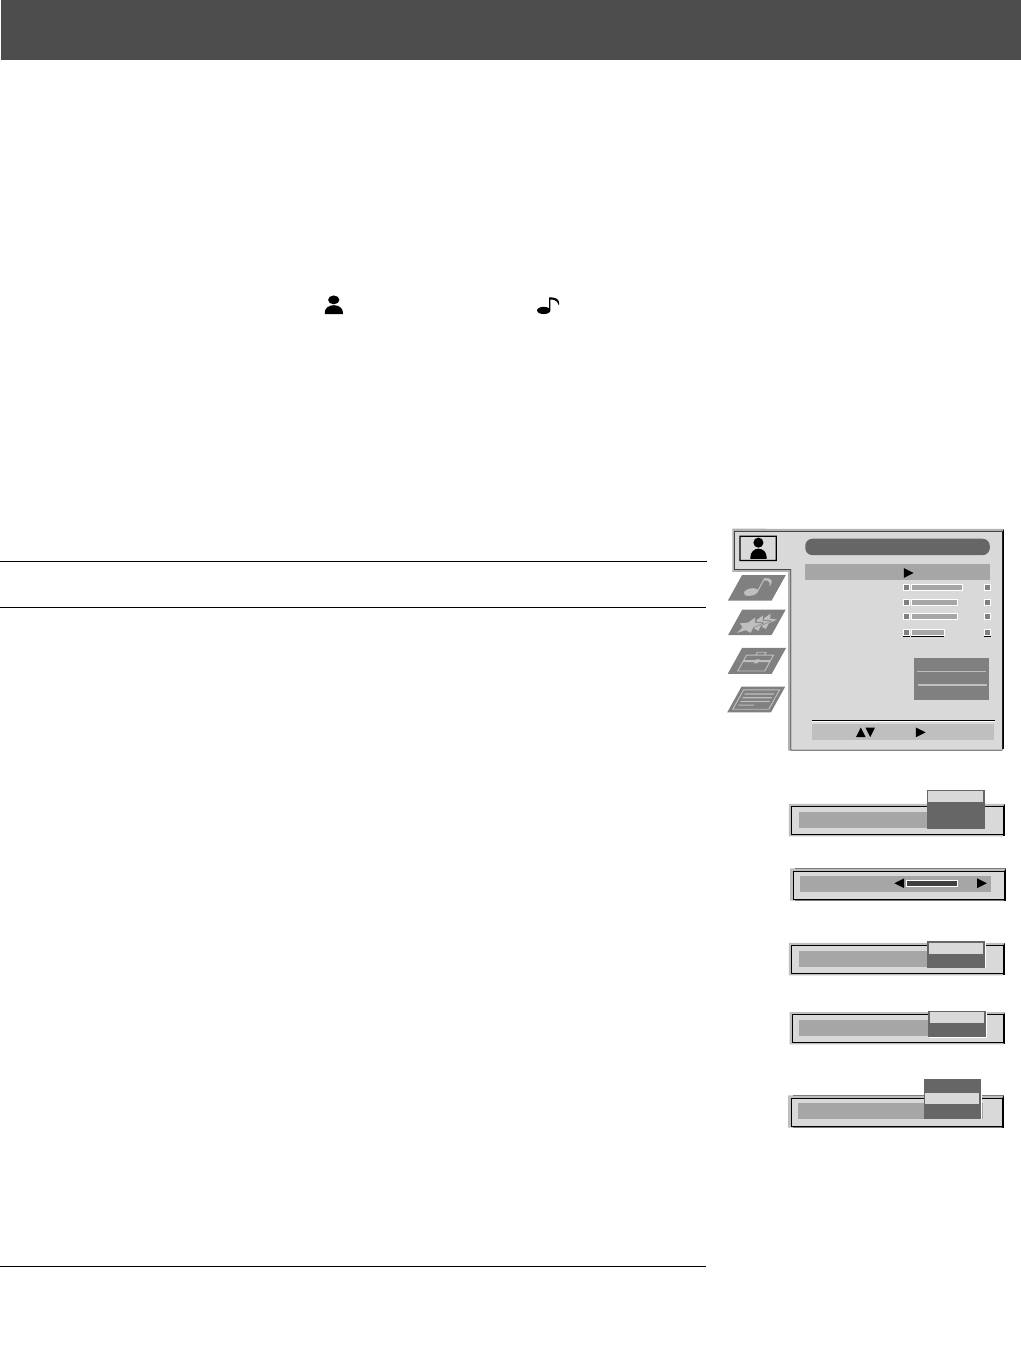
Using the TV menu system
The TV consists of a menu system which is based on a series of user friendly on-screen displays and menus. These displays will
help you get the most from your TV, helping you to change picture and sound settings, to alter the size of the TV picture and to
rearrange the TV channels etc.
Adjusting the picture and sound
The picture and sound are preset at the factory. You can however adjust them to suit your own taste.
1. Press the MENU button on the remote control to display the menu on the TV screen.
2. Press the v or V buttons to select for picture settings or for sound settings then
press B to enter either the ‘Picture Adjustment’ menu or the ‘Audio Adjustment’ menu.
3. Press the v or V buttons to select the item on the screen you wish to adjust then press B to
confirm. For a description of the menu items and their effects, see the table below.
4. Press the v, V, B or b buttons to adjust your selected item.
5. As soon as you have adjusted the item, press the OK button to store the new setting.
6. Repeat steps 3-5 if you wish to adjust any of the other items.
7. Press the MENU button to remove the menu from the TV screen.
Picture Control
Picture Adjustment
Picture Mode
Personal
Item Effect/Operation
Contrast
Brightness
Colour
Picture Mode V Live (for live broadcasts)
Sharpness
Reset
Personal (for individual settings)
AI
On
v Movie (for movie broadcasts)
Noise Reduction
On
Colour Tone
Normal
Contrast Less bB More
Select: Enter:
Brightness* Darker bB Brighter
Colour* Less bB More
Hue** Reddish bB Greenish
Live
Personal
Sharpness* Softer bB Sharper
Picture Mode
Movie
*Only available if ‘Personal’ is selected in ‘Picture Mode’
Contrast
**Only available for NTSC colour signal (eg. US video tapes)
Reset Resets picture to the factory preset levels
On
AI
Off
AI V On: Automatic optimization of contrast level
(Artificial Intelligence) according to the TV signal.
On
Noise Reduction
Off
v Off: Normal.
Noise Reduction V On: Reduces picture noise in case of a weak
Warm
Normal
broadcasting signal.
Colour Tone
Cool
v Off: No noise reduction.
Colour Tone V Warm: Gives a warm tint to the picture.
Normal: Normal.
v Cool: Gives a cool tint to the picture.
12
Using the TV menu system:
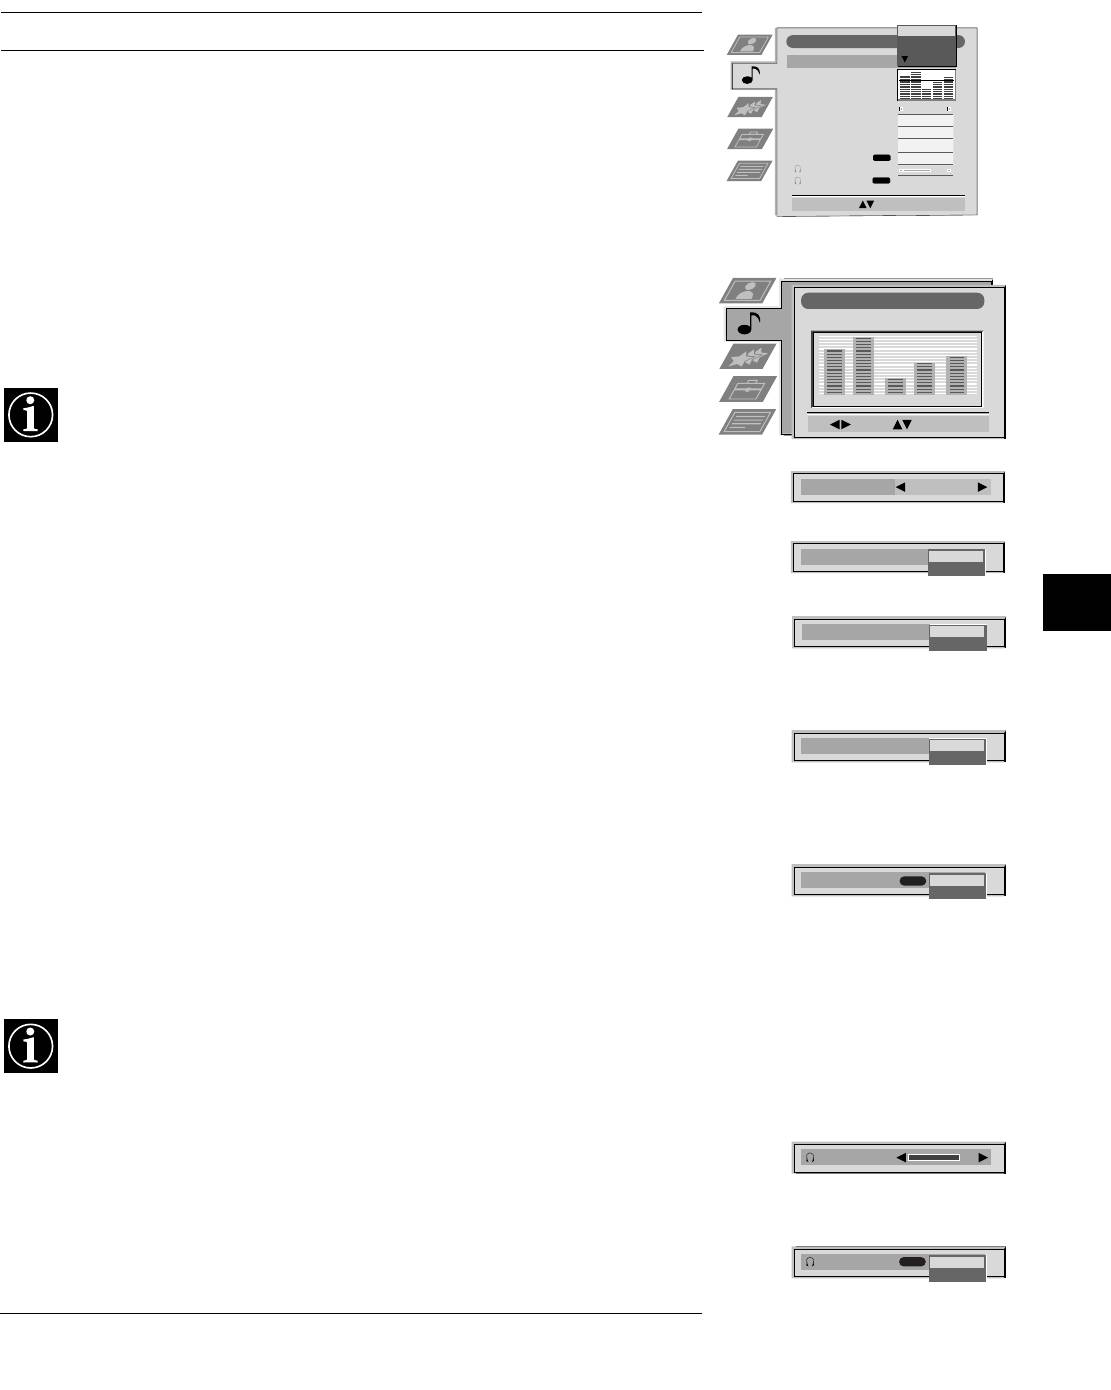
Sound Control
Item Effect/Operation
Personal
Audio Adjustment
Vocal
Jazz
Equaliser Mode
Rock
Equaliser
Equaliser Mode V Personal
Adjustment
Vocal
Balance
0
Loudness
Off
Jazz
Space
Off
Auto Vol. Control
Off
Rock
Dual Sound
NICAM
Stereo
Volume
Pop
Dual Sound
NICAM
Stereo
v Flat (fixed setting, cannot be adjusted)
Select Mode :
Confirm: OK
Equaliser adjustment You can adjust the mode selected in Equaliser mode by
cutting and boosting the 5 selected frequency bands.
Press b or B to select the frequency band then V or v to
Equaliser Adjustment
adjust the frequency. Finally, press the OK button to store
(Personal)
the new adjustment.
+
0
If you want to store the new setting, you need to set the Equaliser mode to
–
120 150 1,5K 5 K 10 K
‘Personal’. Personal mode permanently stores the setting, all other modes
Sel: Adjust: Confirm:OK
(Vocal, Jazz, Rock, Pop) store only until the next mode change.
Balance b More left
Balance
0
B More right
Loudness V Off: Normal
Loudness
Off
On
v On: For music broadcasts
Space V Off: Normal
Space
Off
On
v On: Special acoustic effect
Auto Vol. Control V Off: Volume level changes according to the
broadcast signal.
Auto Vol. Control
Off
v On: Volume level of the channels will stay the
On
same independent of the broadcast signal (eg
in the case of advertisements).
Dual Sound For a bilingual broadcast:
Dual Sound
NICAM
Mono
V A for channel 1
Stereo
v B for channel 2
For a stereo broadcast:
V Mono
v Stereo
When NICAM stereo is being broadcast, the indication NICAM appears briefly
on the screen.
Headphones
i Volume Adjusts headphone volume.
Can also adjust the volume level of additional equipment
Volume
connected to the RCA sockets on the rear of the TV.
i Dual Sound For a bilingual broadcast:
V A for channel 1
Dual Sound
NICAM
B
A
v B for channel 2
13
Using the TV menu system:
Using the Features menu
1. Press the MENU button on the remote control to display the menu on the TV screen.
2. Press the v or V buttons to select for the ‘Features’ menu then press B to enter the ‘Features’
menu.
3. Press the v or V buttons to select the desired menu item then press B to confirm. For a description
Features
of the menu items and their effects, see the table below.
Sleep Timer
Off
4. Press the v, V, B or b buttons to select the desired setting.
Parental Lock
Off
AV 2 Output
TV
5. Press the OK button to confirm your choice of setting.
6. Repeat steps 3-5 if you wish to select any of the other items.
7. Press the MENU button to remove the menu from the TV screen.
Select: Enter:
Item Effect/Operation
Sleep Timer You can select a time after which the TV switches itself into
standby mode.
V Off
v 90 min
Sleep Timer
10 min
Parental Lock V Off: No parental lock.
v On: This feature disables the TV buttons when the set is in standby mode.
It is only possible to switch the set back on by pressing a button on
the remote control.
Parental Look
Off
On
AV2 Output V TV audio/video signal from the aerial
AV1 audio/video signal from scart 1
AV2 audio/video signal from scart 2
AV3 audio/video signal from scart 3
AV 2 Output
TV
v AV4 audio/video signal from connectors on front of the TV
AV 1
AV 2
AV 3
AV 4
Changing the screen size
This feature allows you to change the size of the TV picture.
Press the button on the remote control repeatedly or use the v or V buttons to select one of the
4:3
following formats then press the OK button to confirm your selection:
4:3 conventional 4:3 picture size, full picture information.
16:9 for 16:9 broadcasts.
16:9
14
Using the TV menu system:
Re-arranging the TV channels
After tuning the TV, you can use this feature to change the order of the channels on the TV.
Set Up
Auto Tuning
Programme Sorting
AV Preset
1. Press the MENU button on the remote control to display the menu on the TV screen.
Manual Set Up
Select: Enter:
2. Press the V button to select the symbol on the menu screen then press B to enter the ‘Set Up’
Programme Sorting
menu.
PROG CH LABEL
1
C03
TV 5
2
C05
PRO 7
3
C07
EU-SP
3. Press the V button to select ‘Programme Sorting’ then press B to enter the ‘Programme Sorting’
4
C08
SWF
5
C09
RTL
6
C11
SAT
7
C12
MDR
menu.
8
C13
DDI
9
C14
DSF
10
C15
RTL 2
11
C16
KAB 1
4. Press the v or V buttons to select the channel you want to move then press B to confirm.
Select Prog: Confirm:
Programme Sorting
5. Press the v or V buttons to select the new programme position (eg PROG 4) for your selected
PROG CH LABEL
1
C03
TV 5
C03 TV 5
2
C05
PRO 7
channel then press the OK button to confirm. The selected channel now moves to its new
3
C07
EU-SP
4
C08
SWF
5
C09
RTL
programme position and the other channels move accordingly.
6
C11
SAT
7
C12
MDR
8
C13
DDI
9
C14
DSF
10
C15
RTL 2
11
C16
KAB 1
6. Repeat steps 4 and 5 if you wish to sort the other channels.
Select Position:
Move: OK
7. Press the MENU button to remove the menu from the TV screen.
Manually tuning the TV
You have already tuned the TV automatically using the instructions at the start of this manual. You can however carry
out this operation manually, adding channels to the TV, one at a time.
1. Press the MENU button on the remote control to display the menu on the TV screen.
Set Up
Auto Tuning
Programme Sorting
2. Press the V button to select the symbol on the menu screen then press B to enter the ‘Set Up’
AV Preset
Manual Set Up
menu.
Select: Enter:
3. Press the V button to select ‘Manual Set Up’ on the menu screen then press B to enter the ‘Manual
Set Up’ menu.
Manual Set Up
Language/Country
Manual Programme Preset
4. Press the V button to select ‘Manual Programme Preset’ on the menu screen then press B to enter
Further Programme Preset
RGB Set Up
the ‘Manual Programme Preset’ menu.
Picture Rotation
O
Personal ID
- - - - - - -
5. Press the v or V buttons to select a programme number for your channel (eg PROGR 1 for BBC1)
Select: Enter:
then press B to highlight the ‘SKIP’ column.
Manual Programme Preset
PROG CHSYSSKIP LABEL
1
Off
B/G
C09
TV5
6. Press v to select ‘OFF’ then press B to highlight the ‘SYS’ column.
2
Off
B/G
C10
TV
3
Off
B/G
C21
4
Off
B/G
C33
5
Off
B/G
CXX
6
Off
B/G
CXX
7
Off
B/G
CXX
8
Off
B/G
CXX
7. Press the v or V buttons to select the TV broadcast system or ‘EXT’ for a video input source
9
Off
B/G
CXX
10
Off
B/G
CXX
11
Off
B/G
CXX
(AV1, AV2, ...) then press B to confirm.
Select: Enter:
8. Press the v or V buttons to select ‘C’ for terrestrial channels, ‘S’ for cable channels, or ‘F’ for
PROG CHSYS
SKIP LABEL
1 B/G
Off
direct frequency inputs then press B to confirm.
D/K
IRL
EXT
9. Select the first number digit of ‘CH’ (channel) then the second number digit of ‘CH’ with the
PROG SYS
SKIP LABEL
CH
1 B/G
Off
C
number buttons on the remote control or Press the V button to search for the next available
S
F
channel.
PROG SYS
SKIP LABEL
CH
1 B/G
Off
03
SEARCH
10. If you do not wish to store this channel on the programme number you selected, press the V button
PROG CHSYS
SKIP LABEL
to continue searching for the desired channel.
0 EXT
Off
AV1
AV1
AV2
AV3
AV4
11. If this is the channel you wish to store, press the OK button.
12. Repeat steps 5-11 if you wish to store more channels then press the MENU button to remove the
menu from the TV screen.
15
Using the TV menu system:
Naming a channel
Names for channels are usually taken automatically from Teletext if available. You can however name a channel or an
input video source using up to five characters (letters or numbers).
Manual Set Up
Manual Set Up
1. Press the MENU button on the remote control to display the menu on the TV screen.
Language/Country
Language/Country
Manual Programme Preset
Manual Programme Preset
Further Programme Preset
Further Programme Preset
2. Press the V button to select the symbol on the menu screen then press B to enter the ‘Set
RGB Set Up
RGB Set Up
Picture Rotation
Picture Rotation
O
O
Up’ menu.
Personal ID
Personal ID
- - - - - - -
- - - - - - -
Demo
3. Press the V button to select ‘Manual Set Up’ then press B to enter the ‘Manual Set Up’
Select: Enter:
Select: Enter:
menu.
4. Press the V button to select ‘Manual Programme Preset’ then press B to enter the ‘Manual
Programme Preset’ menu.
Manual Programme Preset
PROG CHSYSSKIP LABEL
1
Off
B/G
C09
ARD
2
Off
B/G
C10
BBC
5. Press the v or V buttons to select the channel you wish to name.
3
Off
4
Off
5
Off
6
Off
7
Off
6. Press the B button repeatedly until the first element of the ‘LABEL’ column is highlighted.
8
Off
9
Off
10
Off
11
Off
7. Press the v or V buttons to select a letter or number (select ‘-’ for a blank) then press B to
Select: Enter:
confirm. Select the other four characters in the same way.
PROG CHSYS
SKIP LABEL
6
Off
I C07 TE
8. After selecting all the characters, press the OK button.
9. Repeat steps 5 to 8 if you wish to label other channels.
10. Press the MENU button to remove the menu from the TV screen.
Skipping programme positions
This function enables you to skip unused programme positions when selecting them with the PROGR+/- buttons.
However, by using the number buttons you can still select the skipped programme position.
1. Press the MENU button on the remote control to display the menu on the TV screen.
Manual Set Up
Language/Country
2. Press the V button to select the symbol on the menu screen then press B to enter the ‘Set
Manual Programme Preset
Up’ menu.
Further Programme Preset
RGB Set Up
Picture Rotation
O
Personal ID
- - - - - - -
3. Press the V button to select ‘Manual Set Up’ then press B to enter the ‘Manual Set Up’
menu.
Select: Enter:
4. Press the V button to select ‘Manual Programme Preset’ then press B to enter the ‘Manual
Programme Preset’ menu.
Manual Programme Preset
5. Press the v or V buttons to select the programme position then press B to highlight the
PROG CHSYSSKIP LABEL
51
Off
I
C09
BBC1
‘SKIP’ column.
52
Off
I
C10
BBC
53
Off
54
Off
55
Off
56
Off
6. Press the v or V buttons to select ‘Off’ or ‘On’ (if you wish to skip this programme
57
Off
58
Off
59
Off
position) then press the OK button to store.
60
Off
61
Off
Select: Enter:
7. Repeat steps 5 and 6 if you wish to skip or unskip further programme positions.
PROG CHSYSSKIP LABEL
53
I F189 - - - Off
8. Press the MENU button to remove the menu from the TV screen.
On
16
Using the TV menu system:
Using the Further Programme Preset feature
With this feature you can a) individually adjust the volume level of each channel, b) manually fine-tune the TV to obtain
a better picture reception if the picture is distorted or c) preset the AV output for the programme positions of channels
with scrambled signals (eg from a pay TV decoder). In this way a connected VCR records the unscrambled signal.
1. Press the MENU button on the remote control to display the menu on the TV screen.
2. Press the V button to select the symbol on the menu screen then press B to enter the ‘Set
Manual Set Up
Up’ menu
Language/Country
Manual Programme Preset
Further Programme Preset
3. Press the V button to select ‘Manual Set Up’ then press B to enter the ‘Manual Set Up’ menu.
RGB Set Up
Picture Rotation
O
Personal ID
- - - - - - -
4. Press the V button to select ‘Further Programme Preset’ then press B to enter the ‘Further
Select: Enter:
Programme Preset’ menu.
Further Programme Preset
PROG AFTVOL DECODER
5. Press the v or V buttons to select the relevant programme number then press the B button
1
0
On
Off
2
0
On
Off
repeatedly to select a)VOL b) AFT or c) DECODER. The selected item changes colour.
3
0
On
Off
4
0
On
Off
5
0
On
Off
6
0
On
Off
7
0
On
Off
8
0
On
Off
9
0
On
Off
6. a)VOL - Volume Offset
10
0
On
Off
11
0
On
Off
Press the v or V buttons to adjust the volume level (range -7 to +7) of the channel. Store by
Select: Enter:
pressing the OK button. Repeat steps 5 and 6a if you wish to adjust the volume level of the
other channels.
PROG AFTVOL DECODER
1 0
b) AFT - Automatic Fine Tuning
PROG AFTVOL DECODER
Press the v or V buttons to fine tune the channel frequency over a range of -15 to +15. Press
1 -5
On
the OK button to confirm. Repeat steps 5 and 6c if you wish to fine tune other channels.
PROG AFTVOL DECODER
1 -5 On
Off
AV1
c)DECODER
AV2
Press the v or V buttons to select AV1 or AV2 for the programme position then press the OK
button to confirm. You can now attach a decoder to the AV1 or the AV2 socket on the back of
the TV and the picture from that decoder will appear on this programme number. Repeat steps
5 and 6c to preset the AV output for other programme positions.
7. Press the MENU button to remove the menu from the TV screen.
17
Using the TV menu system:
Adjusting the picture rotation
Because of the earth’s magnetism the picture might slant. In this case you can readjust the picture.
1. Press the MENU button on the remote control to display the menu on the TV screen.
Set Up
Auto Tuning
Programme Sorting
2. Press the V button to select the symbol on the menu screen then press B to enter the ‘Set
AV Preset
Manual Set Up
Up’ menu.
Select: Enter:
3. Press the V button to select ‘Manual Set Up’ then press B to enter the ‘Manual Set Up’
menu.
4. Press the V button to select ‘Picture Rotation’ then press B to enter the ‘Picture Rotation’
Manual Set Up
sub menu.
Language/Country
Manual Programme Preset
Further Programme Preset
RGB Set Up
5. Press the v or V buttons to rotate the picture over a range of -5 to +5 then press the OK
Picture Rotation
O
Personal ID
- - - - -
- - - - -
button to store.
Rotate: Confirm: OK
6. Press the MENU button to remove the menu from the TV screen.
Adjusting the picture geometry for an RGB source
When connecting an RGB source such as a Sony Playstation you may need to readjust the geometry of the picture.
1. Press the button on the remote control to select the connected RGB source .
1
RGB Set Up
2. Press the MENU button to display the menu on the TV screen.
H Centre
O
3. Press the V button to select the symbol on the menu screen then press B to enter the ‘Set
H Size
O
Up’ menu.
Adjust Position: Confirm: OK
4. Press the V button to select ‘Manual Set Up’ on the menu screen then press B to enter the
‘Manual Set Up’ menu.
5. Press the V button to select ‘RGB Set Up’ on the menu screen then press B to enter the
RGB Set Up
‘RGB Set Up’ sub menu.
H Centre
O
6. Press B to select H Centre then press v or V to adjust the centre of the picture over a range
H Size
O
of -10 to +10. Store the new range by pressing the OK button.
Adjust Size: Confirm: OK
7. Press B to select H Size then press v or V to adjust the horizontal coordinates over a range
of -10 to +10. Store the new range by pressing the OK button.
8. Press the MENU button to remove the menu from the TV screen.
18
Using the TV menu system:
Inputting your personal ID
With this feature, you can allocate a safety code to your TV which will enable you to be traced if the TV is stolen and
recovered. The safety code however can only be entered once - please make a note of it!
1. Press the MENU button on the remote control to display the menu on the TV screen.
2. Press the V button to select the symbol on the menu screen then press B to enter the
Manual Set Up
‘Set Up’ menu.
Language/Country
Manual Programme Preset
Further Programme Preset
RGB Set Up
3. Press the V button to select ‘Manual Set Up’ on the menu screen then press B to enter the
Picture Rotation
Personal ID
- - - - - - -
‘Manual Set Up’ menu.
Select. A-Z, 0-9: Store: OK
4. Press the V button to select ‘Personal ID’ on the menu screen then press B to enter the
‘Personal ID’ sub menu.
5. Press the v or V buttons to select the first of a total of 11 characters (letter, number + or a
blank) then press B to go to the next character.
6. Repeat step 5 to input all the characters for the code.
7. Press the OK button to store. A status box appears on screen requesting you to re-enter
your code.
8. Press the OK button to store the code or press b to cancel.
9. Press the MENU button to remove the menu from the TV screen.
Presetting and naming input signals
Using this feature you can label input sources.
1. Press the MENU button on the remote control to display the menu on the TV screen.
AV Preset
2. Press the V button to select the symbol on the menu screen then press B to enter the ‘Set
INPUT LABEL
AV 1
AV 1
Up’ menu.
AV 2
AV 2
AV 3
AV 3
AV 4
AV 4
3. Press the V button to select ‘AV Preset’ on the menu screen then press B to enter the ‘AV
Preset’ menu.
Select: Enter:
4. Press the v or V buttons to select the desired AV input (AV1, 2, 3 or 4).
AV Preset
INPUT LABEL
AV 1
AV 1
5. Press the B button to select ‘LABEL’.
AV 2
AV 2
AV 3
AV 3
AV 4
AV 4
6. Press the v or V buttons to select the first character of the name then press the B button to
move to the next character.
Select: A-Z, 0-9:
Confirm: OK
7. Repeat step 6 to select the other 4 characters then store by pressing the OK button.
8. Repeat steps 4-8 for the other AV input sources then press the MENU button to remove the
menu from the TV screen.
19
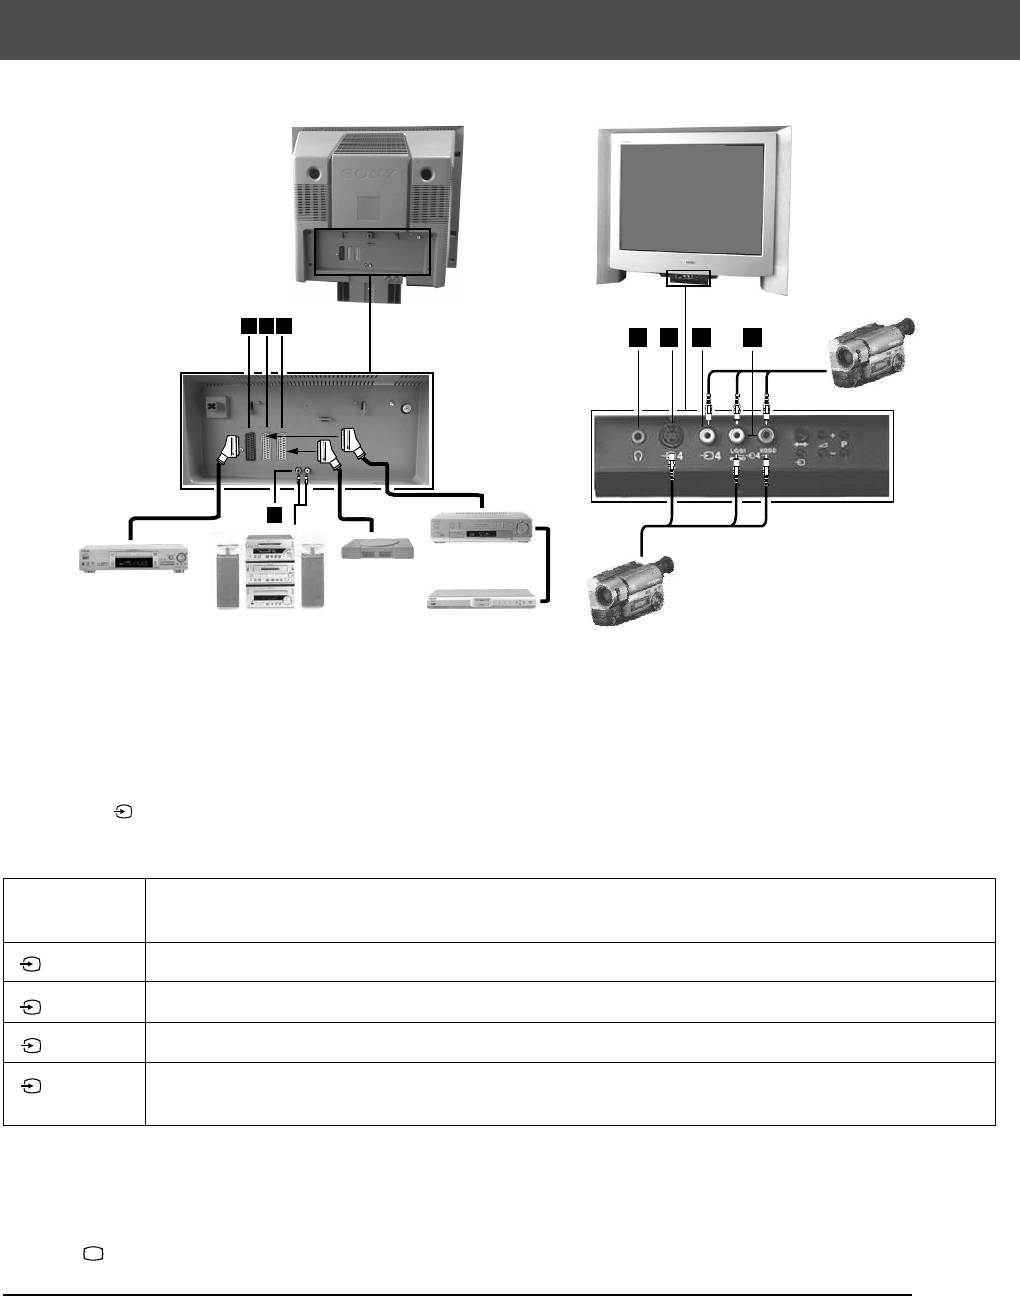
Additional Equipment
Connecting additional equipment to the TV
Using the illustrations below, you can connect a wide range of audio and video equipment to your TV.
A
B
C
E
F
G
H
8mm/Hi8
camcorder
100Hz
D
VCR
Playstation
DVD
S-VHS/Hi8
camcorder
Hi-Fi
Decoder
To view the input signals of connected equipment, please follow the instructions below.
1. Using the illustrations above, connect your equipment to the appropriate TV socket.
2. Press the button repeatedly on the remote control until the correct input symbol for your equipment appears on the TV
screen (see table below):
Symbol on
Input signals from connector
the TV screen
1
• Audio/video input signal through scart connector A or* RGB through scart connector A
• Audio/video input signal through scart connector B or* S-video through scart connector B
2
3
• Audio/video input signal through scart connector C or* S-video through scart connector C
4
• S-video input signal through the 4-pin DIN connector F or* video input signal through phono jack
G and audio input signal through phono jacks H
* automatic detection of the signal according to the connected equipment
3. Switch on the connected equipment. The picture from this equipment (if any are available) will appear on the TV screen.
4. Press to return to the normal TV screen.
Note: To avoid picture distortion, do not connect equipment to the F and G sockets at the same time
Connecting Headphones
Plug in your headphones to the socket E on the front of the TV set.
Connecting Hi-fi Equipment
Plug in your external audio equipment to the output sockets D on the rear of the TV set.
20

Additional Equipment
Additional information when connecting equipment
* If the picture or sound is distorted, move the VCR away from the TV set.
* When connecting a monaural VCR, connect only the white jack to both the TV set and the VCR.
* For information on how to select the output signal of the scart 2 / , see page 14.
2
s
2
* When connecting external hi-fi equipment, you can adjust the volume level by adjusting the headphones setting in the
sound menu - please refer to the ‘Adjusting the picture and sound’ section of this manual.
Smartlink
Smartlink is a direct link between your TV and VCR.
For Smartlink you need:
* A VCR which supports Smartlink, NexTView Link, Easy Link or Megalogic.
* A fully-wired 21-pin scart cable to connect your VCR to scart 2 / connector.
2
s
2
The features of Smartlink are:
* Tuning information such as the channel overview are downloaded from the TV set to the VCR.
* With NexTView you can programme your VCR easily.
* Direct TV recording: while watching TV you need to press just one button on the VCR to record this programme.
For more information on Smartlink please refer to your VCR instruction manual.
Remote control of other Sony equipment
Using the buttons underneath the cover of the remote control you can control other Sony equipment.
1. Open the cover of the remote control.
2. Set the selector VTR 1234 DVD according to the equipment you want to control:
VTR1 Beta VCR
VTR2 8mm VCR
VTR3 VHS VCR
VTR4 Digital Video (DCR-VX 1000/9000E,VHR-1000)
DVD Digital Video Disk
3. Use the buttons on the remote control to operate the equipment.
* If your equipment has a COMMAND MODE selector, set this selector to the same position as the VTR 1234 DVD
selector on the TV remote control.
* If the equipment does not have a certain function, the corresponding button on the remote control does not work.
21
Additional Information
Specifications
TV system
Sound output
B/G/H, D/K
Left/Right: 2x20W (Music Power)
2x10W (RMS)
Colour system
Sub woofer: 30W (Music Power)
PAL, SECAM
15W (RMS)
NTSC 3.58, 4.43 (only Video In)
Power consumption
Channel coverage
158W
See the ‘Channel Display Table’ below.
Dimensions (wxhxd)
Picture tube
Approx. 765x635x570mm
FD Trinitron, Approx. 72cm (29 inches)
Weight
Rear Terminals
Approx. 59kg
1
/ 21-pin Euro connector (CENELEC standard) including audio/
1
video input, RGB input, TV audio/video output.
Accessories supplied
2
/ 21-pin Euro connector (CENELEC standard) including audio/
s
2
RM-893 remote control (1)
video input, S-video input, Selectable audio/video output.
IEC designated size AA batteries (2)
3
/ 21-pin Euro connector (CENELEC standard) including audio/
s
3
video input, S-video input, Monitor audio/video output.
Optional accessory
L/G/S/I RCA connectors, variable output for audio signals.
TV Stand: SU-29FQ1
R/D/D/D
Other features
Flat display Trinitron tube, noise reduction, graphic equaliser,
RF In
2000 page TEXT memory, personal ID, sleep timer,
NexTView.
Front Terminals
4
Video input -phono jacks
Design and specifications are subject to change
4
Audio inputs - phono jacks
without notice.
s
4
S video input - 4 pin DIN
Headphones jack - minijack stereo
Channel Display Table
Receivable Channels Channel Displays
B/G/H E2..12, 21..69 C02..C12, C21..69
KABEL-TV (1) S1..S41 S01..S41
KABEL-TV (2) S01..S05 S42..S46
M1..M10 S01..S10
U1..U10 S11.S20
ITALIEN A, B..H, H1, H2 C13, C14..C20, C11, C12
D/K R01..R12, R21..R69 C01..C12, C21..C69
S01..S05 S42..S46
22
Additional Information
Troubleshooting
Here are some simple solutions to problems which may affect the picture and sound.
Problem Suggested remedy
No picture (screen is dark), no sound. • Plug the TV in.
• Press the button on the front of the TV.
• If the indicator is on press the button or a numbered
/
button on the remote control.
• Check the aerial connection.
• Turn the TV off for 3 or 4 seconds and then turn it on again
using the button on the front of the TV.
Poor or no picture (screen is dark), but
• Using the MENU system, select the Picture Adjustment
good sound.
display. Adjust the brightness, picture and colour balance
levels.
• From the Picture Adjustment display select RESET to return
to the factory settings.
Good picture, no sound.
• Press the button on the remote control.
• If is displayed on the screen, press the button on the
remote control.
No colour on colour programmes. • Using the MENU system, select the Picture Adjustment
display and adjust the colour setting.
• From the Picture Adjustment display select RESET to return
to the factory settings.
Distorted picture when changing
• Turn off any equipment connected to the scart connectors on
programmes or selecting Teletext.
the rear of the TV.
Remote control does not function. • Replace the batteries.
• Contact your nearest Sony service centre.
The standby indicator on the TV
flashes.
Interference on picture from external
• Reduce sharpness level.
equipment.
• If you continue to have these problems, have your TV serviced by qualified personnel.
• NEVER open the casing yourself.
23
24

PL

Informacje dotyczące bezpieczeństwa
Bezpieczeństwo
W telewizorach są wykorzystywane bardzo wysokie napięcia. Aby uniknąć ryzyka pożaru lub porażenia prądem, należy
stosować się do podanych niżej zasad bezpieczeństwa.
Ogólne bezpieczeństwo
• Nie wystawiać telewizora na deszcz ani wilgoć.
• Nie zdejmować tylnej obudowy.
• Dla własnego bezpieczeństwa, wszystkie naprawy zlecać wykwalifikowanym osobom.
Bezpieczeństwo instalacji
• Nie instalować telewizora z miejscach gorących, wilgotnych lub nadmiernie
zapylonych.
• Nie blokować ani nie zakrywać otworów wentylacyjnych. Dla zapewnienia wentylacji
pozostawić ze wszystkich stron telewizorach po 10 cm wolnego miejsca.
• Nie instalować telewizora w miejscach narażonych na wibracje mechaniczne.
• Stawiać telewizor tylko na stabilnej podstawie, która nadaje się do podtrzymywania
telewizora o takich wymiarach i wadze.
Bezpieczeństwo obsługi
• Do zasilania telewizora używać wyłącznie napięcia przemiennego 220-240 V, 50 Hz.
• Jeśli przez otwory wentylacyjne wpadnie jakiś przedmiot lub wleje się płyn, nie
używać telewizora. Natychmiast zlecić jego kontrolę.
• Ze względu na ochronę środowiska i bezpieczeństwo zaleca się, by nie pozostawiać
nieużywanego telewizora w trybie czuwania, ale go wyłączać wyłącznikiem sieciowym.
• Przy wyłączaniu telewizora z gniazdka sieciowego nie ciągnąć za przewód. Zawsze
chwytać za wtyczkę.
• W przypadku burzy należy wyłączyć telewizor z sieci i odłączyć antenę. W przeciwnym
razie telewizor może zostać uszkodzony po uderzeniu pioruna.
Konserwacja
• Czyścić ekran miękką, wilgotną ciereczką. Nie używać żadnych środków do
szorowania.
• Osady z kurzu i nikotyny mogą powodować nagrzewanie się wnętrza telewizora. Na
dłuższą metę może to stanowić czynnik ryzyka i skrócić okres eksploatacji telewizora.
Z tego względu co pięć lat należy zlecać kontrolę serwisową telewizora.

Informacje dotyczące bezpieczeństwa
Informacje dotyczące bezpieczeństwa
Wszystkie odbiorniki telewizyjne pracują z wykorzystaniem bardzo wysokich napięć. Aby uniknąć pożaru lub
porażenia prądem, należy przestrzegać zasad bezpieczeństwa, podanych na załączonym niebieskim arkuszu.
Stojak pod telewizor musi być zawsze odpowiednio stabilny i wytrzymały, aby utrzyma duży i ciężki telewizor. Dla
unikatowej konstrukcji tego telewizora firma Sony zaleca używanie specjalnie zaprojektowanego stojaka SU-29FQ1.W
przypadku stosowania innego rozwiązania (stojaka czy szafki) należy też zapewnić odpowiednio dużą powierzchnię
podstawy, aby wszystkie trzy nóżki telewizora mia y stabilne oparcie i były umiejscowione wystarczająco daleko od
krawędzi podstawy.
Spis Treści
Spis Treści
Instalowanie
1. Sprawdzanie załączonych akcesoriów
2
2. Wkładanie baterii do pilota
2
3. Podłączanie telewizora
3
4. Włączanie telewizora
4
5. Używanie przycisku sterującego
4
6. Programowanie telewizora
5
7. Znajdywanie kanału wideo
5
Obsługa
Przegląd przycisków telewizora
6
Przegląd przycisków pilota
7
NexTView
8
Telegazeta
10
Posługiwanie się systemem menu telewizora
12
Regulacja obrazu
12
Regulacja dźwięku
13
Używanie menu Funkcje
14
Zamiana pozycji programów
15
Ręczne programowanie telewizora
15
Nadawanie nazw programom
16
Pomijanie pozycji programów
16
Posługiwanie się menu "Dalsze nastawianie"
17
Regulacja obrotu obrazu
18
Regulacja geometrii obrazu dla sygnału RGB
18
Wprowadzanie identyfikatora osobistego
19
Regulacja i nadawanie nazw sygnałom wej
ściowym
19
Dodatkowy osprzęt
Podłączanie urządzeń dodatkowych
20
Informacje dodatkowe dotyczące podłączania urządzeń
21
Smartlink
21
Zdalne sterowanie innym sprzętem Sony
21
Informacje dodatkowe
Dane techniczne
22
Tabela kanałów
22
Problemy i ich usuwanie
23
1
Оглавление
- KV-29FQ65 K
- Installation Follow steps 1-7 to install the TV and view TV programmes.
- Operation
- Instalowanie Wykonaj czynności 1-7, aby dokonać instalacji telewizora i zacząć oglądać programy.
- Obsługa
- Instalace
- Obsluha
- Üzembe helyezés Kövesse az 1-7. lépéseket a TV-készülék üzembe helyezéséhez és a TV-programok megtekintéséhez.
- Használat
- Използване
- Установка


