Sony KV-29FQ65K: Installation Follow steps 1-7 to install the TV and view TV programmes.
Installation Follow steps 1-7 to install the TV and view TV programmes.: Sony KV-29FQ65K
Installation
Follow steps 1-7 to install the TV and
view TV programmes.
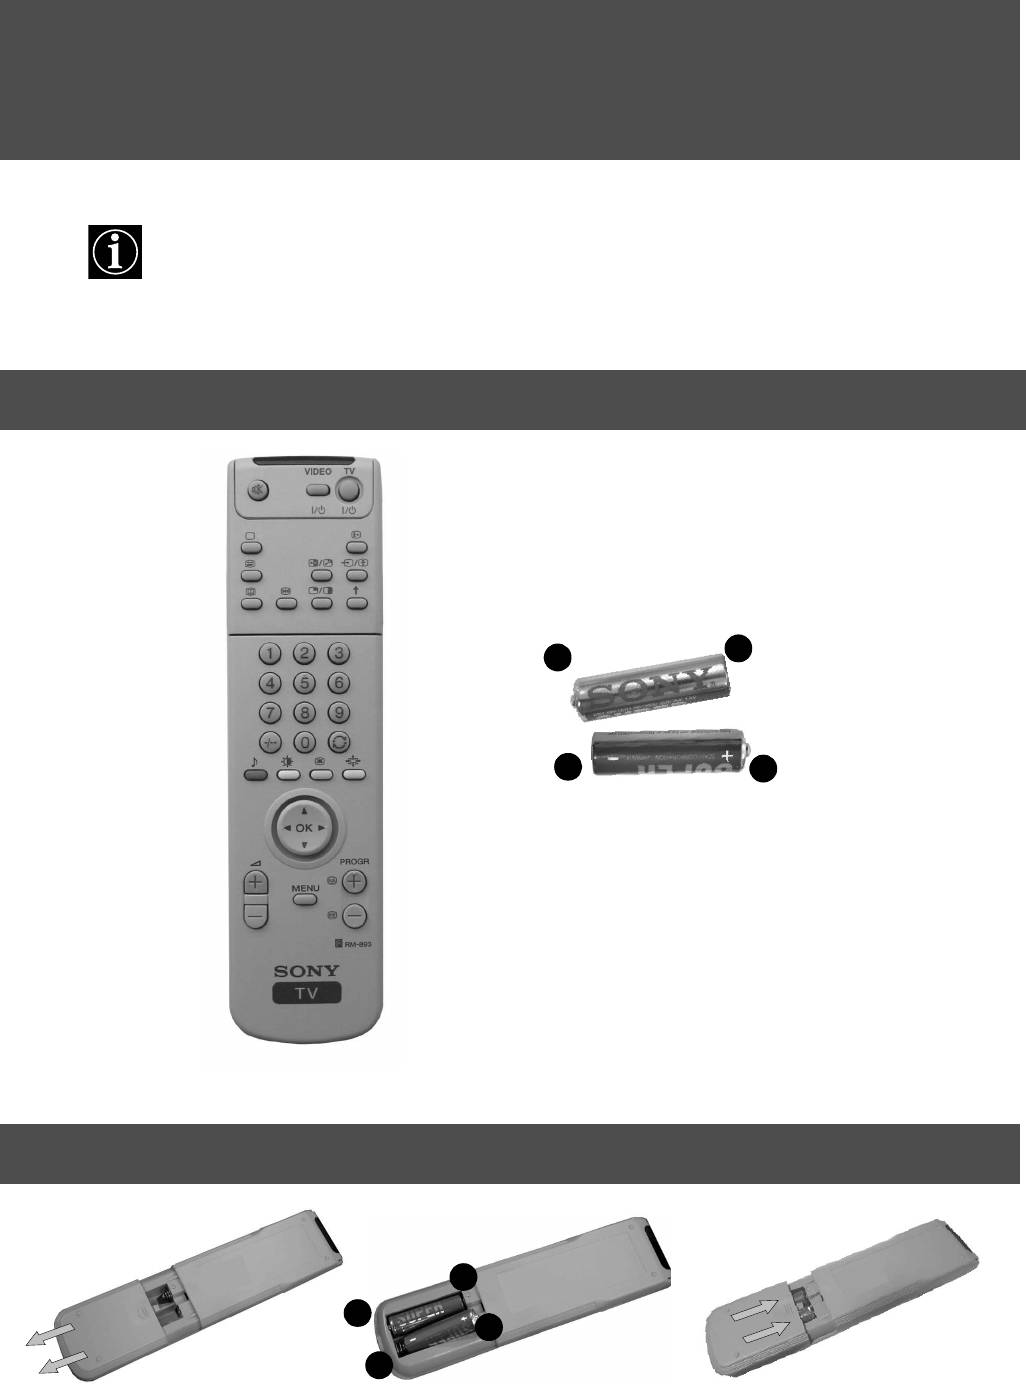
1. Checking the accessories supplied
+
-
-
+
Batteries
Remote control
2. Inserting batteries into the remote control
-
+
+
-
Always observe the correct polarity when inserting batteries.
Always remember to dispose of used batteries in an environmentally friendly way.
2
Installation
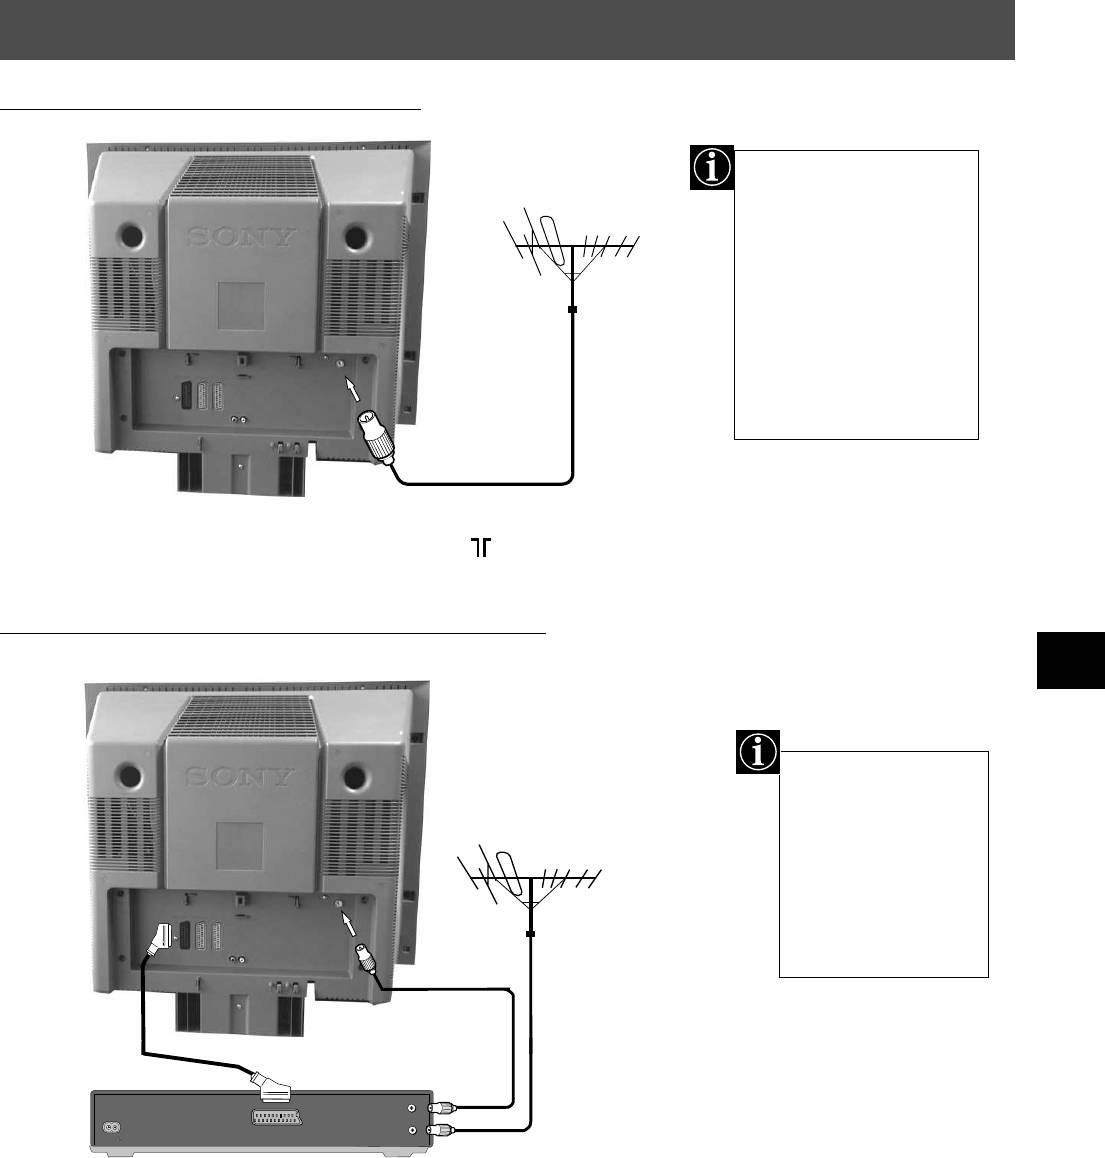
3. Connecting the TV
Connecting an aerial to your TV
If you are not connecting
your TV to a VCR,
please connect the aerial
lead (as shown left) and
proceed to section
‘4.Switching on the TV’.
If you are connecting
your TV to a VCR please
refer to the section
below.
1. Connect your existing aerial lead to the socket marked on the rear of the TV set.
Connecting an aerial and VCR to your TV
The scart lead is
optional. If it can be
used however, this
additional
connection can
improve picture and
sound quality when
in play mode.
existing aerial lead
scart lead
(not supplied)
OUT
IN
AC IN
AERIAL
ANTENNA
1. Connect your existing aerial lead to your VCR as shown.
2. Connect the VCR aerial lead from the RF OUT socket on the back of the VCR to the aerial
socket on the back of the TV as shown.
3. Connect the scart lead (if used) to the AV2 socket on the rear of the TV set.
4. Connect the VCR set to the mains and switch on.
5. Insert a pre-recorded tape into the VCR and press the ‘PLAY’ button. This enables the TV
set to locate and store the video channel during the ‘Tuning your TV’ procedure on page 5.
3
Installation
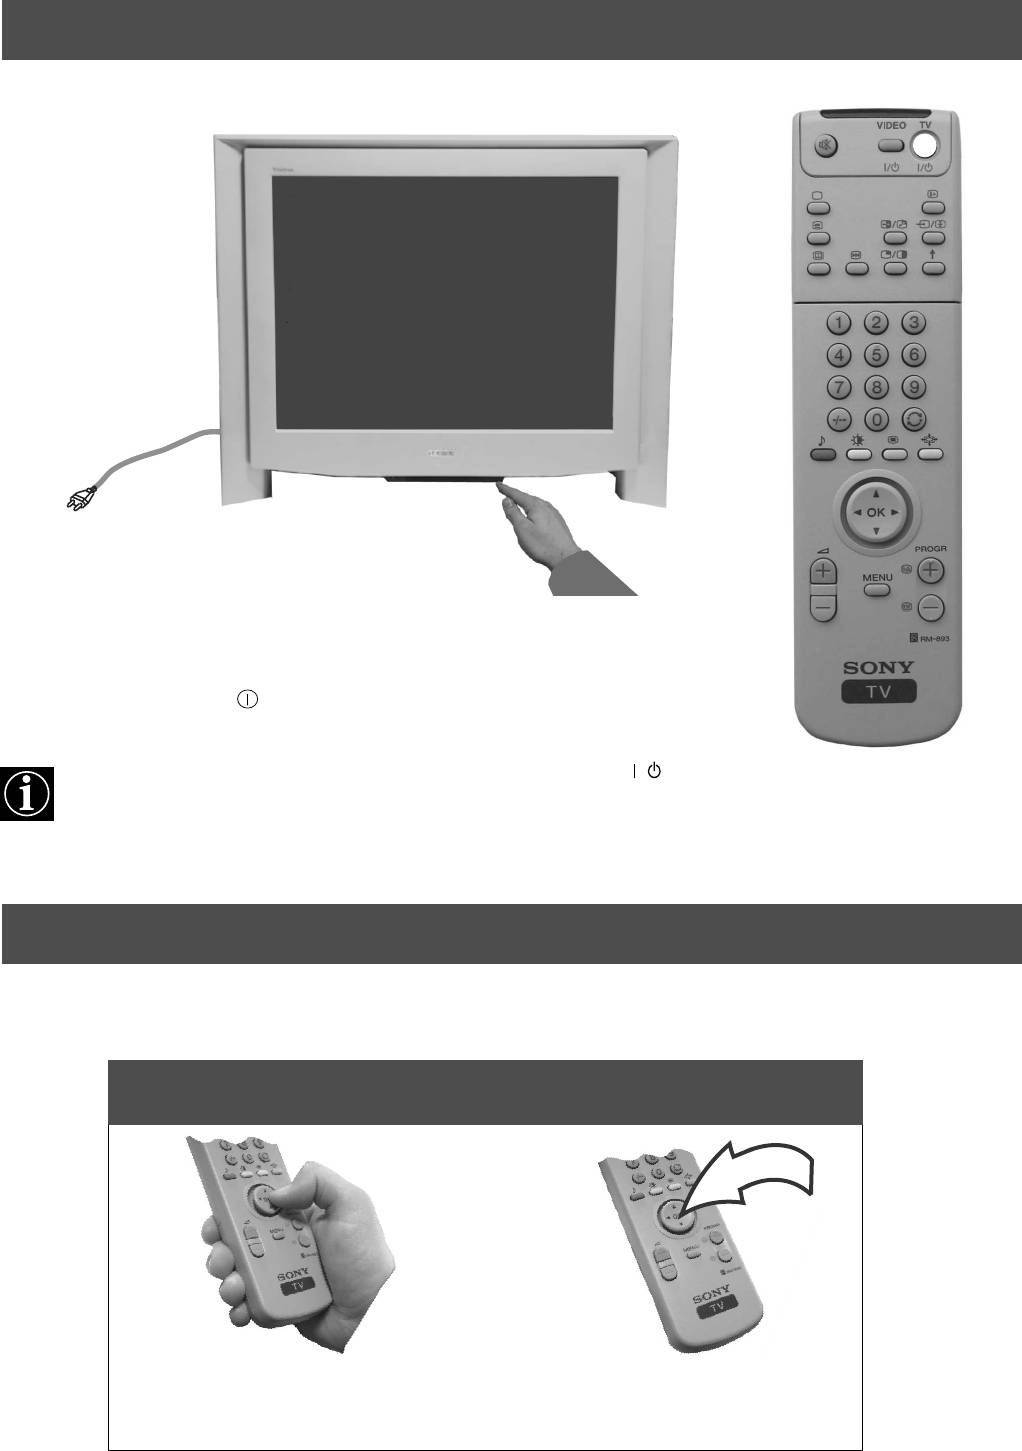
4. Switching on the TV
1. Connect the TV plug to the mains socket (220-240V AC, 50Hz).
2. Push in the on/off button on the front of the TV.
If the standby mode indicator on the front of the TV is lit, press the TV button on
/
the remote control to switch on the TV set. Please be patient as the picture may take a
few moments to appear on the TV screen.
5. Using the joystick
Moving the joystick Pressing the joystick
To move around the menus press
To select an item in a menu press
the relevant arrow button.
the OK button down in the middle.
4
Installation
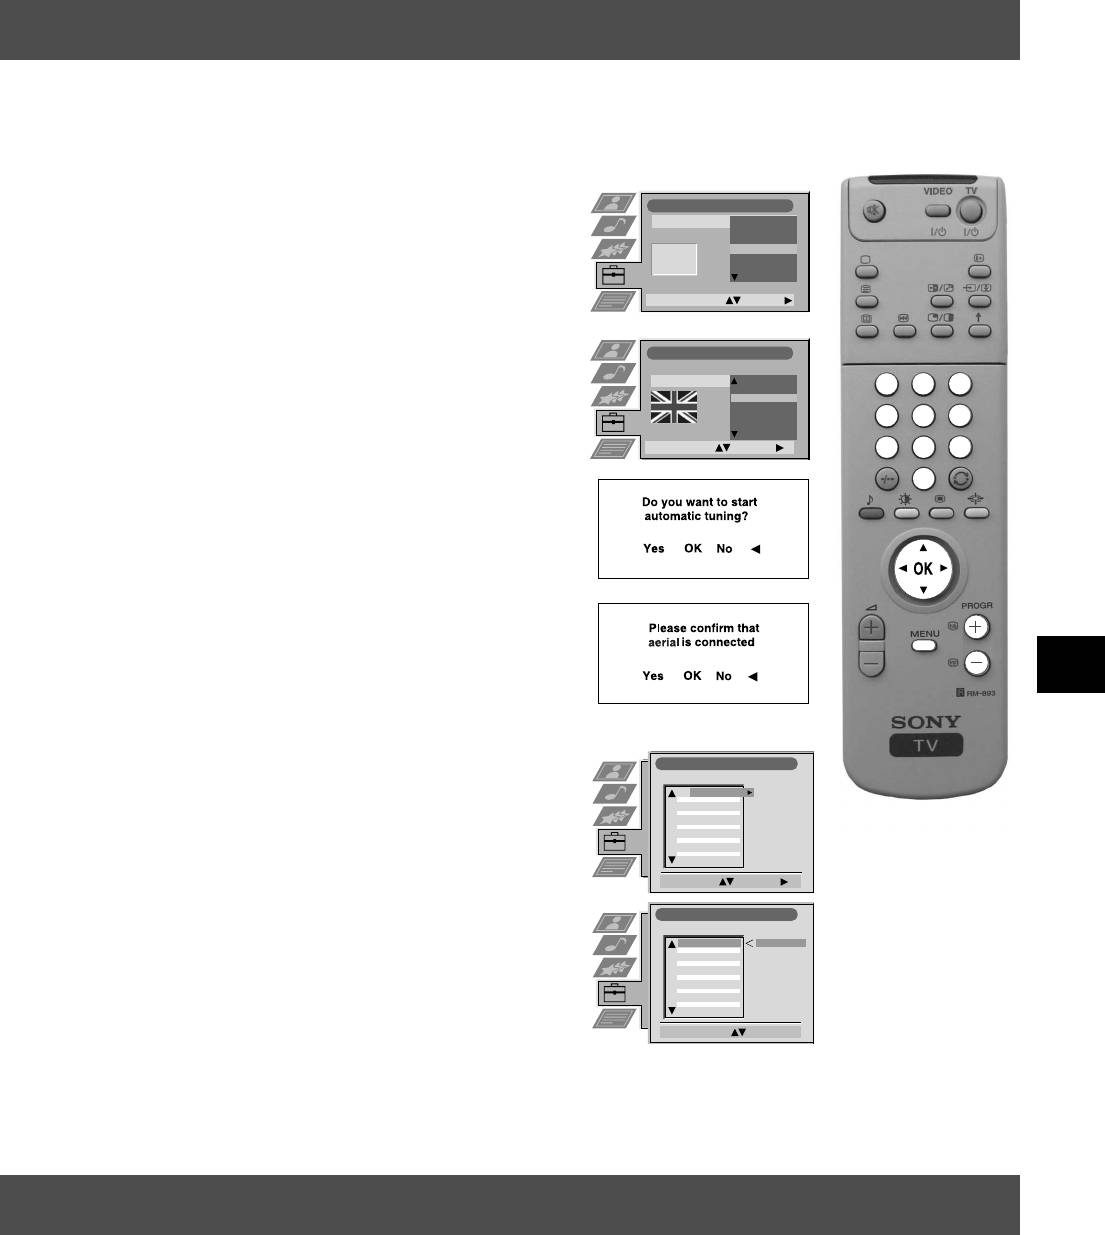
6. Tuning your TV
Before you tune your TV, you will be asked to set your language and country.
1. The Language/Country menu appears on the TV screen with the
word ‘English’ highlighted.
Language/Country
Language
Čeština
Country
Dansk
Deutsch
2. Press the v or V buttons on the remote control to select your
English
Español
Français
chosen language then press the OK button to confirm. The
Italiano
country menu appears on screen with the word ‘OFF’ highlighted.
Select Language: Confirm:
Select ‘OFF’ if you do not want your channels stored in a given
channel sequence starting from programme position 1.
Language/Country
Language
English
Country
France
Germany
1
2
3
3. Press v or V to select the country in which you wish to operate
Great Britain
Greece
the TV then press the OK button to confirm your choice.
Hungary
4
5
6
Ireland
Italy
Select Country: Confirm:
7 8
9
4. The ‘autotune’ menu appears on the TV screen in your selected
0
language. Press the OK button to confirm.
:
:
5. Ensure the aerial is connected as instructed, then press the OK
button to confirm. The TV starts to automatically search and store
all available channels for you. This may take a few minutes -
please be patient and do not press any buttons.
:
:
6. Once the TV has tuned all available channels the ‘Programme
Sorting’ menu appears on the TV screen enabling you to change
the order of the channels on your TV. If you wish to change the
channel order, press the v or V buttons to select the channel you
Programme Sorting
want to move, then press B. Press the v or V buttons to select the
PROG CH LABEL
1
C03
TV 5
new programme number position for your selected channel then
2
C05
PRO 7
3
C07
EU-SP
4
C08
SWF
5
C09
RTL
press the OK button to confirm. The selected channel now moves
6
C11
SAT
7
C12
MDR
8
C13
DDI
9
C14
DSF
to its new programme position and the other channels move
10
C15
RTL 2
11
C16
KAB 1
accordingly. Repeat this procedure if you wish to sort the order of
Select Prog: Confirm:
other channels on your TV.
Programme Sorting
PROG CH LABEL
1
C03
TV 5
C03 TV 5
7. Press the MENU button to remove the menu from the TV screen.
2
C05
PRO 7
3
C07
EU-SP
4
C08
SWF
5
C09
RTL
6
C11
SAT
7
C12
MDR
8
C13
DDI
8. Press the PROGR+/- or the numbered buttons to view the TV
9
C14
DSF
10
C15
RTL 2
11
C16
KAB 1
channels.
Select Position: Move: OK
Note: If you would like to stop the autotune process at any stage,
press the OK button.
7. Finding your video channel
If you have connected a VCR to your TV, you now need to find your video channel.
1. Press the PROGR+/- buttons on the TV remote control until your video picture appears on the TV screen.
Note: If you wish to move your video channel to a different programme position, refer to the ‘Re-arranging the TV channels’
section of this instruction manual.
5
Оглавление
- KV-29FQ65 K
- Installation Follow steps 1-7 to install the TV and view TV programmes.
- Operation
- Instalowanie Wykonaj czynności 1-7, aby dokonać instalacji telewizora i zacząć oglądać programy.
- Obsługa
- Instalace
- Obsluha
- Üzembe helyezés Kövesse az 1-7. lépéseket a TV-készülék üzembe helyezéséhez és a TV-programok megtekintéséhez.
- Használat
- Използване
- Установка


