Sony KP-41S5R: Operating Instructions
Operating Instructions: Sony KP-41S5R
Operating Instructions
Watching the TV
This section explains the basic functions you use while watching
3VTR 1
MDP2
TV
the TV. Most operations are done using the Remote Commander.
¤
VIDEO
0
( u)
Switching the TV on and off
p Pr
+
˚
;
+
REC
CH
_
Switching on
…/
Ú/;
?
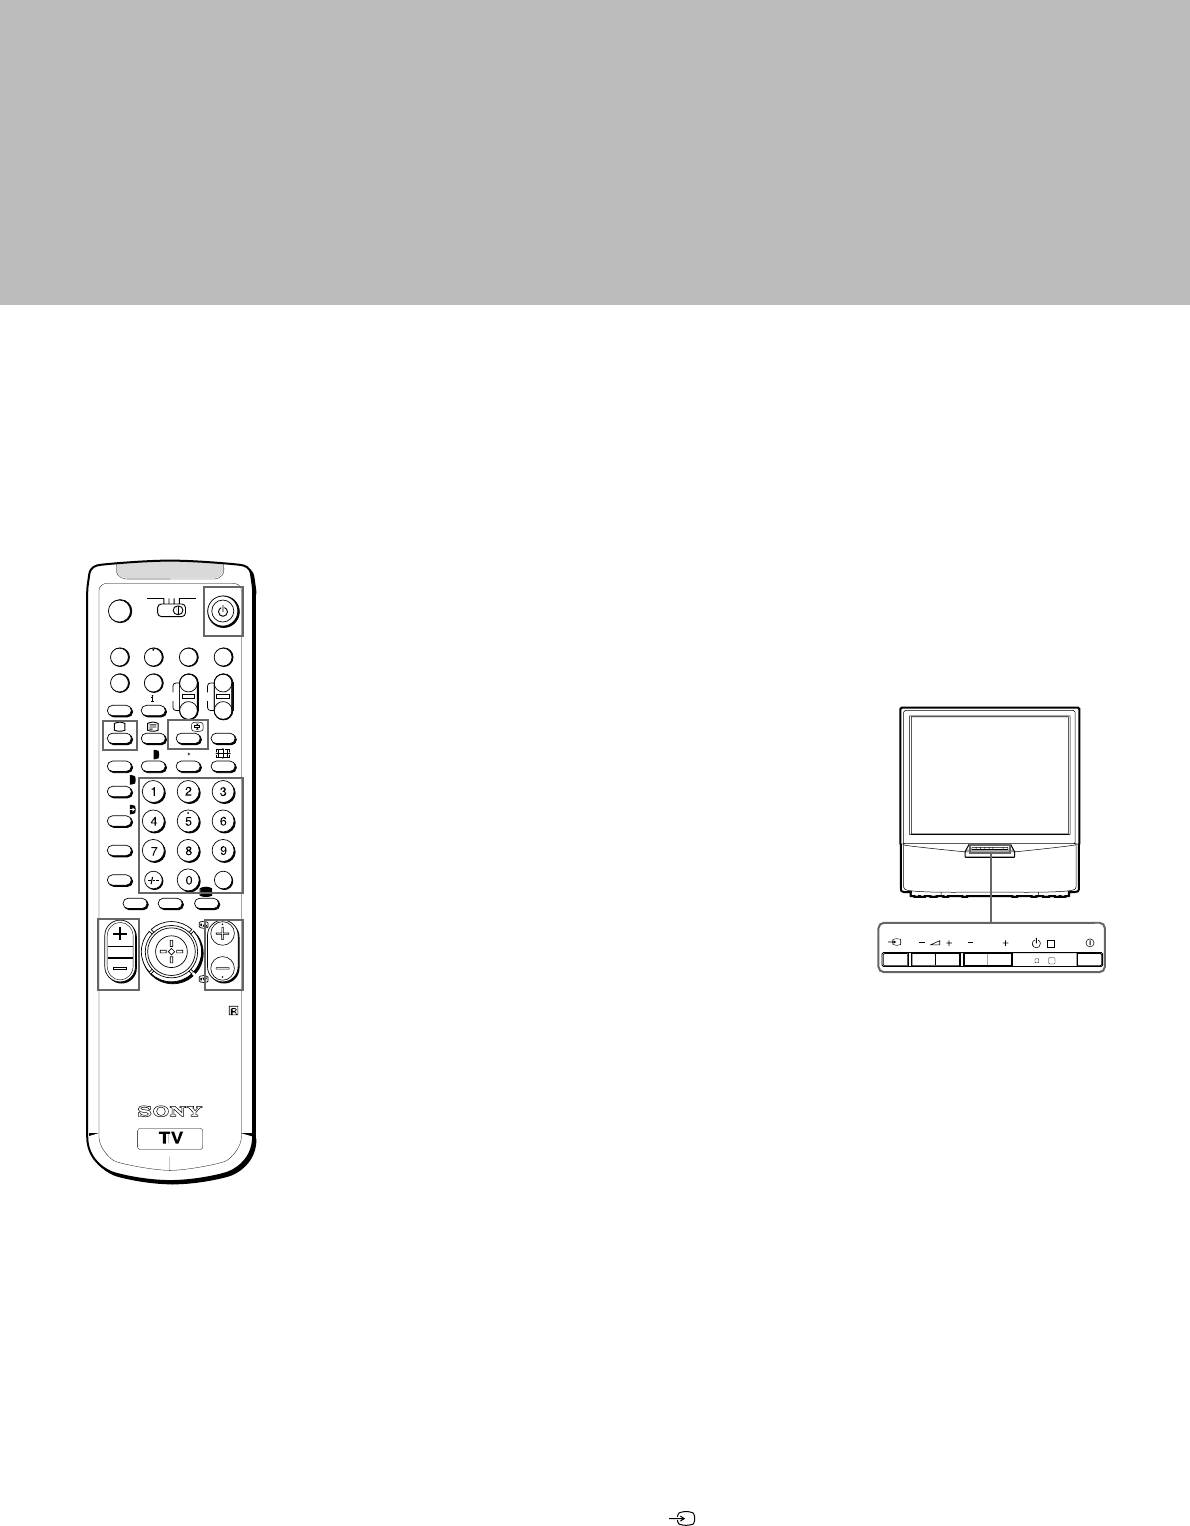
Press U on the TV.
;
8
´
8
x
Switching off temporarily
´/´
Press u on the Remote Commander.
a/Å
The TV enters standby mode and the standby indicator on the front
A
of the TV lights up in red.
b
To switch on again
c
≥
MENU
Press O, PROGR +/–, or one of the number buttons on the
¸
PROGR
Remote Commander.
Switching off completely
Press U on the TV.
RM-862
To save energy, we recommend you switch off your TV completely
when the TV is not in use.
Selecting TV Programmes
Press PROGR +/– or press the number buttons.
To select a double-digit number
Press ÷, then the numbers.
For example, if you want to choose 23, press ÷, 2 and 3.
If no picture appears
when you press U on
the TV and if the
standby indicator on
Adjusting the Volume
the TV is lit, the TV is in
standby mode.
Press ¸ +/–.
Press O, PROGR+/– or
one of the number
buttons to switch it on.
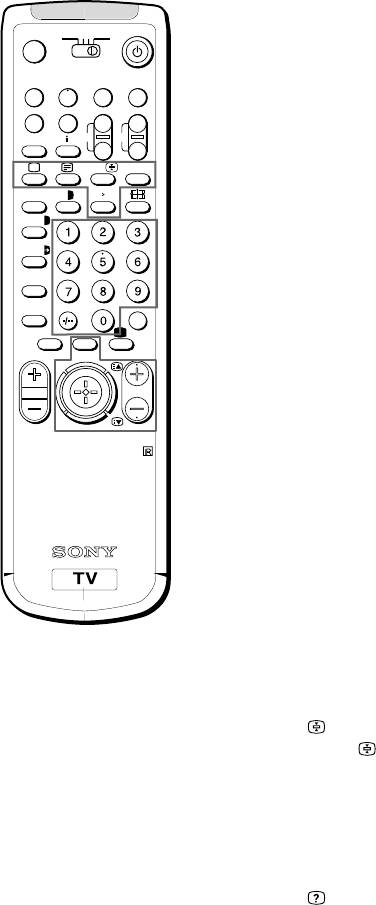
Operating the TV Using the
Buttons on the TV
To select the programme number, press the PROGR +/– buttons.
To adjust the volume, press the ¸ +/– buttons.
To select the video input picture, press the button.
14
PROGR
R
Watching Teletext or Video Input
Watching teletext
GB
1 Press _ to view the teletext.
2 For teletext operation, enter a 3-digit page number with the number
buttons to select a page.
For fastext operation, push the joystick to the colour mark which
For details of the teletext
corresponds to the colour-coded menu.
operation, refer to
For both operations, press R (PAGE + ) for the next page or
page 18.
S (PAGE – ) for the preceding page.
For details of the video
3 To go back to the normal TV picture, press O .
input picture, refer to
page 21.
Watching a video input picture
1 Press repeatedly until the desired video input appears.
2 To go back to the normal TV picture, press O.
3VTR 1
MDP2
TV
¤
More Convenient Functions
VIDEO
0
( u)
p Pr
+
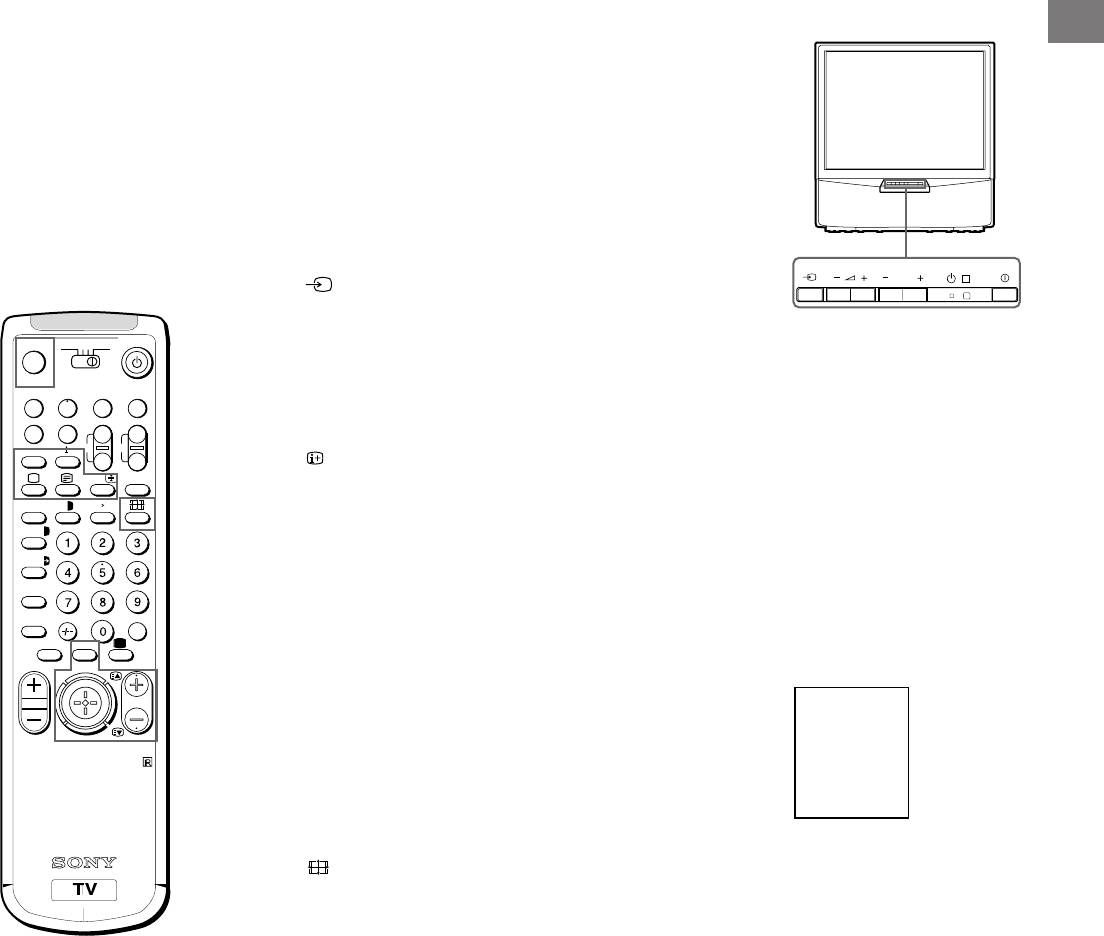
Displaying the on screen indications
REC
˚
;
+
CH
_
Press to display the indications.
…/
Ú/;
?
Press again to make the indications disappear.
;
8
´
8
x
Muting the sound
´/´
Press o.
a/Å
To resume normal sound, press o again.
A
b
Displaying the time
c
≥
MENU
Press #. This function is available only when teletext is broadcast.
¸
PROGR
To make the time display disappear, press # again.
Displaying the Programme Table
Press the joystick. Push the joystick to blue or green to select a
programme, then press the joystick to confirm. A Programme
RM-862
Table will be displayed on the left side of the TV screen.
To make the Programme Table disappear, press MENU.
Viewing the programmes in 16:9 mode
Press .
Press again to return to 4:3 mode.
15
PROGR
R
1
BBC
2
SAT
3
TV5
4
C02
5
C15
6
RTL
7
SKY
8
S34
9
AV1
10
MTV
Adjusting and Setting the TV Using
the Menu
PICTURE
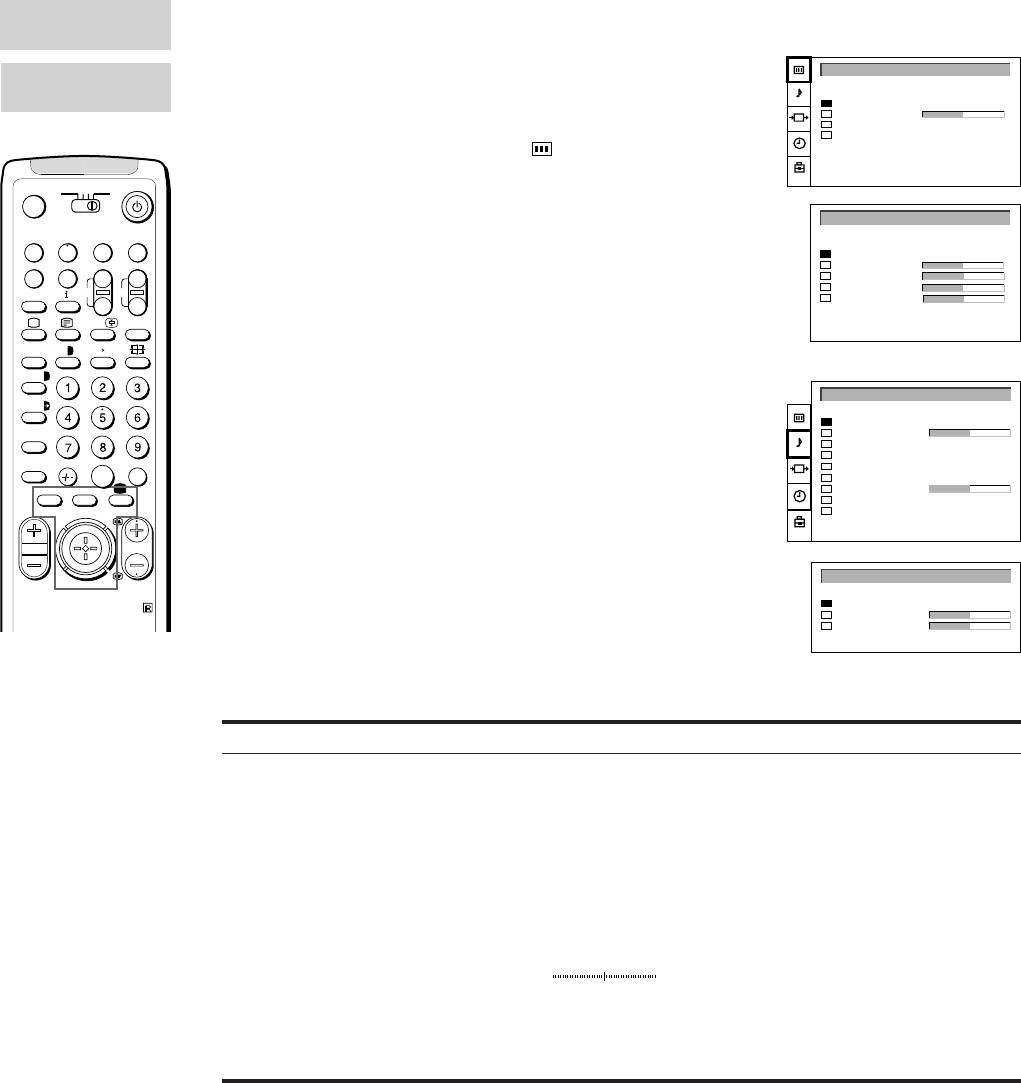
Adjusting the Picture and Sound
CONTROL
Although the picture and sound are adjusted at the factory, you can
PICTURE CONTROL
SOUND
adjust them to suit your own taste. You can also select dual sound
CONTROL
(bilingual) programmes when available or adjust the sound for
Picture Mode
- - >
Contrast
listening with the headphones.
Reset
Format
4:3
1 Press MENU and select the symbol
for Picture Control or ≥ for
Sound Control. Push to yellow to confirm.
3VTR 1
MDP2
TV
The PICTURE CONTROL or SOUND CONTROL menu appears.
¤
PICTURE MODE
2 Push the joystick to blue or green to select the desired item. Push
VIDEO
0
( u)
to yellow to confirm.
Picture Mode
User
Brightness
The selected item changes its colour.
p Pr
+
Colour
˚
;
+
REC
CH
Sharpness
_
3 Push to red or yellow to adjust the selected item. Press the joystick
Hue
…/
Ú/;
?
to confirm.
For the effect of each control, see the table below.
;
8
´
8
x
´/´
4 Repeat steps 2 and 3 to adjust other items.
SOUND CONTROL
a/Å
5 Press MENU to restore the normal TV picture.
Sound Mode
- - > User
A
Balance
Reset
Spatial
Off
b
Dual Sound
Stereo
c
Volume Offset
0
≥
MENU
2 Volume
2 Dual Sound
Stereo
¸
PROGR
Speaker
Centre in
SOUND MODE
RM-862
Mode
User
Treble
Bass
Effect of each control
PICTURE CONTROL
Effect
Note
Picture Mode
User ˜ Game ˜ Movie ˜ Sports ˜ Live
HUE is available for
NTSC colour systems
When “User” is selected in “Picture Mode”
only.
You can preset Brightness, Colour, Sharpness and Hue (NTSC
Note on LINE OUT
signals only) as follows:
The dual sound mode
1 Push the joystick to blue or green to select the desired item. Push
output from the > jack
to yellow to confirm.
on the rear corresponds
2 Push to red or yellow to adjust. Press the joystick to confirm.
to the Headphones Dual
3 Push to red to return to the PICTURE CONTROL menu.
Sound settings.
Contrast
Less
More
When watching a video
Reset
Resets picture to the factory preset levels.
input source with
stereo sound
Format
4:3: normal
You can select Dual
16:9: wide screen effect
Sound to change the
sound.
16
SOUND CONTROL
Effect
Sound Mode
Choice between different sound effects
User ˜ Rock ˜ Jazz ˜ Pop
GB
↑
↑
When “User” is selected in “Sound Mode”
You can preset Treble and Bass as follows:
1 Push the joystick to blue or green to select the desired item. Push
to yellow to confirm.
2 Push to red or yellow to adjust. Press the joystick to confirm.
3 Push to red to return to the PICTURE CONTROL menu.
Balance
More left
More right
Reset
Resets sound to the factory preset levels.
Spatial
Off: normal
On: acoustic sound effect
Dual Sound
A: channel 1 B: channel 2 Stereo n Mono
Volume Offset
Presets the volume level for individual programmes.
–12
12
2 Volume
Less
More
2 Dual Sound
A: channel 1 n B: channel 2
Stereo n Mono
Speaker
Main: sound from TV set
Centre in: sound from external amplifier
Changing Modes Quickly
You can quickly change the Sound Mode or the Picture Mode
without entering the “SOUND CONTROL“ or the “PICTURE
CONTROL“ menu.
1 Press Í for the picture or ≥ for the sound.
2 Push joystick to blue or green to select the desired mode.
3 Press Í or ≥ again to restore the normal TV screen.
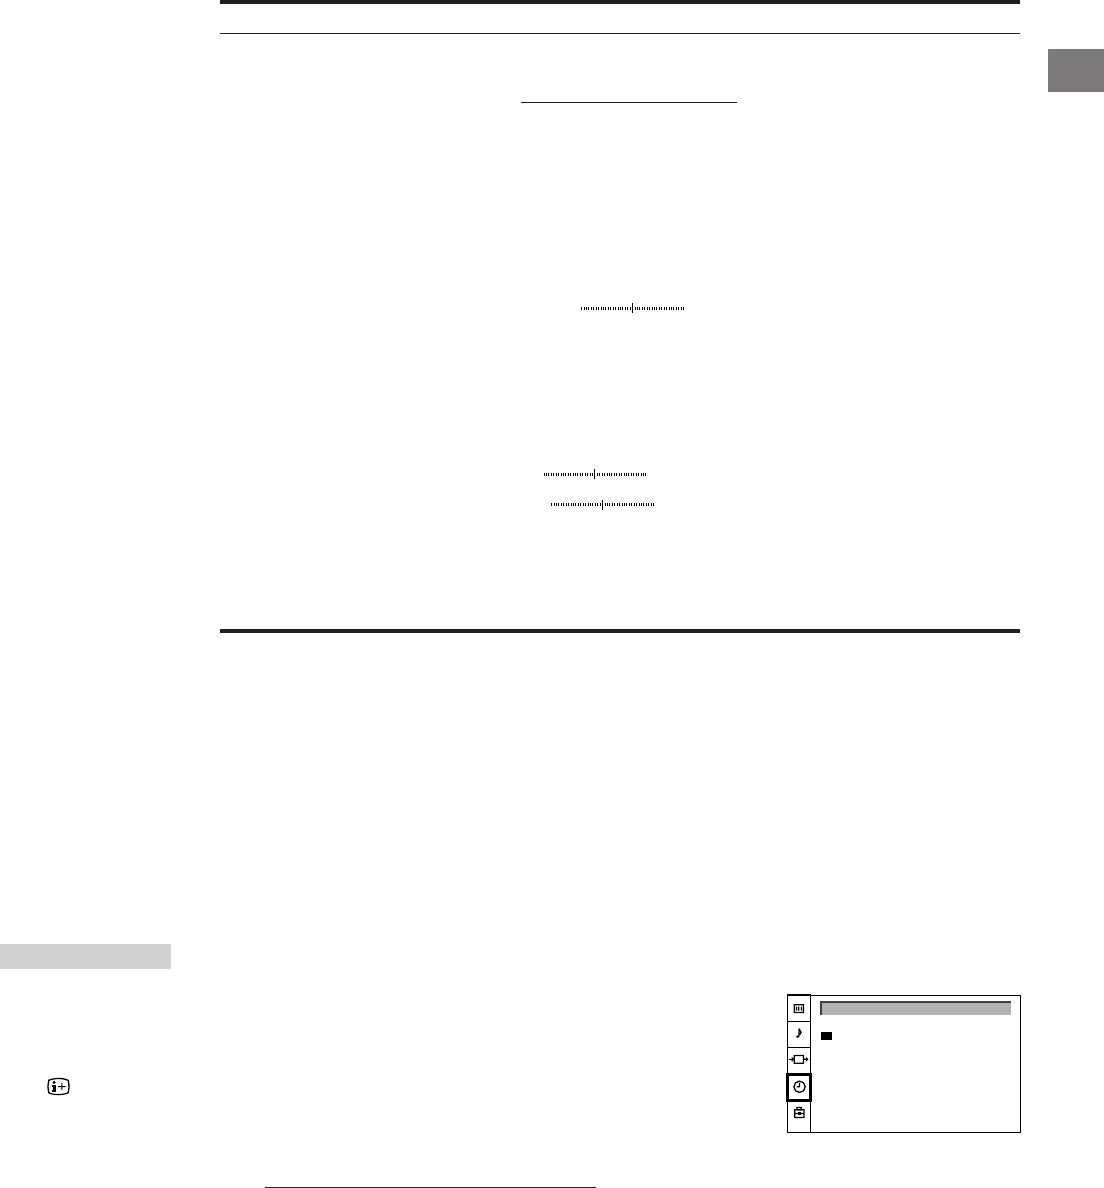
TIMER
Using the Sleep Timer
To switch off the timer
You can select a time period after which the TV automatically
Select “OFF” in step 3.
TIMER
switches into standby mode.
Sleep Timer OFF
To check the
1 Press MENU.
remaining time
2 Push the joystick to blue or green to select the symbol t on the
Press .
menu screen. Push to yellow to confirm.
To go back to the
3 Push to yellow. Push to red or yellow to set time delay.
normal TV picture
Press MENU.
OFF˜0:30˜1:00˜1:30..........3:30˜4:00
↑
↑
4 Press the joystick to confirm.
One minute before the TV switches into standby mode, a message
is displayed on the screen.
17
Teletext
TV stations broadcast an information service called Teletext via
3VTR 1
MDP2
TV
the TV channels.Teletext service allows you to receive various
¤
information pages such as weather reports or news at any time
VIDEO
you want.
0
( u)
p Pr
+
˚
;
+
REC
CH
_
Direct Access Functions
…/
Ú/;
?
;
8
´
8
x
Switching Teletext on and off
´/´
1 Select the TV channel which carries the teletext broadcast you
want to watch.
a/Å
2 Press _ to switch on teletext.
A
A teletext page will be displayed (usually the index page).
b
c
If there is no teletext broadcast, the indication “No Text” is
≥
MENU
displayed on a black screen.
¸
PROGR
3 Input three digits for the page number using the number buttons.
If you have made a mistake, type in any three digits. Then re-enter
the correct page number.
4 Press ; to return to the normal TV picture.
RM-862
Accessing next or preceding page
Press R (PAGE+) or S (PAGE–).
The next or preceding page appears.
Superimposing the teletext display on the TV programme
• Press f once to get Teletext only.
• Press f twice for Mix mode.
The normal TV screen and the Teletext screen are overlapped.
• Press f again to resume normal teletext reception.
Note
Teletext errors may
Preventing a teletext page from being updated
occur if the broadcasting
• Press .
signals are weak.
The symbol “
” is displayed on the information line.
Press again to cancel.
Revealing hidden information (e.g. for a quiz)
Sometimes pages contain concealed information, such as
answers to a quiz. The reveal option lets you disclose the
information.
Press
. Press again to cancel.
18

Favourite page system
You can store up to four of your favourite teletext pages per
Teletext service. In this way you have quick access to the pages
GB
you frequently use.
Storing pages
1 Use the number buttons to select the page you would like to store.
2 Press
twice.
The colour prompts at the bottom of the screen flash.
3 Push the joystick to the desired colour to store the selected page.
The page is now stored on this colour.
Repeat steps 1 to 3 for the other 3 pages.
Displaying the favourite pages
1 Press
.
2 Push the joystick to the colour on which the desired page is stored.
Make sure you press
, otherwise the normal Fastext facility
operates.
Using Fastext
Note
With Fastext you can access pages with one key stroke.
Fastext operation is
When a Fastext page is broadcast, a colour-coded menu will
possible, only when the
appear at the bottom of the screen. The colours of this menu
TV station broadcasts
correspond to the red, green, yellow and blue positions on the
Fastext signals.
Remote Commander.
Push the joystick to the colour mark which corresponds to the
colour-coded menu. The page will be displayed after a few
seconds.
19
Connecting and Operating Optional
Equipment
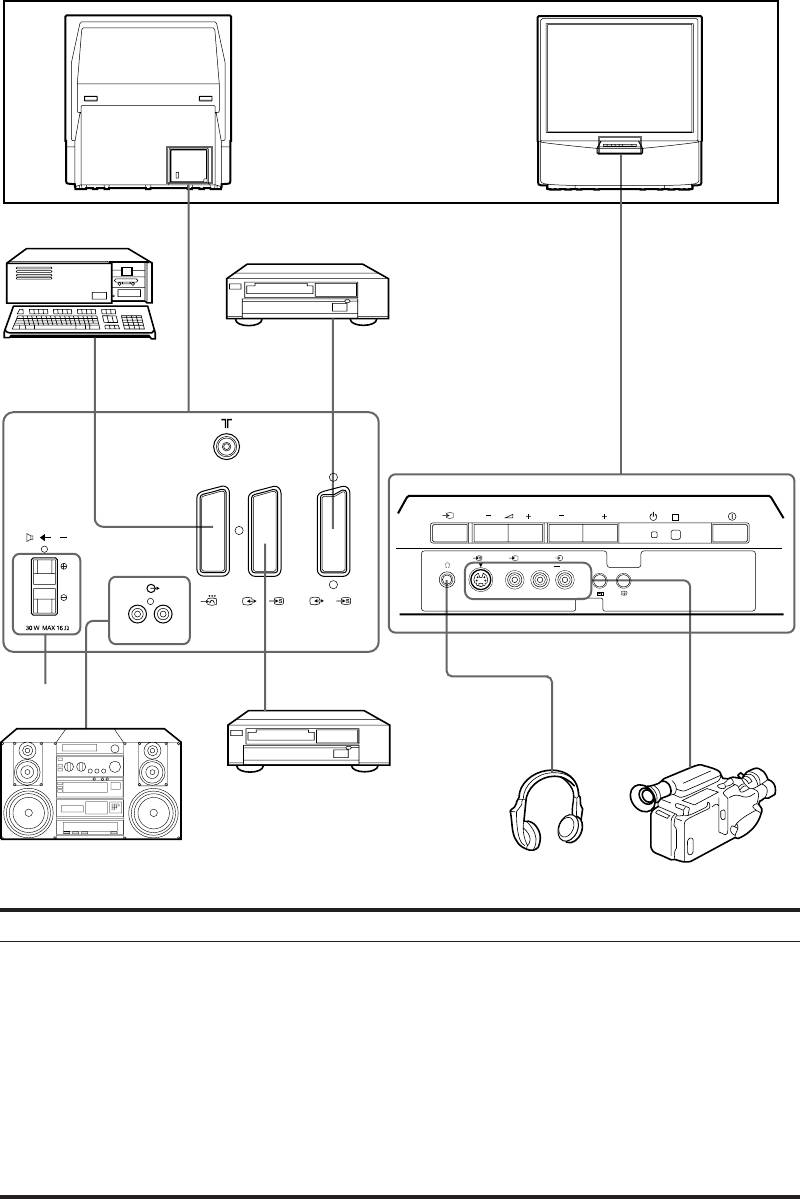
Connecting Optional Equipment
You can connect optional audio-video equipment to this TV such as a
VCR, video disc player, and stereo system.
To connect a VCR
using the
) terminal
))
))
Connect the aerial output
of the VCR to the aerial
terminal ) of the TV.
We recommend that you
tune in the video signal to
programme number “0”.
3
For details, see
1
“Presetting Channels
Manually” on page 10.
If the picture or the
sound is distorted
Move the VCR away from
the TV.
PROGR
R
About S video Inputs
C
(Y/C input)
3 3
MONO
3
Video signals can be
L/G/S/I R/D/D/D
separated into Y
1
2/
2
3/
3
(luminance or brightness)
and C (chrominance)
R/D/D/D-L/G/S/I
signals.
3
Separating the Y and C
4
2
signals prevents them
5
from interfering with one
another, therefore it
improves picture quality
(especially luminance).
This TV is equipped with
3 S Video input jacks,
through which these
separated signals can be
input directly.
When connecting a
monaural VCR
Acceptable input signal
Available output signal
Connect only the white
1 Normal audio/video and RGB signal
Video/audio from TV tuner
≤ jack to both the TV
and VCR.
2 Normal audio/video and S video signal
Video/audio from selected source
3 Normal audio/video and S video signal
No outputs
Note
When you connect the
Normal audio/video and S video signal
Video/audio from selected source (the same output
equipment to the q3/
source as the :2/ q 2 connector)
…3/≤3 connectors on
4 No inputs
Audio signal
the front panel and :3/
q3 connector on the
5 Centre speaker input
No outputs
rear panel, turn off the
Set “Speaker” on the SOUND
power of the equipment
CONTROL menu to “Centre in”.
not in use.
20
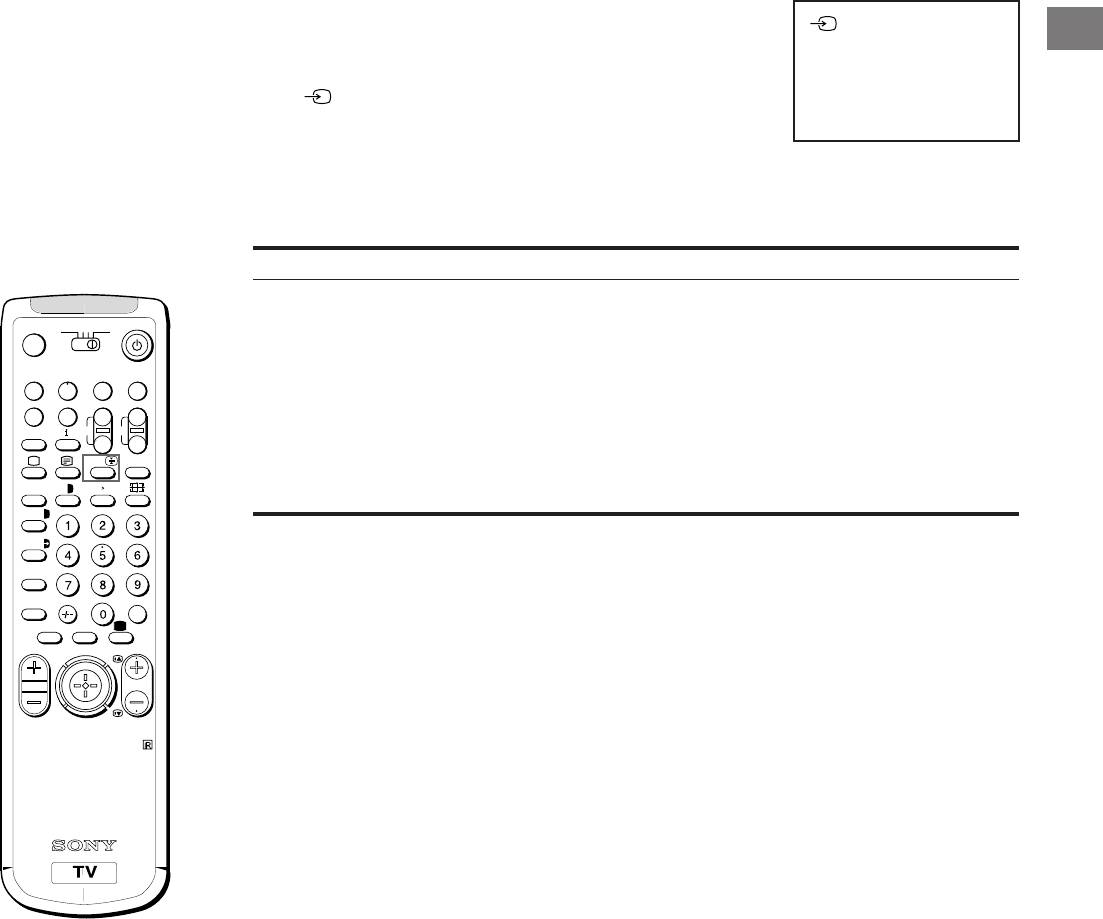
Selecting Input
Selecting input with
This section explains how to view the video input picture (of the
1
GB
PROGR +/– or number
video source connected to your TV) using direct access buttons.
buttons
You can preset video
Selecting input
input sources to the
Press repeatedly to select the input source.
programme positions so
The symbol of the selected input source will appear.
that you can select them
with PROGR +/– or
To go back to the normal TV picture
number buttons. For
Press O.
details, see “Presetting
Channels Manually” on
Input modes
page 10.
Symbol
Input signal
… 1
Audio/video input through the W 1 connector
3VTR 1
MDP2
TV
W
Audio/RGB input through the W 1 connector
¤
… 2
Audio/video input through the : 2/ q 2 connector
VIDEO
0
( u)
q 2
Audio/S video input through the : 2/ q 2 connector
p Pr
+
… 3
Audio/video input through … 3 and ≤ 3 connectors on the front or : 3/ q 3
˚
;
+
REC
CH
_
connector on the rear
…/
Ú/;
?
q 3
Audio/S video input through the q 3 connector (4-pin connector) on the front or
;
8
´
8
x
: 3/ q 3 connector on the rear
´/´
a/Å
A
b
c
≥
MENU
¸
PROGR
RM-862
21
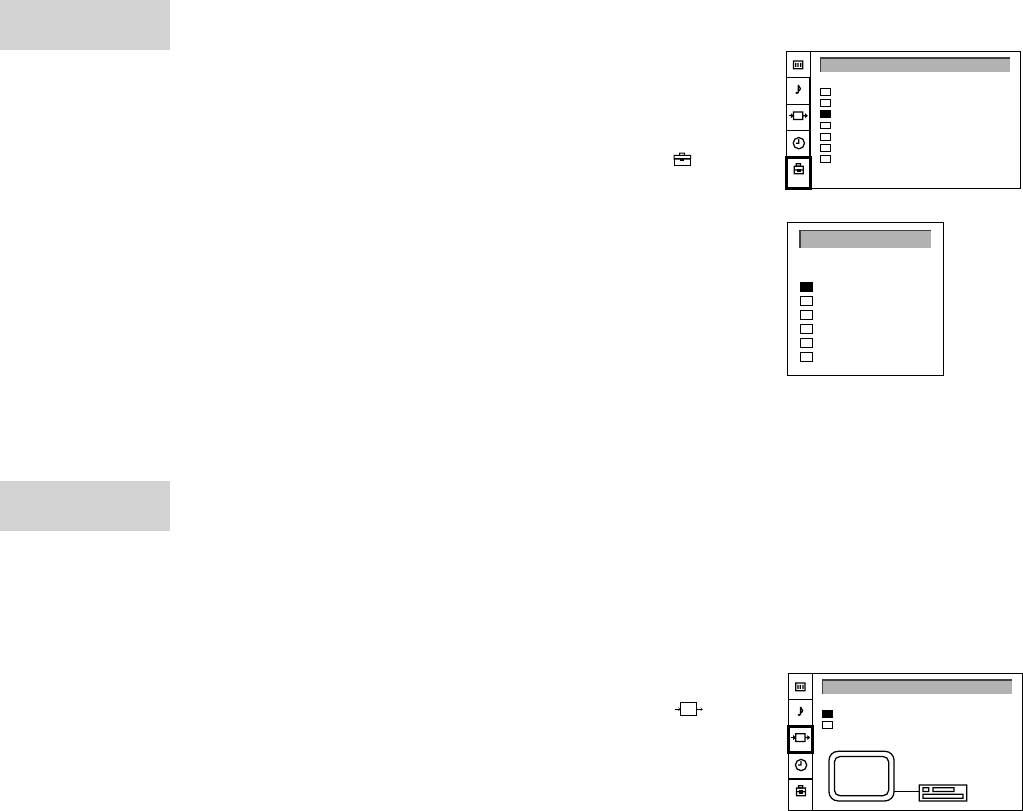
AV LABEL
Using AV Label Preset
PRESET
Using this function you can preset the desired input source (e.g.
PRESET
W 1, RGB signal) to the respective AV input (AV 1 W). In this
Auto Programme
way, a connected VCR will automatically switch to the RGB signal.
Manual Programme
AV Label Preset
Programme Sorting
1 Press MENU.
Parental Lock
Language
2 Push the joystick to blue or green to select the symbol on the
Convergence
menu screen. Push to yellow to confirm.
3 Push to blue or green to select “AV Label Preset”. Push to yellow.
4 Push to blue or green to select the desired input source. Push to
AV LABEL PRESET
yellow to confirm.
INPUT
LABEL
AV1
- - - - -
5 Push to blue or green to select a letter or number. Push to yellow
RGB
- - - - -
(select “-” for a blank).
AV2
- - - - -
YC2
- - - - -
Select the other four characters in the same way.
AV3
- - - - -
YC3
- - - - -
6 After selecting all the characters, press the joystick to confirm.
7 Repeat steps 4 to 6 to label other input sources.
8 Press the MENU button to return to the normal TV picture.
VIDEO
Checking and Selecting the Input
CONNECTION
and Output Sources Using the
Menu
You can display the menu to see which input sources are selected
for the TV screen, as well as which output source is selected. You
can also select them on the menu display.
1 Press MENU.
VIDEO CONNECTION
2 Push the joystick to blue or green to select the symbol on the
TV Screen
[TV - - - - -]
Output
[TV - - - - -]
menu screen. Push to yellow to confirm.
The VIDEO CONNECTION menu appears.
TV
You can see which source is selected for the TV and for the output.
TV
n
If you want to select the input and output on this menu, go on to the
next step.
3 Push to blue or green to select “TV Screen” (input source for TV-
screen), or “Output” (output source for : 2/q 2 and
Note
: 3/q 3).
If you select “AUTO” for
Push to yellow to confirm.
output, the output source
automatically becomes
4 Push to red or yellow to select the desired source. Press joystick
the same as the desired
to store.
input source.
5 Repeat steps 3 to 4 to select the source for other inputs or outputs.
6 Press MENU to return to the normal TV picture.
22

Remote Control of Other Sony
3VTR 1
MDP2
TV
¤
Equipment
GB
VIDEO
0
( u)
You can use the TV Remote Commander to control most of Sony
remote-controlled video equipment: beta, 8 mm and VHS VCRs
p Pr
+
˚
;
+
REC
CH
and video disc players.
_
…/
Ú/;
?
Tuning the Remote Commander to the equipment
;
8
´
8
x
1 Set the VTR 1/2/3 MDP selector according to the equipment you
´/´
want to control:
a/Å
VTR1: Beta VCR
VTR2: 8 mm VCR
A
VTR3: VHS VCR
b
c
MDP: Video disc player
≥
MENU
¸
2 Use the buttons indicated in the illustration to operate the
PROGR
additional equipment.
If your video equipment is furnished with a COMMAND MODE
selector, set this selector to the same position as the VTR 1/2/3
MDP selector on the TV Remote Commander.
RM-862
If the equipment does not have a certain function, the
corresponding button on the Remote Commander will not operate.
When recording
When you use the a
(record) button, make
sure to press this button
and the one to the right
of it simultaneously.
23
For Your Information
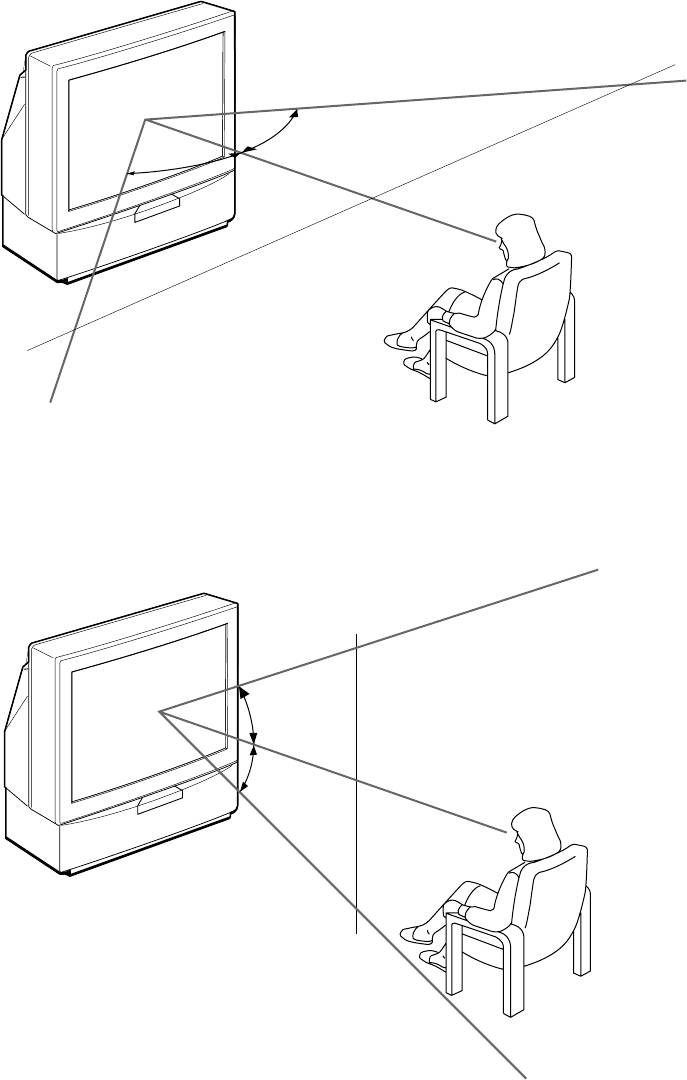
Optimum Viewing Area
For the best picture quality, try to position the projection TV so that you
can view the screen from within the areas shown below.
Horizontal viewing area
2.1m
(Minimum optimum
75˚
distance)
75˚
(Optimum viewing position)
Vertical viewing area
2.1m
(Minimum optimum
distance)
27.5˚
27.5˚
1.5 m and more
(Optimum viewing position)
24
Troubleshooting
Here are some simple solutions to some problems which may affect the picture and sound.
Problem
Solution
No picture (screen is dark), no sound
• Plug the TV in.
• Press U on the TV (if u indicator is on, press ; or a programme number
on the Remote Commander).
• Check the aerial connection.
• Check if the selected video source is on.
• Turn the TV off for 3 or 4 seconds then turn it on again using U.
GB
Poor or no picture (screen is dark), but good sound
• Press MENU to enter the PICTURE CONTROL menu and adjust the
brightness, contrast and colour.
Poor picture quality when watching an RGB video source
• Press … repeatedly to select W.
Good picture but no sound
• Press ¸ +.
• Check that “Main” speaker is selected on the SOUND CONTROL menu.
• If o is displayed on the screen, press o.
No colour for colour programmes
• Press MENU to enter the PICTURE CONTROL menu, select Reset, then
press the joystick to confirm.
Remote Commander does not function
• Replace the batteries.
If you continue to have problems, have your TV serviced by qualified personnel. Never open the casing yourself.
Specifications
Television system B/G/H, D/K
Front q 3, S video inputs - 4-pin DIN
Colour system PAL/SECAM
… 3, video inputs - phono jacks
NTSC 3.58/4.43 (VIDEO IN)
≤ 3 (L, R), audio inputs - phono jacks
Channel coverage See "Receivable channels and
2, headphones jack - stereo minijack
channel displays" on this page
Sound output 2 × 30 W (music power)
Projected picture size 41 inches
2 × 15 W (RMS)
Approx. 103 cm measured diagonally
Centre SP input 30 W (RMS) (using as the centre
speaker)
Terminals
Power consumption 145 W
Dimensions (W × H × D) 948 × 992 × 511 mm
Rear Center speaker input terminals,
Weight 43 kg
2 terminals
Supplied accessories See page 6.
(L, R), audio outputs - phono
Other features Digital comb filter (High resolution)
jacks
FASTEXT, TOPText
W1, 21-pin Euro connector
NICAM
(CENELEC standard)
- inputs for audio and video signals
Design and specifications are subject to change without notice.
- inputs for RGB
- outputs of TV audio and video
signals
: 2/q 2, 21-pin Euro connector
Receivable Channels and Channel Displays
- inputs for audio and video signals
- inputs for S video
Receivable
Indication on the
- outputs for audio and video signals
channels
screen
(selectable)
B/G/H
E2..12 21..69
C02 C03 C04..C12
: 3/q 3, 21-pin Euro connector
C21..C69
- inputs for audio and video signals
CABLE TV (1)
S1..41
S01 S02..S41
- inputs for S video
CABLE TV (2)
S01..S05 M1..M10
S42..S46 S01..S10
- outputs for audio and video signals
U1..U10
S11..S20
(selectable, the same output
ITALY
A B C D E F G H H1
C11..C69
source as the : 2/q 2
H2 21..69
connector)
D/K
R01..R12 R21..R69
C02..C12 C21..C69
CABLE TV (1)
S01 S02..S41
CABLE TV (2)
S42 S43..S46
CABLE TV
B..Q, S21..41
S02, S03..S17,
S21..S41
Ecological Paper - Totally Chlorine Free
25
Osvětlení
UPOZORNĚNÍ
Abyste získali jasný obraz, nevystavujte obrazovku
Nevystavujte přístroj dešti ani vlhkosti, abyste zabránili
přímému světlu nebo slunečnímu záření. Je-li to možné,
vzniku požáru nebo zkratu.
používejte bodové světlo svítící od stropu směrem dolů.
Uvnitř přístroje vzniká nebezpečné vysoké napětí.
Instalace
Neotvírejte přístroj. Veškeré opravy přenechte pouze
• Nezakrývejte větrací otvory, abyste zabránili vnitřnímu
odborníkům.
přehřátí přístroje.
• Neinstalujte televizor na příliš horkých nebo vlhkých
Bezpečnostní opatření
místech, na místech vystavených přímému slunečnímu
záření, nadměrné prašnosti, mechanickým vibracím nebo
Všechny televizory pracují s mimořádně vysokým
otřesům.
napětím.
• Jestliže přenesete televizor přímo z chladna do tepla
Aby nedošlo k požáru nebo úrazu elektrickým proudem,
nebo změní-li se náhle teplota v místnosti, může dojít k
dodržujte níže uvedené bezpečnostní pokyny. Pro vaši
zkreslení obrazu nebo ke zkreslení barev na části
bezpečnost přenechte opravy pouze kvalifikovaným
obrazovky. To je způsobeno kondenzací vlhkosti na
odborníkům.
zrcadlech nebo čočkách uvnitř televizoru. Před použitím
Všeobecná bezpečnost:
televizoru nechte vlhkost vyschnout.
• Nevystavujte televizor dešti ani nadměrné vlhkosti.
Údržba
• Neotvírejte zadní kryt přístroje.
• Uschovejte si originální kartón i další materiál, ve kterém
Bezpečný provoz:
byl televizor zabalen, abyste ho měli k dispozici pro
• Nenapojujte přístroj na jiné napětí než 220 – 240 V
případnou další dopravu televizoru. Pro optimální
střídavého proudu.
ochranu zabalte televizor přesně tak, jak byl originálně
• Nezapojujte přístroj, vnikne-li do něho nějaký předmět
zabalen z továrny.
nebo kapalina - nechte ho okamžitě zkontrolovat
• Aby váš přístroj vypadal jako nový, otírejte ho pravidelně
kvalifikovaným odborníkem.
měkkou utěrkou. Skvrny můžete odstranit utěrkou
• Nenechávejte přístroj zapojený v zásuvce, nebudete-li ho
namočenou v slabém roztoku čistícího prostředku. Nikdy
několik dní používat.
nepoužívejte silná rozpouštědla jako je ředidlo nebo
• Při vytahování zástrčky ze sítě tahejte vždy za zástrčku,
benzín, ani agresivní čistící prostředky (např. písek na
nikdy ne za šňůru.
nádobí), abyste nepoškodili povrch přístroje. Pro vaši
• Nepokládejte žádné předměty na plochu předního
bezpečnost odpojte před čištěním televizor od sítě.
panelu, když je vyklopený.
• Ztmavne-li obrazovka po delší době používání televizoru,
je třeba vyčistit vnitřní prostor televizoru. V tomto případě
se obra»te na odborníky.
Čištění stínítka
• Chcete-li odstranit prach z obrazovky, odpojte televizor a
stírejte prach měkkou utěrkou namočenou ve vodě nebo
Důležité informace
ve slabém roztoku čistícího prostředku pouze svislými
pohyby. Potom ji přetřete suchou měkkou utěrkou. Nikdy
Přečtěte si prosím následující informace, týkající se
za tímto účelem nepoužívejte rozpouštědla nebo ředidla.
užívání a údržby vašeho televizoru, abyste se mohli těšit z
• Čistíte-li kryty hadříkem, používejte měkký hadřík
co nejvyšší kvality příjmu.
navlhčený slabým roztokem saponátu nebo vodou.
Kvalita obrazu
Nepoužívejte žádné abrasivní prostředky, louhy a jiné
• Špatný přenos barev (červený, zelený a modrý barevný
agresivní látky a prášky. Nepoužívejte organická
signál se přesně nepřekrývají) může být způsoben
rozpouštědla (líh, benzín, ředidla). Pro Vaši bezpečnost
zemským magnetizmem. Vylaïte obraz podle postupu v
odpojte před čištěním televizor od sítě.
kapitole konvergenční nastavení (str. 33).
• Nedotýkejte se zbytečně stínítka, nedopust'te dotyk
• Nedotýkejte se obrazovky a dbejte na to, abyste
ostrých předmětů, poškrábání nástroji či popsání perem.
nepoškrábali její povrch tvrdými předměty.
Toto jednání může vést k neodstranitelnému poškození
• Zobrazování nehybného obrazu po delší dobu, například
stínítka.
při používání videoher či počítače, a sledování programů
v režimu 16:9 může vést k poškození obrazovek. Pokud
provozujete televizor popsaným způsobem, stáhněte
kontrast na nižší hodnoty.
26
Obsah
Popis ..................................................................................... 28
Uvedení do provozu .....................................................
30
1. krok: Příprava ....................................................................... 30
Kontrola dodaného příslušenství.................................. 30
Vložení baterií do dálkového ovládání .......................... 30
Zapojení antény ........................................................... 30
Uvedení do provozu
CZ
2. krok: Naladění televizních programů ..................................... 31
Volba jazyka menu....................................................... 31
Funkce
CZ
Automatické ladění kanálů ........................................... 32
3. krok: Nastavení barevných konvergencí ............................... 33
Sjednot'te červený, zelený a modrý pruh ..................... 33
Další funkce předvolby ............................................................. 34
Manuální ladění kanálů ................................................. 34
Ruční doladění.............................................................. 35
Třídění programových pozic ......................................... 35
Přeskakování programových pozic ............................... 36
Záznam názvu stanice .................................................. 36
Použití Rodičovský zámek ............................................ 37
Přechodné naladění kanálu ........................................... 37
Pokyny k obsluze .........................................................
38
Sledování televizního programu ............................................... 38
Zapnutí a vypnutí televizoru .......................................... 38
Volba televizních programů ........................................... 38
Nastavení hlasitosti ....................................................... 38
Ovládání televizoru ovládacími prvky na přístroji ........... 38
Sledování teletextu nebo videoprogramu ...................... 39
Další užitečné funkce .................................................... 39
Nastavení a naladění televizoru pomocí menu .......................... 40
Nastavení obrazu a zvuku ............................................. 40
Použití časovače pro usínání ......................................... 41
Teletext .................................................................................... 42
Funkce s přímým přístupem.......................................... 42
Připojení a ovládání dalšího zařízení ......................................... 44
Připojení dalšího zařízení ............................................... 44
Volba vstupu ................................................................ 45
Použití "Název Předvolby" ............................................ 46
Kontrola a volba vstupních a výstupních zdrojů
pomocí menu ............................................................... 46
Dálkové ovládání jiných přístrojů Sony .......................... 47
Pro vaši informaci .................................................................... 48
Oblast optimálního poslechu ........................................ 48
Poruchy a jejich odstranění ........................................... 49
Technické údaje ........................................................... 49
27
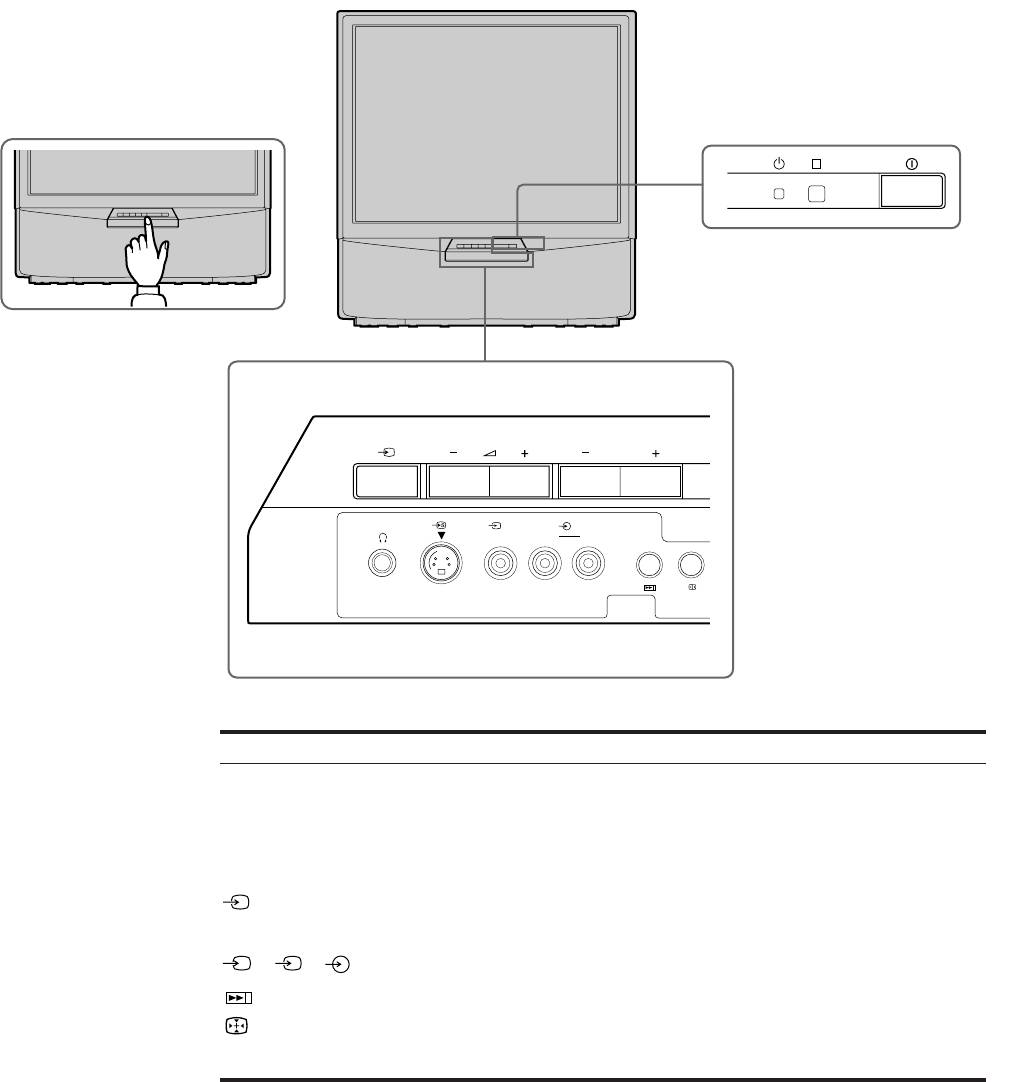
Popis
Tato část stručně popisuje tlačítka a ovládací prvky na televizoru a
na dálkovém ovládání. Další informace naleznete na stránkách
uvedených vedle každého prvku.
Přední strana televizoru
R
PROGR
R
3 3
MONO
3
L/G/S/I R/D/D/D
Symbol
Název
Viz strana
U
Hlavní sí»ový spínač
38
f
Indikátor pohotovosti
38
PROGR +/–
Program
38
Á +/–
Hlasitost
38
Tlačítka pro volbu vstupu
39
l
Zdířka pro sluchátka
44
S
3, 3, 3
Zdířky pro vstup (S video/video/audio)
45
Tlačítka pro automatické předvolby
32
Tlačitka Auto Convergence - automatické
33
nastavení konvergencí
28
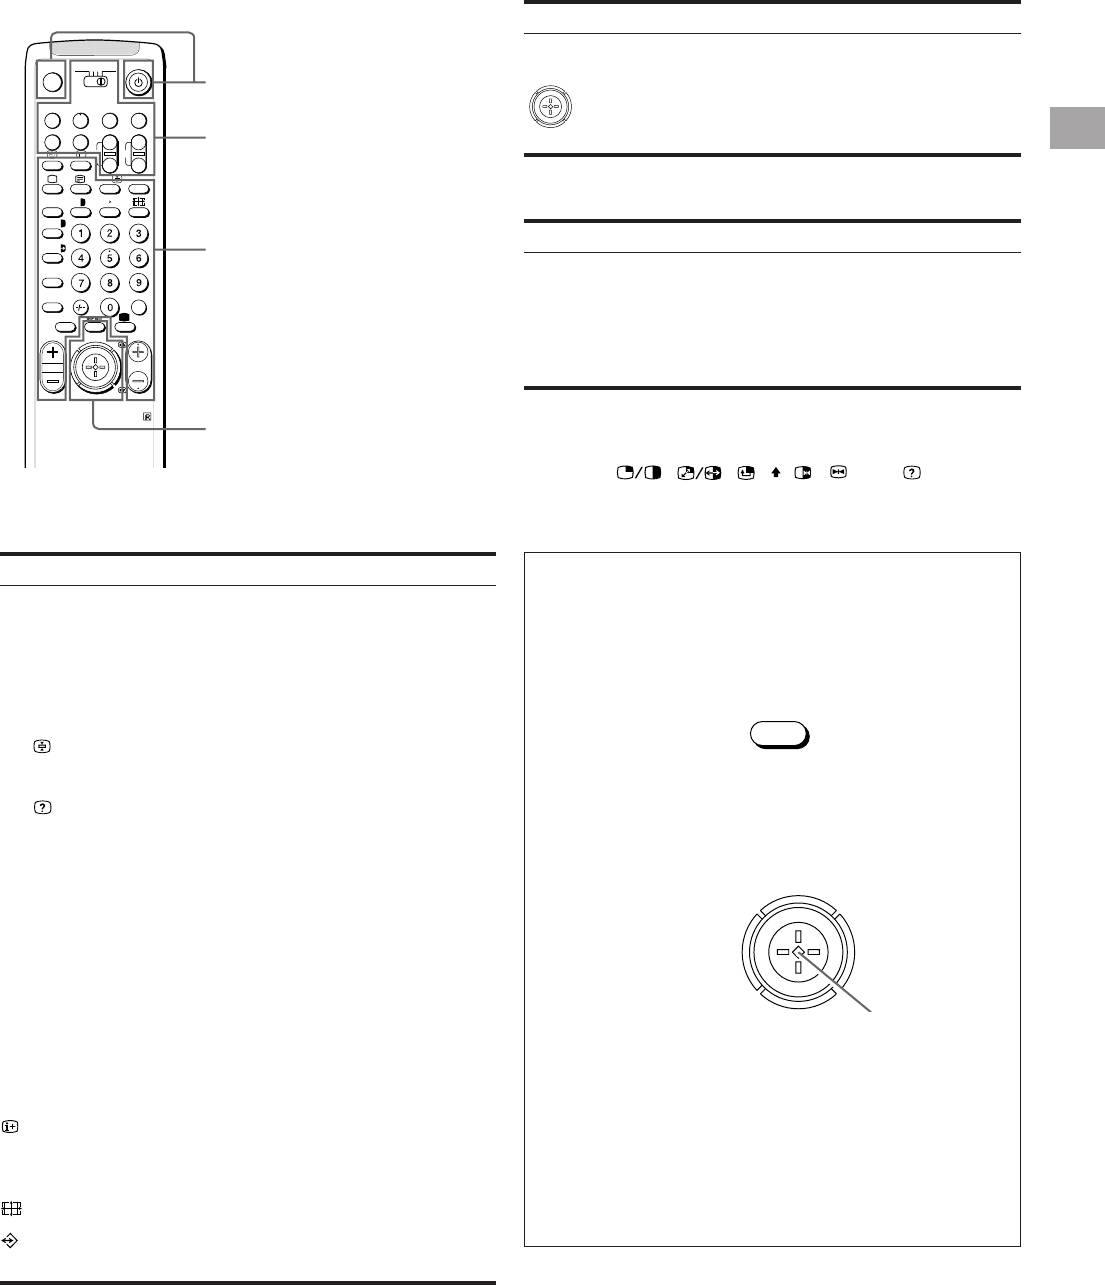
Dálkové ovládání
Ovládání menu
Symbol
Název
Viz strana
MENU
Tlačítka pro zapínání/vypínání menu
Viz níže
3VTR 1
MDP2
TV
¤
Ovládání TV/Teletextu
Joystick pro volbu menu
Viz níže
VIDEO
0
( u)
Stiskněte, chcete-li potvrdit volbu
p Pr
(funkce OK)
CZ
+
Ovládání videa
˚
;
+
REC
CH
_
…/
Ú/;
?
;
8
´
8
x
Ovládání videorekordéru
´/´
Symbol
Název
Viz strana
a/Å
Ovládání TV/Teletextu
A
VTR1/2/3,
Volba videozařízení
47
b
MDP
c
≥
MENU
;; - :: L
Tlačítka ovládání videozařízení
47
¸
PROGR
J a VIDEO f
CH +/–
RM-862
Ovládání menu
Nefunguje na tomto přístroji
Symbol : , , , , , , Ú/ (pro
ovládání TV)
Ovládání televizoru/teletextu
Symbol
Název
Viz strana
Systém menu
o
Vypnutí/zapnutí zvuku
39
Používejte tlačítko MENU a joystick podle následujícího
TV f
Tlačítko TV Standby
38
popisu
(pohotovostí poloha)
1 Stiskněte tlačítko MENU, abyste menu zapnuli nebo vypnuli.
O
Zapnutí televizoru/příjem TV vysílání
38
MENU
_
Tlačítko teletextu
39
…/
Tlačítko volby výstupu/
39
Teletext: zastavení podstránky
42
2 Joystick používejte následovně:
Ú/
Teletext: tlačítko znázornění
42
1,2,3,4,5,6,
Číselná tlačítka
38
ZELENÁ: rolování nahoru
7,8,9 a 0
ČERVENÁ:
÷
Tlačítko pro dvojmístnou volbu
38
snižování/zpět k poslední
C
Tlačítko pro přímou volbu kanálu
34
ŽLUTÁ:
položce nebo poslednímu
zvyšování/
Á +/–
Tlačítko pro ovládání hlasitosti
38
menu
dopředu k další
Není-li znázorněné žádné
PROGR +/–
Tlačítka volby programů
38
položce
menu: posunutí na
R/S
Teletext: tlačítka pro listování
42
červenou, abyste
Joystick: Stiskněte ho v
stránkou nahoru a dolů
znázornili poslední menu
neutrální pozici, abyste
Í
Tlačítko režimu obrazu
41
potvrdili volbu nebo
≥
Tlačítko režimu zvuku
41
uložili údaje do paměti
Tlačítko pro zablokování stránky
39
MODRÁ: rolování dolů
teletextu
#
Tlačítko pro zobrazení hodin
39
Funkce ovladatelné joystickem jsou znázorněny na
Tlačítko pro změnu formátu zobrazení
39
obrazovce.
Teletext: tlačítka pro nejčastěji
43
používané stránky
29
