Sony DCR-TRV16E – страница 13
Инструкция к Видеокамере Sony DCR-TRV16E

Changing the menu settings
POWER
Icon/item
Mode
Meaning
switch
SETUP MENU
CLOCK SET
—
To set the date or time (p. 31)
CAMERA
MEMORY
USB STREAM
z OFF
To deactivate the USB streaming function
PLAYER/VCR
CAMERA
ON
To activate the USB streaming function
USBCONNECT*
z NORMAL
To connect and recognise the “Memory Stick” drive
MEMORY
PTP
To connect and only copy a “Memory Stick” image
from your camcorder to a computer (only with
Windows XP or Mac OS X)
1 Turn the SEL/PUSH EXEC dial to select
USBCONNECT followed by PTP, and press to
set.
2 Insert the “Memory Stick” in the camcorder, and
connect the camcorder to the computer using the
USB cable. Copy Wizard will automatically start
up.
LTR SIZE
z NORMAL
To display selected menu items in normal size
PLAYER/VCR
CAMERA
2×
To display selected menu items at twice the normal
Customising Your Camcorder Выполнение индивидуальных установок на Вашей видеокамере
MEMORY
size
LANGUAGE
z ENGLISH
To display the following information indicators in
PLAYER/VCR
English: REC, STBY, min, sec, CAPTURE, END
CAMERA
SEARCH and VOL, etc.
MEMORY
FRANÇAIS
To display the information indicators in French
ESPAÑOL
To display the information indicators in Spanish
PORTUGUÊS
To display the information indicators in Portuguese
DEUTSCH
To display the information indicators in German
ITALIANO
To display the information indicators in Italian
EΛΛHNIKA
To display the information indicators in Greek
DEMO MODE
z ON
To make the demonstration appear
CAMERA
OFF
To cancel the demonstration mode
* Except DCR-TRV16E/TRV116E
Notes on DEMO MODE
•You cannot select DEMO MODE when a cassette or a “Memory Stick” is inserted in your camcorder.
•The DEMO MODE default setting is STBY (Standby) and the demonstration starts about 10 minutes
after you have set the POWER switch to CAMERA without a cassette and a “Memory Stick” inserted.
To cancel the demonstration, insert a cassette or a “Memory Stick”, set the POWER switch to other
than CAMERA, or set DEMO MODE to OFF. To set to STBY (Standby) again, leave the DEMO
MODE at ON in the menu settings, turn the POWER switch to OFF (CHG), and return the POWER
switch to CAMERA.
•When NIGHTSHOT is set to ON, the ”NIGHTSHOT” indicator appears on the screen and you cannot
select DEMO MODE in the menu settings.
(continued on the following page)
241
Changing the menu settings
POWER
Icon/item
Mode
Meaning
switch
OTHERS
DATA CODE
z DATE/CAM
To press DATA CODE on the Remote Commander to
PLAYER/VCR
display date, time and various settings during
MEMORY
playback (p. 52)
DATE
To press DATA CODE on the Remote Commander to
display date and time during playback
WORLD TIME
—
To set the clock to the local time. Turn the SEL/PUSH
CAMERA
EXEC dial to set a time difference. The clock changes
MEMORY
by the time difference you set here. If you set the time
difference to 0, the clock returns to the originally set
time.
BEEP
z MELODY
To output the melody when you start/stop recording
PLAYER/VCR
or when an unusual condition occurs on your
CAMERA
camcorder
MEMORY
NORMAL
To output the beep instead of the melody
OFF
To cancel the melody and beep sound
COMMANDER
z ON
To activate the Remote Commander supplied with
PLAYER/VCR
your camcorder
CAMERA
MEMORY
OFF
To deactivate the Remote Commander to avoid
erroneous remote control operation caused by other
VCR’s remote control
DISPLAY
z LCD
To show the display on the LCD screen and in the
PLAYER/VCR
viewfinder
CAMERA
MEMORY
V-OUT/LCD
To show the display on the TV screen, LCD screen
and in the viewfinder
REC LAMP
z ON
To light up the camera recording lamp at the front of
CAMERA
your camcorder
MEMORY
OFF
To turn the camera recording lamp off so that the
person is not aware of the recording
VIDEO EDIT
z RETURN*
To cancel video editing
PLAYER/VCR
TAPE*
To make programme and perform video editing
(p. 104)
MEMORY*
To make programme and perform MPEG editing
(p. 175)
* Except DCR-TRV16E/TRV116E
Note
If you press DISPLAY with DISPLAY set to V-OUT/LCD in the menu settings, the picture from a TV
or VCR will not appear on the LCD screen even when your camcorder is connected to outputs on the
TV or VCR.
In more than five minutes after removing the power supply
The “PROGRAM AE”, “AUDIO MIX”, “COMMANDER”, “HiFi SOUND”, and “WHT BAL” settings
are returned to their factory settings.
Other menu settings are held in memory even when the battery is removed.
When recording a close subject
When REC LAMP is set to ON, the red camera recording lamp on the front of the camcorder may
reflect on the subject if it is close. In this case, we recommend that you set REC LAMP to OFF.
242

Изменение установок меню
Русский
Выбор установок режима по каждой опции
z
является установкой по умолчанию.
Опции меню отличаются в зависимости от положения переключателя POWER. На экране
отображаются только те опции, которыми Вы можете оперировать в данный момент времени.
Пиктограмма/
Переключа-
опция
Режим
Предназначение
тель POWER
MANUAL SET
PROGRAM AE
—
Для удовлетворения Ваших особых требований к
CAMERA
съемке (стр. 75)
MEMORY
P EFFECT
—
Для добавления к изображениям специальных
PLAYER/VCR
эффектов, подобных эффектам в фильмах или
CAMERA
телепередачах (стр. 70, 86)
D EFFECT
—
Для добавления к изображениям специальных
PLAYER/VCR
эффектов с использованием различных
CAMERA
цифровых функций (стр. 72, 87)
FLASH MODE
z ON
Для срабатывания вспышки (приобретается
CAMERA
отдельно) независимо от яркости окружения
MEMORY
Customising Your Camcorder Выполнение индивидуальных установок на Вашей видеокамере
AUTO
Для автоматического срабатывания вспышки
AUTO
Для срабатывания вспышки перед записью для
уменьшения эффекта красных глаз
FLASH LVL
HIGH
Для установки уровня вспышки выше, чем
CAMERA
обычно
MEMORY
z NORMAL
Обычная установка
LOW
Для установки уровня вспышки ниже, чем обычно
WHT BAL
—
Для регулировки баланса белого (стр. 64)
CAMERA
MEMORY
N.S.LIGHT
z ON
Для использования функции подсветки для
CAMERA
ночной съемки (стр. 45)
MEMORY
OFF
Для отмены функции подсветки для ночной
съемки
AUTO SHTR
z ON
Для автоматического приведения в действие
CAMERA
электронного затвора при съемке в ярких
условиях.
OFF
Для предотвращения автоматического
приведения в действие электронного затвора
даже при съемке в ярких условиях.
Примечания по опциям FLASH MODE и FLASH LVL
Вы не можете регулировать опции FLASH MODE или FLASH LVL, если внешняя вспышка
(приобретается отдельно) не установлена.
Примечания по опции FLASH LVL
Вы не можете регулировать опцию FLASH LVL, если внешняя вспышка (приобретается
отдельно) не совместима с уровнем вспышки.
(продолжение на следующей странице)
243
Изменение установок меню
Пиктограмма/
Переключа-
опция
Режим
Предназначение
тель POWER
CAMERA SET
SELFTIMER*
z OFF
Для отказа от использования функции таймера
CAMERA
самозапуска
MEMORY
ON
Для использования функции таймера
самозапуска (стр. 46, 60, 54, 169)
D ZOOM
z OFF
Для отключения цифрового вариообъектива.
CAMERA
Выполняется наезд видеокамеры до 10×.
20×
Для приведение в действие цифрового
вариообъектива. Наезд видеокамеры в пределах
от 10× до 20× выполняется цифровым методом.
(стр. 40)
120×
Для приведение в действие цифрового
вариообъектива. Наезд видеокамеры в пределах
от 10× до 120× выполняется цифровым методом.
PHOTO REC*
z MEMORY
Для записи неподвижных изображений на
CAMERA
“Memory Stick” при нажатии кнопки PHOTO во
время записи движущихся изображений на ленте
или в режиме ожидания. (стр. 58)
TAPE
Для записи неподвижных изображений на ленту
при нажатии кнопки PHOTO во время записи
движущихся изображений на ленту или в режиме
ожидания (стр. 62).
16:9WIDE
z OFF
—
CAMERA
ON
Для записи широкоэкранного изображения 16:9
(стр. 66)
STEADYSHOT
z ON
Для компенсации подрагивания видеокамеры
CAMERA
OFF
Для отмены функции устойчивой съемки. При
съемке стационарного объекта с помощью
треноги получаются очень естественные
изображения.
FRAME REC
z OFF
Для отключения функции записи монтажного
CAMERA
кадра
ON
Для включения функции записи монтажного
кадра (стр. 84)
INT. REC
ON
Для включения функции записи с интервалами
CAMERA
(стр. 81)
z OFF
Для отключения функции записи с интервалами
SET
Для установки длительности ожидания и
длительности записи для функции записи с
интервалами.
* Кроме моделей DCR-TRV16E/TRV116E
Примечания по функции устойчивой съемки
•
Функция устойчивой съемки не в состоянии компенсировать чрезмерную тряску видеокамеры.
• Присоединение преобразующего объектива (приобретается отдельно) может повлиять на
функцию устойчивой съемки.
В случае отмены функции устойчивой съемки
Появится индикатор выключенной функции устойчивой съемки “ ”. Ваша видеокамера
предупреждает чрезмерную компенсацию тряски.
244
Изменение установок меню
Пиктограмма/
Переключа-
опция
Режим
Предназначение
тель POWER
1)
VCR*
SET
2)
PLAYER*
SET
HiFi SOUND
z STEREO
Для воспроизведения стереофонической ленты
PLAYER/VCR
или же ленты с двойной звуковой дорожкой с
основным и вспомогательным звуком (стр. 274)
1
Для воспроизведения стереофонической ленты с
левым звуком или ленты с двойной звуковой
дорожкой с основным звуком
2
Для воспроизведения стереофонической ленты с
правым звуком или ленты с двойной звуковой
дорожкой с вспомогательным звуком
AUDIO MIX
—
Для регулировки баланса между стереофоническим
PLAYER/VCR
каналом 1 и стереофоническим каналом 2 (стр. 129)
ST 1 ST 2
A/V t
z OFF
Для вывода цифровых изображений и звука в
VCR
1)
DV OUT*
аналоговом формате, используя Вашу видеокамеру
ON
Для вывода аналоговых изображений и звука в цифро-
вом формате, используя Вашу видеокамеру (стр. 230)
NTSC PB
z ON PAL TV
Для воспроизведения ленты, записанной в
PLAYER/VCR
Customising Your Camcorder Выполнение индивидуальных установок на Вашей видеокамере
системе цветного телевидения NTSC, на
телевизоре системы PAL.
NTSC 4.43
Для воспроизведения ленты, записанной в
системе цветного телевидения NTSC, на
телевизоре в режиме NTSC 4.43
LCD/VF SET
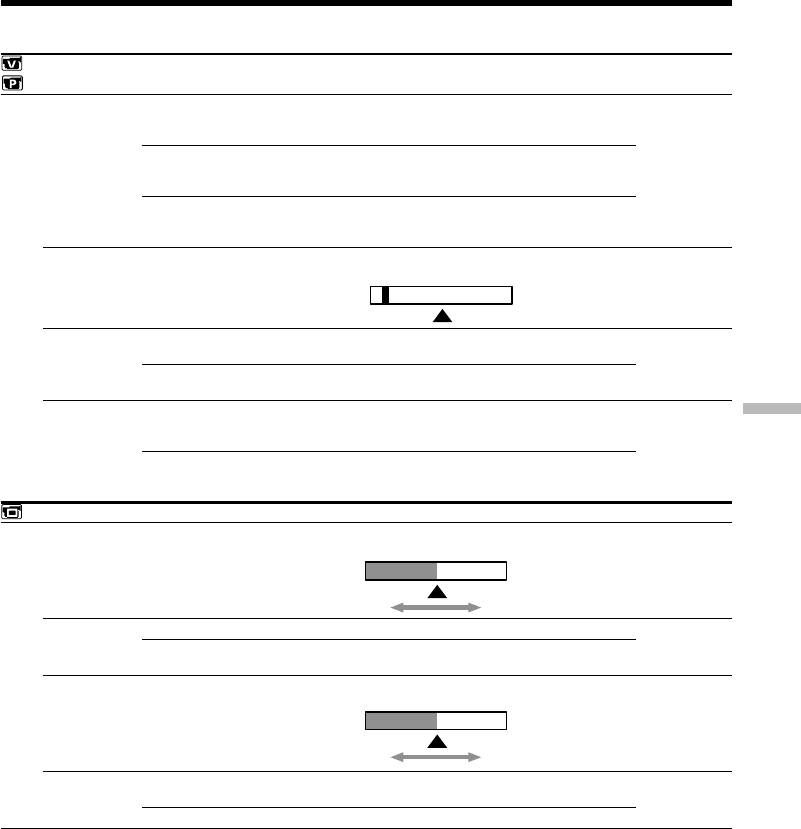
LCD BRIGHT
—
Для регулировки яркости экрана ЖКД при
PLAYER/VCR
помощи диска SEL/PUSH EXEC
CAMERA
MEMORY
Темнее Светлее
LCD B.L.
z BRT NORMAL
Для установки нормальной яркости экрана ЖКД
PLAYER/VCR
CAMERA
BRIGHT
Сделать экран ЖКД ярче
MEMORY
LCD COLOUR
—
Для регулировки цвета экрана ЖКД,
PLAYER/VCR
поворачивая и нажимая диск SEL/PUSH EXEC.
CAMERA
MEMORY
Насыщен-
Насыщен-
ность ниже
ность выше
VF B.L.
z BRT NORMAL
Для установки яркости экрана видоискателя в
PLAYER/VCR
нормальное положение
CAMERA
MEMORY
BRIGHT
Сделать экран видоискателя ярче
1)
*
Только модели DCR-TRV25E/TRV27E/TRV116E/TRV118E
2)
*
Только модели DCR-TRV16E/TRV18E/TRV24E
Примечание по воспроизведению в системе NTSC PB
Когда Вы воспроизводите ленту на мультисистемном телевизоре, выберите наилучший режим
во время просмотра изображения на экране телевизора.
Примечание по режимам LCD B.L. и VF B.L.
• Если Вы выберете режим BRIGHT, срок службы батарейного блока сокращается
приблизительно на 10 процентов в течение записи.
• При использовании источников питания, отличных от батарейного блока, автоматически
выбирается режим BRIGHT.
Даже когда Вы выполняете регулировку режимов LCD BRIGHT, LCD B.L., LCD COLOUR и/или VF B.L.
Записываемое изображение не будет подвержено изменению
(продолжение на следующей странице)
245
Изменение установок меню
Пиктограмма/
Переключа-
опция
Режим
Предназначение
тель POWER
MEMORY SET (кроме моделей DCR-TRV16E/TRV116E)
STILL SET
BURST
z OFF
Чтобы не выполнять непрерывной записи
MEMORY
1)
NORMAL*
Для непрерывной записи до четырех (размером
1152 × 864) или 13 (размером 640 × 480)
неподвижных изображений (стр. 152)
1)
EXP BRKTG*
Для последовательной записи трех изображений
с различными экспозициями
MULTI SCRN
Для непрерывной записи девяти изображений,
отображения изображений на одной странице,
разделенной на девять окон
1)
QUALITY
z SUPER FINE*
Для записи неподвижных изображений в режиме
PLAYER/VCR
высшего качества (стр. 144)
MEMORY
2)
FINE*
Для записи неподвижных изображений в режиме
высокого качества
STANDARD
Для записи неподвижных изображений в режиме
стандартного качества.
1)
IMAGESIZE*
z 1152 × 864
Для записи неподвижных изображений размером
MEMORY
1152 × 864 (стр. 146)
640 × 480
Для записи неподвижных изображений размером
640 × 480
MOVIE SET
IMAGESIZE
z 320 × 240
Для записи движущихся изображений размером
PLAYER/VCR
320 × 240 (стр. 146)
MEMORY
160 × 112
Для записи движущихся изображений размером
160 × 112
REMAIN
z AUTO
Для отображения оставшейся емкости “Memory
PLAYER/VCR
Stick” в следующих случаях:
MEMORY
• В течение пяти секунд после установки
переключателя POWER в положение
3)
4)
PLAYER*
/VCR*
или MEMORY
• В течение пяти секунд после установки
“Memory Stick” в Вашу видеокамеру в опции
3)
4)
MEMORY или PLAYER*
/VCR*
• Если емкость “Memory Stick” составляет менее
двух минут в опции MEMORY
• В течение пяти секунд после начала записи
движущегося изображения
• В течение пяти секунд после завершения
записи движущегося изображения
ON
Чтобы всегда отображать оставшуюся емкость
“Memory Stick”
1)
*
Только модели DCR-TRV24E/TRV25E/TRV27E
2)
*
Для моделей DCR-TRV18E/TRV118E, FINE является установкой по умолчанию.
3)
*
Только модели DCR-TRV16E/TRV18E/TRV24E
4)
*
Только модели DCR-TRV25E/TRV27E/TRV116E/TRV118E
246
Изменение установок меню
Пиктограмма/
Переключа-
опция
Режим
Предназначение
тель POWER
MEMORY SET (кроме моделей DCR-TRV16E/TRV116E)
PRINT MARK
ON
Для записи знака печати на записанных
PLAYER/VCR
неподвижных изображениях, которые Вы
MEMORY
захотите распечатать позже (стр. 199)
z OFF
Для отмены записи знаков печати на
неподвижных изображениях.
PROTECT
ON
Для включения защиты выбранных неподвижных
PLAYER/VCR
изображений от случайного стирания (стр. 195)
MEMORY
z OFF
Для выключения защиты неподвижных
изображений.
SLIDE SHOW
—
Для воспроизведения изображений по
MEMORY
непрерывному циклу (стр. 193)
PHOTO SAVE
—
Для копирования неподвижных изображений с
PLAYER/VCR
миниатюрных носителей цифрового
видеосигнала DV на “Memory Stick” (стр. 179)
FILE NO.
z SERIES
Для последовательного присвоения номеров
PLAYER/VCR
файлам даже при замене “Memory Stick”
MEMORY
Customising Your Camcorder Выполнение индивидуальных установок на Вашей видеокамере
RESET
Для сброса нумерации файлов каждый раз при
замене “Memory Stick”
DELETE ALL
—
Для отмены удаления всех незащищенных
MEMORY
изображений (стр. 198)
FORMAT
z RETURN
Для отмены форматирования.
MEMORY
OK
Для форматирования вставленной “Memory Stick”.
Форматирование стирает всю информацию на
“Memory Stick”.
Перед форматированием проверьте содержимое
“Memory Stick”.
1.Выберите опцию FORMAT с помощью диска
SEL/PUSH EXEC, а затем нажмите диск.
2.Поверните диск SEL/PUSH EXEC для выбора
опции OK, а затем нажмите диск.
3.
После того, как появится индикация
“EXECUTE”, нажмите диск SEL/PUSH EXEC. Во
время форматирования будет мигать индикация
“FORMATTING”. По окончании форматирования
появится индикация “COMPLETE”.
Примечания о форматировании (кроме моделей DCR-TRV16E/TRV116E)
• Прилагаемые или приобретаемые отдельно “Memory Stick” предварительно
отформатированы на предприятии-изготовителе. Форматирование “Memory Stick” на Вашей
видеокамере не требуется.
• Не выполняйте ни одного из следующих действий в случае отображения на экране индикации
FORMATTING:
– Передвижение переключателя POWER
– Манипуляции кнопками
– Извлечение “Memory Stick”
• Вы не можете отформатировать “Memory Stick”, если лепесток защиты от записи на “Memory
Stick” установлен в положение LOCK.
• В случае появления сообщения “ FORMAT ERROR” повторите форматирование.
• Форматирование стирает защищенные данные изображений на “Memory Stick”.
(продолжение на следующей странице)
247

Изменение установок меню
Пиктограмма/
Переключа-
опция
Режим
Предназначение
тель POWER
PRINT SET (кроме моделей DCR-TRV16E/TRV116E)
9PIC PRINT
z RETURN
Для отмены вывода отпечатков разделенного
MEMORY
экрана
SAME
Для вывода отпечатков того же разделенного
экрана (стр. 201)
MULTI
Для вывода отпечатков различных разделенных
экранов
MARKED
Для вывода отпечатков изображений со знаками
печати в порядке записи
DATE/TIME
z OFF
Для вывода отпечатков без даты и времени
MEMORY
записи
DATE
Для вывода отпечатков с датой записи (стр. 202)
DAY&TIME
Для вывода отпечатков с датой и временем
записи
CM SET
TITLE
—
Для наложения титра или создания Вашего
PLAYER/VCR
собственного титра (стр. 130, 134)
CAMERA
TITLEERASE
—
Для стирания наложенного Вами титра (стр. 133)
PLAYER/VCR
CAMERA
TITLE DSPL
z ON
Для отображения наложенного Вами титра
PLAYER/VCR
OFF
Для отказа от отображения титра
CM SEARCH
z ON
Для поиска с использованием кассетной памяти
PLAYER/VCR
(стр. 92)
OFF
Для поиска без использования кассетной памяти
TAPE TITLE
—
Для маркировки кассеты (стр. 137)
PLAYER/VCR
CAMERA
ERASE ALL
—
Для стирания всех данных в кассетной памяти
PLAYER/VCR
(стр. 139)
CAMERA
Примечание о команде PRINT SET (кроме моделей DCR-TRV16E/TRV116E)
Опции 9PIC PRINT и DATE/TIME отображаются только в случае, если внешний принтер
(приобретается отдельно) подсоединен к держателю для установки вспомогательных
принадлежностей.
248
Изменение установок меню
Пиктограмма/
Переключа-
опция
Режим
Предназначение
тель POWER
TAPE SET
REC MODE
z SP
Для записи в режиме SP (стандартное
PLAYER/VCR
воспроизведение)
CAMERA
LP
Для увеличения длительности записи в 1,5 раза
по сравнению с режимом SP
AUDIO MODE
z 12BIT
Для записи в 12-битовом режиме (два
PLAYER/VCR
стереофонических звука).
CAMERA
16BIT
Для записи в 16-битовом режиме (один
стереофонический высококачественный звук)
qREMAIN
z AUTO
Для отображения полосы оставшейся ленты:
PLAYER/VCR
• Около восьми секунд после того, как
CAMERA
видеокамера включится и вычислит
оставшееся количество ленты
• Около восьми секунд после того, как будет
установлена кассета, и видеокамера вычислит
оставшееся количество ленты
• Около восьми секунд после нажатия кнопки N
1)
2)
в режиме PLAYER*
/VCR*
Customising Your Camcorder Выполнение индивидуальных установок на Вашей видеокамере
• Около восьми секунд после нажатия кнопки
DISPLAY для отображения экранных
индикаторов
• В течение процесса ускоренной перемотки
ленты назад, вперед или поиска изображения в
1)
2)
опции PLAYER*
/VCR*
ON
Для постоянного отображения индикатора
оставшейся ленты.
1)
*
Только модели DCR-TRV16E/TRV18E/TRV24E
2)
*
Только модели DCR-TRV25E/TRV27E/TRV116E/TRV118E
Примечания о режиме LP
• Если Вы выполняете на Вашей видеокамере запись на ленту в режиме LP, рекомендуется
воспроизводить ленту на Вашей же видеокамере. При воспроизведении ленты на других
видеокамерах или КВМ, изображение или звук могут воспроизводиться с помехами.
• Если Вы выполняете запись в режиме LP, рекомендуется использовать кассету Sony
Excellence/Master, с которой Вы сможете достигнуть на Вашей видеокамере наилучших
результатов.
• Вы не можете выполнять наложение звука на ленте, записанной в режиме LP. Для
выполнения наложения звука на ленте используйте режим SP.
• Если Вы выполняете запись в режимах SP или LP на одной и той же ленте, или же Вы
записываете некоторые эпизоды в режиме LP, воспроизводимое изображение может быть
искажено, или же код времени может быть не записан надлежащим образом между
эпизодами.
Примечания о режиме AUDIO MODE
• Вы не можете выполнять наложение звука на ленте, записанной в 16-битовом режиме.
• При воспроизведении ленты, записанной в 16-битовом режиме, Вы не можете регулировать
баланс в установке AUDIO MIX.
(продолжение на следующей странице)
249
Изменение установок меню
Пиктограмма/
Переключа-
опция
Режим
Предназначение
тель POWER
SETUP MENU
CLOCK SET
—
Для выполнения установки даты или времени
CAMERA
(стр. 31)
MEMORY
USB STREAM
z OFF
Для деактивизации потоковой функции USB
PLAYER/VCR
CAMERA
ON
Для активизации потоковой функции USB
USBCONNECT*
z NORMAL
Для подсоединения и распознавания устройства,
MEMORY
представляющего “Memory Stick”.
PTP
Для подсоединения “Memory Stick” и только
копирования изображений “Memory Stick” с
Вашей видеокамеры на компьютер (только с
Windows XP или Mac OS X)
1 Поверните диск SEL/PUSH EXEC для выбора
опции USBCONNECT, за которой последует
опция PTP, а затем нажмите диск для
выполнения установки.
2 Установите “Memory Stick” в видеокамеру, и
подсоедините видеокамеру к компьютеру с
помощью кабеля USB. Мастер копирования
будет запущен автоматически.
LTR SIZE
z NORMAL
Для отображения выбранных опций меню
PLAYER/VCR
обычным размером
CAMERA
MEMORY
2×
Для отображения выбранных опций меню
размером вдвое больше обычного
LANGUAGE
z ENGLISH
Для отображения следующих информационных
PLAYER/VCR
индикаторов на английском языке: REC, STBY,
CAMERA
min, sec, CAPTURE, END SEARCH и VOL, и т.д.
MEMORY
FRANÇAIS
Для отображения информационных индикаторов
на французском языке
ESPAÑOL
Для отображения информационных индикаторов
на испанском языке
PORTUGUÊS
Для отображения информационных индикаторов
на португальском языке
DEUTSCH
Для отображения информационных индикаторов
на немецком языке
ITALIANO
Для отображения информационных индикаторов
на итальянском языке
EΛΛHNIKA
Для отображения информационных индикаторов
на греческом языке
DEMO MODE
z ON
Для появления демонстрации
CAMERA
OFF
Для отмены режима демонстрации
* Кроме моделей DCR-TRV16E/TRV116E
Примечания о режиме DEMO MODE
• Вы не можете выбрать опцию DEMO MODE, если в Вашу видеокамеру вставлена кассета или
“Memory Stick”.
• Опция DEMO MODE по умолчанию установлена в положение STBY (ожидание), и
демонстрация начнется примерно через 10 минут после того, как Вы установите
переключатель POWER в положение CAMERA без вставленной кассеты или “Memory Stick”.
Для отмены демонстрации, вставьте кассету или “Memory Stick”, установите переключатель
POWER в положение, отличающееся от положения CAMERA, или установите опцию DEMO
MODE в положение OFF. Для того, чтобы снова вернуться к опции STBY (режима ожидания),
оставьте опцию DEMO MODE в положении ON в установках меню, поверните переключатель
POWER в положение OFF (CHG) и верните переключатель POWER в положение CAMERA.
• Если команда NIGHTSHOT установлена в положение ON, то на экране появится индикатор
”NIGHTSHOT”, и Вы не сможете выбрать опцию DEMO MODE в установках меню.
250

Изменение установок меню
Пиктограмма/
Переключа-
опция
Режим
Предназначение
тель POWER
OTHERS
DATA CODE
z DATE/CAM
Для нажатия кнопки DATA CODE на пульте
PLAYER/VCR
дистанционного управления для отображения
MEMORY
даты, времени и различных установок во время
воспроизведения (стр. 52)
DATE
Для нажатия кнопки DATA CODE на пульте
дистанционного управления для отображения
даты и времени во время воспроизведения
WORLD TIME
—
Для установки часов на местное время.
CAMERA
Поверните диск SEL/PUSH EXEC для установки
MEMORY
разницы во времени. Показания часов меняются
на разницу во времени, установленную Вами
здесь. Если Вы установите разницу во времени
на 0, часы вернутся к первоначально
установленному времени.
BEEP
z MELODY
Для получения выходного мелодичного сигнала
PLAYER/VCR
при пуске/остановке записи или же при необычных
CAMERA
условиях функционирования Вашей видеокамеры
MEMORY
NORMAL
Для получения выходного зуммерного сигнала
вместо мелодии
Customising Your Camcorder Выполнение индивидуальных установок на Вашей видеокамере
OFF
Для отмены мелодии и зуммерного сигнала
COMMANDER
z ON
Для приведения в действие пульта дистанционного
PLAYER/VCR
управления, прилагаемого к Вашей видеокамере
CAMERA
MEMORY
OFF
Для выключения пульта дистанционного
управления во избежание его неправильного
срабатывания, вызванного функционированием
пульта дистанционного управления другого КВМ
DISPLAY
z LCD
Для отображения индикации на экране ЖКД и в
PLAYER/VCR
видоискателе
CAMERA
MEMORY
V-OUT/LCD
Для отображения индикации на экране
телевизора, экране ЖКД и в видоискателе
REC LAMP
z ON
Для высвечивания лампочки записи на передней
CAMERA
панели Вашей видеокамеры
MEMORY
OFF
Для выключения лампочки записи, чтобы снимаемый
человек не мог распознать, что выполняется запись
VIDEO EDIT
z RETURN*
Для отмены видеомонтажа.
PLAYER/VCR
TAPE*
Для создания программы и выполнения
видеомонтажа (стр. 104)
MEMORY*
Для создания программы и выполнения монтажа
MPEG (стр. 175)
* Кроме моделей DCR-TRV16E/TRV116E
Примечание
Если Вы нажмете кнопку DISPLAY, когда опция DISPLAY в установках меню установлена в
положение V-OUT/LCD, изображение с телевизора или КВМ не появится на экране ЖКД, даже
если Ваша видеокамера подсоединена к выходным разъемам на телевизоре или КВМ.
По истечении более пяти минут после отсоединения источника питания
Опции “PROGRAM AE”, “AUDIO MIX”, “COMMANDER”, “HiFi SOUND” и “WHT BAL” вернутся к
своим заводским установкам.
Другие установки меню будут оставаться в памяти, даже если будет снят батарейный блок.
При съемке близко расположенного объекта
Если опция REC LAMP установлена в положение ON, красная лампочка записи на передней
панели видеокамеры может отразиться на объекте, если он находится близко. В таком случае
рекомендуется установить опцию REC LAMP в положение OFF.
251

— Troubleshooting —
English
Types of trouble and how to correct trouble
If you run into any problem using your camcorder, use the following table to troubleshoot the
problem. If the problem persists, disconnect the power supply and contact your Sony dealer or local
authorised Sony service facility. If “C:ss:ss” appears on the screen, the self-diagnosis display
function has worked. See page 259.
In the recording mode
Symptom Cause and/or Corrective Actions
START/STOP does not operate.
• The POWER switch is not set to CAMERA.
c Set it to CAMERA. (p. 35)
• The cassette has run out.
c Rewind the tape or insert a new one. (p. 33, 54)
• The write-protect tab is set to expose the red mark.
c Use a new tape or slide the tab. (p. 34)
• The tape is stuck to the drum (moisture condensation).
c Remove the cassette and leave your camcorder for at least
one hour to acclimatise. (p. 281)
The power goes off.
• While being operated in CAMERA mode, your camcorder has
been in the standby mode for more than five minutes.
c Set the POWER switch to OFF (CHG) and then to CAMERA.
• The battery pack is dead or nearly dead.
c Install a charged battery pack. (p. 24)
The image on the viewfinder screen
• The viewfinder lens is not adjusted.
is not clear.
c Adjust the viewfinder lens. (p. 39)
The SteadyShot function does not
• STEADYSHOT is set to OFF in the menu settings.
work.
c Set it to ON. (p. 235)
The autofocusing function does not
• The setting is the manual focus.
work.
c Press FOCUS/INFINITY to set to the autofocus mode. (p. 79)
• Shooting conditions are not suitable for autofocus.
c Adjust for manual focusing. (p. 79)
The picture does not appear in the
• The LCD panel is open.
viewfinder.
c Close the LCD panel. (p. 37)
A vertical band appears when you
• The contrast between the subject and background is too high.
shoot a subject such as lights or a
This is not a malfunction.
candle flame against a dark
background.
A vertical band appears when you
• This is not a malfunction.
shoot a very bright subject.
Some tiny white, red, blue or green
• Slow shutter, Super NightShot or Colour Slow Shutter is
spots appear on the screen.
activated. This is not a malfunction.
An unknown picture is displayed on
• If 10 minutes elapse after you set the POWER switch to
the screen.
CAMERA or DEMO MODE is set to ON in the menu settings
without a cassette and a “Memory Stick” inserted, your
camcorder automatically starts the demonstration.
c Insert a cassette or a “Memory Stick” and the demonstration
stops.
You can also cancel DEMO MODE. (p. 241)
252

Types of trouble and how to correct trouble
Symptom Cause and/or Corrective Actions
The picture is recorded in incorrect or
• NIGHTSHOT is set to ON.
unnatural colours.
c Set it to OFF. (p. 44)
The picture appears too bright, and
• NIGHTSHOT is set to ON in a bright place.
the subject does not appear on the
c Set it to OFF . (p. 44)
screen.
• BACK LIGHT is activated.
c Deactivate it. (p. 43)
You cannot record still images on a
• PHOTO REC is set to TAPE in the menu settings.
“Memory Stick” in the standby mode
c Set it to MEMORY. (p. 235)
or while recording on tape.*
You cannot record still images on a
• PHOTO REC is set to MEMORY in the menu settings.
tape.*
c Set it to TAPE. (p. 235)
The click of the shutter does not
• BEEP is set to OFF in the menu settings.
sound.
c Set it to MELODY or NORMAL. (p. 242)
Black bands appear when you
c Set the STEADYSHOT to OFF in the menu settings. (p. 235)
record TV or computer screen.
* Except DCR-TRV16E/TRV116E
(continued on the following page)
Troubleshooting Поиск и устранение неисправностей
253

Types of trouble and how to correct trouble
In the playback mode
Symptom Cause and/or Corrective Actions
1)
2)
The tape does not move when a
• The POWER switch is not set to PLAYER*
/VCR*
.
1)
2)
video control button is pressed.
c Set it to PLAYER*
/VCR*
. (p. 50)
The playback button does not work.
• The cassette has run out of tape.
c Rewind the tape. (p. 54)
There are horizontal lines on the
• The video heads may be dirty.
picture or the playback picture is not
c Clean the heads using the cleaning cassette (optional).
clear or does not appear.
(p. 282)
No sound or only a low sound is
• The stereo tape is played back with HiFi SOUND set to 2 in the
heard when playing back a tape.
menu settings.
c Set it to STEREO (p. 236).
• The volume is turned to minimum.
c Turn up the volume. (p. 50)
• AUDIO MIX is set to ST2 in the menu settings.
c Adjust AUDIO MIX. (p. 236)
During displaying the recorded date,
• The cassette has no cassette memory.
date search function does not work.
c Use a cassette with cassette memory. (p. 94)
• CM SEARCH is set to OFF in the menu settings.
c Set it to ON. (p. 239)
• The tape has a blank portion during recorded portions. (p. 95)
The title search function does not
• The cassette has no cassette memory.
work.
c Use a cassette with cassette memory. (p. 92)
• CM SEARCH is set to OFF in the menu settings.
c Set it to ON. (p. 239)
• There is no title in the tape.
c Superimpose the titles. (p. 130)
• The tape has a blank portion between recorded portions.
(p. 93)
The new sound added to the
• AUDIO MIX is set to the ST1 side in the menu settings.
recorded tape is not heard.
c Adjust AUDIO MIX. (p. 236)
The title is not displayed.
• TITLE DSPL is set to OFF in the menu settings.
c Set it to ON. (p. 239)
1)
*
DCR-TRV16E/TRV18E/TRV24E only
2)
*
DCR-TRV25E/TRV27E/TRV116E/TRV118E only
254

Types of trouble and how to correct trouble
In the recording and playback modes
Symptom Cause and/or Corrective Actions
The power does not turn on.
• The battery pack is not installed, or is dead or nearly dead.
c Install a charged battery pack. (p. 24, 25)
• The AC power adaptor is not connected to a wall socket.
c Connect the AC power adaptor to a wall socket. (p. 30)
The end search function does not
• The tape was ejected after recording when using a cassette
work.
without cassette memory. (p. 49)
• You have not recorded on the new cassette yet. (p. 48)
The end search function does not
• The tape has a blank portion at the beginning or midway.
work correctly.
(p. 49)
The battery pack is quickly
• The operating temperature is too low.
discharged.
• The battery pack is not fully charged.
c Charge the battery pack fully again. (p. 25)
• The battery pack is completely dead, and cannot be recharged.
c Replace with a new battery pack. (p. 24)
The battery remaining time indicator
• You have used the battery pack in an extremely hot or cold
does not indicate the correct time.
environment for a long time.
• The battery pack is completely dead, and cannot be recharged.
c Replace with a new battery pack. (p. 24)
Troubleshooting Поиск и устранение неисправностей
• The battery is not fully charged.
c Charge the battery pack fully again. (p. 25)
• A deviation has occured in the remaining battery time.
c Charge the battery pack fully again so that the indication on
the battery remaining battery time indicator is correct. (p. 25)
The power goes off although the
• A deviation has occured in the remaining battery time.
battery remaining time indicator
c Charge the battery pack fully again so that the indication on
indicates that the battery pack has
the battery remaining battery time indicator is correct. (p. 25)
enough power to operate.
The cassette cannot be removed from
• The power supply is disconnected.
the holder.
c Connect it firmly. (p. 24, 30)
• The battery is dead.
c Use a charged battery pack. (p. 24, 25)
The % and Z indicators flash and no
• Moisture condensation has occurred.
functions except for cassette ejection
c Remove the cassette and leave your camcorder for at least
work.
one hour to acclimatise. (p. 281)
indicator does not appear when
• The gold-plated connector of the cassette is dirty or dusty.
using a cassette with cassette
c Clean the gold-plated connector. (p. 275)
memory.
Remaining tape indicator is not
• The q REMAIN is set to AUTO in the menu settings.
displayed.
c Set it to ON to always display the remaining tape indicator.
(p. 240)
(continued on the following page)
255

Types of trouble and how to correct trouble
When operating using the “Memory Stick”
– Except DCR-TRV16E/TRV116E
Symptom Cause and/or Corrective Actions
The “Memory Stick” does not
• The POWER switch is not set to MEMORY.
function.
c Set it to MEMORY. (p. 150)
• The “Memory Stick” is not inserted.
c Insert a “Memory Stick”. (p. 143)
Recording does not function.
• The “Memory Stick” has already been recorded to its full
capacity.
c Delete unnecessary images and record again. (p. 196)
• The “Memory Stick” formatted incorrectly is inserted.
c Format the “Memory Stick” or use another “Memory Stick.”
(p. 238)
• The write-protect tab on the “Memory Stick” is set to LOCK.
c Release the lock. (p. 141)
The image cannot be deleted.
• The image is protected.
c Cancel the image protection. (p. 195)
• The write-protect tab on the “Memory Stick” is set to LOCK.
c Release the lock. (p. 141)
You cannot format the “Memory
• The write-protect tab on the “Memory Stick” is set to LOCK.
Stick”.
c Release the lock. (p. 141)
Deleting all the images cannot be
• The write-protect tab on the “Memory Stick” is set to LOCK.
carried out.
c Release the lock. (p. 141)
You cannot protect the image.
• The write-protect tab on the “Memory Stick” is set to LOCK.
c Release the lock. (p. 141)
• The image to protect is not played back.
c Press MEMORY PLAY to play back the image. (p. 181)
You cannot write a print mark on
• The write-protect tab on the “Memory Stick” is set to LOCK.
the still image.
c Release the lock. (p. 141)
• The image to write a print mark is not played back.
c Press MEMORY PLAY to play back the image. (p. 181)
• You are trying to write a print mark on a moving picture.
c Print marks cannot be written on a moving picture.
The photo save function does not
• The write-protect tab on the “Memory Stick” is set to LOCK.
work.
c Release the lock. (p. 141)
You cannot play back images in
• You may not be able to play back images in actual size when
actual size.
you try to play back images recorded by other equipment. This
is not a malfunction.
You cannot play back image data.
• Your camcorder cannot play back some images processed with
a computer (The file name will blink).
• If you record images with any other equipment, the images
may not play back normally on your camcorder.
256

Types of trouble and how to correct trouble
Others
Symptom Cause and/or Corrective Actions
The title is not recorded.
• The cassette has no cassette memory.
c Use a cassette with cassette memory. (p. 130)
• The cassette memory is full.
c Erase unwanted title. (p. 133)
• The cassette is set to prevent accidental erasure.
c Slide the write-protect tab so that red portion is not visible.
(p. 34)
• The tape has a blank portion between recorded portions.
c Superimpose the title to a recorded portion. (p. 130)
The cassette label is not recorded.
• The cassette has no cassette memory.
c Use a cassette with cassette memory. (p. 137)
• The cassette memory is full.
c Erase unwanted titles. (p. 133)
• The cassette is set to prevent accidental erasure.
c Slide the write-protect tab so that red mark is not visible.
(p. 34)
Digital program editing to a tape
• The input selector on the VCR is not set correctly.
does not function.
c Check the connection and set the input selector on the VCR
again (p. 104)
Troubleshooting Поиск и устранение неисправностей
• The camcorder is connected to DV equipment of other than
Sony using the i.LINK cable (DV connecting cable).
c Set it to IR (p. 111).
• Setting programme on a blank portion of the tape is attempted.
c Set the programme again on a recorded portion (p. 115).
• The camcorder and the VCR are not synchronised.
c Adjust the synchronization (p. 113).
• The IR SETUP code is incorrect.
c Set the correct code (p. 107).
Digital program editing to a
• Setting programme on a blank portion of the tape is attempted.
“Memory Stick” does not
c Set the programme again on a recorded portion (p. 175).
1)
function.*
The Remote Commander supplied
• COMMANDER is set to OFF in the menu settings.
with your camcorder does not work.
c Set it to ON. (p. 242)
• Something is blocking the infrared rays.
c Remove the obstacle.
• The batteries are inserted in the battery holder with the + –
polarities incorrectly matching the + – marks.
c Insert the batteries correctly. (p. 299)
• The batteries are dead.
c Insert new ones. (p. 299)
The picture from a TV or VCR does
• DISPLAY is set to V-OUT/LCD in the menu settings.
not appear even when your
c Set it to LCD. (p. 242)
camcorder is connected to output on
2)
the TV or VCR.*
1)
*
Except DCR-TRV16E/TRV116E
2)
*
DCR-TRV25E/TRV27E/TRV116E/TRV118E only
(continued on the following page)
257

Types of trouble and how to correct trouble
Symptom Cause and/or Corrective Actions
The melody or beep sounds for five
• Moisture condensation has occurred.
seconds.
c Remove the cassette and leave your camcorder for at least
one hour to acclimatise. (p. 281)
• Some troubles have occurred in your camcorder.
c Remove the cassette and insert it again, then operate your
camcorder.
No function works though the
• Disconnect the mains lead of the AC power adaptor or remove
power is on.
the battery, then reconnect it in about one minute. Turn the
power on. If the functions still do not work, open the LCD
panel and press the RESET button using a sharp-pointed object.
(If you press the RESET button, all the settings including the
date and time return to their defaults) (p. 295)
While charging the battery pack, no
• The battery pack is not properly installed.
indicator appears or the indicator
c Install it properly. (p. 24)
flashes in the display window.
• Something is wrong with the battery pack.
c Contact your Sony dealer or local authorised Sony service
facility.
You cannot charge the battery pack.
• The POWER switch is not set to OFF (CHG).
c Set it to OFF (CHG). (p. 25)
Image data cannot be transferred by
• The USB cable was connected before installation of the USB
the USB connection.
driver was completed.
c Uninstall the incorrect USB driver and re-install the USB
driver (p. 214).
• USBCONNECT is set to PTP when the POWER switch is set to
1)
MEMORY*
.
c Set it to NORMAL (p. 241).
When you set the POWER switch to
• This is because some functions use a linear mechanism. This is
VCR or OFF (CHG), if you move
not a malfunction.
your camcorder, you may hear a
clatter sound from inside your
2)
camcorder.*
The cassette cannot be removed
• Moisture has started to condense in your camcorder (p. 281).
even if the cassette lid is open.
1)
*
Except DCR-TRV16E/TRV116E
2)
*
DCR-TRV24E/TRV25E/TRV27E only
258
Troubleshooting Поиск и устранение неисправностей
259
C
:
21
:
00
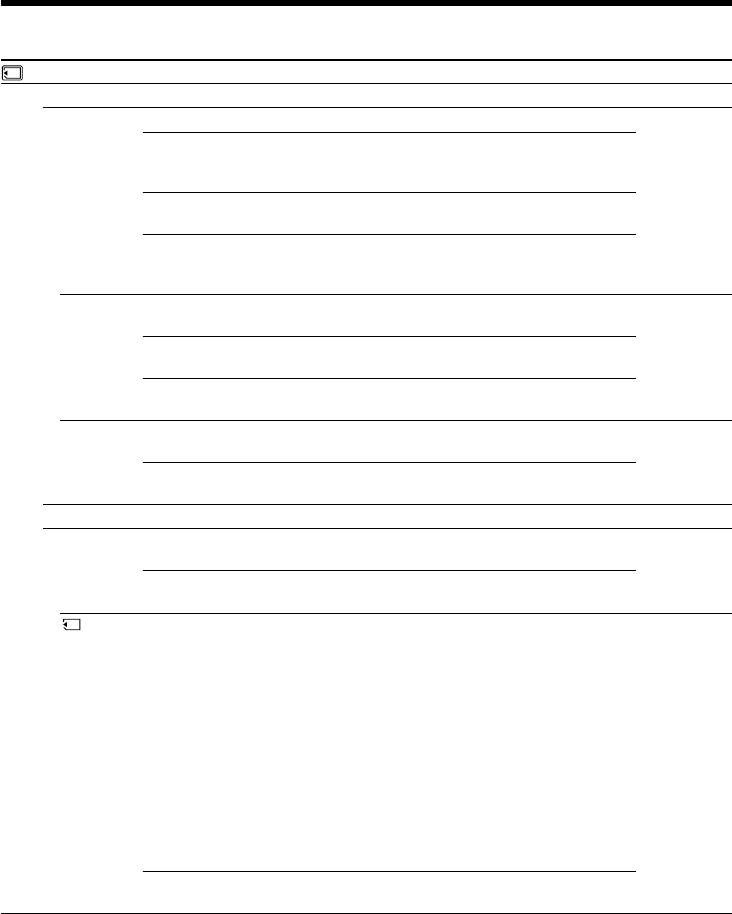
English
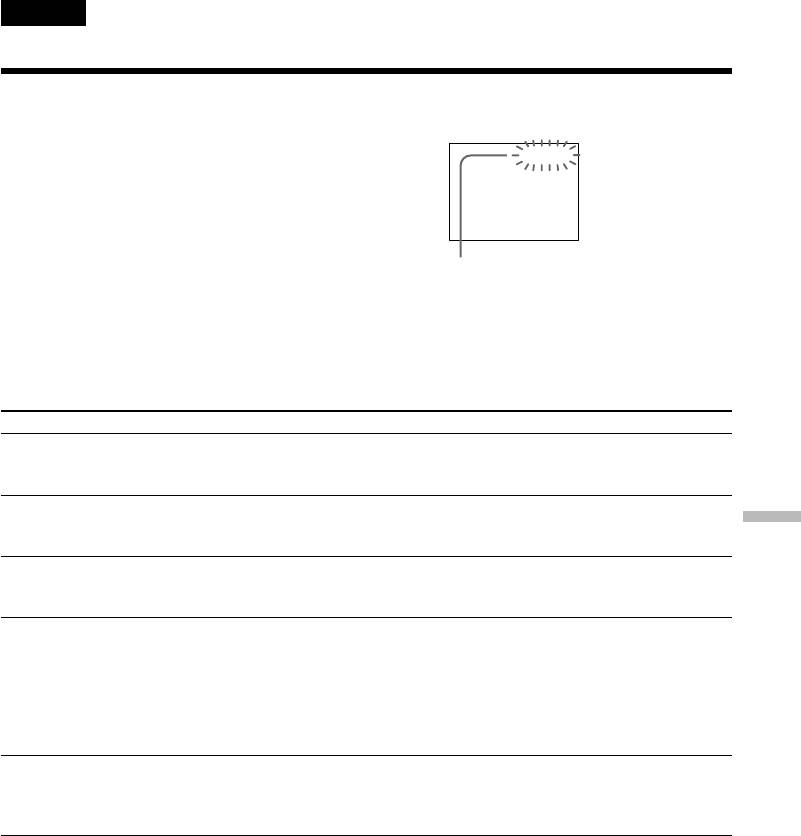
Self-diagnosis display
Your camcorder has a self-diagnosis display function.
LCD screen, viewfinder or
This function displays the current state of your
display window
camcorder as a 5-digit code (a combination of a letter
and figures) in the viewfinder, on the LCD screen or
in the display window. If a 5-digit code is displayed,
check the following list of codes. The last two digits
(indicated by ss) differ depending on the state of
your camcorder.
Self-diagnosis display
•C:ss:ss
You can service your camcorder
yourself.
•E:ss:ss
Contact your Sony dealer or local
authorised Sony service facility.
Five-digit display Cause and/or Corrective Actions
C:04:ss
• You are using a battery pack that is not an “InfoLITHIUM”
battery pack.
c Use an “InfoLITHIUM” battery pack. (p. 276)
C:21:ss
• Moisture condensation has occurred.
c Remove the cassette and leave your camcorder for at least
one hour to acclimatise. (p. 281)
C:22:ss
• The video heads are dirty.
c Clean the heads using the cleaning cassette (optional).
(p. 282)
C:31:ss
• A malfunction other than the above that you can service has
C:32:ss
occurred.
c Remove the cassette and insert it again, then operate your
camcorder.
c Disconnect the mains lead of the AC power adaptor or
remove the battery pack. After reconnecting the power
supply, operate your camcorder.
E:20:ss
• A malfunction that you cannot service has occurred.
E:61:ss
c Contact your Sony dealer or local authorised Sony service
E:62:ss
facility and inform them of the 5-digit code.
(example: E:61:10)
If you are unable to rectify the problem even if you try corrective actions a few times, contact your
Sony dealer or local authorised Sony service facility.
English
Warning indicators and messages
If indicators and messages appear on the LCD screen or in the viewfinder, check the following:
See the page in parentheses “()” for more information.
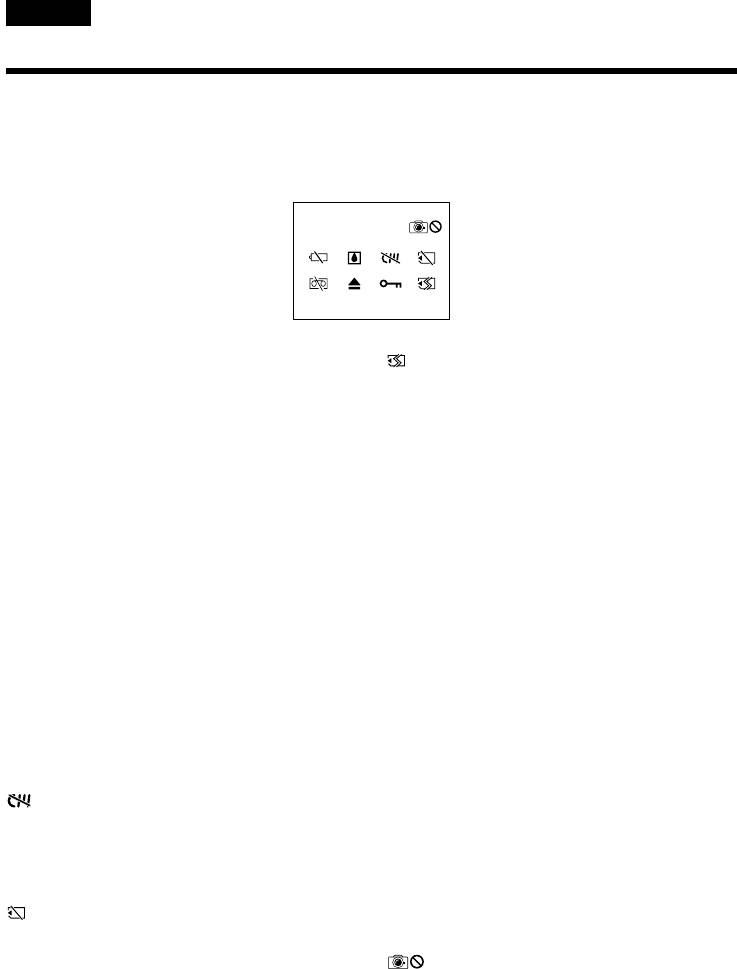
Warning indicators
–
0001
C
:
21
:
00100
100-0001 Warning indicator as to file
Warning indicator as to “Memory Stick”
1)
2)
Slow flashing:
formatting*
*
•The file is corrupted.
Fast flashing:
•The file is unreadable.
•“Memory Stick” is not formatted correctly
•You are trying to use the MEMORY MIX
(p. 238).
1)
function on a moving picture.*
•The “Memory Stick” data is corrupted
(p. 143).
C:21:00 Self-diagnosis display (p. 259)
Q Warning indicator as to tape
E The battery is dead or nearly dead
Slow flashing:
Slow flashing:
•The tape is near the end.
2)
•The battery is nearly dead.
•No tape is inserted.*
Depending on the operating conditions,
•The write-protect tab on the cassette is exposed
2)
environment and battery condition, the E
(red)*
(p. 34).
indicator may flash even if there are
Fast flashing:
approximately five to 10 minutes remaining.
2)
•The cassette has run out of tape.*
2)
% Moisture condensation has occurred*
2)
Z You need to eject the cassette*
Fast flashing:
Slow flashing:
•Eject the cassette, turn off your camcorder, and
•The write-protect tab on the cassette is exposed
leave it for about one hour with the cassette
(red) (p. 34).
compartment open (p. 281).
Fast flashing:
•Moisture condensation has occurred (p. 281).
Warning indicator as to cassette
2)
•The cassette has run out of tape.
memory*
•The self-diagnosis display function is activated
Slow flashing:
(p. 259).
•No cassette with cassette memory is inserted
(p. 272).
1)
2)
- The still image is protected*
*
1)
Slow flashing:
Warning indicator as to “Memory Stick”*
•The still image is protected (p. 195).
Slow flashing:
•No “Memory Stick” is inserted.
Warning indicator as to recording of still
2)
Fast flashing*
:
image
•The “Memory Stick” is not readable on your
Slow flashing:
camcorder (p. 142).
•The still image cannot be recorded on a tape or
•The image cannot be recorded on a “Memory
1)
a “Memory Stick”*
(p. 59, 63)
Stick”.
1)
*
Except DCR-TRV16E/TRV116E
2)
*
You hear the melody or beep.
260


