Sony KV-SW292: x
x: Sony KV-SW292
x
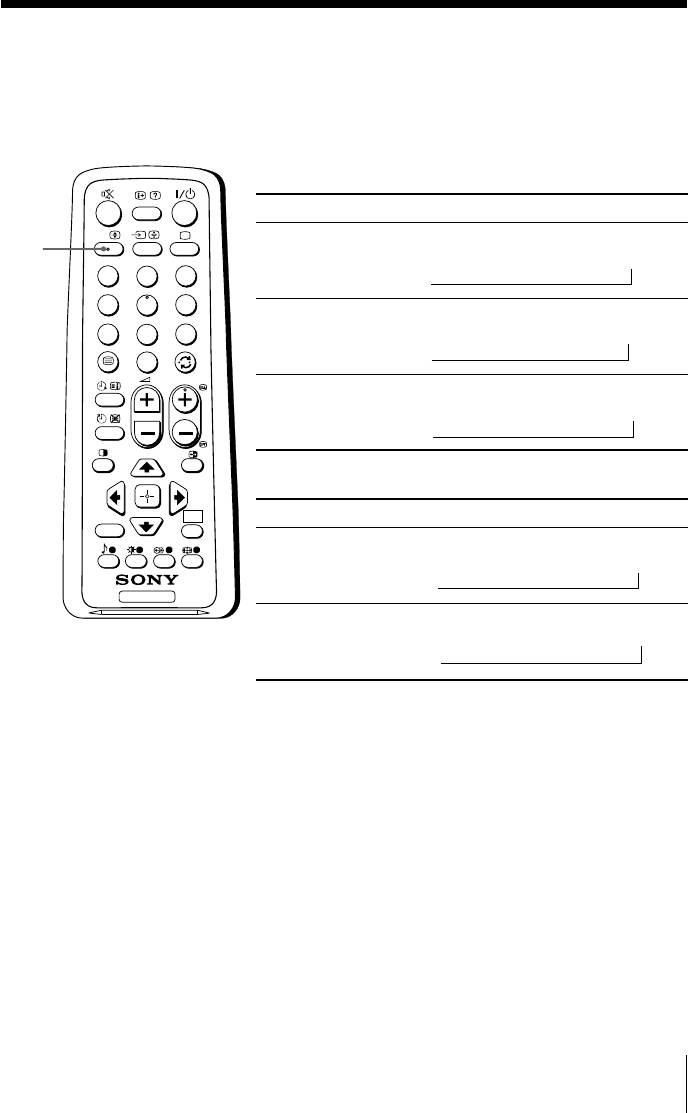
Enjoying stereo or bilingual programs
You can enjoy stereo sound or bilingual programs of NICAM and A2 stereo
systems by using the A/B button.
When receiving a NICAM program
Broadcasting On-screen display (Selected sound)
A/B
NICAM
NICAM
t
Mono
A/B
stereo
(Stereo sound)
(Regular sound)
1
2
3
t
4
5
6
NICAM
NICAM Main
tt
NICAM Sub
Mono
bilingual
7
8
9
(Main sound)
(Sub sound)
(Regular sound)
t
0
PROG
NICAM
NICAM Main
t
Mono
monaural
(Main sound)
(Regular sound)
t
When receiving an A2 program
WEGA
Broadcasting On-screen display (Selected sound)
RETURN
GATE
A2
Stereo
t
Mono
stereo
(Stereo sound)
(Regular sound)
t
TV
A2
Main
t
Sub
bilingual
(Main sound)
(Sub sound)
t
Note
• If the stereo sound is noisy when receiving a stereo program, select “Mono”. The sound
becomes monaural but the noise is reduced.
Advanced Operations
13
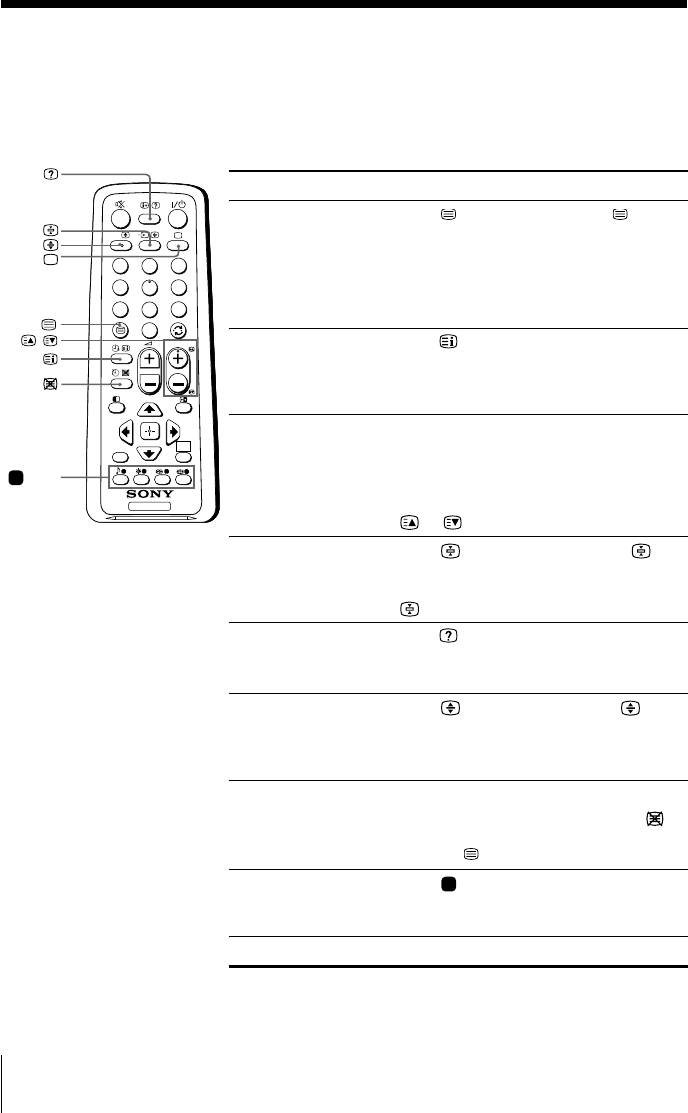
x Viewing Teletext
Some TV stations broadcast an information service called Teletext which allows
you to receive various information, such as stock market reports and news.
You can use the buttons on the remote to view Teletext.
To Do this
display a Teletext Press . Each time you press , the
A/B
A/B
page on the screen changes as follows:
TV picture Teletext t Teletext and TV t TV.
1
1
2
2
3
3
If there is no Teletext broadcast, “100” is
4
4
5
5
6
6
displayed at the top left corner of the
7
7
8
8
9
9
screen.
0
0
,
PROG
PROG
check the contents Press .
of a Teletext service An overview of the Teletext contents,
including page numbers, appears on the
screen.
select a Teletext page Press the number buttons to enter the
WEGA
RETURN
RETURN
RETURN
WEGA
WEGA
GATE
GATE
GATE
three-digit page number of the desired
Teletext page. If you make a mistake,
(red,
reenter the correct page number. To
green,
TV
TV
access the next or previous page, press
yellow,
or .
blue)
hold (pause) a Press to display the symbol “ ” at
Teletext display the top left corner of the screen. To
resume normal Teletext viewing, press
.
reveal concealed Press .
information (e.g., To conceal the information, press the
an answer to a quiz) button again.
enlarge the Teletext Press . Each time you press , the
display Teletext display changes as follows:
Enlarge upper half t Enlarge lower
half t Normal size.
stand by for a Teletext (1) Enter the Teletext page number that
page while watching you want to refer to, then press
.
a TV program (2) When the page number is displayed,
press
to show the text.
select a FASTEXT Press (red, green, yellow and blue)
menu or the colored that corresponds to the desired menu or
boxes page number.
turn off Teletext Press a.
Note
• The FASTEXT feature can be used only when the FASTEXT broadcast is available.
14 Advanced Operations
Menu Adjustment
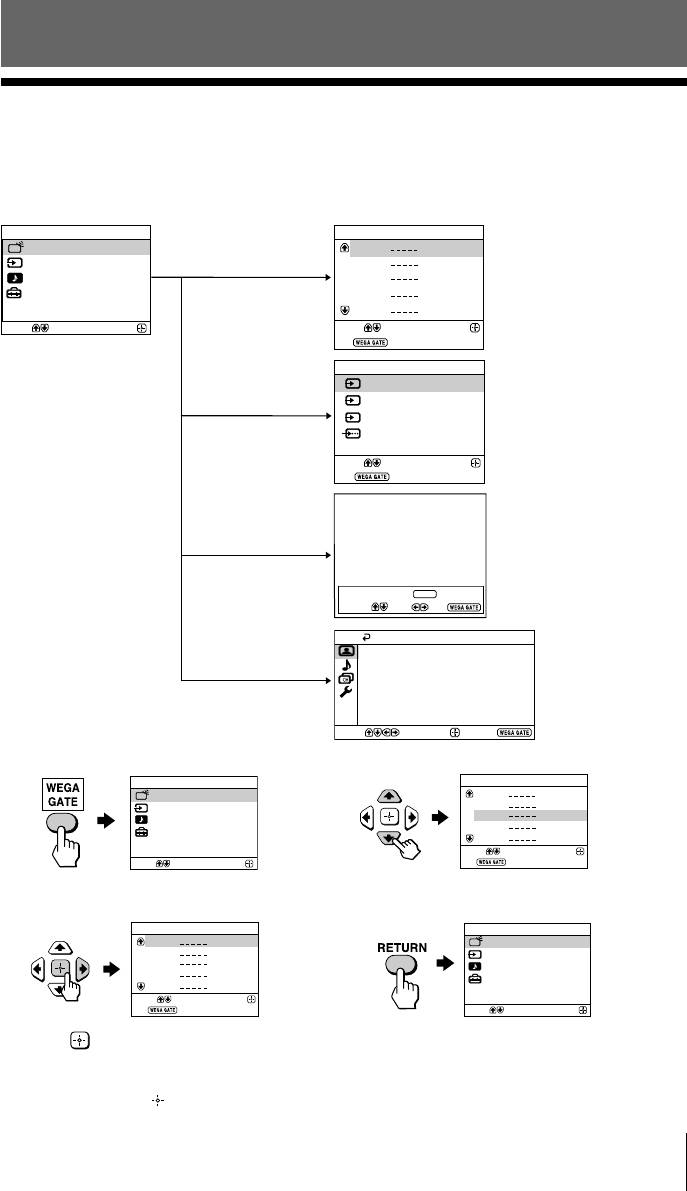
x Introducing the WEGA GATE
navigator
WEGA GATE is a gateway that allows you access to preset TV channels,
connected external inputs, FM Radio mode and “Settings” menu.
WEGA GATE
TV
TV
01
External Inputs
“TV”
02
watch the preset TV
FM Radio
03
channels (see page 6)
Settings
04
05
Select
Confirm
Select
Confirm
End
External Inputs
1
Video 1
2
Video 2
“External Inputs”
select the inputs for the
3
Video 3
connected equipment
DVD
(see page 22)
Select
Confirm
End
FM Radio
listen to the FM Radio
“FM Radio”
Preset 1:
(see page 12)
---.--
Please setup FM Radio
Select Preset 1-9
—PROG+
Search
Fine
Exit
Picture
Picture Mode: Vivid
Picture Adjustment
“Settings”
change the settings
Color Temperature: Cool
Intelligent Picture: On
of your TV
(see page 16)
Select
Confirm
End
How to use WEGA GATE
WEGA GATE
TV
TV
01
External Inputs
02
03
FM Radio
04
Settings
05
Select
Confirm
Select
Confirm
End
(1) Press WEGA GATE to display or cancel
(3) Press V or v to select the desired item.
the WEGA GATE menu.
TV
WEGA GATE
01
TV
02
External Inputs
03
FM Radio
04
Settings
05
Select
Confirm
End
Select
Confirm
(4) Press RETURN to move to the previous
(2) Press
(or b) to confirm your selection
level.
or go to the next level.
Tip
• The WEGA GATE,
and V,v,B,b buttons on the front panel can also be used for the operations
above.
Menu Adjustment
15
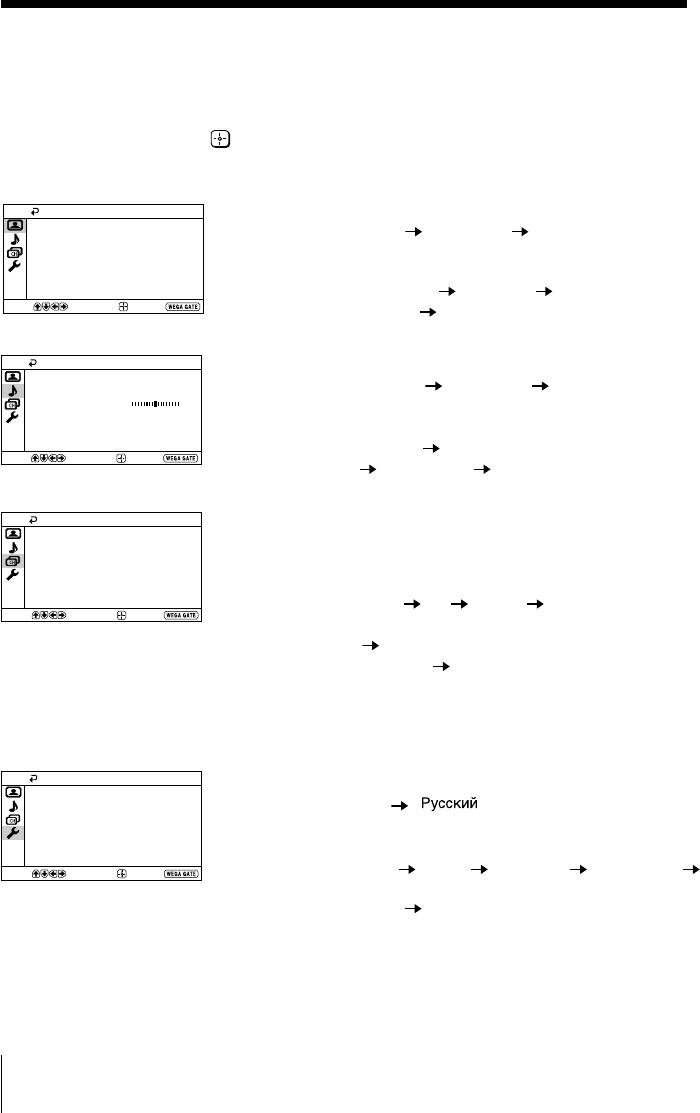
x “Settings” Adjustment
You are able to change the settings of your TV from “Settings” in WEGA GATE
menu.
Press WEGA GATE button to display WEGA GATE menu. Press V or v to select
“Settings” and press
.
The following is an overview of the items that can be adjusted.
Picture
“Picture” (see page 17)
Picture Mode: Vivid
“Picture Mode”: “Vivid”
“Standard” “Custom”
Picture Adjustment
Color Temperature: Cool
“Picture Adjustment”: “Picture”, “Brightness”, “Color”, “Hue”,
Intelligent Picture: On
“Sharpness”, “Reset”
“Color Temperature”: “Cool”
“Neutral” “Warm”
Select
Confirm
End
“Intelligent Picture”: “On”
“Off”
Sound
“Sound” (see page 18)
Sound Mode: Dynamic
Sound Adjustment
“Sound Mode”: “Dynamic”
“Standard” “Custom”
Balance
“Sound Adjustment”: “Adjust”, “Reset”
Intelligent Volume:
Off
Surround: Off
“Balance”
“Intelligent Volume”: “On” “Off”
Select
Confirm
End
“Surround”: “On”
“Simulated” “Off”
Channel Setup
“Channel Setup” (see page 19)
Auto Program
“Auto Program”
Manual Program
Program Sorting/Edit
“Manual Program”
FM Radio Setup
“Program”: “00” - “99”
“TV System”: “B/G”
“I” “D/K” “M”
Select
Confirm
End
“VHF Low”/“VHF High”/“UHF”
“Fine”: “Auto”
“Manual”
“Signal Booster”: “Auto”
“Off”
“Program Sorting/Edit”
“FM Radio Setup”
Setup
“Setup” (see page 21)
Language:
English
Picture Position
“Language”: “English”
“ ” (Russian)
Video Label
“Picture Position”: “Picture Rotation”, “Picture V-Position”
Color System: Auto
Factory Settings
“Video Label”: “Video Input”, “Label”
Select
Confirm
End
“Color System”: “Auto” “PAL” “SECAM” “NTSC3.58”
“NTSC4.43”
“Factory Settings”: “Yes”
“No”
Note
• When a feature is dimmed in the menu, it is not selectable.
16 Menu Adjustment
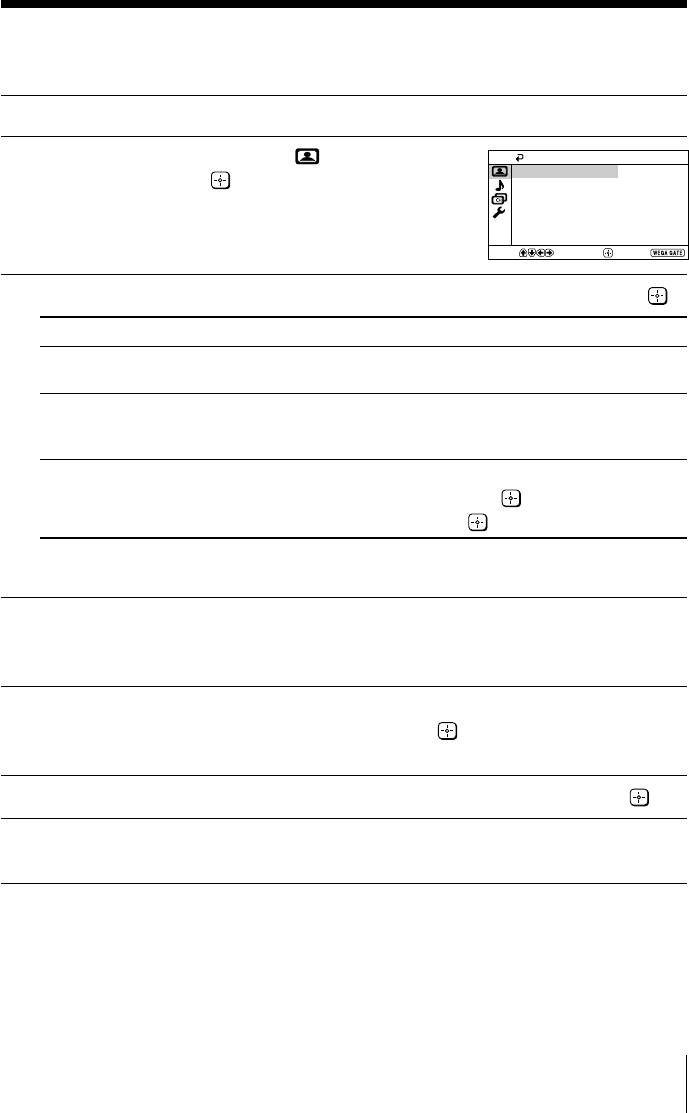
x Changing the “Picture” setting
The “Picture” menu allows you to adjust the picture settings.
Press WEGA GATE and select “Settings”.
1
Make sure the “Picture” icon (
) is
Picture
2
Picture Mode: Vivid
selected, then press
.
Picture Adjustment
Color Temperature: Cool
Intelligent Picture: On
Select
Confirm
End
Press V or v to select the desired item (e.g., “Picture Mode”), then press
.
3
Select To
“Picture Mode” choose either “Vivid”, “Standard” or “Custom”*
(see page 11).
“Color Temperature” adjust white color tint.
Choose either “Cool” (blue tint), “Neutral” (neutral tint) or
“Warm” (red tint).
“Intelligent Picture” optimize picture quality.
Press V or v to select “On”, then press
.
To cancel, select “Off”, then press .
* You can adjust the setting to your personal preference in the “Picture Adjustment” and
“Color Temperature” options only when the “Custom” mode is selected.
Adjusting the “Picture Adjustment” items under
“Custom” mode
Press V or v to select either “Picture” (contrast), “Brightness”, “Color”,
1
“Hue” (color tones) or “Sharpness”, then press
.
Selecting “Reset” will set your TV to the factory settings.
Press V,v,B or b to adjust the setting of your selected item, then press
.
2
Repeat the above steps to adjust other items.
3
The adjusted settings will be received when you select “Custom”.
Notes
• “Hue” can be adjusted for the NTSC color system only.
• Reducing “Sharpness” can also reduce picture noise.
Menu Adjustment
17
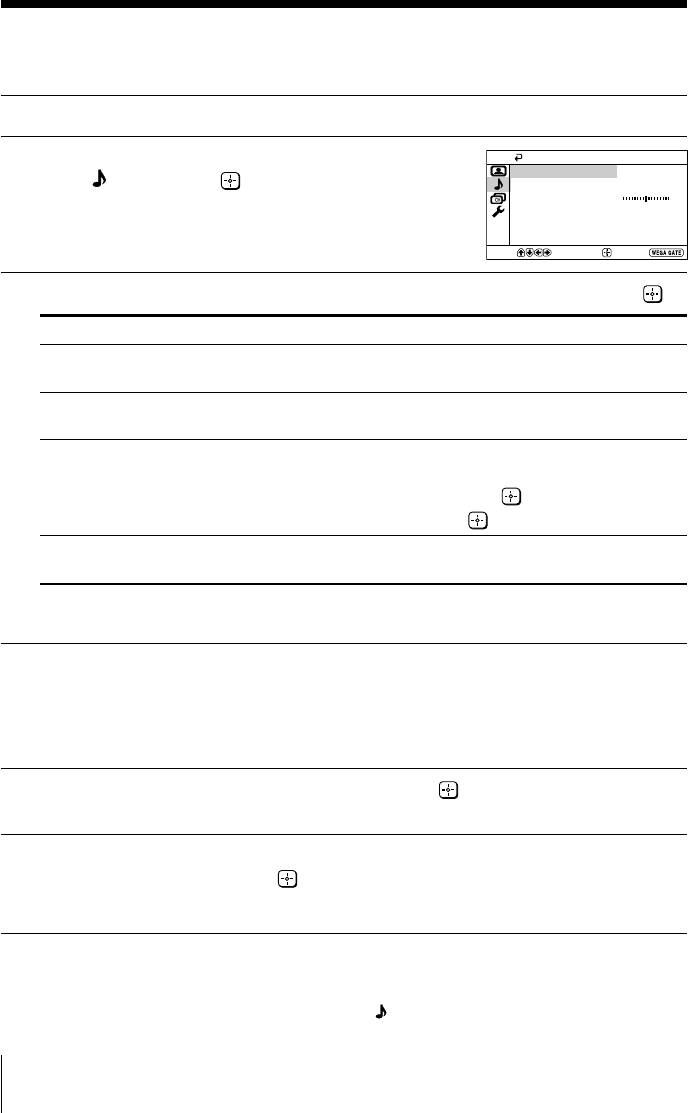
x Changing the “Sound” setting
The “Sound” menu allows you to adjust the sound settings.
Press WEGA GATE and select “Settings”.
1
Press V or v to select the “Sound”
Sound
2
Sound Mode: Dynamic
icon (
), then press .
Sound Adjustment
Balance
Intelligent Volume: Off
Surround: Off
Select
Confirm
End
Press V or v to select the desired item (e.g., “Sound Mode”), then press
.
3
Select To
“Sound Mode” choose either “Dynamic”, “Standard” or “Custom”*
(see page 11).
“Balance” Press v or B to emphasize the left speaker.
Press V or b to emphasize the right speaker.
“Intelligent Volume” adjust the volume of all program numbers and video inputs
automatically.
Press V or v to select “On”, then press
.
To cancel, select “Off”, then press .
“Surround” choose either “On” (surround), “Simulated” (stereo-like
monaural sound) or “Off”.
* You can adjust the setting to your personal preference in the “Sound Adjustment”
option only when the “Custom” mode is selected.
Adjusting the “Sound Adjustment” items under
“Custom” mode
The 5-Band Graphic Equalizer feature allows you to adjust sound frequency settings
of “Custom” mode in the menu.
Make sure that “Adjust” is selected, then press
.
1
Selecting “Reset” will set your TV to the factory settings.
Press B or b to select the desired sound frequency, then press V or v to
2
adjust the setting and press
.
The adjusted settings will be received when you select “Custom”.
Notes
• Adjusting higher frequency will affect higher pitched sound and adjusting lower frequency
will affect lower pitched sound.
• You may display the settings directly by using the
button on the remote control (see
page 11).
18 Menu Adjustment
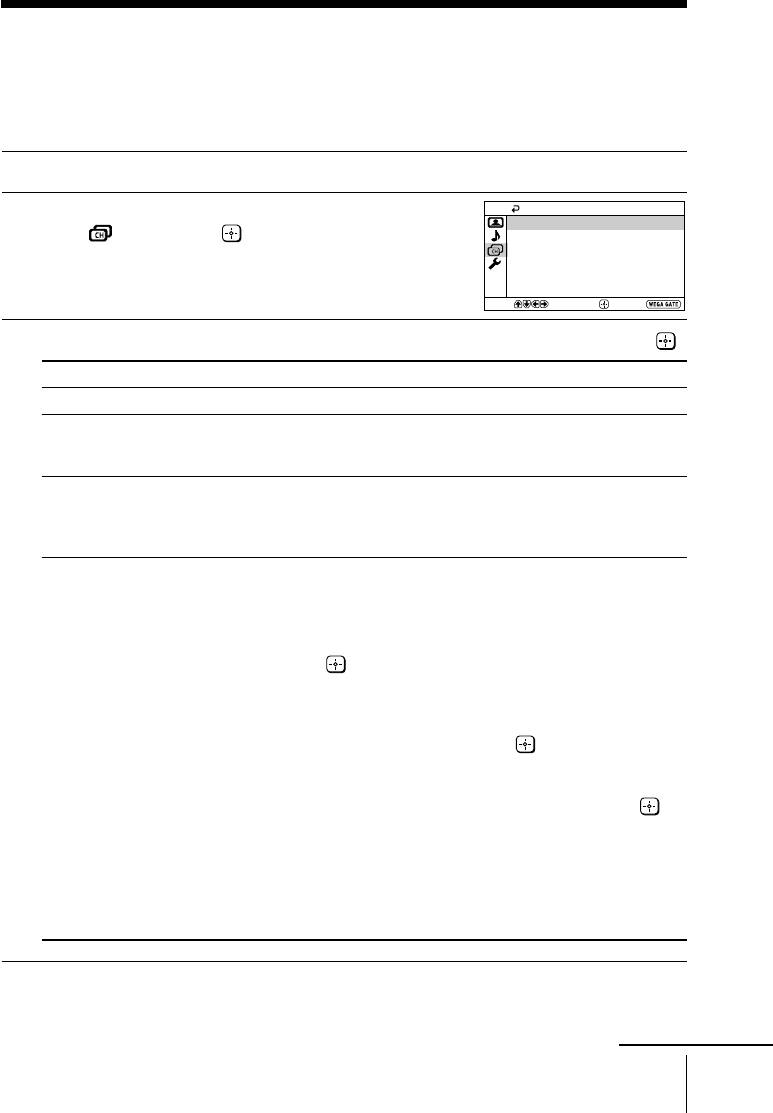
x C
hanging the “Channel Setup”
setting
The “Channel Setup” menu allows you to preset channels automatically,
manually preset channels, sort or edit the channels and preset FM radio stations.
Press WEGA GATE and select “Settings”.
1
Press V or v to select the “Channel Setup”
2
icon (
), then press .
Press V or v to select the desired item (e.g., “Auto Program”), then press
.
3
Select To
“Auto Program” preset channels automatically.
“Manual Program” manually preset desired channels and channels that cannot be
preset automatically (see Presetting channels manually in
page 20).
“Program Sorting/Edit” change the order in which the channels appear on the screen,
label the program number, skip the program number and block
unwanted programs.
(see step 3 of the section “Initial Setup” in page 6).
“FM Radio Setup”* preset up to nine FM radio stations.
You can manually preset each FM radio station that can be
received in your area and then store the radio frequency of the
desired FM radio stations.
(1) Press V or v to select the desired FM radio station position,
then press
.
(2) Press V or v to search the FM radio stations.
Searching stops automatically when a station is tuned in.
If the station has a weak signal, press B or b to fine tune the
radio frequency manually, then press
to store the FM
radio station.
(3) You may edit the FM radio station label. Press V or v to
select alphanumeric characters for the label, then press
.
(4) Repeat steps (1) through (3) to preset other FM radio stations.
* The “FM Radio Setup” feature is only available in FM Radio
mode. To enable this feature, access to FM Radio mode by using
WEGA GATE system (see page 15) or pressing the FM button
on the front panel (see page 8), then preset your desired FM
radio stations according to the steps mentioned above.
Notes
• If you preset a blocked program number, that program number will be unblocked
automatically.
• If you sort a blocked program, that program will remain blocked.
Menu Adjustment
19
Channel Setup
Auto Program
Manual Program
Program Sorting/Edit
FM Radio Setup
Select
Confirm
End
continue

Presetting channels manually
After selecting “Manual Program”, select the program
1
number to which you want to preset a channel.
(1) Make sure “Program” is selected, then press
.
(2) Press V or v
until the program number you want
to preset appears on the menu, then press
.
Select the desired channel.
2
(1) Make sure either “VHF Low”, “VHF High” or “UHF” is selected, then press
.
(2) Press V or v until the desired channel’s broadcast appears on the TV screen,
then press
.
If the sound of the desired channel is abnormal, select the appropriate TV
3
system.
(1) Press V or v
to select “TV System”, then press .
(2) Press V or v
until the sound becomes normal, then press .
If you are not satisfied with the picture and sound quality, you may be able
4
to improve them by using the “Fine” tuning feature.
(1) Press V or v
to select “Fine”, then press .
(2) Press V or v
to select “Manual”, then press .
(3)
Press V,v,B or b until the picture and sound quality are optimal, then press .
The + or – icon on the menu flashes while tuning.
If the TV signal is too strong (picture distorted; picture with lines; signal
5
interference) or weak (snowy picture), you may be able to improve the
picture quality by setting the “Signal Booster” feature.
(1) Press V or v
to select “Signal Booster”, then press .
(2) Press V or v
to select either “Off”(for picture distorted; picture with lines;
signal interference) or “Auto” (for snowy picture), then press
.
20 Menu Adjustment
TV System:
B/G
VHF Low
Fine:
Manual Program
Program:
Select
Confirm
01
Auto
Signal Booster:
Auto
End
continued
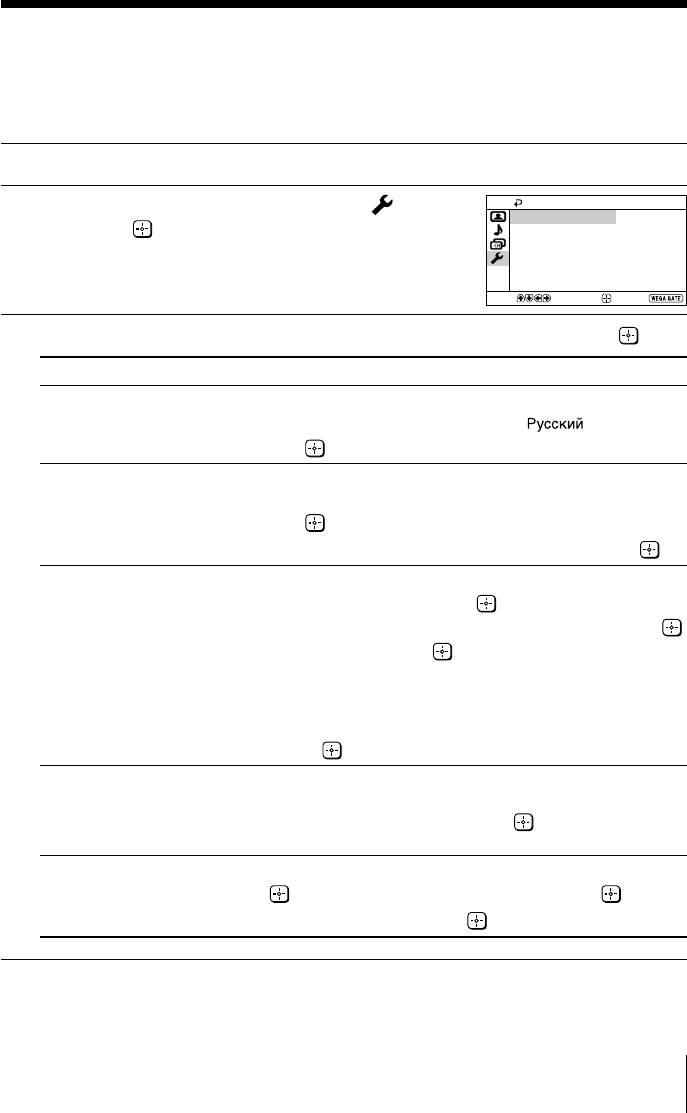
x C
hanging the “Setup” setting
The “Setup” menu allows you to change the menu language, adjust the picture
position, label the connected equipment, select the color system and reset your
TV to factory settings.
Press WEGA GATE and select “Settings”.
1
Setup
Press V or v to select the “Setup” icon (
),
2
Language: English
then press
.
Picture Position
Video Label
Color System:
Auto
Factory Settings
Select
Confirm
End
Press V or v to select the desired item (e.g., “Language”), then press
.
3
Select To
“Language” change the menu language.
Press V or v to select either “English” or “
” (Russian),
then press
.
“Picture Position”
adjust the picture position when it is not aligned with the TV screen.
Press V or v to select “Picture Rotation” or “Picture V-Position”,
then press
.
Press V, v, B or b to adjust the picture position, then press
.
“Video Label” label the connected equipment.
(1) Select “Video Input” and press
.
Press V or v to select the input you want to label, then press .
(2) Select “Label” and press , then press V or v to select the
label options: “Video 1”/ “Video 2”/ “Video 3”/ “DVD”,
“VCR”, “SAT”, “Game” or “Edit”*.
* You may edit the video label to your favorite name.
Press V or v to select alphanumeric characters for the label,
then press
.
“Color System” select the color system.
Press V or v to select either “Auto”, “PAL”, “SECAM”,
“NTSC3.58” or “NTSC4.43”, then press
. Normally, set this to
“Auto”.
“Factory Settings” reset your TV to factory settings.
Press
and press V or v to select “Yes”, then press .
To cancel, select “No”, then press
Note
• Color system is not selectable in FM Radio mode.
Menu Adjustment
21
Additional Information
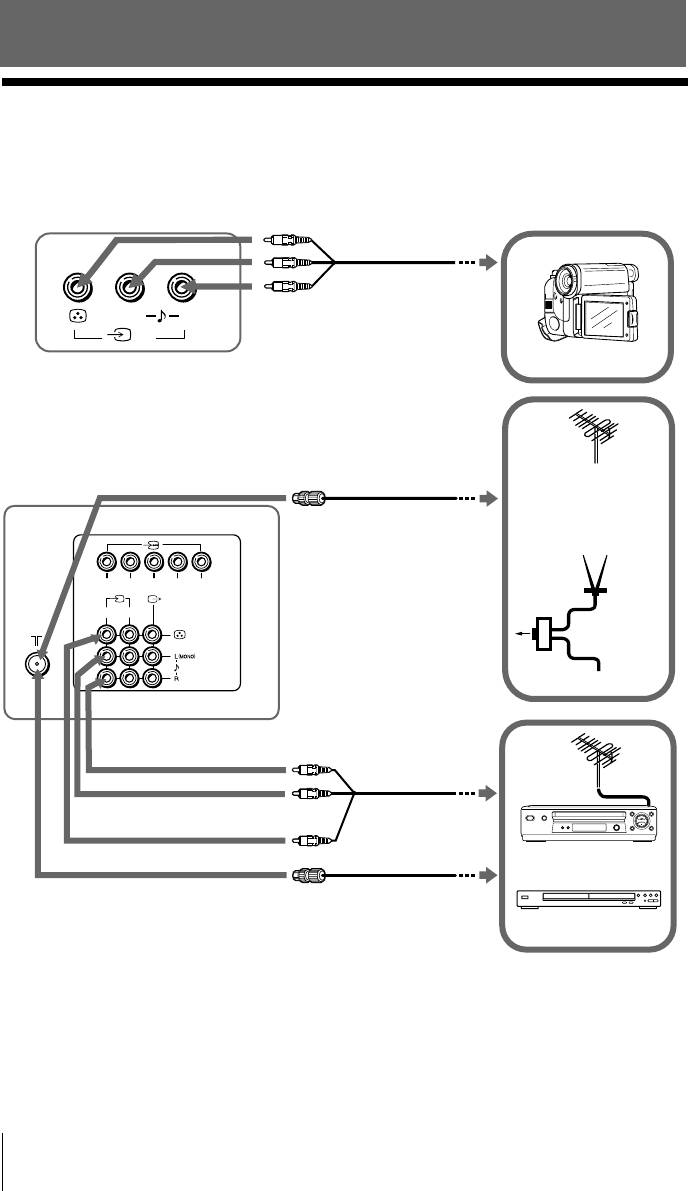
x Connecting optional components
Connecting to the video input terminal ( t )
TV front panel
Audio/Video cable
(not supplied)
L(MONO) R
2
Camcorder
Antenna cable
TV rear panel
(not supplied)
TV, CATV, Satellite
or
When there is no
FM signal
C
B
Antenna
RLY
C
R
selector
FM signal
1
3
TV signal
Audio/Video cable
(not supplied)
VCR
Antenna cable
(not supplied)
DVD player
Note
• If you connect a VCR to 8 (antenna input), preset the signal output from the VCR to the
program number 0 on the TV (see page 20).
22 Additional Information
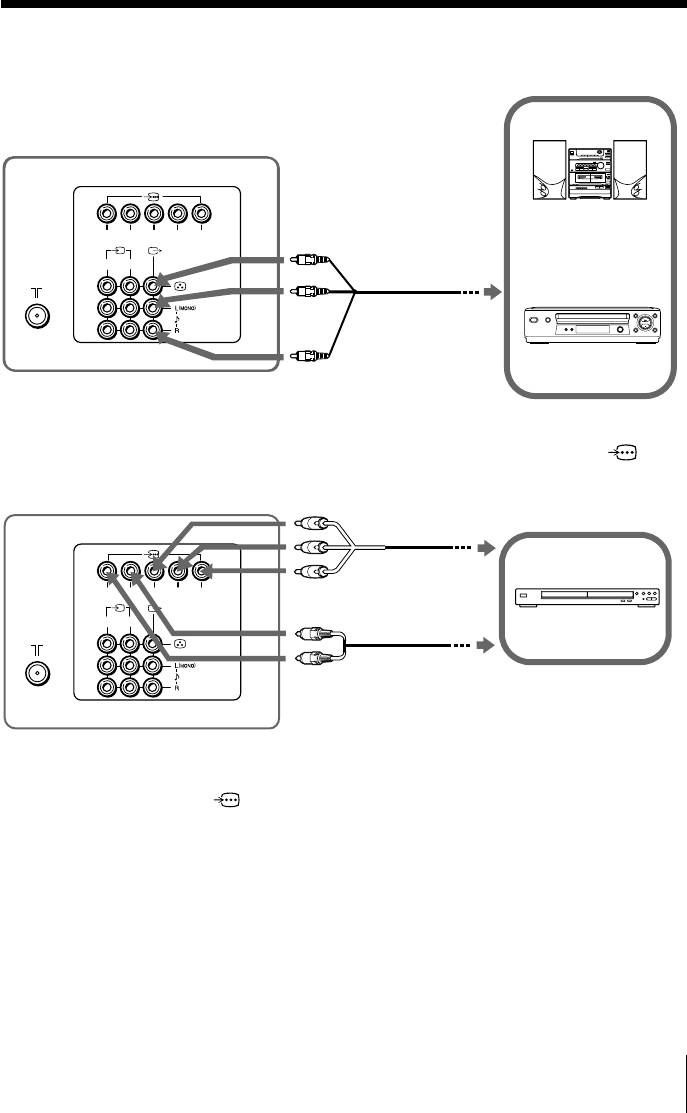
Connecting to the monitor output terminal ( T )
TV rear panel
Audio system
RLY
C
B
C
R
Audio/Video cable
1
3
(not supplied)
VCR
Connecting to the component video input terminal ( )
TV rear panel
Component
video cable
RLY
CB
CR
(not supplied)
1
3
DVD player
Audio cable
(not supplied)
Notes
• If your DVD player can output interlace and progressive mode signals, select the interlace
output when connecting to
(component video input) on your TV. Your TV can receive
either 525i/60Hz or 625i/50Hz interlace signals.
• The component video terminals on your DVD player are sometimes labeled Y/CB/CR, Y/PB/
PR, Y/Cb/Cr or Y/B-Y/R-Y.
• If you select “DVD” on your TV screen, the signal from the T (monitor output) jacks will not
be output properly. This does not indicate a malfunction.
Additional Information
23
