Panasonic NV-RX1-2-5: 2
2: Panasonic NV-RX1-2-5

NEDERLANDS
русский
язык
[3] Terugspoelen en vooruitspoelen van
de Videoband
Voer de volgende bedieningen uit terwiji de Movie
Camera in de VCR functie Staat (de „VCR” indicatielamp
licht op) en in de stopstand Staat.
■ Voor vooruitspoelen
1
Druk de toets in om de band met
hoge snelheid vooruit te spoelen.
•Wanneer het einde van de band bereikt wordt, zal
deze automatisch naar het begin worden
teruggespoeld.
■ Voor terugspoelen
2
Druk de ['^'4] toets in om de band met
hoge snelheid terug te spoelen.
•Wanneer het begin van de band bereikt wordt, zal
het terugspoelen automatisch stoppen.
|T| Afstellen van de spoorregeling om
beeldstoringen te voorkomen
■ Doei van de afstelling van de spoorregeling
Wanneer u een opgenomen videoband weergeeft, met
name een videoband die op een andere Movie Camera
is opgenomen, kunnen horizontale witte storingsstrepen
0
in het beeid verschijnen. Dit komt voor wanneer de
Videokoppen de opgenomen videosporen op de band
niet precies volgen tijdens weergave. Het afstellen van
het spoorvolgingspatroon van de videokoppen heet
afstelling van de spoorregeling.
1
Druk zowel de
[4
TRACKING] als de
[TRACKING ►] toets tegelijkertijd in.
Opmerking:
Indien het tegelijkertijd indrukken van de beide toetsen
geen verbetering in de beeidkwaliteit opievert, stelt u de
spoorregeling af door de
[4
TRACKING] toets of de
[TRACKING ►] toets afzonderlijk in te drukken.
(Het is mogelijk dat de storingsstrepen niet geheel
verdwijnen.)
[Щ
Ускоренная перемотка ленты в
прямом и обратном направлениях
Следующие операции следует выполнять, когда
видеокамера находится в режиме ВКМ
(высвечивается индикаторная лампа ‘VCR’’) или в
режиме остановки.
■ Для ускоренной перемотки в прямом
направлении
1
Для ускоренной перемотки в прямом
направлении нажмите кнопку [^^].
• По достижении конца ленты она будет
автоматически перемотана на начало.
■ Для ускоренной перемотки в обратном
направлении
2
Для ускоренной перемотки в обратном
направлении нажмите кнопку [
44
].
•По достижении начала ленты она
автоматически остановится,
|~4] Устранение искажений
изображения посредством
регулировки трекинга
■ Цель регулировки трегинга
Горизонтинтальные белые штрихи d могут
появиться на изображении при воспризведении
записанной ленты, особенно в случае ленты,
записанной на другой видеокамере. Это явление
происходит вследствие неточного отслеживания
видеоголовками записанных видеодорожек при
воспроизведении. Подрегулировка отслеживания
головками дорожек и называется регулировкой
трекинга.
/ Нажмите одновременно обе кнопки
[4
TRACKING] и [TRACKING ►].
Примечание:
Если нажатием обоих кнопок одновременно не
удается улучшить качество изображения, то
следует попытаться подрегулировать трекинг
нажатием одной из кнопок
[4
TRACKING] и
[TRACKING ►].
(Возможна ситуация, в которой полное удаление
шумовых полос невозможно.)
43
FRANÇAIS
ENGLISH
Utilisation des fonctions repérage
avant, repérage arrière et arrêt sur
image pendant une lecture normale
Remarques:
1. Le son n'est reproduit qu’en lecture normale.
2. En mode repérage avant, repérage arrière ou arrêt
sur image, des barres parasites horizontales O
apparaissent sur les images, ou les images peuvent
être en noir et blanc ou déformées. Ceci est normal; il
ne s’agit pas d’un mauvais fonctionnement.
■ Pour une lecture en repérage avant
1
Maintenir la touche
enfoncée.
• L’indication du mode avance
rapide/repérage avant apparaît dans le viseur.
• Pour reprendre la lecture normale, relâcher la
touche [►►].
■ Pour une lecture en repérage arrière
2
Maintenir la touche
enfoncée.
• L’indication “<]<]” du mode rebobinage/repérage
arrière apparaît dans le viseur.
• Pour reprendre la lecture normale, relâcher la
touche
■ Pour un arrêt sur image
3
Appuyer sur la touche [11].
• L’indication
“II”
du mode arrêt sur image apparaît
dans le viseur.
• Pour reprendre la lecture normale, appuyer à
nouveau sur la touche [11].
•Si on laisse le caméscope en mode arrêt sur
image pendant 6 minutes environ, il passe
automatiquement en mode arrêt de manière à
protéger la bande et les têtes vidéo.
\W\
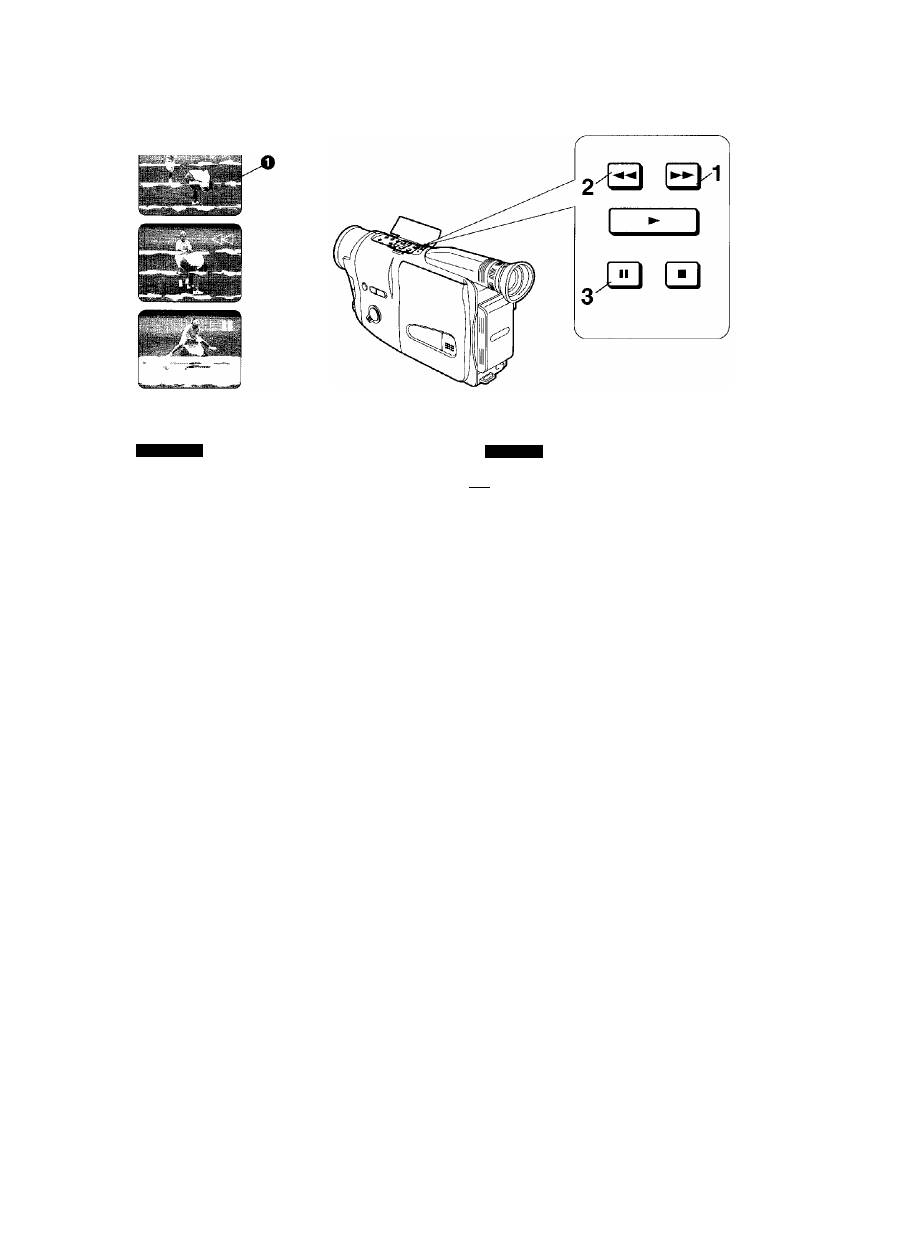
How to Use the Cue, Review and
still
Playback Functions During Normal
Playback
Notes:
1. The sound is played back only during normal
playback.
2. In the Cue, Review and Still Playback Modes,
horizontal noise bars O appear in the picture, or the
picture may become black and white or distorted.
However, this is normal and not an indication of a
malfunction.
■ For Cue Playback
1
Keep pressing the Button.
•The Fast Forward/Cue Mode Indication
appears in the Viewfinder.
•To resume normal playback, release the [►►]
Button.
■ For Review Playback
2
Keep pressing the
[ M M ]
Button.
•The Rewind/Review Mode Indication “<]<]”
appears in the Viewfinder.
•To resume normal playback, release the
Button.
■ For Still Playback
3
Press the [II] Button.
•The Still Playback Mode Indication
“I I”
appears in
the Viewfinder.
•To Resume Normal Playback, press the
[I I]
Button again.
• If you leave the Movie Camera in the Still
Playback Mode for about 6 minutes, it switches
over to the Stop Mode to protect the tape and the
video heads.
44

NEDERLANDS
РУССКИМ ЯЗЫК
Gebruik van de eue, review en
stilstaand-beeld weergavefuncties
tijdens normale weergave
Opmerkingen:
1. Het geluid zal uitsiuitend tijdens normale weergave
worden weergegeven.
2. In de eue, review en stilstaand-beeld
weergavefuncties verschijnen horizontale
storingsstrepen O beeid of het beeid kan
zwart/wit of vervormd worden. Dit is echter normaal
en duidt niet op een defekt.
■ Voor eue weergave
1
De toets ingedrukt houden.
• De vooruitspoelen/cue functie indicatie
verschijnt in de zoeker.
• Laat de [►►] toets los om de normale weergave
te hervatten.
■ Voor review weergave
2
De [^-4] toets ingedrukt houden.
• De terugspoelen/review functie indicatie „<!<]'’
verschijnt in de zoeker.
• Laat de
[
44
]
toets los om de normale weergave
te hervatten.
■ Voor stilstaand-beeld weergave
3
Druk de [II] toets in.
• De stilstaand-beeld weergavefunctie indicatie „11"
verschijnt in de zoeker.
• Druk de [II] toets nogmaals in om de normale
weergave te hervatten.
• Indien U de Movie Camera ongeveer 6 minuten in
de stilstaand-beeld weergavefunctie laat staan,
schakeit de Movie Camera over naar de stopstand
om de band en de videokoppen te beschermen.
[У| Использование функций
ускоренного воспроизведения в
прямом и обратном направлениях и
воспроизведения стоп-кадра при
нормальном воспроизведении
Примечания:
1. Звуковое сопровождение воспроизводится
только при нормальном воспроизведении.
2. В режимах ускоренного воспроизведения в
прямом и обратном направлениях или
воспроизведения стоп-кадра на изображение
возможно наложение горизонтальных шумовых
полос О’ искажение изображения, а также
передача изображения в черно-белом цвете.
Это, однако, нормально и не указывает на
неполадки.
■ Для ускоренного воспроизведения
1
Держите кнопку нажатой.
• в видоискателе появляется индикация режима
ускоренной перемотки/подсказки “[>[> ”.
•Для возобновления нормального
воспроизведения высвободите кнопку [►►].
■ Для ускоренного воспроизведения в
обратном направлении
2
Держите кнопку [
44
]
нажатой.
• В видоискателе появляется индикация режима
перемотки назад/обзора “«] ”,
•Для возобновления нормального
воспроизведения высвободите кнопку
[
44
].
■ Для воспроизведения стоп-кадра
3
Нажмите кнопку [II].
• В видоискателе появляется индикация режима
воспроизведения стоп-кадра “II”.
•Для возобновления нормального
воспроизведения нажмите кнопку [II]
повторно.
•
в
случае, если Вы оставите видеокамеру в
режиме воспроизведения стопа-кадра в
течение приблиз. 6 минут, она автоматически
переходит в режим остановки с целью
предохранения ленты и видеоголовок,
45
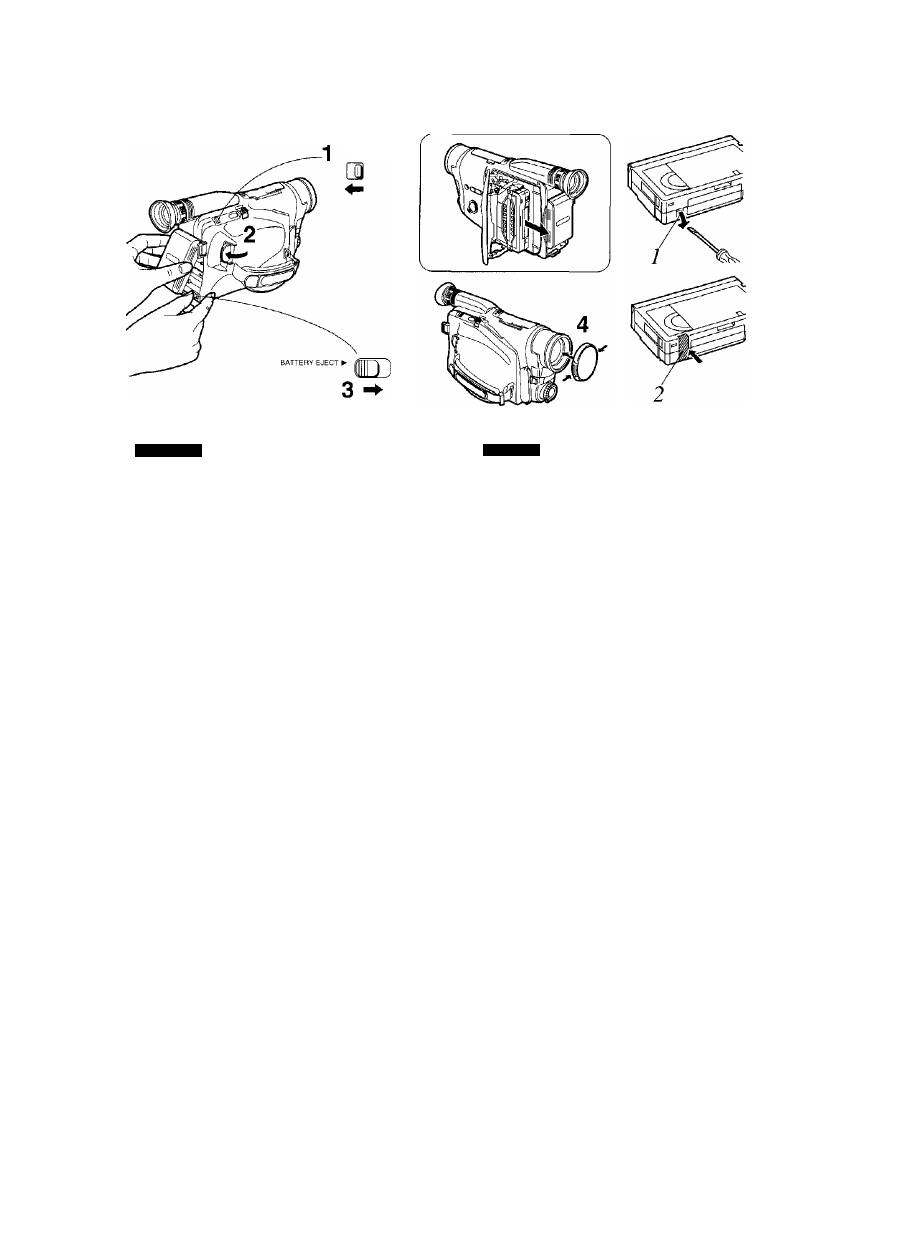
EJECTS
FRANÇAIS
Après l’utilisation
1
ENGLISH
After Use
2
3
Faire glisser le levier [EJECT
é^]
dans le
sens de la flèche et retirer la cassette
vidéo.
Enfoncer l’interrupteur [POWER].
(Le caméscope se met hors circuit.)
Faire glisser le levier [BATTERY EJECT ►]
dans le sens de la flèche et retirer le bloc-
batterie.
4
Remettre le capuchon de l’objectif.
■ Si le caméscope doit rester longtemps
inutilisé
Mettre le caméscope en circuit de temps à autre pour
éviter un mauvais fonctionnement.
Comment éviter que des
enregistrements ne soient effacés
accidentellement
Filmer sur une séquence déjà enregistrée efface les
séquences précédemment enregistrées. Pour éviter que
des enregistrements auxquels on tient ne soient effacés
accidentellement:
1
Rompre la languette à l’aide d’un tournevis.
• Une fois que la languette est supprimée,
l’enregistrement de cette cassette vidéo n’est plus
possible.
(Certaines
cassettes
sont
munies
d’une
languette
coulissante.)
■ Pour enregistrer à nouveau sur une
cassette dont on a supprimé la languette
Bien recouvrir l’orifice avec deux couches
de ruban adhésif (afin de remplacer la
languette enlevée).
2
1
2
3
4
Slide the [EJECT A] Lever in the direction
of the arrow and remove the video
cassette.
Turn in the [POWER] Switch. (The Movie
Camera switches off.)
Slide the [BATTERY EJECT ►] Lever and
remove the Battery Pack.
Attach the Lens Cap.
■ When You Are Not Going to Use the Movie
Camera for a Long Time
Turn on the Movie Camera occasionally to prevent
malfunction.
How to Prevent Accidental Erasure
of Recordings
Recording on a previously recorded tape erases the
previously recorded scenes and sound. To protect
important recordings against accidental erasure;
1
Break off the tab with a screwdriver.
• If the tab has been removed, recording on this
video cassette is no longer possible.
(Some cassettes have slidIng-type tabs.)
■ Recording again onto a video cassette with
Removed Tab
2
Firmly cover the hole where the tab was
removed with two layers of adhesive tape
(to substitute for the broken out tab).
46
