Panasonic ES8249: инструкция
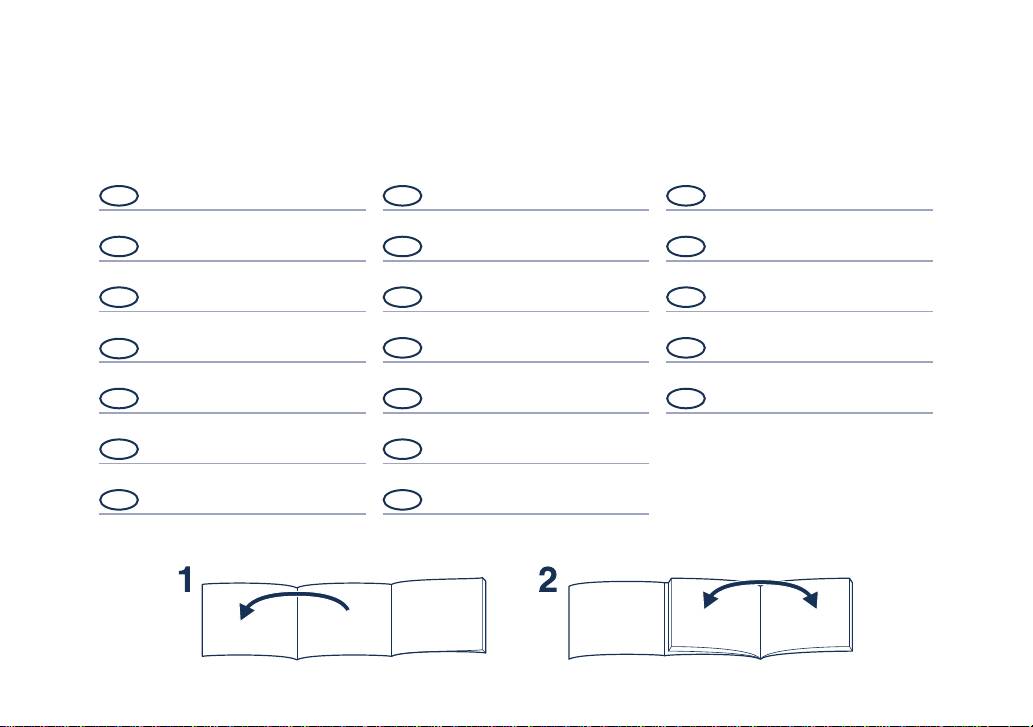
Раздел: Аксессуары для дома
Тип:
Инструкция к Panasonic ES8249

Operating Instructions
Rechargeable Shaver
Model No. ES8249
Before operating this unit, please read these instructions completely.
GB
English 4
P
Português 67
H
Magyar 130
D
Deutsch 13
N
Norsk 76
RO
Română 140
F
Français 22
S
Svenska 85
RUS
Русский 149
I
Italiano 31
FIN
Suomi 94
TR
Türkçe 159
NL
Nederlands 40
PL
Polski 103
UA
Українська 168
E
Español 49
CZ
Česky 112
DK
Dansk 58
SK
Slovensky 121
2
3
a
b
c
d
e
f
g
CLEAN
SELECT
DRY
CHARGE
STATUS

•
Plug in the adaptor into a household outlet where there is
Warning
English
no moisture and handle it with dry hands.
Warning - Disconnect the power cord from the shaver
•
The shaver and the recharger may become warm during
before cleaning it to prevent electric shock.
use and charging. However, this is not a malfunction.
•
Do not charge the shaver where it will be exposed to direct
Important
sunlight or other heat sources.
•
Hold the adaptor when disconnecting it from the
Before use
household outlet. If you tug on the power cord, you may
This WET/DRY shaver can be used for wet shaving with
damage it.
shaving lather or for dry shaving. You can use this watertight
•
The supply cord cannot be replaced. If the cord is
shaver in the shower and clean it in water. The following is
damaged, the appliance should be scrapped.
the symbol of Wet shaver. The symbol means that the hand-
held part may be used in a bath or shower.
Cleaning the shaver
•
Keep both the inner blades inserted. If only one of the
inner blades is inserted, the shaver may be damaged.
•
If you clean the shaver with water, do not use salt water or
hot water.
•
Do not soak the shaver in water for a long period of time.
Treat yourself to wet lather shaves for at least three weeks
Wipe it with a cloth dampened with soapy water. Do not
and notice the difference. Your Panasonic WET/DRY shaver
use thinner, benzine or alcohol.
requires a little time to get used to because your skin and
Storing the shaver
beard need about a month to adjust to any new shaving
•
Disconnect the power cord when storing the shaver. Do
method.
not bend the power cord or wrap it around the shaver.
Using the shaver
•
This appliance is not intended for use by persons
Caution - The outer foil is very thin and can be damaged if
(including children) with reduced physical, sensory or
not used correctly. Check that the foil is not damaged before
mental capabilities, or lack of experience and knowledge,
using the shaver. Do not use the shaver if the foil etc. is
unless they have been given supervision or instruction
damaged as you will cut your skin.
concerning use of the appliance by a person responsible
Persons using an implanted medical electronic device, such
for their safety. Children should be supervised to ensure
as a pacemaker, should not allow this unit to touch the skin
that they do not play with the appliance.
where the medical electronic device is implanted because
•
Keep these operating instructions in a safe place.
this may cause a malfunction.
Self-cleaning recharger
Charging the shaver
•
Do not clean the adaptor or the self-cleaning recharger in
•
Do not use an
y power cord, AC adaptor (RE7-40) or
water as it will damage them or cause an electric shock.
recharger other than one specifically designed for this
Do not remove the shaver from the self-cleaning recharger
model.
while using a course that includes the “Dry” function. A
GB
4

heater is used so the area around the blades becomes
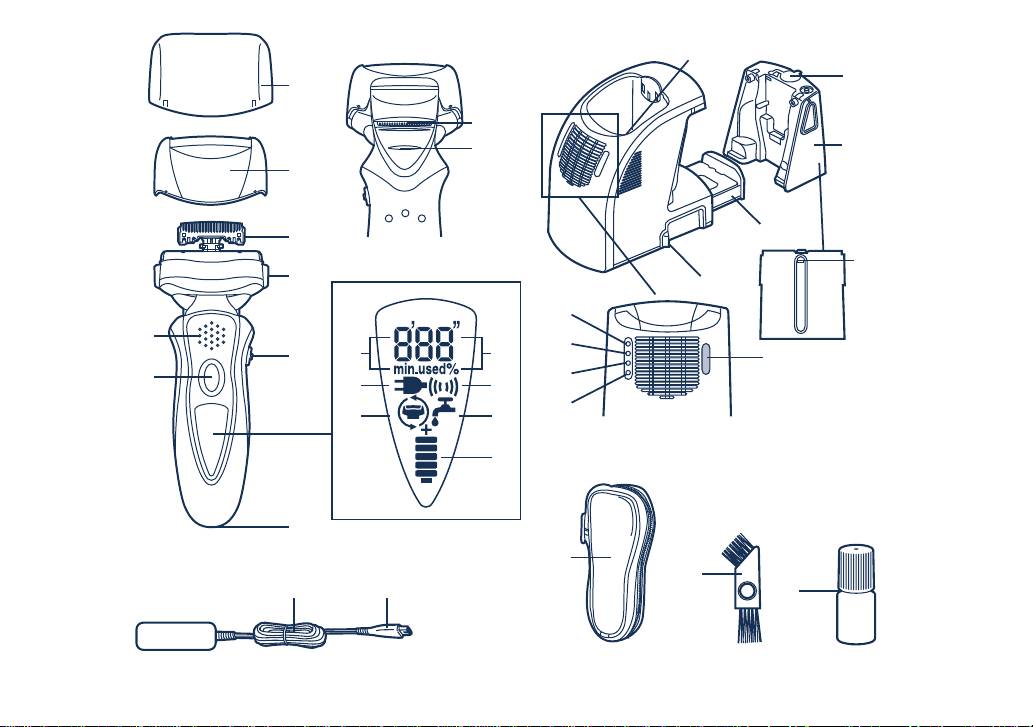
Parts identification
extremely hot and you may burn yourself.
•
Place the self-cleaning recharger on a level and stable
A Protective cap
Appliance plug
surface. Otherwise the cleaning liquid may spill and
B System outer foil
F Self-cleaning recharger
discolor leather products or other surfaces. Wipe it
C Inner blades
(Referred to as the
English
immediately. The self-cleaning recharger cleans the inner
D Main body
“Recharger”.)
blades and the system outer foil. Brush or wash with water
1 System outer foil release
Cleaning tray
to remove beard trimmings in other areas.
buttons
Detergent cartridge
•
Use the self-cleaning recharger in temperatures between
2 Finger rest
Socket
15 °C and 35 °C. Otherwise, the following problems may
3 Pivot action selector
Water tank cap
occur.
4 OFF/ON switch
Water tank
-
The time it takes to charge the shaver increases.
5 LCD panel
Water maximum line
-
The recharger stops functioning.
a. Used time
Clean lamp
-
The lifespan of the rechargeable battery shortens. (Only
b. Battery capacity
Dry lamp
when you use the recharger in lower temperatures.) In
c. Charge staus
Charge lamp
this case, the indicators on the LCD panel will blink twice
d. Sonic vibration
Status lamp
every second.
e. Foil/blade check
Select button
•
Use the self-cleaning recharger in humidity less than 95%.
f. Clean
G Soft case
•
Depending on the environment, the shaver may not dry
g. Battery capacity
H Cleaning brush
even if you select a course that includes the “Dry” function.
6 Appliance socket
I Oil
In this case, wipe off any drops of water with a dry cloth.
7 Trimmer
8 Trimmer handle
SPECIFICATIONS
E Adaptor (RE7-40)
Power source: See the name plate on the product.
9 Power cord
(Automatic voltage conversion)
Motor voltage: 3.6 V DC
Replacement parts
Charging time: 1 hour
This product is intended for household use only.
Replacement parts are available at your dealer or Service
Center.
Airborne Acoustical Noise:
Replacement parts for ES8249
In sha
ving mode: 63 (dB (A) re 1 pW)
System outer foil and inner blades: WES9020
In trimmer mode: 66 (dB (A) re 1 pW)
System outer foil: WES9161
Inner blades: WES9068
Detergent cartridge: WES035
GB
5
English
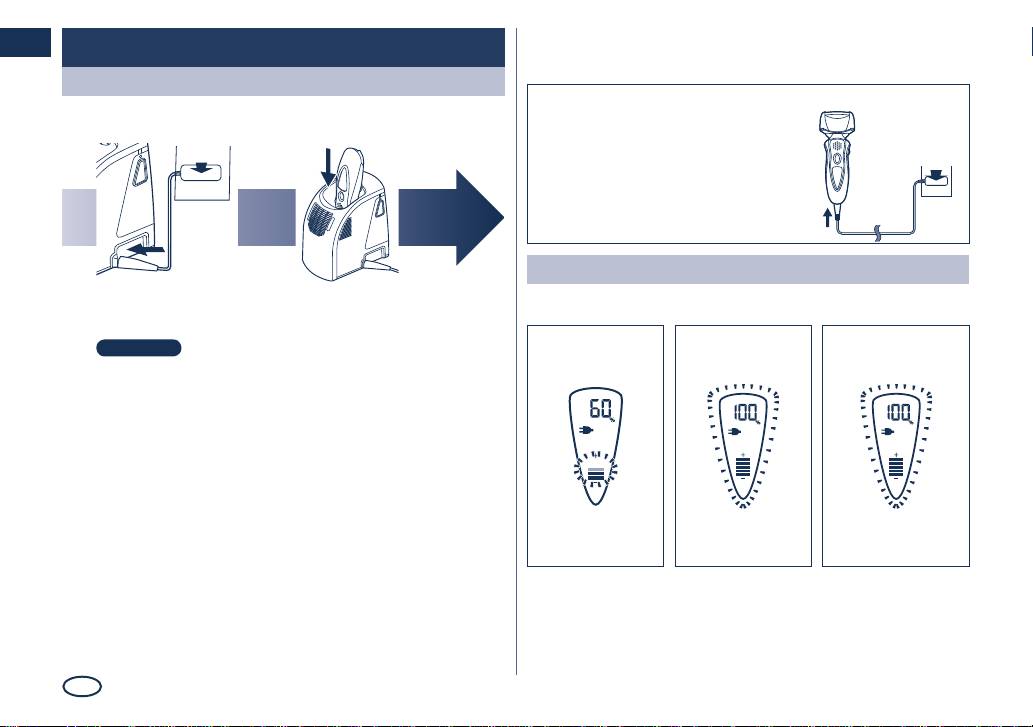
Charge
Charging with the self-cleaning recharger
Thoroughly wipe off any drops of water on or around the
recharger so that it is dry before charging it.
GB
6
3
2
4
You can keep the shaver attached to the recharger, or
connected to the adaptor, when not using it to maintain full
battery capacity. You cannot overcharge the shaver.
Charging without the recharger
You can also charge without the
recharger.
1. Inser
t the appliance plug into the
shaver.
2. Plug in the adaptor into a
household outlet.
Attach the detergent cartridge and the
1
1
water tank to the self-cleaning recharger.
Page 8
Insert the appliance plug.
2
2
Plug in the adaptor.
3
3
Remove the protective cap and then attach
4
4
the shaver.
•
Turn the shaver off before attaching.
•
Check that the outer foil is not deformed or damaged when
you are attaching the shaver.
•
The indicators on the LCD panel glow and charging starts.
•
If the indicators on the LCD panel do not glow, wait for a
short while until it glows.
•
Charging is completed when the indicators on the LCD panel
blink.
(Max. 1 hour later)
2
1
•
LCD panel when charging
The LCD panel shows the remaining battery capacity from 0%
to 100%, in 10% increments.
10 minutes after
After charging is
While charging
charging is
completed
completed
The indicators
The indicators
The indicators
blink once every
blink once every 2
glow.
second.
seconds.
