Panasonic RC-DC1: инструкция
Раздел: Бытовая, кухонная техника, электроника и оборудование
Тип: Радиоприемник
Характеристики, спецификации
Инструкция к Радиоприемнику Panasonic RC-DC1

Operating Instructions
Instrucciones de funcionamiento
Instrukcja obsługi
Návod k obsluze
Инструкция по эксплуатации
Інструкція з експлуатації
Clock Radio
Radio reloj
Radiobudzik
Radiobudík
Радио-часы
Радіо-годинник
Model No. RC-DC1
EG
RQTX1209-2E
RQTX1209-2E_1gb.indd 1RQTX1209-2E_1gb.indd 1 7/7/2010 10:41:37 AM7/7/2010 10:41:37 AM
RQTX1209
2
ENGLISH
ENGLISH
2
2
NEDERLANDS
NEDERLANDS
ENGLISH
Dear Customer
WARNING:
Thank you for purchasing this product.
TO REDUCE THE RISK OF FIRE, ELECTRIC
SHOCK OR PRODUCT DAMAGE,
For optimum performance and safety, please read
• DO NOT EXPOSE THIS APPARATUS TO RAIN,
these instructions thoroughly before connecting,
MOISTURE, DRIPPING OR SPLASHING AND
operating or adjusting this product.
THAT NO OBJECTS FILLED WITH LIQUIDS,
Keep this manual for future reference.
SUCH AS VASES, SHALL BE PLACED ON THE
APPARATUS.
• USE ONLY THE RECOMMENDED
ACCESSORIES.
CAUTION!
• DO NOT REMOVE THE COVER (OR BACK);
• DO NOT INSTALL OR PLACE THIS UNIT IN
THERE ARE NO USER SERVICEABLE PARTS
A BOOKCASE, BUILT-IN CABINET OR IN
INSIDE. REFER SERVICING TO QUALIFIED
ANOTHER CONFINED SPACE. ENSURE THE
SERVICE PERSONNEL.
UNIT IS WELL VENTILATED. TO PREVENT
RISK OF ELECTRIC SHOCK OR FIRE HAZARD
ENGLISH
DUE TO OVERHEATING, ENSURE THAT
This product may receive radio interference
CURTAINS AND ANY OTHER MATERIALS DO
caused by mobile telephones during use. If such
NOT OBSTRUCT THE VENTILATION VENTS.
interference is apparent, please increase separation
• DO NOT OBSTRUCT THE UNIT’S
between the product and the mobile telephone.
VENTILATION OPENINGS WITH
NEWSPAPERS, TABLECLOTHS, CURTAINS,
AND SIMILAR ITEMS.
The socket outlet shall be installed near the
• DO NOT PLACE SOURCES OF NAKED
equipment and easily accessible.
FLAMES, SUCH AS LIGHTED CANDLES, ON
THE UNIT.
The mains plug of the power supply cord shall
• DISPOSE OF BATTERIES IN AN
remain readily operable.
ENVIRONMENTALLY FRIENDLY MANNER.
To completely disconnect this apparatus from the AC
Mains, disconnect the power supply cord plug from
AC receptacle.
THIS UNIT IS INTENDED FOR USE IN MODERATE
Product identifi cation marking
CLIMATES.
Product Location
Main unit Bottom
AC adaptor Bottom
RQTX1209-2E_1gb.indd 2RQTX1209-2E_1gb.indd 2 7/7/2010 10:41:37 AM7/7/2010 10:41:37 AM

ENGLISH
ENGLISH
ENGLISH
ENGLISH
ENGLISH
ENGLISH
RQTX1209
3
3
SUOMI
VAROITUS!
VAROITUS:
• ÄLÄ ASENNA TAI LAITA TÄTÄ LAITETTA
VÄHENNÄ TULIPALON, SÄHKÖISKUN TAI
KABINETTITYYPPISEEN KIRJAKAAPPIIN
LAITTEISTON VAHINGOITTUMISEN VAARAA
TAI MUUHUN SULJETTUUN TILAAN, JOTTA
• TÄTÄ LAITETTA EI SAA ALTISTAA SATEELLE,
TUULETUS ONNISTUISI. VARMISTA, ETTÄ
KOSTEUDELLE, ROISKEILLE TAI TIPPUVILLE
VERHO TAI MIKÄÄN MUU MATERIAALI
NESTEILLE. LAITTEEN PÄÄLLE EI SAA
EI HUONONNA TUULETUSTA, JOTTA
MYÖSKÄÄN ASETTAA MITÄÄN NESTEELLÄ
VÄLTETTÄISIIN YLIKUUMENEMISESTA
TÄYTETTYÄ ESINETTÄ, KUTEN MALJAKKOA.
JOHTUVA SÄHKÖISKU- TAI
• KÄYTÄ VAIN SUOSITELTUJA
TULIPALOVAARA.
LISÄVARUSTEITA.
• ÄLÄ PEITÄ LAITTEEN TUULETUSAUKKOJA
• ÄLÄ IRROTA KANTTA (TAI TAUSTAA).
SANOMALEHDELLÄ, PÖYTÄLIINALLA,
SISÄLLÄ EI OLE KÄYTTÄJÄN
VERHOLLA TAI MUULLA VASTAAVALLA
HUOLLETTAVISSA OLEVIA OSIA. HUOLLON
ESINEELLÄ.
SAA SUORITTAA VAIN AMMATTITAITOINEN
• ÄLÄ ASETA PALAVAA KYNTTILÄÄ TAI
HENKILÖKUNTA.
MUUTA AVOTULEN LÄHDETTÄ LAITTEEN
PÄÄLLE.
• HÄVITÄ PARISTOT LUONTOA
VAHINGOITTAMATTOMALLA TAVALLA.
Pistorasia tulee asentaa laitteen lähelle
helppopääsyiseen paikkaan.
Verkkojohdon pistokkeen on oltava aina helposti
käytettävissä.
TÄMÄ LAITE ON TARKOITETTU KÄYTETTÄVÄKSI
Tämä laite voidaan kytkeä kokonaan irti
LEUDOSSA ILMASTOSSA.
verkkovirrasta irrottamalla verkkojohdon pistoke
pistorasiasta.
3
RQTX1209-2E_1gb.indd 3RQTX1209-2E_1gb.indd 3 7/7/2010 10:41:37 AM7/7/2010 10:41:37 AM

RQTX1209
4
ENGLISH
ENGLISH
4
4
NEDERLANDS
NEDERLANDS
ENGLISH
NORSK
ADVARSEL!
ADVARSEL:
• APPARATET MÅ IKKE PLASSERES I EN
FØLG NEDENSTÅENDE INSTRUKSER FOR Å
BOKHYLLE, ET INNEBYGGET KABINETT
REDUSERE RISIKOEN FOR BRANN, ELEKTRISK
ELLER ET ANNET LUKKET STED HVOR
STØT OG SKADE PÅ PRODUKTET:
VENTILASJONSFORHOLDENE ER
• DETTE APPARATET MÅ IKKE UTSETTES FOR
UTILSTREKKELIGE. SØRG FOR AT
REGN, FUKTIGHET, DRYPP ELLER SPRUT,
GARDINER ELLER LIGNENDE IKKE
OG INGEN VÆSKEFYLTE GJENSTANDER,
FORVERRER VENTILASJONSFORHOLDENE,
SOM F.EKS. VASER, MÅ PLASSERES PÅ
SÅ RISIKO FOR ELEKTRISK SJOKK ELLER
APPARATET.
BRANN FORÅRSAKET AV OVERHETING
• BRUK KUN ANBEFALT TILBEHØR.
UNNGÅS.
• IKKE FJERN DEKSELET (ELLER BAKSIDEN);
• APPARATETS VENTILASJONSÅPNINGER
APPARATET INNEHOLDER INGEN DELER
MÅ IKKE DEKKES TIL MED AVISER,
SOM KAN SKIFTES ELLER REPARERES AV
BORDDUKER, GARDINER OG LIGNENDE.
BRUKEREN. OVERLAT TIL KVALIFISERTE
• PLASSER IKKE ÅPEN ILD, SLIK SOM
SERVICETEKNIKERE Å UTFØRE SERVICE.
ENGLISH
LEVENDE LYS, OPPÅ APPARATET.
• BRUKTE BATTERIER MÅ KASSERES UTEN
FARE FOR MILJØET.
Strømuttaket må befi nne seg i nærheten av utstyret
og være lett tilgjengelig.
Støpslet på strømkabelen må være klart til bruk.
DETTE APPARATET ER BEREGNET TIL BRUK
Når dette apparatet skal kobles helt fra strømnettet
UNDER MODERATE KLIMAFORHOLD.
(AC), må støpslet på strømkabelen trekkes ut av
stikkontakten.
RQTX1209-2E_1gb.indd 4RQTX1209-2E_1gb.indd 4 7/7/2010 10:41:37 AM7/7/2010 10:41:37 AM

ENGLISH
ENGLISH
ENGLISH
ENGLISH
ENGLISH
ENGLISH
RQTX1209
5
5
Safety precautions
Foreign matter
Do not let metal objects fall inside the unit. This can
Placement
cause electric shock or malfunction.
Set the unit up on an even surface away from direct
Do not let liquids get into the unit. This can cause
sunlight, high temperatures, high humidity, and
electric shock or malfunction. If this occurs,
excessive vibration. These conditions can damage the
immediately disconnect the unit from the power supply
cabinet and other components, thereby shortening the
and contact your dealer.
unit’s service life.
Do not spray insecticides onto or into the unit. They
Place it at least 15 cm away from wall surfaces to avoid
contain fl ammable gases which can ignite if sprayed
distortion and unwanted acoustical effects.
into the unit.
Do not place heavy items on the unit.
Service
Voltage
Do not attempt to repair this unit by yourself. If sound
is interrupted, indicators fail to light, smoke appears,
Do not use high voltage power sources. This can
or any other problem that is not covered in these
overload the unit and cause a fi re.
instructions occurs, disconnect the AC adaptor and
Do not use a DC power source. Check the source
contact your dealer or an authorised service centre.
carefully when setting the unit up on a ship or other
Electric shock or damage to the unit can occur if the
places where DC is used.
unit is repaired, disassembled or reconstructed by
unqualifi ed persons.
Extend operating life by disconnecting the unit from the
power source if it is not to be used for a long time.
AC adaptor protection
Ensure the AC adaptor is connected correctly and
not damaged. Poor connection and lead damage can
cause fi re or electric shock. Do not pull, bend, or place
heavy items on the lead.
Grasp the plug fi rmly when unplugging the adaptor.
Pulling the AC adaptor can cause electric shock.
Do not handle the plug with wet hands. This can cause
electric shock.
5
RQTX1209-2E_1gb.indd 5RQTX1209-2E_1gb.indd 5 7/7/2010 10:41:37 AM7/7/2010 10:41:37 AM
RQTX1209
6
ENGLISH
ENGLISH
6
6
NEDERLANDS
NEDERLANDS
ENGLISH
Information for Users on Collection and
For business users in the European
Union
Disposal of Old Equipment and used
If you wish to discard electrical and
Batteries
electronic equipment, please contact your
dealer or supplier for further information.
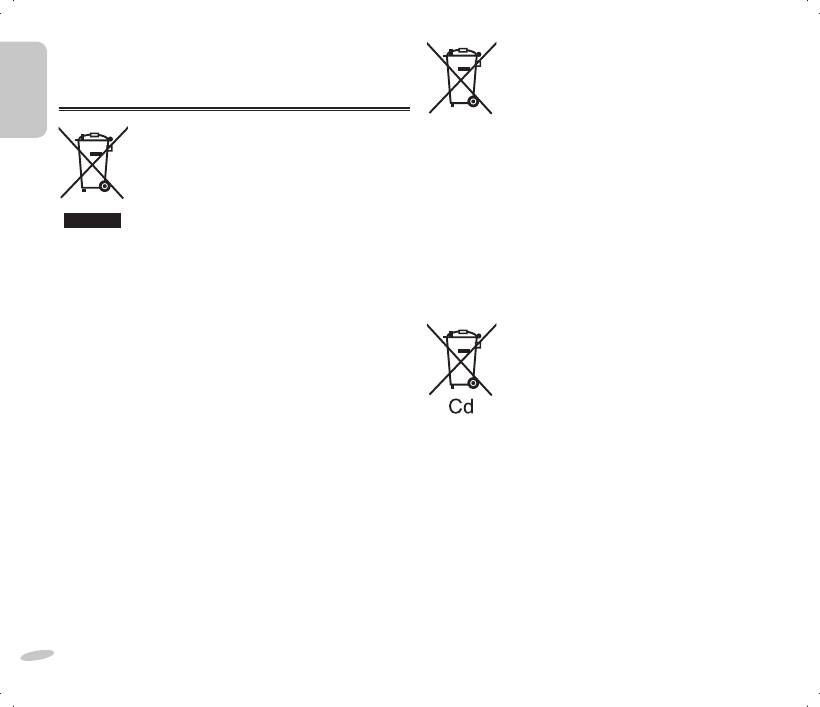
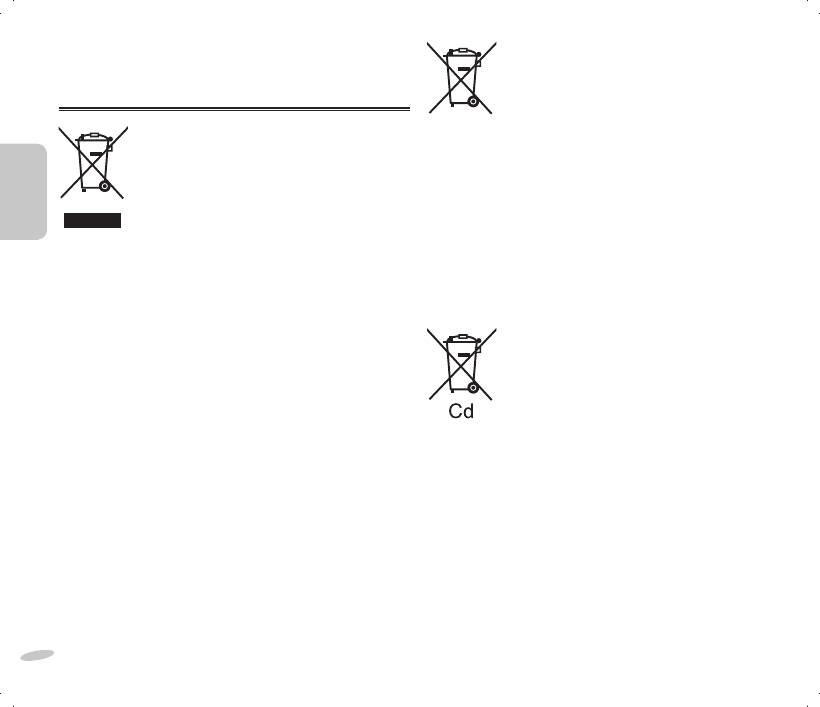
These symbols on the products,
packaging, and/or accompanying
[Information on Disposal in other
documents mean that used electrical and
Countries outside the European
electronic products and batteries should
Union]
not be mixed with general household
These symbols are only valid in the
waste.
European Union. If you wish to discard
For proper treatment, recovery and
these items, please contact your local
recycling of old products and used
authorities or dealer and ask for the
batteries, please take them to applicable
correct method of disposal.
collection points, in accordance with your
national legislation and the Directives
2002/96/EC and 2006/66/EC.
ENGLISH
Note for the battery symbol (bottom
By disposing of these products and
two symbol examples):
batteries correctly, you will help to save
valuable resources and prevent any
This symbol might be used in combination
potential negative effects on human
with a chemical symbol. In this case it
health and the environment which could
complies with the requirement set by the
otherwise arise from inappropriate waste
Directive for the chemical involved.
handling.
For more information about collection and
recycling of old products and batteries,
please contact your local municipality,
your waste disposal service or the point
of sale where you purchased the items.
Penalties may be applicable for incorrect
disposal of this waste, in accordance with
national legislation.
RQTX1209-2E_1gb.indd 6RQTX1209-2E_1gb.indd 6 7/7/2010 10:41:37 AM7/7/2010 10:41:37 AM
ENGLISH
ENGLISH
ENGLISH
ENGLISH
ENGLISH
ENGLISH
RQTX1209
7
7
Table of contents
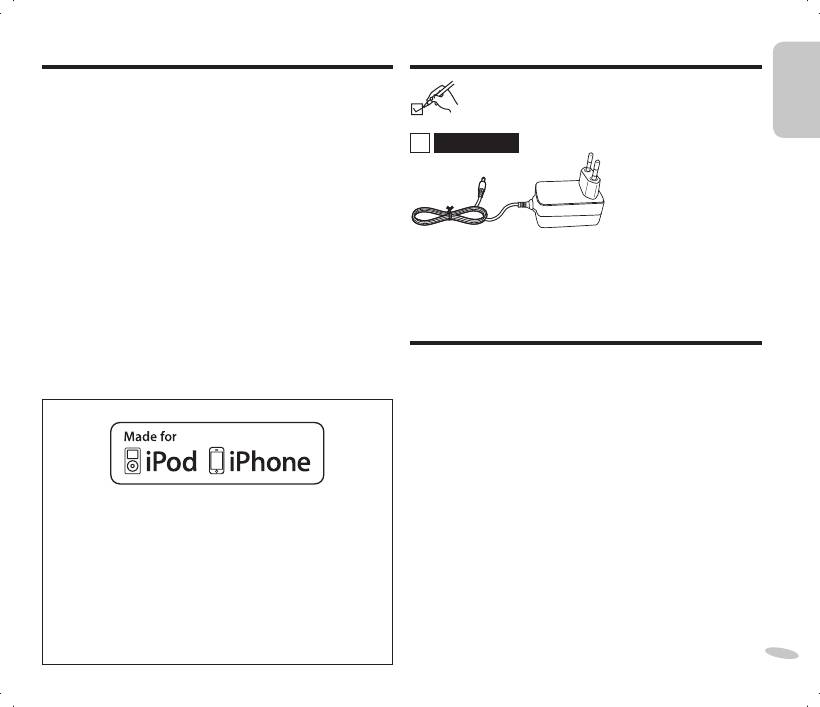
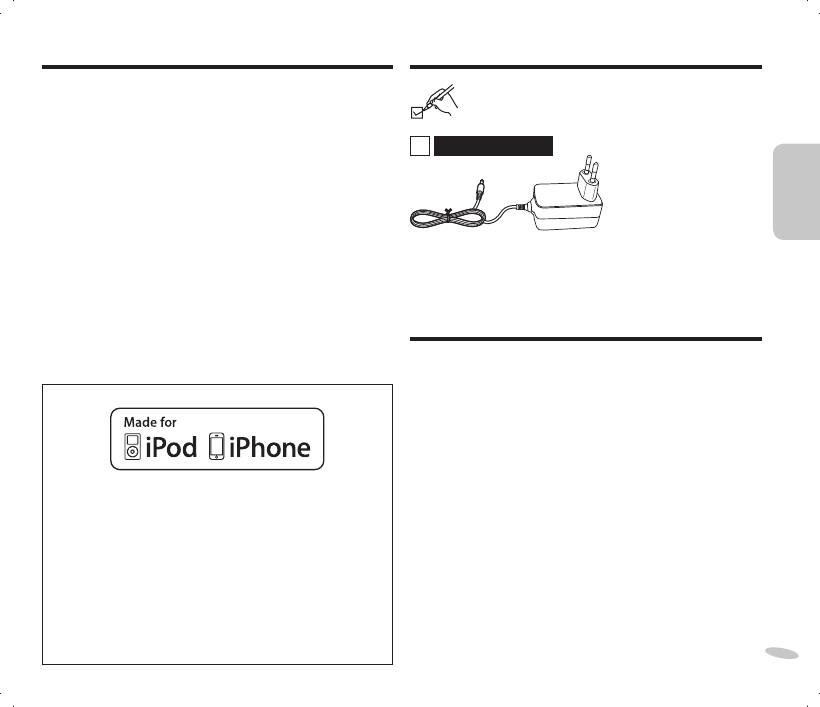
Supplied accessories
Safety precautions .......................................................5
Supplied accessories ...................................................7
Please check and identify the supplied accessories.
Compatible iPod and iPhone .......................................7
Overview of controls ....................................................8
1 AC adaptor
Making the connections ...............................................9
Setting the clock ...........................................................9
Using an iPod or iPhone ............................................10
Using the radio ...........................................................10
Using the sleep timer .................................................11
Using the alarm ...........................................................11
Using the Memory Loader application .....................12
Memory back-up battery ............................................13
Troubleshooting guide ...............................................14
Specifi cations .............................................................15
Compatible iPod and iPhone
Maintenance ................................................................ 15
• iPod nano 5th generation (video camera) (8GB, 16GB)
• iPod touch 2nd generation (8GB, 16GB, 32GB, 64GB)
• iPod classic [120GB, 160GB (2009)]
• iPod nano 4th generation (video) (8GB, 16GB)
• iPod classic (160GB) (2007)
• iPod touch 1st generation (8GB, 16GB, 32GB)
• iPod nano 3rd generation (video) (4GB, 8GB)
• iPod classic (80GB)
• iPod nano 2nd generation (aluminum) (2GB, 4GB, 8GB)
• iPod 5th generation (video) (60GB, 80GB)
• iPod 5th generation (video) (30GB)
“Made for iPod” and “Made for iPhone” mean that an
• iPod nano 1st generation (1GB, 2GB, 4GB)
electronic accessory has been designed to connect
• iPod 4th generation (colour display) (40GB, 60GB)
specifi cally to iPod, or iPhone, respectively, and has been
• iPod 4th generation (colour display) (20GB, 30GB)
certifi ed by the developer to meet Apple performance
• iPod 4th generation (40GB)
standards.
• iPod 4th generation (20GB)
• iPod mini (4GB, 6GB)
Apple is not responsible for the operation of this device or its
• iPhone 3GS (16GB, 32GB)
compliance with safety and regulatory standards.
• iPhone 3G (8GB, 16GB)
iPhone, iPod, iPod classic, iPod nano, and iPod touch are
• iPhone (4GB, 8GB, 16GB)
trademarks of Apple Inc., registered in the U.S. and other
Compatibility depends on the software version of your iPod or
7
countries.
iPhone.
RQTX1209-2E_1gb.indd 7RQTX1209-2E_1gb.indd 7 7/7/2010 10:41:38 AM7/7/2010 10:41:38 AM
RQTX1209
8
ENGLISH
ENGLISH
8
8
NEDERLANDS
NEDERLANDS
ENGLISH
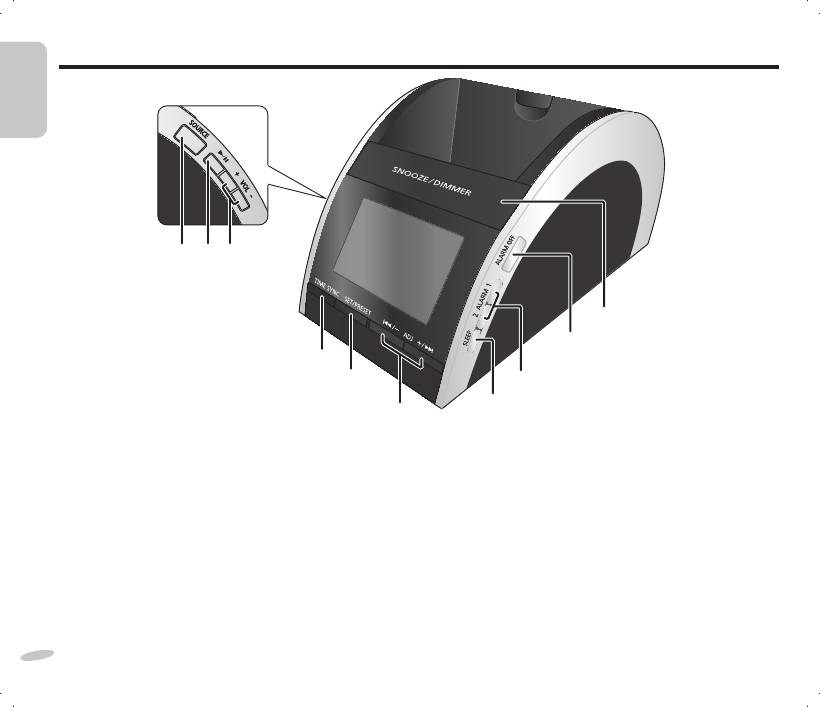
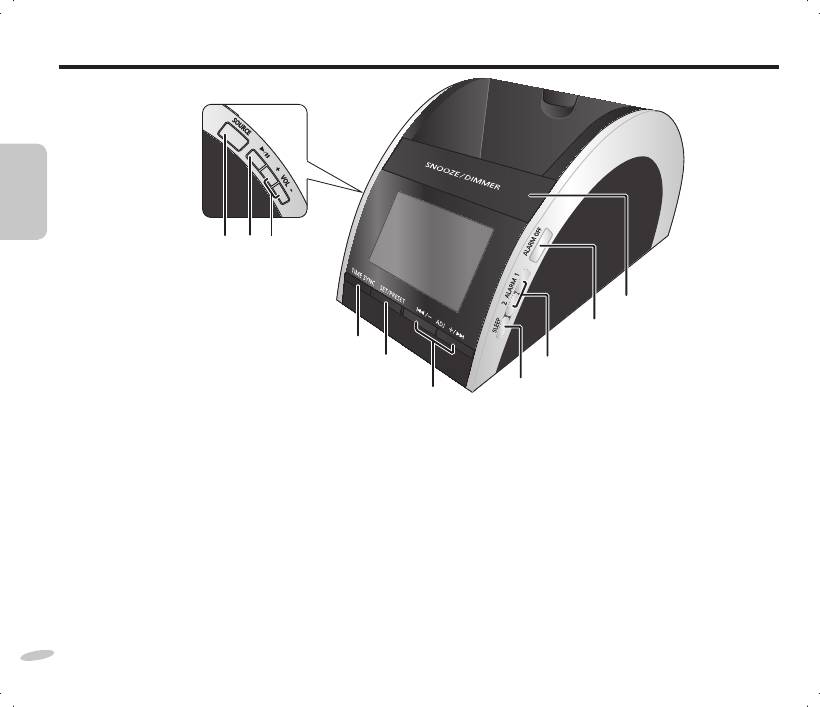
Overview of controls
HIJ
ENGLISH
A
B
G
F
C
D
A [SNOOZE/DIMMER]
E
Snooze: To stop the alarm for 9 minutes.
Dimmer: To adjust the display panel’s brightness
(High (default), Medium or Low).
F [SET/PRESET]
To set the clock.
B [ALARM OFF]
To perform automatic presetting or to view preset channels
To turn off the alarm.
in radio mode.
C [ALARM 1], [ALARM 2]
G [TIME SYNC]
To activate either alarm 1 or alarm 2 function.
To synchronise the main unit with an iPod or iPhone’s time.
To display alarm 1 or alarm 2 setting.
H [+, VOL], [–, VOL]
D [SLEEP]
To adjust the volume.
To activate sleep function.
To select a 12-hour or 24-hour clock display.
To activate daylight saving time (summer time) in clock
mode.
I [
4/9
]
To start music playback from an iPod or iPhone and to
E [2 /–, ADJ], [+/6, ADJ]
pause during playback.
To adjust clock, radio and alarm settings.
To skip to previous or next track.
J [SOURCE]
To backward or forward search through a track.
To select clock, “IPOD” or “RADIO FM” mode.
RQTX1209-2E_1gb.indd 8RQTX1209-2E_1gb.indd 8 7/7/2010 10:41:38 AM7/7/2010 10:41:38 AM
ENGLISH
ENGLISH
ENGLISH
ENGLISH
ENGLISH
ENGLISH
RQTX1209
9
9
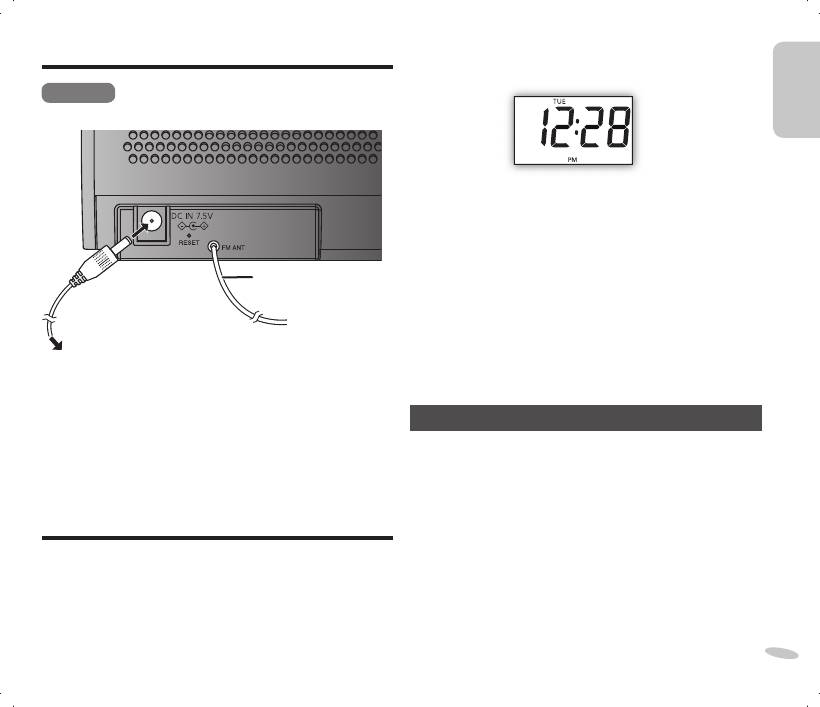
Making the connections
3
Press [SET/PRESET] again to confi rm.
4
Repeat steps 2 and 3 to set the hour and minute.
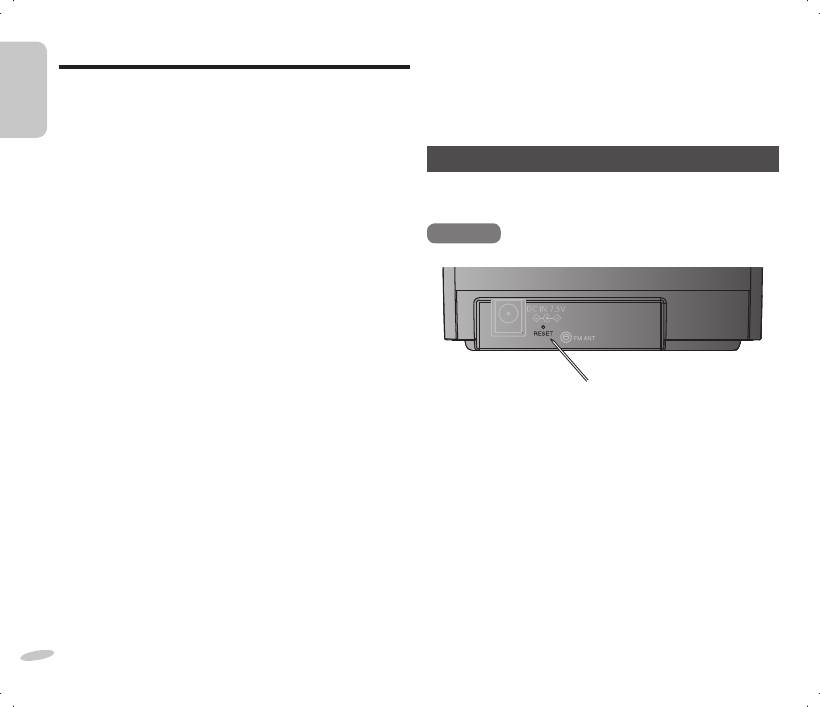
Rear view
Example:
To change the clock display
In clock mode, press and hold [+, VOL] and [–, VOL] at the
same time for 2 seconds to select between a 12-hour or 24-hour
display.
For 12-hour display:
AM : “PM” is not displayed.
FM indoor antenna
PM : “PM” is displayed.
Daylight saving time (summer time)
In clock mode, press and hold [SLEEP] to activate or cancel
To household
daylight saving time (summer time) function.
mains socket
“DST” is displayed when the function is activated.
Connect the AC adaptor.
• Do not use an AC adaptor from other equipment.
• Do not use any other AC adaptors except the supplied one.
Synchronising clock with iPod or iPhone time
• The unit is in the standby condition when the AC adaptor is
connected. The primary circuit is always “live” as long as the
This function allows you to set the clock’s time to be the same
AC adaptor is connected to an electrical outlet.
time as your iPod or iPhone’s time (
Z page 7,
“Compatible iPod
and iPhone”).
Press [TIME SYNC] while an iPod or iPhone is docked unto
the main unit.
Setting the clock
Note:
• Exact synchronisation of an iPod or iPhone with the main
The clock is displayed once the main unit is connected to the
unit is not possible. There could be a difference of up to
household mains socket.
59 seconds between them.
Reset the clock regularly to maintain accuracy (monthly
• Compatibility depends on the software version of your iPod
accuracy
+
/– 60 seconds).
or iPhone.
1
Press and hold [SET/PRESET] for 2 seconds.
9
2
Press [2 /–, ADJ] or [+/6, ADJ] to select the day.
RQTX1209-2E_1gb.indd 9RQTX1209-2E_1gb.indd 9 7/7/2010 10:41:38 AM7/7/2010 10:41:38 AM
RQTX1209
10
ENGLISH
ENGLISH
10
10
NEDERLANDS
NEDERLANDS
ENGLISH
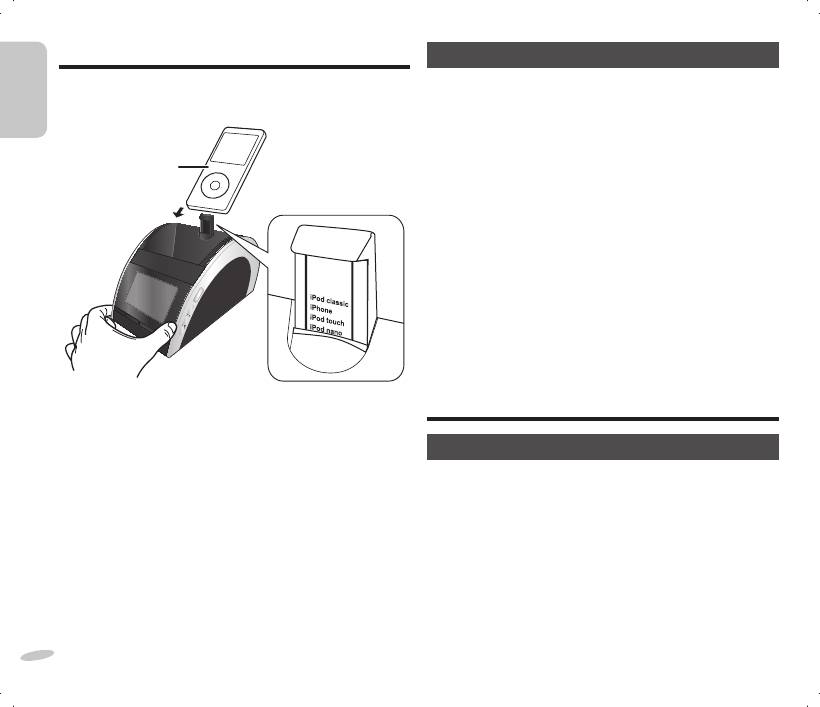
Using an iPod or iPhone
Playing an iPod or iPhone
1
Pull out the iPod or iPhone support.
1
Place an iPod or iPhone in the dock and turn it on.
Adjust the support according to the height of your iPod or
2
Press [SOURCE] to select “IPOD”.
iPhone.
3
Press [
4/9
] once to start music playback from the iPod
iPod
or iPhone. Press again to pause playback.
(not included)
Gently pull out the
4
Press [2 /–, ADJ] or [+/6, ADJ] to skip to the
iPod or iPhone
previous or next track.
support.
5
Press and hold [2 /–, ADJ] or [+/6, ADJ] to
iPod tou
iPhone
iPod cl
assic
iPod n
ano
ch
backward or forward search through a track.
Note:
• If the iPod or iPhone automatically shuffl es or skip a track;
– Turn off its “Shake” feature (if there is any).
– Play the iPod or iPhone using an iPod or iPhone dock
ENGLISH
adaptor (not included).
• For iPod or iPhone operation details, refer to iPod or iPhone’s
User Guide.
2
Connecting an iPod or iPhone.
Using the radio
Hold the main unit when connecting or disconnecting the
iPod or iPhone.
Manual tuning
Note:
When docking an iPod touch or iPhone for the fi rst time, a
1
Press [SOURCE] to select “RADIO FM”.
message will be displayed on your iPod touch or iPhone if the
Memory Loader application has not been installed (Z page 12).
2
Press [2 /–, ADJ] or [+/6, ADJ] to select the desired
frequency.
Charging an iPod or iPhone
The iPod or iPhone charges automatically when connected to
To tune automatically
the main unit.
Press and hold [2/–, ADJ] or [+/6, ADJ] until the frequency
• See iPod or iPhone display to check its charging status.
starts changing rapidly. Automatic tuning stops when it fi nds a
• If the iPod or iPhone is not being used for an extended period
station or when [2 /–, ADJ] or [+/6, ADJ] is pressed again.
of time after charging has completed, disconnect it from the
main unit, as the battery will be depleted naturally. (Once fully
Note:
charged, additional charging will not occur.)
For better reception, extend and change the direction of the FM
antenna.
RQTX1209-2E_1gb.indd 10RQTX1209-2E_1gb.indd 10 7/7/2010 10:41:38 AM7/7/2010 10:41:38 AM

ENGLISH
ENGLISH
ENGLISH
ENGLISH
ENGLISH
ENGLISH
RQTX1209
11
11
Memory preset
Using the alarm
You may store your favourite channels in 5 FM preset channels.
You can set two different alarm times. Before setting the alarm,
Preparation
make sure to set the clock (
Z page 9,
“Setting the clock”).
Press [SOURCE] to select “RADIO FM”.
Automatic presetting (AP)
Setting the alarm
Press and hold [SOURCE] until “AP” is displayed.
1
Press and hold [ALARM 1] or [ALARM 2] until the hour
Note:
display blinks.
• Automatic presetting begins from the current frequency.
• Only the fi rst 5 stations detected will be stored.
2
Within 10 seconds, press [2 /–, ADJ] or [+/6, ADJ]
• “AP” will blink continuously until all 5 channels have been set.
to set the hour.
Manual presetting
3
Press [ALARM 1] or [ALARM 2] to confi rm.
1
Press [2 /–, ADJ] or [+/6, ADJ] to select the desired
frequency.
4
Repeat steps 2 and 3 to set the minutes.
2
Press and hold [SET/PRESET] for 2 seconds to display
5
Press [2 /–, ADJ] or [+/6, ADJ] to select the days
the preset number.
of the week:
3
Press [2 /–, ADJ] or [+/6, ADJ] to select a preset
MON-SUN (everyday) ] MON-FRI (weekdays)
number.
SAT-SUN (weekend)SAT-SUN (weekend)
4
Press [SET/PRESET] again to confi rm.
Tuning in to a preset channel
6
Press [ALARM 1] or [ALARM 2] to confi rm.
Press [SET/PRESET] to switch between preset channels.
7
Press [2 /–, ADJ] or [+/6, ADJ] to select the desired
alarm mode: “IPOD”, “RADIO” or “BUZZER”.
8
Press [ALARM 1] or [ALARM 2] to confi rm.
Using the sleep timer
“IPOD” selection: Continue with steps 9 and 10.
“RADIO” selection: Continue from steps 11 to 14.
This function enables you to turn off the unit automatically after
the set time (only in iPod and radio mode).
Setting iPod alarm
9
Press [2 /–, ADJ] or [+/6, ADJ] to adjust the
1
Press [SLEEP] to activate the timer.
volume level.
2
Press [SLEEP] again to select your desired time
10
Press [ALARM 1] or [ALARM 2] to confi rm the setting.
(in minutes).
OFF (default)
]
30
]
60
]
90
]
120
Note:
• The buzzer will sound if no iPod or iPhone is detected at the
set alarm time.
• Music will be played from the iPod or iPhone’s library when
Note:
the alarm sounds.
11
Press [SLEEP] once to check the remaining time.
(Continued on next page)
RQTX1209-2E_1gb.indd 11RQTX1209-2E_1gb.indd 11 7/7/2010 10:41:38 AM7/7/2010 10:41:38 AM
RQTX1209
12
ENGLISH
ENGLISH
12
12
NEDERLANDS
NEDERLANDS
ENGLISH
Setting radio alarm
Using the Memory Loader application
11
Press [2 /–, ADJ] or [+/6, ADJ] to adjust the
volume level.
This main unit is designed to operate with the Memory Loader
application which can be downloaded from the App Store
12
Press [ALARM 1] or [ALARM 2] to confi rm.
(search for MemoryLoader).
If you have not already downloaded the free Memory Loader
13
Press [2 /–, ADJ] or [+/6, ADJ] to select the
application, you will see the following message on your iPod
desired preset channel.
touch or iPhone display:
14
Press [ALARM 1] or [ALARM 2] to confi rm the setting.
Application Not Installed
Note:
This accessory requires an
• Alarm will function only when powered by AC power.
application you do not have
• To activate or display the alarm setting, press [ALARM 1] or
installed. Would you like to install it
[ALARM 2] once.
from the App store?
• Press [ALARM 1] or [ALARM 2] again to deactivate the alarm
function.
This message is a reminder for you to download the application
in order to enjoy the enhanced features of this main unit.
However, your iPod touch and iPhone will work properly with
Turning off the alarm
ENGLISH
this main unit even without the Memory Loader application
Press [ALARM OFF] to turn off the alarm.
installed.
The alarm will sound at the same time on the next day.
The Memory Loader application only works with iPod touch and
iPhone running on OS 3.0 or later.
Note:
If the alarm is not turned off, it will sound continuously for
Once the Memory Loader application is installed into your
59 minutes before turning off by itself.
iPod touch or iPhone, the following functions can be easily
accessible and controlled directly through the application’s
platform.
Snoozing the alarm
Alarm
Press [SNOOZE] when the alarm sounds to stop it for a few
• Adjust alarm 1 and alarm 2 settings easily.
minutes.
• You may select any combination of days for the alarm to
The alarm will sound again after 9 minutes.
sound.
• You can choose your desired snooze settings from a choice
of 1 to 30 minutes.
Tip:
For iPod touch and iPhone users, use the Memory Loader
application to unlock custom alarm settings (Z see right).
Radio
• Preset 5 FM channels by scrolling through your desired
frequencies by using the picker.
Events
• You can be alerted of dates stored on your iPod touch or
iPhone contacts (if the alarm is set to sound on that day).
RQTX1209-2E_1gb.indd 12RQTX1209-2E_1gb.indd 12 7/7/2010 10:41:38 AM7/7/2010 10:41:38 AM
ENGLISH
ENGLISH
ENGLISH
ENGLISH
ENGLISH
ENGLISH
RQTX1209
13
13
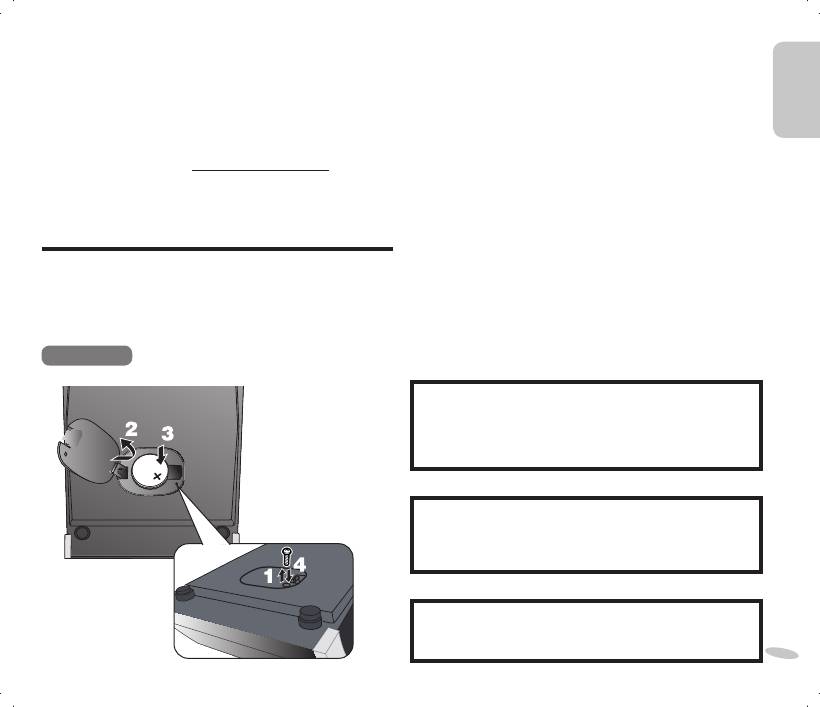
Nap
1
Keep the AC adaptor connected to the household mains
• You can set a short nap timer or countdown on your iPod
socket when unscrewing the screw on the cover of the
touch or iPhone.
battery holder using a screwdriver.
Daylight saving time (DST)
2
Open the cover of the battery holder.
• Activate or deactivate the daylight saving time function with
one simple step.
3
Insert a new battery with the (+) side facing up.
4
Close the cover of the battery holder and secure it with
For more information, visit: www.memoryloader.com
the screw.
Replacing the battery
The service life of this battery is approximately 1 month.
When the battery is weak, the battery-weak indicator will blink
Memory back-up battery
constantly on the display.
The back-up battery (CR2032, not included) saves the clock
Note:
and alarm settings in the event of a power interruption.
• Do not heat or expose to fl ame.
Inserting the battery
• Do not leave the battery(ies) in an automobile exposed
When there is no battery, the battery-weak indicator will be
to direct sunlight for a long period of time with doors and
displayed until a battery is inserted.
windows closed.
• Remove the battery if the clock radio is not going to be used
Bottom view
for a long period of time. Store in a cool, dark place.
CAUTION
Danger of explosion if battery is incorrectly replaced.
Replace only with the same or equivalent type
recommended by the manufacturer. Dispose of used
batteries according to the manufacturer’s instructions.
Warning
Keep the Button-Type battery out of the reach of children.
Never put Button-Type battery in mouth. If swallowed call
your doctor.
Warning
Risk of fi re, explosion and burns. Do not recharge,
disassemble, heat above 60°C or incinerate.
13
RQTX1209-2E_1gb.indd 13RQTX1209-2E_1gb.indd 13 7/7/2010 10:41:38 AM7/7/2010 10:41:38 AM
RQTX1209
14
ENGLISH
ENGLISH
14
14
NEDERLANDS
NEDERLANDS
ENGLISH
■ Radio
Troubleshooting guide
A noise or sound distortion is heard.
• Distance the unit away from any television, personal computer
Before requesting service, make the following checks. If you
or device easily infl uenced by magnetism.
are in doubt about some of the check points, or if the solutions
indicated do not solve the problem, consult your dealer for
instructions.
Reset
■ Clock
Clock cannot be synchronised to iPod or iPhone’s time.
This function enables you to restore the main unit to the original
• Make sure the iPod or iPhone is securely connected and
factory settings or when it is behaving abnormally.
turned on (Z page 9).
• Update your iPod or iPhone with the latest software.
Rear view
Daylight saving time does not work.
• Make sure the clock has been set correctly.
• Press and hold [SLEEP] in clock mode to activate daylight
saving time (Z page 9).
ENGLISH
■ Alarm
The iPod, radio or buzzer alarm does not sound at the
preset time.
• Check that “ALARM 1” or “ALARM 2” has been correctly
activated (Z page 11).
The iPod or radio alarm is activated but there is no sound at
Press [RESET] with a paper clip or a pointed object.
the preset time.
• Check the alarm’s volume setting (Z page 11, 12).
■ iPod or iPhone
The iPod or iPhone cannot be operated with this unit.
• Make sure the iPod or iPhone has been securely connected
and turned on (Z page 10).
• Update your iPod or iPhone with the latest software.
There is no sound from the iPod or iPhone.
• Make sure the iPod or iPhone has been securely connected
(Z page 10).
• Adjust the volume.
The iPod or iPhone does not charge.
• Check the connections. Turn off and remove the iPod or
iPhone from the dock connector. Reinsert and turn it on again
(Z page 10).
RQTX1209-2E_1gb.indd 14RQTX1209-2E_1gb.indd 14 7/7/2010 10:41:39 AM7/7/2010 10:41:39 AM
ENGLISH
ENGLISH
ENGLISH
ENGLISH
ENGLISH
ENGLISH
RQTX1209
15
15
Specifi cations
Power consumption in standby mode:
Main unit 0.3 W (approximate)
AC adaptor 0.3 W (approximate)
AMPLIFIER SECTION
RMS Output Power (Mono)
Note:
Front channel 2.6 W per channel (8
), 1 kHz, 10% THD
1) Specifi cations are subject to change without notice.
Mass and dimensions are approximate.
2) Total harmonic distortion is measured by the digital spectrum
analyser.
TUNER SECTION
Preset memory FM 5 stations
Frequency modulation (FM)
Frequency range
87.50 MHz to 108.00 MHz (50 kHz step)
Maintenance
Antenna terminals 75 (unbalanced)
To clean this unit, wipe with a soft, dry cloth.
• Never use alcohol, paint thinner or benzine to clean this unit.
SPEAKER SECTION
• Before using chemically treated cloth, read the instructions
that came with the cloth carefully.
Type 1 way, 1 speaker system (Bass refl ex)
Speaker unit(s) Impedance 8
Full range 2.5 cm cone type
GENERAL
Power supply (AC adaptor) AC 100 to 240 V, 50/60 Hz
DC Output 7.5 V
Power consumption (with iPod or iPhone charging)
Main unit 7 W
Dimensions (W x H x D) 112 mm x 80 mm x 150 mm
Mass
Main unit 0.37 kg
AC adaptor 0.14 kg
Operating temperature range 0°C to +35°C
Operating humidity range
20% to 80% RH (no condensation)
15
RQTX1209-2E_1gb.indd 15RQTX1209-2E_1gb.indd 15 7/7/2010 10:41:39 AM7/7/2010 10:41:39 AM
RQTX1209
ENGLISH
2
2
ESPAÑOL
ESPAÑOL
ENGLISH
Estimado Cliente
ADVERTENCIA:
Muchísimas gracias por haber adquirido este aparato.
PARA REDUCIR EL RIESGO DE INCENDIOS,
DESCARGAS ELÉCTRICAS O DAÑOS EN EL
Para un funcionamiento y seguridad óptimos, lea con
PRODUCTO,
atención estas instrucciones antes de conectar, utilizar
• NO EXPONGA ESTE APARATO A LA LLUVIA,
o confi gurar este producto.
HUMEDAD, GOTEO O SALPICADURAS, Y NO
Guarde este manual para su consulta en el futuro.
COLOQUE ENCIMA DEL MISMO OBJETOS
CON LÍQUIDOS COMO, POR EJEMPLO,
FLOREROS.
• UTILICE SOLAMENTE LOS ACCESORIOS
¡ADVERTENCIA!
RECOMENDADOS.
• PARA MANTENER BIEN VENTILADA ESTA
• NO QUITE LA CUBIERTA (O EL PANEL
UNIDAD, NO LA INSTALE NI PONGA EN UN
TRASERO); EN EL INTERIOR NO HAY
ESTANTE DE LIBROS, MUEBLE EMPOTRADO
PIEZAS QUE PUEDA REPARAR EL USUARIO.
U OTRO ESPACIO DE DIMENSIONES
SOLICITE LAS REPARACIONES AL
REDUCIDAS. ASEGÚRESE QUE CORTINAS
PERSONAL DE SERVICIO CUALIFICADO.
ENGLISH
Y OTROS MATERIALES NO OBSTRUYAN
LAS CONDICIONES DE VENTILACIÓN PARA
Este producto puede tener interferencias causadas
PREVENIR EL RIESGO DE SACUDIDAS
por teléfonos móviles durante su utilización. Si
ELÉCTRICAS O INCENDIOS DEBIDOS AL
tales interferencias resultan evidentes, aumente la
RECALENTAMIENTO.
separación entre el producto y el teléfono móvil.
• NO OBSTRUYA LAS ABERTURAS DE
VENTILACIÓN DE LA UNIDAD CON
PERIÓDICOS, MANTELES, CORTINAS U
La toma de corriente deberá estar instalada
OBJETOS SIMILARES.
cerca del equipo y donde se pueda acceder a ella
• NO COLOQUE OBJETOS CON LLAMA
fácilmente.
DESCUBIERTA, UNA VELA POR EJEMPLO,
El enchufe del cable de la alimentación deberá estar
ENCIMA DE LA UNIDAD.
siempre listo para ser utilizado.
• TIRE LAS PILAS DE FORMA QUE NO
CONTAMINE EL MEDIO AMBIENTE.
Para desconectar completamente este aparato de
la red de CA, desconecte el enchufe del cable de
alimentación del receptáculo de CA.
ESTA UNIDAD HA SIDO DISEÑADA PARA SER
Símbolos de identifi cación del producto
UTILIZADA EN CLIMAS MODERADOS.
Producto Ubicación
Unidad principal Parte inferior
Adaptador de CA Parte inferior
16
RQTX1209-2E_2es.indd 2RQTX1209-2E_2es.indd 2 7/7/2010 10:44:15 AM7/7/2010 10:44:15 AM

ENGLISHESPAÑOL
ESPAÑOL
ENGLISH
ENGLISH
RQTX1209
3
Precauciones de seguridad
Objetos extraños
No permita que objetos de metal caigan dentro de la
Ubicación
unidad. Esto puede causar una descarga eléctrica o un
fallo en el funcionamiento.
Coloque el unidad en una superfi cie plana lejos de la
luz la del sol, temperatura y humedad altas, y vibración
No permita que entren líquidos en la unidad. Esto
excesiva. Estas condiciones pueden dañar la caja y
puede causar una descarga eléctrica o un fallo
otros componentes, reduciendo por lo tanto la vida útil
en el funcionamiento. Si ocurre esto, desconecte
de la unidad.
inmediatamente la unidad de la fuente de alimentación
y póngase en contacto con su distribuidor.
Colóquela por lo menos a 15 cm de superfi cies de
paredes para evitar distorsión y efectos acústicos
No rocíe insecticidas sobre o dentro de la unidad.
indeseados.
Contienen gases infl amables que pueden encenderse
si son rociados dentro de la unidad.
No ponga objetos pesados sobre la unidad.
Servicio
Voltaje
No intente reparar esta unidad usted mismo. Si el
No utilice fuentes de alimentación de alta tensión. Esto
sonido se interrumpe, los indicadores no se iluminan,
puede sobrecargar la unidad y causar un incendio.
aparece humo o se produce cualquier otro problema
No use una fuente de alimentación de CC. Compruebe
que no esté tratado en estas instrucciones, desconecte
cuidadosamente la fuente cuando instale la unidad en
el adaptador de CA y póngase en contacto con su
una embarcación o en otro lugar donde se utilice CC.
distribuidor o con un centro de servicio autorizado. Si
la unidad es reparada, desarmada o reconstruida por
personas que no estén cualifi cadas para ello pueden
producirse descargas eléctricas o daños en la misma.
Protección del adaptador de CA
Aumente la vida útil de la unidad desconectándola de
Asegúrese de que el adaptador de CA esté conectado
la fuente de alimentación si no la va a utilizar durante
correctamente y no esté dañado. Una mala conexión
mucho tiempo.
y daños en el cable pueden causar un incendio o una
descarga eléctrica. No tire del cable ni lo doble, y no
ponga objetos pesados encima de él.
Sujete fi rmemente el enchufe cuando desconecte el
adaptador. Tirar del adaptador de CA puede causar
una descarga eléctrica.
No maneje el enchufe con las manos mojadas. Esto
3
puede causar una descarga eléctrica.
17
RQTX1209-2E_2es.indd 3RQTX1209-2E_2es.indd 3 7/7/2010 10:44:15 AM7/7/2010 10:44:15 AM
RQTX1209
ENGLISH
4
4
ESPAÑOL
ESPAÑOL
ENGLISH
Información para Usuarios sobre la
Para usuarios empresariales en la
Unión Europea
Recolección y Eliminación de aparatos
Si usted desea descartar aparatos
viejos y baterías usadas
eléctricos y electrónicos, por favor
contacte a su distribuidor o proveedor a
Estos símbolos en los productos,
fi n de obtener mayor información.
embalajes y/o documentos adjuntos,
signifi can que los aparatos eléctricos y
[Informacion sobre la Eliminación
electrónicos y las baterías no deberían
en otros Países fuera de la Unión
ser mezclados con los desechos
Europea]
domésticos.
Estos símbolos sólo son válidos dentro
Para el tratamiento apropiado, la
de la Unión Europea. Si desea desechar
recuperación y el reciclado de aparatos
estos objetos, por favor contacte con
viejos y baterías usadas, por favor,
sus autoridades locales o distribuidor
observe las normas de recolección
y consulte por el método correcto de
aplicables, de acuerdo a su legislación
eliminación.
nacional y a las Directivas 2002/96/CE y
ENGLISH
2006/66/CE.
Nota sobre el símbolo de la bateria
Al desechar estos aparatos y baterías
(abajo, dos ejemplos de símbolos):
correctamente, Usted estará ayudando a
Este símbolo puede ser usado en
preservar recursos valiosos y a prevenir
combinación con un símbolo químico.
cualquier potencial efecto negativo sobre
En este caso, el mismo cumple con
la salud de la humanidad y el medio
los requerimientos establecidos por la
ambiente que, de lo contrario, podría
Directiva para los químicos involucrados.
surgir de un manejo inapropiado de los
residuos.
Para mayor información sobre la
recolección y el reciclado de aparatos
y baterías viejos, por favor, contacte
a su comunidad local, su servicio de
eliminación de residuos o al comercio
donde adquirió estos aparatos.
Podrán aplicarse penas por la eliminación
incorrecta de estos residuos, de acuerdo
a la legislación nacional.
18
RQTX1209-2E_2es.indd 4RQTX1209-2E_2es.indd 4 7/7/2010 10:44:15 AM7/7/2010 10:44:15 AM
ENGLISHESPAÑOL
ESPAÑOL
ENGLISH
ENGLISH
RQTX1209
5
Índice
Accesorios suministrados
Precauciones de seguridad .........................................3
Por favor, compruebe e identifi que los accesorios
Accesorios suministrados ...........................................5
suministrados.
iPod e iPhone compatibles ..........................................5
Controles ....................................................................... 6
1 Adaptador de CA
Conexiones ...................................................................7
Puesta en hora ..............................................................7
Utilización un iPod o iPhone .......................................8
Utilización la radio ........................................................8
Utilización del temporizador para dormir ...................9
Utilización la alarma .....................................................9
Utilización la aplicación Memory Loader .................10
Pila de repuesto de la memoria .................................11
Guía para la solución de problemas .........................12
Especifi caciones ........................................................13
iPod e iPhone compatibles
Mantenimiento ............................................................13
• iPod nano 5a generación (video cámara) (8GB, 16GB)
• iPod touch 2a generación (8GB, 16GB, 32GB, 64GB)
• iPod classic [120GB, 160GB (2009)]
• iPod nano 4a generación (video) (8GB, 16GB)
• iPod classic (160GB) (2007)
• iPod touch 1a generación (8GB, 16GB, 32GB)
• iPod nano 3a generación (video) (4GB, 8GB)
• iPod classic (80GB)
• iPod nano 2a generación (aluminio) (2GB, 4GB, 8GB)
• iPod 5a generación (video) (60GB, 80GB)
• iPod 5a generación (video) (30GB)
“Made for iPod” y “Made for iPhone” signifi ca que un
• iPod nano 1a generación (1GB, 2GB, 4GB)
accesorio electrónico ha sido diseñado para conectarse
• iPod 4a generación (pantalla de color) (40GB, 60GB)
específi camente a iPod, o iPhone, respectivamente, y su
• iPod 4a generación (pantalla de color) (20GB, 30GB)
fabricante ha certifi cado que cumple con los estándares de
• iPod 4a generación (40GB)
rendimiento de Apple.
• iPod 4a generación (20GB)
Apple no se responsabiliza del funcionamiento de este
• iPod mini (4GB, 6GB)
dispositivo o su cumplimiento de las normas de regulación
• iPhone 3GS (16GB, 32GB)
y seguridad.
• iPhone 3G (8GB, 16GB)
iPhone, iPod, iPod classic, iPod nano e iPod touch son
• iPhone (4GB, 8GB, 16GB)
marcas comerciales de Apple Inc., registradas en EUA y
La compatibilidad depende de la versión del software de su
5
otros países.
iPod o iPhone.
19
RQTX1209-2E_2es.indd 5RQTX1209-2E_2es.indd 5 7/7/2010 10:44:16 AM7/7/2010 10:44:16 AM
RQTX1209
ENGLISH
6
6
ESPAÑOL
ESPAÑOL
ENGLISH
Controles
HIJ
A
ENGLISH
B
G
F
C
A [SNOOZE/DIMMER]
D
Función de repetición de alarma: Para detener la alarma
E
durante 9 minutos.
Atenuador: Para ajustar el brillo del panel del visor
(Alto (predeterminado), Medio o Bajo).
F [SET/PRESET]
Para confi gurar el reloj.
B [ALARM OFF]
Para realizar una confi guración previa automática o para
Para apagar la alarma.
visualizar los canales preconfi gurados en el modo radio.
C [ALARM 1], [ALARM 2]
G [TIME SYNC]
Para activar la función alarma 1 o alarma 2.
Para sincronizar la unidad principal con la hora de un iPod
Para mostrar la confi guración de alarma 1 o alarma 2.
o iPhone.
D [SLEEP]
H [+, VOL], [–, VOL]
Para activar la función dormir.
Para ajustar el volumen.
Para activar el horario de ahorro de energía (en verano) en
Para seleccionar la visualización de un reloj de 12 o
el modo reloj.
24 horas.
E [2 /–, ADJ], [+/6, ADJ]
Para ajustar las confi guraciones del reloj, la radio y la
I [
4/9
]
alarma.
Para iniciar la reproducción de música desde un iPod o
Para saltar a la pista anterior o siguiente.
iPhone y para pausar la reproducción.
Para adelantar o retroceder la búsqueda dentro de una
J [SOURCE]
20
pista.
Para seleccionar el modo reloj, “IPOD” o “RADIO FM”.
RQTX1209-2E_2es.indd 6RQTX1209-2E_2es.indd 6 7/7/2010 10:44:16 AM7/7/2010 10:44:16 AM
