Panasonic DMR-E65 EE-S: инструкция
Раздел: Видеотехника
Тип: Проектор/экран
Характеристики, спецификации
Инструкция к Проектору/экрану Panasonic DMR-E65 EE-S
Operating Instructions
Инструкция по эксплуатации
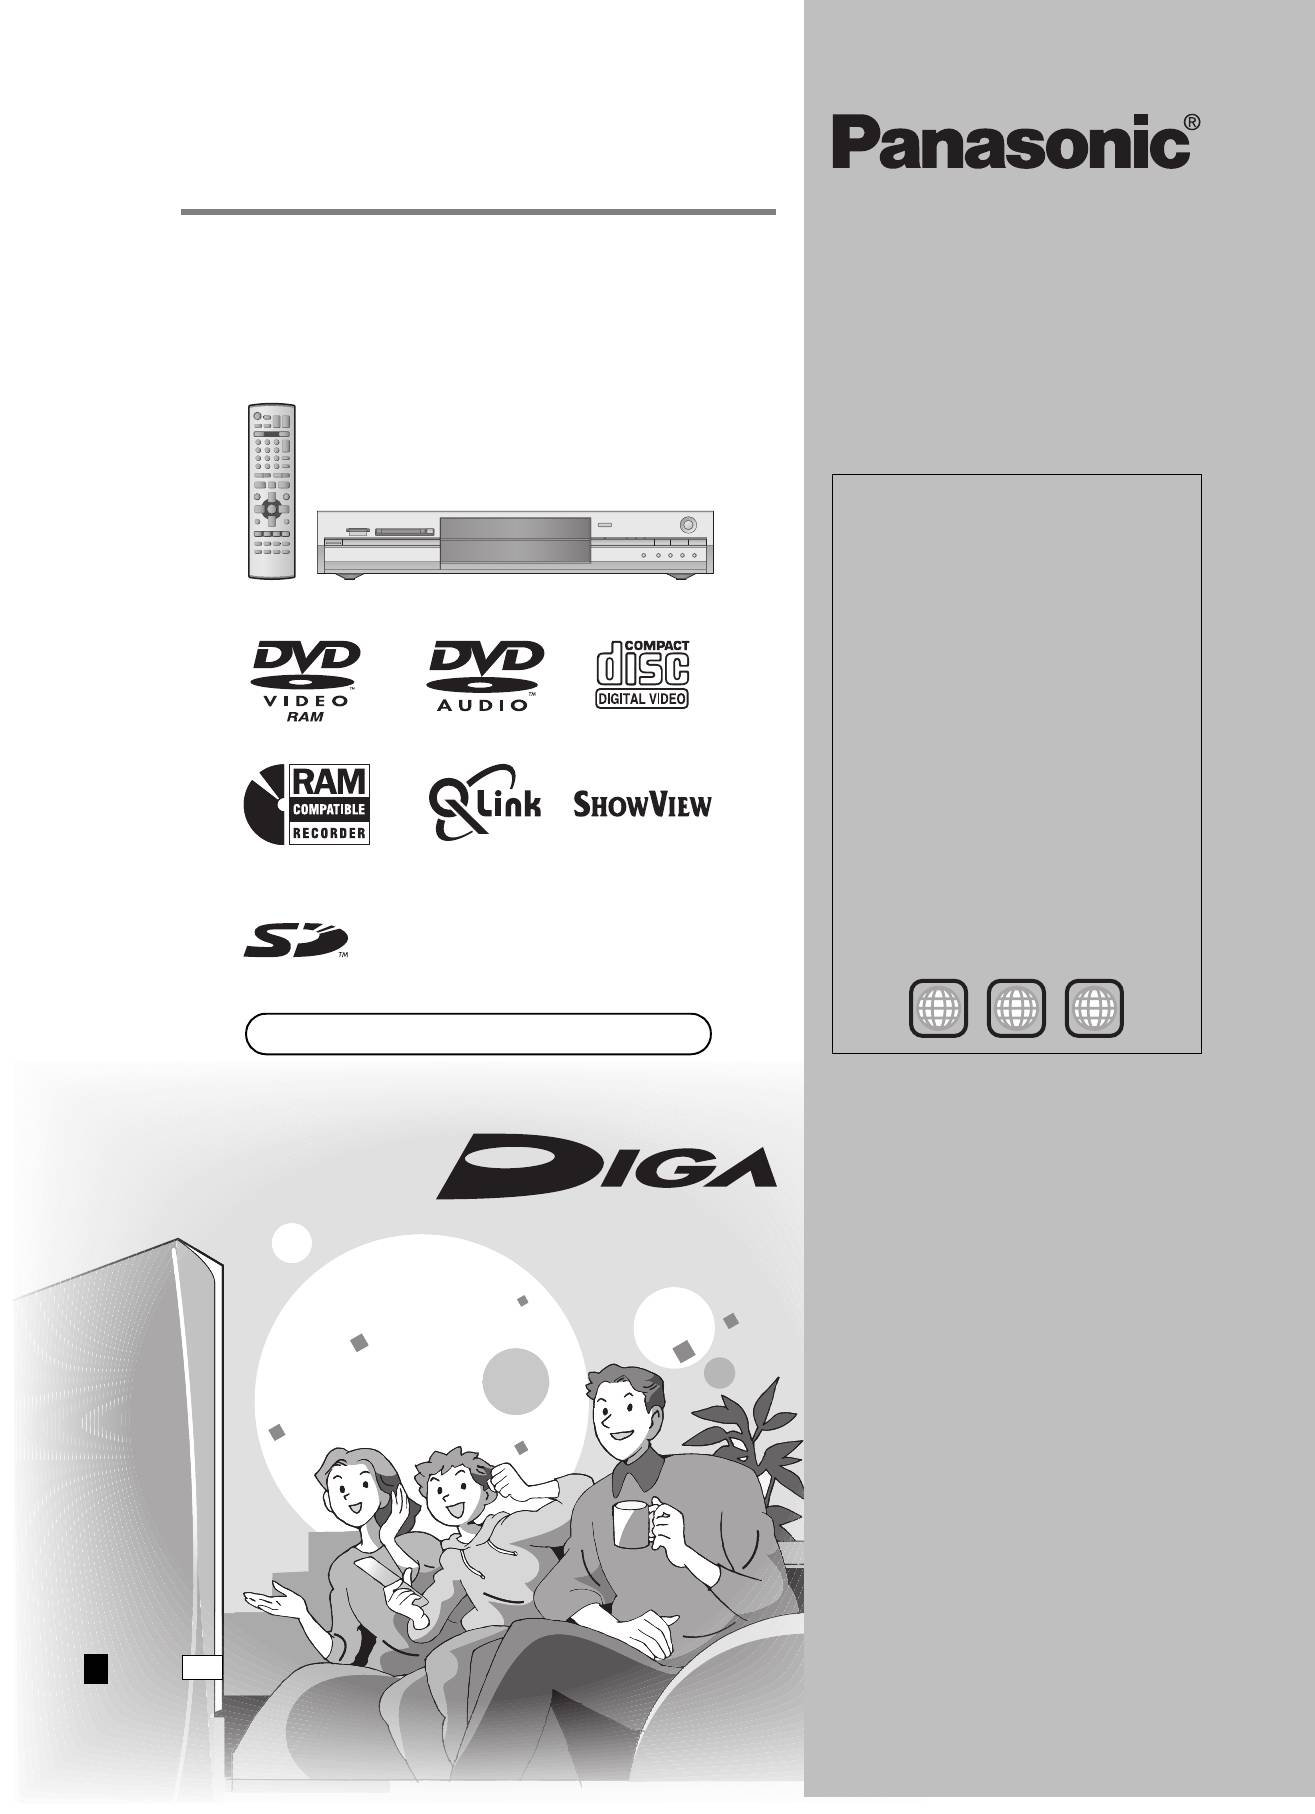
DVD Video Recorder
DVD-магнитофон
Model No. DMR-E65
Region number supported by
this unit
Region numbers are allocated to DVD players
and software according to where they are sold.
≥The region number of this unit is “5”.
≥The unit will play DVDs marked with labels
containing “5” or “ALL”.
Региональный номер,
поддерживаемый данным
аппаратом
В зависимости от географии продажи DVD-
проигрывателей и программного
обеспечения, им присваиваются
региональные номера.
≥Региональный номер данного аппарата “5”.
≥Аппарат воспроизводит DVD-диски, на
этикетках которых содержится маркировка
“5” или “ALL”..
Example:
Например:
2
5 ALL
3
5
Web Site: http://www.panasonic-europe.com
Dear customer
Thank you for purchasing this product. For optimum
performance and safety, please read these
instructions carefully.
Before connecting, operating or adjusting this
product, please read these instructions completely.
Please keep this manual for future reference.
Уважаемый покупатель
Благодарим Вас за покупку этой системы.
Чтобы получить оптимальное качество работы
системы и обеспечить безопасность,
пожалуйста, внимательно прочитайте эту
инструкцию.
Перед подключением, работой или
регулировкой данного аппарата прочтите,
пожалуйста, эту инструкцию полностью.
Сохраните, пожалуйста, эту инструкцию для
дальнейших справок.
RQT7448-REE
CAUTION!
THIS PRODUCT UTILIZES A LASER.
USE OF CONTROLS OR ADJUSTMENTS OR
PERFORMANCE OF PROCEDURES OTHER THAN THOSE
SPECIFIED HEREIN MAY RESULT IN HAZARDOUS
RADIATION EXPOSURE.
DO NOT OPEN COVERS AND DO NOT REPAIR YOURSELF.
REFER SERVICING TO QUALIFIED PERSONNEL.
WARNING:
TO REDUCE THE RISK OF FIRE, ELECTRIC SHOCK OR
PRODUCT DAMAGE, DO NOT EXPOSE THIS APPARATUS
TO RAIN, MOISTURE, DRIPPING OR SPLASHING AND THAT
NO OBJECTS FILLED WITH LIQUIDS, SUCH AS VASES,
SHALL BE PLACED ON THE APPARATUS.
CAUTION!
≥DO NOT INSTALL OR PLACE THIS UNIT IN A BOOKCASE,
BUILT-IN CABINET OR IN ANOTHER CONFINED SPACE.
ENSURE THE UNIT IS WELL VENTILATED. TO PREVENT
RISK OF ELECTRIC SHOCK OR FIRE HAZARD DUE TO
Getting started
OVERHEATING, ENSURE THAT CURTAINS AND ANY
OTHER MATERIALS DO NOT OBSTRUCT THE
VENTILATION VENTS.
≥DO NOT OBSTRUCT THE UNIT’S VENTILATION OPENINGS
WITH NEWSPAPERS, TABLECLOTHS, CURTAINS, AND
SIMILAR ITEMS.
≥DO NOT PLACE SOURCES OF NAKED FLAMES, SUCH AS
LIGHTED CANDLES, ON THE UNIT.
≥DISPOSE OF BATTERIES IN AN ENVIRONMENTALLY
FRIENDLY MANNER.
THIS UNIT IS INTENDED FOR USE IN MODERATE CLIMATES.
This product may receive radio interference caused by mobile
telephones during use. If such interference is apparent, please
increase separation between the product and the mobile
telephone.
The socket outlet shall be installed near the equipment and
easily accessible or the mains plug or an appliance coupler shall
remain readily operable.
Y
RF IN
PB
OPTICAL
R - AUDIO - L
VIDEO
S-VIDEO
OUT
AV1 (TV)
PR
AV4 I N
AC IN
DIGITAL AUDIO OUT
(PCM/BITSTREAM)
R - AUDIO - L
VIDEO
S-VIDEO
AV2 (DECODER/EXT)
(NTSC:480P/480I,
PAL:576P/576I)
VIDEO OUT
COMPONENT
RF OUT
DANGER
-
VISIBLE AND INVISIBLE LASER RADIATION WHEN OPEN.
AVOID DIRECT EXPOSURE TO BEAM.
(FDA 21 CFR)
CAUTION
-
VISIBLE AND INVISIBLE LASER RADIATION WHEN OPEN.
AVOID EXPOSURE TO BEAM.
(IEC60825-1)
ATTENTION
-
RAYONNEMENT LASER VISIBLE ET INVISIBLE EN CAS D’OUVERTURE.
EXPOSITION DANGEREUSE AU FAISCEAU.
ADVARSEL
-
SYNLIG OG USYNLIG LASERSTRÅLING VED ÅBNING.
UNDGÅ UDSÆTTELSE FOR STRÅLING.
VARO!
-
AVATTAESSA OLET ALTTIINA NÄKYVÄÄ JA NÄKYMÄTÖN
LASERSÄTEILYLLE. ÄLÄ KATSO SÄTEESEEN.
VARNING
-
SYNLIG OCH OSYNLIG LASERSTRÅLNING NÄR DENNA DEL
ÄR ÖPPNAD. BETRAKTA EJ STRÅLEN.
ADVARSEL
-
SYNLIG OG USYNLIG LASERSTRÅLING NÅR DEKSEL ÅPNES.
UNNGÅ EKSPONERING FOR STRÅLEN.
VORSICHT
-
SICHTBARE UND UNSICHTBARE LASERSTRAHLUNG, WENN ABDECKUNG
GEÖFFNET. NICHT DEM STRAHL AUSSETZEN.
-
(Inside of product)
-
RQLS0233
Keep the small memory cards such as the SD
Memory Card out of reach of children. If
swallowed, seek medical advice immediately.
RQT7448
2
2

Table of contents
Getting started
Transfer (Dubbing)
Accessories . . . . . . . . . . . . . . . . . . . . . . . . . . . . . . . 3
Recording from a video cassette recorder . . . . . 35
Useful features . . . . . . . . . . . . . . . . . . . . . . . . . . . . . 4
Manual recording . . . . . . . . . . . . . . . . . . . . . . . . . . . . . . . . . . . 35
DV automatic recording (DV AUTO REC). . . . . . . . . . . . . . . . . 35
The remote control. . . . . . . . . . . . . . . . . . . . . . . . . . 4
Transferring (dubbing) still pictures . . . . . . . . . . 36
Control reference guide. . . . . . . . . . . . . . . . . . . . . . 5
Transferring (dubbing) using the transferring (dubbing) list . . . 36
STEP 1
Connection . . . . . . . . . . . . . . . . . . . . . . . . . 6
Transferring (dubbing) all the still pictures of a card
STEP
2
Channel reception settings. . . . . . . . . . . 10
onto a DVD-RAM—COPY ALL PICTURES . . . . . . . . . . . . . . 37
STEP 3
Set up to match your television
and remote control. . . . . . . . . . . . . . . . . . . . . . . . 12
Convenient functions
To enjoy progressive video. . . . . . . . . . . . . . . . . . . . . . . . . . . . 12
Disc and card information . . . . . . . . . . . . . . . . . . . 14
FUNCTIONS window . . . . . . . . . . . . . . . . . . . . . . . 37
Disc and card management . . . . . . . . . . . . . . . . . 38
Setting the protection . . . . . . . . . . . . . . . . . . . . . . . . . . . . . . . . 38
Recording
Providing a disc with a name . . . . . . . . . . . . . . . . . . . . . . . . . . 38
Erasing all titles and play lists—Erase all titles. . . . . . . . . . . . . 38
Recording television programmes . . . . . . . . . . . . 16
Erasing all the contents of a disc or card—Format. . . . . . . . . . 39
Recording modes and approximate recording times . . . . . . . . 17
Enabling DVD-R to be played on other equipment—Finalize . . 39
Playing while you are recording . . . . . . . . . . . . . . . . . . . . . . . . 17
Entering text . . . . . . . . . . . . . . . . . . . . . . . . . . . . . 40
Flexible Recording . . . . . . . . . . . . . . . . . . . . . . . . . . . . . . . . . . 18
Direct TV Recording . . . . . . . . . . . . . . . . . . . . . . . . . . . . . . . . 18
Changing the unit’s settings . . . . . . . . . . . . . . . . 41
Getting started
Recording from satellite/digital receiver or decoder. . . . . . . . . 18
Common procedures . . . . . . . . . . . . . . . . . . . . . . . . . . . . . . . . 41
Timer recording . . . . . . . . . . . . . . . . . . . . . . . . . . . 19
Summary of settings. . . . . . . . . . . . . . . . . . . . . . . . . . . . . . . . . 41
Using SHOWVIEW number to make timer recordings. . . . . . . . . 19
Tuning . . . . . . . . . . . . . . . . . . . . . . . . . . . . . . . . . . . . . . . . . . . . 45
Manually programming timer recordings . . . . . . . . . . . . . . . . . 20
TV System . . . . . . . . . . . . . . . . . . . . . . . . . . . . . . . . . . . . . . . . 46
Check, change or delete a programme . . . . . . . . . . . . . . . . . . 21
Clock settings . . . . . . . . . . . . . . . . . . . . . . . . . . . . . . . . . . . . . . 47
Linked timer recordings with external equipment (EXT LINK)
. . 21
Child Lock . . . . . . . . . . . . . . . . . . . . . . . . . . . . . . . 47
Playing back
Reference
Playing recorded video contents/Playing play-
Specifications . . . . . . . . . . . . . . . . . . . . . . . . . . . . 48
only discs . . . . . . . . . . . . . . . . . . . . . . . . . . . . . . . 22
Glossary. . . . . . . . . . . . . . . . . . . . . . . . . . . . . . . . . 49
Operations during play. . . . . . . . . . . . . . . . . . . . . . . . . . . . . . . 23
Frequently asked questions. . . . . . . . . . . . . . . . . 51
Editing operations during play . . . . . . . . . . . . . . . . . . . . . . . . . 24
Error messages . . . . . . . . . . . . . . . . . . . . . . . . . . . 52
Changing audio . . . . . . . . . . . . . . . . . . . . . . . . . . . . . . . . . . . . 24
Troubleshooting guide . . . . . . . . . . . . . . . . . . . . . 53
Using menus to play MP3 . . . . . . . . . . . . . . . . . . . 25
Safety precautions . . . . . . . . . . . . . . . . . . . . . . . . 57
Playing still pictures . . . . . . . . . . . . . . . . . . . . . . . 26
Maintenance/Disc and card handling . . . . . . . . . 57
Useful functions during still picture play. . . . . . . . . . . . . . . . . . 27
Index. . . . . . . . . . . . . . . . . . . . . . . . . . . . . . . . . . . . 58
Using on-screen menus and Status messages. . 28
On-screen menus . . . . . . . . . . . . . . . . . . . . . . . . . . . . . . . . . . 28
Status messages . . . . . . . . . . . . . . . . . . . . . . . . . . . . . . . . . . . 29
Editing
Editing titles/chapters . . . . . . . . . . . . . . . . . . . . . . 30
Editing titles/chapters and playing chapters. . . . . . . . . . . . . . . 30
Title operations . . . . . . . . . . . . . . . . . . . . . . . . . . . . . . . . . . . . 31
Chapter operations . . . . . . . . . . . . . . . . . . . . . . . . . . . . . . . . . 31
Creating, editing and playing play lists . . . . . . . . 32
Creating play lists. . . . . . . . . . . . . . . . . . . . . . . . . . . . . . . . . . . 32
Editing and playing play lists/chapters . . . . . . . . . . . . . . . . . . . 33
Play list operations. . . . . . . . . . . . . . . . . . . . . . . . . . . . . . . . . . 33
Chapter operations . . . . . . . . . . . . . . . . . . . . . . . . . . . . . . . . . 33
Editing still pictures. . . . . . . . . . . . . . . . . . . . . . . . 34
Picture and folder operation. . . . . . . . . . . . . . . . . . . . . . . . . . . 34
Accessories
Please check and identify the supplied accessories.
∏∏ ∏ ∏∏
1 Remote control
1 AC mains lead
1 RF coaxial cable 2 Batteries
1 Audio/video cable
(EUR7721KC0)
≥For use with this unit only. Do not
for remote control
use it with other equipment.
RQT7448
3
3
Useful features
This DVD Video recorder records high quality images to rapid random access capable DVD-RAM media. This has resulted in
many new features that out perform older tape formats. The following information summarizes a few of these features.
Instant recording
Chasing playback
You no longer need to search for empty disc space. By
There is no need to wait until
pressing the recording button, the unit finds available
recording is complete. Without
recording space and begins recording right away. There is no
stopping recording, you can play the
need to worry about overwriting already recorded content.
video currently being recorded from
its beginning.
SD/PC card slots, DV input terminal
This unit is equipped with interfaces that allow networking
with digital equipment.
≥The SD/PC card slots of this unit let you transfer (dub) digital
Simultaneous Recording
camera photographs from a card to DVD-RAM for easy storage
and Playback
without using a computer.
While recording, you can play
≥The DV automatic recording function of this unit lets you easily
another video programme that was
transfer (dub) digital images to the DVD-RAM by connecting only a
recorded previously.
single DV cable.
Getting started
Instant play
There is no need to rewind or search forward. Direct
Navigator guides you to the beginning of the recorded video
Time Slip
immediately.
During play and also while recording,
you can jump to the scene you wish
to view by specifying the skip time.
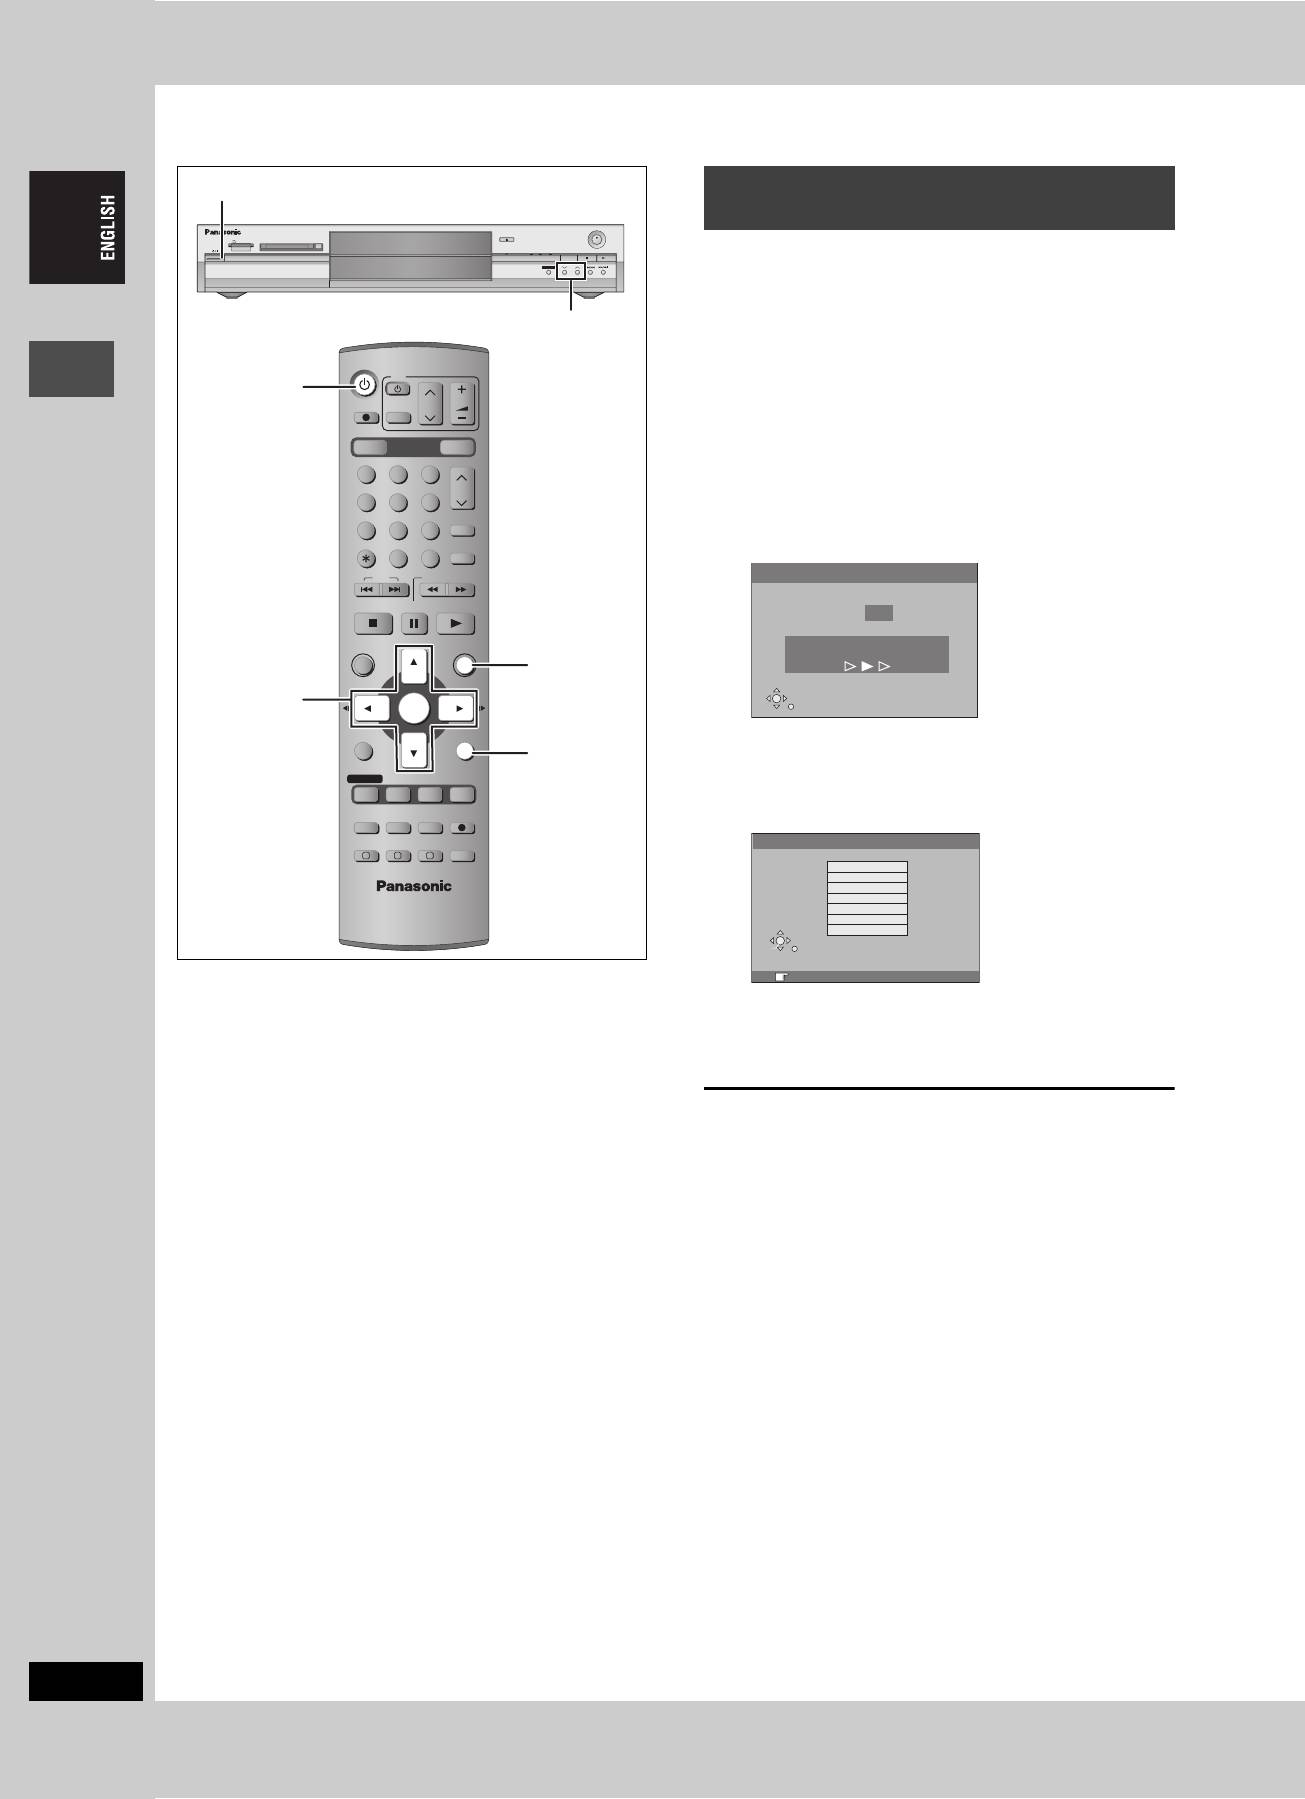
The remote control
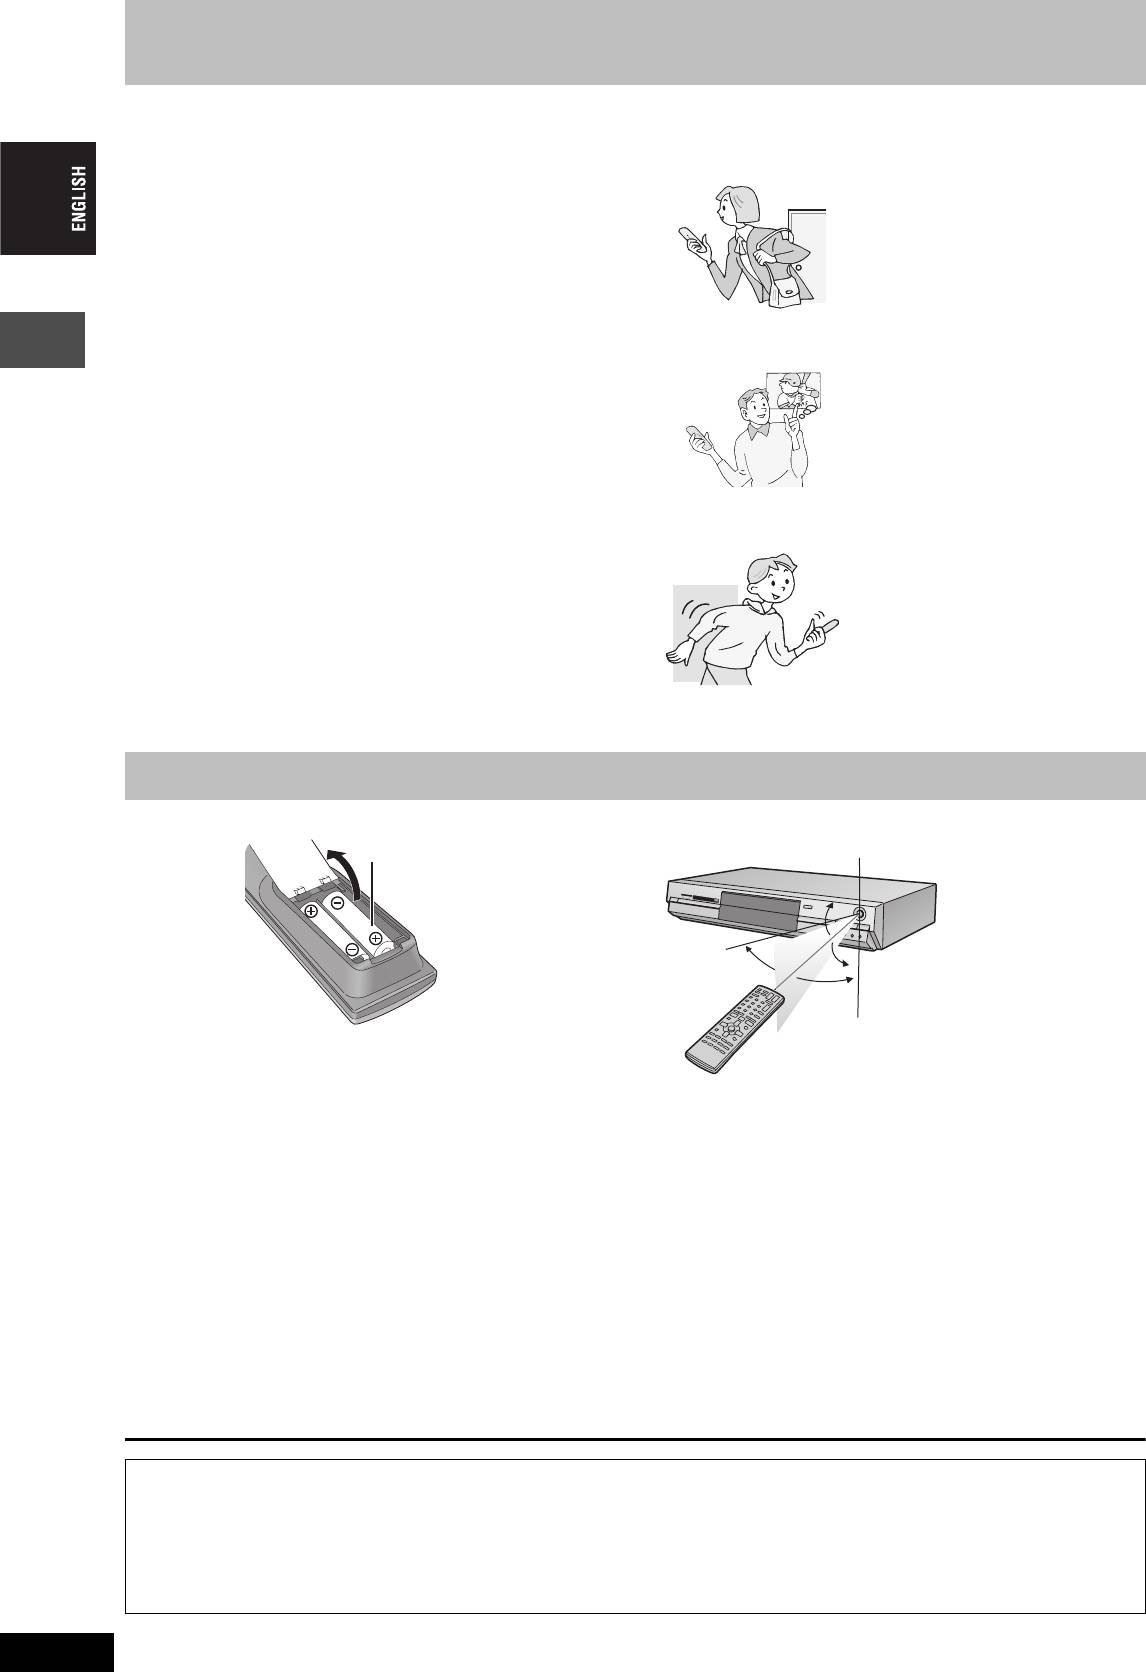
∫ Batteries
∫ Use
≥Insert so the poles (i and j) match those in the remote control.
≥Do not use rechargeable type batteries.
≥Do not mix old and new batteries.
≥Do not use different types at the same time.
≥Do not heat or expose to flame.
≥Do not take apart or short circuit.
≥Do not attempt to recharge alkaline or manganese batteries.
≥Do not use batteries if the covering has been peeled off.
Mishandling of batteries can cause electrolyte leakage which can
damage items the fluid contacts and may cause a fire.
Remove if the remote control is not going to be used for a long
period of time. Store in a cool, dark place.
[Note]
If you cannot operate the unit or television using the remote control
after changing the batteries, please re-enter the codes (➡ page 13).
RQT7448
4
R6/LR6, AA, UM-3
Remote control signal sensor
20˚
30˚
20˚
30˚
7 m directly in front of the unit
The manufacturer accepts no responsibility and offers no compensation for loss of recorded or edited material due to a problem
with the unit or recordable media, and accepts no responsibility and offers no compensation for any subsequent damage caused by
such loss.
Examples of causes of such losses are
≥A disc recorded and edited with this unit is played in a DVD recorder or computer disc drive manufactured by another company.
≥A disc used as described above and then played again in this unit.
≥A disc recorded and edited with a DVD recorder or computer disc drive manufactured by another company is played in this unit.
4
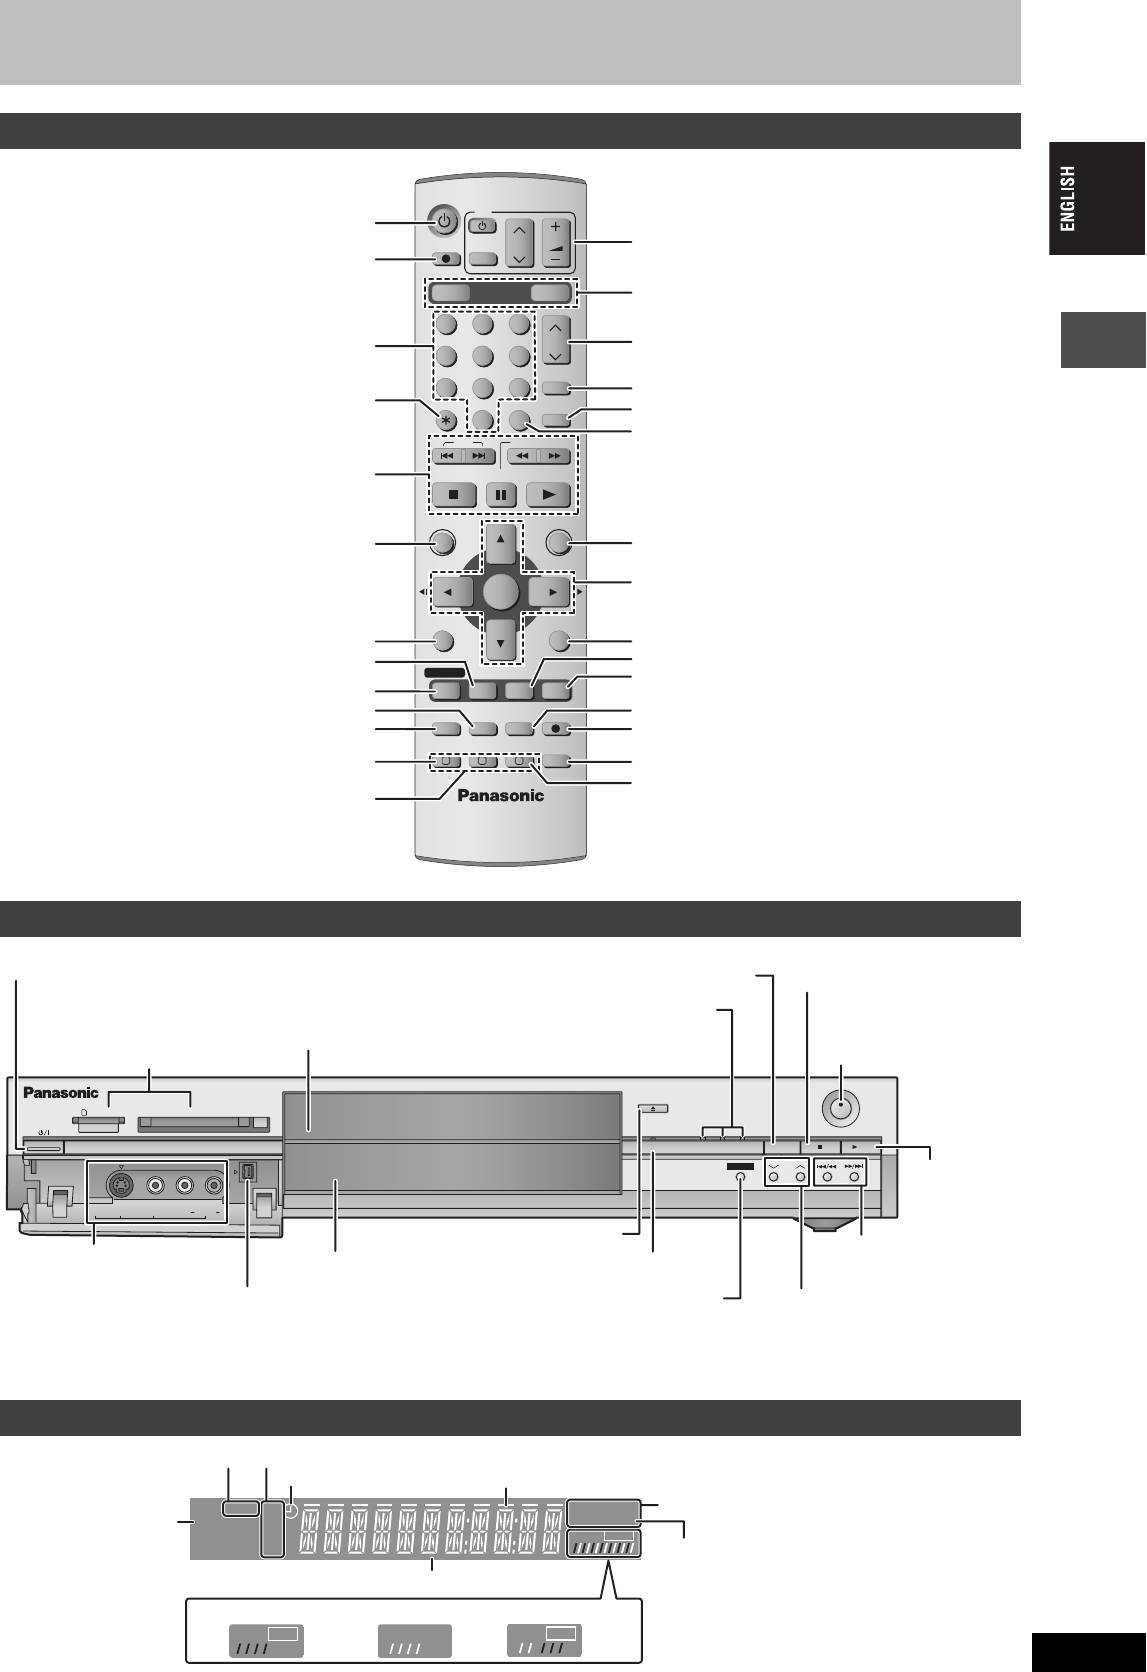
Control reference guide
Remote control
DVD
Turn the unit on (➡ page 10, 11)
TV
VOLUME
Television operations (➡ page 13)
DIRECT TV REC
CH
Direct TV recording (➡ page 18)
AV
DVD
DRIVE SELECT
SD/PC
Select drive (DVD, SD or PC)
(➡ page 16, 22, 27)
123
Select channels and title numbers etc./
CH
Channel select (➡ page 16)
Enter numbers
456
ShowView
78
9
Show S
HOWVIEW screen (➡ page 19)
Cancel
CANCEL
INPUT SELECT
MANUAL SKIP
Skip 30 seconds forward (➡ page 23)
0
Input select (AV1, AV2, AV3, AV4 or DV)
SKIP
SLOW/SEARCH
(➡ page 18, 35)
Basic operations for recording and play
STOP
PAU SE
PLAY/x1.3
DIRECT NAVIGATOR
FUNCTIONS
Getting started
Show Top menu/Direct navigator (➡ page 22, 30)
Show FUNCTIONS window (➡ page 37)
TOP MENU
Selection/Enter, Frame-by-frame (➡ page 10, 23)
ENTER
SUB MENU
RETURN
Show sub menu (➡ page 30)
Return to previous screen
Show on-screen menu (➡ page 28)
Show status messages (➡ page 29)
PROG/CHECK
DISPLAY
STATUS
TIME SLIP
Skip the specified time/Display the television image
Show timer recording programme screen
(➡ page 20)
as a picture-in-picture (➡ page 17, 23)
Erase items (➡ page 24)
Change recording mode (➡ page 16)
TIMER
REC MODEERASE
REC
Programme recording standby/release
F
Start recording (➡ page 16)
(➡ page 19, 20)
CREATE
EXT LINK
CHAPTER
AUDIO
Linked timer recordings with external equipment
A B C
Select audio (➡ page 24)
(➡ page 21)
Create chapter (➡ page 24)
Manual tuning operation (➡ page 45)
Main unit
Standby/on switch (Í/I) (➡ page 10, 11)
Select drive (➡ page 16, 22, 27)
Press to switch the unit from on to standby mode or vice
Stop (➡ page 16, 23)
versa. In standby mode, the unit is still consuming a small
Lights when the DVD, SD or PC
amount of power.
drive is selected
Disc tray (➡ page 16, 22)
Remote control signal sensor/
SD/PC card slots (➡ page 26)
Start recording (➡ page 16)
OPEN/CLOSE
SD CARD PC CARD EJECT
REC
TIME SLIP
SD PCDVD
DRIVE SELECT
x
/
1.3
TIME SLIP
CH
Start play
(➡ page 22)
AV3
S-VIDEO IN VIDEO IN AUDIO IN DV IN
L/MONO
R
Open/close disc tray (➡ page 16, 22)
Skip/Slow/Search
Connection for camcorder
Display (➡ below)
Time Slip indicator (➡ page 17)
(➡ page 23)
etc. (➡ page 35)
Connection for digital
Skip the specified time/Display the television
Channel select
video (DV) camcorder
image as a picture-in-picture (➡ page 17, 23)
(➡ page 16)
(➡ page 35)
Rear panel terminals (➡ page 7, 8)
The unit’s display
SD PC
XP
DVD
-
R
AM
EXT
Link
SP
VCD
.MIX
LP
PLAY
REC
EP
RQT7448
5
PLAY
REC
PLAY
REC
Card indicator
Recording mode
Timer recording indicator
Transferring (dubbing) in progress indicator
Disc type
Linked timer recordings
with external equipment
indicator
D.MIX (multi-channel DVD-Audio only)
When lit: down-mixed audio is played.
Main display section
When off: the disc prevents down-mixing so only
Recording
Playback
Recording/Playback
the two front channels can be played.
5

STEP 1
Connection
≥The equipment connections described are examples.
≥Before connection, turn off all equipment and read the appropriate operating instructions.
≥Peripheral equipment and optional cables sold separately unless otherwise indicated.
∫ Recommended connection for your television
Required
Page No. for
Page No. for TV
What kind of input terminal does your television have?
cable(s)
connections
settings
Scart Highly recommended connection.
≥You can enjoy high-quality RGB video from this
➡ 11
AV IN
unit by connecting to an RGB compatible
Fully wired 21-
➡ 7
television.
pin Scart cable
≥If it’s a Q Link
≥If your television has the Q Link feature, you can
television ➡ 10
use a variety of useful functions.
Component
These terminals provide a purer picture than the S-
video
Video terminal.
COMPONENT
≥If your television is compatible with progressive
VIDEO IN
scan, you can enjoy high-quality progressive video.
3 video cables ➡ 8 ➡ 11
If you have a progressive compatible CRT
Getting started
television, we cannot recommend this connection
as some flickering may occur.
S-Video This terminal achieves a more vivid picture than the
S-VIDEO IN
video terminal.
S-Video cable ➡ 8 ➡ 11
Audio/Video The most basic connection.
AUDIO IN
VIDEO IN
R L
Audio/Video
➡ 8
➡ 11
cable (included)
Q Link functions
Q Link offers a range of convenient functions (For further details ➡ page 50). Make sure to connect a fully wired 21-pin Scart cable to the
television if using the Q Link function.
The following systems from other manufacturers have similar function to Q Link from Panasonic. For details, refer to your television’s operating
instructions or consult your dealer.
≥Q Link (registered trademark of Panasonic)
≥Megalogic (registered trademark of Grundig)
≥DATA LOGIC (registered trademark of Metz)
≥SMARTLINK (registered trademark of Sony)
≥Easy Link (registered trademark of Philips)
∫ Examples of equipment you can connect to this unit’s terminals
Television
Amplifier
From AV1, AUDIO/VIDEO OUT or
From AUDIO OUT terminals or
COMPONENT VIDEO OUT terminals
DIGITAL AUDIO OUT terminal
This unit
To AV2 or AV4 input terminals (rear)
To AV3 or DV input terminals (front) (➡ page 35)
Satellite/digital
receiver or decoder
Camcorder
Video cassette recorder
∫ Do not connect the unit through a video cassette recorder
Video signals fed through video cassette recorders will be affected by copyright
Television
Television
protection systems and the picture will not be shown correctly on the television.
≥When connecting to a television with a built in VCR, connect to the input terminals on
This unit
VCR
the television side, not the VCR side.
VCR
This unit
∫ When the unit is not to be used for a long time
Before moving the unit, ensure the disc tray is
To save power, unplug it from the household mains socket. This
empty.
unit consumes a small amount of power, even when it is turned off
Failure to do so will risk severely damaging the disc and
(approx. 3 W).
RQT7448
the unit.
6
6

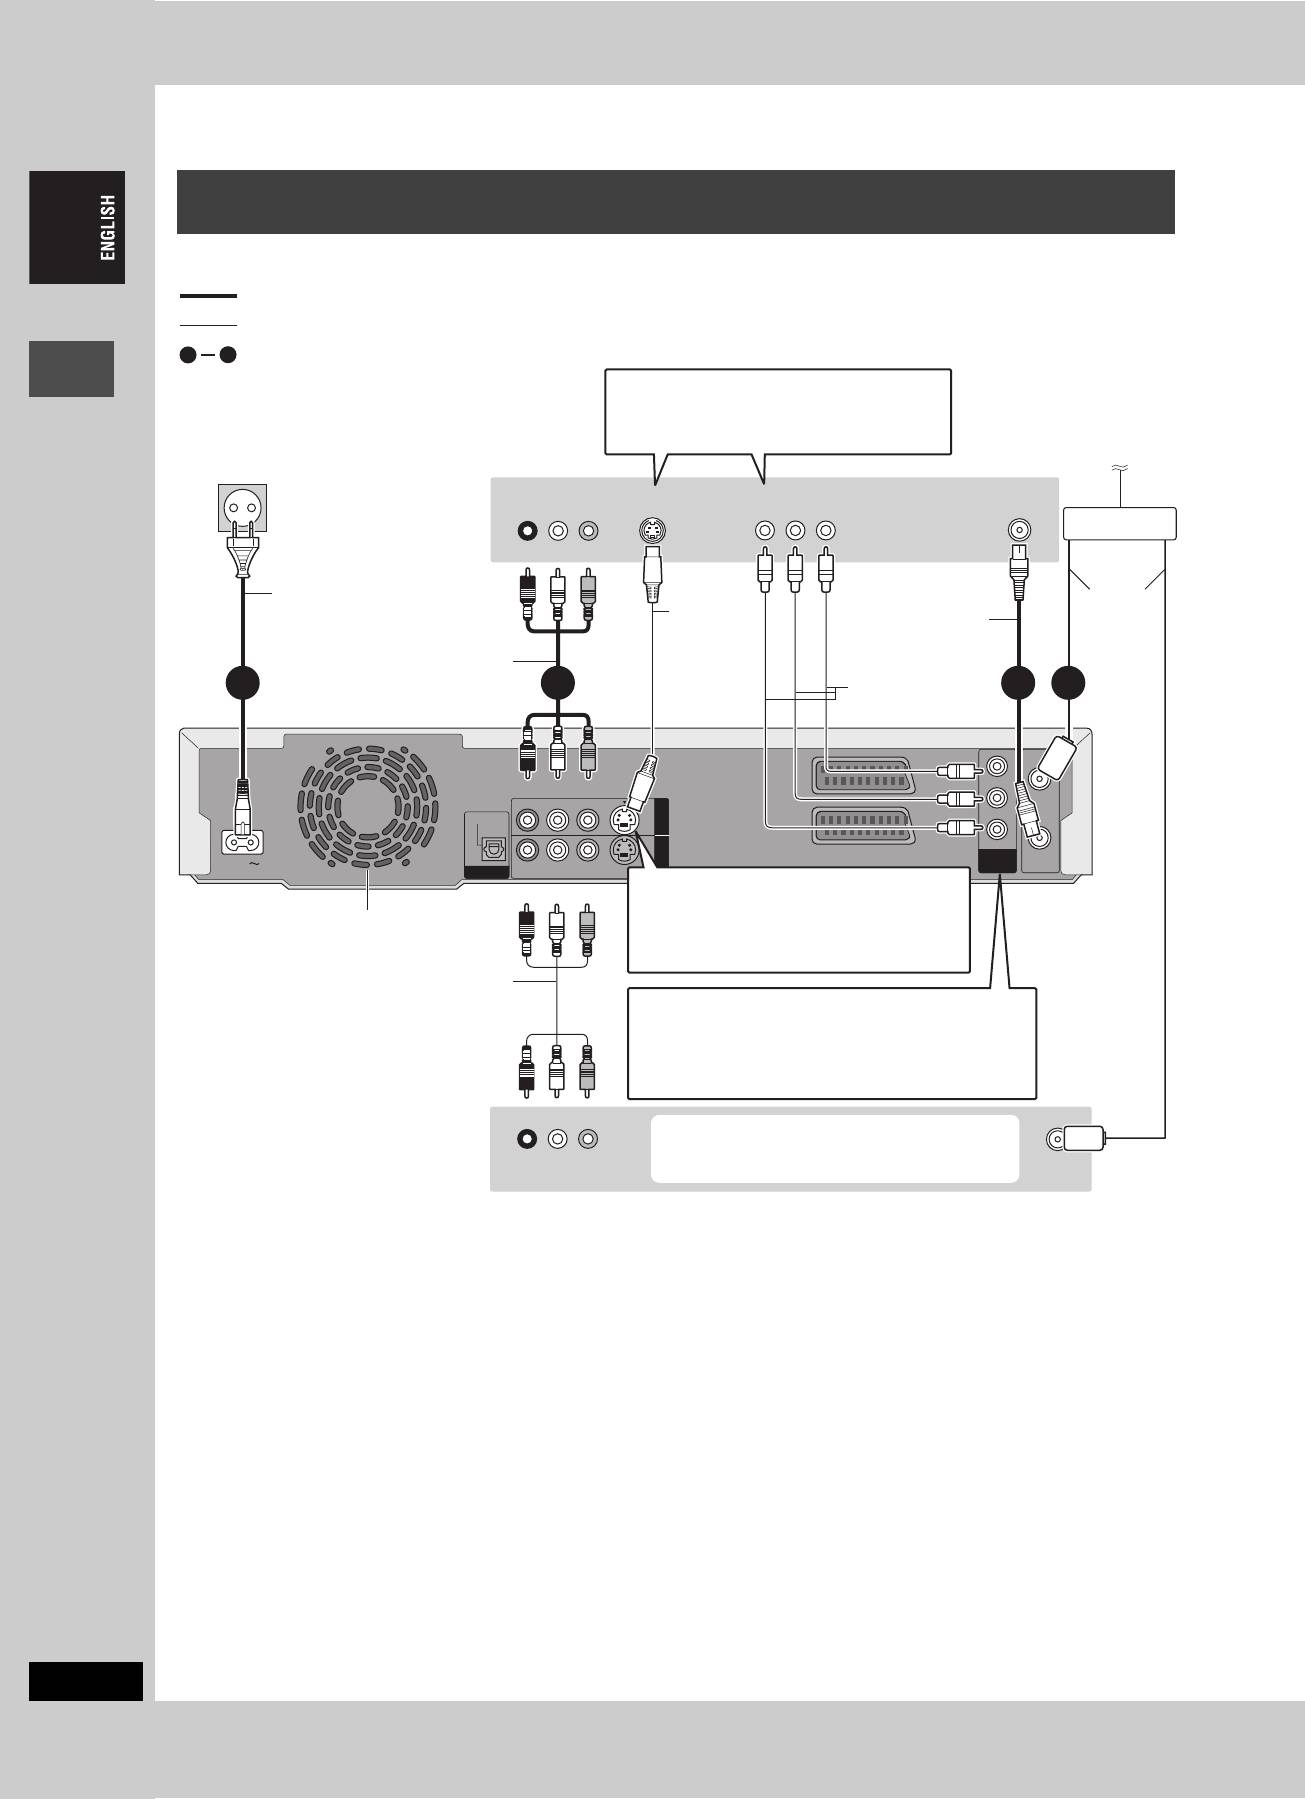
Connecting a television with 21-pin Scart terminal and VCR
When there is no 21-pin Scart terminal on the television (➡ page 8)
indicates included accessories.
indicates accessories not included.
1
4
are required connections. Connect in the numbered order.
To the aerial
To household mains socket
Television’s
AV IN
(AC 220–240 V, 50 Hz)
VHF/UHF
rear panel
RF IN
Splitter
Aerial
AC mains lead
RF coaxial cable
cable
Connect only after all other
Fully wired 21-pin Scart cable
connections are complete.
Getting started
2 134
Cooling fan
Y
RF IN
PB
R - AUDIO - L
VIDEO
S-VIDEO
AV1 (TV)
OUT
OPTICAL
PR
AV4 I N
AV2 (DECODER/EXT)
COMPONENT
RF OUT
AC IN
DIGITAL AUDIO OUT
R - AUDIO - L
VIDEO
S-VIDEO
(PROGRESSIVE/
VIDEO OUT
(PCM/BITSTREAM)
INTERLACE)
AV1 terminal
This unit’s rear panel
Red White Yellow
If your television is equipped with RGB
input capability, by connecting with a
fully wired 21-pin Scart cable you can
see video using RGB output on this
unit (➡ below).
Audio/Video cable
To output in RGB select
“RGB ( without component )” from
“AV1 Output” in the SETUP menu
Use a splitter if you
(➡ page 44) after tuning is completed
also want to connect
(➡ page 10, 11).
the aerial to your VCR.
Red White Yellow
You can also connect with the AV2 terminal
on this unit using the 21-pin Scart cable.
R L
VHF/UHF
VCR’s rear panel
AUDIO OUT VIDEO OUT
RF IN
∫ RGB
This refers to the three primary colours of light, red (R), green (G), and blue (B) and also the method of producing video that uses them. By
dividing the video signal into the three colours for transmission, noise is reduced for even higher quality images.
RQT7448
7
7
STEP 1
Connection
Connecting a television with AUDIO/VIDEO, S-VIDEO or COMPONENT VIDEO
terminals and VCR
Connecting to the television using the 21-pin Scart cables (➡ page 7)
indicates included accessories.
indicates accessories not included.
1
4
are required connections. Connect in the numbered order.
When making this connection, ensure you
connect the audio cables to the corresponding
audio input terminals on the television.
To household mains socket
Television’s
To the aerial
(AC 220–240 V, 50 Hz)
rear panel
AUDIO IN
VIDEO IN
S-VIDEO IN
COMPONENT
VHF/UHF
R L
VIDEO IN
RF IN
Splitter
Red White Yellow
Getting started
AC mains lead
Aerial
Connect only after all other
S-Video
RF coaxial cable
cable
connections are complete.
cable
Audio/Video cable
Video cable
2 134
Y
RF IN
Red White Yellow
PB
R - AUDIO - L
VIDEO
S-VIDEO
AV1 (TV)
OUT
OPTICAL
PR
AV4 I N
AV2 (DECODER/EXT)
COMPONENT
R - AUDIO - L
(PROGRESSIVE/
VIDEO OUT
RF OUT
AC IN
DIGITAL AUDIO OUT
(PCM/BITSTREAM)
VIDEO
S-VIDEO
INTERLACE)
S-VIDEO OUT terminal
This unit’s rear panel
Red White Yellow
The S-VIDEO OUT terminal achieves a more
Cooling fan
vivid picture than the VIDEO OUT terminal.
(Actual results depend on the television.)
Audio/Video cable
COMPONENT VIDEO OUT terminal
Use a splitter if
These terminals can be used for either interlace or
you also want
progressive output and provide a purer picture than the
to connect the
S-VIDEO OUT terminal (➡ below).
aerial to your
≥Connect to terminals of the same colour.
VCR.
Red White Yellow
You can also connect with the AV2 terminal
on this unit using the 21-pin Scart cable.
R L
VHF/UHF
VCR’s rear panel
AUDIO OUT VIDEO OUT
RF IN
∫ Component video output
Component signal outputs the colour difference signals (PB/PR) and luminance signal (Y) separately in order to achieve high fidelity in
reproducing colours. If the television is compatible with progressive output, a high quality picture can be output because this unit’s component
video output terminal outputs a progressive output signal (➡ page 49).
For progressive output (➡ page 12)
RQT7448
8
8
Connecting a satellite receiver, digital receiver or decoder
≥Decoder here means the device used to decode scrambled broadcasts (Pay TV).
≥Change the “AV2 Input” and “AV2 Connection” settings in the SETUP menu to match the connected equipment (➡ page 44) after tuning is
completed (➡ page 10, 11).
Viewing video from the decoder on the television while the
unit is stopped, or while recording
If you connected the television to the AV1 terminal and the decoder
to the AV2 terminal on this unit, press [0]i[ENTER]. (“DVD”
appears on the unit’s display.)
Press again to cancel. (“TV” appears on the unit’s display.)
≥If the television is compatible with RGB input, the RGB output
signal from the decoder can also be output from the main unit the
same way.
Getting started
∫ To enjoy multi-channel surround sound on
∫ Connection to a stereo amplifier
DVD-Video
Connect an amplifier with Dolby Digital, DTS and MPEG decoders
using an optical digital audio cable and change the settings in
“Digital Audio Output” (➡ page 43) after tuning is completed
(➡ page 10, 11).
≥
You cannot use DTS Digital Surround decoders not suited to DVD.
≥Even if using this connection, output will be only 2 channels when
playing DVD-Audio.
RQT7448
9
Y
RF IN
PB
AV1 (TV)
PR
AV2 (DECODER/EXT)
COMPONENT
VIDEO OUT
RF OUT
Satellite receiver,
AV OUT
digital receiver or
decoder’s rear panel
21-pin Scart cable
This unit’s
rear panel
(PROGRESSIVE/
INTERLACE)
Connecting an amplifier or system component
R - AUDIO -
OPTICAL
AC IN
DIGITAL AUDIO OUT
(PCM/BITSTREAM)
R - AUDIO -
Amplifier’s rear panel
OPTICAL IN
Optical digital audio cable
Do not bend this cable sharply.
Insert fully, with this side facing up.
This unit’s rear panel
R - AUDIO - L
VIDEO
S-VIDEO
OUT
OPTICAL
AV4 I N
DIGITAL AUDIO OUT
(PCM/BITSTREAM)
R - AUDIO - L
VIDEO
S-VIDEO
Amplifier’s rear panel
AUDIO IN
R L
Red White
Audio cable
Red White
This unit’s rear panel
Do not place the unit on
amplifiers or equipment
that may become hot.
The heat can damage the unit.
9
STEP
2
Channel reception settings
Í/ l
Preset Download
(Setup with Q Link functions)
OPEN/CLOSE
SD CARD PC CARD EJECT
REC
When connecting to a television that has the Q Link
TIME SLIP
SD PCDVD
DRIVE SELECT
1.3
x
/
TIME SLIP
CH
function (➡ page 50) with a fully wired 21-pin Scart
cable (➡ page 7).
You can download the tuning positions from the television.
X CH W
This unit’s Auto Clock Setting function synchronizes the time when
the TV channel that is broadcasting time and date information is
DVD
TV
tuned.
Í DVD
DIRECT TV REC
CH
VOLUME
AV
1 Turn on the television and select the
DVD
DRIVE SELECT
SD/PC
appropriate AV input to suit the
123
CH
connections to this unit.
456
ShowView
2 Press [Í DVD] to turn the unit on.
78
9
CANCEL
INPUT SELECT
MANUAL SKIP
Downloading from the television starts.
Getting started
0
SKIP
SLOW/SEARCH
Download from TV
STOP
PAU SE
PLAY/x1.3
Pos 4
DIRECT NAVIGATOR
FUNCTIONS
Download in progress, please wait.
RETURN: to abort
FUNCTIONS
TOP MENU
3,4,2,1
ENTER
RETURN
ENTER
SUB MENU
RETURN
Downloading is complete when you see the television
RETURN
picture.
PROG/CHECK
DISPLAY
STATUS
TIME SLIP
≥If the Country setting menu appears on the television,
TIMER
REC MODEERASE
REC
press [3, 4] to select the country and press [ENTER].
F
EXT LINK
CREATE
CHAPTER
AUDIO
Страна
A B C
Polska
Česká republika
Magyarország
Deutschland
Pocc
ия
Others (OIRT)
SELECT
Others (CCIR)
ENTER
RETURN
RETURN: отмена. ENTER: доступ
When “Poccия” (Russia) is selected in the Country setting
menu, the names of TV stations may not be correctly
displayed and the Auto Clock Setting does not work. Set the
clock manually (➡ page 47).
To stop partway
Press [RETURN].
∫ If the clock setting menu appears
Set the clock manually (➡ page 47).
∫ To confirm that stations have been tuned
correctly (➡ page 45)
∫ To restart Preset Download (➡ page 46)
RQT7448
10
10
Оглавление
- 1 Turn on the television and select the
- 1 Turn on the television and select the
- 3 Press [3, 4] to select “Connection”
- 1 While stopped
- 1 Press [DVD] to select the DVD drive.
- 1 Press [DIRECT NAVIGATOR].
- 1 Press [DVD] to select the DVD drive.
- 4 Press [ENTER].
- 1 Press [PROG/CHECK].
- 1∫
- 1 Press [1] while a track is highlighted
- 1 Press [DVD] or [SD/PC] to select the
- 1 Press [DISPLAY].
- 1 Press [DIRECT NAVIGATOR].
- 1 Press [ENTER] at the start point and end
- 2 Press [3, 4, 2, 1] to select “PLAY
- 1 Press [FUNCTIONS].
- 2 [RAM]
- 2 Press [REC MODE] to select the
- 5 Press [3, 4] to select “Set” and
- 1 While stopped
- 4 Press [2, 1] to select “Yes” and
- 1 While stopped 1 While stopped
- 1 Show Enter Name screen.
- 1 While stopped
- 5 Press [3, 4, 2, 1] 1 While stopped
- 1 While stopped
- 1 While stopped
- 1 Включите телевизор и выберите
- 1 Включите телевизор и выберите
- 3 Нажав кнопку [3, 4], выберите
- 1 В режиме остановки
- 1 Нажав кнопку [DVD], выберите
- 1 Нажмите кнопку
- 1 Нажав кнопку [DVD], выберите
- 4 Нажмите кнопку [ENTER].
- 1 Нажмите кнопку [PROG/CHECK].
- 1∫
- 1 Нажмите кнопку [1] при
- 1 Нажав кнопку [DVD] или [SD/PC],
- 1 Нажмите кнопку [DISPLAY].
- 2 Нажав кнопку [3, 4, 2, 1],
- 1 Нажмите кнопку [ENTER] в начальной и
- 2 Нажав кнопку [3, 4, 2, 1],
- 1 Нажмите кнопку [FUNCTIONS].
- 2 [RAM]
- 2 Нажав кнопку [REC MODE],
- 6 Нажав кнопку [3, 4], выберите 1 В режиме остановки
- 1 В режиме остановки
- 1 В режиме остановки
- 1 В режиме остановки 1 В режиме остановки
- 1 Отображение экрана Ввести титр
- 1 В режиме остановки
- 5 Нажав кнопку 1 В режиме остановки
- 1 В режиме остановки
- 1 В режиме остановки

