Panasonic DMR-E65 EE-S: 1 While stopped
1 While stopped: Panasonic DMR-E65 EE-S
Clock settings
≥The unit’s Preset Download or Auto-Setup function (➡ page 10, 11) automatically adjusts the clock to correct time. However, when “Poccия”
(Russia) is selected in the Country setting menu the Auto Clock Setting does not work. Under some reception conditions the clock setting
cannot be set automatically.
In this case, follow the steps indicated below to set the clock manually.
≥In the case of a power failure, the clock setting remains in memory for approximately 60 minutes.
1 While stopped
Press [FUNCTIONS].
2 Press [3, 4, 2, 1] to select “SETUP” and press [ENTER].
3 Press [3, 4] to select the “Others” and press [1].
4 Press [3, 4] to select “Clock” and press [ENTER].
Manual Clock Setting
Auto Clock Setting
When “Poccия”
If a TV station transmits a time setting signal, and when “Automatic”
Clock
(Russia) is selected
in the Clock setting menu is set to “On”, the automatic time
Automatic Off
as the country, the
correction function checks the time and if necessary it is adjusted
Time Date
“Automatic” field does
several times every day.
15
:
45 :
39
1
. 8
.
2004
not appear in the
No.
Clock setting menu.
0 9
CHANGE
Please set clock manually.
Skip step 5.
5 Press [3, 4] to select “On” of
SELECT
ENTER: store RETURN: leave
ENTER
“Automatic” and press [ENTER].
RETURN
Auto clock setting starts.
5 Press [3, 4] to select “Off” of
The following screen appears when setting is complete.
“Automatic” and press [ENTER].
Clock
Automatic
On
6 Press [2, 1] to select the item you
Time Date
want to change.
15
:
45 :
39
1
. 8
.
2004
The items change as follows:
Hour!#Minute!#Second!#Day!#Month!#Year
CHANGE
Automatic clock setting completed.
ENTER: access RETURN: leave
^--------------------------------------------------------------------------------J
ENTER
RETURN
7 Press [3, 4] to change the setting.
To stop partway
You can also use the numbered buttons for setting.
Press [RETURN].
8 Press [ENTER] when you have
finished the settings.
Convenient functions
The clock starts.
To exit the screen
Press [RETURN] several times.
To return to the previous screen
Press [RETURN].
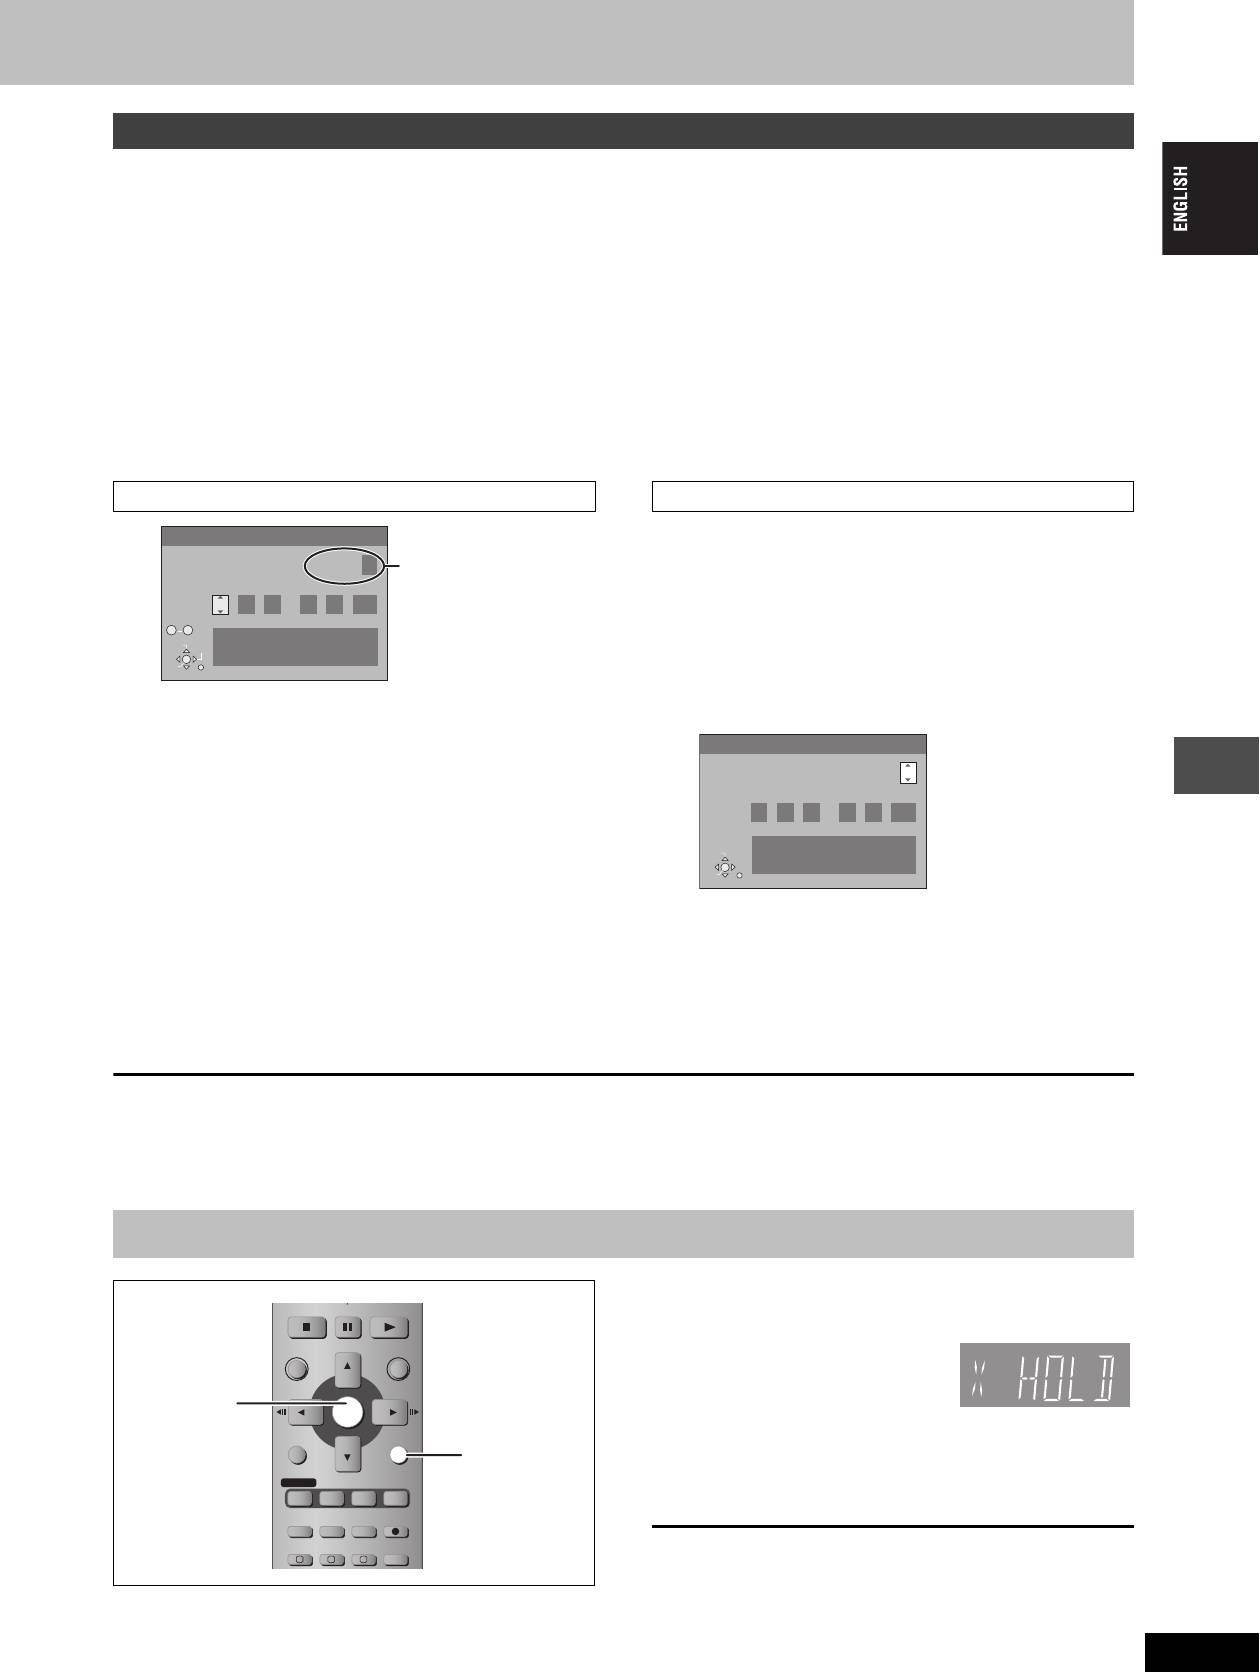
Child Lock
The Child Lock deactivates all buttons on the unit and remote
STOP
PAU SE
PLAY/x1.3
control. Use it to prevent other people from operating the unit.
DIRECT NAVIGATOR
FUNCTIONS
Press and hold [ENTER]
TOP MENU
and [RETURN]
ENTER
ENTER
simultaneously until “X
SUB MENU
RETURN
HOLD” appears on the unit’s display.
RETURN
PROG/CHECK
DISPLAY
STATUS
TIME SLIP
If you press a button while the Child Lock is on, “X HOLD” appears
on the unit’s display and operation is impossible.
TIMER
REC MODEERASE
REC
F
EXT LINK
CREATE
To cancel the Child Lock
CHAPTER
AUDIO
A B C
Press and hold [ENTER] and [RETURN] simultaneously until “X
HOLD” disappears.
RQT7448
47
47

Specifications
Recording system DVD Video Recording format (DVD-RAM),
Video
DVD-Video format (DVD-R)
Video system:
Recordable discs
SECAM (only input)/PAL colour signal, 625 lines, 50 fields
DVD-RAM: 12 cm 4.7 GB, 12 cm 9.4 GB, 8 cm 2.8 GB
NTSC colour signal, 525 lines, 60 fields
12 cm 4.7 GB (Ver. 2.1/3k-SPEED DVD-RAM Revision 1.0)
Recording system: MPEG2 (Hybrid VBR)
DVD-R: 12 cm 4.7 GB, 8 cm 1.4 GB (for General Ver. 2.0)
Video in (SECAM/PAL/NTSC):
12 cm 4.7 GB (for General Ver. 2.0/4k-SPEED DVD-R Revision 1.0)
AV1/AV2 (21 pin), AV3/AV4 (pin jack) 1 Vp-p 75 ≠, termination
Recording time Maximum 8 hours (with 4.7 GB disc)
S-Video in (SECAM/PAL/NTSC):
XP: Approx. 1 hour, SP: Approx. 2 hours
AV2 (21 pin), AV3/AV4 (S terminal) 1 Vp-p 75 ≠, termination
LP: Approx. 4 hours, EP: Approx. 6 hours/8 hours
RGB in (PAL): AV2 (21 pin) 0.7 Vp-p (PAL) 75 ≠, termination
Video out (PAL/NTSC):
Playable discs
AV1/AV2 (21 pin), Video Out (pin jack) 1 Vp-p 75 ≠, termination
DVD-RAM: 12 cm 4.7 GB, 12 cm 9.4 GB , 8 cm 2.8 GB
S-Video out (PAL/NTSC):
12 cm 4.7 GB (Ver. 2.1/3k-SPEED DVD-RAM Revision 1.0)
AV1 (21 pin), S-Video Out (S terminal) 1 Vp-p 75 ≠, termination
DVD-R: 12 cm 4.7 GB, 8 cm 1.4 GB (for General Ver. 2.0)
RGB out (PAL/NTSC):
12 cm 4.7 GB (for General Ver. 2.0/4k-SPEED DVD-R Revision 1.0)
AV1 (21 pin) 0.7 Vp-p (PAL) 75 ≠, termination
DVD-Video, DVD-Audio, Video CD, CD-Audio (CD-DA)
CD-R/RW (MP3, CD-DA, Video CD formatted discs)
Component video output (NTSC 480P/480I, PAL 576P/576I)
Y: 1.0 Vp-p 75 ≠, termination
Drive unit High Speed Drive (correspond to 4 times speed with
P
B: 0.7 Vp-p 75 ≠, termination
DVD-R disc and 3 times speed with DVD-RAM disc.)
P
R: 0.7 Vp-p 75 ≠, termination
LASER specification
DV input (PAL/NTSC) IEEE 1394 Standard, 4 pin
Class I LASER Product (Pickup)
SD/PC card slot SD Memory Card slot: 1 pc.
Wave length: 795 nm, 658 nm
PC Card slot (Type II): 1 pc.
Laser power:
Still pictures (JPEG, TIFF)
No hazardous radiation is emitted with the safety protection
Compatible media (SD card slot):
Audio
SD Memory Card, MultiMediaCard
Recording system: Dolby Digital 2ch, Linear PCM (XP mode, 2ch)
Compatible media (PC card slot):
Audio in: AV1/AV2 (21 pin), AV3/AV4 (pin jack)
A PC card adaptor conforming to PC card standards,
Input level: Standard: 0.5 Vrms, Full scale: 2.0 Vrms at 1 kHz
ATA Flash PC Card,
Input impedance: More than 10 k≠
PC card adaptor (SD Memory Card, xD-Picture Card,
Audio out: AV1/AV2 (21 pin), Audio Out (pin jack)
Microdrive, MultiMediaCard, CompactFlash,
Output level: Standard: 0.5 Vrms, Full scale: 2.0 Vrms at 1 kHz
SmartMedia, M
EMORYSTICK), Mobile hard disk
Output impedance: Less than 1 k≠
Format: FAT12, FAT16
Digital audio out: Optical terminal (PCM, Dolby Digital, DTS, MPEG)
Image file format: JPEG conforming to DCF
(Design rule for Camera File system),
Television system
(sub sampling 4:2:2 or 4:2:0),
Tuner system Channel coverage
TIFF (uncompressed RGB chunky),
PA L- DK
VHF: R1–R12
DPOF compatible
SECAM-DKK1
UHF: 21–69
Number of pixels: 34a34 to 6144a4096
(OIRT)
CATV: 44 MHz–470 MHz
Thawing time: Approx. 7 sec. (2 M pixels)
PA L- BGH
VHF: E2–E12
Others
Reference
SECAM-BG
UHF: E21–E69
Region code: ‚ 5
(CCIR)
CATV: S01–S05
Operating temperature: 5–40 oC
M1–M10, U1–U10
Operating humidity range: 10–80 % RH (no condensation)
S21–S41
Power supply: AC 220–240 V, 50 Hz
Power consumption: 32 W
PA L- I
UHF: 21–69
Dimensions (WkDkH): Approx. 430 mmk274 mmk79 mm
(Hong Kong)
Mass: Approx. 3.6 kg
RF converter output: Not provided
Power consumption in standby mode:
Approx. 3 W (Power Save mode)
[Note]
Specifications are subject to change without notice.
Mass and dimensions are approximate.
RQT7448
48
48
Glossary
Bitstream
JPEG (Joint Photographic Experts Group)
This is the digital form of multi-channel audio data (e.g., 5.1 channel)
This is a system used for compressing/decoding colour still pictures.
before it is decoded into its various channels.
If you select JPEG as the storage system on digital cameras etc.,
CPRM (Content Protection for Recordable Media)
the data will be compressed to 1/10–1/100 of its original size. The
CPRM is technology used to protect broadcasts that are allowed to
feature of JPEG is less deterioration in picture quality considering
be recorded only once. Such broadcasts can be recorded only with
the degree of compression.
CPRM compatible recorders and discs.
LPCM (Linear PCM)
Dolby Digital
These are uncompressed digital signals, similar to those found on
This is a method of coding digital signals developed by Dolby
CDs. LPCM sound is available when recording in XP mode.
Laboratories. Apart from stereo (2-channel) audio, these signals can
also be multi-channel audio. A large amount of audio information can
MP3 (MPEG Audio Layer 3)
be recorded on one disc using this method.
An audio compression method that compresses audio to
When recording on this unit Dolby Digital (2 channel) is the default
approximately one tenth of its size without any considerable loss of
audio.
audio quality. You can play MP3 you have recorded onto CD-R and
CD-RW.
Down-mixing
This is the process of remixing the multi-channel audio found on
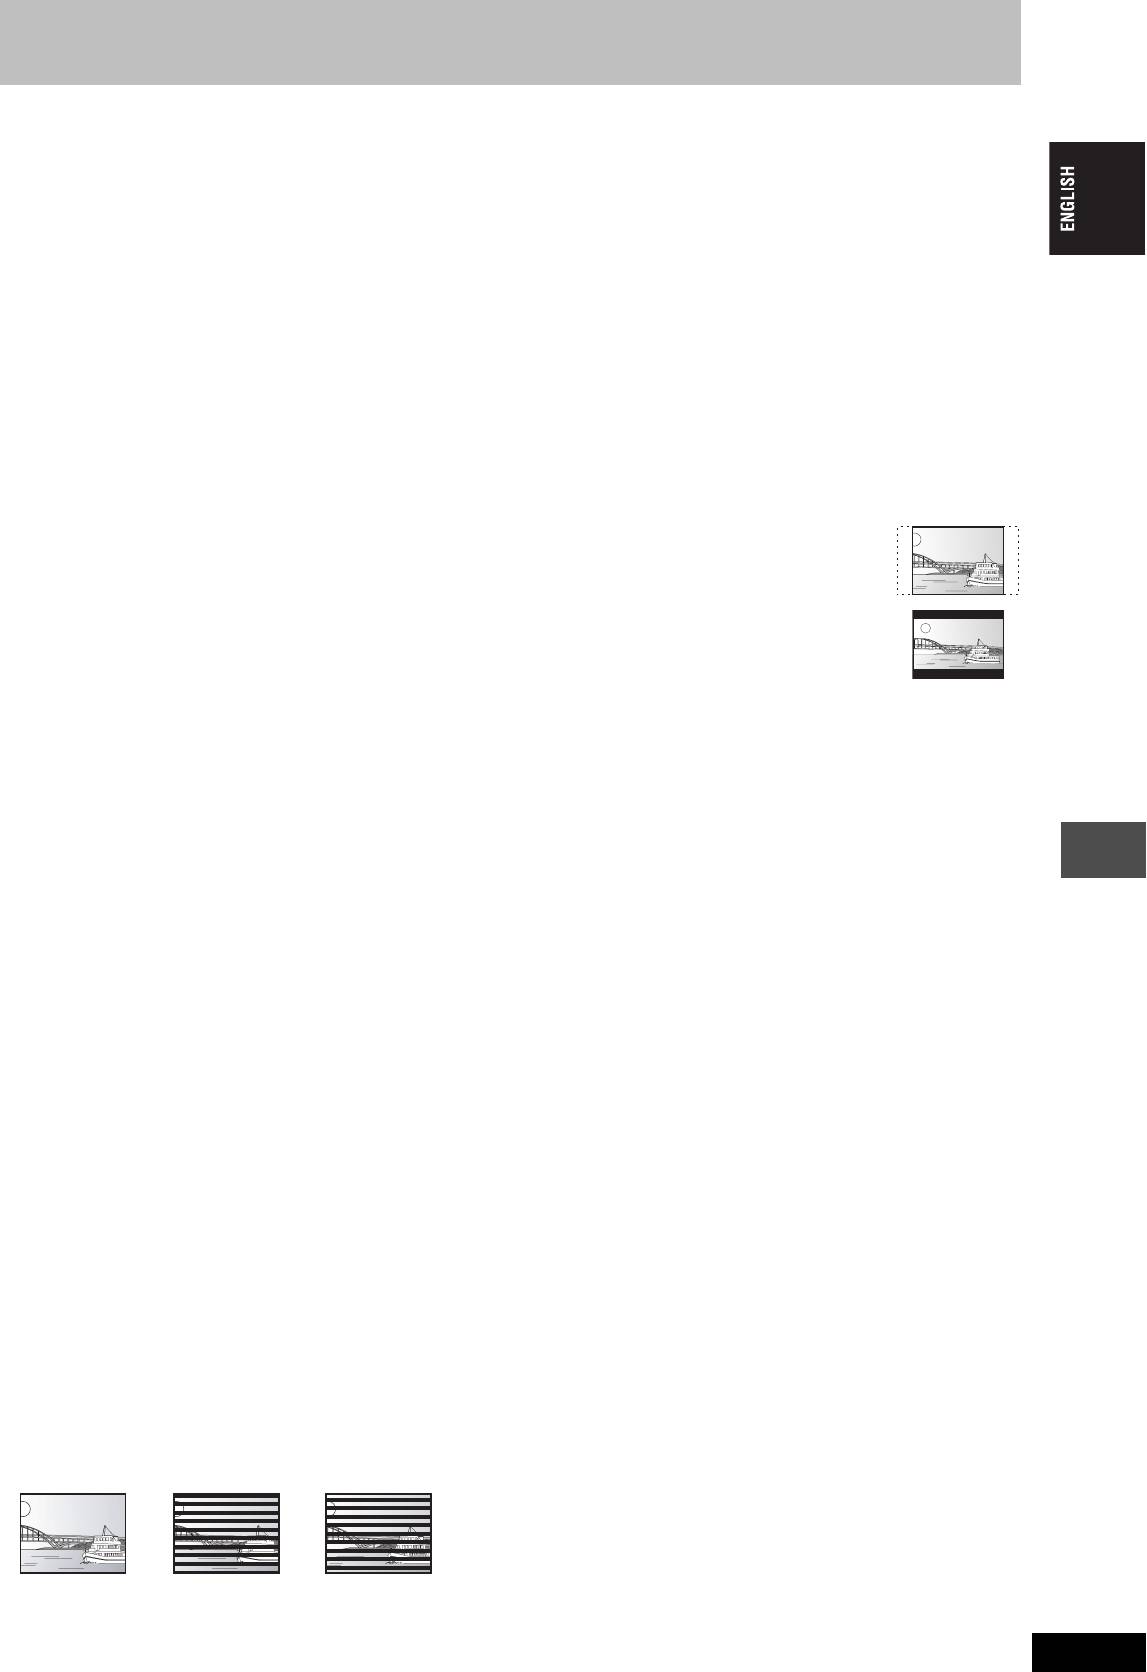
Pan&Scan/Letterbox
some discs into two channels. It is useful when you want to listen to
In general, DVD-Video are produced with the intention that they be
the 5.1-channel audio recorded on DVDs through your television’s
viewed on a widescreen television (16:9 aspect ratio), so images
speakers. Some discs prohibit down-mixing and this unit can then
often don’t fit regular (4:3 aspect ratio) televisions. Two styles of
only output the front two channels.
picture, “Pan & Scan” and “Letterbox”, deal with this problem.
DPOF (Digital Print Order Format)
Pan & Scan: The sides are cut off so the picture
DPOF is the standard printing format for still picture data taken by a
fills the screen.
digital camera, etc. It is used for automatic printing at a photo
developing store or on your home printer.
Drive
Letterbox: Black bands appear at the top and
In the instance of this unit, this refers to the disc (DVD), SD card
bottom of the picture so the picture
(SD) and PC card (PC). These perform the reading and writing of
itself appears in an aspect ratio of
data.
16:9.
DTS (Digital Theater Systems)
Playback control (PBC)
This surround system is used in many movie theaters. There is good
If a Video CD has playback control, you can select scenes and
separation between the channels, so realistic sound effects are
information with menus.
possible.
(This unit is compatible with version 2.0 and 1.1.)
Dynamic range
Progressive/Interlace
Dynamic range is the difference between the lowest level of sound
The PAL video signal standard has 625 (or 576) interlaced (I) scan
that can be heard above the noise of the equipment and the highest
level of sound before distortion occurs.
lines, whereas progressive scanning, called 625P (or 576P), uses
Dynamic range compression means reducing the gap between the
twice the number of scan lines. For the NTSC standard, these are
loudest and softest sounds. This means you can listen at low
called 525I (or 480I) and 525P (or 480P) respectively.
volumes but still hear dialogue clearly.
Using progressive output, you can enjoy the high-resolution video
recorded on media such as DVD-Video.
Film and video
Your television must be compatible to enjoy progressive video.
DVD-Videos are recorded using either film or video. This unit can
determine which type has been used, then uses the most suitable
Panasonic televisions with 625 (576)/50I · 50P, 525 (480)/60I · 60P
method of progressive output.
input terminals are progressive compatible.
For PAL
Protection
Reference
Film is 25 frames per second.
You can prevent accidental erasure by setting writing protection or
Video is 50 fields per second (two fields making up one frame).
For NTSC
erasure protection.
Film is 24 or 30 frames per second, with motion picture film generally
Sampling frequency
being 24 frames per second.
Sampling is the process of converting the heights of sound wave
Video is 60 fields per second (two fields making up one frame).
(analog signal) samples taken at set periods into digits (digital
Finalize
encoding). Sampling frequency is the number of samples taken per
A process that makes play of a recorded CD-R, CD-RW, DVD-R, etc.
second, so larger numbers mean more faithful reproduction of the
possible on equipment that can play such media. You can finalize
original sound.
DVD-R on this unit.
After finalizing, the disc becomes play-only and you can no longer
TIFF (Tag Image File Format)
record or edit.
This is a system used for compressing/decoding colour still pictures.
A common format for storing high quality images on digital cameras
Folder
and other devices.
This is a place on the DVD-RAM or memory card where groups of
data are stored together. In the case of this unit, it refers to the place
Thumbnail
where still pictures (JPEG, TIFF) are stored.
This refers to a miniature representation of a picture used to display
multiple pictures in the form of a list.
Formatting
Formatting is the process of making media such as DVD-RAM
VBR (Variable bitrate)
recordable on recording equipment.
This is a method of video recording that adjusts the bit rate
You can format the DVD-RAM and memory cards on this unit.
according to video signal.
Formatting erases irrevocably all contents.
Frames and fields
Frames refer to the single images that constitute the video you see
on your television. Each frame consists of two fields.
u
r
Frame Field Field
≥A frame still shows two fields, so there may be some blurring, but
picture quality is generally better.
RQT7448
≥A field still shows less picture information so it may be rougher, but
there is no blurring.
49
49

Glossary
Q Link
≥On-Screen Messages
§
This function works only if the unit is connected via a fully wired 21-
When you are watching a TV programme, the following messages
pin Scart cable to a TV featuring the Q Link or similar function.
appear on the TV screen to inform you of the unit’s condition:
Q Link offers the following functions:
≥Download from the TV
§
Message Message appears when:
When you connect the unit to a TV, the station list data is
This programme has
A timer recording has just started.
automatically copied from the TV to the unit, and the TV stations
already started
are assigned to the programme positions on the unit in the same
order as on the TV.
Set DVD to timer
The unit is not in the timer standby mode
≥Direct TV Recording
standby mode
10 minutes before the programmed
By simply pressing [¥ DIRECT TV REC], you can at once record
recording start time (message appears
the same programme that you are watching on the TV.
every minute during these 10 minutes).
≥TV/DVD Auto On
§
Even if the TV and the unit are off (standby mode), pressing
DVD is in timer
[¥ REC] or [ShowView] was pressed while
[1] (PLAY), [DIRECT NAVIGATOR, TOP MENU], [ShowView] or
recording mode
the unit is in the timer recording mode.
[PROG/CHECK] automatically turns on both the TV and the unit.
Depending on the type of TV used, the above messages may not
If the TV is off (standby mode) and the unit is on, when you press
appear correctly.
[FUNCTIONS] or [1] (PLAY), or insert the disc (except DVD-RAM
§
and DVD-R), the TV automatically is turned on.
These operations are only available if the unit is connected to a TV
§
featuring the Q Link function.
≥DVD Auto Standby
When you turn the TV off, the unit is turned off as well. However,
[Note]
this function works in the stop mode.
If “Power Save” is set to “On”, Direct TV Recording function does not
This function does not work during the following operations: Preset
work when the unit is switched off (standby mode).
Download, Auto-Setup, Auto Clock Setting and Manual Tuning.
This function does also not work when the DVD drive selected and
an audio CD is in the disc tray.
VPS (Video Programme System)/PDC (Programme Delivery Control)
VPS or PDC is a very convenient system which records exactly from
≥When the VPS/PDC signal drops out because the broadcast signal
beginning to end of the TV programmes set in timer recording, even
is weak, or when a TV station does not transmit a regular VPS/
if the actual broadcasting time differs from the scheduled time due to
PDC signal, the timer recording will be performed in the normal
delayed start or extension of the programme duration. Also, if a
mode (without VPS/PDC) even if it was programmed for VPS/PDC.
programme is interrupted, for example, some special news is
In this case, even if the timer recording is performed, whatever has
inserted, the recording will be paused automatically and resumed
been programmed will not be cancelled at that particular time but
when the programme continues.
at 4 a.m. two days later.
Depending on the signals sent from the TV stations, the VPS/PDC
≥The start times of scheduled programmes listed in the newspaper
system may not work properly even when “VPS/PDC” has been set
or magazine may be changed at a later date. Set “VPS/PDC” to
to “ON”.
“OFF” when programming a programme whose start time has
Please check with the broadcasters in your area for details.
been subsequently changed. Particular care must be taken in this
≥In the case of VPS/PDC recording, use the correct time (VPS/PDC
respect with S
HOWVIEW programming since “VPS/PDC” is
time) for recording the TV programmes.
automatically set to “ON” in some countries (➡ below).
Set “VPS/PDC” to “OFF” when the recording time is not the correct
≥If a programme listed in a newspaper or magazine has two
time (VPS/PDC time).
S
HOWVIEW numbers, use the SHOWVIEW number for VPS/PDC if
Reference
VPS/PDC recording is not performed when the time (VPS/PDC
you wish to proceed with VPS/PDC recording using S
HOWVIEW
time) is incorrect, even if only by one minute. To find out the correct
programming.
time (VPS/PDC time), consult Teletext, a newspaper or magazine,
≥The default settings for “VPS/PDC” differ depending on the country
or other source.
concerned. Refer to the following table.
≥If the actual broadcasting times of timer recordings overlap
(regardless of whether they are VPS/PDC controlled), the
recording that starts first always has priority, and the recording of
the later programme will start only after the first timer recording has
finished.
When SHOWVIEW
When the SHOWVIEW programming
When programming
programming
start time is changed
manually
Germany, Other Countries ON ON ON
Poland, Czech, Hungary, Russia OFF OFF OFF
≥If the broadcasting station is not transmitting VPS/PDC signals, “jjj” appears in the menu for timer programming under “VPS/PDC”.
≥The beginnings of recordings may not be recorded correctly in some cases.
RQT7448
50
50

Frequently asked questions
Set up Page
What equipment is necessary to play multi
≥DVD-Video:
9
channel surround sound?
You can play DVD-Video multi channel surround by digitally connecting
an amplifier equipped with a Dolby Digital, DTS or MPEG decoder.
≥DVD-Audio:
—
This unit plays DVD-Audio in 2 channels. You cannot play multi channel
surround sound.
Are the headphones and speakers directly
≥You cannot directly connect to the unit. Connect through the amplifier
9
connected to the unit?
etc.
The television has a Scart terminal and
≥If you have a regular television (CRT: cathode ray tube) we recommend
7, 8
component video input terminal. Which
using the Scart terminal. You can enjoy high-quality RGB video from
terminal should I connect with?
this unit by connecting to an RGB compatible television.
If you have an LCD/plasma television or LCD projector compatible with
progressive scan, connect through the component video terminals for
high-quality progressive video.
If you have a CRT television or a multi system television using PAL
mode that is compatible with progressive scan, we cannot recommend
progressive output as some flickering can occur.
Is my television progressive output
≥All Panasonic televisions that have 625 (576)/50I · 50P, 525 (480)/60I ·
—
compatible?
60P input terminals are compatible. Consult the manufacturer if you
have another brand of television.
Disc
Can I play DVD-Video, DVD-Audio and
≥You cannot play DVD-Video if their region number does not include “5”
Cover
Video CDs bought in another country?
or “ALL”.
Can a DVD-Video that does not have a
≥The DVD-Video region number indicates the disc conforms to a
—
region number be played?
standard. You cannot play discs that do not have a region number.
Please tell me about DVD-R and DVD-RW
≥This unit records and plays DVD-R. However, you cannot record onto
—
compatibility with this unit.
DVD-R discs that are finalized.
≥This unit also records and plays high speed recording compatible discs.
—
≥This unit does not record or play DVD-RW.
—
Please tell me about CD-R and CD-RW
≥This unit plays CD-R/CD-RW discs (audio recording discs) which have
14, 25
compatibility with this unit.
been recorded under one of the following standards: CD-DA, MP3 and
Video CD. Close the session or finalize the disc after recording.
≥You cannot write to a CD-R or CD-RW with this unit.
—
Recording
Reference
Can I record from a commercially
≥Most commercially sold video cassettes and DVD are copy protected;
—
purchased video cassette or DVD?
therefore, recording is usually not possible.
Can a DVD-R recorded on this unit be
≥You can play on DVD-R compatible players after finalizing the disc on
39
played on other equipment?
this unit; however, due to the condition of the recording, play may not be
possible.
How many times can I write to a DVD-RAM
≥You can write to the disc approximately 100,000 times depending upon
—
disc?
the conditions of use.
Can I record digital audio signals using this
≥You cannot record digital signals. The digital audio terminals on this unit
—
unit?
are for output only. (The audio recorded using the DV automatic
recording function from a digital video camcorder, for example, is
recorded digitally.)
Can a digital audio signal from this unit be
≥You can record if using the PCM signal. When recording DVD, change
43
recorded to other equipment?
the “Digital Audio Output” settings to the following in the SETUP menu.
–PCM Down Conversion: On
–Dolby Digital/DTS/MPEG: PCM
However, only as long as digital recording from the disc is permitted and
the recording equipment is compatible with a sampling frequency of
48 kHz.
≥You cannot record MP3 signals.
—
Can I switch to bilingual broadcast during
≥With DVD-RAM, you can. Just press [AUDIO].
24
recording?
≥With DVD-R, you cannot. Change before recording with “Bilingual Audio
43
Selection” in the SETUP menu.
RQT7448
51
51
Error messages
On the television Page
Cannot finish recording
≥The programme was copy-protected.
—
completely.
≥The disc may be full.
—
Cannot playback this title.
≥You tried to play a title recorded using a different encoding system from that of the TV
46
TV system is different from the
system currently selected on the unit.
setting.
Alter the “TV System” setting on this unit to suit.
To playback this title, please
change the TV System in
SETUP.
Cannot record on the disc. ≥The disc may be dirty or scratched.
57
≥You cannot format a Microdrive or mobile hard disk on this unit.
—
Please check the disc.
Unable to format.
Cannot play on this unit. ≥You tried to play a non-compatible image.
26
≥Turn the unit off and re-insert the card.
26
Cannot record. Disc is full. ≥Create space by erasing any unnecessary titles. [RAM]
24, 31,
(Even if you erase recorded content from the DVD-R, there is no increase in disc space.)
38, 39
Cannot record. Maximum
≥Use a new disc.
—
number of titles exceeded
Error has occurred. Please
≥Press [ENTER] to start recovery process. You cannot operate the unit while it is recovering
—
press ENTER.
(“SELF CHECK” appears on the unit’s display).
No Disc ≥The disc may be upside down. —
No folders. ≥There is no compatible folder in this unit. 15
No PC CARD
≥The card is not inserted. If this message is displayed with a compatible card already
26
No SD CARD
inserted, turn off the unit, remove and then re-insert the card.
No valid PC card.
≥The card inserted is not compatible or the card format does not match.
15
No valid SD card.
Not enough space on dubbing
≥Create space by erasing any unnecessary items. 24, 27, 31,
destination.
34, 38, 39
Please change the disc. ≥There may be a problem with the disc. Press [< OPEN/CLOSE] on the main unit to
57
remove it and check it for scratches or dirt. (The unit turns off automatically after you open
the tray.)
This is a non-recordable disc. ≥The unit cannot record on the disc you inserted. Insert a DVD-RAM or unfinalized DVD-R.
—
≥You inserted an unformatted DVD-RAM. Format the disc with this unit.
39
This disc is not properly
formatted.
Formatting is necessary using
DISC MANAGEMENT.
$
≥The operation is prohibited by the unit or disc. —
Reference
On the unit’s display
HARD ERR ≥If there is no change after turning the unit on and off, consult the dealer where the unit was
—
purchased.
NO READ ≥The disc is dirty or badly scratched. The unit cannot record, play, or edit.
57
≥You have used a DVD-RAM/PD lens cleaner and it has finished. Press [< OPEN/CLOSE]
—
on the main unit to eject the disc.
PROG FULL ≥There are already 16 timer programmes. Delete unnecessary timer programmes. 21
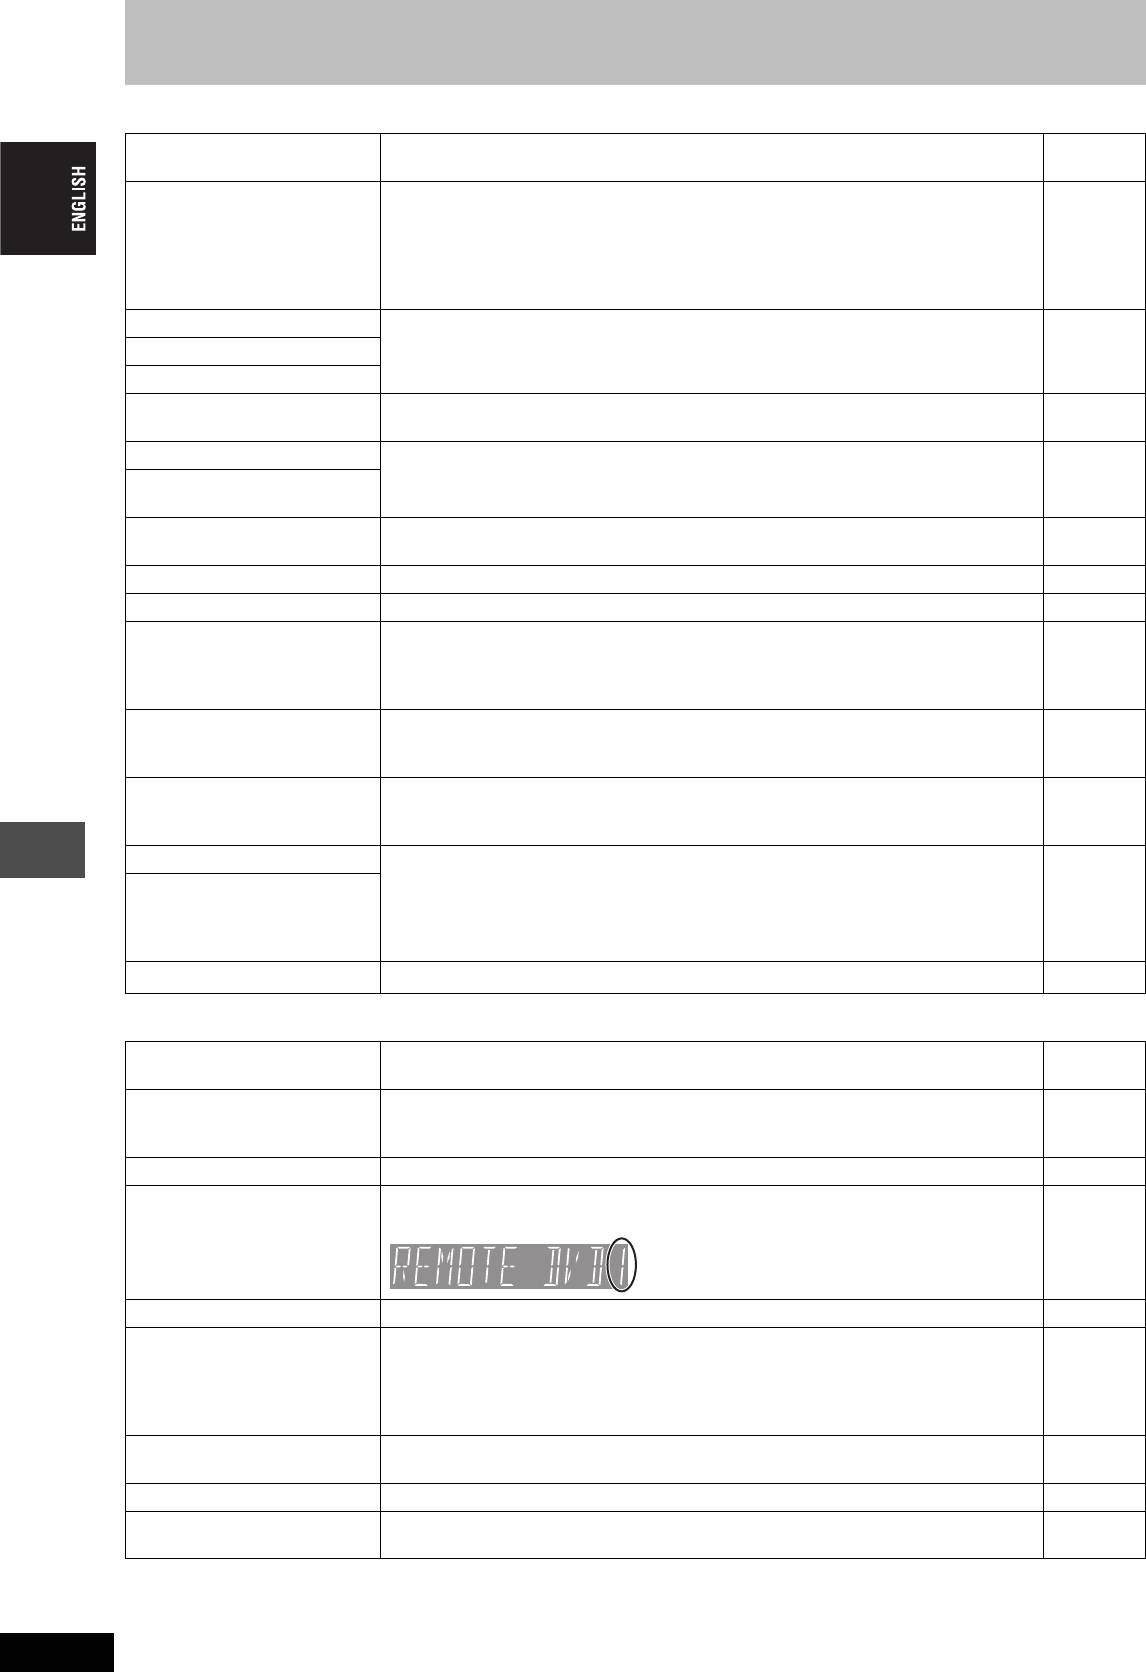
REMOTE DVD
≥The remote control and main unit are using different codes. Change the code on the
13
(“∑” stands for a number.)
remote control.
Press and hold [ENTER] and the indicated number
button at the same time for more than 2 seconds.
SELF CHECK ≥The unit is starting up. Wait until the message disappears. —
U14 ≥The unit is hot.
—
The unit switches to standby for safety reasons. Wait for about 30 minutes until the
message disappears.
Select a position with good ventilation when installing the unit. Do not block the cooling fan
on the rear of the unit.
U99 ≥The unit fails to operate properly. Press [Í/I] on the main unit to switch the unit to standby.
—
Now press [Í/I] on the main unit again to turn the unit on.
UNSUPPORT ≥You have inserted a disc the unit cannot play or record on. 14
X HOLD ≥The Child Lock function is activated.
47
Press and hold [ENTER] and [RETURN] simultaneously until “X HOLD” disappears.
RQT7448
52
52
Troubleshooting guide
Before requesting service, make the following checks. If you are in doubt about some of the check points, or if the remedies indicated in the chart
do not solve the problem, consult your dealer for instructions.
The following do not indicate a problem with this unit:
≥Regular disc rotating sounds. The sound of the disc rotating may
≥Image disturbance during search.
become louder especially when finalizing a DVD-R.
≥Interruptions in reception due to periodic satellite broadcasting
≥Poor reception due to atmospheric conditions.
breaks.
Power Page
No power.
≥Insert the AC mains lead securely into a known active AC mains socket.
7, 8
≥Linked timer recordings with external equipment is in recording standby. Press [EXT LINK]
21
Unit does not turn on pressing
to cancel the recording standby.
[Í DVD].
The unit switches to standby
≥One of the unit’s safety devices is activated. Press [Í/I] on the main unit to turn the unit on. —
mode.
Displays
The display is dim. ≥Change “FL Display” in the SETUP menu. 43
“0:00” is flashing on the unit’s
≥Set the clock. 47
display.
The time recorded on the disc
≥Times shown may disagree with actual times.
—
and the available time shown
≥More disc space than the actual recording time is used after recording or editing the DVD-R
—
do not add up.
200 times or more.
The play time shown for MP3
≥While searching, the elapsed time may not display correctly.
—
does not agree with the actual
≥Even if you erase recorded content from the DVD-R, there is no increase in disc space.
—
time.
The clock is not correct. ≥Under adverse reception conditions, etc., the automatic time correction function may not
47
work. In this case, “Automatic” is automatically turned to “Off”. If re-setting the Auto Clock
Setting does not work, set the time manually.
TV screen and video
Television reception worsens
≥This can occur because the signals are being divided between the unit and other
—
after connecting the unit.
equipment. It can be solved by using a signal booster, available from audio-visual suppliers.
Status messages do not
≥Select “Automatic” in “On-Screen Messages” in the SETUP menu. 43
appear.
The grey background does not
≥Select “On” in “Grey Background” in the SETUP menu. 43
appear.
The 4:3 aspect ratio picture
≥Use the television to change the aspect. If your television does not have that function, set
29
Reference
expands left and right.
“Progressive” in the Picture menu to “OFF”.
≥Check the settings for “TV Aspect” in the SETUP menu.
12
Screen size is wrong.
There is a lot of after-image
≥Set “Playback NR” in the Picture menu to “OFF”. 29
when playing video.
When playing DVD-Video
≥Set “Progressive” in the Picture menu to “OFF”. This problem is caused by the editing
29
using progressive output, one
method or material used on DVD-Video, but should be corrected if you use interlace output.
part of the picture
momentarily appears to be
doubled up.
There is no apparent change
≥The effect is less perceivable with some types of video. —
in picture quality when
adjusted with the Picture
menu in the on-screen menus.
The images from this unit do
≥Make sure that the television is connected to the AV1 terminal, VIDEO OUT terminal, S-
7, 8
not appear on the television.
VIDEO OUT terminal or COMPONENT VIDEO OUT terminals on this unit.
≥Make sure that the television’s input setting (e.g., AV 1) is correct.
—
Picture is distorted.
≥The television isn’t compatible with progressive signals. Press and hold [∫] and [TIME SLIP]
—
on the main unit at the same time for about 5 seconds. The setting will change to interlace.
≥The unit’s “TV System” setting differs from the TV system used by the disc now playing.
46
While stopped, keep pressing [∫] and [< OPEN/CLOSE] on the main unit for 5 or more
seconds. The system switches from PAL to NTSC or vice versa.
RQT7448
53
53
Troubleshooting guide
Sound Page
No sound.
≥Check the connections and settings. Check the input mode on the amplifier if you have
7–9, 43
Low volume.
connected one.
Distorted sound.
≥Press [AUDIO] to select the audio.
24
Cannot hear the desired audio
≥Turn off V.S.S. in the following cases.
29
type.
–When using discs that do not have surround sound effects such as Karaoke discs.
–When playing bilingual broadcast programmes.
≥The disc may have a restriction on the method of audio output. If “D.MIX” does not appear in
—
the display when playing multi-channel DVD-Audio, only audio for the two front channels will
be output. Refer to the disc’s jacket. [DVD-A]
Cannot switch audio. ≥You cannot switch the audio in the following cases.
–When a DVD-R disc is in the disc tray while DVD drive is selected.
—
–When the recording mode is XP and “Audio Mode for XP Recording” is set to “LPCM”.
43
≥You have used a digital connection. Set “Dolby Digital” to “PCM” or connect using audio
43, 9
cables (analog connection).
≥There are discs for which audio cannot be changed because of how the disc was created.
—
Operation
Cannot operate the television.
≥Change manufacturer code. Some televisions cannot be operated even if you change the
13
The remote control doesn’t
code.
work.
≥The remote control and main unit are using different codes. Change the code on the remote
13
control.
Press and hold [ENTER] and the indicated number
button at the same time for more than 2 seconds.
≥The batteries are depleted. Replace them with new ones.
4
≥Coloured glass may obstruct the signal reception/transmission.
—
≥Don’t place the signal sensor in direct sunlight or in areas that may be subject to sunlight
—
exposure.
≥The child lock function is activated.
47
The unit is on but cannot be
≥Recording drive or playback drive has not been selected properly.
16, 22
operated.
≥Some operations may be prohibited by the disc.
—
≥The unit is hot (“U14” appears on the display). Wait for “U14” to disappear.
—
≥One of the unit’s safety devices may have been activated.
—
Reset the unit as follows:
Press [Í/I] on the main unit to switch the unit to standby.
If the unit doesn’t switch to standby, press and hold [Í/I] on the main unit for about 10
seconds. The unit is forcibly switched to standby.
Alternatively, disconnect the AC mains lead, wait one minute, then reconnect it.
Cannot eject disc. ≥The unit may have a problem. While the unit is off, press and hold [∫] and [CH W] on the
47
Reference
main unit at the same time for about 5 seconds. Remove the disc and consult the dealer.
If the Child Lock function is activated, above operation does not work. Cancel the Child Lock
function.
Cannot tune channels.
≥Check the connections.
7, 8
≥You must connect to a television equipped with the Q Link function with a fully wired 21-pin
—
Cannot download channel
Scart cable to download channel presets.
presets from the television.
Recording, timer recording and transferring (dubbing)
Cannot record. ≥You haven’t inserted a disc or the disc you inserted cannot be recorded on. Insert a disc the
14
unit can record onto.
≥The disc is un-formatted. Format the disc. [RAM]
39
≥The write-protect tab on the cartridge is set to PROTECT, or the disc is protected with DISC
38
MANAGEMENT.
≥Some programmes have limitations on the number of times they can be recorded (CPRM).
49
≥The disc is full or nearly full. Erase un-needed titles or use another disc.
24, 31,
38, 39
≥You cannot record on finalized DVD-R discs.
—
≥Due to peculiarities of DVD-R, you may be unable to record onto them if you either insert
—
and remove the disc or switch the unit on and off while a disc is loaded, a total of fifty times.
≥A DVD-R recorded on this unit may not be recordable on other Panasonic DVD recorders.
—
Timer recording does not
≥The timer programme is incorrect or different timer programme times overlap. Correct the
21
work properly.
programme.
≥The unit is not on timer recording standby. (“F” on the unit’s display is not on.) Press
19, 20
S
HOWVIEW programming does
[F TIMER].
not work properly.
≥Set the clock.
47
Continued on next page
RQT7448
54
54
Recording, timer recording and transferring (dubbing) (Continued) Page
Timer recording does not stop
≥While using timer recording, press [F TIMER]. (“F” disappears.)
19, 20
even when [∫] is pressed.
≥When using the linked timer recording with external equipment, press [EXT LINK]. (“Ext
21
Link” disappears.)
The timer programme remains
≥The timer programme remains if set to daily or weekly. 20
even after recording finishes.
A part or whole of a recorded
≥If there is a power failure or the plug is disconnected from the household AC mains socket
—
title has been lost.
while recording or editing, the title may be lost or the disc may become unusable.
You will have to format the disc ([RAM]) or use a new disc. We cannot offer any guarantee
regarding lost programmes or discs.
The DV automatic recording
≥If images cannot be recorded or if the recording is aborted, check the connections and DV
35
function does not work.
equipment settings.
≥You cannot start recording until the images from the DV equipment appear on the television.
—
≥Recording may not be performed as desired if the time codes on the tape in the DV
—
equipment are not successive.
≥Depending on the equipment, the DV automatic recording may not operate properly.
—
Play
Play fails to start even when
≥Insert the disc correctly with the label facing up.
22
[1] (PLAY) is pressed.
≥You tried to play a blank DVD-RAM/DVD-R, or disc unplayable on this unit.
14
Play starts but then stops
≥When recording to DVD-RAM using “EP (8Hour)” mode, play may not be possible on DVD
42
immediately.
players that are compatible with DVD-RAM. In this case use “EP (6Hour)” mode.
≥You cannot play discs during DV automatic recording.
—
Audio and video momentarily
≥This occurs between play list chapters. [RAM] —
pause.
DVD-Video is not played. ≥Some DVD-Video cannot be played when you change the ratings level. 42
Alternative soundtrack and
≥The languages are not recorded on the disc.
—
subtitles cannot be selected.
≥You may have to use the disc’s menus to select languages.
—
No subtitles. ≥Subtitles are not recorded on the disc.
—
≥Turn the subtitles on.
28
Angle cannot be changed. ≥Angles can only be changed during scenes where different angles are recorded. —
You have forgotten your
≥While the disc tray is open, press [DVD] then press and hold [D] and [E] on
—
ratings password.
the main unit at the same time for 5 or more seconds.
Quick View does not work. ≥This does not work if the setting is “Off” in “PLAY k1.3 & Audio during Search”.
43
≥This does not work when audio is other than Dolby Digital.
—
≥This does not work when recording is in XP or FR mode. [RAM]
—
Reference
The resume play function
≥This function only works when the indicator on the right appears on
—
does not work.
the unit display.
≥Memorized positions are canceled when the unit is turned off or when
—
the tray is opened. The memorized position on the play list is also
canceled when the play list and title are edited.
The Video CD picture does not
≥When connecting to Multi-system TV, select “NTSC” in “TV System” in the SETUP menu.
46
display properly.
≥When connecting to PAL TV, the lower part of the picture cannot be displayed correctly
—
during search.
Time Slip does not work. ≥Time Slip does not work when the unit’s “TV System” settings are different from the title
46
recorded on the disc.
RQT7448
55
DVD
-
R
AM
55

Troubleshooting guide
Edit Page
Cannot format. ≥The disc is dirty. Use a special cleaner and wipe clean.
57
≥You tried formatting a disc that is not compatible with this unit.
14
Cannot create chapters.
≥The unit writes the chapter information to the disc when you turn it off or remove the disc.
—
The information is not written if there is an interruption to the power before this.
Cannot mark the start point or
≥These operations are not possible with still pictures.
—
the end point during “Partial
≥You cannot set points if they are too close to each other. You cannot set an end point before
—
Erase” operation.
a start point.
Cannot erase chapters. ≥When the chapter is too short to erase, use “Combine Chapters” to make the chapter
31
longer.
The available recording time
≥Available recording space on the DVD-R does not increase even after erasing previously
—
doesn’t increase even after
recorded titles.
erasing recordings on the
disc.
Cannot create a play list. ≥You cannot select all the chapters at once in a title if the title also includes still pictures.
—
Select them individually.
Still pictures
Cannot display Direct
≥This screen cannot be displayed during recording or transfer (dubbing) or while the unit is
—
Navigator screen.
standing by for linked timer recording with external equipment.
Cannot edit or format a card. ≥Release the card’s protection setting. (With some cards, the “Write protection Off” message
38
sometimes appears on the screen even when protection has been set.)
The contents of the card
≥The card format is not compatible with the unit. (The contents on the card may be
15, 26
cannot be read.
damaged.)
Format using FAT 12 or FAT 16 with other equipment or format the card with this unit.
39
≥The card contains a folder structure and/or file extensions that are not compatible with this
15
unit.
≥Turn off and then turn on the unit again.
—
Transferring (dubbing),
≥When there are a lot of folders and files, it may sometimes take a few hours.
—
erasing and setting protection
≥When repeating transferring (dubbing) or erasing, it may sometimes take a long time.
39
takes a long time.
Format the disc or card.
The PC card cannot be
≥Make sure the PC card is slotted home firmly before attempting to remove. 26
removed.
Reference
RQT7448
56
56
Safety precautions
Placement
Foreign matter
Set the unit up on an even surface away from direct sunlight, high
Do not let metal objects fall inside the unit. This can cause electric
temperatures, high humidity, and excessive vibration. These
shock or malfunction.
conditions can damage the cabinet and other components, thereby
Do not let liquids get into the unit. This can cause electric shock or
shortening the unit’s service life.
malfunction. If this occurs, immediately disconnect the unit from the
Do not place heavy items on the unit.
power supply and contact your dealer.
Do not spray insecticides onto or into the unit. They contain
Voltage
flammable gases which can ignite if sprayed into the unit.
Do not use high voltage power sources. This can overload the unit
Service
and cause a fire.
Do not use a DC power source. Check the source carefully when
Do not attempt to repair this unit by yourself. If sound is
setting the unit up on a ship or other place where DC is used.
interrupted, indicators fail to light, smoke appears, or any other
problem that is not covered in these instructions occurs, disconnect
AC mains lead protection
the AC mains lead and contact your dealer or an authorized service
center. Electric shock or damage to the unit can occur if the unit is
Ensure the AC mains lead is connected correctly and not
repaired, disassembled or reconstructed by unqualified persons.
damaged. Poor connection and lead damage can cause fire or
electric shock. Do not pull, bend, or place heavy items on the lead.
Extend operating life by disconnecting the unit from the power
Grasp the plug firmly when unplugging the lead. Pulling the AC
source if it is not to be used for a long time.
mains lead can cause electric shock.
Do not handle the plug with wet hands. This can cause electric
shock.
Maintenance/Disc and card handling
Unit care
Disc and card handling
The precision parts in this unit are readily affected by the
∫ How to hold a disc
environment, especially temperature, humidity, and dust.
or card
Cigarette smoke also can cause malfunction or breakdown.
Do not touch the recorded
To clean this unit, wipe with a soft, dry cloth.
surface or the terminal
≥Never use alcohol, paint thinner or benzine to clean this unit.
surface.
≥Before using chemically treated cloth, read the instructions that
came with the cloth carefully.
Observe the following points to ensure continued listening and
∫ If there is dirt or condensation on the disc
viewing pleasure.
[RAM] [DVD-R]
Dust and dirt may adhere to the unit’s lens over time, making it
≥Clean with an optional DVD-RAM/PD disc cleaner (LF-K200DCA1,
impossible to record or play discs.
where available).
Use the DVD-RAM/PD lens cleaner (LF-K123LCA1, where
≥Do not use cleaners for CDs or cloths.
available) about once every year, depending on frequency of use
[DVD-A] [DVD-V] [VCD] [CD]
Reference
and the operating environment. Read the lens cleaner’s instructions
Wipe with a damp cloth and then
carefully before use.
wipe dry.
∫ Handling precautions
≥Do not attach labels or stickers to discs. (This may cause disc
warping and un-balanced rotation, rendering it unusable.)
≥Do not write on the label side with a ball-point pen or other writing
instrument.
≥Do not use record cleaning sprays, benzine, thinner, static
electricity prevention liquids or any other solvent.
≥Do not use scratch-proof protectors or covers.
≥Do not expose the terminals of the card to water, garbage or other
strange things.
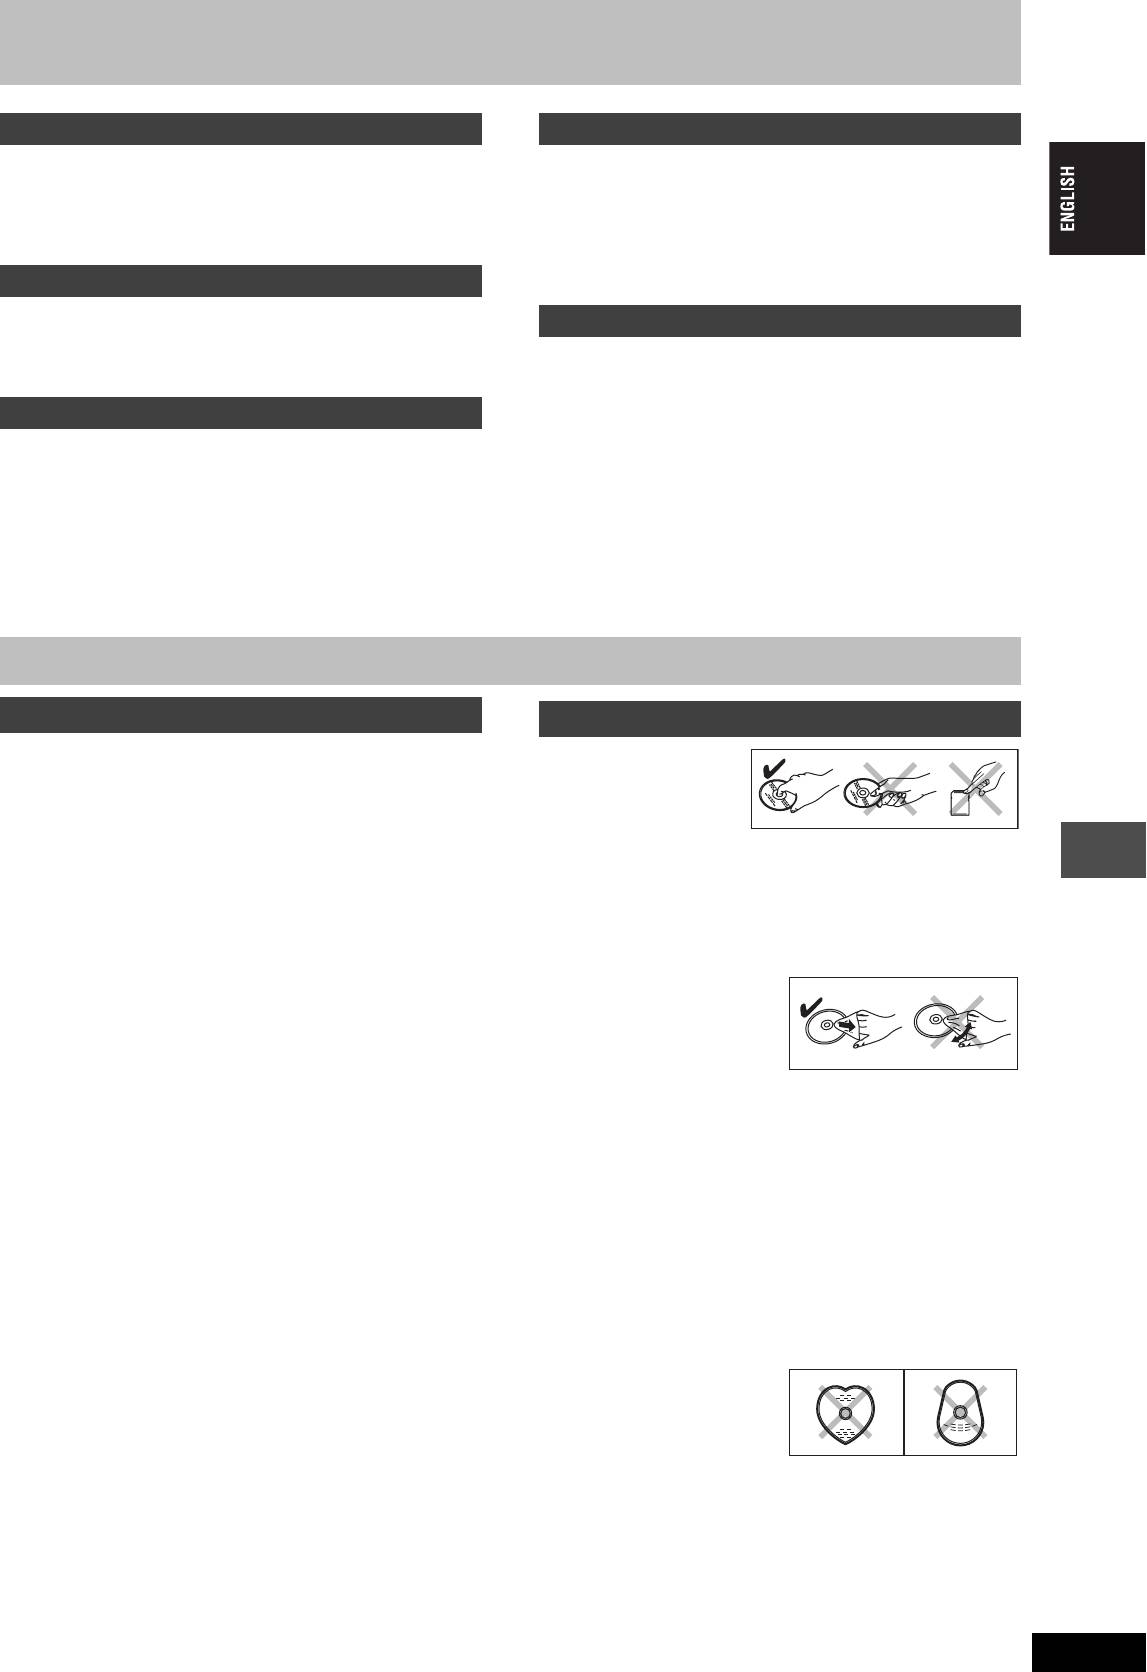
≥Do not use the following discs:
–Discs with exposed adhesive from removed stickers or labels
(rented discs etc).
–Discs that are badly warped or cracked.
–Irregularly shaped discs, such
as heart shapes.
≥Do not place in the following
areas:
–In direct sunlight.
–In very dusty or humid areas.
–Near a heater
–Where static electricity or electromagnetic waves occur
RQT7448
57
57

Index
Angle . . . . . . . . . . . . . . . . . . . . . . . . . . . 28
Finalize . . . . . . . . . . . . . . . . . . . . . . 39, 49
Q Link . . . . . . . . . . . . . . . . . . . . . . . . 6, 50
Aspect . . . . . . . . . . . . . . . . . . . . . . . . . . 12
Flexible Recording . . . . . . . . . . . . . . . . 18
Quick View . . . . . . . . . . . . . . . . . . . . . . 23
Audio
Format . . . . . . . . . . . . . . . . . . . . . . . 39, 49
Attribute . . . . . . . . . . . . . . . . . . . . . . . 28
FR (Flexible Recording Mode) . . . . . . 17
Ratings level . . . . . . . . . . . . . . . . . . . . . 42
Language . . . . . . . . . . . . . . . . . . . . . . 42
FUNCTIONS window . . . . . . . . . . . . . . 37
Recording . . . . . . . . . . . . . . . . . . . . . . . 16
Playback . . . . . . . . . . . . . . . . . . . . . . 24
Direct TV Recording . . . . . . . . . . . . . 18
Receiving . . . . . . . . . . . . . . . . . . . . . . 29
JPEG . . . . . . . . . . . . . . . . . . . . . . . . 26, 49
DV automatic recording . . . . . . . . . . . 35
External Link . . . . . . . . . . . . . . . . . . . 21
Change Thumbnail . . . . . . . . . . . . . . . . 31
Language
Flexible Recording . . . . . . . . . . . . . . . 18
Channel
Audio . . . . . . . . . . . . . . . . . . . . . . . . 42
Mode . . . . . . . . . . . . . . . . . . . . . . . . . 17
Audio . . . . . . . . . . . . . . . . . . . . . . . . . 28
Code list . . . . . . . . . . . . . . . . . . . . . . 44
Timer . . . . . . . . . . . . . . . . . . . . . . 19–21
Auto-Setup . . . . . . . . . . . . . . . . . . 11, 46
On-screen . . . . . . . . . . . . . . . . . . . . . 41
Remote control code . . . . . . . . . . . . . . 13
Preset Download . . . . . . . . . . . . . 10, 46
Soundtrack . . . . . . . . . . . . . . . . . 28, 42
Repeat Play . . . . . . . . . . . . . . . . . . . . . . 29
Chapter . . . . . . . . . . . . . . . . . . . . . . 24, 30
Subtitle . . . . . . . . . . . . . . . . . . . . 28, 42
Resume play function . . . . . . . . . . . . . 23
Chasing playback . . . . . . . . . . . . . . . . . 17
LPCM . . . . . . . . . . . . . . . . . . . . . . . . 43, 49
RGB
Child Lock . . . . . . . . . . . . . . . . . . . . . . . 47
Input . . . . . . . . . . . . . . . . . . . . . . . . . . 44
Cleaning
Manual Skip . . . . . . . . . . . . . . . . . . . . . 23
Output . . . . . . . . . . . . . . . . . . . . . . 7, 44
Disc . . . . . . . . . . . . . . . . . . . . . . . . . . 57
Menu
Lens . . . . . . . . . . . . . . . . . . . . . . . . . . 57
MP3 . . . . . . . . . . . . . . . . . . . . . . . . . 25
SD card . . . . . . . . . . . . . . . . . . . . . . . . . 15
Main unit . . . . . . . . . . . . . . . . . . . . . . 57
On-screen . . . . . . . . . . . . . . . . . . . . . 28
SETUP menu . . . . . . . . . . . . . . . . . . . . . 41
Clock settings . . . . . . . . . . . . . . . . . . . . 47
SETUP . . . . . . . . . . . . . . . . . . . . . . . 41
Shipping Condition . . . . . . . . . . . . . . . . 41
Connection
Mode
S
HOWVIEW . . . . . . . . . . . . . . . . . . . . . . . . 19
Aerial . . . . . . . . . . . . . . . . . . . . . . . . 7, 8
Recording . . . . . . . . . . . . . . . . . . . . . 17
Simultaneous rec and play . . . . . . . . . 17
Amplifier, system component . . . . . . . . 9
Still Mode . . . . . . . . . . . . . . . . . . . . . 42
Soundtrack . . . . . . . . . . . . . . . . . . . . . . 28
AV3 input terminals . . . . . . . . . . . . . 35
MP3 . . . . . . . . . . . . . . . . . . . . . . . . . . . . 25
Status messages . . . . . . . . . . . . . . . . . 29
DV input terminal . . . . . . . . . . . . . . . . 35
Still picture
Satellite receiver, digital receiver,
Noise reduction (NR)
Edit . . . . . . . . . . . . . . . . . . . . . . . . . . 34
decoder . . . . . . . . . . . . . . . . . . . . . . . . 9
AV-in NR . . . . . . . . . . . . . . . . . . . . . . 42
Play . . . . . . . . . . . . . . . . . . . . . . . . . . 26
Television . . . . . . . . . . . . . . . . . . . . . 7, 8
Playback NR . . . . . . . . . . . . . . . . . . . 29
Transferring (dubbing) . . . . . . . . . . . . 36
Video cassette recorder . . . . . . . 7, 8, 35
Subtitle . . . . . . . . . . . . . . . . . . . . . . . . . 28
Copy (play list) . . . . . . . . . . . . . . . . . . . 33
On-screen
Country setting . . . . . . . . . . . . . . . . 10, 11
Language . . . . . . . . . . . . . . . . . . . . . 41
Teletext . . . . . . . . . . . . . . . . . . . . . . . . . 17
CPRM . . . . . . . . . . . . . . . . . . . . . . . . . . . 49
Menus . . . . . . . . . . . . . . . . . . . . . . . . 28
TIFF . . . . . . . . . . . . . . . . . . . . . . . . . 26, 49
Create Chapter . . . . . . . . . . . . . . . . 24, 31
Status messages . . . . . . . . . . . . . . . 29
Time Slip . . . . . . . . . . . . . . . . . . . . . 17, 23
Create play lists . . . . . . . . . . . . . . . . . . 32
Timer recording . . . . . . . . . . . . . . . 19–21
Default Settings . . . . . . . . . . . . . . . . . . 41
Partial Erase . . . . . . . . . . . . . . . . . . . . . 31
Transfer . . . . . . . . . . . . . . . . . . . . . . . . . 29
Dialog Enhancer . . . . . . . . . . . . . . . . . . 29
PC card . . . . . . . . . . . . . . . . . . . . . . . . . 15
Transferring (dubbing) still pictures . . 36
Direct Navigator . . . . . . . . . 22, 27, 30, 34
PCM Down Conversion . . . . . . . . . . . . 43
Tuning
Direct TV Recording . . . . . . . . . . . . . . . 18
Picture settings . . . . . . . . . . . . . . . 29, 42
Auto-Setup . . . . . . . . . . . . . . . . . . 11, 46
Divide Title . . . . . . . . . . . . . . . . . . . . . . . 31
Play list . . . . . . . . . . . . . . . . . . . . . . . . . 32
Manual . . . . . . . . . . . . . . . . . . . . . . . . 45
DPOF . . . . . . . . . . . . . . . . . . . . . . . . 34, 49
Playback NR . . . . . . . . . . . . . . . . . . . . . 29
Preset Download . . . . . . . . . . . . . 10, 46
DV automatic recording . . . . . . . . . . . . 35
Power Save . . . . . . . . . . . . . . . . . . . . . . 41
TV System (PAL/NTSC) . . . . . . . . . . . . 46
DVD-R (Enabling DVD-R to be played on
Progressive . . . . . . . . . . . . 12, 29, 44, 49
TV type . . . . . . . . . . . . . . . . . . . . . . . . . . 12
other equipment—Finalize) . . . . . . . . . 39
Properties
Reference
DVD-RAM, DVD-R . . . . . . . . . . . . . . . . . 14
Play list . . . . . . . . . . . . . . . . . . . . . . . 33
V.S.S. . . . . . . . . . . . . . . . . . . . . . . . . . . . 29
Still picture . . . . . . . . . . . . . . . . . . . . 27
VPS/PDC . . . . . . . . . . . . . . . . . . . . . 19, 50
Enter name
Title . . . . . . . . . . . . . . . . . . . . . . . . . . 31
Disc . . . . . . . . . . . . . . . . . . . . . . . . . . 38
Protection
Entering text . . . . . . . . . . . . . . . . . . . . 40
Card . . . . . . . . . . . . . . . . . . . . . . . . . 38
Folder . . . . . . . . . . . . . . . . . . . . . . . . . 34
Cartridge . . . . . . . . . . . . . . . . . . . . . . 38
Play list . . . . . . . . . . . . . . . . . . . . . . . 33
Disc . . . . . . . . . . . . . . . . . . . . . . . . . . 38
Title . . . . . . . . . . . . . . . . . . . . 19, 20, 31
Folder . . . . . . . . . . . . . . . . . . . . . . . . 34
Erase
Still picture . . . . . . . . . . . . . . . . . . . . 34
All titles . . . . . . . . . . . . . . . . . . . . . . . . 38
Title . . . . . . . . . . . . . . . . . . . . . . . . . . 31
Chapter . . . . . . . . . . . . . . . . . 24, 31, 33
Folder . . . . . . . . . . . . . . . . . . . . . . . . . 34
Play list . . . . . . . . . . . . . . . . . . . . 24, 33
Still picture . . . . . . . . . . . . . . . . . . . . . 34
Title . . . . . . . . . . . . . . . . . . . . . . . 24, 31
Ext Link . . . . . . . . . . . . . . . . . . . . . . 21, 44
Manufactured under license from Dolby Laboratories.
This product incorporates copyright protection technology that is
“Dolby” and the double-D symbol are trademarks of Dolby
protected by method claims of certain U.S. patents and other
Laboratories.
intellectual property rights owned by Macrovision Corporation
and other rights owners. Use of this copyright protection
“DTS” and “DTS 2.0iDigital Out” are trademarks of Digital
technology must be authorized by Macrovision Corporation, and
Theater Systems, Inc.
is intended for home and other limited viewing uses only unless
otherwise authorized by Macrovision Corporation. Reverse
engineering or disassembly is prohibited.
S
HOWVIEW is a trademark of Gemstar Development Corporation.
The S
HOWVIEW system is manufactured under licence from
Gemstar Development Corporation.
≥SD logo is a trademark.
≥Portions of this product are protected under copyright law and
RQT7448
are provided under license by ARIS/SOLANA/4C.
MPEG Layer-3 audio decoding technology licensed from
Fraunhofer IIS and Thomson multimedia.
58
58
MEMO
RQT7448
59
GPELOCTEPE·EHNE!
Ljr Poccnn
“YctahobjehhsØ gponÎbolntejem b goprlke g. 2 ct. 5
B ÍTOM YCTPOÆCTBE NCGOJV„YETCR JA„EP.
Ielepajvhofo „akoha PI “O Îaqnte gpab
GPNMEHEHNE PEFYJNPOBOK N HACTPOEK, OTJN¨HSX
gotpe°ntejeØ” cpok cjyÒ°s nÎlejnr pabeh 7 folam c
OT HN·EOGNCAHHSX, MO·ET GPNBECTN K
lats gponÎbolctba gpn ycjobnn, ≠to nÎlejne
OGACHOMY JA„EPHOMY OøJY¨EHND.
ncgojvÎyetcr b ctpofom cootbetctbnn c hactorqeØ
HE OTKPSBAÆTE KPSWKY N HE GPON„BOLNTE
nhctpykuneØ go ˙kcgjyataunn n gpnmehnmsmn
PEMOHT CAMN—JY¨WE GOPY¨NTV ÍTO
texhn≠ecknmn ctahlaptamn.”
KBAJNINUNPOBAHHOMY CGEUNAJNCTY.
Gpnmep mapknpobkn: ± ± 1 A ± ± ± ± ± ± ±
ПРЕДУПРЕЖДЕНИЕ:
ДЛЯ УМЕНЬШЕНИЯ РИСКА ВОЗНИКНОВЕНИЯ ПОЖАРА,
Íjemehts kola: „-nØ cnmboj–fol nÎfotobjehnr
(1±2001 f., 2±2002 f., 3±2003 f., ...);
ПОРАЖЕНИЯ ЭЛЕКТРИЧЕСКИМ ТОКОМ ИЛИ
4-sØ cnmboj–mecru nÎfotobjehnr
ПОВРЕЖДЕНИЯ ИЗДЕЛИЯ НЕ ПОДВЕРГАЙТЕ ДАННЫЙ
(A±rhbapv, B±iebpajv, ...,
АППАРАТ ВОЗДЕЙСТВИЮ ДОЖДЯ, ВЛАГИ, БРЫЗГ ИЛИ
L±leka°pv)
КАПЕЛЬ, И НЕ СТАВЬТЕ НА АППАРАТ ПРЕДМЕТЫ,
НАПОЛНЕННЫЕ ЖИДКОСТЯМИ, ТАКИЕ, КАК ВАЗЫ.
PacgojoÒehne
mapknpobkn: „alhrr, hnÒhrr njn °okobar gahejv
GPELOCTEPE·EHNE!
yctpoØctba
≥ HE CJELYET YCTAHABJNBATV NJN PA„MEQATV
LAHHSÆ AGGAPAT B KHN·HOM WKAIY,
BCTPOEHHOM WKAIY NJN LPYFOM OFPAHN¨EHHOM
Mauywnta Íjektpnk Nhlactpnaj Ko., Jtl.
GPOCTPAHCTBE LJR TOFO, ¨TOøS COXPAHNTV
1006 Kaloma, Ocaka, Rgohnr
YCJOBNR XOPOWEÆ BEHTNJRUNN.
Clejaho b Rgohnn
YLOCTOBEPVTECV, ¨TO WTOPS N LPYFNE
GOLOøHSE GPELMETS HE GPEGRTCTBYDT
HOPMAJVHOÆ BEHTNJRUNN LJR GPELOTBPAQEHNR
PNCKA GOPA·EHNR ÍJEKTPN¨ECKNM TOKOM NJN
BO„HNKHOBEHNR GO·APA N„-„A GEPEFPEBA.
≥ НЕ ЗАКРЫВАЙТЕ ВЕНТИЛЯЦИОННЫЕ ОТВЕРСТИЯ
АППАРАТА ГАЗЕТАМИ, СКАТЕРТЯМИ, ШТОРАМИ И
ПОДОБНЫМИ ПРЕДМЕТАМИ.
Подготовка к эксплуатации
≥ НЕ РАЗМЕЩАЙТЕ НА АППАРАТ ИСТОЧНИКИ
ОТКРЫТОГО ПЛАМЕНИ, ТАКИЕ, КАК ГОРЯЩИЕ СВЕЧИ.
≥ ВЫБРАСЫВАЙТЕ БАТАРЕИ В МУСОР, УЧИТЫВАЯ
Y
RF IN
ОХРАНУ ОКРУЖАЮЩЕЙ СРЕДЫ.
VIDEO
AV1 (TV)
PB
OPTICAL
R - AUDIO - L
S-VIDEO
OUT
PR
AV4 I N
AC IN
DIGITAL AUDIO OUT
(PCM/BITSTREAM)
R - AUDIO - L
VIDEO
S-VIDEO
AV2 (DECODER/EXT)
COMPONENT
PAL:576P/576I)
(NTSC:480P/480I,
VIDEO OUT
RF OUT
ЭТОТ АППАРАТ ПРЕДНАЗНАЧЕН ДЛЯ
ИСПОЛЬЗОВАНИЯ В КЛИМАТЕ СРЕДНЕЙ ПОЛОСЫ.
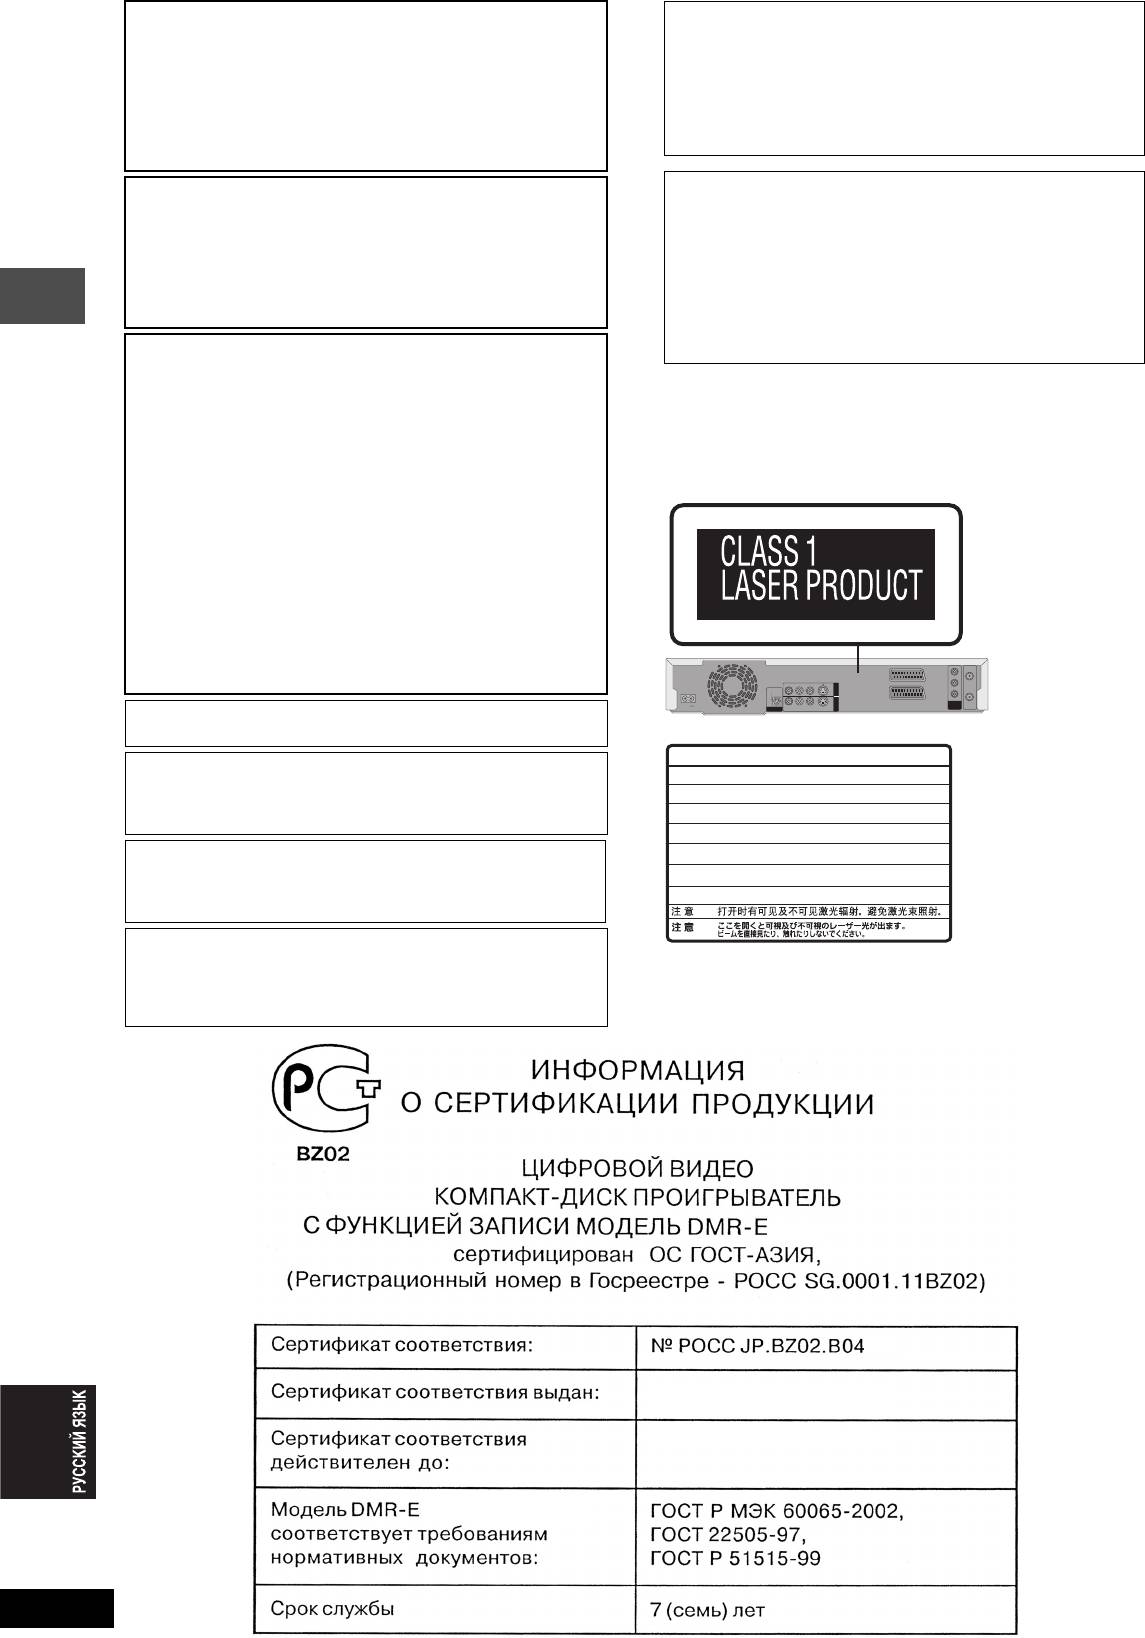
DANGER
-
VISIBLE AND INVISIBLE LASER RADIATION WHEN OPEN.
AVOID DIRECT EXPOSURE TO BEAM.
(FDA 21 CFR)
Это изделие может принимать радио помехи,
CAUTION
-
VISIBLE AND INVISIBLE LASER RADIATION WHEN OPEN.
обусловленные переносными телефонами. Если такие
AVOID EXPOSURE TO BEAM.
(IEC60825-1)
ATTENTION
-
RAYONNEMENT LASER VISIBLE ET INVISIBLE EN CAS D’OUVERTURE.
помехи являются очевидными, увеличьте, пожалуйста,
EXPOSITION DANGEREUSE AU FAISCEAU.
ADVARSEL
-
SYNLIG OG USYNLIG LASERSTRÅLING VED ÅBNING.
расстояние между изделием и переносным телефоном.
UNDGÅ UDSÆTTELSE FOR STRÅLING.
VARO!
-
AVATTAESSA OLET ALTTIINA NÄKYVÄÄ JA NÄKYMÄTÖN
LASERSÄTEILYLLE. ÄLÄ KATSO SÄTEESEEN.
Оборудование должно быть размещено около сетевой
VARNING
-
SYNLIG OCH OSYNLIG LASERSTRÅLNING NÄR DENNA DEL
ÄR ÖPPNAD. BETRAKTA EJ STRÅLEN.
розетки переменного тока, а сетевая вилка должна быть
ADVARSEL
-
SYNLIG OG USYNLIG LASERSTRÅLING NÅR DEKSEL ÅPNES.
UNNGÅ EKSPONERING FOR STRÅLEN.
расположена так, чтобы она была легкодоступна в случае
VORSICHT
-
SICHTBARE UND UNSICHTBARE LASERSTRAHLUNG, WENN ABDECKUNG
GEÖFFNET. NICHT DEM STRAHL AUSSETZEN.
возникновения проблемы.
-
-
RQLS0233
(
Внутри аппарата
)
Храните карточки памяти малого размера
как SD Memory Card в местах, недоступных
для детей. Если карточка была проглочена,
сразу же обратитесь к врачу.
65EE
Panasonic
484
26 мая 2004 года
26 мая 2007 года
65EE Panasonic
Panasonic
RQT7448
2
60

Содержание
Подготовка к эксплуатации
Копирование
Аксессуары . . . . . . . . . . . . . . . . . . . . . . . . . . . . . . . 3
Запись от видеомагнитофона. . . . . . . . . . . . . . 35
Полезные функции . . . . . . . . . . . . . . . . . . . . . . . . 4
Ручная запись . . . . . . . . . . . . . . . . . . . . . . . . . . . . . . . . . . . . . 35
Пульт ДУ . . . . . . . . . . . . . . . . . . . . . . . . . . . . . . . . . 4
Автоматическая запись DV (DV AUTO REC) . . . . . . . . . . . . 35
Справочное руководство по органам
Копирование фотоснимков . . . . . . . . . . . . . . . 36
управления . . . . . . . . . . . . . . . . . . . . . . . . . . . . . . 5
Копирование с использованием списка копирования . . . . 36
ШАГ 1 Подключение . . . . . . . . . . . . . . . . . . . . . . . 6
Копирование всех фотоснимков на карте на
DVD-RAM-диск—Коп. всех снимков . . . . . . . . . . . . . . . . . 37
ШАГ 2 Настройки приема канала . . . . . . . . . . . 10
ШАГ 3 Настройка соответствия телевизора и
пульта ДУ . . . . . . . . . . . . . . . . . . . . . . . . . 12
Полезные функции
Просмотр прогрессивной видеокартинки . . . . . . . . . . . . . . 12
Информация о дисках и картах. . . . . . . . . . . . . 14
Окно FUNCTIONS. . . . . . . . . . . . . . . . . . . . . . . . . 37
Управление дисками и картами. . . . . . . . . . . . 38
Установка защиты . . . . . . . . . . . . . . . . . . . . . . . . . . . . . . . . . 38
Запись
Присваивание названия диску . . . . . . . . . . . . . . . . . . . . . . . 38
Запись телевизионных программ. . . . . . . . . . . 16
Удаление всех наименований и списков воспроизведения—
Режимы записи и приблизительное время записи. . . . . . . 17
Стереть все титры . . . . . . . . . . . . . . . . . . . . . . . . . . . . . . . . 38
Воспроизведение во время записи . . . . . . . . . . . . . . . . . . . 17
Удаление всего содержания диска или карты—Формат . . 39
Переменный режим записи . . . . . . . . . . . . . . . . . . . . . . . . . 18
Приспосабливание DVD-R-диска для воспроизведения на
Прямая запись с телевизора . . . . . . . . . . . . . . . . . . . . . . . . 18
другом оборудовании—Завершение . . . . . . . . . . . . . . . . . 39
Запись от спутникового/цифрового ресивера или декодера
. . . 18
Ввод текста . . . . . . . . . . . . . . . . . . . . . . . . . . . . . 40
Запись по таймеру . . . . . . . . . . . . . . . . . . . . . . . . 19
Изменение настроек аппарата . . . . . . . . . . . . . 41
И
спользование номера S
HOW
V
IEW
для записи по таймеру
. . . 19
Общие процедуры . . . . . . . . . . . . . . . . . . . . . . . . . . . . . . . . . 41
Программирование записи по таймеру вручную . . . . . . . . 20
Краткое содержание настроек . . . . . . . . . . . . . . . . . . . . . . . 41
Проверка, изменение или удаление программы . . . . . . . . 21
Приём ТВ . . . . . . . . . . . . . . . . . . . . . . . . . . . . . . . . . . . . . . . . . 45
Запись по таймеру с внешнего подключенного оборудования
Система TB . . . . . . . . . . . . . . . . . . . . . . . . . . . . . . . . . . . . . . . 46
(EXT LINK) . . . . . . . . . . . . . . . . . . . . . . . . . . . . . . . . . . . . . . 21
Установка часов . . . . . . . . . . . . . . . . . . . . . . . . . . . . . . . . . . . 47
Функция Child Lock . . . . . . . . . . . . . . . . . . . . . . . 47
Подготовка к эксплуатации
Воспроизведение
Воспроизведение записанного видеосодержания/
Справочник
Воспроизведение дисков только для
Технические характеристики . . . . . . . . . . . . . . 48
воспроизведения
. . . . . . . . . . . . . . . . . . . . . . . . . 22
Справочная информация. . . . . . . . . . . . . . . . . . 49
Операции во время воспроизведения. . . . . . . . . . . . . . . . . 23
Часто задаваемые вопросы . . . . . . . . . . . . . . . 51
Операции редактирования во время воспроизведения . . 24
Сообщения об ошибках . . . . . . . . . . . . . . . . . . . 52
Изменение звучания . . . . . . . . . . . . . . . . . . . . . . . . . . . . . . . 24
Руководство по устранению возможных
Использование меню для воспроизведения
неисправностей. . . . . . . . . . . . . . . . . . . . . . . . . 53
МР3 . . . . . . . . . . . . . . . . . . . . . . . . . . . . . . . . . . . . 25
Меры безопасности . . . . . . . . . . . . . . . . . . . . . . 57
Воспроизведение фотоснимков . . . . . . . . . . . . 26
Обслуживание/Обращение с диском и картой
. . 57
Полезные функции для воспроизведения фотоснимков
. . . . 27
Алфавитный указатель . . . . . . Задняя обложка
Использование экранных меню и сообщений о
состоянии . . . . . . . . . . . . . . . . . . . . . . . . . . . . . . 28
Экранные меню . . . . . . . . . . . . . . . . . . . . . . . . . . . . . . . . . . . 28
Сообщения о состоянии . . . . . . . . . . . . . . . . . . . . . . . . . . . . 29
Редактирование
Редактирование наименований/разделов . . . 30
Редактирование наименований/
разделов и воспроизведение разделов . . . . . . . . . . . . . . 30
Управление наименованиями. . . . . . . . . . . . . . . . . . . . . . . . 31
Управление разделами. . . . . . . . . . . . . . . . . . . . . . . . . . . . . 31
Создание, редактирование и воспроизведение
списков воспроизведения
. . . . . . . . . . . . . . . . . 32
Создание списков воспроизведения. . . . . . . . . . . . . . . . . . 32
Редактирование и воспроизведение списков
воспроизведения/разделов . . . . . . . . . . . . . . . . . . . . . . . . 33
Управление списком воспроизведения. . . . . . . . . . . . . . . . 33
Управление разделами. . . . . . . . . . . . . . . . . . . . . . . . . . . . . 33
Редактирование фотоснимков . . . . . . . . . . . . . 34
Управление картинками и папками. . . . . . . . . . . . . . . . . . . 34
Аксессуары
Пожалуйста, проверьте и определите поставляемые аксессуары.
∏∏ ∏ ∏∏
1Пульт ДУ
1 Силовой провод
1 Радиочастотный
2 Батарейки
1 Аудио/видеокабель
(EUR7721KC0)
переменного тока
коаксиальный
для пульта ДУ
≥Только для использования с
кабель
данным аппаратом. Не
используйте его с другим
RQT7448
оборудованием.
3
61
Полезные функции
Данный DVD видеомагнитофон производит запись высококачественного изображения на DVD-RAM носители,
совместимых с режимом быстрого случайного доступа. Это отразилось на многих новых функциях, превосходящих
старые кассетные форматы. Следующая информация вкратце описывает некоторые из этих функций.
Воспроизведение
Мгновенная запись
вдогонку
Вам больше не требуется искать свободное дисковое
Нет необходимости ждать до
пространство. При нажатии кнопки записи, аппарат
окончания процесса записи. Вы
находит свободное пространство для записи и сразу-же
можете воспроизвести с самого
начинает запись. Нет необходимости волноваться по
начала видеоматериал,
поводу того, что можно перезаписать на уже
записываемый в данный момент,
записанный материал.
не останавливая запись.
Одновременная запись и
Слоты для SD/PC карт, входной терминал
воспроизведение
DV
Во время записи, вы можете
Данный аппарат оборудован устройствами соединения,
воспроизводить другую
что позволяет создавать сеть с другими цифровыми
видеопрограмму, записанную
приборами.
≥Слоты для SD/PC карт данного оборудования позволяют
ранее.
копировать фотографии с карты цифровой камеры на DVD-
RAM-диск для облегчения хранения данных без
использования компьютера.
≥Функция автоматической записи DV данного аппарата
Time Slip
позволяет легко копировать цифровые изображения на DVD-
Во время воспроизведения и
RAM-диск через один подключенный DV кабель.
также во время записи, вы
можете перейти на желаемую
Мгновенное воспроизведение
сцену для просмотра, указав
Не существует необходимости перемотки назад или
время пропуска.
Подготовка к эксплуатации
вперед. Функция Direct Navigator сразу-же перенесет
вас на начало записанного видеоматериала.
Пульт ДУ
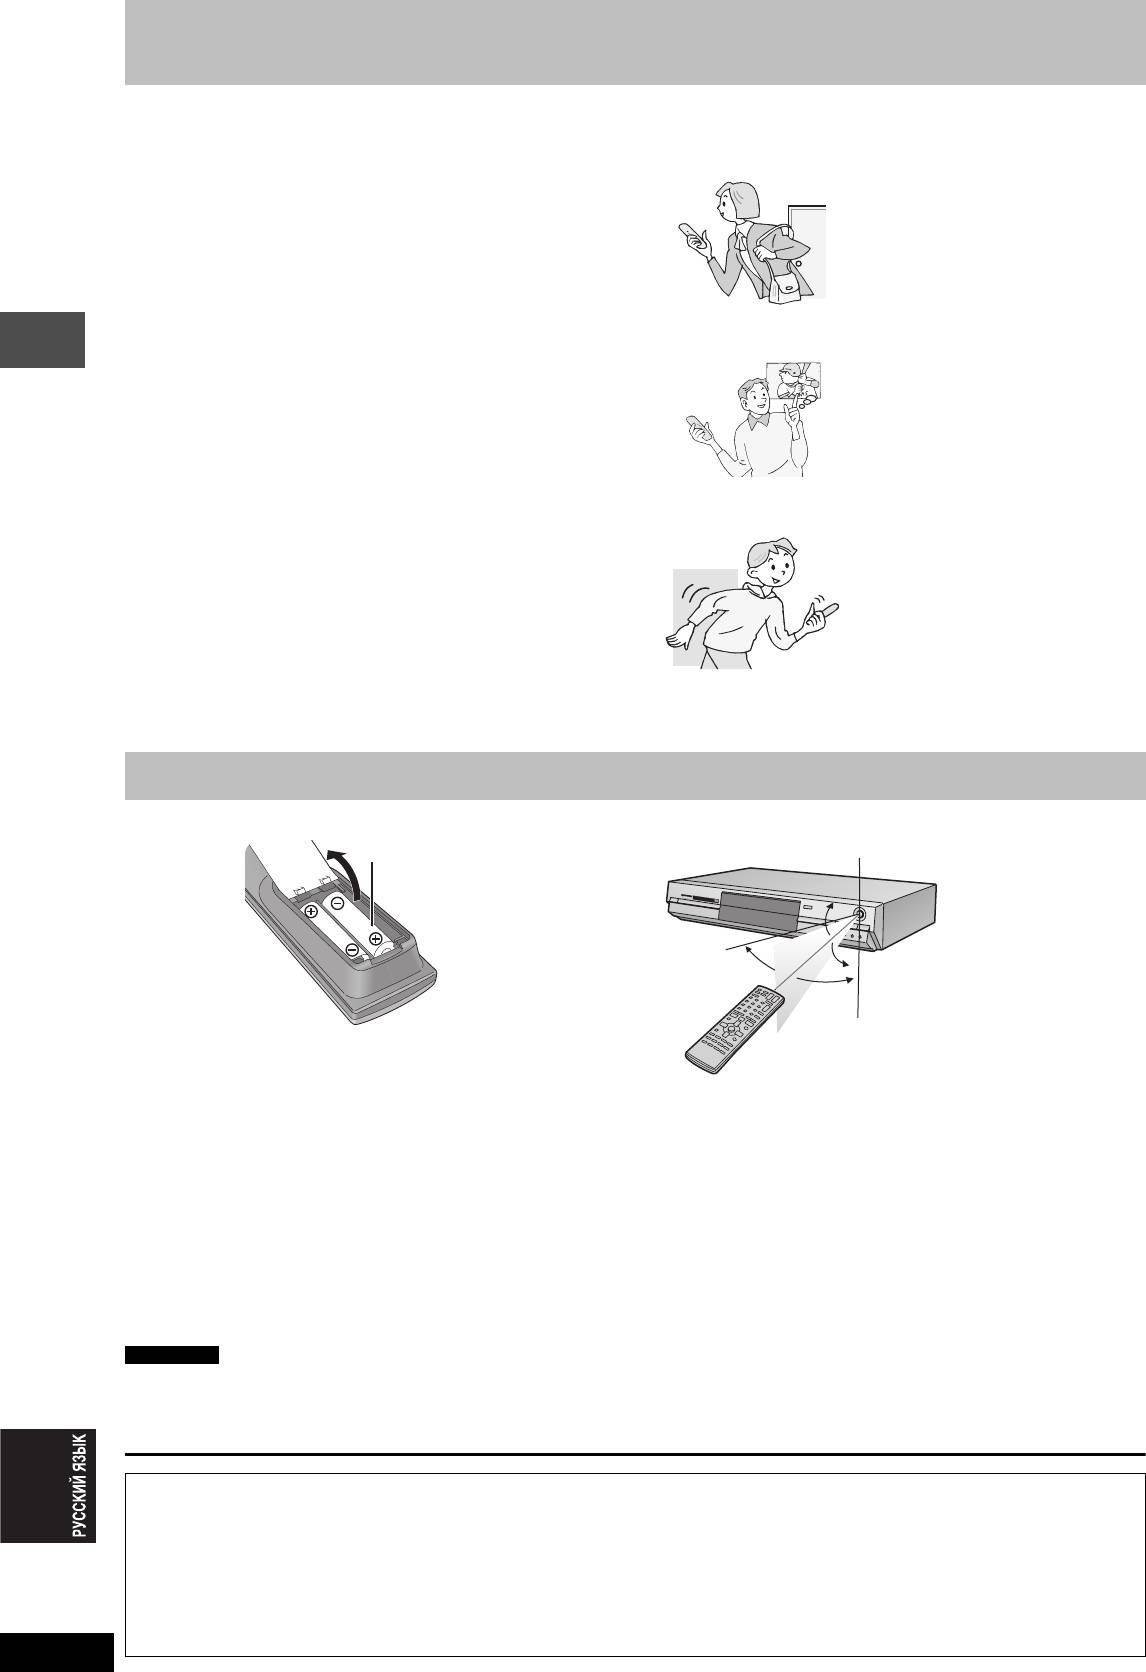
∫ Батарейки
∫ Использование
≥Вставьте в соответствии c полярностью (i и j) на пульте ДУ.
≥He ncgojvÎyØte °atapen gepeÎaprÒaemofo tnga.
≥Не смешивайте старые и новые батарейки.
≥Не используйте различные типы одновременно.
≥Не нагревайте и не подвергайте влиянию огня.
≥Не разбирайте или подвергайте короткому замыканию.
≥Не пытайтесь перезарядить щелочные или марганцовые
батарейки.
≥Не используйте батарейки со снятой оболочкой.
Ненадлежащее обращение с батарейками может вызвать
протекание электролита, соприкосновение с которым может
привести к повреждению предметов и возможному пожару.
Удалите их, если не собираетесь использовать пульт ДУ в
течение продолжительного периода времени. Храните в
прохладных темных местах.
Примечание
Если, после замены батареек, управление аппаратом или
телевизором от пульта ДУ невозможно, пожалуйста,
переустановите коды (➡ стр. 13).
RQT7448
4
R6/LR6, AA, UM-3
Сенсор сигнала дистанционного управления
20˚
30˚
20˚
30˚
7 м прямо на фронтальную часть аппарата
Производитель не несет ответственности и не предоставляет компенсацию за потерю записанного или
отредактированного материала из-за проблем, связанных с аппаратом или средством записи, и не несет ответственности
и не предоставляет компенсацию за любой последующий ущерб вследствие такой потери.
Примеры причин таких потерь
≥При воспроизведении диска, записанного и отредактированного на данном аппарате, на DVD-магнитофоне или компьютерном
дисководе, произведенном другой компанией.
≥При использовании диска как описано выше, и последующем его воспроизведении на данном аппарате.
≥При воспроизведении диска, записанного и отредактированного на DVD-магнитофоне или компьютерном дисководе,
произведенном другой компанией, на данном аппарате.
62
Справочное руководство по органам управления
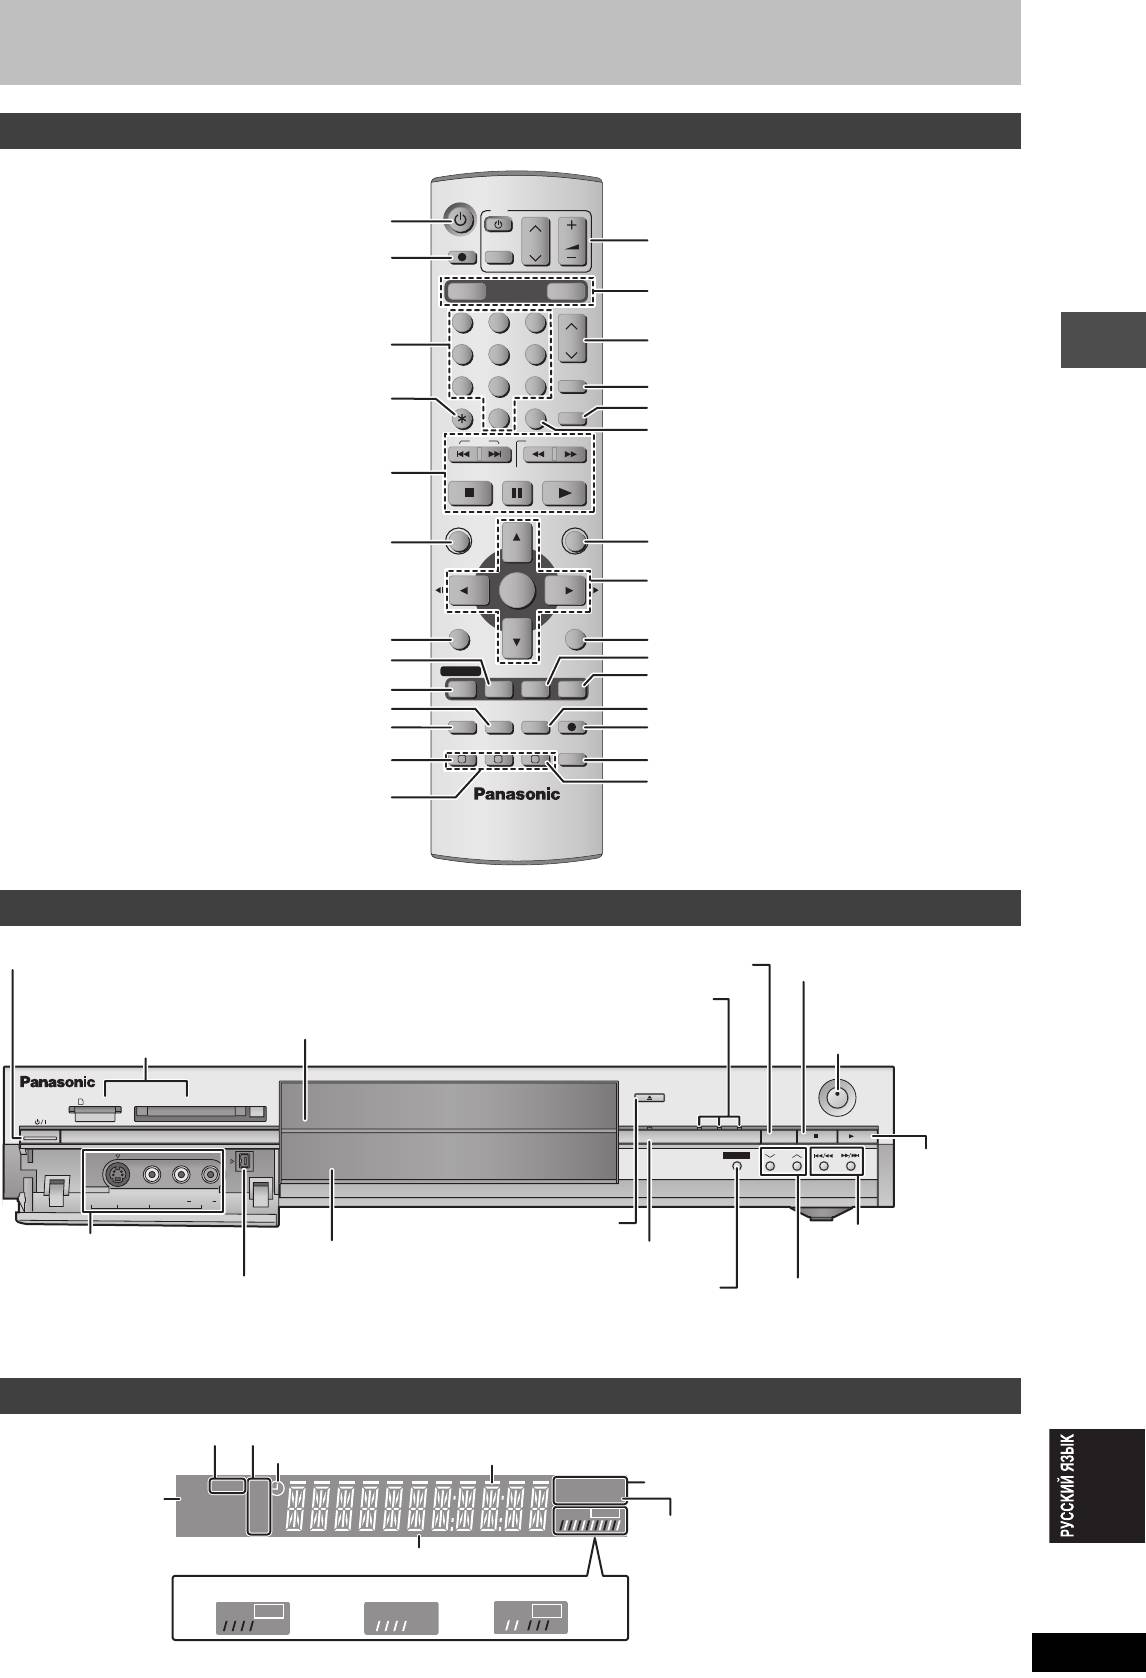
Пульт ДУ
DVD
TV
Включение аппарата (➡ стр. 10, 11)
DIRECT TV REC
CH
VOLUME
Управление телевизором (➡ стр. 13)
Прямая запись с телевизора (➡ стр. 18)
AV
DVD
DRIVE SELECT
SD/PC
Выбор дисковода (DVD, SD или PC)
(➡ стр. 16, 22, 27)
123
Выбор каналов и номеров наименований, др./
CH
Выбор канала (➡ стр. 16)
Цифровой ввод
456
ShowView
78
9
Отображение экрана S
HOWVIEW (➡ стр. 19)
Отмена
CANCEL
INPUT SELECT
MANUAL SKIP
Пропуск вперед на 30 секунд (➡ стр. 23)
0
Выбор источника (AV1, AV2, AV3, AV4 или DV)
SKIP
SLOW/SEARCH
(➡ стр. 18, 35)
Основные операции записи и воспроизведения
STOP
PAU SE
PLAY/x1.3
DIRECT NAVIGATOR
FUNCTIONS
Отображение основного меню/Direct navigator
Отображение окна FUNCTIONS (➡ стр. 37)
(➡ стр. 22, 30)
TOP MENU
Выбор/Ввод, Покадровое воспроизведение
ENTER
(➡ стр. 10, 23)
SUB MENU
RETURN
Отображение субменю (➡ стр. 30)
Возвращение на предыдущий экран
Отображение сообщений о состоянии (
➡
стр. 29)
Отображение экранного меню (➡ стр. 28)
PROG/CHECK
DISPLAY
STATUS
TIME SLIP
Пропуск на указанное время/Отображение телевизионной
Подготовка к эксплуатации
Отображение экрана программы записи по таймеру (
➡
стр. 20)
картинки в режиме картинка-в-картинке (
➡
стр. 17,
23
)
Удаление параметров (➡ стр. 24)
Изменение режима записи (➡ стр. 16)
TIMER
REC MODEERASE
REC
Режим ожидания/отмена режима ожидания
F
Начало записи (➡ стр. 16)
записи программы (➡ стр. 19, 20)
CREATE
EXT LINK
CHAPTER
AUDIO
Запись по таймеру с внешнего подключенного
A B C
Выбор аудио режима (➡ стр. 24)
оборудования (➡ стр. 21)
Создать главу (➡ стр. 24)
Операция ручной настройки (➡ стр. 45)
Основной блок
Включатель питания standby/on (
Остановка (➡ стр. 16, 23)
Сенсор сигнала
Дисковод (➡ стр. 16, 22)
дистанционного управления/
Начало записи (
➡
стр. 16)
OPEN/CLOSE
SD CARD PC CARD EJECT
REC
TIME SLIP
SD PCDVD
DRIVE SELECT
/
x
1.3
TIME SLIP
CH
AV3
S-VIDEO IN VIDEO IN AUDIO IN DV IN
L/MONO
R
Подключение для
Дисплей (➡ ниже)
Индикатор Time Slip (➡ стр. 17)
видеокамеры и т.д. (➡ стр. 35)
Пропуск на указанное время/Отображение
телевизионной картинки в режиме картинка-
в-картинке (➡ стр. 17, 23)
Терминалы задней панели (➡ стр.7,8)
RQT7448
5
Í
/I) (➡ стр. 10, 11)
Нажмите включатель, чтобы переключить аппарат из режима
Выбор дисковода
“включено” в режим ожидания и наоборот.
(➡ стр. 16, 22, 27)
В режиме ожидания аппарат тем не менее потребляет небольшое
Высвечивается при выборе
количество электроэнергии.
дисковода DVD, SD или PC
Слоты для SD/PC карт (➡ стр. 26)
Начало
воспроизведения
(
➡
стр. 22)
Открыть/закрыть дисковод
(➡ стр. 16, 22)
Пропуск/Замедление/
Поиск (➡ стр. 23)
Подключение для
Выбор канала
цифровой видеокамеры
(➡ стр. 16)
(DV) (➡ стр. 35)
Дисплей аппарата
SD PC
XP
DVD
-
R
AM
EXT
Link
SP
VCD
.MIX
LP
PLAY
REC
EP
PLAY
REC
PLAY
REC
Индикатор карты
Режим записи
Индикатор таймера записи
Индикатор выполнения копирования
Тип диска
Индикатор записи по
таймеру с внешнего
D.MIX (только для многоканальных
подключенного
DVD-Audio-дисков)
оборудования
Раздел основного дисплея
При высвечивании: воспроизводятся
микшированные
Запись
Воспроизведение
Запись/Воспроизведение
аудиосигналы.
При отключении: диск предотвращает
микширование таким
образом,что могут
воспроизводиться только
два фронтальных канала.
63
ШАГ 1 Подключение
≥На примерах ниже описаны подключения оборудования.
≥Перед подключением, выключите все оборудование и изучите соответствующие инструкции по эксплуатации.
≥Периферийное оборудование и дополнительные кабели продаются отдельно, если не указано иное.
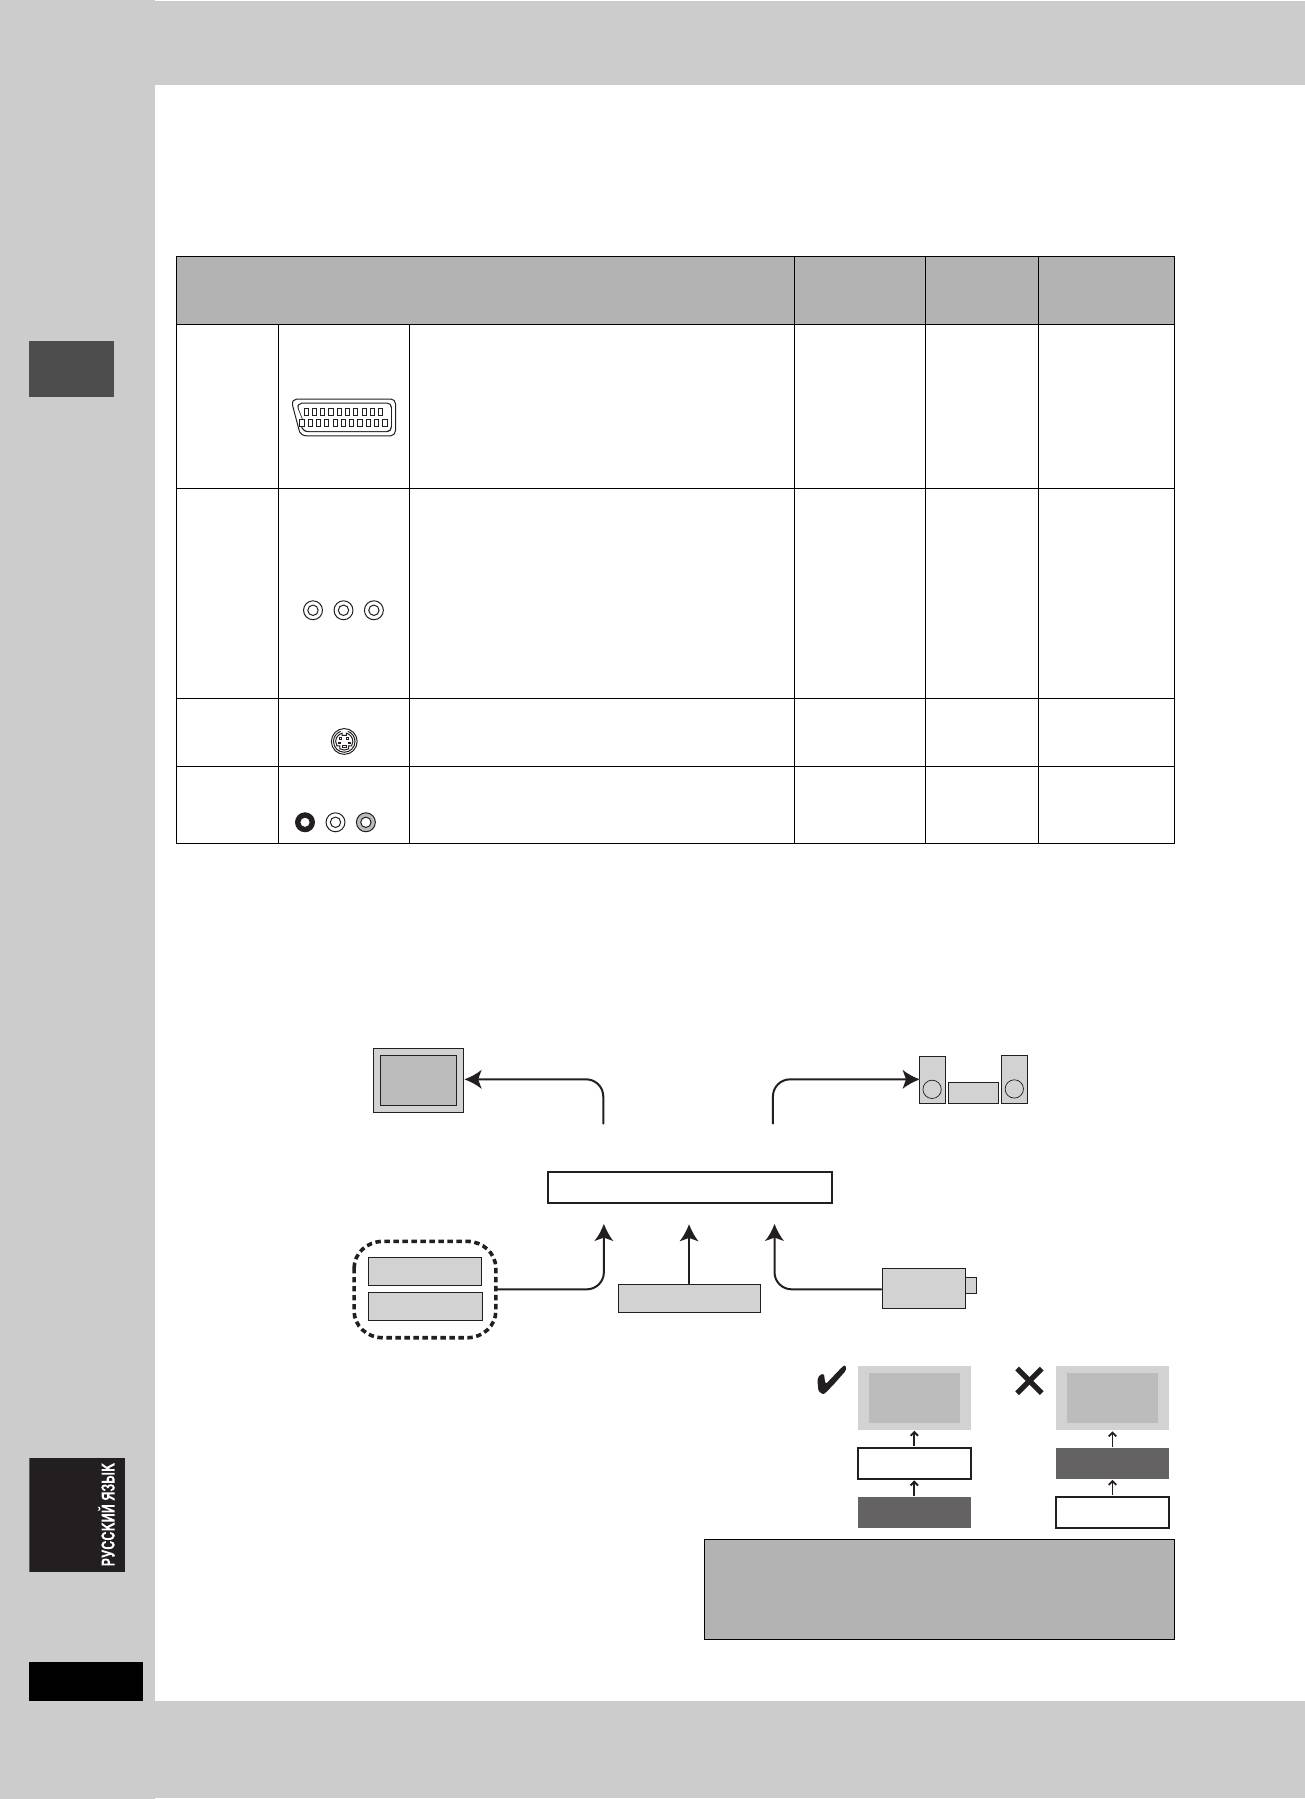
∫ Рекомендуемое подключение для телевизора
Страница №
Страница №
Требуемый(е)
Какими видами входных терминалов оборудован ваш телевизор?
для
для установок
кабель(и)
подключений
телевизора
Скарт Очень рекомендуемое подключение.
≥
Выполнив подключение к цветному телевизору,
➡ 11
поддерживающему формат RGB, вы сможете
21-пиновый
AV IN
просматривать высококачественное цветное
скартовый
≥Если это
видеоизображение формата RGB от данного
кабель
➡ 7
телевизор
аппарата.
полного
формата
≥Если телевизор оборудован функцией Q Link,
соединения
QLink ➡ 10
вы можете воспользоваться разнообразными
полезными функциями.
Компонент
Данные терминалы предоставляют более
ное видео
чистую картинку, чем терминал S-Video.
≥Если ваш телевизор поддерживает
прогрессивную развертку, вы можете
COMPONENT
просматривать высококачественную
VIDEO IN
прогрессивную видеокартинку.
3 видеокабеля ➡ 8 ➡ 11
Если вы имеете обычный телевизор с ЭЛТ,
поддерживающий прогрессивное
подключение, данное подключение не может
рекомендоваться, так как это может привести
к некоторым колебаниям.
Подготовка к эксплуатации
S-Video Данный терминал позволяет получить более
S-VIDEO IN
живую картинку, чем при подключении к
S-Video кабель ➡ 8 ➡ 11
видеотерминалу.
Аудио/
AUDIO IN
VIDEO IN
Самое основное подключение.
Аудио/
Видео
R L
Видеокабель
➡ 8
➡ 11
(поставляется)
Функции Q Link
Q Link обладает разнообразными полезными функциями (Более подробно на ➡ стр. 50). При использовании функции Q Link,
обязательно подключите 21-пиновый скартовый кабель полного соединения к телевизору.
Следующие системы других производителей обладают похожей функцией, как функция Q Link производства Panasonic. Более
подробно, изучите инструкцию по эксплуатации к телевизору
или посоветуйтесь с вашим дилером.
≥Q Link (зарегистрированная торговая марка Panasonic)
≥Megalogic (зарегистрированная торговая марка Grundig)
≥DATA LOGIC (зарегистрированная торговая марка Metz)
≥SMARTLINK (зарегистрированная торговая марка Sony)
≥Easy Link (зарегистрированная торговая марка Philips)
∫ Примерные виды оборудования, которое можно подключить к терминалам данного аппарата
Телевизор
Усилитель
От терминалов AV1, AUDIO/VIDEO OUT
От терминалов AUDIO OUT или
или COMPONENT VIDEO OUT
терминала DIGITAL AUDIO OUT
Данный аппарат
К входным терминалам AV2 или AV4 (задняя панель)
К входным терминалам AV3 или DV (фронтальная панель) (
➡
стр. 35)
Спутниковый/
цифровой ресивер
Видеокамера
или декодер
Видеомагнитофон
∫ Не подключайте аппарат через видеомагнитофон
Видеосигналы, поступающие через видеомагнитофон, подвергнутся влиянию
Телевизор
Телевизор
систем защиты авторских прав и приведут к неправильному отображению
картинки на телевизоре.
≥При подключению к телевизору со встроенным видеомагнитофоном,
Данный аппарат
Видеомагнитофон
подключите к входным терминалам телевизора, а не видеомагнитофона.
Видеомагнитофон
Данный аппарат
∫ Если вы не собираетесь использовать
Перед перемещением аппарата, убедитесь, что
данный аппарат в течение
дисковод пуст.
продолжительного периода времени
В противном случае, это приведет к сильному
Для экономии электроэнергии, отсоедините его от розетки
повреждению диска и аппарата.
электросети. Данный аппарат потребляет малое количество
RQT7448
электроэнергии даже в отключенном состоянии (примерно
3Ватта).
6
64
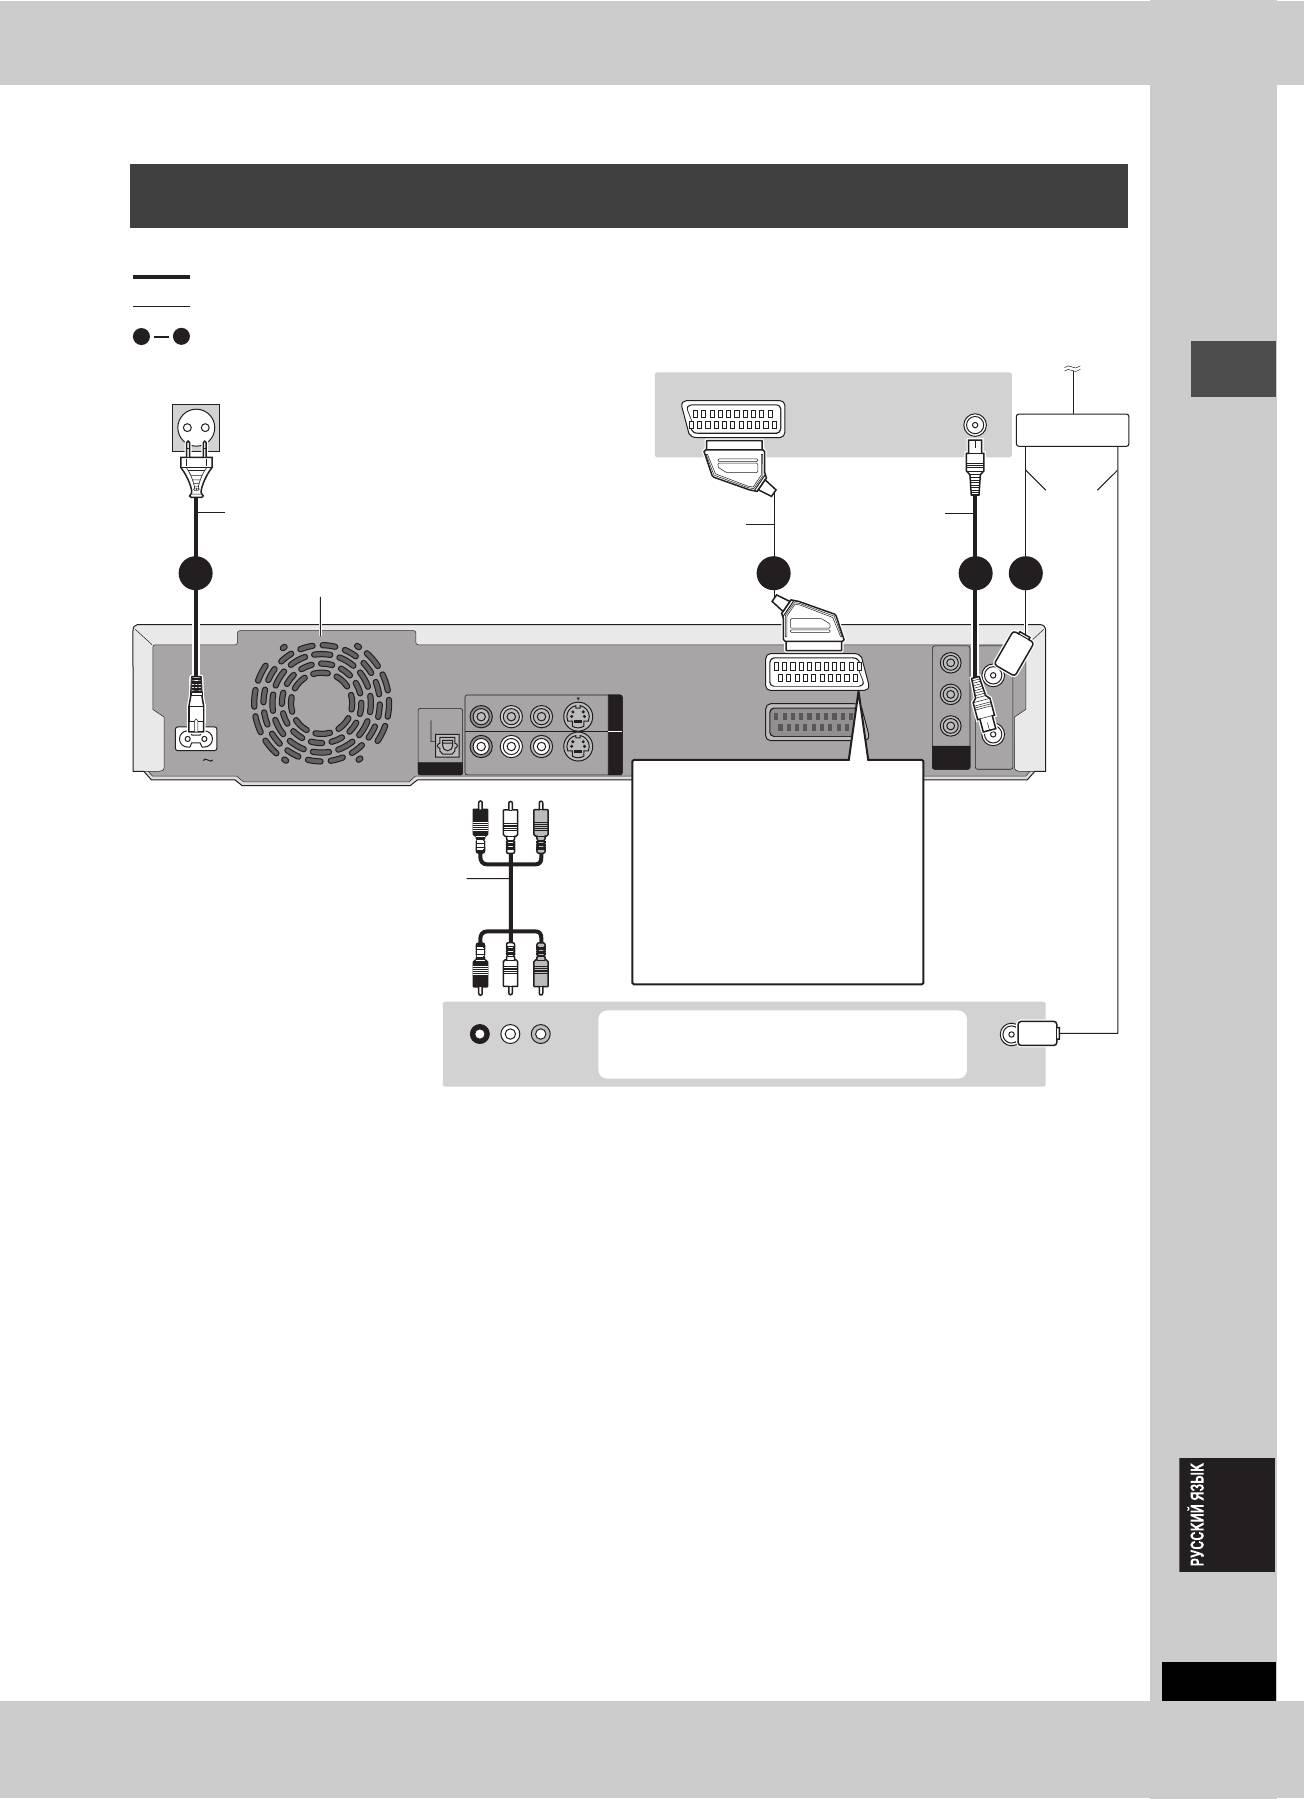
Подключение телевизора с 21-пиновым скартовым терминалом и
видеомагнитофона
При отсутствии 21-пинового скартового терминала на телевизоре (➡ стр. 8)
обозначает поставляемые аксессуары.
обозначает аксессуары, не включаемые в комплект поставки.
1
4
требуемые подключения. Подключите, следуя нумерации.
К антенне
К розетке электропитания
Задняя панель
(220–240 В переменного тока, 50 Гц)
AV IN
VHF/UHF
телевизора
RF IN
Разветвитель
Кабель
Силовой провод
Радиочастотный
антенны
переменного тока
21-пиновый скартовый
коаксиальный
Подключите после завершения
кабель полного соединения
кабель
всех остальных соединений.
2 134
Охлаждающий вентилятор
Y
RF IN
PB
R - AUDIO - L
VIDEO
S-VIDEO
AV1 (TV)
OUT
Подготовка к эксплуатации
OPTICAL
PR
AV4 I N
AV2 (DECODER/EXT)
COMPONENT
VIDEO OUT
RF OUT
AC IN
DIGITAL AUDIO OUT
(PCM/BITSTREAM)
R - AUDIO - L
VIDEO
S-VIDEO
INTERLACE)
(PROGRESSIVE/
Терминал AV1
Красный Белый Желтый
Задняя панель данного
Если телевизор оборудован функцией
цветного ввода формата RGB,
аппарата
подключив его с использованием
21-пинового скартового кабеля полного
соединения, вы можете просматривать
Аудио/видеокабель
видеокартинку, используя функцию
цветного вывода RGB данного аппарата
(
➡
ниже).
Если вы также
Для вывода сигнала RGB, выберите
хотите подключить
“RGB (без компонента)” из “Вывод AV1”
антенну к
в меню Нач. наст. (
➡
стр. 44) после
видеомагнитофону,
завершения настройки (
➡
стр. 10, 11).
используйте
разветвитель.
Красный Белый Желтый
Вы можете также подключиться к
терминалу AV2 данного аппарата, используя
Задняя панель
R L
21-пиновый скартовый кабель.
VHF/UHF
видеомагнитофона
AUDIO OUT VIDEO OUT
RF IN
∫ RGB
Означает три основных световых цвета, красный (R), зеленый (G), и синий (B), а также метод производства видео с их
использованием. Разделение видеосигнала на три цвета для передачи позволяет снизить уровень шума и получить более
высококачественную картинку.
RQT7448
7
65
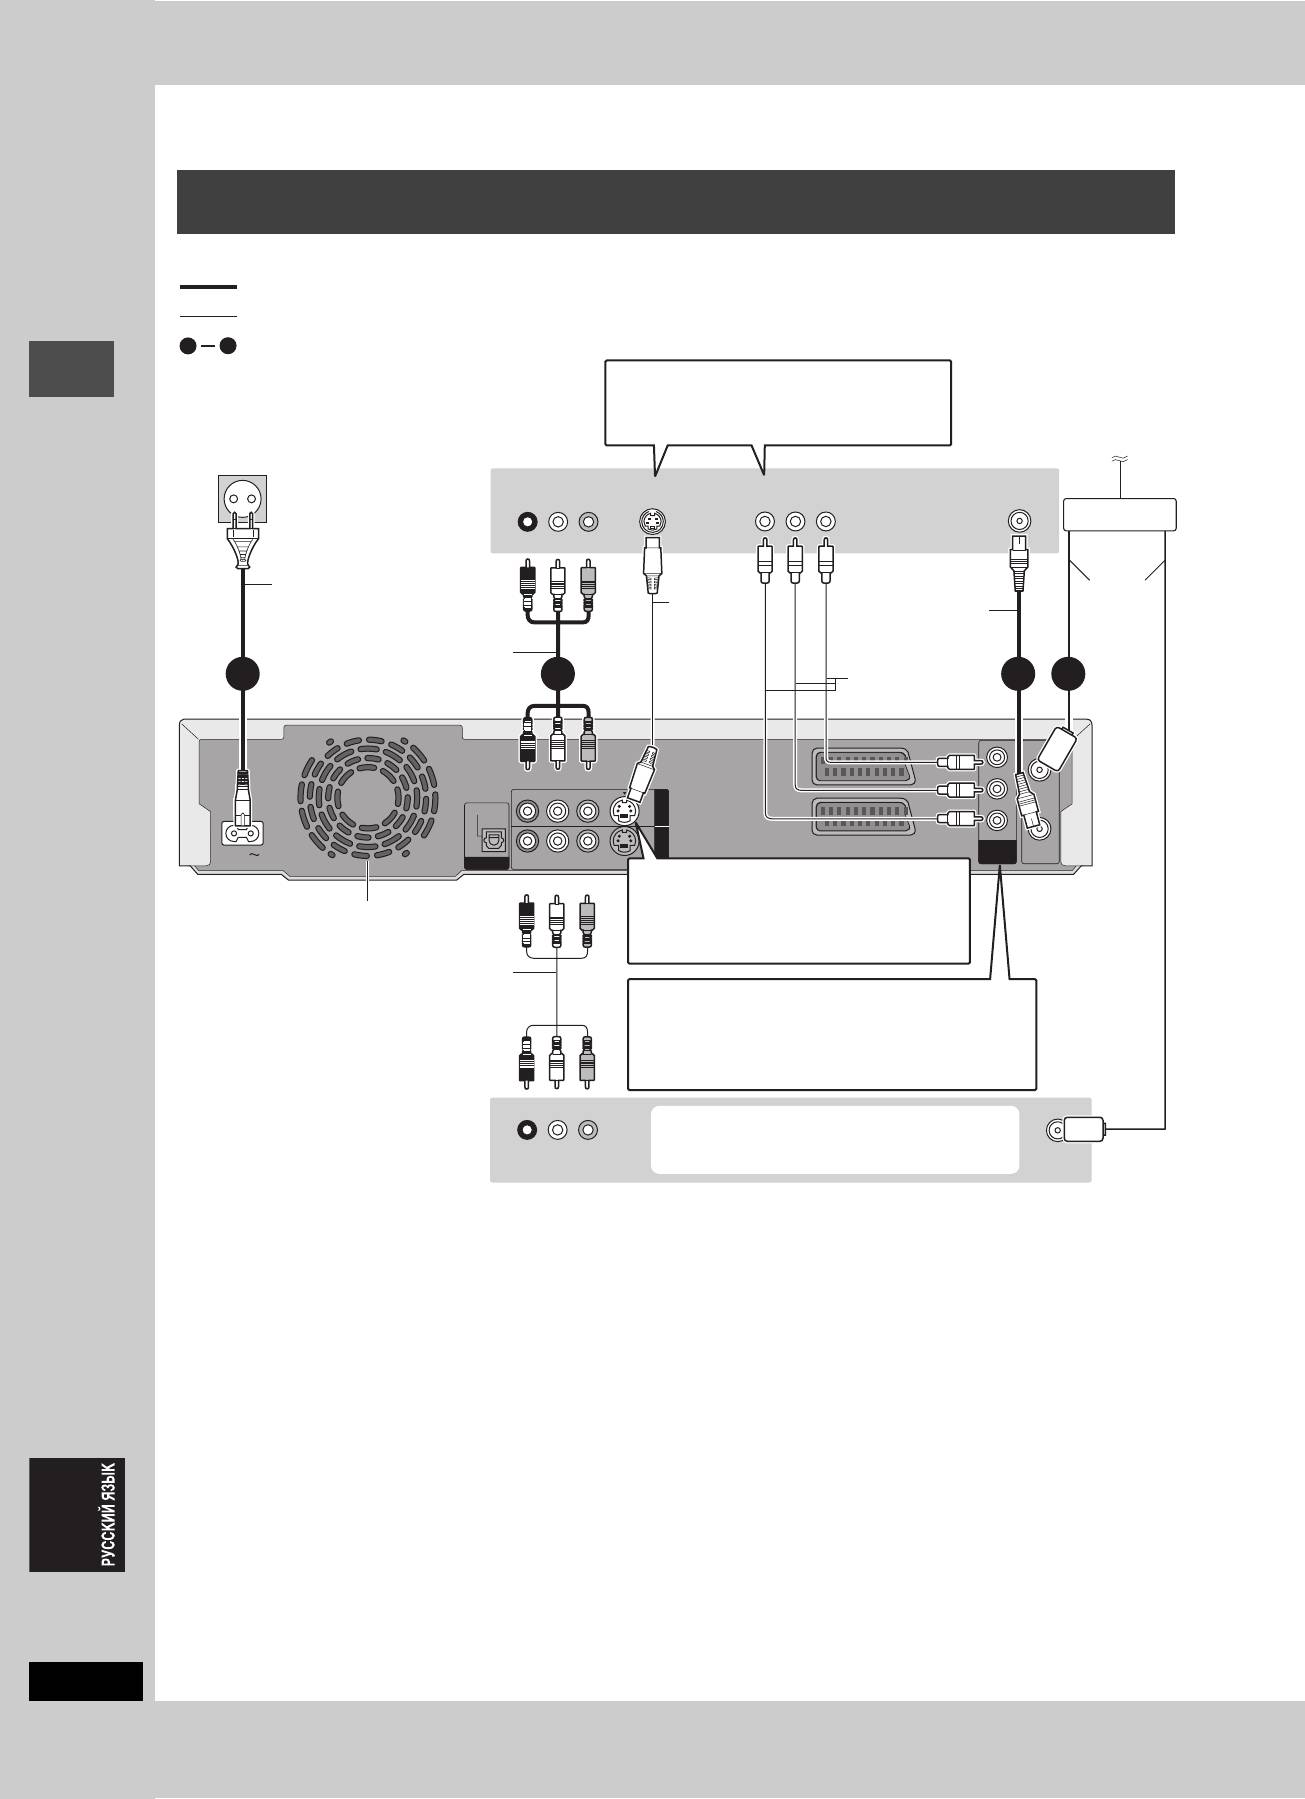
ШАГ 1 Подключение
Подключение телевизора с терминалами AUDIO/VIDEO, S-VIDEO или
COMPONENT VIDEO и видеомагнитофона
Подключение телевизора с использованием 21-пиновых скартовых кабелей (➡ стр. 7)
обозначает поставляемые аксессуары.
обозначает аксессуары, не включаемые в комплект поставки.
1
4
требуемые подключения. Подключите, следуя нумерации.
При выполнении данного подключения,
убедитесь в подключении аудиокабелей к
соответствующим аудиовходным
Задняя
терминалам телевизора.
К розетке электропитания
панель
К антенне
(220–240 В переменного тока, 50 Гц)
телевизора
AUDIO IN
VIDEO IN
S-VIDEO IN
COMPONENT
VHF/UHF
R L
VIDEO IN
RF IN
Разветвитель
Красный Белый Желтый
Силовой провод
Кабель
переменного тока
S-Video
антенны
Подключите после завершения
Радиочастотный
кабель
всех остальных соединений.
коаксиальный
Аудио/видеокабель
кабель
Видеокабель
2 134
Подготовка к эксплуатации
Y
RF IN
Красный Белый Желтый
PB
R - AUDIO - L
VIDEO
S-VIDEO
AV1 (TV)
OUT
OPTICAL
PR
AV4 I N
AV2 (DECODER/EXT)
VIDEO OUT
COMPONENT
RF OUT
AC IN
DIGITAL AUDIO OUT
(PCM/BITSTREAM)
R - AUDIO - L
VIDEO
S-VIDEO
(PROGRESSIVE/
INTERLACE)
Терминал S-VIDEO OUT
Задняя панель
Красный Белый Желтый
Терминал S-VIDEO OUT позволяет
данного аппарата
Охлаждающий
получить более живую картинку, чем
вентилятор
терминал VIDEO OUT. (Конечный
результат зависит от телевизора.)
Если вы также
Аудио/видеокабель
хотите
Терминал COMPONENT VIDEO OUT
подключить
Данные терминалы можно использовать для
антенну к
интерлейсного или прогрессивного вывода, что
видеомагнито
позволяет получить более чистую картинку, чем при
фону,
использовании терминала S-VIDEO OUT (➡ ниже).
используйте
≥Подключите к терминалам одинакового цвета.
разветвитель.
Красный Белый Желтый
Вы можете также подключиться к
терминалу AV2 данного аппарата, используя
Задняя панель
R L
21-пиновый скартовый кабель.
VHF/UHF
видеомагнитофона
AUDIO OUT VIDEO OUT
RF IN
∫ Компонентный видеовыход
Компонентный сигнал раздельно выводит сигналы различия цветов (PB/PR) и сигнал яркости (Y) для достижения высокой точности
воспроизведения цветов. Если телевизор поддерживает прогрессивное соединение, путем вывода прогрессивного сигнала от
терминала компонентного видеовыхода данного аппарата, можно получить более качественную картинку (➡ стр. 49).
Прогрессивный выход (➡ стр. 12)
RQT7448
8
66
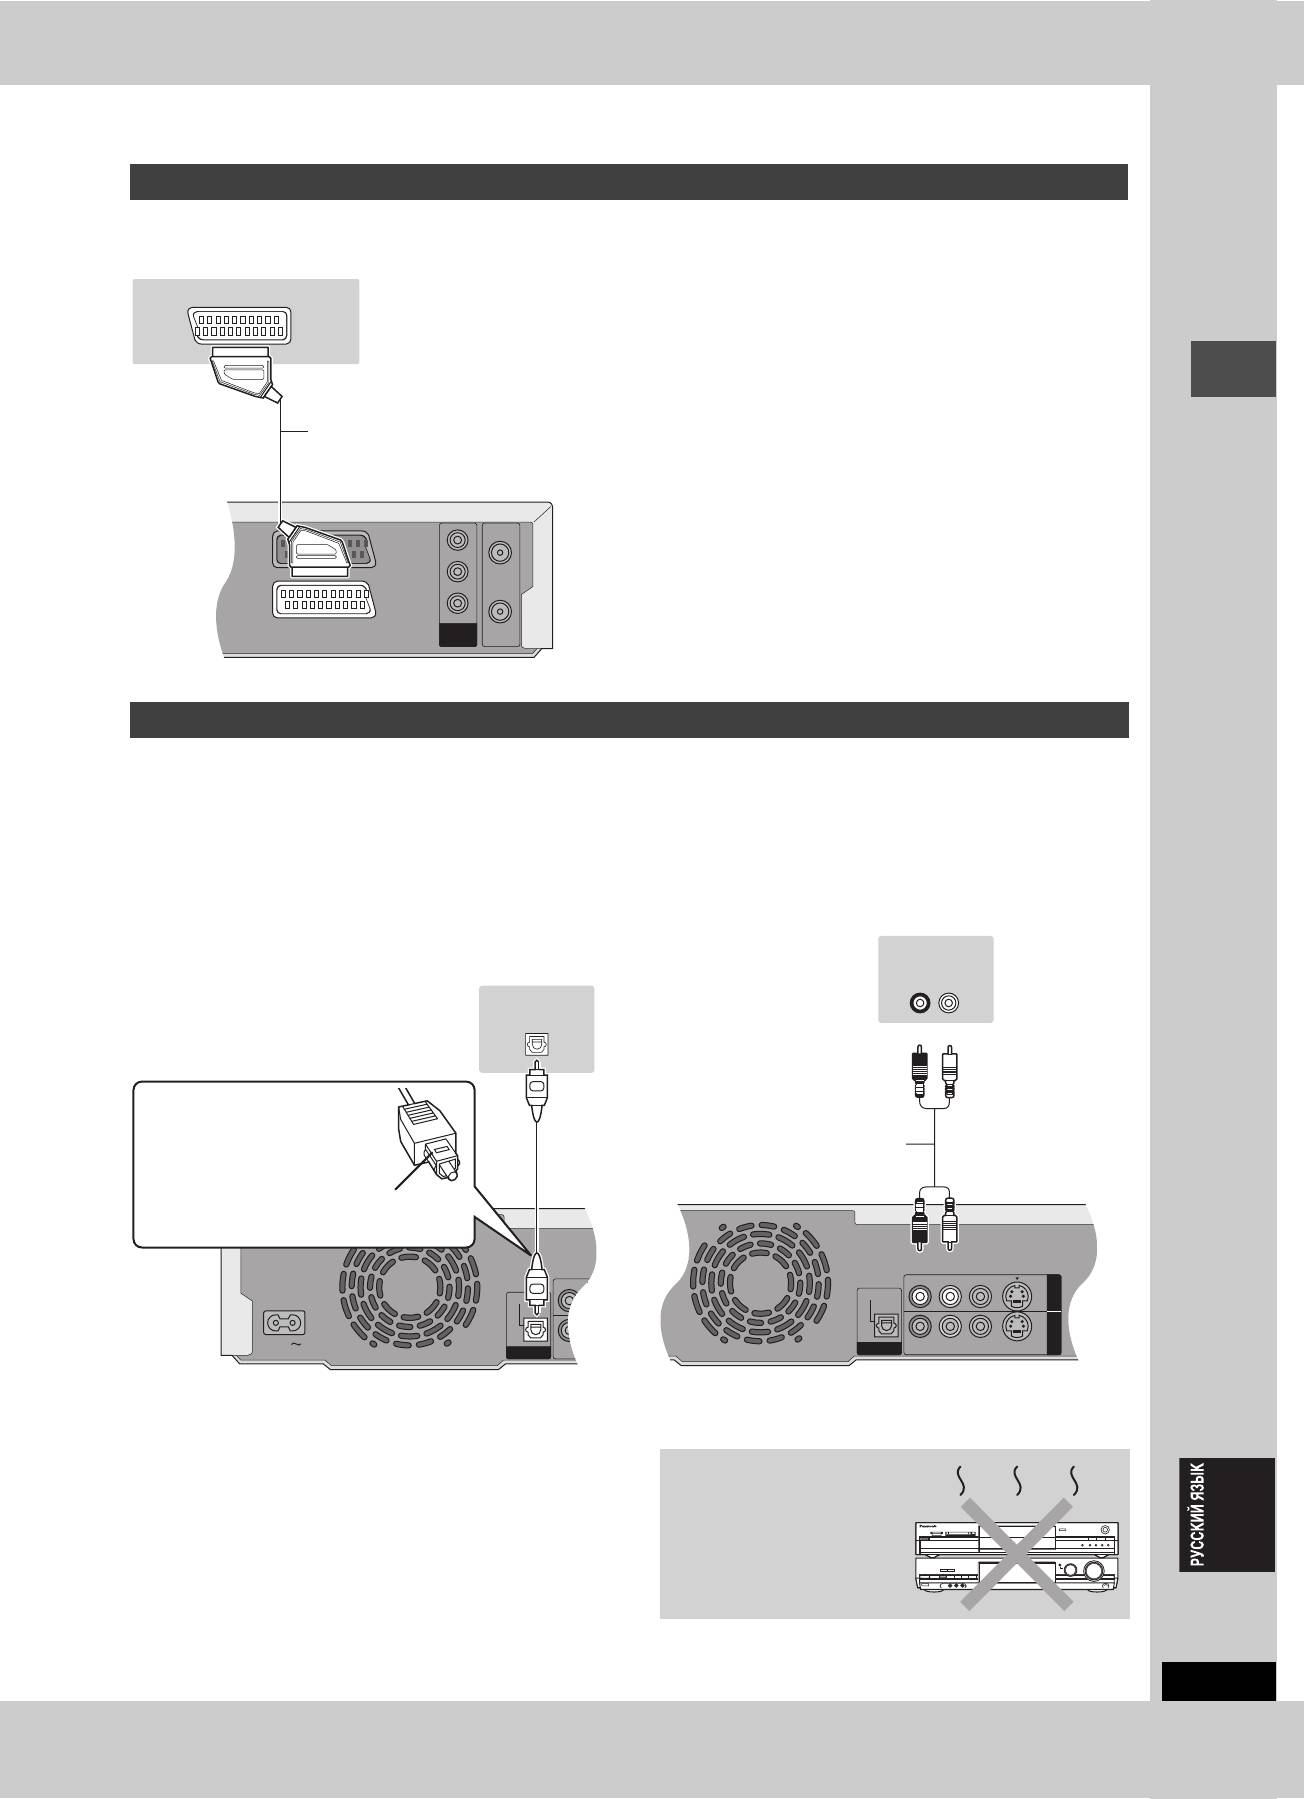
Подключение спутникового ресивера, цифрового ресивера или декодера
≥В данном случае, декодер обозначает устройство для декодирования закодированных трансляций (платное телевидение).
≥После завершения настройки (➡ стр. 10, 11), измените установки “Ввод AV2” и “Соединение AV2” в меню Нач. наст. для
соответствия подключенному оборудованию (➡ стр. 44).
Просмотр видеокартинки от декодера на телевизоре во
время остановки или записи аппарата
При подключении телевизора к терминалу AV1 и декодера к
терминалу AV2 данного аппарата, нажмите кнопки
[0]i[ENTER]. (Индикация “DVD” появится на дисплее
аппарата.)
Для отмены, нажмите еще раз. (Индикация “TV” появится на
дисплее аппарата.)
≥Если телевизор поддерживает цветной ввод формата RGB,
выходной сигнал RGB от декодера может также
выводиться и от основного аппарата.
Подготовка к эксплуатации
∫ Для прослушивания многоканального
∫ Подключение к стереофоническому
окружающего звучания на DVD-Video-диске.
усилителю
После завершения настройки (➡ стр. 10, 11), подключите
усилитель с декодерами Dolby Digital, DTS и MPEG, используя
оптический цифровой аудиокабель, и измените настройки в
“Цифров. вывод звука” (➡ стр. 43).
≥
Вы не можете использовать декодеры DTS Digital Surround,
не подходящие к DVD.
≥Даже при использовании данного соединения, при
воспроизведении DVD-Audio-диска звучание будет
выводиться только на 2 канала.
RQT7448
9
Y
RF IN
PB
AV1 (TV)
PR
AV2 (DECODER/EXT)
COMPONENT
VIDEO OUT
RF OUT
Задняя панель спутникового
AV OUT
ресивера, цифрового
ресивера или декодера.
21-пиновый скартовый
кабель
Задняя
панель
данного
аппарата
(PROGRESSIVE/
INTERLACE)
Подключение усилителя или системного компонента
R - AUDIO -
OPTICAL
AC IN
DIGITAL AUDIO OUT
(PCM/BITSTREAM)
R - AUDIO -
Задняя панель усилителя
OPTICAL IN
Оптический цифровой
аудиокабель
Не сгибайте резко данный
кабель.
Вставляйте полностью, данной
стороной вверх.
Задняя панель данного аппарата
R - AUDIO - L
VIDEO
S-VIDEO
OUT
OPTICAL
AV4 I N
DIGITAL AUDIO OUT
(PCM/BITSTREAM)
R - AUDIO - L
VIDEO
S-VIDEO
Задняя панель усилителя
AUDIO IN
R L
Красный Белый
Аудиокабель
Красный Белый
Задняя панель данного аппарата
Не размещайте аппарат
на усилителях или
оборудовании, которое
может нагреваться.
Нагревание может повредить
аппарат.
67
Оглавление
- 1 Turn on the television and select the
- 1 Turn on the television and select the
- 3 Press [3, 4] to select “Connection”
- 1 While stopped
- 1 Press [DVD] to select the DVD drive.
- 1 Press [DIRECT NAVIGATOR].
- 1 Press [DVD] to select the DVD drive.
- 4 Press [ENTER].
- 1 Press [PROG/CHECK].
- 1∫
- 1 Press [1] while a track is highlighted
- 1 Press [DVD] or [SD/PC] to select the
- 1 Press [DISPLAY].
- 1 Press [DIRECT NAVIGATOR].
- 1 Press [ENTER] at the start point and end
- 2 Press [3, 4, 2, 1] to select “PLAY
- 1 Press [FUNCTIONS].
- 2 [RAM]
- 2 Press [REC MODE] to select the
- 5 Press [3, 4] to select “Set” and
- 1 While stopped
- 4 Press [2, 1] to select “Yes” and
- 1 While stopped 1 While stopped
- 1 Show Enter Name screen.
- 1 While stopped
- 5 Press [3, 4, 2, 1] 1 While stopped
- 1 While stopped
- 1 While stopped
- 1 Включите телевизор и выберите
- 1 Включите телевизор и выберите
- 3 Нажав кнопку [3, 4], выберите
- 1 В режиме остановки
- 1 Нажав кнопку [DVD], выберите
- 1 Нажмите кнопку
- 1 Нажав кнопку [DVD], выберите
- 4 Нажмите кнопку [ENTER].
- 1 Нажмите кнопку [PROG/CHECK].
- 1∫
- 1 Нажмите кнопку [1] при
- 1 Нажав кнопку [DVD] или [SD/PC],
- 1 Нажмите кнопку [DISPLAY].
- 2 Нажав кнопку [3, 4, 2, 1],
- 1 Нажмите кнопку [ENTER] в начальной и
- 2 Нажав кнопку [3, 4, 2, 1],
- 1 Нажмите кнопку [FUNCTIONS].
- 2 [RAM]
- 2 Нажав кнопку [REC MODE],
- 6 Нажав кнопку [3, 4], выберите 1 В режиме остановки
- 1 В режиме остановки
- 1 В режиме остановки
- 1 В режиме остановки 1 В режиме остановки
- 1 Отображение экрана Ввести титр
- 1 В режиме остановки
- 5 Нажав кнопку 1 В режиме остановки
- 1 В режиме остановки
- 1 В режиме остановки

