Panasonic NV-RX1-2-5: 1 2
1 2: Panasonic NV-RX1-2-5

NEDERLANDS
РУССКИМ язык
Stroom voorziening
РП Gebruiken van de
netspanningsadapter als
stroomvoorzieningsbron
1 2
3
4
Opmerking:
Wanneer u de netspanningsadapter gebruikt om de
Movie Camera van stroom te voorzien, bevestigt u de
accu niet aan de netspanningsadapter.
Sluit de gelijkstroom-ingangskabel aan op
de [DC IN] ingang van de Movie Camera.
Sluit het andere uiteinde van de kabel aan
op de geiijkstroom-uitgang van de
netspanningsadapter.
Sluit het netsnoer aan op de
netspanningsadapter.
Sluit het andere uiteinde van het netsnoer
aan op een stopkontakt.
|Y| Gebruiken van de auto-accukabel
(optie)
Opmerkingen:
1. De auto-accukabel kan uitsiuitend gebruikt worden bij
voertuigen met een 12 V geiijkstroom-systeem met
negatieve massa.
2. Terwiji de Movie Camera door de auto-accu van
stroom wordt voorzien, mag de motor van de auto
niet gestart worden.
3. In geval het voltage van de auto-accu plotseling
vermindert, bijvoorbeeld doordat de verwarming van
de auto wordt ingeschakeld, zai de Movie Camera ter
bescherming zichzelf automatisch uitschakelen.
Wacht ongeveer 10 seconden alvorens de Movie
Camera weer in te schakelen.
1
Start de motor en steek vervolgens de
auto-accukabel in de aansluitbus voor de
sigaretteaansteker O-
Sluit het andere uiteinde van de kabel aan
op de [DC IN] ingang van de Movie Camera.
2
3
4
Источники питания
рГ] Использование адаптера
переменного тока в качестве
источника питания
Примечание:
Не подключайте батарейный блок к адаптеру
переменного тока при использовании адаптера
переменного тока в качестве источника питания для
видеокамеры.
1
Подсоедините входной кабель
постоянного тока к гнезду [СС IN]
видеокамеры.
2
Подсоедините другой конец кабеля к
выходному гнезду постоянного тока на
адаптере переменного тока.
Подсоедините сетевой шнур к адаптеру
переменного тока.
Включите другой конец сетевого шнура
в сетевую розетку.
[У| Использование автомобильного
батарейного шнура (не
поставляется)
Примечания:
1. Автомобильный батарейный шнур может
использоваться только в автомобилях с
питанием 12 В постоянного тока с
отрицательным заземлением.
2. Не стартуйте автомобильный двигатель в то
время, когда видеокамера запитывается от
автомобильной батареи.
3. В случае внезапного падения напряжения,
например, при включении нагревателя
автомобиля видеокамера автоматически
выключается с целью самозащиты,
Подождите около 10 сек перед повторным ее
включением.
1
Стартовав двигатель, вставьте
автомобильный батарейный шнур в
гнездо зажигалки сигарет
О-
2
Подсоедините другой конец шнура к
гнезду [ОС IN1 на видеокамере.
51
0
:
00.00
in
©
/
f
------------------------ \
f \
0:00.00
M 0:00.00
FRANÇAIS
Indication du compteur de bande
■ Pour vérifier le temps écoulé
Remarques:
1. L’indication du compteur de bande ne change pas
lors de la lecture de parties non enregistrées.
2. Lorsqu’on retire ia cassette ou lorsqu’on enlève le
bloc-batterie, le compteur de bande revient
automatiquement à “0:00.00”.
3. Lorsque la bande est rebobinée au-delà de la position
“0:00,00” du compteur de bande, le signe moins
apparaît en face de l’indication du compteur de bande.
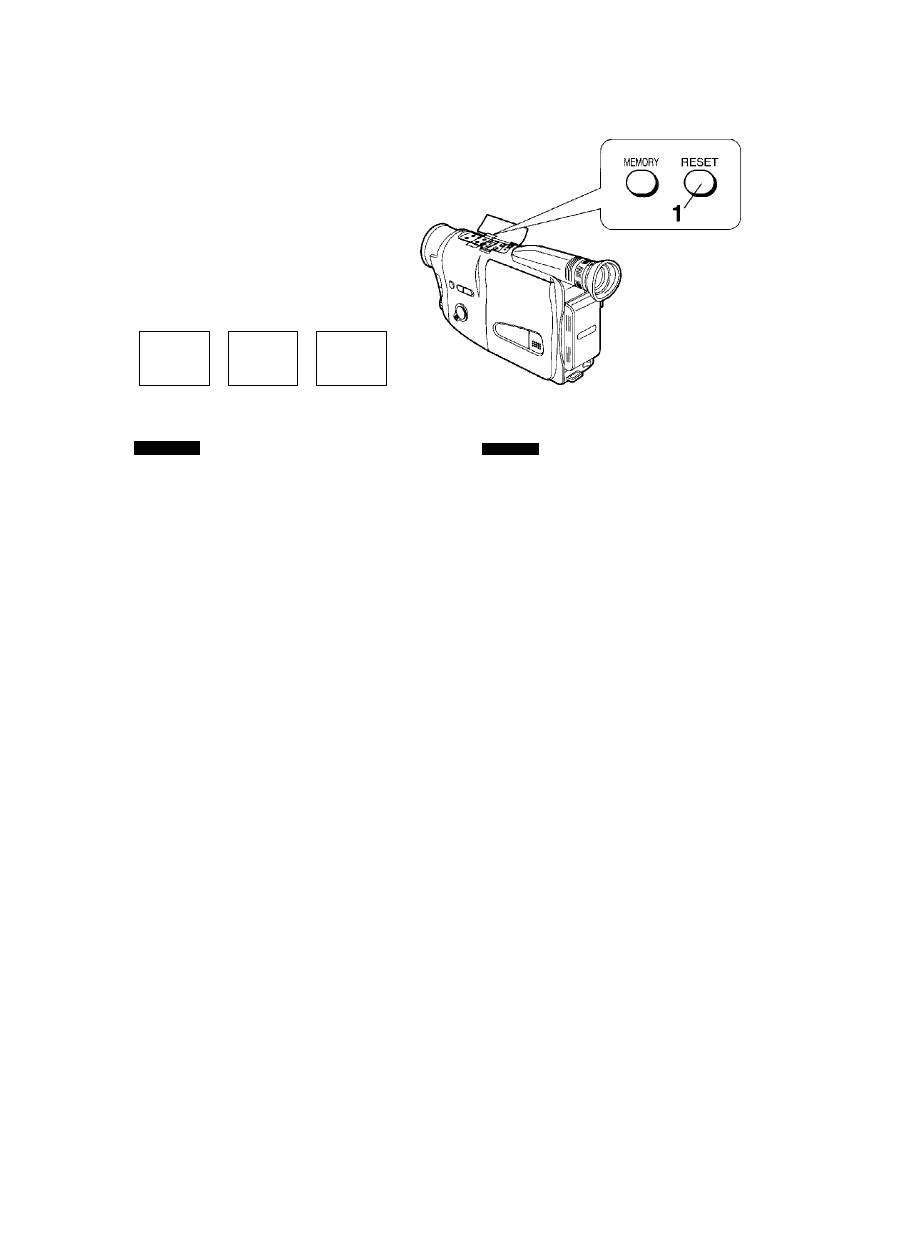
L’indication du compteur de bande dans le viseur indique
le temps en heures minutes @ et secondes
Q
Remettre le compteur de bande à “0,00.00” en appuyant
sur la touche [RESET]: on peut ainsi vérifier le temps
d’enregistrement écoulé sur la cassette.
1
Appuyer sur la touche [RESET].
■ L’indication du compteur de bande peut être
changée de la façon suivante:
A chaque nouvelle pression sur la touche [MEMORY],
l'indication du compteur de bande change dans l’ordre
des figures ©, @,
@
ci-dessus.
■ Fonction arrêt mémoire
Lorsque l’indication de mémoire “M” est affichée, la
bande s’arrête automatiquement sur la position “0:00.00”
pendant le rebobinage et l’avance rapide de la bande,
ENGLISH
How to Use the Tape Counter
Indication
■ For Checking the Elapsed Tape Time
Notes:
1. The Tape Counter Indication does not change during
playback of parts of the tape on which no recording
has been made.
2. Taking out the video cassette or removing the Battery
Pack automatically resets the Tape Counter
Indication to “0:00.00”.
3. When the tape is rewound further than the tape
counter position “0:00.00”, the minus sign
appears in front of the Tape Counter Indication.
The Tape Counter Indication in the Viewfinder shows the
time in hours '©•flutes ^ and seconds e
Resetting the Tape Counter Indication to “0:00.00” by
pressing the [RESET] Button before starting to shoot
makes it easy to keep track of the elapsed recording time.
1
Press the [RESET] Button.
■ The Tape Counter Indication Can Be
Changed as Follows:
When you press the [MEMORY] Button repeatedly, the
Tape Counter Indication changes in the order of the
illustrations ©,
@ above.
■ Memory Stop Function
When the Memory Indication “M” is displayed, the tape
stops automatically at the “0:00.00” position during
rewinding or fast-forwarding of the tape.
52
