Panasonic AW-RC600E: Adjustment
Adjustment: Panasonic AW-RC600E
13 (E)
Cable compensation
1. Turn the cable compensation selector switch to match the length of the cable connecting the camera and the RCU.
Switch position
Cable length
1
Less than 75 m
2
75 to 150 m
3
150 to 230 m
4
230 to 300 m
(The cable lengths above are approximations only.)
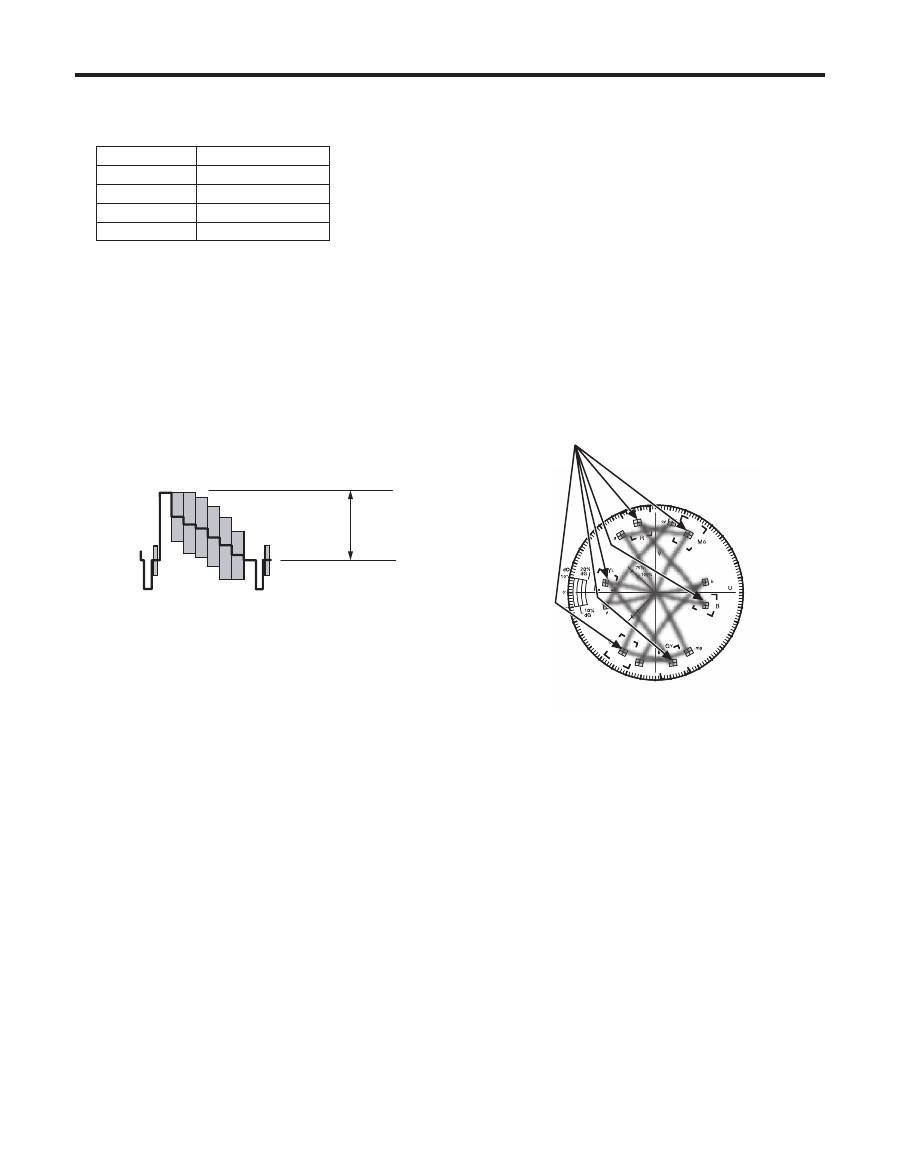
2. Connect the wave form monitor (or oscilloscope) and vectorscope to the video output connectors.
(75 ohms termination)
3. Switch the camera signal to colour bar and adjust the Y (luminance) level and chrominance level with the Y gain
adjustment control and the chroma gain adjustment control, respectively.
If the camera output colour bar is normal, adjust the values as below.
Chrominance level:
Each colour should be in the vectorscope frame.
Y Level:
0.7 Vp-p
0.7 Vp-p
Y
L
G
Y
M
G
cy
b
g
yl
75%
100%
mg
G
R
B
U
V
20%
dG
dO
10%
dG
10°
10°
0°
Adjustment
14 (E)
ENGLISH
Adjustment
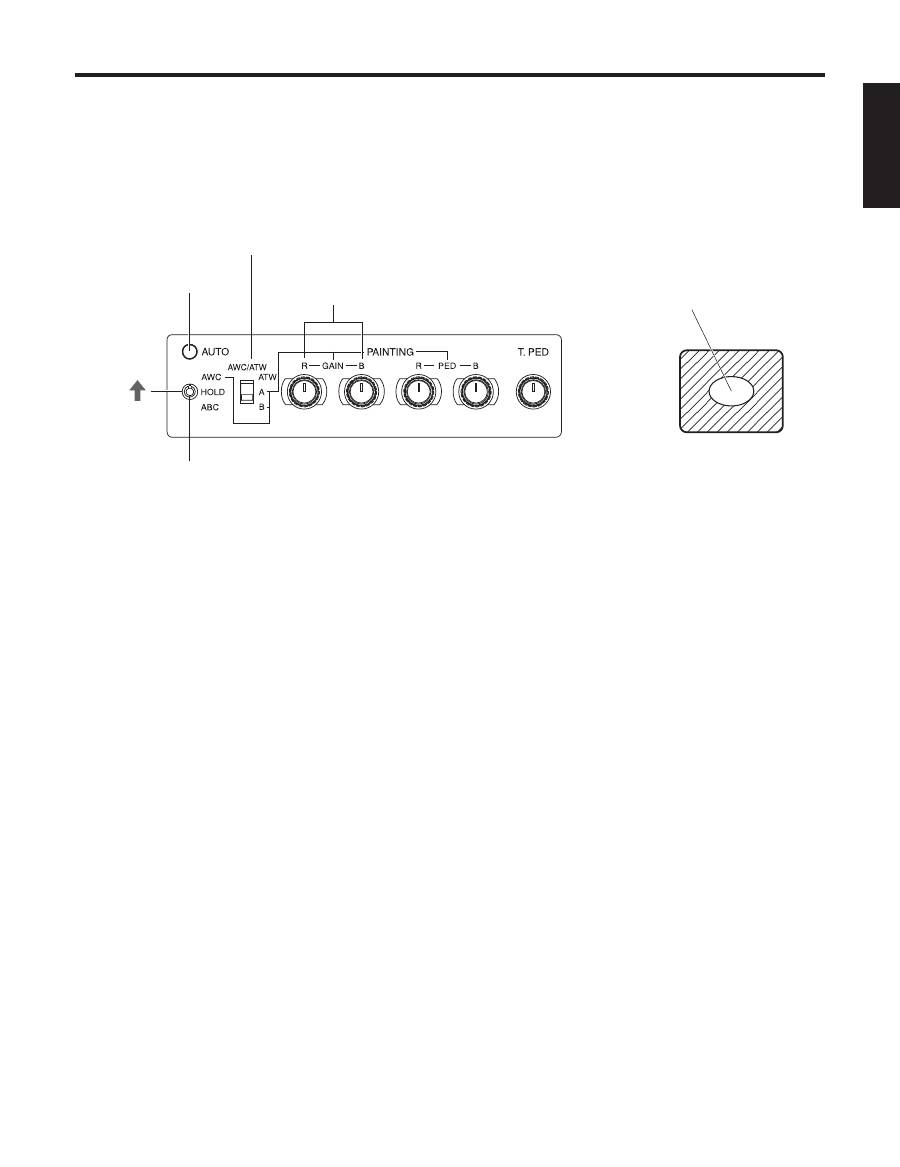
White balance adjustments
Automatic adjustment (AWC)
Two sets of colour temperature conditions can be stored in the memory.
When using the unit under the same conditions as the ones stored in the memory, there is no need to re-adjust the white
balance.
When the white balance is automatically adjusted again, the data in the memory is rewritten.
Auto setting indicator LED
White balance selector switch
Red and blue gain adjustment controls
The white object must occupy over
10 % of the monitor screen area.
Auto white/auto black setting switch
1. Set the white balance selector switch to [A] or [B].
2. Fill the screen with a white object.
The white object must have a size which is at least 10% of the screen size, and it must be displayed in the screen centre.
Do not allow shiny objects and very bright objects to appear on the screen.
3. The white balance can be automatically adjusted by setting the auto white/auto black setting switch to [AWC].
While the white balance is being automatically adjusted, the auto setting indicator LED starts blinking: it goes off if the
adjustment is successful and lights up if it is not successful.
If the adjustment is not successful, change the lens iris setting, lighting, subject and/or other conditions, and try performing
the automatic adjustment again.
4. After automatically adjusting the white balance, use the red and blue gain adjustment controls to finely adjust the
white balance.
Note
:
When the white balance is automatically adjusted again after it has been finely adjusted, it will return to the status prior to the
fine adjustment regardless of the positions of the red and blue gain adjustment controls.
Automatic colour temperature search (ATW)
When the white balance selector switch is set to [ATW], the camera provides compensation automatically in such a way that
the white balance is adjusted automatically even when the light source or colour temperature has changed. The result is
images in which nothing feels odd or out of place.
Notes:
The white balance may shift if there are no white objects on the screen.
With some light sources or at some colour temperatures, it may not be possible to compensate the white balance
completely.
15 (E)
Adjustment
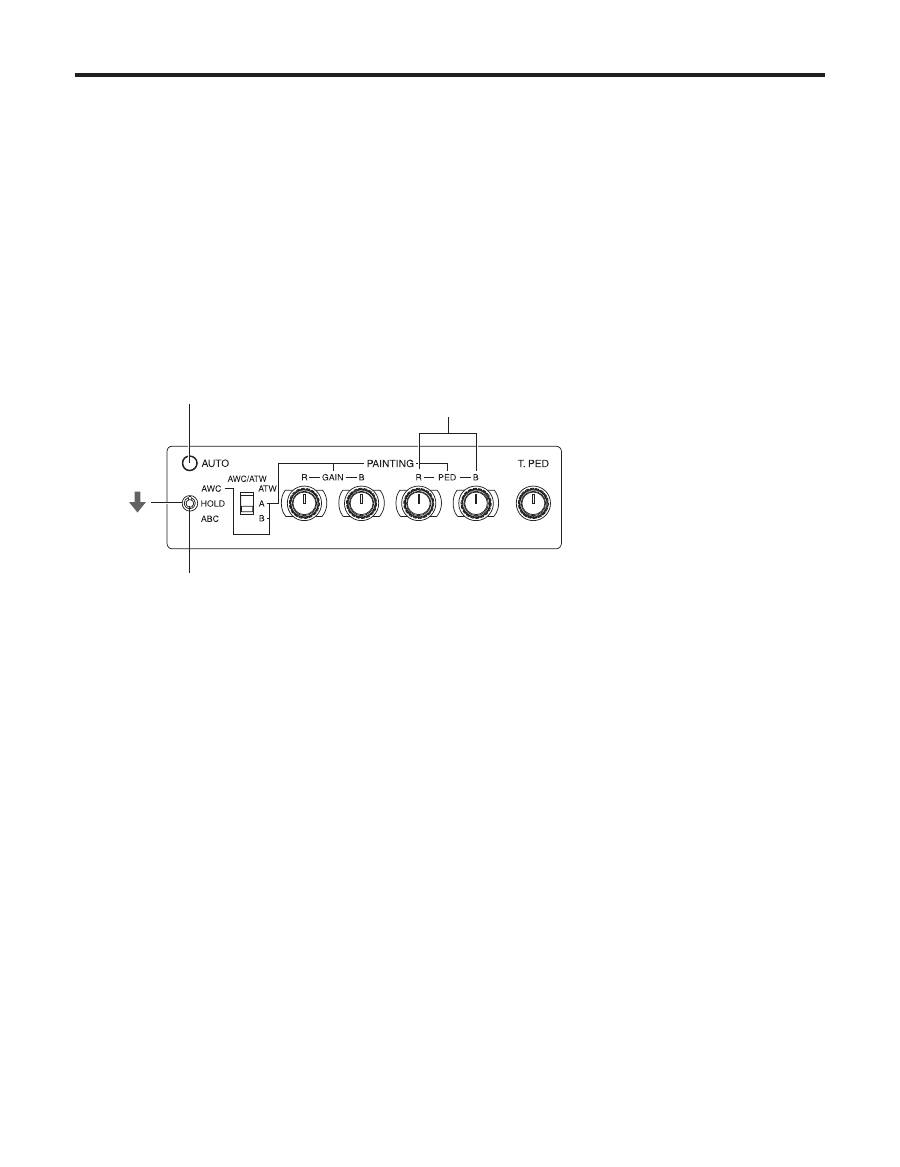
Auto setting indicator LED
Red and blue pedestal adjustment controls
Auto white/auto black setting switch
Black balance adjustments
Automatic adjustment (ABC)
1. The black balance can be automatically adjusted by setting the auto white/auto black setting switch to [ABC].
While the black balance is being automatically adjusted, the auto setting indicator LED starts blinking: it goes off if the
adjustment is successful and lights up if it is not successful. If the adjustment is not successful, try performing the automatic
adjustment again.
(If the black balance is automatically adjusted with the lens iris selector switch at [AUTO], the lens iris will be closed
automatically. Check that the lens iris is completely closed.)
2. After automatically adjusting the black balance, use the red and blue pedestal adjustment controls to finely adjust
the black balance.
Note:
When the black balance is automatically adjusted again after it has been finely adjusted, it will return to the status prior to the
fine adjustment regardless of the positions of the red and blue pedestal adjustment controls.
16 (E)
ENGLISH
Adjustment
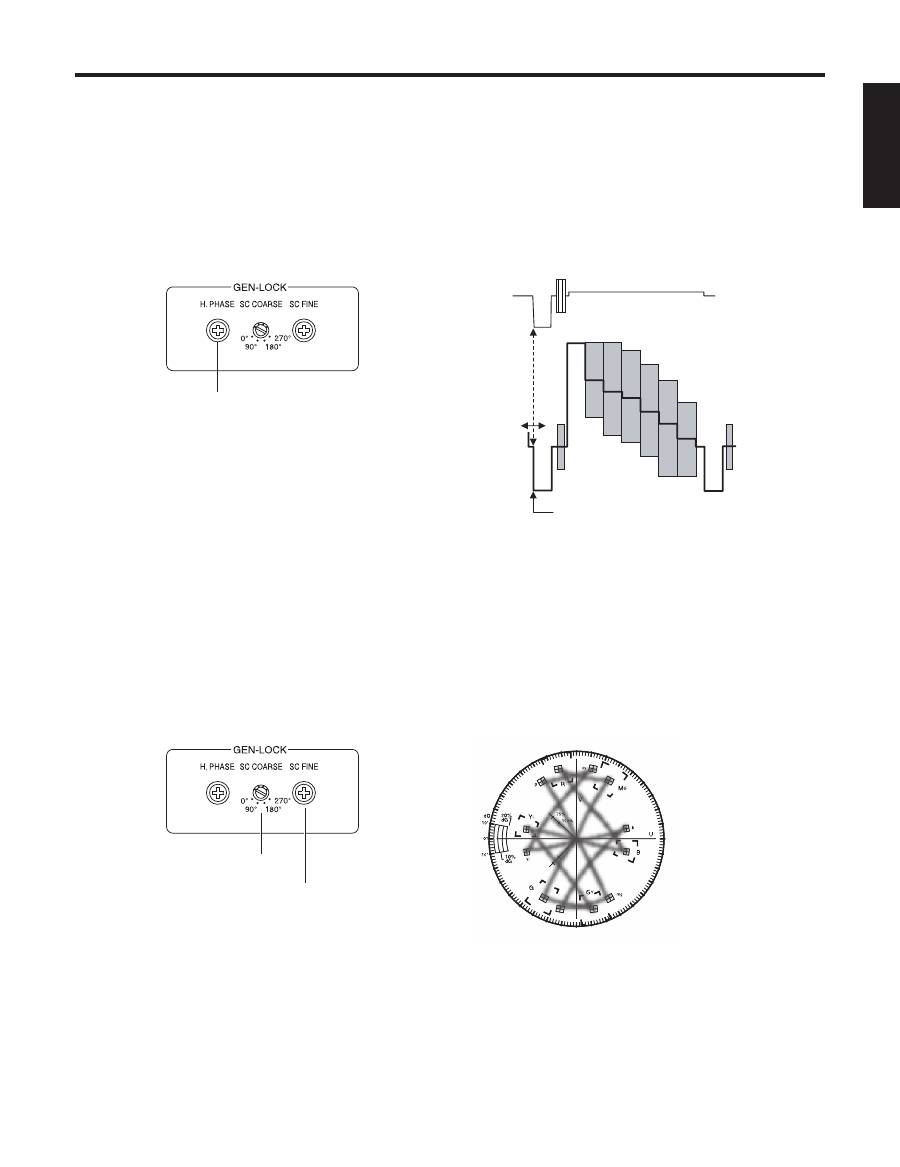
Gen-lock adjustment
When using the gen-lock function, the phases of the signals must be adjusted to bring the phases into alignment with the other
devices and camera.
Before proceeding with the adjustment, switch the camera’s video signals to colour bar signals.
Horizontal phase adjustment
Using a dual-trace oscilloscope, monitor the waveforms of the gen-lock input signals (black burst signals) and video output
signals, and align the horizontal phase using the horizontal phase adjustment control.
Hue adjustment
1. Connect the video output signals to a vectorscope.
2. Set the vectorscope to the gen-lock mode using the same gen-lock signals.
3. Observe the waveforms on the vectorscope, and use the subcarrier phase coarse adjustment switch and the
subcarrier phase fine adjustment control to set the colours of the colour bars to the prescribed phase.
External synchronizing
input signal
(black burst signal)
Video output signal
Adjust the horizontal phase
Horizontal phase adjustment control
Subcarrier phase coarse adjustment
switch
Subcarrier phase fine adjustment
control
Оглавление
- ContentsIntroductionAccessories
- Precautions for use
- Parts and their functions
- Connections
- Operating procedure
- Adjustment
- Menu item setting
- Rack mounting
- Appearance
- Specifications
- Sicherheitshinweise
- InhaltEinleitungZubehör
- Vorsichtsmaßnahmen zum Gebrauch
- Teile und ihre Funktionen
- Anschlüsse
- Bedienungsverfahren
- Einstellung
- Einstellung von Menüposten
- Rack-einbau
- Aussehen
- Technische Daten
- Consignes de sécurité
- Table des matièresIntroductionAccessoires
- Précautions d’utilisation
- Les commandes et leurs fonctions
- Raccordements
- Utilisation
- Réglages
- Réglage des options du menu
- Installation en rack
- Aspect extérieur
- Fiche technique
- Precauzioni per la sicurezza
- SommarioIntroduzioneAccessori
- Precauzioni per l’uso
- Parti e loro funzioni
- Collegamenti
- Funzionamento
- Regolazioni
- Configurazione delle voci di menu
- Montaggio su rack
- Aspetto
- Dati tecnici
- Precauciones de seguridad
- ÍndiceIntroducciónAccesorios
- Precauciones para la utilización
- Partes y sus funciones
- Conexiones
- Procedimiento de operación
- Ajuste
- Ajuste de los elementos del menú
- Montaje en estantería
- Apariencia
- Especificaciones
- Меры предосторожности
- СодержаниеВведениеПринадлежности
- Меры предосторожности во время использования
- Компоненты и их функции
- Соединения
- Рабочая процедура
- Регулировка
- Установка пунктов меню
- Монтаж в стойку
- Внешний вид
- Технические характеристики
