Panasonic HFS45150E: инструкция

Panasonic

Раздел: Аудиотехника и DJ оборудование

Тип:

Инструкция к Panasonic HFS45150E

E

Operating Instructions

INTERCHANGEABLE LENS FOR DIGITAL CAMERA

Model No. H-FS45150

Before use, please read these instructions completely.

VQT4J90

F0812HH0

until

2012/9/10

VQT4J90_E.book 1 ペー 012年8月21日 火曜日 午後5時10分

VQT4J90_E.book 2 ペー 012年8月8日 水曜日 午後4時50分

The lens can be used with a digital camera

Contents

compatible with the lens mount standard for the

Information for Your Safety..................................... 2

TM

“Micro Four Thirds

System”.

Precautions........................................................... 4

TM

It cannot be mounted on the Four Thirds

mount

Supplied Accessories ............................................. 5

specification camera.

Attaching/Detaching the Lens................................. 5

The digital camera illustrations in these operating

Names and Functions of Components ................... 8

instructions show DMC-G5 as an example.

Cautions for Use..................................................... 8

The appearance and specifications of products

Troubleshooting .................................................... 9

described in this manual may differ from the actual

Specifications........................................................ 10

products you have purchased due to later

enhancements.

TM

Micro Four Thirds

and Micro Four Thirds Logo

Information for Your Safety

marks are trademarks or registered trademarks of

Olympus Imaging Corporation, in Japan, the

Keep the unit as far away as possible from

United States, the European Union and other

electromagnetic equipment (such as microwave

countries.

TM

ovens, TVs, video games, radio transmitters,

Four Thirds

and Four Thirds Logo marks are

trademarks or registered trademarks of Olympus

high-voltage lines etc.).

Imaging Corporation, in Japan, the United States,

Do not use the camera near cell phones because

the European Union and other countries.

doing so may result in noise adversely affecting

G MICRO SYSTEM is an interchangeable lens

the pictures and sound.

type digital camera system of LUMIX based on a

If the camera is adversely affected by electromagnetic

Micro Four Thirds System standard.

equipment and stops functioning properly, turn the

Other names of systems and products mentioned

camera off and remove the battery and/or the

in these instructions are usually the registered

connected AC adaptor. Then reinsert the battery and/

trademarks or trademarks of the manufacturers

or reconnect the AC adaptor and turn the camera on.

who developed the system or product concerned.

2

VQT4J90

VQT4J90_E.book 3 ペー 012年8月8日 水曜日 午後4時50分

ENGLISH

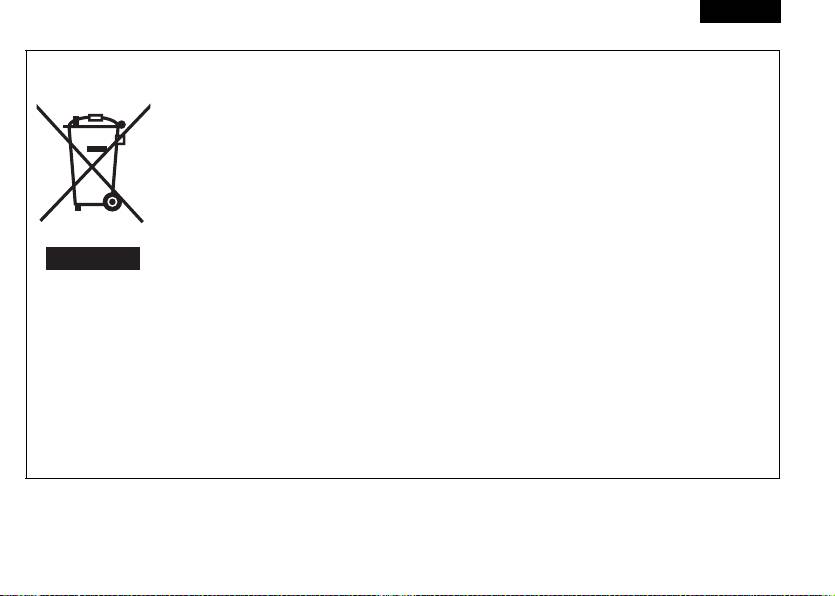
-If you see this symbol-

Information on Disposal for Users of Waste Electrical & Electronic Equipment (private

households)

This symbol on the products and/or accompanying documents means that used

electrical and electronic products should not be mixed with general household waste.

For proper treatment, recovery and recycling, please take these products to

designated collection points, where they will be accepted on a free of charge basis.

Alternatively, in some countries you may be able to return your products to your local

retailer upon the purchase of an equivalent new product.

Disposing of this product correctly will help to save valuable resources and prevent

any potential negative effects on human health and the environment which could

otherwise arise from inappropriate waste handling. Please contact your local authority

for further details of your nearest designated collection point.

Penalties may be applicable for incorrect disposal of this waste, in accordance with national legislation.

For business users in the European Union

If you wish to discard electrical and electronic equipment, please contact your dealer or supplier for

further information.

Information on Disposal in other Countries outside the European Union

This symbol is only valid in the European Union.

If you wish to discard this product, please contact your local authorities or dealer and ask for the correct

method of disposal.

3

VQT4J90

VQT4J90_E.book 4 ペー 012年8月8日 水曜日 午後4時50分

About Condensation (Fogging of the

Precautions

Lens)

Lens Care

Condensation occurs when there are differences

Sand and dust can damage the lens. Make

in temperature and humidity as described below.

sure that no sand or dust gets inside the lens

Condensation can cause the lens to become dirty

or the terminals when using the lens on a

and lead to mold and malfunctioning, so exercise

beach, etc.

caution in the following situations:

This lens is not waterproof. If drops of water

When the camera is brought indoors from outside

get onto the lens, wipe the lens with a dry

during cold weather

cloth.

When the camera is brought into an air-

Do not press the lens with excessive force.

conditioned car

When there is dirt (water, oil, and fingerprints, etc.)

When cold air from an air conditioner is directly

on the surface of the lens, the picture may be

blown onto the lens

affected. Lightly wipe the surface of the lens with a

In humid places

soft, dry cloth before and after taking pictures.

Put the camera into a plastic bag to allow it to
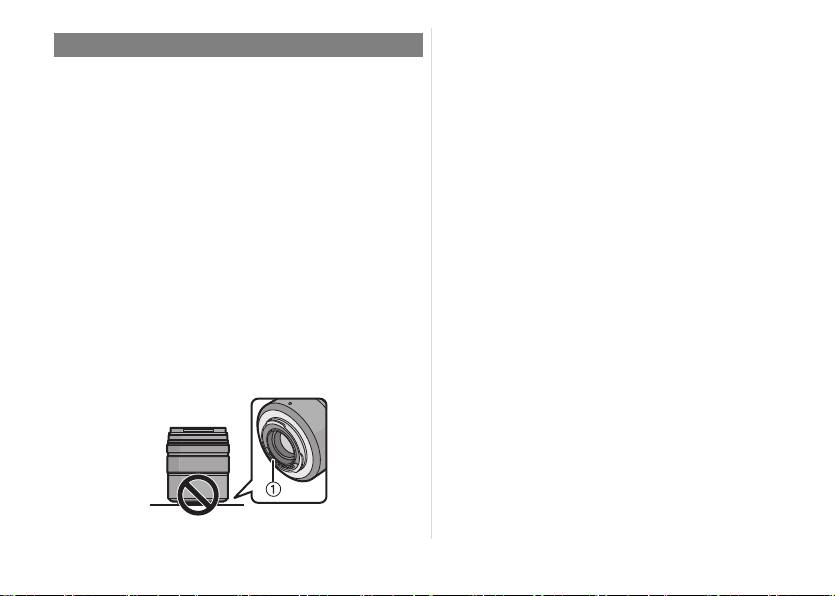
Do not place the lens mount facing downwards.

acclimatize to the surrounding temperature in

Do not allow the lens contact points 1 to become

order to prevent condensation. If condensation

dirty.

occurs, turn the power off and leave it for about

two hours. Once the camera acclimatizes to the

surrounding temperature the condensation will go

away naturally.

4

VQT4J90

Supplied Accessories

Attaching/Detaching the Lens

[Inspection to be performed when you unpack

Refer also to the camera’s operating instructions

the unit]

for attaching and detaching the lens.

When removing the unit from its packing box, check

Attaching the Lens

that the main unit and the supplied accessories are

Check that the camera is turned off.

there and also check their external appearance and

1 Turn the lens rear cap to

functions to verify that they have not sustained any

detach it.

damage during distribution and transportation.

A: Lens Rear Cap

If you discover any trouble, contact your vendor

before using the product.

Product numbers correct as of September 2012.

These may be subject to change.

2 Align the lens fitting

marks B (red marks) on

the camera body and the

lens and then rotate the

lens in the direction of

the arrow until it clicks.

Do not press the lens release

1 Lens Hood

button C when you attach a lens.

2 Lens Cap

Do not try to attach the lens when holding it at an

3 Lens Rear Cap

angle to the camera body as the lens mount may

(The lens rear cap and lens cap are attached to

get scratched.

the interchangeable lens at the time of purchase.)

Check that the lens is attached correctly.

5

VQT4J90

21 3

VYC1090 VYF3201 VFC4605

VQT4J90_E.book 5 ペー 012年8月8日 水曜日 午後4時50分

VQT4J90_E.book 6 ペー 012年8月8日 水曜日 午後4時50分

Detaching the Lens

Attaching the Lens Hood

Check that the camera is turned off.

(Supplied Accessory)

While pressing on the

1 Align the fitting mark E on the lens

lens release button D,

hood with the mark on the tip of the

rotate the lens toward the

lens.

arrow until it stops and

2 Turn the lens hood in the direction of

then remove.

the arrow until it stops, and align the

Attach the lens rear cap so

stop mark F on the lens hood with

that the lens contact point does not get

the mark on the tip of the lens.

scratched.

Attach the body cap to the camera so no dirt or

dust will get inside the main unit.

Attaching and Detaching the Lens Cap

Pinch the lens cap as shown in the figure

to attach or detach.

Be careful not to lose

the lens cap.

6

VQT4J90

VQT4J90_E.book 7 ペー 012年8月8日 水曜日 午後4時50分

Temporarily Storing the Lens Hood

Attaching Filters

Vignetting may occur if using 2 or more

1 Turn the lens hood in the direction of the

MC protectors (optional: DMW-LMC52),

arrow to detach it.

PL filters (optional: DMW-LPL52) or ND filters

(optional: DMW-LND52), or if using thick

protectors and/or filters.

The filter may become impossible to remove if

excessively tightened, so please refrain from

tightening it too strongly.

It is possible to attach the lens cap with the filter

already attached.

2 Reverse the lens hood and then attach it

You cannot attach a conversion lens or adaptor to

in the same way as shown previously.

this lens. A filter may be used, but attaching any

When taking pictures with

other element may cause damage to the lens.

the flash with the lens hood

attached, the lower portion of

the screen may turn dark

(vignetting effect) and the

control of the flash may be

disabled because the photo

flash may be obscured by the lens hood. We

recommend detaching the lens hood.

When using the AF assist lamp in the dark, detach

the lens hood.

7

VQT4J90

Names and Functions of

Note

When flash recording with a close subject, the

Components

light of the flash will be blocked by the lens and

part of the picture may be dark. Check the

distance from the subject when recording.

If you zoom after focusing, focusing errors may occur.

After zooming, please perform the focusing again.

Cautions for Use

Take care not to drop or knock the lens. Also

take care not to put a lot of pressure on the lens.

Take care not to drop the bag that you inserted the

lens in as it may strongly shock the lens. The camera

may stop operating normally and pictures may no

longer be recorded. Also, the lens may be damaged.

1 Lens surface

When using pesticides and other volatile

2 Focus ring

substances around the camera make sure that

Rotate to focus when taking pictures with manual

they do not get onto the lens.

focus.

If such substances get onto the lens they can

3 Zoom ring

damage the exterior case or cause the paint to peel.

Rotate the zoom ring when you wish to take large

Do not carry the unit when it is still attached to

(tele) or wide (wide angle) pictures. (35 mm film

the camera body.

camera equivalent: 90 mm to 300 mm)

Under no circumstances should the unit be stored in

4 Contact points

any of the following locations since doing so may

5 Lens fitting mark

cause problems in operation or malfunctioning.

8

VQT4J90

1 2 3 4 5

VQT4J90_E.book 8 ペー 012年8月8日 水曜日 午後4時50分

VQT4J90_E.book 9 ペー 012年8月20日 月曜日 午後12時8分

In direct sunlight or on a beach in summer

Use a dry, dust cloth to remove dirt and dust on

In locations with high temperatures and humidity

the zoom ring and the focus ring.

levels or where the changes in temperature and

Do not use a household detergent or a chemically

humidity are acute

treated cloth.

In locations with high concentrations of sand,

dust or dirt

Troubleshooting

Where there is fire

Near heaters, air conditioners or humidifiers

A sound is heard when the camera is turned on

Where water may make the unit wet

or off.

Where there is vibration

This is the sound of lens or aperture movement

Inside a vehicle

and is not a malfunction.

Refer also to the operating instructions of the

When this lens is attached to digital camera,

digital camera.

When the unit is not going to be used for a

stabilizer function cannot be turned off or

prolonged period, we recommend storing with a

stabilizer function does not work.

desiccant (silica gel). Failure to do so may result in

The Optical Image Stabilizer function of this lens

performance failure caused by mold, etc. It is

only works correctly with supported cameras.

recommended that you check the unit’s operation

>

When older Panasonic digital cameras (DMC-GF1,

prior to use.

Do not leave the lens in contact with rubber or

DMC-GH1, DMC-G1) are used, [Stabilizer] in the

plastic products for extended periods of time.

[Rec] mode menu cannot be set to [OFF]. It is

Do not touch the lens contact point. Doing so can

recommended to update the firmware of the digital

cause failure of the unit.

camera at the following website.

Do not disassemble or alter the unit.

http://panasonic.jp/support/global/cs/dsc/download/

Do not use benzine, thinner, alcohol or other

> When using this lens with another make of digital

similar cleaning agents to clean the lens glass or

exterior cabinet.

cameras, the Optical Image Stabilizer function will

Using solvents can damage the lens or cause the

not work. (As of September 2012)

paint to peel.

For details, contact the respective company.

Wipe off any dust or fingerprints with a soft, dry cloth.

9

VQT4J90

VQT4J90_E.book 10 ペー 012年8月20日 月曜日 午後12時8分

Specifications

INTERCHANGEABLE LENS FOR DIGITAL CAMERA

“LUMIX G VARIO 45–150 mm/F4.0 5.6 ASPH./MEGA O.I.S.

Focal length f=45 mm to 150 mm

(35 mm film camera equivalent: 90 mm to 300 mm)

Aperture type 7 diaphragm blades/circular aperture diaphragm

Aperture range F4.0 (Wide) to F5.6 (Tele)

Minimum aperture value F22

Lens construction 12 elements in 9 groups (2 aspherical lenses, 1 UHR Lens)

In focus distance 0.9 m

to (from the focus distance reference line)

Maximum image magnification 0.17k (35 mm film camera equivalent: 0.35k)

Optical image stabilizer Available

[O.I.S.] switch None (Setting of the [Stabilizer] is done in [Rec] mode menu by

LUMIX digital cameras.)

Mount “Micro Four Thirds Mount”

Angle of view 27x (Wide) to 8.2x (Tele)

Filter diameter 52 mm

Max. diameter Approx. 62 mm

Overall length Approx. 73 mm

(from the tip of the lens to the base side of the lens mount)

Mass Approx. 200 g

10

VQT4J90

11

VQT4J90

Limited Warranty (ONLY FOR AUSTRALIA)

VQT4J90_E.book 11 ペー 012年8月8日 水曜日 午後4時50分

VQT4J90_E.book 12 ペー 012年8月21日 火曜日 午後4時54分

Wenn die Kamera durch elektromagnetische Felder

Inhalt

anderer Geräte gestört wird und Fehlfunktionen

Informationen für Ihre Sicherheit.................................12

auftreten, schalten Sie die Kamera aus. Nehmen

Vermeidung von Störungen ......................................15

Sie den Akku heraus und/oder trennen Sie das

Beiliegendes Zubehör.................................................16

Netzadapter ab. Setzen Sie den Akku dann wieder

Objektiv ansetzen/abnehmen .....................................16

ein und/oder stecken Sie das Netzadapter wieder

Bezeichnungen und Funktionen der

ein und schalten Sie die Kamera ein.

einzelnen Kamerateile ................................................19

Vorsichtsmaßnahmen.................................................19

Das Objektiv kann mit Digitalkameras verwendet

Fehlerbehebung........................................................20

werden, deren Objektivfassung mit dem “Micro Four

Spezifikationen ...........................................................21

Thirds

System”-Standard kompatibel ist.

Objektive dieser Ausführung lassen sich nicht auf

Kameras mit

Four-Thirds™-Bajonett aufsetzen.

Die Erläuterungen zur Digitalkamera in dieser

Informationen für Ihre

Bedienungsanleitung beziehen sich als ein

Sicherheit

Beispiel auf DMC-G5.

Ausstattung und technische Daten der von Ihnen

Halten Sie das Gerät so weit wie möglich von

erworbenen Produkte können aufgrund technischer

Geräten und Einrichtungen fern, die

Weiterentwicklungen von der Ausstattung und den

elektromagnetische Felder erzeugen (wie

technischen Daten der in diesem Handbuch

Mikrowellengeräte, Fernsehgeräte,

beschriebenen Produkte abweichen.

Videospielgeräte, Funksender,

Micro Four Thirds™ und die für Micro Four Thirds

Hochspannungsleitungen usw.).

verwendeten Logos sind Markenzeichen oder

Verwenden Sie die Kamera nicht in der Nähe von

eingetragene Markenzeichen der Olympus

Mobiltelefonen. Es könnten sonst Bild- und

Imaging Corporation in Japan, den USA, der EU

und anderen Ländern.

Tonstörungen auftreten.

12

VQT4J90

VQT4J90_E.book 13 ペー 012年8月8日 水曜日 午後4時50分

DEUTSCH

Four Thirds™ und die für Four Thirds verwendeten

Logos sind Markenzeichen oder eingetragene

Markenzeichen der Olympus Imaging Corporation in

Japan, den USA, der EU und anderen Ländern.

Das G MICRO SYSTEM ist ein Digitalkamerasystem

aus der LUMIX-Reihe mit Wechselobjektiven auf

Grundlage des Micro-Four-Thirds-Standards.

Andere Namen von Systemen oder Produkten

welche in dieser Bedienungsanleitung genannt

werden, sind normalerweise Warenzeichen oder

eingetragene Warenzeichen der Hersteller dieser

Produkte oder Systeme.

13

VQT4J90

VQT4J90_E.book 14 ペー 012年8月8日 水曜日 午後4時50分

-Bedeutung des nachstehend abgebildeten Symbols-

Benutzerinformationen zur Entsorgung von elektrischen und elektronischen Geräten (private

Haushalte)

Entsprechend der grundlegenden Firmengrundsätzen der Panasonic-Gruppe wurde

ihr Produkt aus hochwertigen Materialien und Komponenten entwickelt und

hergestellt, die recycelbar und wieder verwendbar sind.

Dieses Symbol auf Produkten und/oder begleitenden Dokumenten bedeutet, dass

elektrische und elektronische Produkte am Ende ihrer Lebensdauer vom Hausmüll

getrennt entsorgt werden müssen.

Bringen Sie bitte diese Produkte für die Behandlung, Rohstoffrückgewinnung und

Recycling zu den eingerichteten kommunalen Sammelstellen bzw.

Wertstoffsammelhöfen, die diese Geräte kostenlos entgegennehmen.

Die ordnungsgemäße Entsorgung dieses Produkts dient dem Umweltschutz und

verhindert mögliche schädliche Auswirkungen auf Mensch und Umwelt, die sich aus

einer unsachgemäßen Handhabung der Geräte am Ende Ihrer Lebensdauer ergeben

könnten.

Genauere Informationen zur nächstgelegenen Sammelstelle bzw. Recyclinghof

erhalten Sie bei Ihrer Gemeindeverwaltung.

Für Geschäftskunden in der Europäischen Union

Bitte treten Sie mit Ihrem Händler oder Lieferanten in Kontakt, wenn Sie elektrische und elektronische

Geräte entsorgen möchten. Er hält weitere Informationen für sie bereit.

Informationen zur Entsorgung in Ländern außerhalb der Europäischen Union

Dieses Symbol ist nur in der Europäischen Union gültig.

14

VQT4J90

VQT4J90_E.book 15 ペー 012年8月8日 水曜日 午後4時50分

Hinweise zu Kondensation (Beschlagen

Vermeidung von Störungen

des Objektivs)

Objektivpflege

Kondensation entsteht, wenn sich

Sand und Staub können das Objektiv

Umgebungstemperatur oder Luftfeuchte wie unten

beschädigen. Achten Sie darauf, dass kein

beschrieben ändern. Da Kondensation zu Flecken

Sand oder Staub auf Objektiv oder Anschlüsse

auf dem Objektiv, Pilzbefall und Fehlfunktionen

gelangt, wenn Sie die Kamera im Freien, z.B.

führen kann, müssen Sie in folgenden Fällen auf

am Strand, verwenden.

Anzeichen von Kondensation achten:

Dieses Objektiv ist nicht wasserdicht. Wenn

Die Kamera wird bei kaltem Wetter von draußen

Regenwasser oder anderes Wasser auf das

nach drinnen gebracht

Objektiv spritzt, wischen Sie es mit einem

Die Kamera wird in ein klimatisiertes Auto

trockenen Tuch ab.

gebracht

Üben Sie keinen zu starken Druck auf das Objektiv aus.

Eine Klimaanlage bläst kalte Luft direkt auf das

Schmutz auf dem Objektiv (Wasser, Öl,

Fingerabdrücke usw.) kann zu schlechteren Bildern

Objektiv

führen. Wischen Sie die Objektivoberfläche vor und

Die Kamera wird bei hoher Luftfeuchte verwendet

nach dem Fotografieren vorsichtig mit einem

Sie vermeiden Kondensation, wenn Sie die

weichen, trockenen Tuch ab.

Kamera in einer geschlossenen Plastiktüte

Richten Sie die Objektivfassung nicht nach unten.

transportieren und diese erst dann öffnen, wenn

Achten Sie darauf, dass der Kontaktpunkt der

sich die Kamera an die Umgebungstemperatur

Objektivfassung 1 nicht verschmutzen.

angepasst hat. Wenn sich Kondensation bildet,

schalten Sie die Kamera aus und lassen Sie sie

für etwa zwei Stunden ausgeschaltet. Die

Kondensation baut sich während der Anpassung

der Kamera an die Umgebung auf natürlichem

Wege ab.

15

VQT4J90

Beiliegendes Zubehör

Objektiv ansetzen/abnehmen

[Kontrollen, die beim Entfernen der Verpackung

Informationen zum Aufsetzen und Abnehmen des

des Geräts vorzunehmen sind]

Objektivs finden Sie auch in der

Prüfen Sie beim Entnehmen des Gerätes aus seinem

Bedienungsanleitung der Kamera.

Karton, ob das Hauptgerät und sein beiliegendes Zubehör

Das Objektiv aufsetzen

vorhanden sind. Kontrollieren Sie deren äußeres

Stellen Sie sicher, dass die Kamera ausgeschaltet ist.

Aussehen und ihre Funktionsweise, um zu prüfen, dass

1

Drehen Sie den hinteren

es während des Vertriebs und Transports nicht zu

Objektivdeckel, um ihn

Beschädigungen gekommen ist.

abzunehmen

.

Setzen Sie sich, sollten Sie Störungen feststellen, vor dem

A: Hinterer Objektivdeckel

Gebrauch des Gerätes mit Ihrem Händler in Verbindung.

Der Stand der Produktnummern ist September

2012. Änderungen sind vorbehalten.

2 Richten Sie die roten

Markierungen B zum

Ansetzen des Objektivs

auf Kameragehäuse und

Objektiv aneinander aus

und drehen Sie das

Objektiv in Pfeilrichtung,

1 Gegenlichtblende

bis es hörbar einrastet.

2 Objektivdeckel

Drücken Sie nicht die Objektivfreigabetaste C

wenn Sie ein Objektiv anschließen.

3 Hinterer Objektivdeckel

Versuchen Sie niemals, das Objektiv schräg

(Beim Kauf sind der hintere Objektivdeckel und der

zum Gehäuse anzusetzen, da die

Objektivdeckel auf das Wechselobjektiv aufgesetzt.)

Objektivfassung beschädigt werden könnte.

16

VQT4J90

21 3

VYC1090 VYF3201 VFC4605

VQT4J90_E.book 16 ペー 012年8月8日 水曜日 午後4時50分

VQT4J90_E.book 17 ペー 012年8月8日 水曜日 午後4時50分

Überprüfen Sie, ob das Objektiv richtig

Gegenlichtblende aufsetzen

aufgesetzt ist.

(Mitgeliefertes Zubehör)

Das Objektiv abnehmen

1 Richten Sie die Markierung E an der

Stellen Sie sicher, dass die Kamera ausgeschaltet ist.

Gegenlichtblende mit der Markierung

am Rand des Objektivs aus.

Drehen Sie beim Betätigen der

Objektivfreigabetaste

D das Objektiv in

2 Drehen Sie die Gegenlichtblende in

Pfeilrichtung bis zum Anschlag und entfernen

Pfeilrichtung, bis sie stoppt, und

Sie es.

richten Sie die Stop-Markierung F an

Setzen Sie den hinteren

der Gegenlichtblende mit der

Objektivdeckel auf, um die

Kontakte der Objektivfassung

Markierung am Rand des Objektivs

nicht zu beschädigen.

aus.

Setzen Sie den Gehäusedeckel

der Kamera auf, damit kein

Schmutz oder Staub ins

Kamerainnere gelangen kann.

Objektivdeckel aufsetzen und abnehmen

Drücken Sie zum Anbringen oder Abnehmen

des Objektivdeckels wie in der Abbildung

gezeigt darauf.

Verlieren Sie den

Objektivdeckel nicht.

17

VQT4J90

VQT4J90_E.book 18 ペー 012年8月8日 水曜日 午後4時50分

Gegenlichtblende auf dem Objektiv

Filter aufsetzen

aufbewahren

Ein Vignettierungseffekt kann auftreten, wenn 2

oder mehr MC-Schutzfilter (Sonderzubehör:

1 Drehen Sie die Gegenlichtblende in

DMW-LMC52),

Pfeilrichtung, um sie abzunehmen.

PL-Filter (Sonderzubehör: DMW-LPL52) oder ND-

Filter (Sonderzubehör: DMW-LND52) verwendet

werden, oder wenn dicke Schutzfilter und/oder

Filter verwendet werden.

Der Filter lässt sich eventuell nicht mehr

abnehmen, wenn er zu fest angezogen wird.

Gehen Sie daher vorsichtig vor.

2 Drehen Sie die Gegenlichtblende um und

Der Objektivdeckel kann auch aufgesetzt werden,

setzen Sie sie wie oben beschrieben

wenn der Filter bereits angebracht ist.

wieder auf.

Auf dieses Objektiv lassen sich weder

Wenn Sie bei aufgesetzter

Vorsatzlinsen noch Adapter aufsetzen. Die

Gegenlichtblende Aufnahmen

Verwendung von Filtern ist möglich, das

mit Blitz machen, kann der

Aufsetzen anderer Komponenten dagegen kann

untere Teil des Bildes dunkel

zu einer Beschädigung des Objektivs führen.

erscheinen (Vignettierungseffekt/

Randabschattung). Außerdem

funktioniert unter Umständen die

Blitzsteuerung nicht, weil das Blitzlicht durch die

Gegenlichtblende verdeckt wird. Wir empfehlen, bei

Blitzaufnahmen die Gegenlichtblende abzunehmen.

Nehmen Sie die Gegenlichtblende ab, wenn Sie

bei wenig Licht mit der AF-Hilfslampe arbeiten.

18

VQT4J90

VQT4J90_E.book 19 ペー 012年8月8日 水曜日 午後4時50分

5 Markierung zum Ansetzen des Objektivs

Bezeichnungen und

Funktionen der einzelnen

Hinweis

Wenn Sie ein Motiv nah an der Kamera mit Blitz

Kamerateile

aufnehmen, blockiert das Objektiv das Licht vom

Blitz, so dass Teile des Bildes dunkel werden

können. Achten Sie bei diesen Aufnahmen daher

auf ausreichenden Abstand zum Motiv.

Wenn Sie nach dem Fokussieren den Zoom

verwenden, kann es zu Fokussierungsproblemen

kommen. Bitte stellen Sie nach dem

Zoomvorgang erneut scharf.

Vorsichtsmaßnahmen

Achten Sie darauf, das Objektiv nicht fallen zu lassen

und keinen starken Sßen auszusetzen. Üben Sie

keinesfalls zu starken Druck auf das Objektiv aus.

1 2 3 4 5

Achten Sie auch darauf, dass die Tasche, in der Sie

das Objektiv aufbewahren, nicht herunterfällt, denn

1 Linsenfläche

das Objektiv könnte sonst schwer beschädigt werden.

2 Schärfenring

Unter Umständen funktioniert dann auch die Kamera

Drehen Sie zum Scharfstellen am Schärfenring, wenn Sie

nicht mehr und kann keine Bilder mehr aufzeichnen.

Aufnahmen mit der manuellen Scharfeinstellung machen.

Wenn in der Umgebung der Kamera Pestizide oder

andere flüchtige Substanzen verwendet werden,

3 Zoomring

müssen Sie dafür sorgen, dass diese Stoffe nicht

Drehen Sie am Zoomring, wenn Sie Aufnahmen mit

in Kontakt mit der Obektivoberfläche kommen.

Tele oder Aufnahmen mit Weitwinkel machen

Falls solche Substanzen auf das Objektiv gelangen,

möchten. (Kleinbild-Äquivalent: 90 mm bis 300 mm)

könnten sie zur Beschädigung des Objektivs oder

4 Kontaktpunkt

zum Abblättern der Farbe führen.

19

VQT4J90

VQT4J90_E.book 20 ペー 012年8月20日 月曜日 午後12時8分

Tragen Sie das Gerät nicht, während es noch an

Verwenden Sie zur Reinigung der Geräte kein

der Kamera angebracht ist.

Waschbenzin, Alkohol oder ähnliche Reinigungsmittel.

Keinesfalls darf das Gerät unter den folgenden

Lösungsmittel können zur Beschädigung des

Bedingungen benutzt oder aufbewahrt werden, da dies

Objektivs oder zum Abblättern der Farbe führen.

zu Defekten oder Funktionsstörungen führen kann.

Staub und Fingerabdrücke lassen sich mit einem

Bei direktem Sonnenlicht oder im Sommer an der Küste

weichen, trockenen Tuch entfernen.

An Orten mit hohen Temperaturen und hoher

Verwenden Sie ein trockenes Staubtuch, um Schmutz und

Feuchtigkeit, bzw. wo starke Änderungen bei

Staub auf dem Zoomring und dem Schärfering zu entfernen.

Temperatur und Feuchtigkeit erfolgen

Verwenden Sie keine Küchenspülmittel oder mit

An Orten mit hoher Konzentration von Sand,

Chemikalien getränkte Tücher.

Staub oder Schmutz

Fehlerbehebung

Bei einem Brand

In der Nähe von Heizkörpern, Klimaanlagen oder

Beim Ein- und Ausschalten ist ein Geräusch zu hören.

Dieses Geräusch wird durch die Blenden- oder

Luftbefeuchtern

Objektivbewegung verursacht; es ist keine Fehlfunktion.

Wo Wasser das Gerät benässen kann

Bei Anschluss dieses Objektivs an eine Digital-Kamera

Wo Erschütterungen vorhanden sind

kann die Stabilisierfunktion nicht ausgeschaltet werden

In einem Fahrzeug

oder die Stabilisierfunktion funktioniert nicht.

Weiter Informationen finden Sie auch in der

Die optische Bildstabilisierfunktion dieses Objektivs

Bedienungsanleitung der Kamera.

funktioniert nur korrekt mit gestützten Kameras.

Wenn für längere Zeit kein Einsatz erfolgt, lagern Sie das

> Bei Verwendung älterer Digital-Kameras von

Objektiv gemeinsam mit einem Trocknungsmittel (Silica-Gel).

Panasonic (DMC-GF1, DMC-GH1, DMC-G1) kann

Ohne ausreichende Trocknung kann die Einsatzfähigkeit des

[Stabilisator] im [Rec] Betriebsmenü nicht auf

Objektivs durch Schimmel usw. beeinträchtigt oder der

[OFF] eingestellt werden. Es wird empfohlen, die

Einsatz völlig unmöglich werden. Es wird empfohlen, die

Firmware der Digital-Kamera auf der folgenden

Funktionsfähigkeit des Gerätes vor dem Gebrauch zu prüfen.

Website zu aktualisieren.

Stellen Sie sicher, dass das Objektiv nicht über einen längeren

http://panasonic.jp/support/global/cs/dsc/download/

Zeitraum in Kontakt mit Gummi- oder Plastikprodukten kommt.

>

Bei Verwendung dieses Objektivs mit einer Digital-

Berühren Sie nicht die elektrischen Kontakte des Gerätes.

Kamera einer anderen Marke funktioniert die optische

Dadurch kann es zu einem Defekt am Gerät kommen.

Bildstabilisierfunktion nicht.

(Stand September 2012)

Nehmen Sie das Gerät nicht auseinander und

nehmen Sie keine Veränderungen daran vor.

Für Einzelheiten wenden Sie sich an die entsprechende

Firma.

20

VQT4J90

Оглавление

    Аннотация для Panasonic HFS45150E в формате PDF