Panasonic CQ-R223W: Installation (Continued)
Installation (Continued): Panasonic CQ-R223W
1
2
3
4
E
E
N
Installation (Continued)
N
G
G
L
L
I
I
S
Cautions:
To Remove the Unit
S
H
• We strongly recommend that you wear gloves for installation work to protect yourself from injuries.
Switch off the power of the unit.
H
11
• When bending the mounting tab of the mounting collar with a screwdriver, be careful not to injure your hands and
12
fingers.
1
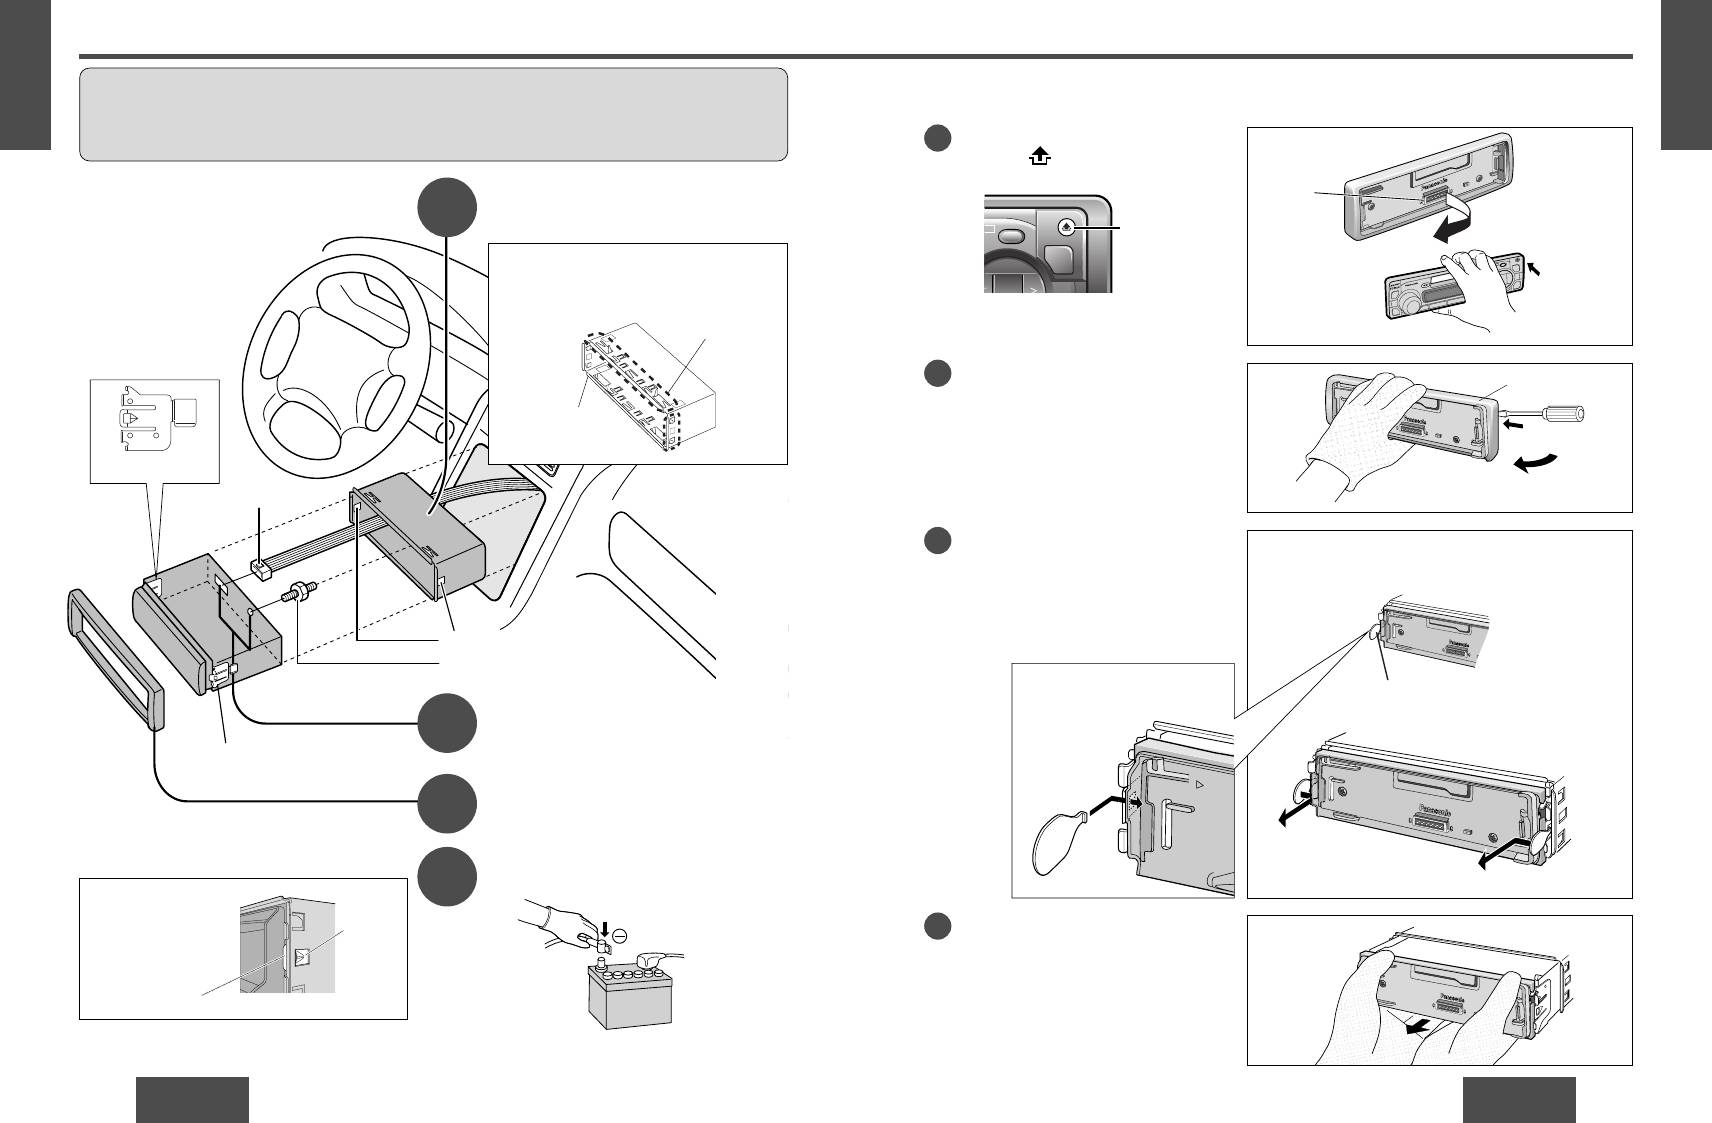
Remove the removable face plate.
Press []. (release button). The
First complete the electrical connections, and
removable face plate will be released.
Insert Mounting Collar q into the
then check them for correctness.(
a page 25)
dashboard, and bend the mounting
The included Mounting Collar
tabs out with a screwdriver.
q is designed specially for this
unit. Do not use it to attach any
The tabs to be bent vary depending on the car.
other model.
To securely install the unit, fully bend a
number of the tabs so that there is no rattling.
Example:
Tab
2
Remove the Trim Plate i with a screwdriver.
q Mounting
Collar
Mounting spring (L)
y Power Connector
3
Insert the Dismounting Plates u along the
grooves on both sides of the main unit
until “click” is heard.
Pull out the unit while pushing the plates
further inside.
Mounting Holes
t Mounting Bolt
Establish the rear of the unit.
After fixing Mounting Bolt t connection and
Power Connector
y, fix the rear of the unit to the
Mounting Springs (R)
car body by either method (a) or (b) shown on the
previous page.
Insert Trim Plate i.
After installation reconnect the
Engage Mounting
negative (–) battery terminal.
Springs (
C) in the both
sides of the mounting
Mounting
4
Remove the unit pulling with both hands.
holes of Mounting Collar
Hole
q firmly.
Mounting Spring
22
23
CQ-R223W
CQ-R223W
D
O
L
B
B
Y
N
R
C
Q
R
-
3
2
2
W
Contact
Push
i Trim Plate
Screwdriver
Insert
u Dismounting Plate
Pull out
NR
REMOTE
MODE
TUNE
Release button
Insert the tab
end in the
outer groove.
“Click”

