Sony XR-3100R: Other Functions
Other Functions: Sony XR-3100R
Setting the clock
Other Functions
automatically
The CT (Clock Time) data from the RDS
You can also control this unit with the rotary
transmission sets the clock automatically.
commander.
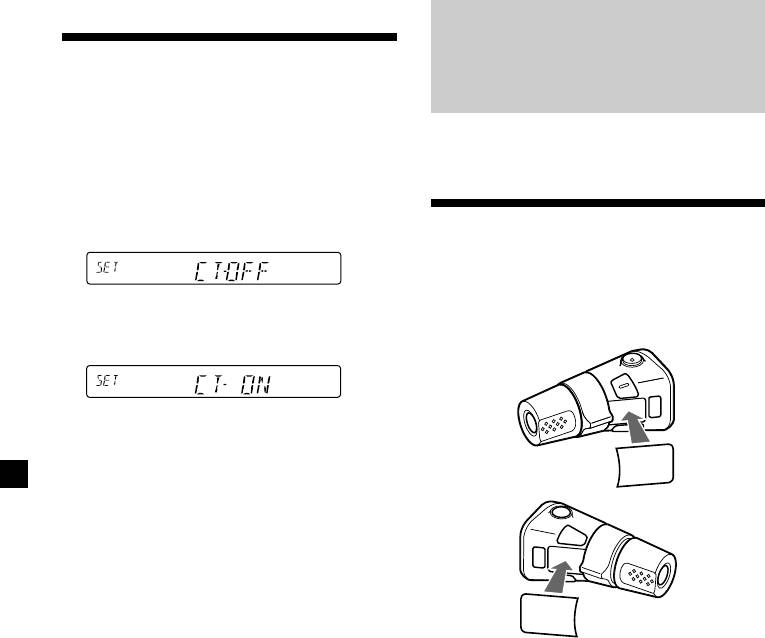
1 During radio reception, press (SHIFT),
then press (2) (SET UP) repeatedly until
“CT” appears.
Labelling the rotary
commander
Depending on how you mount the rotary
2 Press (4) (n) repeatedly until “CT-ON”
commander, attach the appropriate label as
appears.
shown in the illustration below.
The clock is set.
3 Press (SHIFT) to return to the normal
display.
SOUND
MODE
DSPL
To cancel the CT function
Select “CT-OFF” in step 2 above.
Notes
• The CT function may not work even though an
RDS station is being received.
DSPL
MODE
• There might be a difference between the time
SOUND
set by the CT function and the actual time.
16
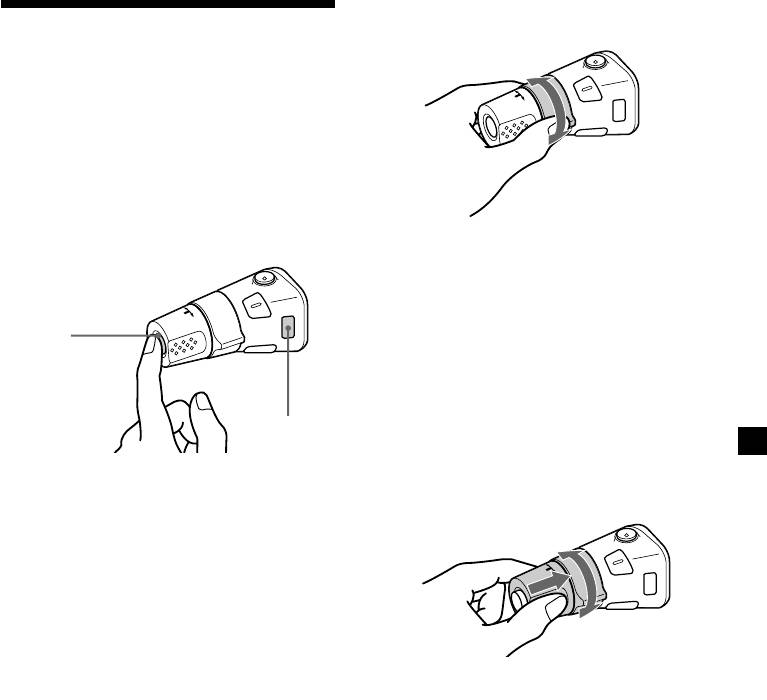
By rotating the control
Using the rotary
(the SEEK/AMS control)
commander
The rotary commander works by pressing
buttons and/or rotating controls.
XR-C33R only:
You can also control the optional CD or MD
units with the rotary commander.
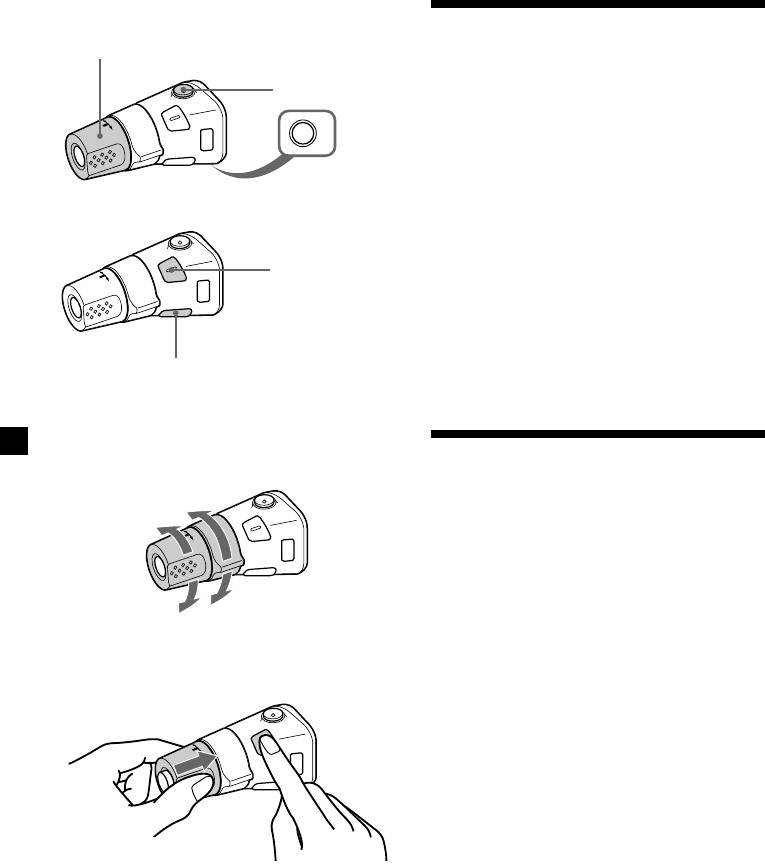
By pressing buttons
(the SOURCE and MODE buttons)
Rotate the control and release it to:
•Locate the beginnings of tracks on the
tape. Rotate and hold the control, and
release it to fast-wind the tape. To start
playback while fast-winding the tape,
(SOURCE)
press (MODE).
•Locate a specific track on a disc. Rotate
and hold the control until you locate the
specific point in a track, then release it to
start playback.
(MODE)
•Tune in stations automatically. Rotate and
hold the control to find a specific station.
GB
Each time you press (SOURCE), the
By pushing in and rotating the
source changes as follows:
control (the PRESET/DISC control)
TUNER n CD* n MD* n TAPE
Pressing (MODE) changes the operation
in the following ways;
• Tape : playback direction
• Tuner : FM1 n FM2 n FM3 n MW n LW
• CD unit* : CD1 n CD2 n …
• MD unit* : MD1 n MD2 n …
* If the corresponding optional equipment is
Push in and rotate the control to:
not connected, the item will not appear (XR-
•Receive the stations memorized on the
C33R only).
number buttons.
Tip
•Change the disc (XR-C33R only).
When the POWER SELECT switch is set to position
B, you can turn on this unit by pressing (SOURCE)
on the rotary commander.
17
Other operations
Rotate the VOL control to
Adjusting the sound
adjust the volume.
Press (ATT) to
characteristics
attenuate the
sound.
You can adjust the bass, treble, balance, and
fader.
OFF
You can store the bass and treble levels
independently for each source.
Press (OFF) to
turn off the unit.
1 Select the item you want to adjust by
pressing (SOUND) repeatedly.
VOL (volume) n BAS (bass) n TRE (treble) n
Press (SOUND) to
BAL (left-right) n FAD (front-rear)
adjust the volume
and sound menu.
2 Adjust the selected item by rotating the
dial.
Adjust within three seconds after selecting
the item. (After three seconds, the dial
Press (DSPL) to change
function reverts to volume control.)
the displayed items.
Changing the operative direction
The operative direction of controls is factory-
Attenuating the sound
set as shown below.
To increase
Press (ATT) on the rotary commander.
“ATT-ON” flashes momentarily.
To restore the previous volume level, press
(ATT) again.
To decrease
If you need to mount the rotary commander on
the right hand side of the steering column, you
can reverse the operative direction.
Press (SOUND) for two seconds while
pushing the VOL control.
Tip
You can also change the operative direction of
these controls with the unit (see “Changing the
sound and display settings” on page 19).
18
Changing the sound and
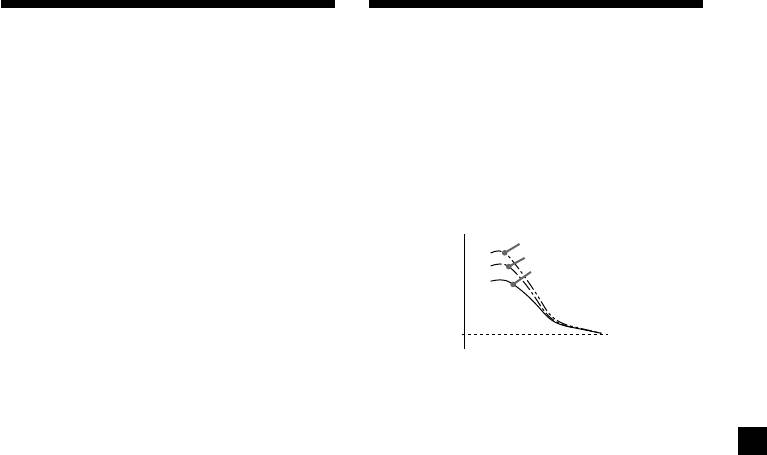
Boosting the bass sound
— D-bass
display settings
You can enjoy a clear and powerful bass
The following items can be set:
sound. The D-bass function boosts the low
•CLOCK (page 7).
frequency signal with a sharper curve than
•CT (Clock Time) (page 16).
conventional bass boost.
•BEEP – to turn the beep sound on or off.
You can hear the bass line more clearly even
•RM (Rotary Commander) – to change the
while the vocal volume remains the same. You
operative direction of the rotary commander.
can emphasize and adjust the bass sound
— Select “NORM” to use the rotary
easily with the D-BASS control.
commander as the factory-set position.
— Select “REV” when you mount the rotary
D-BASS 3
D-BASS 2
commander on the right side of the
Level
D-BASS 1
steering column.
•M.DSPL (Motion Display) – to turn the
motion display on or off.
•A.SCRL (Auto Scroll)* (page 20) (XR-C33R
0dB
only) .
Frequency (Hz)
1 Press (SHIFT).
Adjusting the bass curve
Turn the D-BASS control to adjust the
2 Press (2) (SET UP) repeatedly until the
bass level (1, 2, or 3).
GB
desired item appears.
“D-BASS” appears in the display.
Each time you press (2) (SET UP), the item
changes as follows:
To cancel, turn the control to OFF.
CLOCK n CT n BEEP n RM n M.DSPL n
A.SCRL*
Note
If the bass sound becomes distorted, adjust the
* When no CD or MD is playing, this item will
D-BASS control or volume.
not appear.
3 Press (4) (n) to select the desired
setting (Example: ON or OFF).
4 Press (SHIFT).
After the mode setting is complete, the
display returns to normal playback mode.
Note
If the “SFT” indication appears, press (SHIFT) to
complete the mode setting.
19
Оглавление
- Getting Started
- Cassette Player
- Radio
- RDS
- Other Functions
- CD/MD Unit (XR-C33R only)
- Additional
- Uvedení do provozu
- Přehrávač kazet
- Rádio
- RDS
- Další funkce
- Přehrávač CD/MD
- Dodatečné
- Przygotowania
- Magnetofon
- Radio
- RDS
- Pozostałe funkcje
- Komponent CD/MD
- Informacje
- Başlarken
- Kasetçalar
- Radyo
- RDS
- Diğer Fonksiyonlar
- CD/MD ünitesi
- Ek bilgi
- Начальные
- Проигрыватель
- Радиоприемник
- RDS
- Прочие функции
- Проигрыватель CD/MD
- Дополнительная
 red")

