Sony STR-DE345: Unpacking Hookup Overview
Unpacking Hookup Overview: Sony STR-DE345
Getting Started
Unpacking
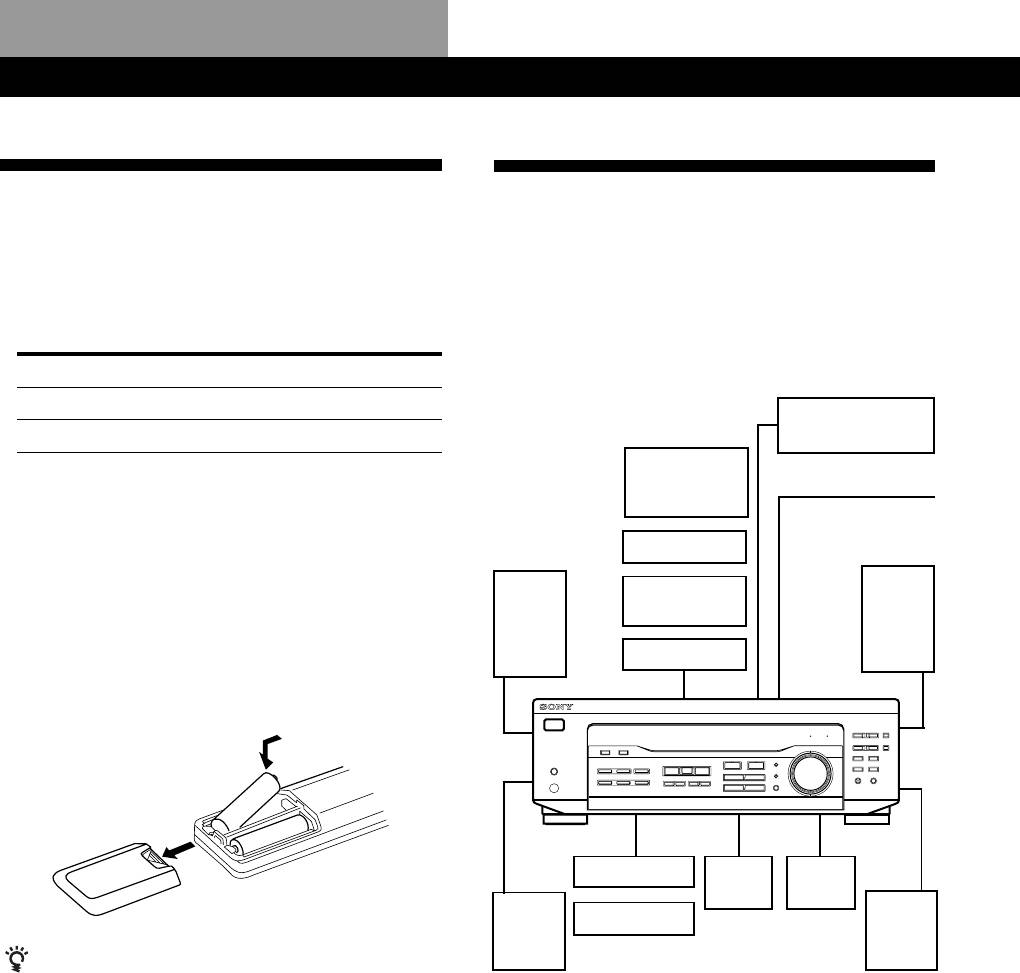
Hookup Overview
Check that you received the following items with the
The receiver allows you to connect and control the
receiver:
following audio/video components. Follow the
• FM wire aerial (1)
hookup procedures for the components that you want
• AM loop aerial (1)
to connect to the receiver on the pages specified. To
• Remote commander (remote) (1)
learn the locations and names of each jack, see “Rear
Panel Descriptions” on page 26.
Model Remote
STR-DE345 RM-PP404
Video Component
DVD player/Dolby
STR-DE245 RM-U304
Hookups (6)
Digital decoder
TV monitor
• Size AA (R6) batteries (2)
(STR-DE345
Aerial Hookups (5)
• Operating instructions of the remote RM-PP404
only)
(STR-DE345 only)
Speaker
AM/FM aerial
System
TV tuner
Hookups (8)
Inserting batteries into the remote
SAT (Satellite
Front
Front
receiver)
speaker
Insert two size AA (R6) batteries in accordance with
speaker
(L)
(R)
the + and – markings on the battery compartment.
VCR
When using the remote, point it at the remote sensor g
on the receiver.
]
}
}
]
CD player
Centre
Active
speaker
woofer
Rear
Rear
MD/TAPE deck
speaker
speaker
(L)
(R)
When to replace batteries
Audio Component
Under normal use, the batteries should last for about 6
Hookups (5)
months. When the remote no longer operates the
receiver, replace both batteries with new ones.
Before you get started
Notes
• Turn off the power to all components before making
• Do not leave the remote in an extremely hot or humid
any connections.
place.
• Do not connect the mains lead until all of the
• Do not use a new battery with an old one.
connections are completed.
• Do not expose the remote sensor to direct sunlight or
• Be sure to make connections firmly to avoid hum
lighting apparatuses. Doing so may cause a malfunction.
and noise.
• If you don’t use the remote for an extended period of time,
remove the batteries to avoid possible damage from
• When connecting an audio/video cable, be sure to
battery leakage and corrosion.
match the color-coded pins to the appropriate jacks
on the components: Yellow (video) to Yellow; White
(left, audio) to White; and Red (right, audio) to Red.
GB
4
Оглавление
- WARNING Precautions
- About This Manual
- Unpacking Hookup Overview
- Aerial Hookups
- Video Component Hookups
- Speaker System Hookups
- AC Hookups
- Before You Use Your Receiver Storing FM Stations Automatically in Alphabetical
- Selecting a Component
- Receiving Broadcasts
- Presetting Radio Stations
- Using the Radio Data System
- Recording
- Choosing a Sound Field
- Getting the Most Out of Dolby
- Troubleshooting
- Specifications
- Glossary
- Receiving Broadcasts Presetting Radio Selecting a
- ВНИМАНИЕ! Меры
- Пояснения к настоящей
- Распаковка Общая схема соединений
- Подключение антенн
- Подключение видеоаппаратуры
- Подключение
- Подключение к сети
- Перед началом Автоматический ввод в эксплуатации память станций диапазона FM в алфавитном порядке
- Выбор источника сигнала
- Прием радиопередач
- Ввод радиостанций в память
- Пользование системой
- Запись
- Выбор режима звука
- Получение наибольшего
- Устранение неполадок
- Технические
- Глоссарий
- Прием Ввод Выбор радиопередач радиостанций в подключенной
- OSTRZEŻENIE Środki ostrożności
- Rozpakowanie elementów Ogólny opis montażu zestawu
- Podłączenie Anten
- Montaż Komponentów Wizualnych
- Montaż Systemu
- Montaż Obiegu Zasilania
- Przed Rozpoczęciem Automatyczne i alfabetyczne Użytkowania Odbiornika zapisywanie radiowych stacji nadawczych w pamięci
- Wybór Odpowiedniego
- Odbiór Audycji Radiowych
- Kodowanie Radiowych Stacji
- Korzystanie z Serwisu
- Wykonywanie nagrań
- Wybranie pola akustycznego
- Optymalne wykorzystanie funkcji Dolby Pro Logic
- Usuwanie usterek
- Dane Techniczne
- Słowniczek
- Odbiór Audycji Zapisywanie Wybór