Pioneer XC-HM70-K: General control
General control: Pioneer XC-HM70-K
General control
English Français Español Italiano
General control
To turn the power on
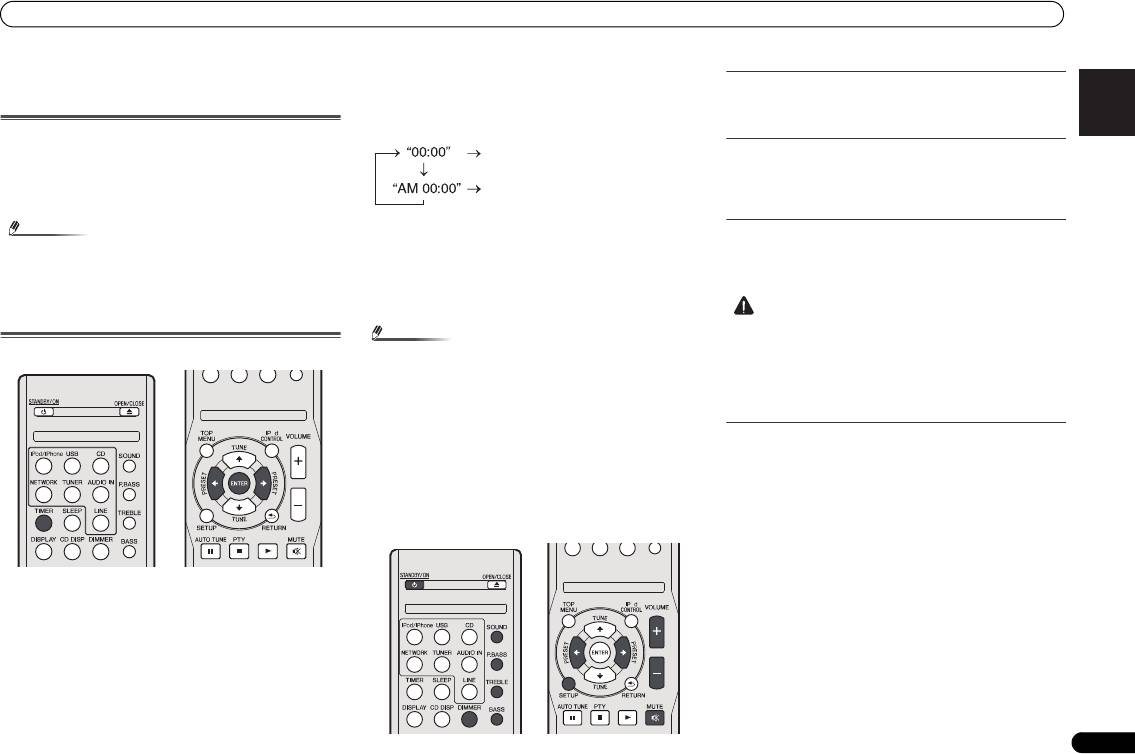
Press the STANDBY/ON button to turn the power on.
After use:
Press the STANDBY/ON button to enter the power stand-by
mode.
Deutsch
Nederlands
11
En
Note
2 Press ENTER button.
3Use
/
to set the day, then press ENTER.
4Use
/
to select 24-hour or 12-hour display, then
press ENTER.
5Use
/
to set the hour, then press ENTER.
6Use
/
to set the minute, then press ENTER to
• However, if iPod/iPhone is docked, the unit turns charge
confirm.
mode. “iPod charge” will be displayed.
• During iPod charge mode, press the STANDBY/ON
To confirm the time display:
button to turn the power on.
Press the TIMER button. The time display will appear for
• Remove iPod to turn the power stand-by mode.
about 10 seconds.
Setting the clock
In this example, the clock is set for the 24-hour (00:00)
display.
1 Press TIMER button on the remote control.
The current date and time are displayed.
The first time you use the clock, you are taken to the clock
adjust mode.
Note
Display brightness control
Press DIMMER button to dims the display brightness. The
brightness can be controlled in four steps.
Volume auto fade-in
If you turn off and on the main unit with the volume set to 41
or higher, the volume starts at 40 and fades in to the last set
level.
Volume control
Turn the volume knob towards VOLUME (on main unit) or
press VOLUME +/- (on remote control) to increase or
decrease the volume.
• When power supply is restored after unit is plugged in
again or after a power failure, reset the clock (See below).
To readjust the clock:
Perform “Setting the clock” from step 1. If the “Clock” does
not appear in step 2, step 4 (for selecting the 24-hour or 12-
hour display) will be skipped.
To change the 24-hour or 12-hour display:
1 Clear all the programmed contents.
Refer to Factory reset, clearing all memory on page 29 for
details.
2 Perform “Setting the clock” from step 1 onwards.
CAUTION
X-HM70_En.fm 11 ページ 2011年8月2日 火曜日 午後4時46分
The 24-hour display will appear.
(00:00 - 23:59)
The 12-hour display will appear.
(AM 00:00 - PM 11:59)
• The sound level at a given volume setting depends on
speaker efficiency, location, and various other factors. It
is advisable to avoid exposure to high volume levels. Do
not turn the volume on to full at switch on. Listen to music
at moderate levels. Excessive sound pressure from
earphones and headphones can cause hearing loss.
O
Auto power down setup
Set to automatically turn off the receiver after a specified time
has passed (when the power has been on with no operation
for several hours).
• Default setting: 6H
1 Press SETUP on the remote control.
•If APD does not appear, press / to select APD.
2Use
/
to specify the amount of time to allow before
the power is turned off (when there has been no
operation).
O
• You can select 2, 4 or 6 hours, or off (if no automatic
shutoff is desired).
3 When you’re finished, press RETURN.
General control
Muting
The volume is muted temporarily when pressing the MUTE
button on the remote control. Press again to restore the
volume.
P.bass control
When the power is first turned on, the unit will enter the
P.bass mode which emphasises the bass frequencies. To
cancel the P.bass mode, press the P.BASS button on the
remote control.
Bass control
Press the BASS button, then press / to adjust the bass.
Treble control
Press the TREBLE button, then press / to adjust the
treble.
Equaliser
When the SOUND button is pressed, the current mode
setting will be displayed. To change to a different mode, press
the SOUND button repeatedly until the desired sound mode
appears.
Input function
When the INPUT button on main unit is pressed, the current
function will change to different mode. Press the INPUT
button repeatedly to select desired function.
12
En
Note
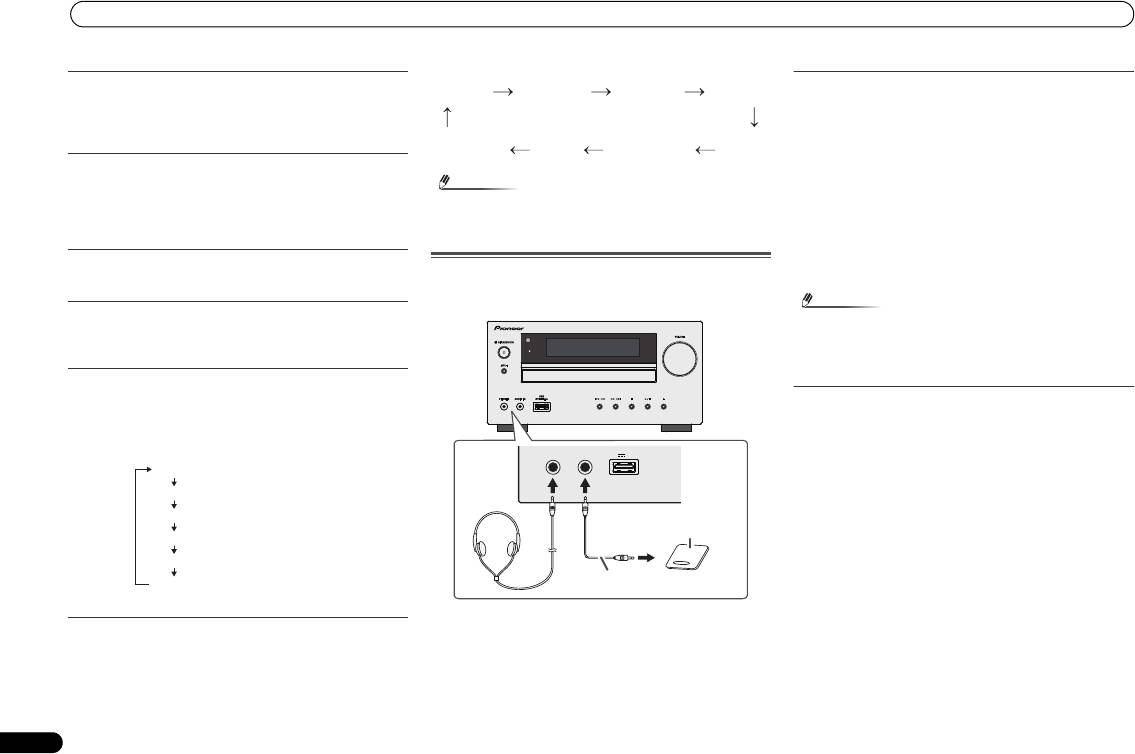
Listening to the playback sounds of portable
audio player, etc.
1 Use a connection lead to connect the portable audio
player etc. to the AUDIO IN socket.
2 Press the STANDBY/ON button to turn the power on.
3 Press the AUDIO IN button on the remote control or
INPUT button repeatedly on main unit to select AUDIO
• The backup function will protect the memorised function
IN function.
mode should there be a power failure or the AC power
4 Play the connected equipment.
lead becomes disconnected.
• If volume level of the connected device is too high, sound
distortion may occur. Should this happen, lower the
volume of the connected device. If volume level is too low,
Enhancing your system
increase the volume of the connected device.
The connection lead is not included. Purchase a
commercially available lead as shown below.
Note
• To prevent noise interference, place the unit away from
the television.
• When using video equipment, connect the audio output
to this unit and the video output to a television.
Headphones
• Do not turn the volume on to full at switch on and listen
to music at moderate levels. Excessive sound pressure
from earphones and headphones can cause hearing loss.
• Before plugging in or unplugging the headphone, reduce
FLAT
Equaliser off.
No equalization.
the volume.
GAME
For game.
For rock music.
• Be sure your headphone has a 3.5 mm diameter plug and
CLASSIC
For classical music.
For classical music.
impedance between 16 and 50 ohms. The recommended
impedance is 32 ohms.
POPS
For pop music.
For pop music.
• Plugging in the headphone disconnects the speakers
VOCAL
Vocals are enhanced.
Vocals are enhanced.
automatically. Adjust the volume using the VOLUME
control.
JAZZ
For jazz.
For jazz.
CD AM USB
FM
Stereo
NETWORK
iPodLINEAUDIO IN
TIMER
PHONES AUDIO IN
5V 2.1A
USB
Portable audio player, etc.
Audio cable (not supplied)
X-HM70_En.fm 12 ページ 2011年8月2日 火曜日 午後4時46分
Оглавление
- Contents
- Before you start
- Controls and Displays
- Connecting your equipment
- General control
- Listening to a CD or MP3/
- Listening to the iPod, iPhone or iPad
- Listening to USB mass storage device/MP3 player
- Playback with NETWORK feature
- Listening to the radio
- Using the Radio Data System (RDS)
- Timer and sleep operation
- Additional Information
- Table des matières
- Préparatifs
- Commandes et affichages
- Raccordement de votre équipement
- Commandes générales
- Écoute de disques MP3/
- Écoute de l’iPod, iPhone et iPad
- Lecture mémoire de grande capacité USB/ lecteur MP3
- Utilisation de la fonction de lecture réseau (NETWORK)
- Pour écouter la radio
- Utilisation du système RDS (Radio Data System)
- Utilisation des fonctions
- Informations
- Índice
- Antes de comenzar
- Controles e indicadores
- Conexión del equipo
- Control general
- Escuchando un CD o disco
- Escuchar el iPod, iPhone o iPad
- Escuchando a través del dispositivo de almacenamiento USB/
- Reproducción con opción NETWORK
- Recepción de radio
- Empleo del sistema de datos radiofónicos (RDS)
- Funcionamiento del
- Información adicional
- Inhalt
- Vor der Inbetriebnahme
- Bedienelemente und
- Anschluss der Geräte
- Generelle Bedienung
- CDs oder MP3/WMA-Discs
- iPod, iPhone oder iPad- Wiedergabe
- Hören von USB- Massenspeicher MP3- Player
- Wiedergabe mit der NETWORK- Funktion
- Radio hören
- Benutzen des Radio- Daten-Systems (RDS)
- Timer- und Sleep-
- Zusätzliche
- Indice
- Prima di cominciare
- Controlli e display
- Collegamento dell’apparecchio
- Comando generale
- Ascolto di un CD o disco
- Ascolto dell’iPod, iPhone o iPad
- Ascolto della periferica di memoria di massa USB/del lettore MP3
- Playback con caratteristica NETWORK
- Ascolto della radio
- Funzionamento di RDS (Radio Data System)
- Funzione di timer e
- Informazioni aggiuntive
- Inhoud
- Voordat u begint
- Bedieningselementen en
- De apparatuur aansluiten
- Algemene bediening
- Luisteren naar een CD of
- Luisteren naar de iPod, iPhone of iPad
- Luisteren naar USB massaopslagapparaat/ MP3-speler
- Weergave met NETWORK- functie
- Luisteren naar de radio
- Gebruiken van het Radio Data Systeem (RDS)
- Timer en inslaaptimer
- Overige informatie
- Содержание
- Перед началом работы
- Органы управления и
- Подключение оборудования
- Общее управление
- Прослушивание дисков CD
- Прослушивание iPod, iPhone или iPad
- Прослушивание запоминающего устройства большой
- Воспроизведение с функцией NETWORK
- Прослушивание
- Использование системы радиоданных (RDS)
- Работа с таймером и
- Дополнительная
