Pioneer SBX-300: инструкция
Раздел: Видео Аудио Фото Оборудование
Тип: Hi-Fi Акустика
Характеристики, спецификации
Инструкция к Hi-Fi Акустику Pioneer SBX-300
English
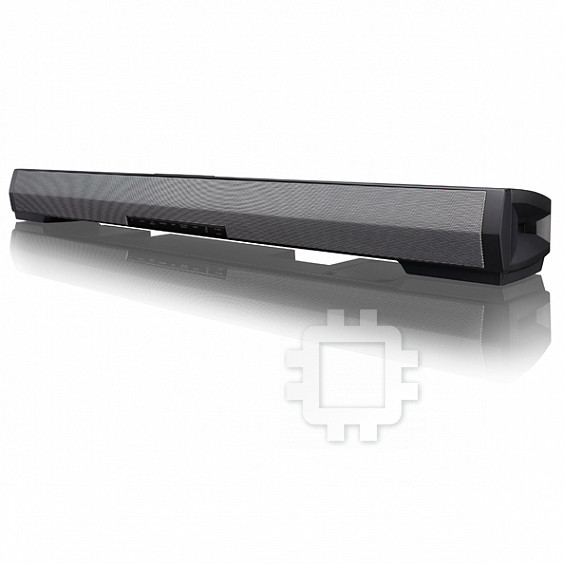
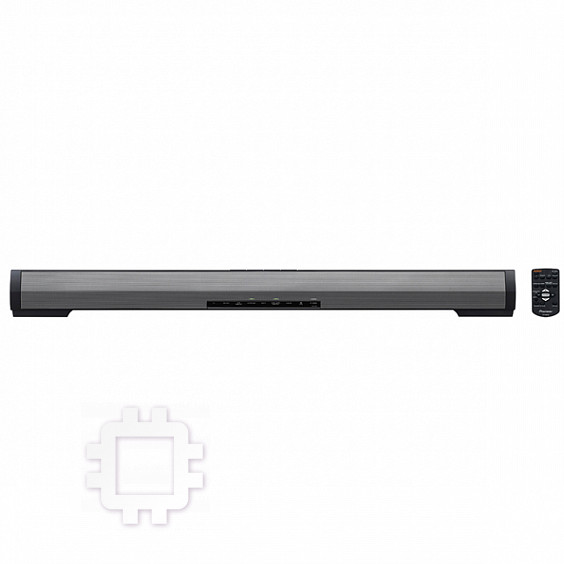
Speaker Bar System
SBX-300
Barre de son
TV Lautsprecher-System
Français
Sistema soundbar
Speaker Bar Systeem
Barra de sonido
Deutsch
Панельная акустическая система
Italiano
Nederlands
Español
Pyccкий
Operating Instructions / Mode d’emploi / Bedienungsanleitung /
Istruzioni per l’uso / Handleiding / Manual de instrucciones /
Инструкции по эксплуатации

Safety Information
Operating Environment
Operating environment temperature and humidity:
+5 °C to +35 °C (+41 °F to +95 °F); less than 85 %RH
(cooling vents not blocked)
Do not install this unit in a poorly ventilated area, or in
locations exposed to high humidity or direct sunlight (or
strong artificial light)
WARNING
D3-4-2-1-7c*_A1_En
This equipment is not waterproof. To prevent a fire or
shock hazard, do not place any container filled with
liquid near this equipment (such as a vase or flower pot)
or expose it to dripping, splashing, rain or moisture.
D3-4-2-1-3_A1_En
Thank you for buying this Pioneer product.
Please read through these operating instructions so you will know how to operate your model properly.
After you have finished reading the instructions, put them away in a safe place for future reference.
CAUTION
TO PREVENT THE RISK OF ELECTRIC SHOCK, DO NOT
REMOVE COVER (OR BACK). NO USER-SERVICEABLE
PARTS INSIDE. REFER SERVICING TO QUALIFIED
SERVICE PERSONNEL.
D3-4-2-1-1_B1_En
CAUTION
The STANDBY/ON switch on this unit will not
completely shut off all power from the AC outlet.
Since the power cord serves as the main disconnect
device for the unit, you will need to unplug it from the
WARNING
AC outlet to shut down all power. Therefore, make
To prevent a fire hazard, do not place any naked flame
sure the unit has been installed so that the power
sources (such as a lighted candle) on the equipment.
cord can be easily unplugged from the AC outlet in
D3-4-2-1-7a_A1_En
case of an accident. To avoid fire hazard, the power
cord should also be unplugged from the AC outlet
when left unused for a long period of time (for
VENTILATION CAUTION
example, when on vacation).
When installing the unit, leave space of at least 10 cm
D3-4-2-2-2a*_A1_En
at the sides and top.
Furthermore, to facilitate good heat dissipation, make
sure there is a little distance between the other devices.
This product is for general household purposes. Any
When installing the unit in a rack or the like, leave
failure due to use for other than household purposes
space of at least 10 cm at the top, rear, and sides.
(such as long-term use for business purposes in a
Internal heat buildup may cause a fire.
restaurant or use in a car or ship) and which requires
repair will be charged for even during the warranty
period.
K041_A1_En
WARNING
Slots and openings in the cabinet are provided for
ventilation to ensure reliable operation of the product,
POWER-CORD CAUTION
and to protect it from overheating. To prevent fire
Handle the power cord by the plug. Do not pull out the
hazard, the openings should never be blocked or
plug by tugging the cord and never touch the power
covered with items (such as newspapers, table-cloths,
cord when your hands are wet as this could cause a
curtains) or by operating the equipment on thick carpet
short circuit or electric shock. Do not place the unit, a
or a bed.
piece of furniture, etc., on the power cord, or pinch the
D3-4-2-1-7b*_A1_En
cord. Never make a knot in the cord or tie it with other
cords. The power cords should be routed such that they
are not likely to be stepped on. A damaged power cord
can cause a fire or give you an electrical shock. Check
the power cord once in a while. When you find it
damaged, ask your nearest PIONEER authorized
service center or your dealer for a replacement.
S002*_A1_En
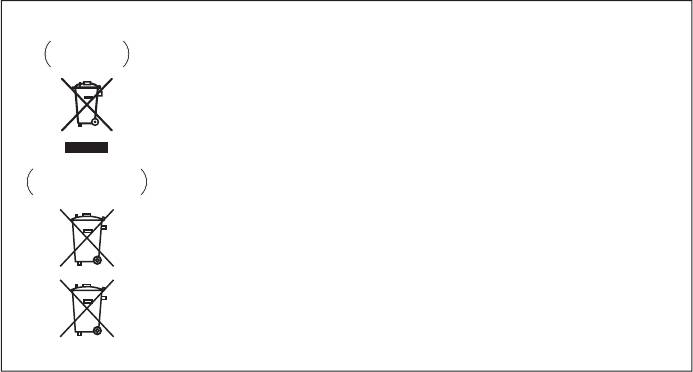
Information for users on collection and disposal of old equipment and used batteries
Symbol for
These symbols on the products, packaging, and/or accompanying documents mean
equipment
that used electrical and electronic products and batteries should not be mixed with
general household waste.
For proper treatment, recovery and recycling of old products and used batteries,
please take them to applicable collection points in accordance with your national
legislation.
By disposing of these products and batteries correctly, you will help to save valuable
Symbol examples
resources and prevent any potential negative effects on human health and the
for batteries
environment which could otherwise arise from inappropriate waste handling.
For more information about collection and recycling of old products and batteries,
please contact your local municipality, your waste disposal service or the point of sale
where you purchased the items.
These symbols are only valid in the European Union.
For countries outside the European Union:
If you wish to discard these items, please contact your local authorities or dealer and
ask for the correct method of disposal.
Pb
K058a_A1_En
Radio wave caution
This unit uses a 2.4 GHz radio wave frequency,
which is a band used by other wireless sys-
tems (Microwave ovens and Cordless phones,
etc.). In this event noise appears in your televi-
sion image, there is the possibility this unit
(including products supported by this unit) is
causing signal interference with the antenna
input connector of your television, video,
satellite tuner, etc. In this event, increase the
distance between the antenna input connector
and this unit (including products supported by
this unit).
• Pioneer is not responsible for any
malfunction of the compatible Pioneer
product due to communication error/
malfunctions associated with your network
connection and/or your connected
equipment. Please contact your Internet
service provider or network device
manufacturer.
• A separate contract with/payment to an
Internet service provider is required to use
the Internet.

5 Other Information and
Table of Contents
Troubleshooting
20 Troubleshooting
1 Before you start
20 – Sound
5 Introduction
20 – Others
5 – Supplied accessories
21 – Trademarks and licenses
5 – Before using the remote control
21 Radio wave caution
5 – Replacing the remote control battery
22 – Scope of operation
6 – Operating range of remote control
22 – Radio wave reections
6 – Remote control
22 – Precautions regarding connections to products
7 – Rear panel
supported by this unit
8 – Front panel
6 Appendix
2 Installing and Connecting the Unit
23 Specications
9 Installing the Unit
23 – Unit
9 – Installing the unit in front of a TV
24 – Speakers
9 – Mounting the unit to a wall
25 Maintenance
10 Connecting to Your TV
25 – Handling the unit
11 Connections with external device
3 Operations
12 Outputting the sound of a device connected to the
unit
12 Enjoying the surround function
12 Listening to sound at nighttime
12 Automatically equalize volume level dierences
during playback
12 Making dialog in movies and vocals in music easy
to hear
13 Adjusting the sound delay time (LIP SYNC (AUDIO
SYNC) )
13 Switching the power to standby mode
automatically (Auto Power O)
13 Enjoying music on Bluetooth®devices
13 – Listening to music on Bluetooth devices
4 Other Functions
15 PHASE CONTROL technology
16 IR Repeater Function
16 – When the TV remote control does not work
(when the unit is installed in front of the TV)
16 – Connecting the supplied IR cable
17 Controlling the unit with the TV remote control
17 – Clearing the learning function
17 Restoring all settings to the default settings
18 Unit indicator operation
19 – MUTE
19 – STATUS
19 – LIP SYNC (AUDIO SYNC)
Before you start 5
En
Chapter 1
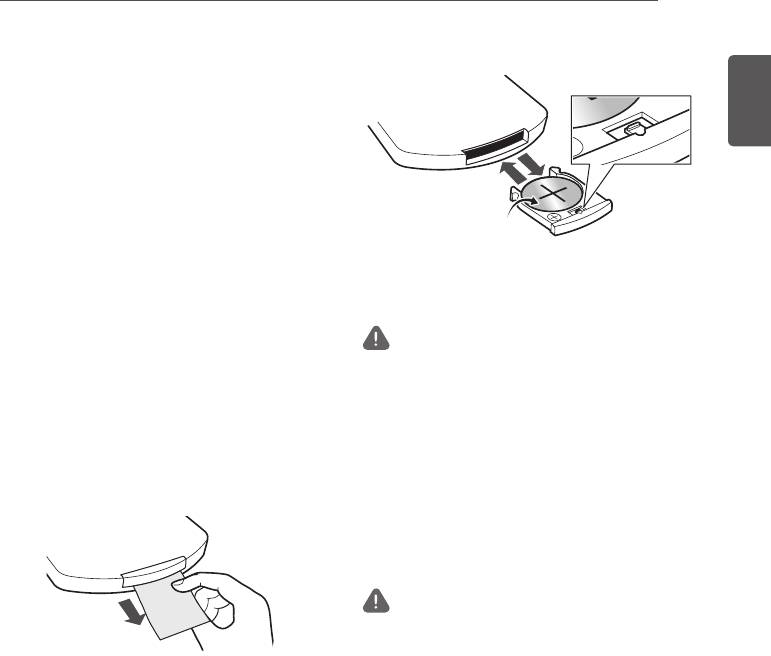
3. Close the battery holder.
Close securely (a click should be heard).
English
Before you start
1
1
Introduction
3
Supplied accessories
2
• Height adjustment foot x 2 (L, R)
• Foot attachment screws x 2
The battery included with the unit have
• Remote control x 1
been provided to allow you to check product
• IR cable x 1
operation and may not last long.
• Optical digital audio cable x 1 (1.5 m)
• Power cord
Warning
• Warranty
• Do not use or store the battery in direct sunlight or
• Operating Instructions (this manual)
other excessively hot place, such as inside a car or
near a heater. This can cause the battery to leak,
Before using the remote
overheat, explode or catch fire. It can also reduce
the life or performance of the battery.
control
• Incorrect replacement of the lithium battery may
The battery comes pre-inserted in the remote
result in an explosion. Only replace the battery with
control. Pull out the insulation sheet before
a battery that is the same or an equivalent type.
using the remote control.
• The battery may have different voltages, even if
they look similar. Do not use different kinds of the
battery together.
• Do not heat the battery, disassemble them, or
throw them into flames or water.
Caution
• When disposing of used the battery, please comply
with governmental regulations or environmental
public institution’s rules that apply in your country/
area.
• To prevent leakage of battery fluid, remove the
Replacing the remote control
battery if you do not plan to use the remote control
battery
for a long period of time (1 month or more). If the
fluid should leak, wipe it carefully off the inside
1. Pull out the battery holder while
of the case, then insert new battery. If a battery
pressing the tab.
should leak and the fluid should get on your skin,
flush it off with large quantities of water.
2. Insert the lithium battery (CR2025 x1)
• To prevent an accident, store the battery out of the
correctly.
reach of infants and young children. If accidentally
Insert the battery in the holder so that the +
swallowed, contact a doctor immediately.
side is facing up.
Before you start6
En
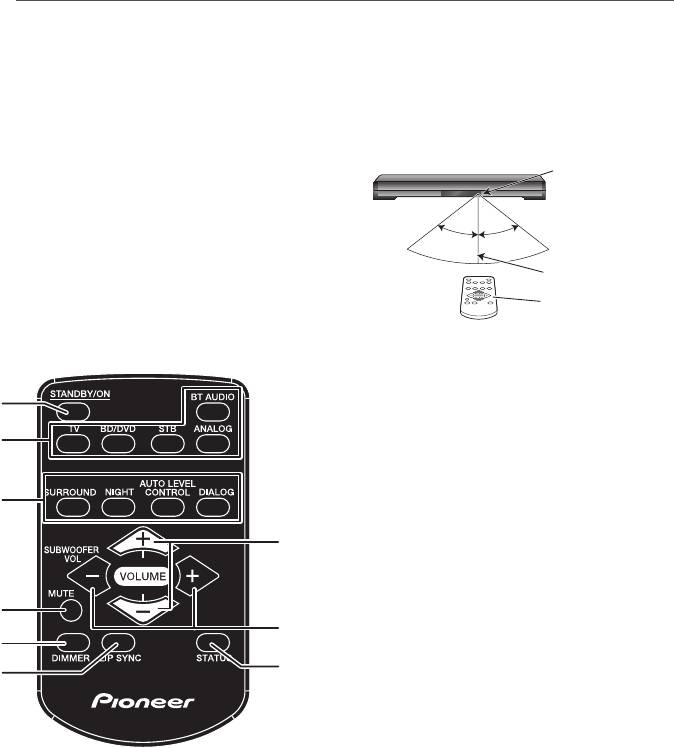
• The unit is operated simultaneously with another
Operating range of remote
infrared remote control unit.
control
• When the IR repeater function (page 16) or
The remote control may not work properly if:
learning function (page 17) is used to operate
TV remote control, the operating range will differ
• There are obstacles between the remote control
depending on the performance of the TV remote
and the unit's remote sensor.
control. (The operating range may be reduced.)
• Direct sunlight or fluorescent light is shining onto
Remote control
the remote sensor.
sensor
• The unit is located near a device that is emitting
infrared rays.
30°30°
7 m
Remote control
Remote control
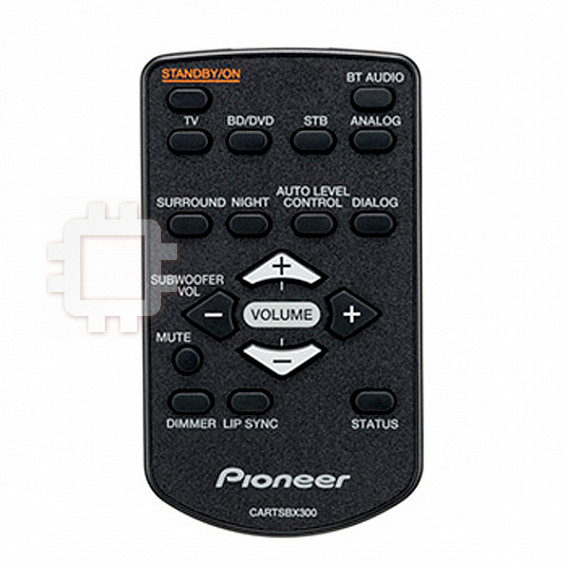
4
MUTE
Temporarily mutes the sound. Press again
1
to restore the original volume.
2
5
DIMMER
Changes the brightness of the indicators on
the front panel of the unit in three steps.
3
6
LIP SYNC (AUDIO SYNC)
Adjusts the lip sync function.
7
7
VOLUME
Adjusts the overall volume including the
subwoofer volume.
4
8
SUBWOOFER VOL
8
Adjusts the subwoofer (bass sound) volume.
5
9
STATUS
9
6
Allows you to confirm the status of various
settings.
1
STANDBY/ON
Turns the power of the unit on/off (standby
mode).
2 Input Selection Buttons
Switches the input of the unit.
3 Sound setting buttons
SURROUND
Turns on/off the surround function.
NIGHT
Turns on/off the night function.
AUTO LEVEL CONTROL
Turns on/off the auto level control function.
DIALOG
Turns the dialog function on/off.
Before you start 7
En
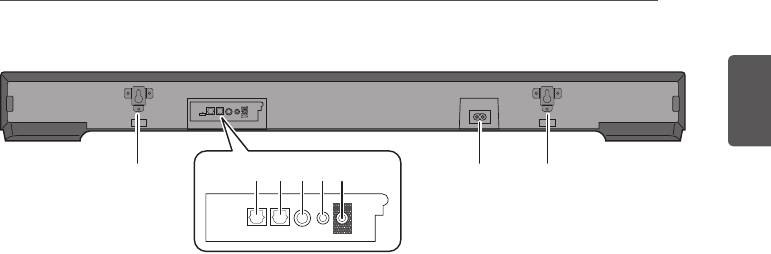
Rear panel
English
IR OUT
TV
BD/DVD
STB
ANALOG
AC IN
6 77
1 2 43 5
IR OUT
TV
BD/DVD
STB
ANALOG
1 Optical digital audio input 1 terminal
4 Analog audio input terminal
(page 10)
(page 10)
Connect a TV or other device with an
(3.5-mm stereo mini jack)
optical digital audio output.
Connect a TV, portable audio player, or
other device with an analog audio output.
2 Optical digital audio input 2 terminal
(page 11)
5 IR OUT terminal (page 16)
Connect a BD, DVD, or CD player or other
Connect the supplied IR Cable when the TV
device with an optical digital audio output.
remote control does not work.
3 Coaxial digital audio input terminal
6 AC IN terminal
(page 11)
Be sure to connect this last.
Connect a satellite broadcast tuner or
7 Wall mounting fittings (page 9)
other device with a coaxial digital audio
output.
Before you start8
En
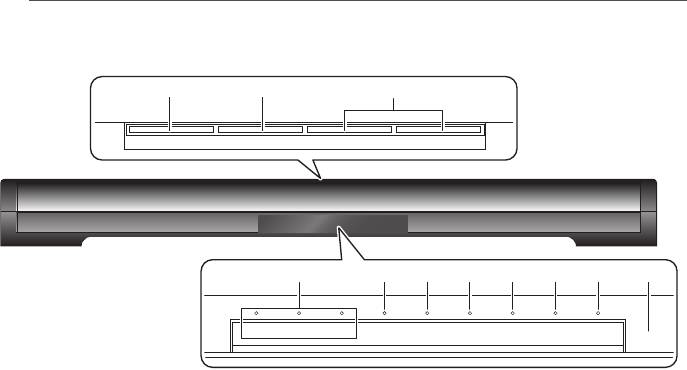
Front panel
STANDBY/ON
INPUT SELECT − VOLUME +
TV BD/DVD SURROUND NIGHT AUTO LEVEL
STB
DIALOG 2
BT AUDIO
ANALOG
CONTROL
DTS
1 2 3
5 6 7 8 9 a b4
1
u
STANDBY/ON
8 DIALOG indicator
Turns the power of the unit on/off (standby
Lit when the dialog function is on.
mode).
9 2/DTS indicator
2 INPUT SELECT
Lit when any of the following audio formats
Switches the input.
is input.
Green: Dolby Digital
3 VOLUME +/–
Red: DTS
Adjusts the volume.
Off: PCM
4 Input selection indicators
a BT AUDIO indicator
The indicator corresponding to the
Lit when connected with a Bluetooth
selected input is lit.
device.
Green: TV, BD/DVD, STB
Flashes when not connected with a
Orange: ANALOG
Bluetooth device.
5 SURROUND indicator
Quick flashing: Pairing mode
Lit when the surround is on.
Slow flashing: Connection standby mode
6 NIGHT indicator
b Remote control sensor
Lit when the night function is on.
7 AUTO LEVEL CONTROL indicator
Lit when the auto level control function is
on.
Оглавление
- Safety Information
- Before you start
- Installing and
- Operations
- Other Functions
- Other Information and Troubleshooting
- Appendix
- Consignes de sécurité
- Avant de commencer
- Installation et
- Fonctionnement
- Autres fonctions
- Autres informations et résolution des pannes
- Annexe
- Sicherheitshinweise
- Vor der Inbetriebnahme
- Installieren und
- Bedienung
- Andere Funktionen
- Andere Informationen und Fehlerbehebung
- Anhang
- Informazioni sulla sicurezza
- Prima di iniziare
- Installazione e
- Operazioni
- Altre funzioni
- Ulteriori informazioni e Diagnostica
- Appendice
- Veiligheidsinformatie
- Voordat u begint
- Het toestel
- Bediening
- Andere functies
- Overige informatie en storingen verhelpen
- Aanhangsel
- Información de seguridad
- Antes de comenzar
- Instalación y
- Operaciones
- Otras funciones
- Otra información y solución de problemas
- Apéndice
- Информация по технике безопасности
- Перед началом работы
- Установка и
- Управление
- Прочие функции
- Прочие сведения и устранение неисправностей
- Приложение


