Pioneer S-31C-K: инструкция
Раздел: Бытовая, кухонная техника, электроника и оборудование
Тип: Домашний кинотеатр
Инструкция к Домашнему кинотеатру Pioneer S-31C-K

1
En
ඵᖑᏣقಜ
/
ᆲ໌ධ
ᐈձКь
/
ቂངಖ༚
S-31C-K
S-31C-QL
cover_31C.fm 1 ページ 2009年7月29日 水曜日 午後5時50分
2
En
Thank you for buying this Pioneer product.
Please read through these operating instructions so you will know how to operate your model properly. After you have finished reading the
instructions, put them away in a safe place for future reference.
Before you start
• The nominal impedance of this speaker system is 6
Ω
.
Connect the speaker system to an amplifier with a load
impedance ranging from 4
Ω
to 16
Ω
(a model with “4
Ω
to
16
Ω
” displayed on the speaker output terminals).
In order to prevent damage to the speaker system resulting
from input overload, please observe the following precautions:
• Do not supply power to the speaker system in excess of the
maximum permissible input.
• When using a graphic equalizer to emphasize loud sounds
in the high-frequency range, do not use excessive amplifier
volume.
• Do not try to force a low-powered amplifier to produce loud
volumes of sound (the amplifier’s harmonic distortion will
be increased, and you may damage the speaker).
Caution: installation
• Do not attach these speakers to the wall or ceiling. They may
fall off and cause injury.
• Do not install your speakers overhead on the ceiling or wall. If
improperly attached, the speaker grille can fall and cause
damage or personal injury.
• Switch off and unplug your AV equipment and consult the
instructions when connecting up components. Make sure you
use the correct connecting cables.
Caution: in use
• Do not place the speaker on an unstable surface. It could
present a hazard if it falls, as well as damaging the equipment.
• Do not use the speaker to output distorted sound for long
periods of times. This can result in a fire hazard.
• Do not sit or stand on the speaker, or let children play on the
speaker.
• Do not put large or heavy objects on top of the speaker.
Cleaning the speaker cabinet
With normal use, wiping with a dry cloth should be sufficient to
keep the cabinet clean. If necessary, clean with a cloth dipped in
a neutral cleanser diluted five or six times with water, and wrung
out well. Do not use furniture wax or cleansers.
Never use thinners, benzine, insecticide sprays or other chemicals
on or near this unit since these will corrode the surfaces.
What’s in the box
Speaker cable (3 m) x 1
Silicon rubber foot x 4
Warranty card
Operating instructions (this document)
For U.S. model
For European model
WARNING:
Handling the cord on this product or
cords associated with accessories sold with the
product will expose you to chemicals listed on
proposition 65 known to the State of California and
other governmental entities to cause cancer and
birth defect or other reproductive harm.
D36-P4_A_En
Wash hands after handling
If you want to dispose this product, do not mix it with general household waste. There is a separate collection system for used
electronic products in accordance with legislation that requires proper treatment, recovery and recycling.
Private households in the member states of the EU, in Switzerland and Norway may return their used electronic products free of charge to
designated collection facilities or to a retailer (if you purchase a similar new one).
For countries not mentioned above, please contact your local authorities for the correct method of disposal.
By doing so you will ensure that your disposed product undergoes the necessary treatment, recovery and recycling and thus prevent potential
negative effects on the environment and human health.
K058_A_En
S-31C_En.fm 2 ページ 2009年7月29日 水曜日 午後4時16分
3
En
English
How to install
Choosing where to place the speaker systems
• Sounds played through speaker systems are easily affected in
subtle ways by the conditions in the listening space.
• For best sound, choose a solid floor upon which to place the
speakers, and position the speakers as shown below. The level
of low sounds can be adjusted by moving the speakers closer
to or further from the wall. Adjust the speakers so that they are
equidistant from their respective side walls to assure balanced
sound.
• If the room has a lot of reverberation, we recommend hanging
heavy fabric on the walls, and/or putting a carpet on the floor
to damp the sound. For best results, cover walls completely.
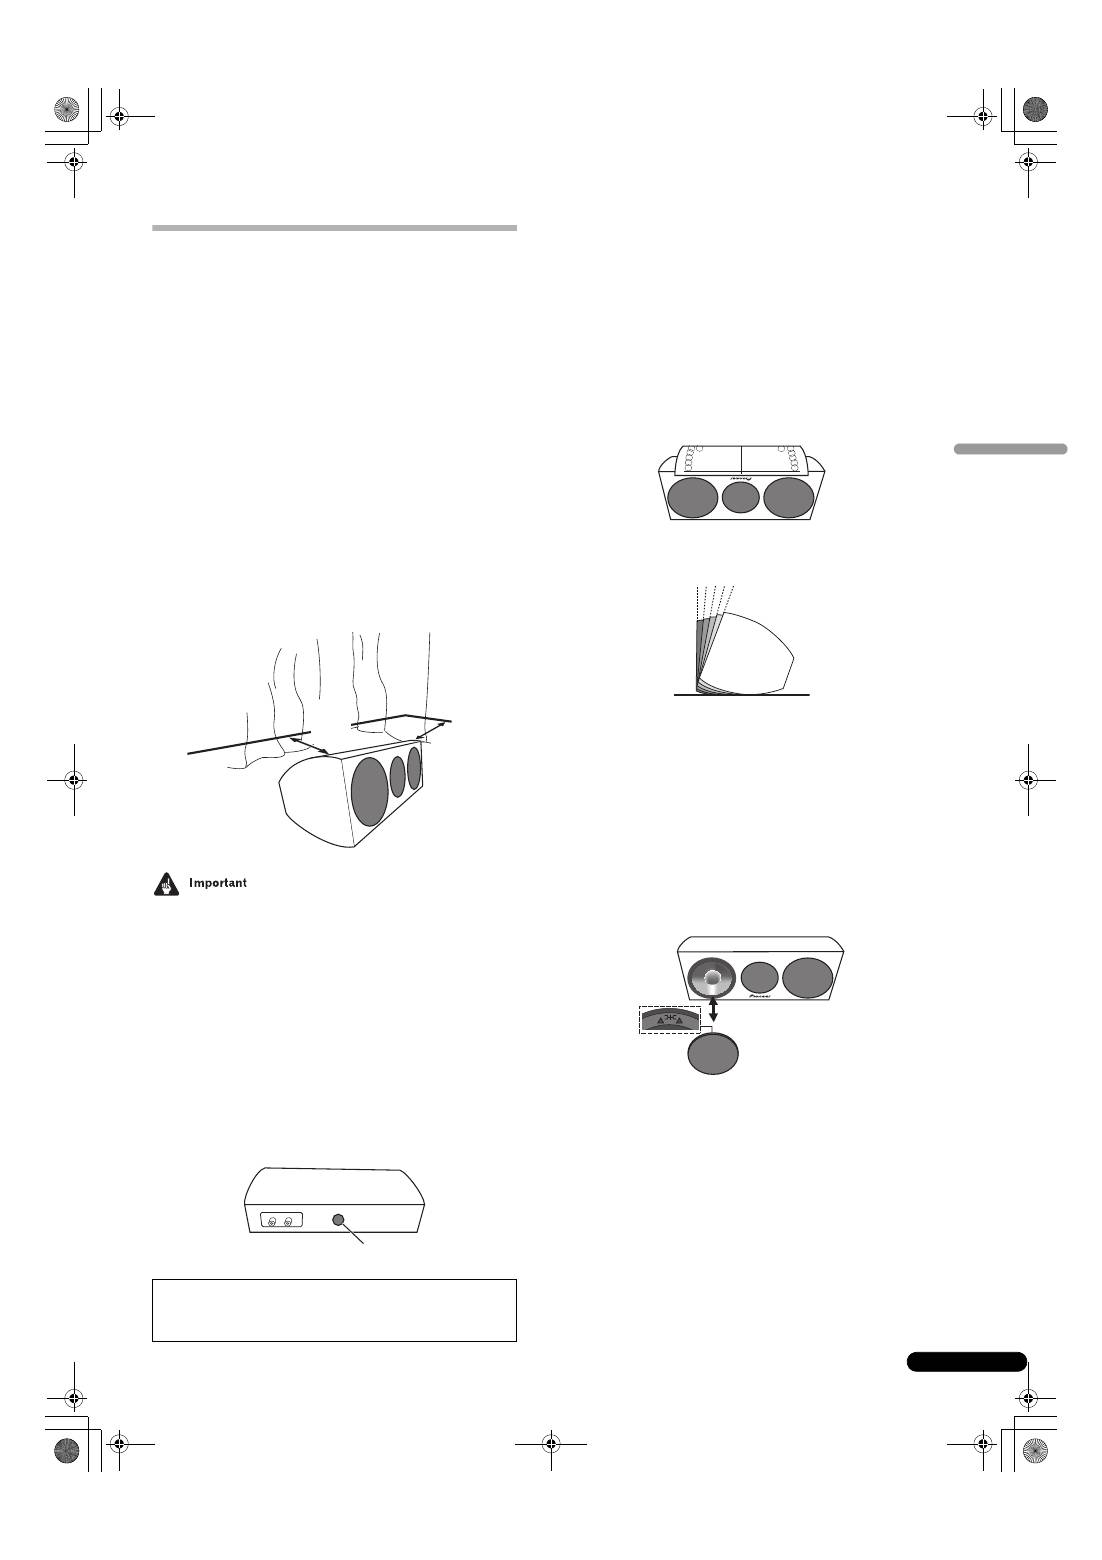
• This speaker is a bookshelf-type speaker which will give best
performance when placed on a solid, level surface off the floor.
Placing the speaker directly on the floor will result in boomy,
undefined sound.
• Pioneer assumes no liability whatsoever for damages
resulting from assembly, improper mounting, insufficient
reinforcement, misuse of the product, acts of nature, etc.
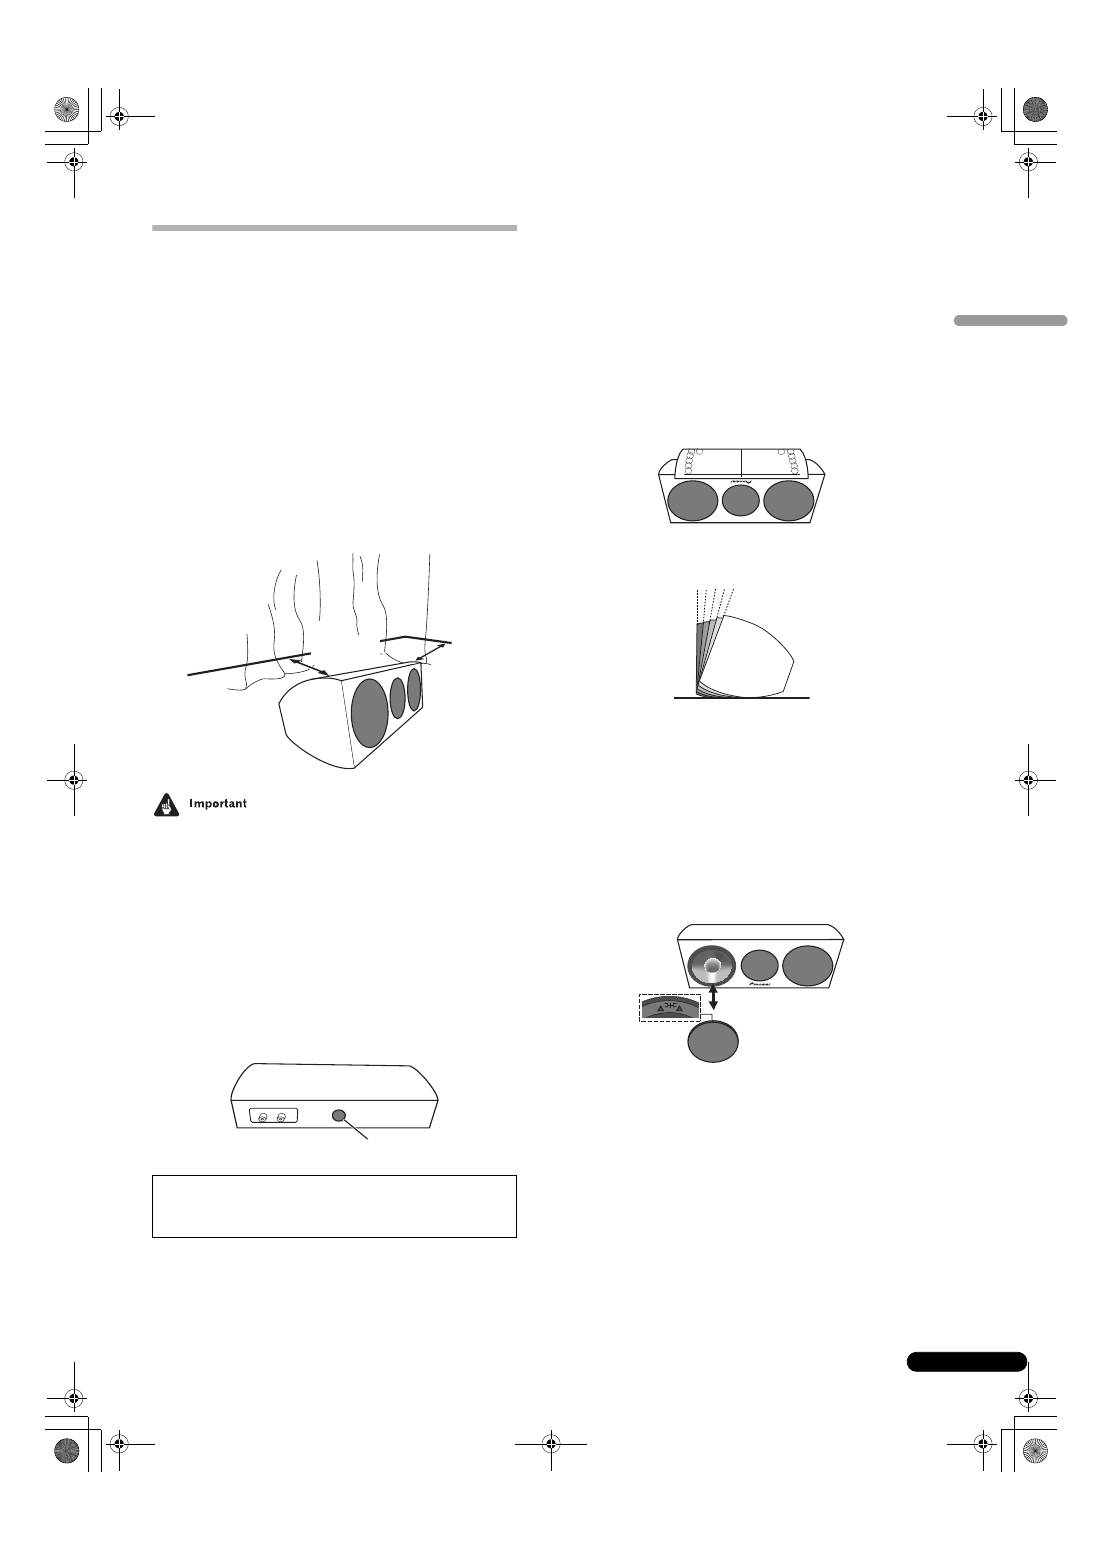
Using the Foam Plug
On the rear side of the unit, a foam plug is provided to allow
adjustment of the bass sound. The foam plug can be removed if
desired to produce a different bass emphasis.
The following can be taken as general guidelines for use of the
foam plug:
• Mounted in the middle of a rack: Leave the foam plug in place
• Mounted on the top of a rack or on the floor: Remove the foam
plug
When using the silicon rubber feet
These speaker systems have been provided with silicon rubber
feet. Use them to adjust the four corners to produce optimum
stability.
Using the template (see end page) will allow easiest adjustment of
the setting angle.
Using the template
1
Open the hole in the template along the line indicating
your desired setting angle.
2
Align the line with the front of the unit, and then align
the template with the cabinet.
3
Affix the four silicon rubber feet in alignment with the
four cut-out holes.
Attaching and Removing the Grille
It is recommended that this speaker system be used with the grille
net attached, but it can be removed if desired. To remove, follow
these instructions:
1
To remove the grille, place your fingers at the outside of
the grille toward the bottom and pull gently outward. Then
do the same at the top to detach.
2
To reattach the grille, hold the speaker grille with the
triangular symbol pointing upward, then align the four pins
on the back side of the grille with the holes in the speaker
and press in firmly.
Do not force the foam plug into the hole excessively,
since it might be pressed inside the speaker and be
impossible to remove.
50 cm
(19
11
/
16
in.)
20 cm
(7
7
/
8
in.)
foam plug
0 5 101520
S-31C_En.fm 3 ページ 2009年7月29日 水曜日 午後4時16分
4
En
Connections
This speaker does not include speaker cables used for connecting
to an amplifier.
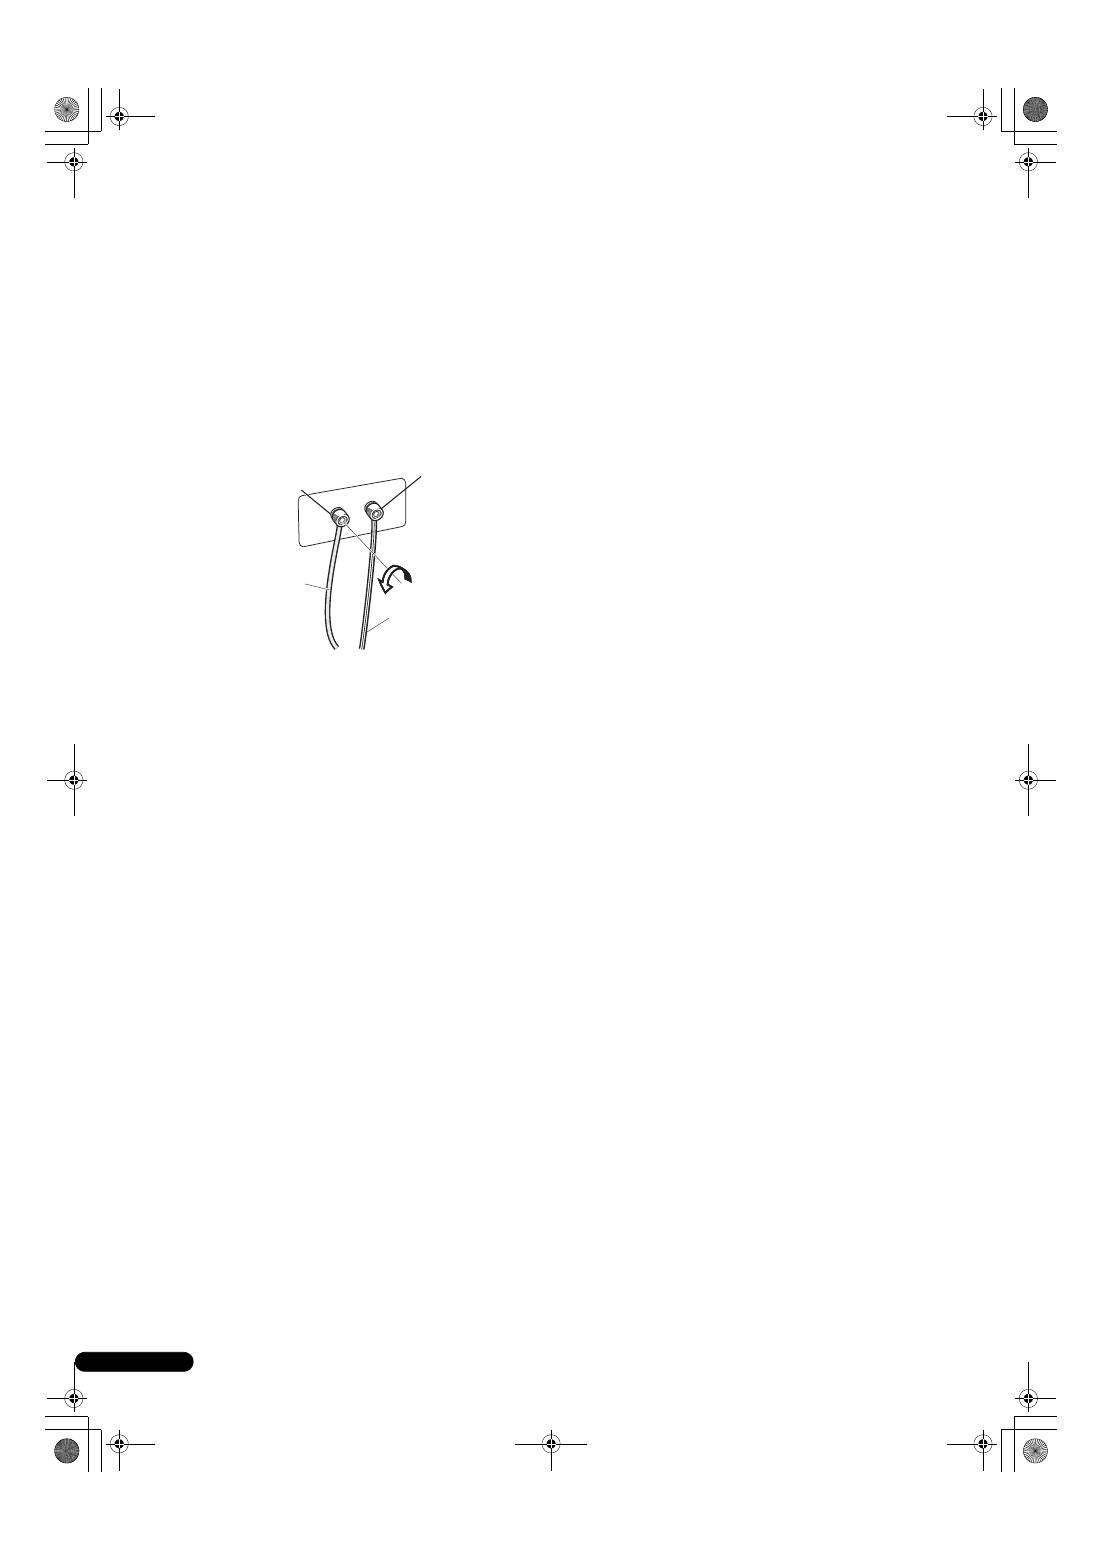
Connecting the cables
1
Switch off the power to your amplifier.
2
Connect the speaker cables to the input terminals on the
back of the speaker. For input terminal polarity, red is
positive (+) and black is negative (–).
Loosen the knobs on the input terminals and insert the speaker
cable wires into each of the terminal post holes, then tighten the
knobs.
3
Connect the other ends of the cables to the amp's
speaker
output terminals (for more details, refer to your amp
instruction manual).
• You can also connect the speaker’s terminals with a banana
plug.
• When using a banana plug, first remove the caps covering the
speaker terminal.
• After connecting the plugs, pull lightly on the cables to make
sure that the ends of the cables are securely connected to the
terminals. Poor connections can create noise and
interruptions in the sound.
• If the cables’ wires happen to be pushed out of the terminals,
allowing the wires to come into contact with each other, it
places an excessive additional load on the amp. This may
cause the amp to stop functioning, and may even damage the
amp.
• When using a set of speakers connected to an amplifier, you
won’t be able to obtain the normal stereo effect if the polarity
(
+
,
–
) of one of the speakers (left or right) is reversed.
Red terminal (+)
Black terminal (
−
)
Hot-side speaker cord
Common-side
speaker cord
CAUTION
These speaker terminals carry
HAZARDOUS LIVE
voltage
. To prevent the risk of electric shock when
connecting or disconnecting the speaker cables,
disconnect the power cord before touching any
uninsulated parts.
D3-4-2-2-3_A_En
S-31C_En.fm 4 ページ 2009年7月29日 水曜日 午後4時16分
5
En
English
Specifications
Enclosure. . . . . . . . . . . . . . . . . . . . . . . . . . . . Bass-reflex bookshelf type
Configuration . . . . . . . . . . . . . . . . . . . . . . . . . . . . . . . . . . . . . . . . . .2-way
Woofer . . . . . . . . . . . . . . . . . . . . . . . . . . . . . . . . 10 cm (4 in.) cone x 2
Tweeter . . . . . . . . . . . . . . . . . . . . . . . . . . . . . . . . . . . . . . . 2.5 cm (1 in.) dome
Impedance. . . . . . . . . . . . . . . . . . . . . . . . . . . . . . . . . . . . . . . . . . . . . . 6
Ω
Frequency response . . . . . . . . . . . . . . . . . . . . . . . . . . . . 45 Hz to 40 kHz
Sensitivity. . . . . . . . . . . . . . . . . . . . . . . . . . . . . . . . . . . . . . . 84 dB (2.83 V)
Maximum input power . . . . . . . . . . . . . . . . . . . . . . . . . . . . . . . . . . 120 W
Crossover frequency . . . . . . . . . . . . . . . . . . . . . . . . . . . . . . . . . . . . . 3 kHz
Exterior dimensions . . . . . . . 364 (W) mm x 146 (H) mm x 177 (D) mm
14
5
/
16
(W) in. x 5
3
/
4
(H) in. x 6
15
/
16
(D) in.
Weight . . . . . . . . . . . . . . . . . . . . . . . . . . . . . . . . . . . . 3.6 kg (7 lbs 15 oz.)
Supplied accessories
Speaker cable (3 m) . . . . . . . . . . . . . . . . . . . . . . . . . . . . . . . . . . . . . . . . 1
Silicon rubber foot . . . . . . . . . . . . . . . . . . . . . . . . . . . . . . . . . . . . . . . . . 4
Warranty card
Operating instructions (this document)
Specifications and design subject to possible modification
without notice, due to improvements.
is a trademark placed on a product with Pioneer’s Phase
Control technology. This technology enables high-grade sound
reproduction through each component by improving overall
phase matching.
Published by Pioneer Corporation.
Copyright © 2009 Pioneer Corporation.
All rights reserved.
S001_En
Selecting fine audio equipment such as the unit
you’ve just purchased is only the start of your
musical enjoyment. Now it’s time to consider how
you can maximize the fun and excitement your
equipment offers. This manufacturer and the
Electronic Industries Association’s Consumer
Electronics Group want you to get the most out of
your equipment by playing it at a safe level. One that
lets the sound come through loud and clear without
annoying blaring or distortion-and, most importantly,
without affecting your sensitive hearing.
Sound can be deceiving. Over time your hearing
“comfort level” adapts to higher volumes of sound.
So what sounds “normal” can actually be loud and
harmful to your hearing. Guard against this by
setting your equipment at a safe level BEFORE your
hearing adapts.
To establish a safe level:
• Start your volume control at a low setting.
• Slowly increase the sound until you can hear it
comfortably and clearly, and without distortion.
Once you have established a comfortable sound
level:
• Set the dial and leave it there.
Taking a minute to do this now will help to prevent
hearing damage or loss in the future. After all, we
want you listening for a lifetime.
We Want You Listening For A Lifetime
Used wisely, your new sound equipment will
provide a lifetime of fun and enjoyment. Since
hearing damage from loud noise is often
undetectable until it is too late, this manufacturer
and the Electronic Industries Association’s
Consumer Electronics Group recommend you avoid
prolonged exposure to excessive noise. This list of
sound levels is included for your protection.
Decibel
Level Example
30
Quiet library, soft whispers
40 Living room, refrigerator, bedroom away from traffic
50
Light traffic, normal conversation, quiet office
60
Air conditioner at 20 feet, sewing machine
70
Vacuum cleaner, hair dryer, noisy restaurant
80 Average city traffic, garbage disposals, alarm clock
at two feet.
THE FOLLOWING NOISES CAN BE DANGEROUS
UNDER CONSTANT EXPOSURE
90 Subway, motorcycle, truck traffic, lawn mower
100 Garbage truck, chain saw, pneumatic drill
120 Rock band concert in front of speakers,
thunderclap
140 Gunshot blast, jet plane
180 Rocket launching pad
Information courtesy of the Deafness Research Foundation.
For U.S. model
S-31C_En.fm 5 ページ 2009年7月29日 水曜日 午後4時16分
2
Fr
Nous vous remercions d’avoir acheté ce produit Pioneer.
Veuillez lire attentivement ce mode d’emploi de manière à pouvoir utiliser votre modèle correctement. Après avoir lu ces explications,
conservez-les en lieu sûr pour éventuellement les consulter plus tard.
Avant de commencer
• L’impédance nominale de ces enceintes acoustiques est de
6
Ω
. Raccordez ces enceintes à un amplificateur dont
l’impédance de charge va de 4
Ω
à 16
Ω
(un modèle pour
lequel “4
Ω
to 16
Ω
” est indiqué sur les bornes de sortie des
enceintes).
Pour éviter d’endommager les enceintes par une surcharge à
l’entrée, observez les précautions suivantes :
• Ne fournissez pas aux enceintes acoustiques une
puissance électrique dépassant l’entrée maximale
autorisée.
• Si vous utilisez un égaliseur graphique pour accentuer les
sons dans la plage des hautes fréquences, n’élevez pas trop
le volume de l’amplificateur.
• N’essayez pas de pousser un amplificateur de faible
puissance à produire un volume sonore élevé, car la
distorsion harmonique de l’amplificateur en serait
accentuée et vous pourriez endommager les haut-parleurs.
Précautions: d’installation
• Ne fixez pas les enceintes sur une paroi ou au plafond. Elles
pourraient tomber et provoquer des blessures.
• N’installez pas les enceintes en hauteur, au plafond ou sur
une paroi. Si elle est mal installée, la grille des haut-parleurs
peut tomber et provoquer des dégâts, voire des blessures à
des personnes.
• Mettez votre système audiovisuel hors tension et débranchez-
le, puis consultez le mode d’emploi avant de brancher des
composants. Prenez soin d’utiliser correctement les cordons
de raccordement.
Précautions: d’utilisation
• Ne placez pas l’enceinte sur une surface instable. En tombant,
elle pourrait entraîner des blessures et être endommagée.
• N’utilisez pas les enceintes pour produire des sons distordus
pendant une longue période. Cela pourrait provoquer un
incendie.
• Ne montez pas et ne vous asseyez pas sur les enceintes et ne
laissez pas des enfants jouer sur celles-ci.
• Ne posez pas d’objets lourds ou volumineux sur le dessus des
enceintes.
Nettoyage du coffret de l’enceinte
Normalement, il suffira de frottez le coffret de ces enceintes avec
un linge sec pour maintenir leur propreté. Au besoin, trempez un
linge dans un détergent neutre allongé de cinq à six fois son
volume d’eau et essorez bien le linge avant de l’utiliser pour frotter
le coffret. N’utilisez pas de cire ou de détergent pour mobilier.
N’employez jamais de diluant, benzine, insecticide en atomiseur
ou autre produit chimique sur les coffrets ou à proximité, car cela
endommagerait leurs surfaces.
Contenu de l’emballage
Cordon d’enceinte (3 m) x 1
Pied en caoutchouc de silicone x 4
Carte de garantie
Mode d’emploi (ce document)
K058_A_Fr
Si vous souhaitez vous débarrasser de cet appareil, ne le mettez pas à la poubelle avec vos ordures ménagères. Il existe un système de
collecte séparé pour les appareils électroniques usagés, qui doivent être récupérés, traités et recyclés conformément à la législation.
Les habitants des états membres de l’UE, de Suisse et de Norvège peuvent retourner gratuitement leurs appareils électroniques usagés aux
centres de collecte agréés ou à un détaillant (si vous rachetez un appareil similaire neuf).
Dans les pays qui ne sont pas mentionnés ci-dessus, veuillez contacter les autorités locales pour savoir comment vous pouvez vous débarrasser
de vos appareils.
Vous garantirez ainsi que les appareils dont vous vous débarrassez sont correctement récupérés, traités et recyclés et préviendrez de cette façon
les impacts néfastes possibles sur l’environnement et la santé humaine.
02_S-31C_Fr.fm 2 ページ 2009年7月29日 水曜日 午後4時17分
3
Fr
Français
Méthode d’installation
Choix d’un emplacement pour les enceintes
acoustiques
• Les sons reproduits par les enceintes acoustiques sont
facilement affectés de manière subtile par les conditions du
local d’écoute.
• Pour obtenir un son optimal, choisissez un plancher solide
pour disposer les enceintes et positionnez-les comme indiqué
ci-après. Le niveau des sons graves peut être ajusté en
rapprochant ou éloignant les enceintes par rapport aux parois.
Afin d’obtenir un son équilibré, ajustez les enceintes de sorte
qu’elles soient équidistantes de leur mur respectif.
• Si la pièce à tendance à réverbérer les sons, nous conseillons
de suspendre des tentures aux murs et/ou de placer un tapis
sur le plancher afin d’amortir les sons. Pour obtenir les
meilleurs résultats possibles, couvrez complètement les
murs.
• Cette enceinte est du type bibliothèque et elle déploiera donc
ses meilleures performances lorsqu’elle sera placée sur une
surface solide et plate, séparée du plancher. Le fait de placer
l’enceinte directement sur le plancher provoquera un son
ronflant et mal défini.
• Pioneer n’assume aucune responsabilité en cas de dégâts
causés par un assemblage et un montage inadéquats, un
renforcement insuffisant, une erreur d’utilisation, des
catastrophes naturelles, etc.
Utilisation du bouchon de mousse
À l’arrière de l’appareil se trouve bouchon de mousse qui permet
l’ajustement des sons graves. Le bouchon de mousse peut être
retiré si vous souhaitez produire un son grave plus accentué.
Voici des instructions générales pour l’utilisation du bouchon de
mousse:
• Montage au milieu d’un bâti: Laissez le bouchon de mousse
en place
• Montage en haut d’un bâti ou sur le sol: Retirez le bouchon de
mousse
Lors de l’utilisation des pieds en caoutchouc de silicone
Ces enceintes acoustiques sont fournies avec des pieds en
caoutchouc de silicone. Utilisez-les pour ajuster les quatre coins
et obtenir un maximum de stabilité.
L’utilisation du gabarit (voir la dernière page) permet d’ajuster
facilement l’angle d’installation.
Utilisation du gabarit
1
Ouvrez le trou dans le gabarit le long de la ligne
indiquant l’angle d’installation souhaité.
2
Alignez la ligne avec l’avant de l’appareil, puis alignez le
gabarit avec le coffret.
3
Fixez les quatre pieds en caoutchouc de silicone alignés
avec les quatre trous coupés.
Fixation et dépose de la grille
Il est recommandé d’utiliser ces enceintes acoustiques avec la
grille attachée, mais elle peut être retirée si vous le souhaitez.
Pour la retirer, suivez ces instructions:
1
Pour déposer la grille, placez vos doigts sur l’extérieur de
la grille vers le bas et tirez doucement vers l’extérieur. Puis,
faites de même avec la partie supérieure pour détacher la
grille.
2
Pour remettre la grille en place, tenez la grille avec le
symbole triangulaire dirigé vers le haut, puis alignez les
quatres ergots situés à l’arrière de la grille avec les trous sur
les enceintes et poussez fermement.
Ne poussez pas trop le bouchon de mousse dans le trou
car il pourrait entrer entièrement dans l’enceinte et
être impossible à retirer.
50 cm
20 cm
Bouchon de mousse
0 5 101520
02_S-31C_Fr.fm 3 ページ 2009年7月29日 水曜日 午後4時17分
