Pioneer DJM-250-W: инструкция
Раздел: Музыкальное Оборудование
Тип: Dj-Проигрыватель

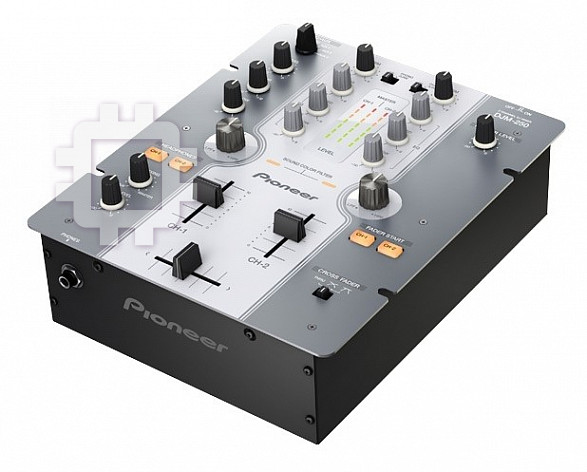
Инструкция к Dj-Проигрывателю Pioneer DJM-250-W

DJ MIXER
TABLE DE MIXAGE
DJ-MISCHPULT
DJM-250-K
MIXER PER DJ
DJ MENGPANEEL
DJM-250-W
MESA DE MEZCLAS DJ
DJ
микшерный
пульт
http://www.prodjnet.com/support/
The Pioneer website shown above offers FAQs, information on software and various other types of information
and services to allow you to use your product in greater comfort.
Le site Pioneer ci-dessus offre une FAQ, des informations sur le logiciel et divers types d’informations et de
services permettant de tirer le meilleur parti de ce produit.
Die oben gezeigte Pioneer-Website enthält häufig gestellte Fragen, Informationen über Software und andere
wichtige Informationen und Dienste, die Ihnen helfen, Ihr Produkt optimal zu verwenden.
Il sito Web di Pioneer sopra menzionato offre FAQ, informazioni sul software e vari altri tipi di informazione e
servizi, in modo da permettervi di fare uso del vostro prodotto in tutta comodità.
De bovengenoemde Pioneer website biedt een overzicht van de vaak gestelde vragen, informatie over
software, tips en hulpfuncties om uw gebruik van dit product te veraangenamen.
El sitio Web de Pioneer indicado más arriba tiene una sección con las preguntas más frecuentes, y además
ofrece información del software y varios tipos de información y servicios para que usted pueda usar su
producto con la mayor comodidad.
На вебсайте Pioneer выше содержатся часто задаваемые вопросы, информация по программному
обеспечению и различные типы информации и услуг, позволяющих использовать данное изделие
более лучшим образом.
Operating Instructions
Mode d’emploi
Bedienungsanleitung
Istruzioni per l’uso
Handleiding
Manual de instrucciones
Инструкции по эксплуатации
Thank you for buying this Pioneer product. Please read through these operating instructions so you will know how to operate your model properly. After
you have finished reading the instructions, put them away in a safe place for future reference.
In some countries or regions, the shape of the power plug and power outlet may sometimes differ from that shown in the explanatory drawings.
However the method of connecting and operating the unit is the same.
2
En
WARNING
If the AC plug of this unit does not match the AC
This equipment is not waterproof. To prevent a fire or
outlet you want to use, the plug must be removed
shock hazard, do not place any container filled with
and appropriate one fitted. Replacement and
liquid near this equipment (such as a vase or flower
mounting of an AC plug on the power supply cord of
pot) or expose it to dripping, splashing, rain or
this unit should be performed only by qualified
moisture.
service personnel. If connected to an AC outlet, the
D3-4-2-1-3_A1_En
cut-off plug can cause severe electrical shock. Make
sure it is properly disposed of after removal.
WARNING
The equipment should be disconnected by removing
Before plugging in for the first time, read the following
the mains plug from the wall socket when left unused
section carefully.
for a long period of time (for example, when on
The voltage of the available power supply differs
vacation).
according to country or region. Be sure that the
D3-4-2-2-1a_A1_En
power supply voltage of the area where this unit
will be used meets the required voltage (e.g., 230 V
or 120 V) written on the side panel.
CAUTION
D3-4-2-1-4*_A1_En
The ON/OFF switch on this unit will not completely
shut off all power from the AC outlet. Since the power
WARNING
cord serves as the main disconnect device for the
To prevent a fire hazard, do not place any naked flame
unit, you will need to unplug it from the AC outlet to
sources (such as a lighted candle) on the equipment.
shut down all power. Therefore, make sure the unit
D3-4-2-1-7a_A1_En
has been installed so that the power cord can be
easily unplugged from the AC outlet in case of an
Operating Environment
accident. To avoid fire hazard, the power cord should
Operating environment temperature and humidity:
also be unplugged from the AC outlet when left
+5 °C to +35 °C (+41 °F to +95 °F); less than 85 %RH
unused for a long period of time (for example, when
(cooling vents not blocked)
on vacation).
Do not install this unit in a poorly ventilated area, or in
D3-4-2-2-2a*_A1_En
locations exposed to high humidity or direct sunlight (or
strong artificial light)
D3-4-2-1-7c*_A1_En
POWER-CORD CAUTION
Handle the power cord by the plug. Do not pull out the
This product is for general household purposes. Any
plug by tugging the cord and never touch the power
failure due to use for other than household purposes
cord when your hands are wet as this could cause a
(such as long-term use for business purposes in a
short circuit or electric shock. Do not place the unit, a
restaurant or use in a car or ship) and which requires
piece of furniture, etc., on the power cord, or pinch the
repair will be charged for even during the warranty
cord. Never make a knot in the cord or tie it with other
period.
cords. The power cords should be routed such that they
K041_A1_En
are not likely to be stepped on. A damaged power cord
can cause a fire or give you an electrical shock. Check
the power cord once in a while. When you find it
damaged, ask your nearest PIONEER authorized
service center or your dealer for a replacement.
S002*_A1_En
If you want to dispose this product, do not mix it with general household waste. There is a separate collection system for used
electronic products in accordance with legislation that requires proper treatment, recovery and recycling.
Private households in the member states of the EU, in Switzerland and Norway may return their used electronic products free of charge to
designated collection facilities or to a retailer (if you purchase a similar new one).
For countries not mentioned above, please contact your local authorities for the correct method of disposal.
By doing so you will ensure that your disposed product undergoes the necessary treatment, recovery and recycling and thus prevent potential
negative effects on the environment and human health.
K058b_A1_En

Contents
How to read this manual
The names of displays, menus, and buttons in this manual are enclosed
in brackets. (e.g. [MASTER] channel, [ON/OFF], [File] menu)
Before start
Features ....................................................................................................... 4
System setup example ............................................................................... 4
What’s in the box ........................................................................................ 4
Connections
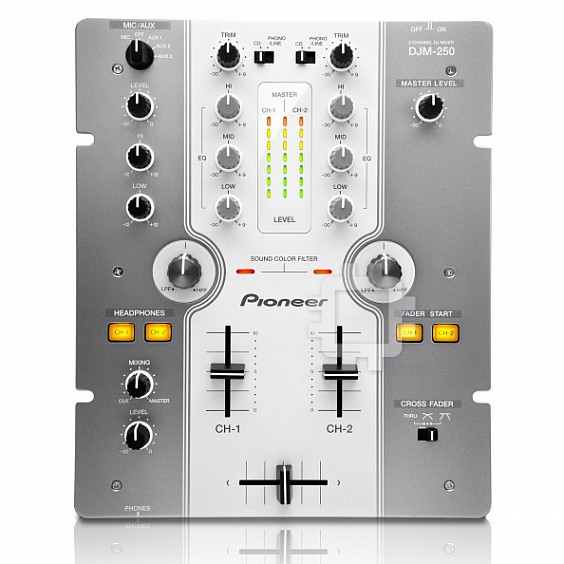
Names of Parts ........................................................................................... 5
Connecting the input/output terminals .................................................... 6
About the AC adapter ................................................................................. 7
Operation
Control panel ............................................................................................... 9
About the power switch of this unit .......................................................... 9
Basic operations (mixer section) ............................................................ 10
Using the filter function (filter section) ................................................... 11
Selecting the crossfader’s curve characteristics
(crossfader section) .................................................................................. 11
Starting playback of a Pioneer DJ player using the fader
(fader start section) .................................................................................. 11
Monitoring the sound over headphones (headphones section) .......... 12
Using a microphone or external device (MIC/AUX section) ................. 12
Additional information
Troubleshooting ........................................................................................ 13
Block Diagram .......................................................................................... 13
About trademarks and registered trademarks ...................................... 14
Specifications............................................................................................ 14
En
3
Before start
Features
This unit is a DJ mixer that carries over the technology of the Pioneer DJM series, the world standard in club sound. It is a standard type unit equipped
with the basic functions required for mixing, enabling full-fledged DJ play easily.
SOUND COLOR FILTER
MIC/AUX INPUT
Each channel is equipped with a SOUND COLOR FILTER function by
This unit is equipped with three sets of AUX inputs for input of audio
which filter effects can be achieved simply by turning a large control.
signals from external devices (computers, portable audio sets, TVs,
This lets you arrange and mix tracks intuitively for DJ performances.
synthesizers, etc.), as well as a microphone input. It can be used not only
for DJ performances, but also as a pre-amp to appreciate music.
3-BAND EQUALIZER
XLR OUTPUT
This unit is equipped with a 3-band equalizer allowing the volume of
the high, medium and low frequency ranges to be adjusted separately.
This unit is equipped with XLR balanced outputs featuring little loss of
Not only can the tone be adjusted to your tastes, the sound for a certain
audio signal quality, enabling DJ performances with high sound quality.
range can be turned completely off by turning the control all the way
Also, it can be connected to powered speakers or other devices support-
counterclockwise (isolator function).
ing XLR inputs without any changes to the terminals.
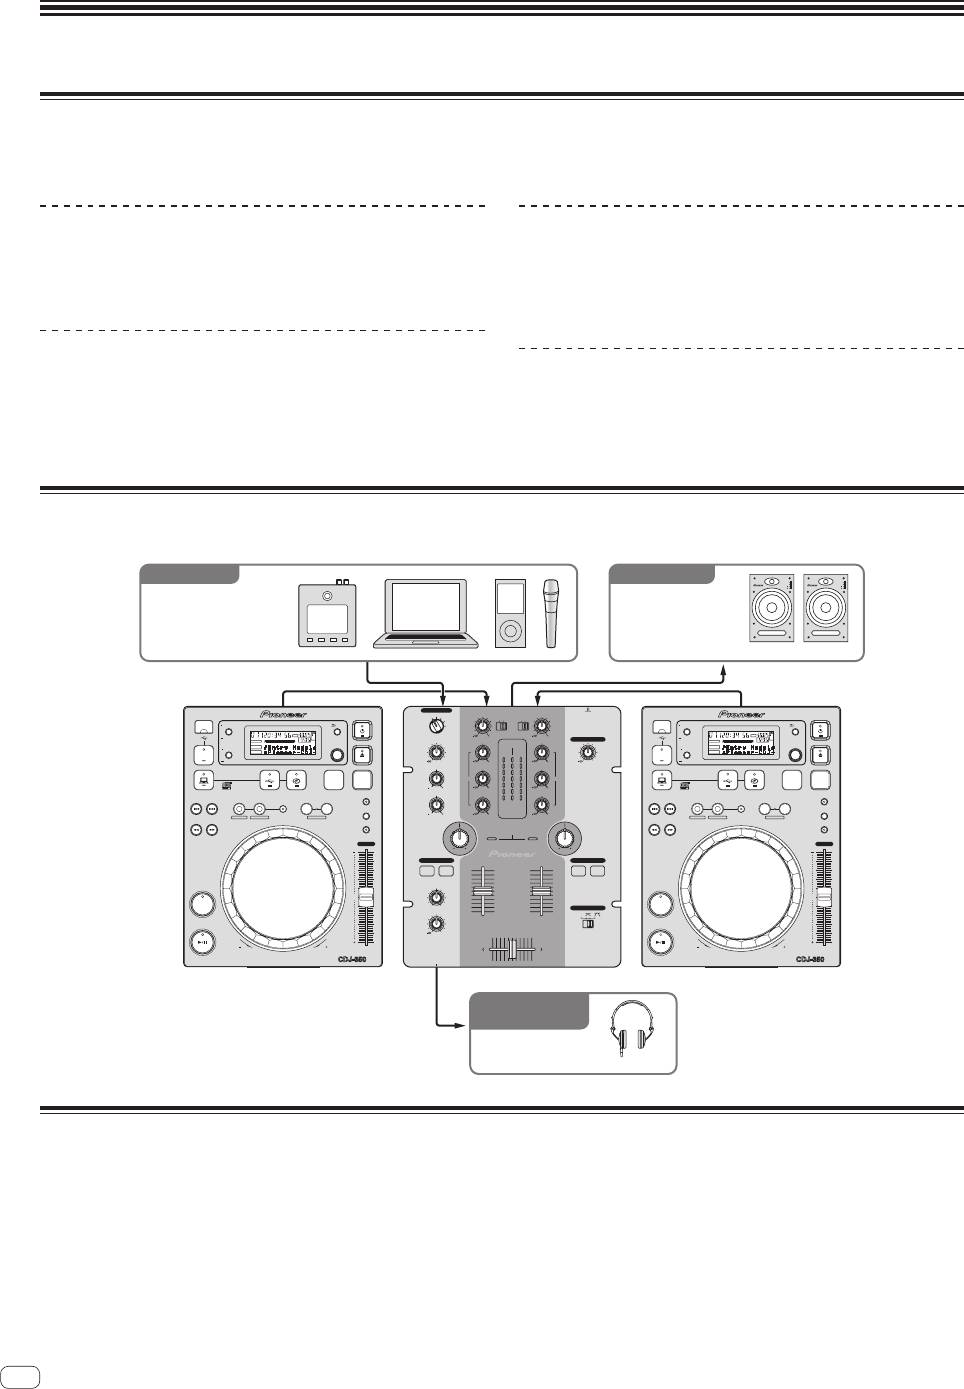
System setup example
A DJ system like the one shown on the diagram below can be achieved by combining this unit with a DJ player and peripheral equipment.
For audio outputFor audio input
EQ
INPUT
4
3
1
POWER
EQ
INPUT
POWER
2
1
2
3
4
Synthesizers,
Powered speakers,
computers,
components,
portable audio devices,
amplifiers, etc.
microphones, etc.
S-DJ05, etc.
MIC/AUX
OFF
ONOFF
MIC
AUX 1
TRIM
AUX 2
CD
PHONO
/LINE
CD
PHONO
/LINE
TRIM
2 CHANNEL DJ MIXER
TIME MODE
BACK
AUX 3
DJM-250
TIME MODE
BACK
REMAIN
MS
FTEMPO %
LOCK
16
9
9
REMAIN
MS
F TEMPO %
AUTO CUE
BPM
LEVEL
HI
MASTER LEVEL
AUTO CUE
LOCK
16
A.CUE
HI
A.CUE
BPM
DISPLAY
INFO
SELECT PUSH
MASTER
DISPLAY
INFO
SELECT PUSH
BROWSE
STOP
USB
CH-1 CH-2
USB
BROWSE
UTILITY
DISC
0
9
OVER
OVER
9
0
STOP
DISC
HI
MID
+4
+4
UTILITY
+2
+2
MID
SOURCE SELECT
PLAYLIST
SOURCE SELECT
MP3/AAC
LOCK
BPM
EQ EQ
0
0
PLAYLIST
LOCK
BPM
WAV/AIFF
1212
9
6
-
-
6
MP3/AAC
LOW
LOW
-
12
-
12
9
WAV/AIFF
LOW
TRACK SEARCH
IN/CUEOUT
RELOOP/EXIT
BEAT LOOP
VINYL MODE
-
18
18
-
dB
dB
TRACK SEARCH
IN/CUEOUT
RELOOP/EXIT
BEAT LOOP
VINYL MODE
LOOP
LOOP
OUT ADJUSTHOT LOOP
LOOP DRIVE
TEMPO RANGE
1212
9
LEVEL
9
SEARCH
SEARCH
OUT ADJUSTHOT LOOP
LOOP DRIVE
TEMPO RANGE
MASTER TEMPO
SOUND COLOR FILTER
MASTER TEMPO
TEMPO
LPFHPF LPFHPF
TEMPO
HEADPHONES
FADER START
CH-1 CH-2
CH-1 CH-2
MIXING
0
0
CUE
MASTERCUE
CUE
LEVEL
CROSS FADER
THRU
PLAY/PAUSE
CH
-
1 CH
-
2
PLAY/PAUSE
0
REVFWD
MULTI PLAYER
REVFWD
MULTI PLAYER
PHONES
CDJ-350, etc. DJM-250
CDJ-350, etc.
For checking the
audio input/output
Headphones
HDJ-500, etc.
What’s in the box
! AC adapter
! Power plug
! Warranty card
! Operating instructions (this document)
4
En
Оглавление
- Contents
- Before start
- Connections
- Operation
- Additional information
- Sommaire
- Informations préliminaires
- Raccordements
- Fonctionnement
- Informations supplémentaires
- Inhalt
- Vor der Inbetriebnahme
- Anschlüsse
- Bedienung
- Zusätzliche Informationen
- Indice
- Prima di cominciare
- Collegamenti
- Impiego
- Informazioni aggiuntive
- Inhoud
- Alvorens te beginnen
- Aansluitingen
- Bediening
- Aanvullende informatie
- Contenido
- Antes de empezar a usar la unidad
- Conexiones
- Operación
- Información adicional
- Содержание
- До начала
- Подключения
- Управление
- Дополнительная информация


