Pioneer HTP-SL100: инструкция
Раздел: Бытовая, кухонная техника, электроника и оборудование
Тип: Домашний кинотеатр
Инструкция к Домашнему кинотеатру Pioneer HTP-SL100

1
En
S-SL100-LR
S-SL100CR
ඵᖑᏣقಜ
Subwoofer / Enceinte d’extrêmes graves / Subwoofer / Subwoofer /
S-SLW500
Subwoofer / Altavoz de subgraves / Subwoofer / Subwoofer /
Subwoofer / Subwoofer / Apubassokaiutin / Сабвуфер /
ົմඵᖑᏣ
ᐈձКь
cover_S-SL100-LR_S-SL100CR.fm 1 ページ 2011年4月11日 月曜日 午前10時45分

S-SL100-LR_S-SL100CR_En.fm 2 ページ 2011年4月12日 火曜日 午前11時31分
Thank you for buying this Pioneer product.
Please read through these operating instructions so you will know how to operate your model properly. After you have finished reading the
instructions, put them away in a safe place for future reference.
S-SLW500
• This product is a passive subwoofer, and must be combined
Before you start
with the VSX-S300 or other audio device provided with a built-
in subwoofer amplifier.
S-SL100-LR/S-SL100CR
• This speaker system has an impedance of 4 Ω, and should be
• This speaker system has an impedance of 8 Ω, and should be
connected only to an amplifier designed with a load
connected only to an amplifier designed with a load
impedance of 4 Ω (the amplifier’s speaker output connector
impedance of 8 Ω (the amplifier’s speaker output connector
should clearly be labeled “4 Ω”).
should clearly be labeled “8 Ω”).
In order to prevent damage to the speaker system resulting
In order to prevent damage to the speaker system resulting
from input overload, please observe the following precautions:
from input overload, please observe the following precautions:
•Do not supply power to the speaker system in excess of the
•Do not supply power to the speaker system in excess of the
maximum permissible input.
maximum permissible input.
•When using a graphic equalizer to emphasize loud sounds in
•When using a graphic equalizer to emphasize loud sounds in
the high-frequency range, do not use excessive amplifier
the high-frequency range, do not use excessive amplifier
volume.
volume.
•Do not try to force a low-powered amplifier to produce loud
•Do not try to force a low-powered amplifier to produce loud
volumes of sound (the amplifier’s harmonic distortion will be
volumes of sound (the amplifier’s harmonic distortion will be
increased, and you may damage the speaker).
increased, and you may damage the speaker).
Caution: installation
Caution: installation
• Do not place the speaker on an unstable surface, as doing so
• Do not place the speaker on an unstable surface, as doing so
may cause the speaker to fall and cause damage or bodily
may cause the speaker to fall and cause damage or bodily
injury.
injury.
• Switch off and unplug your AV equipment and consult the
• Switch off and unplug your AV equipment and consult the
instructions when connecting up components. Make sure you
instructions when connecting up components. Make sure you
use the correct connecting cables.
use the correct connecting cables.
• Install the center speaker below the TV. When installing the
• Do not attach these speakers to the wall or ceiling, as they may
center speaker on top of the TV, be sure to secure it with tape
cause injury in the event of a fall.
or some other suitable means. Otherwise, the speaker may fall
from the TV due to external shocks such as earthquakes,
Caution: in use
endangering those nearby or damaging the speaker.
• Do not use the speaker to output distorted sound for long
Caution: in use
periods of time. This can result in damages to the speaker and
poses a potential fire hazard.
• Do not use the speaker to output distorted sound for long
periods of time. This can result in damages to the speaker and
• Do not place heavy or large objects on top of the speaker.
poses a potential fire hazard.
Doing so could provoke the speaker to fall, causing damages
• Do not place heavy or large objects on top of the speaker.
or bodily injury.
Doing so could provoke the speaker to fall, causing damages
• Do not sit or stand on the speaker, or let children play on the
or bodily injury.
speaker. Doing so could provoke the speaker to fall, causing
• The speaker system grill cannot be removed. Do not try to
damages or bodily injury.
forcibly remove it since doing so may damage the grille.
• The speaker system grill cannot be removed. Do not try to
• This product incorporates autoregression technology to
forcibly remove it since doing so may damage the grille.
protect the speakers. If the speakers stop emitting noise when
receiving too large a signal, turn the volume down on the amp
and wait a few seconds. The protection feature disables itself
Pioneer is not responsible for any accidents or damage that
automatically.
result from improper installation, misuse or modification of
the product, or natural disasters.
Cleaning the speaker cabinet
With normal use, wiping with a dry cloth should be sufficient to
keep the cabinet clean. If necessary, clean with a cloth dipped in
a neutral cleanser diluted five or six times with water, and wrung
out well. Do not use furniture wax or cleansers.
Never use thinners, benzine, insecticide sprays or other chemicals
on or near this unit since these will corrode the surfaces.
2
En
S-SLW500
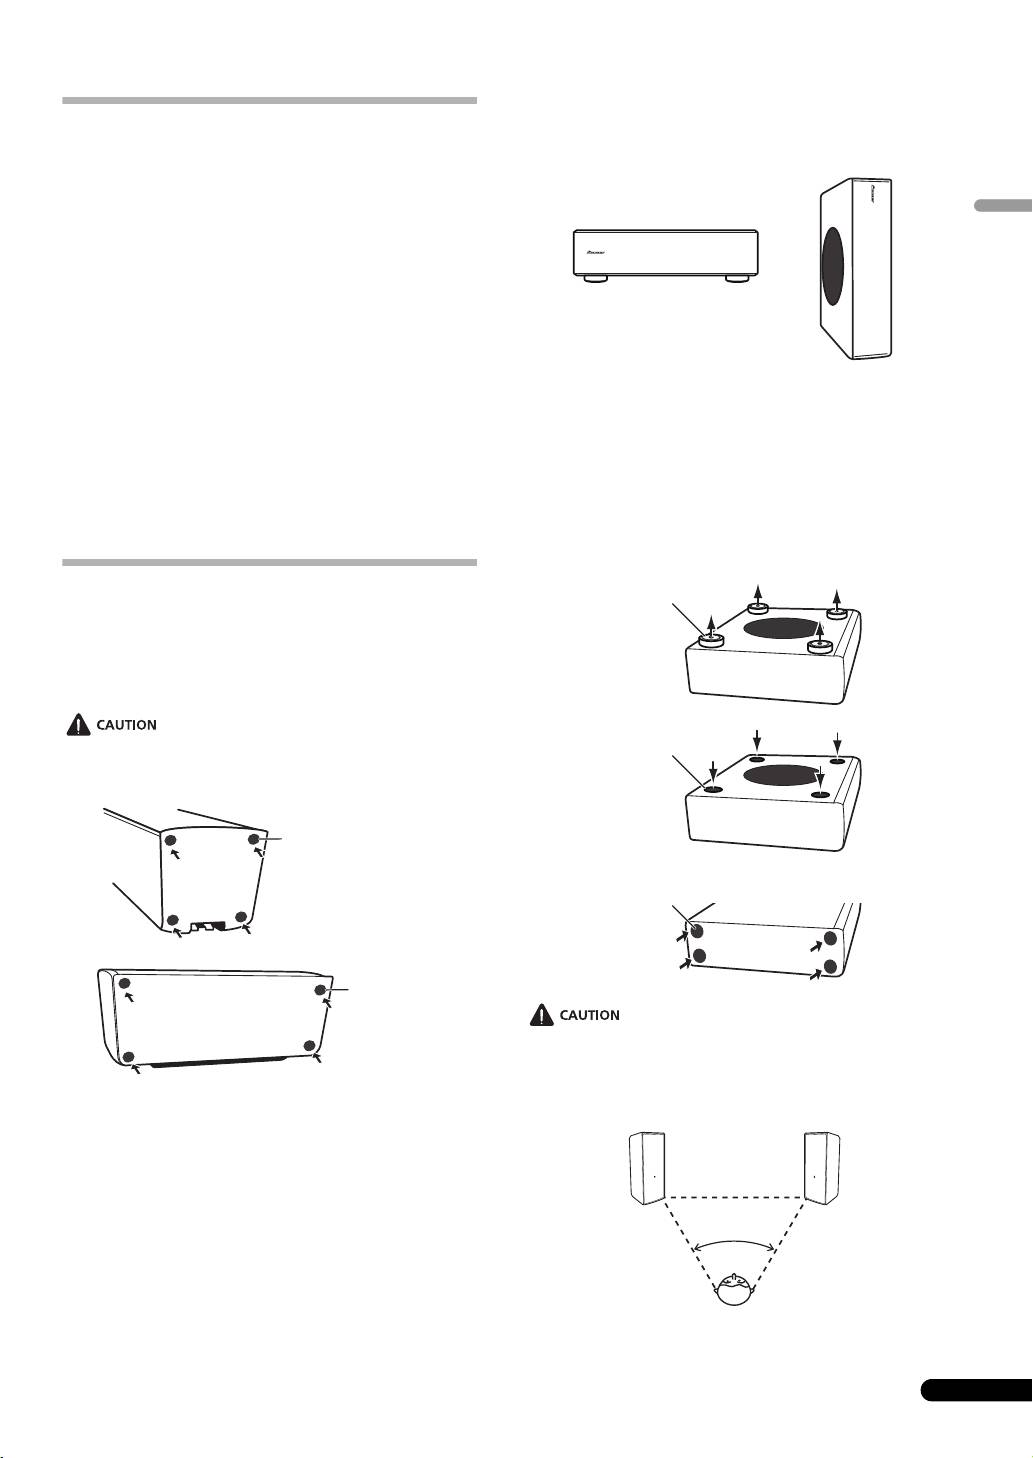
What’s in the box
Installing the subwoofer
The subwoofer can be mounted in either vertical or horizontal
orientation. The factory default is horizontal orientation.
S-SL100-LR
• Speaker cord (4 m) x 2
• Non-skid pads x 8
English
• Warranty card x 1 (European model only)
• Operating instructions (this document)
S-SL100CR
• Speaker cord (4 m) x 1
• Speaker cord (10 m) x 2
• Non-skid pads x 12
• Warranty card x 1 (European model only)
For vertical orientation installation
• Operating instructions (this document)
1 The feet are attached with Phillips screws; use a Phillips
screwdriver to remove them.
S-SLW500
2 Apply the accessory seals to the place the feet were
• Speaker cord (3 m) x 1
located to hide the screw holes.
• Non-skid pads x 4
3 Apply the non-skid pads to the four corners of the surface
•Seal x 4
where the subwoofer is to be mounted. Note that the non-
• Warranty card x 1 (European model only)
skid pads may not be fully effective on all surfaces, so do not
install in slippery locations.
Installation
S-SL100-LR/S-SL100CR
Install non-skid pads
Use the accessory non-skid pads as necessary, depending on your
installation location.
Lay the unit on its side on soft cloth or other material that will not
scar the unit.
・ Do not attempt to perform these procedures while tilting the
unit at an angle. Lay the unit on its side on soft cloth or other
material that will not scar the unit.
Mounting location
3
En
Non-skid pads
Non-skid pads
Step 1
Feet
Step 2
Seals
Step 3
Non-skid pads
50˚ to 60˚
S-SL100-LR_S-SL100CR_En.fm 3 ページ 2011年4月12日 火曜日 午前11時31分
