Pioneer VSX-920-K: Basic Setup
Basic Setup: Pioneer VSX-920-K
VSX-1020_SYXCN.book 39 ページ 2010年3月12日 金曜日 午前9時10分
Basic Setup 04
Chapter 4:
English
Basic Setup
6 Select ‘
OK
’ to change the language.
Deutsch
Changing the OSD display
The setting is completed and the
System
Setup
menu reappears automatically.
language (OSD Language)
The language used on the Graphical User
Interface (GUI) screen can be changed.
Automatically conducting
• The explanations in these operating
optimum sound tuning (Auto
Français
instructions are for when English is
MCACC)
selected for the GUI screen.
The Auto MCACC Setup measures the
1 Switch on the receiver and your TV.
acoustic characteristics of your listening area,
taking into account ambient noise, speaker
2 Press on the remote control,
RECEIVER
connection and speaker size, and tests for
Italiano
then press
HOME MENU
.
both channel delay and channel level. After
A GUI screen appears on your TV. Use //
you have set up the microphone provided with
/ and ENTER to navigate through the
your system, the receiver uses the information
screens and select menu items. Press
from a series of test tones to optimize the
RETURN to exit the current menu.
speaker settings and equalization for your
Nederlands
3 Select ‘
System Setup
’ from the
Home
particular room.
Menu
.
Make sure you do this before moving on to
Playing a source on page 44.
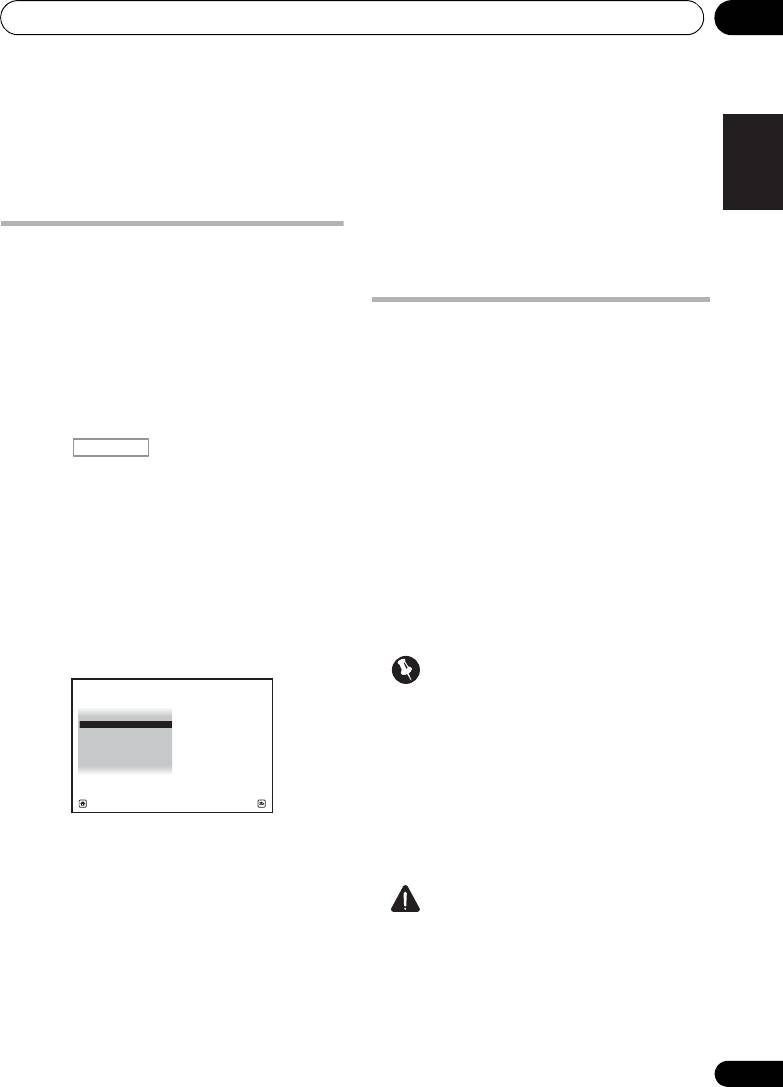
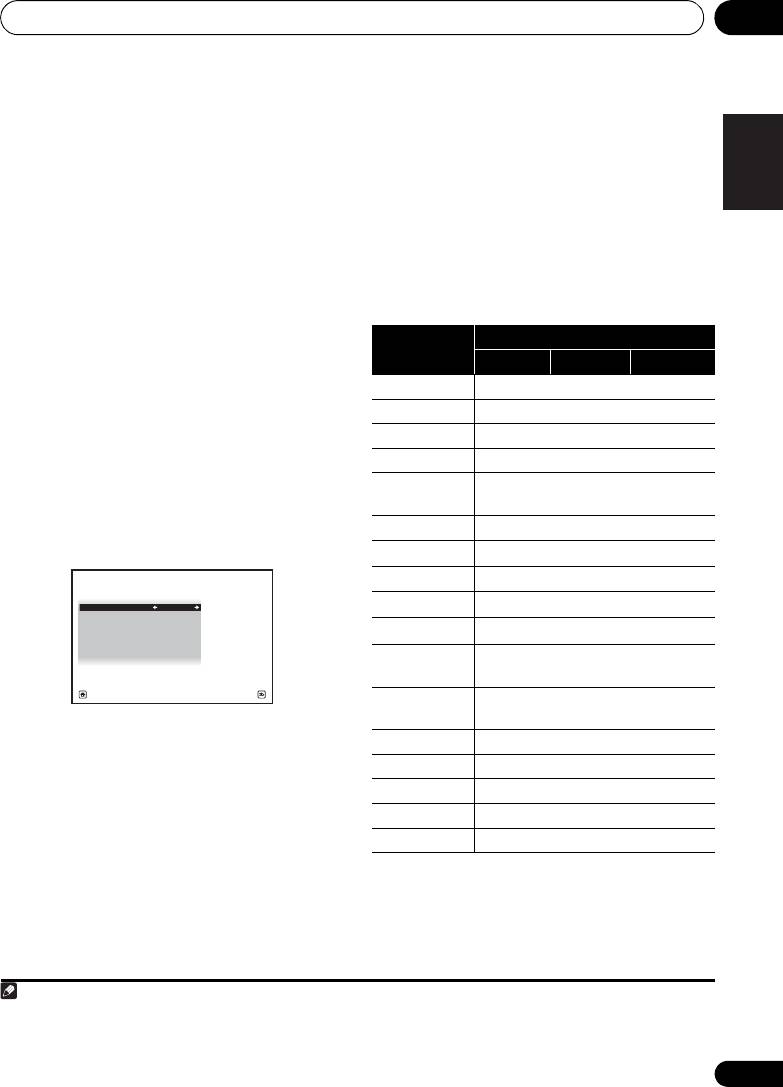
4 Select ‘
OSD Language
’ from the
System
Setup
menu.
Important
4.System Setup
Español
A/V RECEIVER
• Make sure the microphone and speakers
a. Manual SP Setup
b. Input Setup
c. OSD Language
are not moved during the Auto MCACC
d. Network Setup
e. Other Setup
Setup.
• Using the Auto MCACC Setup will
overwrite any existing settings for the
Exit Return
MCACC preset you select.
• Before using the Auto MCACC Setup, the
5 Select the desired language.
headphones should be disconnected.
• English
• French
CAUTION
• German
• The test tones used in the Auto MCACC
• Italian
Setup are output at high volume.
• Spanish
• Dutch
• Russian
39
En
Basic Setup04
®
The Full Auto MCACC display appears once the
THX
2
microphone is connected.
THX is a trademark of THX Ltd., which may be
registered in some jurisdictions. All rights
reserved.
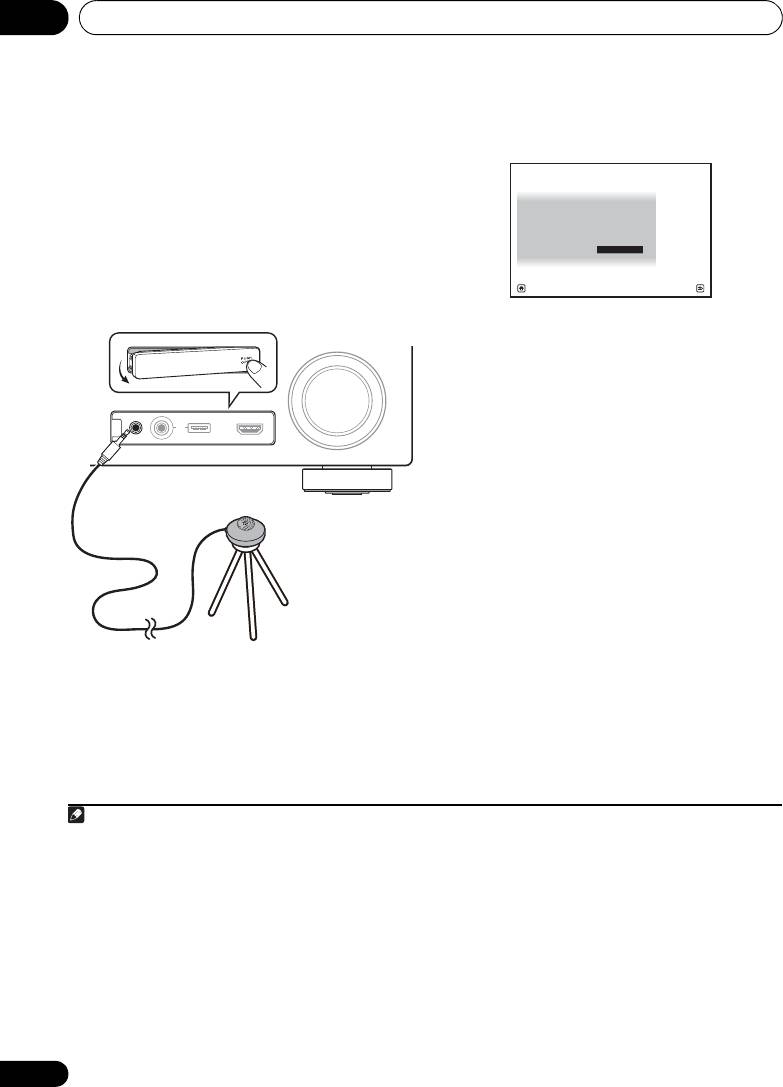
1 Switch on the receiver and your TV.
2 Connect the microphone to the
MCACC
SETUP MIC
jack on the front panel.
Make sure there are no obstacles between the
speakers and the microphone.
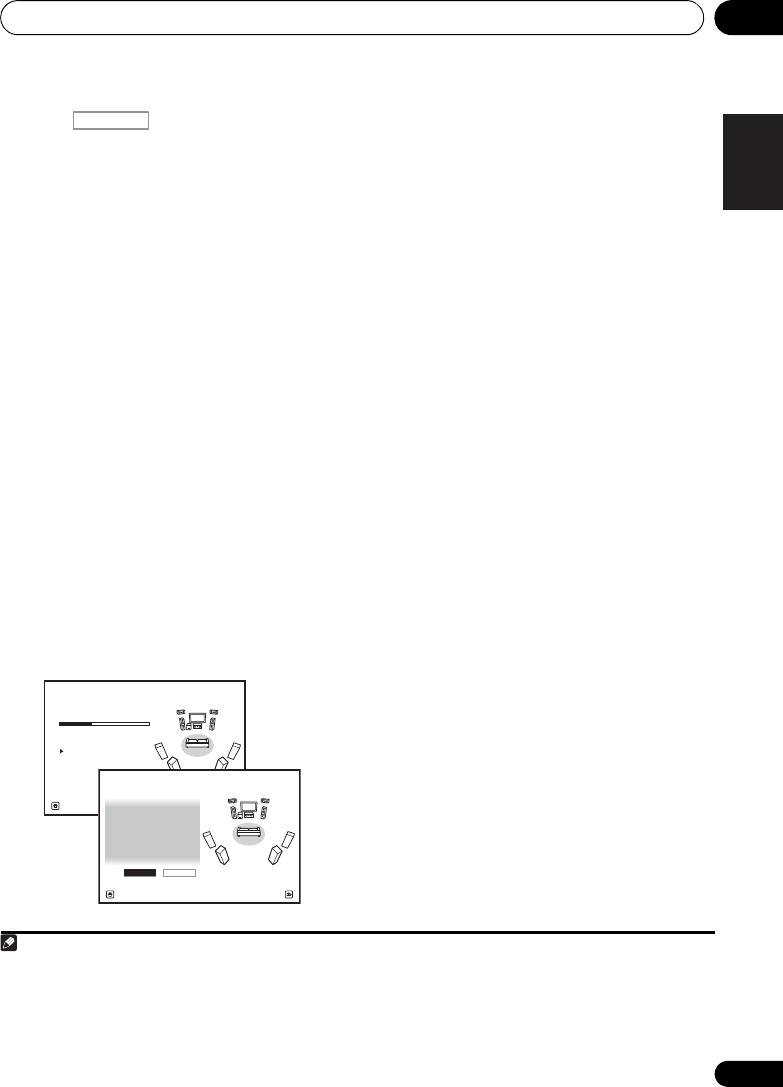
3
3 Select the parameters you want to set.
If the speakers are connected using any setup
other than the Front height setup, be sure to
set Speaker System before the Auto MCACC
Setup. See Speaker system setting on
page 101.
4
• Speaker System
– Select your speaker
system setting.
• EQ Type – This determines how the
frequency balance is adjusted.
• MCACC – The six MCACC presets are used
for storing surround sound settings for
different listening positions. Simply choose
an unused preset for now (you can rename
it later in Data Management on page 98).
• THX Speaker – Select YES if you are using
If you have a tripod, use it to place the
THX speakers (set all speakers to SMALL),
microphone so that it’s about ear level at your
otherwise leave it set to NO.
normal listening position. If you do not have a
tripod, use some other object to install the
1
microphone.
40
En
Note
1 Install the microphone on a stable floor. Placing the microphone on any of the following surfaces may make accurate
measurement impossible:
• Sofas or other soft surfaces.
• High places such as tabletops and sofa tops.
CONTROL ON
/
OFF
MASTER
VOLUME
VIDEO CAMERA
iPod
iPhone
MCACC
SETUP MIC
USB HDMI 5
VSX-1020/VSX-1025
Microphone
Tripod
2 If you leave the GUI screen for over five minutes, the screen saver will appear.
3 • When data measurement is taken, the reverb characteristics data (both before- and after-calibration) that this
receiver had been storing will be overwritten. If you want to save the reverb characteristics data before measuring,
connect a USB memory device to this receiver and transfer the data.
• When measurement is taken of reverb characteristics data other than SYMMETRY, the data are not measured after
the correction. If you will need to measure after correcting data, take the measurement using the EQ Professional
menu in the Manual MCACC setup (page 93).
4 If you are planning on bi-amping your front speakers, or setting up a separate speaker system in another room, read
through Speaker system setting on page 101 and make sure to connect your speakers as necessary before continuing
to step 4.
1a.Full Auto MCACC
A/V RECEIVER
Speaker System : Normal
(
SB/FH
)
EQ Type : SYMMETRY
MCACC : M1.MEMORY 1
THX Speaker : NO
START
Exit Return
VSX-1020_SYXCN.book 40 ページ 2010年3月12日 金曜日 午前9時10分
Basic Setup 04
4 Press and then select
START
.
The configuration shown on-screen should
English
reflect the actual speakers you have.
5 Follow the instructions on-screen.
•If you see an ERR message (or the speaker
Make sure the microphone is connected, and if
configuration displayed isn’t correct),
you’re using a subwoofer, make sure it is
there may be a problem with the speaker
switched on and set to a comfortable volume
connection.
level.
Deutsch
If selecting RETRY doesn’t work, turn off
6 Wait for the test tones to finish, then
the power and check the speaker
confirm the speaker configuration in the GUI
connections. If there doesn’t seem to be a
screen.
problem, you can simply use / to
A progress report is displayed on-screen while
select the speaker and / to change
the receiver outputs test tones to determine the
the setting and continue.
Français
speakers present in your setup. Try to be as
•If Reverse Phase is displayed, the
1
quiet as possible while it’s doing this.
speaker’s wiring (+ and –) may be
2
If no operations are performed for 10 seconds
inverted. Check the speaker connections.
while the speaker configuration check screen
– If the connections were wrong, turn off
is being displayed, the Auto MCACC Setup will
the power, disconnect the power cord,
Italiano
resume automatically. In this case, you don’t
then reconnect properly. After this,
need to select ‘OK’ and press ENTER in step 7.
perform the Full Auto MCACC procedure
• With error messages (such as Too much
again.
ambient noise! or Check microphone.),
– If the connections were right, select GO
select RETRY after checking for ambient
NEXT and
continue.
Nederlands
noise (see Problems when using the Auto
7 Make sure ‘
OK
’ is selected, then press
MCACC Setup on page 42) and verifying the
ENTER
.
mic connection. If there doesn’t seem to be
A progress report is displayed on-screen while
a problem, you can simply select GO NEXT
the receiver outputs more test tones to
and continue.
determine the optimum receiver settings for
Channel Level, Speaker Distance, Standing
Español
Wave and Acoustic Cal EQ.
Again, try to be as quiet as possible while this
is happening. It may take 3 to 10 minutes.
8 The Auto MCACC Setup procedure is
completed and the
Home Menu
menu
3
reappears automatically.
Be sure to disconnect the microphone from
this receiver upon completion of the Auto
MCACC Setup.
41
En
Note
1 Do not adjust the volume during the test tones. This may result in incorrect speaker settings.
RECEIVER
1a.Full Auto MCACC
A/V RECEIVER
Now Analyzing... 2/9
Environment Check
Ambient Noise : OK
Microphone :
Speaker YES/NO :
Exit Cancel
VSX-1020_SYXCN.book 41 ページ 2010年3月12日 金曜日 午前9時10分
1a.Full Auto MCACC
A/V RECEIVER
L : YES
FHL : YES
C : YES
FHR : YES
R : YES
SR : YES
SBR : YES
SBL : YES
SL : YES
SW : YES
10
OK RETRY
Exit Cancel
2 If the speaker is not pointed to the microphone (listening position) or when using speakers that affect the phase
(dipole speakers, reflective speakers, etc.), Reverse Phase may be displayed even if the speakers are properly
connected.
3 You can also choose to view the settings from the MCACC Data Check screen. See Checking MCACC Data on page 96
for more on this.
Basic Setup04
The settings made in the Auto MCACC Setup
2 Press on the remote control,
should give you excellent surround sound from
then press
HOME MENU
.
your system, but it is also possible to adjust
A Graphical User Interface (GUI) screen
these settings manually using The Advanced
appears on your TV.
Use /// and
MCACC menu on page 86 or The System Setup
ENTER to navigate through the screens and
1
and Other Setup menus on page 100.
select menu items. Press RETURN to confirm
and exit the current menu.
Problems when using the Auto
3Select ‘
System Setup
’ from the
Home
MCACC Setup
Menu
.
If the room environment is not optimal for the
Auto MCACC Setup (too much background
4Select ‘
Input Setup
’ from the
System
noise, echo off the walls, obstacles blocking
Setup
menu.
the speakers from the microphone) the final
settings may be incorrect. Check for household
appliances (air conditioner, fridge, fan, etc.),
that may be affecting the environment and
switch them off if necessary. If there are any
instructions showing in the front panel display,
please follow them.
• Some older TVs may interfere with the
operation of the microphone. If this seems
to be happening, switch off the TV when
doing the Auto MCACC Setup.
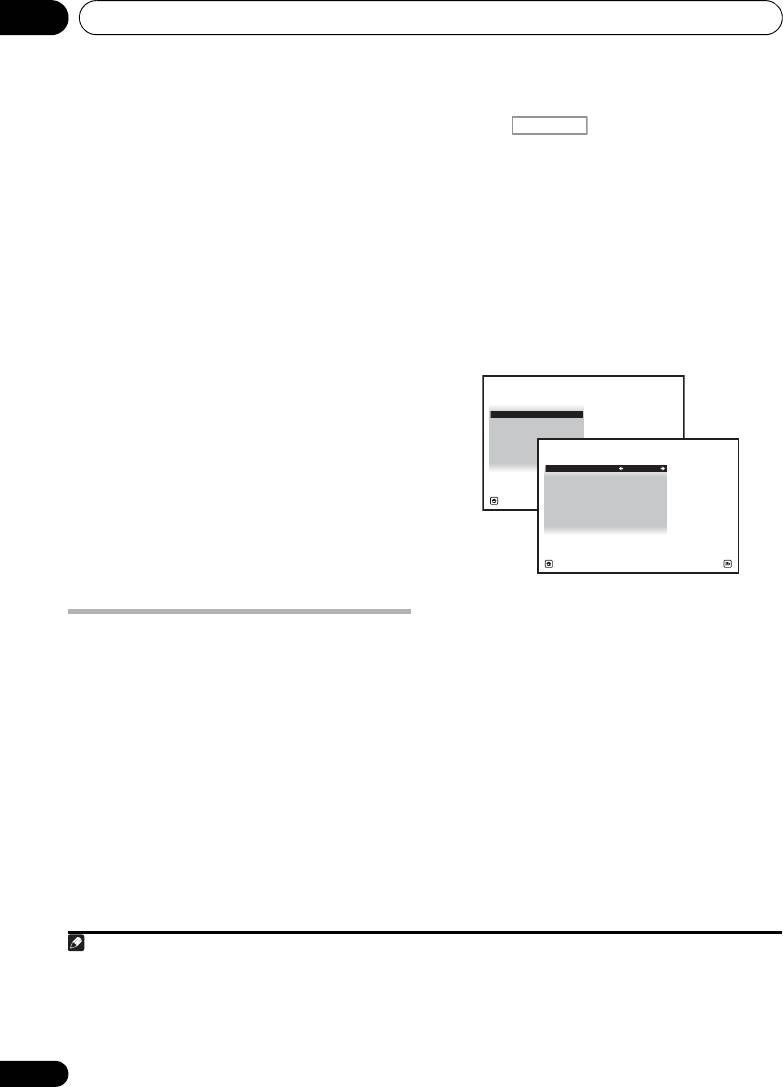
5 Select the input function that you want to
set up.
The Input Setup menu
The default names correspond with the names
You only need to make settings in the Input
next to the terminals on the rear panel (such as
Setup menu if you didn’t hook up your digital
DVD) which, in turn, correspond with the
equipment according to the default settings
names on the remote control.
(see Input function default and possible
settings on page 43). In this case, you need to
6 Select the input(s) to which you’ve
tell the receiver what equipment is hooked up
connected your component.
to which terminal so the buttons on the remote
For example, if your DVD player only has an
control correspond to the components you’ve
optical output, you will need to change the
connected.
DVD input function’s Digital In setting from
COAX-1 (default) to the optical input you’ve
1 Switch on the receiver and your TV.
connected it to.The numbering (OPT-1 to 2)
Use RECEIVER to switch on.
corresponds with the numbers beside the
inputs on the back of the receiver.
42
En
Note
1 • Depending on the characteristics of your room, sometimes identical speakers with cone sizes of around 12 cm will
end up with different size settings. You can correct the setting manually using the Manual speaker setup on page 100.
• The subwoofer distance setting may be farther than the actual distance from the listening position. This setting
should be accurate (taking delay and room characteristics into account) and generally does not need to be changed.
• If Auto MCACC Setup measurement results are incorrect due to the interaction of the speakers and viewing
environment, we recommend adjusting the settings manually.
RECEIVER
4.System Setup
A/V RECEIVER
a. Manual SP Setup
b. Input Setup
c. OSD Language
d. Network Setup
e. Other Setup
Exit Return
VSX-1020_SYXCN.book 42 ページ 2010年3月12日 金曜日 午前9時10分
4b.Input Setup
A/V RECEIVER
Input : DVD
Input Name : Rename
Input Skip : OFF
Digital In : COAX-1
HDMI Input :
---
Component In : Comp-1
Exit Finish
Basic Setup 04
• If your component is connected via a
Input function default and possible
English
component video cable to an input
settings
terminal other than the default, you must
The terminals on the receiver generally
tell the receiver which input terminal your
correspond to the name of one of the input
component is connected to, or else you
functions. If you have connected components
may see the composite video signals
to this receiver differently from (or in addition
1
instead of the component video signals.
Deutsch
to) the defaults below, see The Input Setup
7 When you’re finished, proceed to the
menu on page 42 to tell the receiver how
settings for other inputs.
you’ve connected up. The dots () indicate
There are optional settings in addition to the
possible assignments.
assignment of the input jacks:
Français
• Input Name – You can choose to rename
the input function for easier identification.
Select Rename to do so, or Default to
return to the system default.
• Input Skip – When set to ON, that input is
skipped when selecting the input using
Italiano
INPUT SELECT or the front panel INPUT
SELECTOR dial. (DVD and other inputs can
be still be selected directly with the input
function buttons.)
Nederlands
Español
8 When you’re finished, press
RETURN
.
You will return to the System Setup menu.
43
En
Note
VSX-1020_SYXCN.book 43 ページ 2010年3月12日 金曜日 午前9時10分
Input
Input Terminals
function
Digital HDMI
Component
a
DVD COAX-1
IN 1
BD (BD)
a
TV/SAT OPT-1
a
DVR/BDR OPT-2
IN 2
b
a
VIDEO
/
c
VIDEO 1
c
VIDEO 2
HDMI 1
(HDMI-1)
4b.Input Setup
HDMI 2 (HDMI-2)
A/V RECEIVER
Input : DVD
HDMI 3
Input Name : Rename
(HDMI-3)
Input Skip : OFF
b
Digital In : COAX-1
HDMI 4
(HDMI-4)
HDMI Input :
---
Component In : Comp-1
b
HDMI 5
(HDMI-5)
(front panel)
Exit Finish
INTERNET
RADIO
iPod/USB
b
CD COAX-2
CD-R/TAPE
TUNER
ADAPTER PORT
a.With Control set to ON in the HDMI Setup,
assignments cannot be made (see Control with HDMI
function on page 63).
b.VSX-1020/VSX-1025 only
c.VSX-920 only
1 For high-definition video (using component video connections), or when digital video conversion is switched off (in
Setting the Video options on page 71), you must connect your TV to this receiver using the same type of video cable as
you used to connect your video component.
Оглавление
- Contents
- Flow of settings on the receiver
- Before you start
- Controls and displays
- Connecting your equipment
- Basic Setup
- Basic playback
- Listening to your system
- Control with HDMI function
- Using other functions
- Controlling the rest of your system
- The Advanced MCACC menu
- The System Setup and Other Setup menus
- Additional information
- Table des matières
- Organigramme des réglages sur le récepteur
- Avant de commencer
- Commandes et affichages
- Raccordement de votre équipement
- Configuration de base
- Lecture de base
- Écoute de sources à l’aide de votre système
- Fonction Control HDMI
- Utilisation d’autres fonctions
- Commander le reste de votre système
- Le menu MCACC avancé
- Configuration du système et autres réglages
- Informations complémentaires
- Содержание
- Порядок выполнения настроек на ресивере
- Перед началом работы
- Органы управления и индикаторы
- Подключение оборудования
- Основная настройка
- Основные операции воспроизведения
- Прослушивание системы
- Функция Управление по HDMI
- Использование других функций
- Управление остальными частями системы
- Меню Advanced MCACC
- Меню System Setup (Настройка системы) и Other Setup (Другие настройки)
- Дополнительная информация
