Pioneer VSX-920-K: The Advanced MCACC menu
The Advanced MCACC menu: Pioneer VSX-920-K
The Advanced MCACC menu10
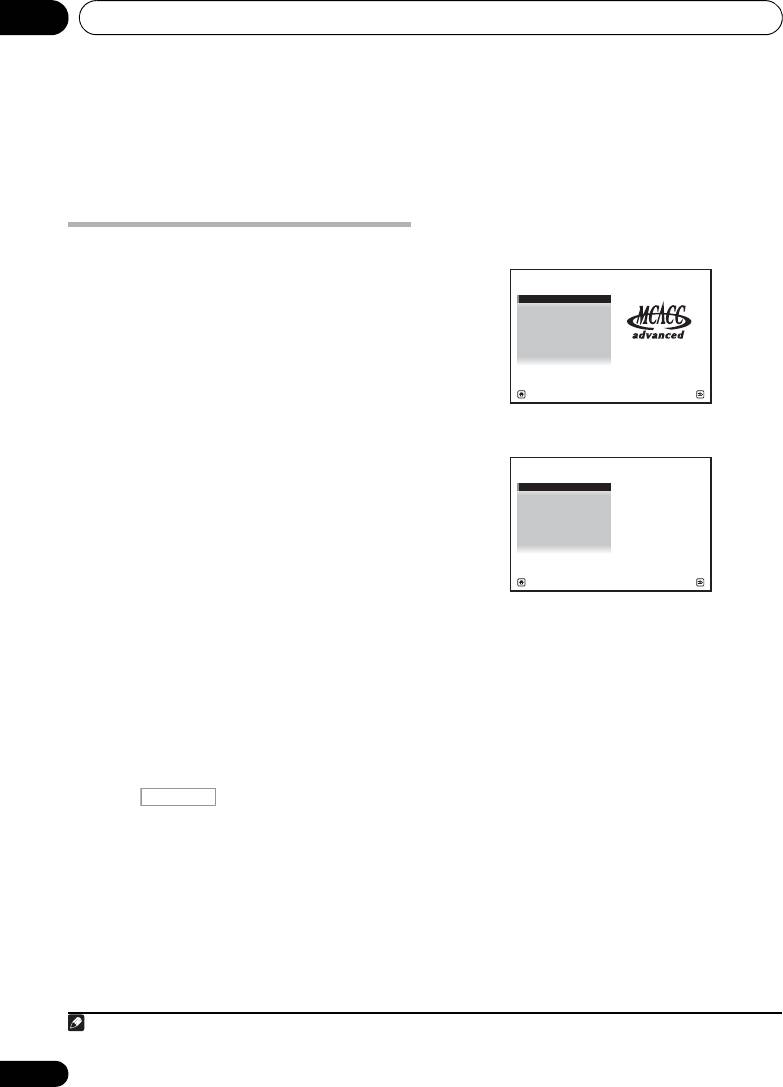
Chapter 10:
The Advanced MCACC menu
3Select ‘
Advanced MCACC
’ from the
Making receiver settings from
Home Menu
, then press
ENTER
.
the Advanced MCACC menu
The Advanced MCACC (Multi Channel
ACoustic Calibration) system was developed in
Pioneer’s laboratories with the aim of making it
possible for home users to perform
adjustments of the same level as in a studio
easily and with high precision. The acoustic
characteristics of the listening environment
are measured and the frequency response is
4 Select the setting you want to adjust.
calibrated accordingly to allow high precision,
automatic analysis and optimal calibration of
the sound field to bring it closer to a studio
environment than ever before. Furthermore,
while it was previously difficult to eliminate
standing waves, this receiver is equipped with
a standing wave control function using a
unique process to perform acoustic analysis
and reduce their influence.
• Full Auto MCACC – See Automatically
This section describes how to calibrate the
conducting optimum sound tuning (Auto
sound field automatically and fine-adjust the
MCACC) on page 39 for a quick and
sound field data manually.
effective automatic surround setup.
1 Switch on the receiver and your TV.
• Auto MCACC – See Automatic MCACC
1
Use RECEIVER to switch on.
(Expert) on page 87 for a more detailed
• If headphones are connected to the
MCACC setup.
receiver, disconnect them.
• Manual MCACC – Fine-tunes your speaker
settings and customizes the Acoustic
2 Press on the remote control,
Calibration EQ (see Manual MCACC setup
then press
HOME MENU
.
on page 90).
A Graphical User Interface (GUI) screen
appears on your TV. Use /// and
• Demo – No settings are saved and no
ENTER to navigate through the screens and
errors occur. When the speakers are
select menu items. Press RETURN to confirm
connected to this receiver, the test tone is
and exit the current menu.
output repeatedly. Press RETURN to
cancel the test tone.
• Press HOME MENU at any time to exit the
Home Menu.
86
En
Note
1 Make sure not to switch off the power when using the HOME MENU.
RECEIVER
HOME MENU
A/V RECEIVER
1. Advanced MCACC
2. MCACC Data Check
3. Data Management
4. System Setup
Exit Return
1.Advanced MCACC
A/V RECEIVER
a. Full Auto MCACC
b. Auto MCACC
c. Manual MCACC
d. Demo
Exit Return
VSX-1020_SYXCN.book 86 ページ 2010年3月12日 金曜日 午前9時10分

The Advanced MCACC menu 10
English
CAUTION
Automatic MCACC (Expert)
If your setup requires more detailed settings
• The test tones used in the Auto MCACC
than those provided in Automatically
Setup are output at high volume.
conducting optimum sound tuning (Auto
1 Select ‘
Auto MCACC
’ from the
MCACC) on page 39, you can customize your
Advanced MCACC
menu, then press
ENTER
.
Deutsch
setup options below. You can calibrate your
If the Advanced MCACC screen is not
system differently for up to six different MCACC
displayed, refer to Making receiver settings
1
presets
, which are useful if you have different
from the Advanced MCACC menu on page 86.
listening positions depending on the type of
source (for example, watching movies from a
2 Select the parameters you want to set.
2
sofa, or playing a video game close to the TV).
Use / to select the item, then use / to
Français
set.
Important
• Auto MCACC – The default is ALL
(recommended), but you can limit the
• Make sure the microphone/speakers are
system calibration to only one setting (to
not moved during the Auto MCACC Setup.
4
save time) if you want.
The available
• Using the Auto MCACC Setup will
5
Italiano
options are ALL, Keep SP System,
overwrite any existing settings for the
Speaker Setting, Channel Level,
3
MCACC preset you select.
Speaker Distance and EQ Pro & S-Wave.
• The screen saver will automatically appear
• EQ Type (only available when the Auto
after five minutes of inactivity.
MCACC Menu above is EQ Pro & S-Wave)
Nederlands
– This determines how the frequency
balance is adjusted.
Español
87
En
Note
VSX-1020_SYXCN.book 87 ページ 2010年3月12日 金曜日 午前9時10分
1 These are stored in memory and referred to as MEMORY1 to MEMORY6 until you rename them in Data Management
on page 98.
2 You may also want to have separate calibration settings for the same listening position, depending on how you’re
using your system.
3 Except in cases where you are only adjusting one parameter (i.e. channel level) from the Auto MCACC menu (step 2).
4 • When data measurement is taken (after selecting ALL or Keep SP System), the reverb characteristics data (both
before- and after-calibration) that this receiver had been storing will be overwritten. If you want to save the reverb
characteristics data before measuring, connect a USB memory device to this receiver and transfer the data.
• When measurement is taken of data other than SYMMETRY (after selecting ALL or Keep SP System), the data are
not measured after the correction. If you will need to measure after correction data, take the measurement using the
EQ Professional menu in the Manual MCACC setup (page 93).
• The EQ Pro & S-Wave measurement is also taken when Keep SP System or EQ Pro & S-Wave is selected. See
Acoustic Calibration EQ Professional on page 93 for more on this.
• Either effect of Acoustic Calibration EQ Professional and Standing Wave can be switched on and off in the
respective MCACC preset. For details, see Setting the Audio options on page 68.
5The Keep SP System option allows you to calibrate your system while leaving your current speaker setting (page 102)
unchanged.
The Advanced MCACC menu10
After a single calibration is performed, each of
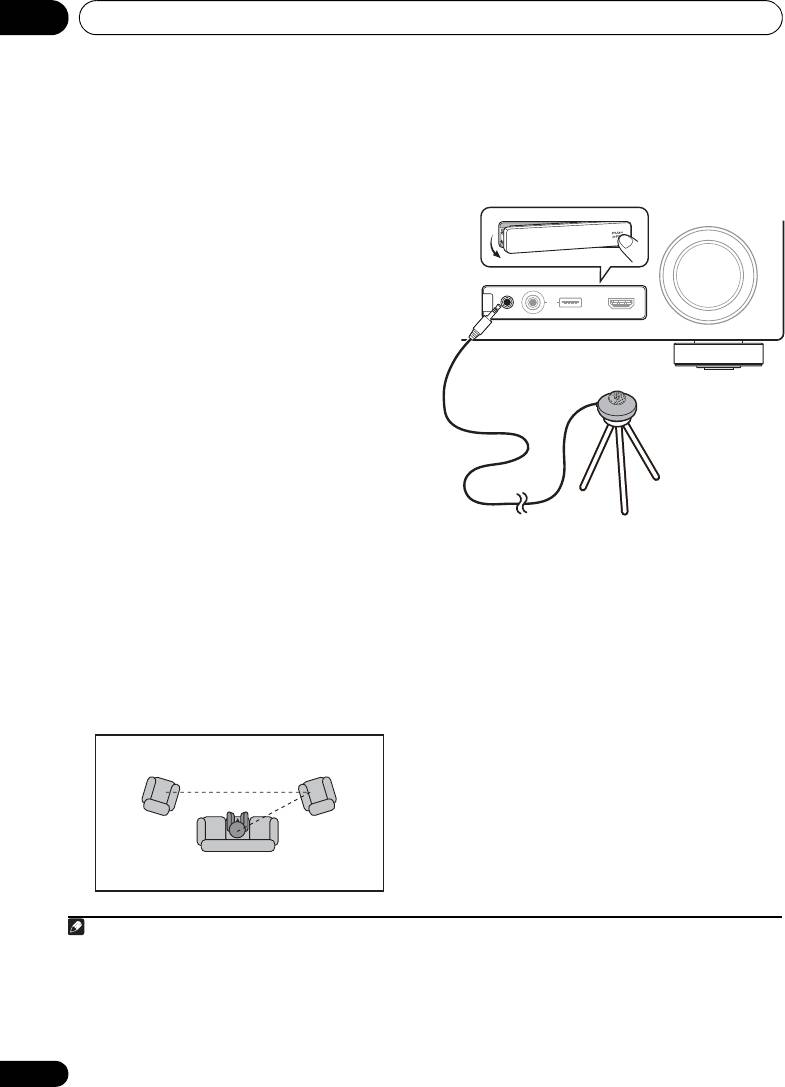
3 Connect the microphone to the
MCACC
the following three correction curves can be
SETUP MIC
jack on the front panel.
stored separately in the MCACC memory.
Make sure there are no obstacles between the
SYMMETRY implements symmetric
speakers and the microphone.
correction for each pair of left and right
speakers to flatten the frequency-amplitude
characteristics. ALL CH ADJ is a ‘flat’ setting
where all the speakers are set individually so
no special weighting is given to any one
1
channel. FRONT ALIGN
sets all speakers in
accordance with the front speaker settings (no
equalization is applied to the front left and right
channels).
• THX Speaker (only available when the
Auto MCACC Menu above is ALL or
Speaker Setting) – Select YES if you are
using THX speakers (set all speakers to
SMALL), otherwise leave it set to NO.
•
STAND.WAVE Multi-P
(only available when
the
Auto MCACC
Menu above is
EQ Pro &
S-Wave
)
– In addition to measurements at
If you have a tripod, use it to place the
the listening position, you can use two more
microphone so that it’s about ear level at your
reference points for which test tones will be
normal listening position. If you do not have a
analyzed for standing waves. This is useful if
tripod, use some other object to install the
you want to get a balanced ‘flat’ calibration
3
microphone.
for several seating positions in your
2
listening area.
Place the microphone at the
4 When you’re finished setting the options,
reference point indicated on-screen and
select
START
then press
ENTER
.
note that
the last microphone placement will
5 Follow the instructions on-screen.
be at your main listening position:
• Make sure the microphone is connected.
• If you’re using a subwoofer, it is
automatically detected every time you
switch on the system. Make sure it is on
and the volume is turned up.
• See Problems when using the Auto MCACC
Setup on page 42 for notes regarding high
background noise levels and other possible
interference.
88
En
Note
1 If you selected ALL or Keep SP System as your Auto MCACC menu, you can specify the MCACC preset where you
want to save the SYMMETRY, ALL CH ADJ and FRONT ALIGN settings.
2Switch the Multi-P setting NO if you only use one listening position.
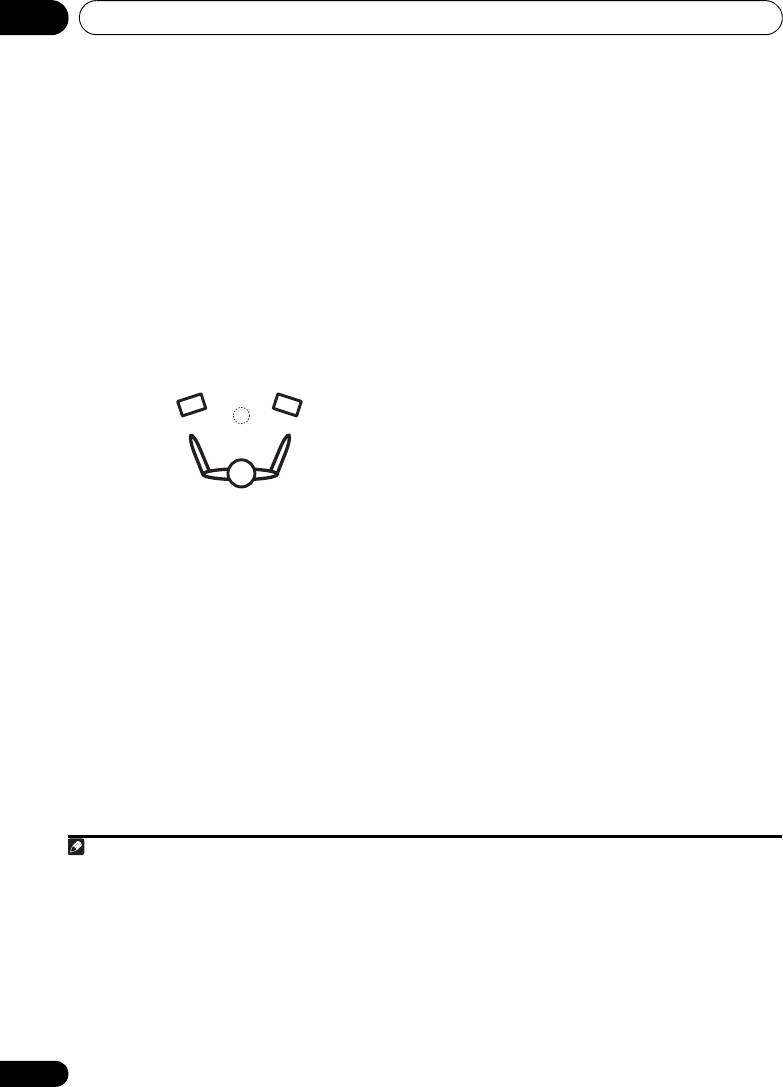
1 2
3
2nd reference
3rd reference
point
point
Main listening
position
3 Install the microphone on a stable floor. Placing the microphone on any of the following surfaces may make accurate
measurement impossible:
• Sofas or other soft surfaces.
• High places such as tabletops and sofa tops.
CONTROL ON
/
OFF
MASTER
VOLUME
VIDEO CAMERA
iPod
iPhone
MCACC
SETUP MIC
USB HDMI 5
VSX-1020/VSX-1025
Microphone
Tripod
VSX-1020_SYXCN.book 88 ページ 2010年3月12日 金曜日 午前9時10分

The Advanced MCACC menu 10
6 Wait for the Auto MCACC Setup to finish
•If Reverse Phase is displayed, the
English
outputting test tones.
speaker’s wiring (+ and –) may be
3
A progress report is displayed on-screen while
inverted. Check the speaker connections.
the receiver outputs test tones to determine the
– If the connections were wrong, turn off
speakers present in your setup. Try to be as
the power, disconnect the power cord,
1
quiet as possible while it’s doing this.
then reconnect properly. After this,
Deutsch
• With error messages (such as Too much
perform the Full Auto MCACC procedure
ambient noise! or Check microphone)
again.
select RETRY after checking for ambient
– If the connections were right, select GO
noise (see Problems when using the Auto
NEXT and
continue.
MCACC Setup on page 42) and verifying the
8 Make sure ‘
OK
’ is selected, then press
mic connection. If there doesn’t seem to be
2
ENTER
.
Français
a problem, you can simply select GO NEXT
A progress report is displayed on-screen while
and continue.
the receiver outputs more test tones to
7 If necessary, confirm the speaker
determine the optimum receiver settings for
2
configuration in the GUI screen.
channel level, speaker distance, and Acoustic
The configuration shown on-screen should
Calibration EQ.
Italiano
reflect the actual speakers you have.
Again, try to be as quiet as possible while this
If no operations are performed for 10 seconds
is happening. It may take 3 to 7 minutes.
while the speaker configuration check screen
• If you selected a STAND.WAVE Multi-P
is being displayed, the Auto MCACC Setup will
setup (in step 2), you will be asked to place
resume automatically. In this case, you don’t
the mic at the 2nd and 3rd reference
Nederlands
need to select ‘OK’ and press ENTER in step 8.
points before finally placing it at your main
• If you see an ERR message (or the speaker
listening position.
configuration displayed isn’t correct), there
9 The Auto MCACC Setup procedure is
may be a problem with the speaker
completed and the
Advanced MCACC
menu
connection.
reappears automatically.
If selecting RETRY doesn’t work, turn off
Español
The settings made in the Auto MCACC Setup
the power and check the speaker
should give you excellent surround sound
connections. If there doesn’t seem to be a
from your system, but it is also possible to
problem, you can simply use / to select
adjust these settings manually using the
the speaker and / to change the
Manual MCACC setup menu (starting below)
setting and continue.
or Manual SP Setup menu (starting on
4
page 100).
89
En
Note
VSX-1020_SYXCN.book 89 ページ 2010年3月12日 金曜日 午前9時10分
1 Do not adjust the volume during the test tones. This may result in incorrect speaker settings.
2 This screen is only shown if you selected ALL or Speaker Setting from the Auto MCACC menu.
3 If the speaker is not pointed to the microphone (listening position) or when using speakers that affect the phase
(dipole speakers, reflective speakers, etc.), Reverse Phase may be displayed even if the speakers are properly
connected.
4 • Depending on the characteristics of your room, sometimes identical speakers with cone sizes of around 12 cm will
end up with different size settings. You can correct the setting manually using the Manual speaker setup on page 100.
• The subwoofer distance setting may be farther than the actual distance from the listening position. This setting
should be accurate (taking delay and room characteristics into account) and generally does not need to be changed.
• If Auto MCACC Setup measurement results are incorrect due to the interaction of the speakers and viewing
environment, we recommend adjusting the settings manually.
The Advanced MCACC menu10
You can also choose to view the settings by
selecting individual parameters from the
Manual MCACC setup
MCACC Data Check screen:
You can use the settings in the Manual
• Speaker Setting – The size and number of
MCACC setup menu to make detailed
speakers you’ve connected (see page 102
adjustments when you’re more familiar with
for more on this)
the system. Before making these settings, you
should have already completed Automatically
• Channel Level – The overall balance of
your speaker system (see page 91 or 103
conducting optimum sound tuning (Auto
for more on this)
MCACC) on page 39.
• Speaker Distance – The distance of your
You only need to make these settings once
speakers from the listening position (see
(unless you change the placement of your
1
page 91 or 103 for more on this)
current speaker system or add new speakers).
• Standing Wave – Filter settings to control
lower ‘boomy’ frequencies (see page 92 for
CAUTION
• The test tones used in the Manual MCACC
• Acoustic Cal EQ – Adjustments to the
setup are output at high volume.
frequency balance of your speaker system
based on the acoustic characteristics of
your room (see page 93 for more on this)
Important
• Output MCACC data – MCACC data and
• Press the MCACC button while the
parameters can be transferred from this
pertinent setup screens are displayed to
receiver to a USB device and the data
select MCACC presets.
imported into other devices using a special
• For some of the settings below, you’ll have
application via a computer (see Output
to connect the setup microphone to the
MCACC data on page 97 for more on this).
front panel and place it about ear level at
Press
RETURN
after you have finished checking
your normal listening position. Press
each screen. When you’re finished, select
HOME MENU to display the Home Menu
RETURN
to go back to the
Home Menu
.
before you connect the microphone to this
Be sure to disconnect the microphone from
receiver. If the microphone is connected
this receiver upon completion of the Auto
while the HOME MENU is not being
MCACC Setup.
displayed, the display will change to the
Full Auto MCACC under Advanced
MCACC.
• See Problems when using the Auto MCACC
Setup on page 42 for notes regarding high
background noise levels and other possible
interference.
• If you’re using a subwoofer, switch it on
and turn up the volume to the middle
position.
90
En
Note
VSX-1020_SYXCN.book 90 ページ 2010年3月12日 金曜日 午前9時10分
1 Since the distance measurements have been set according to the sound characteristics of your speakers, there are
cases where (for optimal surround sound) the actual distance may differ from the speaker distance setting.

VSX-1020_SYXCN.book 91 ページ 2010年3月12日 金曜日 午前9時10分
The Advanced MCACC menu 10
1 Select ‘
Manual MCACC
’ from the
1 Select ‘
Fine Channel Level
’ from the
English
Advanced MCACC
menu.
Manual MCACC
setup menu.
See Making receiver settings from the Advanced
The volume increases to the 0.0 dB reference
MCACC menu on page 86 if you’re not already
level.
at this screen.
2 Adjust the level of the left channel.
2 Select the setting you want to adjust.
This will be the reference speaker level, so you
Deutsch
If you’re doing this for the first time, you might
may want to keep the level around 0.0 dB so
want to make these settings in order.
that you’ll have plenty of room to adjust the
other speaker levels.
• Fine Channel Level – Make fine
adjustments to the overall balance of your
• After pressing ENTER, test tones will be
speaker system (see Fine Channel Level
output.
Français
below).
3 Select each channel in turn and adjust
• Fine SP Distance – Make precise delay
the levels (
+/–12.0 dB
) as necessary.
settings for your speaker system (see Fine
Use / to adjust the volume of the speaker
Speaker Distance below).
you selected to match the reference speaker.
• Standing Wave – Control overly resonant
When it sounds like both tones are the same
Italiano
low frequencies in your listening room (see
volume, press to confirm and continue to
Standing Wave on page 92).
the next channel.
The last two settings are specifically for
• For comparison purposes, the reference
customizing the parameters explained in
speaker will change depending on which
Acoustic Calibration EQ Adjust on page 93:
speaker you select.
Nederlands
• EQ Adjust – Manually adjust the frequency
• If you want to go back and adjust a
balance of your speaker system while
channel, simply use / to select it.
listening to test tones (see Acoustic
4 When you’re finished, press
RETURN
.
Calibration EQ Adjust on page 93).
You will return to the Manual MCACC setup
• EQ Professional – Calibrate your system
menu.
based on the direct sound coming from the
Español
speakers and make detailed settings
Fine Speaker Distance
according to your room’s reverb
•Default setting: 3.00m (all speakers)
characteristics (see Acoustic Calibration
For proper sound depth and separation with
EQ Professional on page 93).
your system, it is necessary to add a slight bit
of delay to some speakers so that all sounds
Fine Channel Level
will arrive at the listening position at the same
•Default setting: 0.0dB (all channels)
time. You can adjust the distance of each
You can achieve better surround sound by
speaker in 1 cm increments. The following
properly adjusting the overall balance of your
setting can help you make detailed
speaker system. You can adjust the Channel
adjustments that you may not achieve using
Level of each speaker in 0.5 dB increments. The
the Manual speaker setup on page 100.
following setting can help you make detailed
1 Select ‘
Fine SP Distance
’ from the
adjustments that you may not achieve using
Manual MCACC
setup menu.
the Manual speaker setup on page 100.
2 Adjust the distance of the left channel
from the listening position.
91
En
The Advanced MCACC menu10
3 Select each channel in turn and adjust the
Standing Wave
distance as necessary.
2
•Default setting: ON
/ATT 0.0dB (all filters)
Use / to adjust the delay of the speaker
Acoustic standing waves occur when, under
you selected to match the reference speaker.
certain conditions, sound waves from your
The delay is measured in terms of speaker
speaker system resonate mutually with sound
distance from 0.01m to 9.00m.
waves reflected off the walls in your listening
Listen to the reference speaker and use it to
area. This can have a negative effect on the
measure the target channel. From the listening
overall sound, especially at certain lower
position, face the two speakers with your arms
frequencies. Depending on speaker placement,
outstretched pointing at each speaker. Try to
your listening position, and ultimately the
make the two tones sound as if they are
shape of your room, it results in an overly
arriving simultaneously at a position slightly in
resonant (‘boomy’) sound. The Standing Wave
1
front of you and between your arm span.
Control uses filters to reduce the effect of overly
resonant sounds in your listening area. During
playback of a source, you can customize the
filters used for Standing Wave Control for each
3
of your MCACC presets.
1Select ‘
Standing Wave
’ from the
Manual
MCACC
setup menu.
When it sounds like the delay settings are
2 Adjust the parameters for the Standing
matched up, press to confirm and continue
Wave Control.
to the next channel.
• Filter Channel – Select the channel to
• For comparison purposes, the reference
which you will apply the filter(s): MAIN (all
speaker will change depending on which
except center channel and subwoofer),
speaker you select.
Center or SW (subwoofer).
• If you want to go back and adjust a
• TRIM (only available when the filter channel
channel, simply use / to select it.
above is SW) – Adjust the subwoofer
4 When you’re finished, press
RETURN
.
channel level (to compensate for the
You will return to the Manual MCACC setup
difference in output post-filter).
menu.
92
En
Note
VSX-1020_SYXCN.book 92 ページ 2010年3月12日 金曜日 午前9時10分
1 • If you can’t seem to achieve this by adjusting the distance setting, you may need to change the angle of your
speakers very slightly.
• For better audibility, the subwoofer emits a continuous test tone (oscillating pulses are heard from your other
speakers). Note that it may be difficult to compare this tone with the other speakers in your setup (depending on the
low frequency response of the reference speaker).
2 You can switch on or off the Standing Wave and Acoustic Calibration EQ feature in the AUDIO PARAMETER menu.
See Setting the Audio options on page 68 for more on this.
3 • Since they will be overwritten, you may want to save the standing wave settings made with the Auto MCACC Setup
to another MCACC preset.
• Standing Wave control filter settings cannot be changed during playback of sources using the HDMI connection.
• When Standing Wave is selected for an MCACC preset memory where STAND.WAVE is set to OFF in the AUDIO
PARAMETER, STAND.WAVE ON is automatically selected.

The Advanced MCACC menu 10
• Freq / Q / ATT – These are the filter
•The OVER! indicator shows in the display
English
parameters where Freq represents the
if the frequency adjustment is too drastic
frequency you will be targeting and Q is the
and might distort. If this happens, bring
bandwidth (the higher the Q, the narrower
the level down until OVER! disappears
the bandwidth, or range) of the attenuation
from the display.
(ATT, the amount of reduction to the
targeted frequency).
Deutsch
Tip
3 When you’re finished, press
RETURN
.
• Changing the frequency curve of one
You will return to the Manual MCACC setup
channel too drastically will affect the
menu.
overall balance. If the speaker balance
seems uneven, you can raise or lower
Français
Acoustic Calibration EQ Adjust
channel levels using test tones with the
1
•Default setting: ON
/0.0dB (all channels/
TRIM feature. Use / to select TRIM,
bands)
then use / to raise or lower the
Acoustic Calibration Equalization is a kind of
channel level for the current speaker.
room equalizer for your speakers (excluding
3 When you’re finished, press
RETURN
.
the subwoofer). It works by measuring the
Italiano
You will return to the Manual MCACC setup
acoustic characteristics of your room and
menu.
neutralizing the ambient characteristics that
can color the original source material
Acoustic Calibration EQ Professional
(providing a ‘flat’ equalization setting). If you’re
This setup minimizes the unwanted effects of
not satisfied with the adjustment provided in
Nederlands
room reverberation by allowing you to
Automatically conducting optimum sound
calibrate your system based on the direct
tuning (Auto MCACC) on page 39 or Automatic
sound coming from the speakers.
MCACC (Expert) on page 87, you can also
adjust these settings manually to get a
How to use Acoustic Calibration EQ
frequency balance that suits your tastes.
Professional
1 Select ‘
EQ Adjust
’ from the
Manual
Español
If you find that lower frequencies seem overly
MCACC
setup menu.
reverberant in your listening room (i.e. it
sounds ‘boomy’), or that different channels
2 Select the channel(s) you want and adjust
to your liking.
seem to exhibit different reverb characteristics
(when Type A or Type B shown on the
Use / to select the channel.
diagrams on the following applies), select EQ
Use
/
to select the frequency and
/
to
Pro. & S-Wave (or ALL) for the Auto MCACC
boost or cut the EQ. When you’re finished, go
setting in Automatic MCACC (Expert) on
back to the top of the screen and press
to
page 87 to calibrate the room automatically.
return to
Ch
, then use
/
to select the
channel.
93
En
Note
VSX-1020_SYXCN.book 93 ページ 2010年3月12日 金曜日 午前9時10分
1 When EQ Adjust is selected for an MCACC preset memory where EQ is set to OFF in the AUDIO PARAMETER, EQ
ON is automatically selected.
The Advanced MCACC menu10
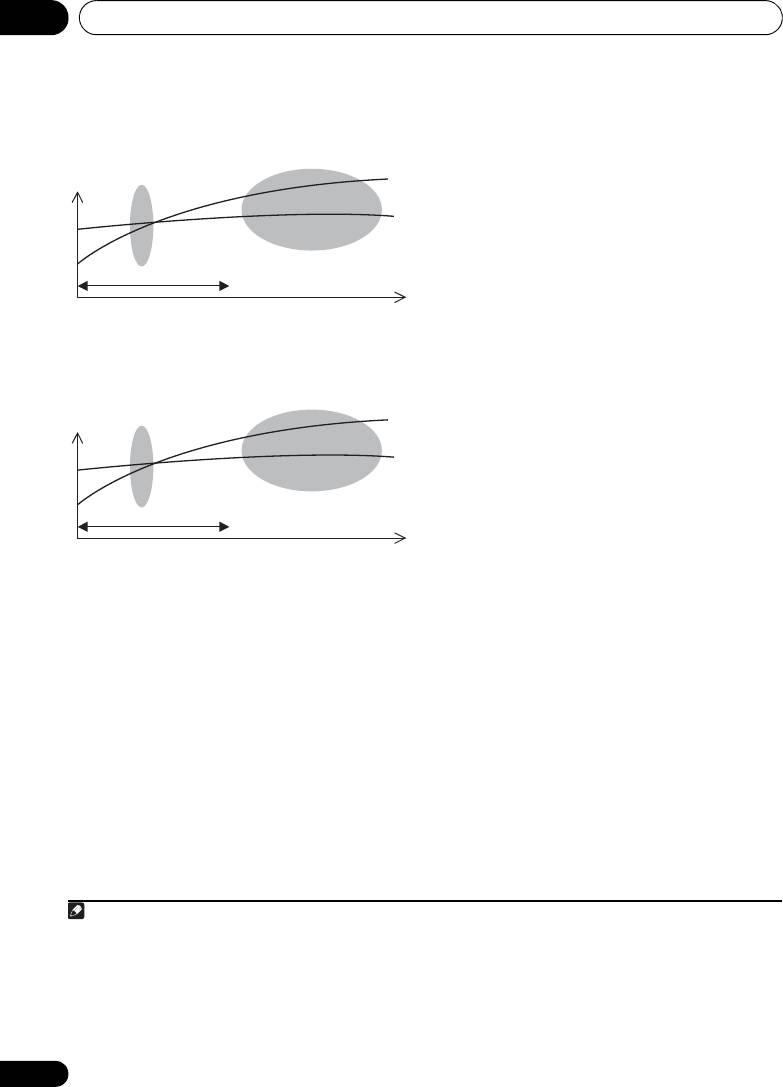
• Type A: Reverberance of high vs. low
Using Acoustic Calibration EQ Professional
frequencies
1 Select ‘
EQ Professional
’, then press
ENTER
.
2 Select an option and press
ENTER
.
• Reverb Measurement – Use this to
measure the reverb characteristics of your
room.
• Reverb View – You can check the reverb
measurements made for specified
1
frequency ranges in each channel.
• Advanced EQ Setup – Use this to select
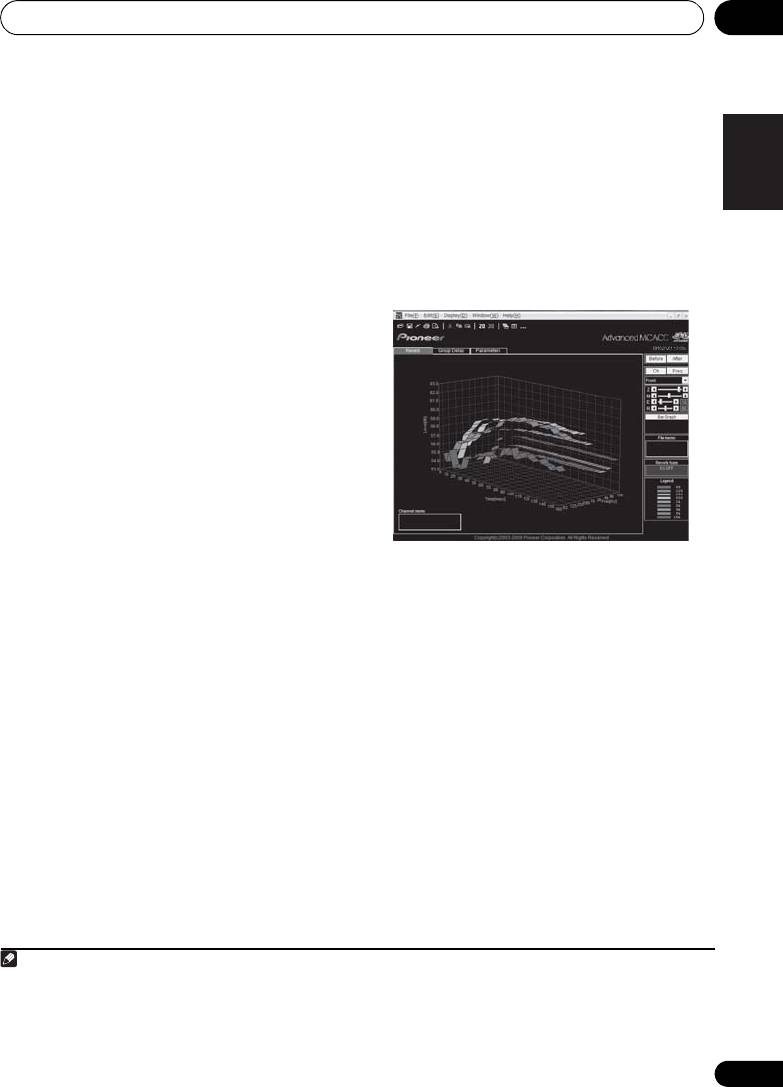
• Type B: Reverb characteristics for
the time period that will be used for
different channels
frequency adjustment and calibration,
based on the reverb measurement of your
listening area. Note that customizing
system calibration using this setup will
alter the settings you made in
Automatically conducting optimum sound
tuning (Auto MCACC) on page 39 or
Automatic MCACC (Expert) on page 87 and
is not necessary if you’re satisfied with
these settings.
If the pattern is as shown above, select the 30-
3 If you selected ‘
Reverb Measurement
’,
50ms setting. If not, this setting is not
select
EQ
ON
or
OFF
, and then
START
.
necessary.
The following options determine how the
reverb characteristics of your listening area are
displayed in Reverb View:
• EQ OFF – You will see the reverb
characteristics of your listening area
without the equalization performed by this
receiver (before calibration).
94
En
Low frequencies
Level
High frequencies
Conventional MCACC
EQ calibration range
Acoustic Cal. EQ Pro
calibration range
080
160
Time (in msec)
Front L
Level
Front R
Conventional MCACC
EQ calibration range
Acoustic Cal. EQ Pro
calibration range
080
160
Time (in msec)
Note
VSX-1020_SYXCN.book 94 ページ 2010年3月12日 金曜日 午前9時10分
1If the Reverb View procedure is performed after the Automatically conducting optimum sound tuning (Auto MCACC)
on page 39 or Reverb Measurement operation, depending on the standing wave control setting, differences may
appear on the reverb graph. With the Auto MCACC function, the reverberations are measured with the standing waves
controlled, so the reverb characteristics graph shows the characteristics with the effect of the standing waves
eliminated. By contrast, the Reverb Measurement function measures the reverberations without controlling the
standing waves, so the graph indicates the reverb characteristics including the effect of the standing waves. If you
wish to check the reverb characteristics of the room itself (with the standing waves as such), we recommend using
the Reverb Measurement function.

The Advanced MCACC menu 10
• EQ ON – You will see the reverb
5If ‘
Advanced EQ Setup
’ is selected, select
English
characteristics of your listening area with
the MCACC memory to be stored, then enter
the equalization performed by this receiver
the desired time setting for calibration, and
1
5
(after calibration).
Note that the EQ
then select
START
.
response may not appear entirely flat due
Based on the reverb measurement above, you
to adjustments necessary for your listening
can choose the time period that will be used
2
area.
for the final frequency adjustment and
Deutsch
calibration. Even though you can make this
When the reverb measurement is finished, you
setting without reverb measurement, it is best
can select Reverb View to see the results on-
to use the measurement results as a reference
screen. See Professional Calibration EQ
for your time setting. For an optimal system
graphical output on page 114 for
calibration based on the direct sound coming
troubleshooting information.
Français
from the speakers, we recommend using the
4 If you selected ‘
Reverb View
’, you can
30-50ms setting.
check the reverb characteristics for each
Use
/
to select the setting. Use
/
to
channel. Press
RETURN
when you’re done.
switch between them.
The reverb characteristics are displayed when
Select the setting from the following time
the Full Auto MCACC or Reverb
Italiano
periods (in milliseconds): 0-20ms, 10-30ms,
Measurement measurements are
3
20-40ms, 30-50ms, 40-60ms, 50-70ms and
conducted.
60-80ms. This setting will be applied to all
Use / to select the channel, frequency
channels during calibration.
and calibration setting you want to check. Use
When you’re finished, select
START
. It will take
/ to go back and forth between the three.
Nederlands
about 2 to 4 minutes for the calibration to
The reverb characteristics graph before and
finish.
after EQ calibration can be displayed by
4
selecting Calibration : Before / After.
Note
After the Acoustic Calibration Equalization is
that the markers on the vertical axis indicate
set, you are given the option to check the
decibels in 2 dB steps.
settings on-screen.
Español
95
En
Note
VSX-1020_SYXCN.book 95 ページ 2010年3月12日 金曜日 午前9時10分
1 The calibration corresponding to the currently selected MCACC preset will be used when EQ ON is selected. To use
another MCACC preset, press MCACC to select the MCACC memory you want to store.
2 After auto calibration with EQ Type : SYMMETRY (Full Auto MCACC, etc.), the graph for the inferred reverb
characteristics can be displayed by selecting Reverb View. To display the actually measured reverb characteristics
after EQ calibration, measure with EQ ON.
3The After display when measurements have been made using the Full Auto MCACC or Auto MCACC (ALL or KEEP
SP system) function shows the graph for the inferred reverb characteristics after EQ Type : SYMMETRY calibration.
4 The reverb characteristics graph is overwritten each time the reverberations are measured. No Data is displayed if
there is no reverb characteristic data, for example before measurements have been taken.
5 To specify the place where the MCACC memory is to be stored, press MCACC to select the MCACC memory you want
to store.

The Advanced MCACC menu10
4 Press
RETURN
to go back to the
MCACC
Checking MCACC Data
Data Check
menu, repeating steps 2 and 3 to
check other settings.
At the procedure of
Automatically conducting
optimum sound tuning (Auto MCACC)
on
5 When you’re finished, press
RETURN
.
page 39, the procedure of
Automatic MCACC
You will return to the Home Menu.
(Expert)
on page 87 or after fine-adjusting at
Manual MCACC setup
on page 90, you can
Speaker Setting
check your calibrated settings using the GUI
Use this to display the speaker size and
screen.
The data can be transferred to a
number of speakers. See Speaker Setting on
computer using a USB device to check it on the
page 102 for more on this.
computer’s screen as well.
1Select ‘
Speaker Setting
’ from the
MCACC
1 Press , then press
HOME
Data Check
menu.
MENU
.
A Graphical User Interface (GUI) screen appears
2 Select the channel you want to check.
on your TV. Use
///
and
ENTER
to
Use / to select the channel. The
navigate through the screens and select menu
corresponding channel on the layout diagram
items. Press
RETURN
to confirm and exit the
is highlighted.
current menu.
Channel Level
2 Select ‘
MCACC Data Check
’ from the
Use this to display the level of the various
Home Menu
.
channels. See Channel Level on page 103 for
3 Select the setting you want to check.
•
Speaker Setting
– Used to check the
1Select ‘
Channel Level
’ from the
MCACC
settings of the speaker systems. See
Data Check
menu.
Speaker Setting
below for more on this.
• Channel Level – Used to check the output
2 When ‘
MCACC
’ is highlighted, use
/
level of the different speakers. See Channel
to select the MCACC preset you want to
Level below for more on this.
check.
The level of the various channels set at the
• Speaker Distance – Used to check the
selected MCACC preset is displayed. ‘---’ is
distance to the different speakers. See
displayed for channels that are not connected.
Speaker Distance below for more on this.
• Standing Wave – Used to check the
Speaker Distance
standing wave control filter settings. See
Use this to display the distance from the
Standing Wave on page 97 for more on this.
different channels to the listening position. See
• Acoustic Cal EQ –
Used to check the
Speaker Distance on page 103 for more on this.
calibration values of the listening
environment’s frequency response. See
1Select ‘
Speaker Distance
’ from the
Acoustic Cal EQ on page 97
for more on
MCACC Data Check
menu.
this.
2 When ‘
MCACC
’ is highlighted, use
/
• Output MCACC data – See Output
to select the MCACC preset you want to
MCACC data on page 97 for more on this.
check.
The distance from the various channels set at
the selected MCACC preset is displayed. ‘---’ is
displayed for channels that are not connected.
96
En
RECEIVER
VSX-1020_SYXCN.book 96 ページ 2010年3月12日 金曜日 午前9時10分
The Advanced MCACC menu 10
Standing Wave
Output MCACC data
English
Use this to display the standing wave related
Before continuing, make sure you have
adjustment values for the various MCACC
completed step 2 in Checking MCACC Data on
memories. See Standing Wave on page 92 for
page 96. The data measured with the
Advanced MCACC function is transmitted to
1
the USB device.
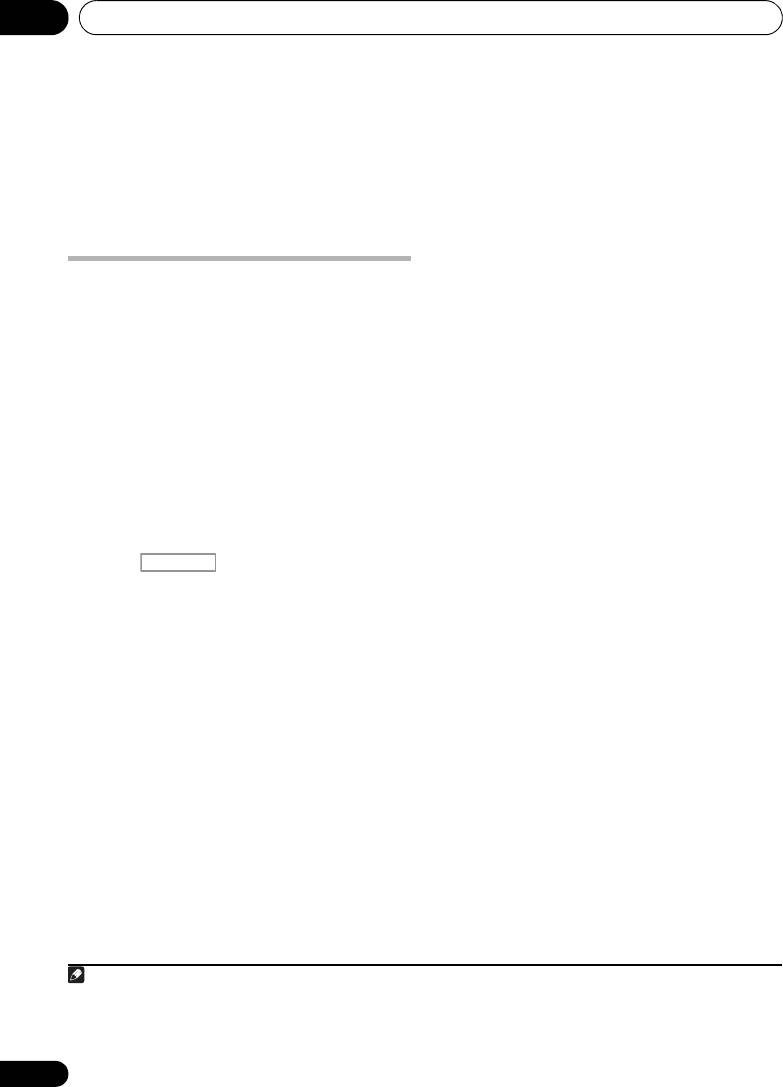
The 3D graphs of the reverb
1 Select ‘
Standing Wave
’ from the
MCACC
Deutsch
characteristics before and after calibration
Data Check
menu.
and the MCACC results (parameters) can be
2 When ‘
Filter Channel
’ is highlighted, use
checked on your computer.
/
to select the channel for which you
want to check standing wave control.
The standing wave related calibration value for
Français
the selected channel stored at the selected
MCACC preset and its graph are displayed.
3 Press
to highlight ‘
MCACC
’, then use
/
to select the MCACC preset you want to
check.
Italiano
Acoustic Cal EQ
Use this to display the calibration values for the
frequency response of the various channels set
in the different MCACC presets. See Acoustic
1 Select ‘
Output MCACC data
’ from the
Nederlands
Calibration EQ Adjust on page 93 for more on
MCACC Data Check
menu.
this.
When the receiver is ready for transmission,
“Please connect your USB memory for the
1 Select ‘
Acoustic Cal EQ
’ from the
MCACC
MCACC data, then press OK to output
Data Check
menu.
them.” shows on the GUI screen.
2 When ‘
Ch
’ is highlighted, use
/
to
Español
2 Connect your USB device to the USB
select the channel.
terminal on the front panel, then select “OK”.
The calibration value for the frequency response
“Please wait...” will be displayed on the
of the selected channel stored at the selected
screen and transmission of measurement
MCACC preset and its graph are displayed.
data to the USB device will begin.
3 Press
to highlight ‘
MCACC
’, then use
Transmission is complete when “Complete” is
/
to select the MCACC preset you want to
2
displayed.
check.
97
En
Note
VSX-1020_SYXCN.book 97 ページ 2010年3月12日 金曜日 午前9時10分
1 MCACC data and parameters are transferred from this receiver to a USB device and by connecting the USB device
to a computer, the data is imported via the MCACC software in the computer. See Connecting a USB device for
Advanced MCACC output on page 36 for more on this.
2 Only one set of reverb characteristics is stored on the receiver. If you wish to compare several different measurement
results, transmit the data to the USB memory each time reverb measurements are taken.
The Advanced MCACC menu10
3 When you’re finished, press
RETURN
.
• MCACC Memory Clear – Clear any
You will return to the MCACC Data Check
MCACC presets that you don’t want (see
menu. Continue with other operations in the
Clearing MCACC presets on page 99).
MCACC Data Check menu if necessary. Press
RETURN again to exit the MCACC Data Check
Renaming MCACC presets
menu.
If you have several different MCACC presets
that you’re using, you may want to rename
them for easier identification.
Data Management
1Select ‘
Memory Rename
’ from the
Data
This system allows you to store up to six
Management
setup menu.
MCACC presets, allowing you to calibrate your
system for different listening positions (or
2 Select the MCACC preset you want to
frequency adjustments for the same listening
rename, then select an appropriate preset
1
position).
This is useful for alternate settings
name.
to match the kind of source you’re listening to
Use / to select the preset, then / to
and where you’re sitting (for example,
select a preset name.
watching movies from a sofa, or playing a video
game close to the TV).
3 Repeat for as many MCACC presets as
necessary, then press
RETURN
when you’re
From this menu you can copy from one preset to
finished.
another, name presets for easier identification
You will return to the Data Management
and clear any ones you don’t need.
setup menu.
1 Press , then press
HOME
MENU
.
Copying MCACC preset data
A Graphical User Interface (GUI) screen
If you want to manually adjust the Acoustic
appears on your TV. Use /// and
Calibration EQ (see Manual MCACC setup on
ENTER to navigate through the screens and
page 90), we recommend copying your current
2
select menu items. Press RETURN to confirm
settings
to an unused MCACC preset. Instead
and exit the current menu.
of just a flat EQ curve, this will give you a
reference point from which to start.
2 Select ‘
Data Management
’ from the
Home Menu
.
1Select ‘
MCACC Memory Copy
’ from the
Data Management
setup menu.
3 Select the setting you want to adjust.
• Memory Rename – Name your MCACC
2 Select the setting you want to copy.
presets for easy identification (see
• All Data – Copies all the settings of the
Renaming MCACC presets below).
selected MCACC preset memory.
• MCACC Memory Copy – Copy settings
•
Level & Distance
– Copies only the channel
from one MCACC preset to another (see
level and speaker distance settings of the
Copying MCACC preset data below).
selected MCACC preset memory.
98
En
Note
1 This can be done in Automatically conducting optimum sound tuning (Auto MCACC) on page 39 or Automatic MCACC
(Expert) on page 87, either of which you should have already completed.
RECEIVER
VSX-1020_SYXCN.book 98 ページ 2010年3月12日 金曜日 午前9時10分
2 The settings made in Automatically conducting optimum sound tuning (Auto MCACC) on page 39 or Automatic
MCACC (Expert) on page 87.

VSX-1020_SYXCN.book 99 ページ 2010年3月12日 金曜日 午前9時10分
The Advanced MCACC menu 10
3 Select the MCACC preset you’ll be
English
copying the settings ‘
From
’, then specify
where you want to copy them (‘
To
’).
Make sure you don’t overwrite an MCACC
preset you’re currently using (this can’t be
undone).
Deutsch
4 Select ‘
OK
’ to confirm and copy the
settings.
When MCACC Memory Copy? is displayed,
select YES. If NO is selected, the memory is not
copied.
Français
Completed! shows in the GUI screen to
confirm the MCACC preset has been copied,
then you automatically return to the Data
Management setup menu.
Clearing MCACC presets
Italiano
If you are no longer using one of the MCACC
presets stored in memory, you can choose to
clear the calibration settings of that preset.
1 Select ‘
MCACC Memory Clear
’ from the
Nederlands
Data Management
setup menu.
2 Select the MCACC preset you want to
clear.
Make sure you don’t clear an MCACC preset
you’re currently using (this can’t be undone).
Español
3 Select ‘
OK
’ to confirm and clear the
preset.
When MCACC Memory Clear? is displayed,
select YES. If NO is selected, the memory is not
cleared.
Completed! shows in the GUI screen to
confirm the MCACC preset has been cleared,
then you automatically return to the Data
Management setup menu.
99
En
Оглавление
- Contents
- Flow of settings on the receiver
- Before you start
- Controls and displays
- Connecting your equipment
- Basic Setup
- Basic playback
- Listening to your system
- Control with HDMI function
- Using other functions
- Controlling the rest of your system
- The Advanced MCACC menu
- The System Setup and Other Setup menus
- Additional information
- Table des matières
- Organigramme des réglages sur le récepteur
- Avant de commencer
- Commandes et affichages
- Raccordement de votre équipement
- Configuration de base
- Lecture de base
- Écoute de sources à l’aide de votre système
- Fonction Control HDMI
- Utilisation d’autres fonctions
- Commander le reste de votre système
- Le menu MCACC avancé
- Configuration du système et autres réglages
- Informations complémentaires
- Содержание
- Порядок выполнения настроек на ресивере
- Перед началом работы
- Органы управления и индикаторы
- Подключение оборудования
- Основная настройка
- Основные операции воспроизведения
- Прослушивание системы
- Функция Управление по HDMI
- Использование других функций
- Управление остальными частями системы
- Меню Advanced MCACC
- Меню System Setup (Настройка системы) и Other Setup (Другие настройки)
- Дополнительная информация
