Pioneer VSX-920-K: Basic playback
Basic playback: Pioneer VSX-920-K

Basic playback05
Chapter 5:
Basic playback
It is possible to check on the front panel display
Playing a source
whether or not multi-channel playback is being
performed properly.
Here are the basic instructions for playing a
source (such as a DVD disc) with your home
When using a surround back speaker, PLIIx
theater system.
MOVIE is displayed when playing Dolby Digital
signals, and DTS+Neo:6 is displayed when
1 Switch on your system components and
playing DTS 5.1-channel signals.
receiver.
If the display does not correspond to the input
Start by switching on the playback component
1
signal and listening mode, check the
(for example a DVD player), your TV
and
connections and settings.
subwoofer (if you have one), then the receiver
(press RECEIVER).
4 Use the volume control to adjust the
• Make sure the setup microphone is
volume level.
disconnected.
Turn down the volume of your TV so that all
sound is coming from the speakers connected
2 Select the input function you want to
to this receiver.
play.
You can use the input function buttons on the
remote control, INPUT SELECT, or the front
2
panel INPUT SELECTOR dial.
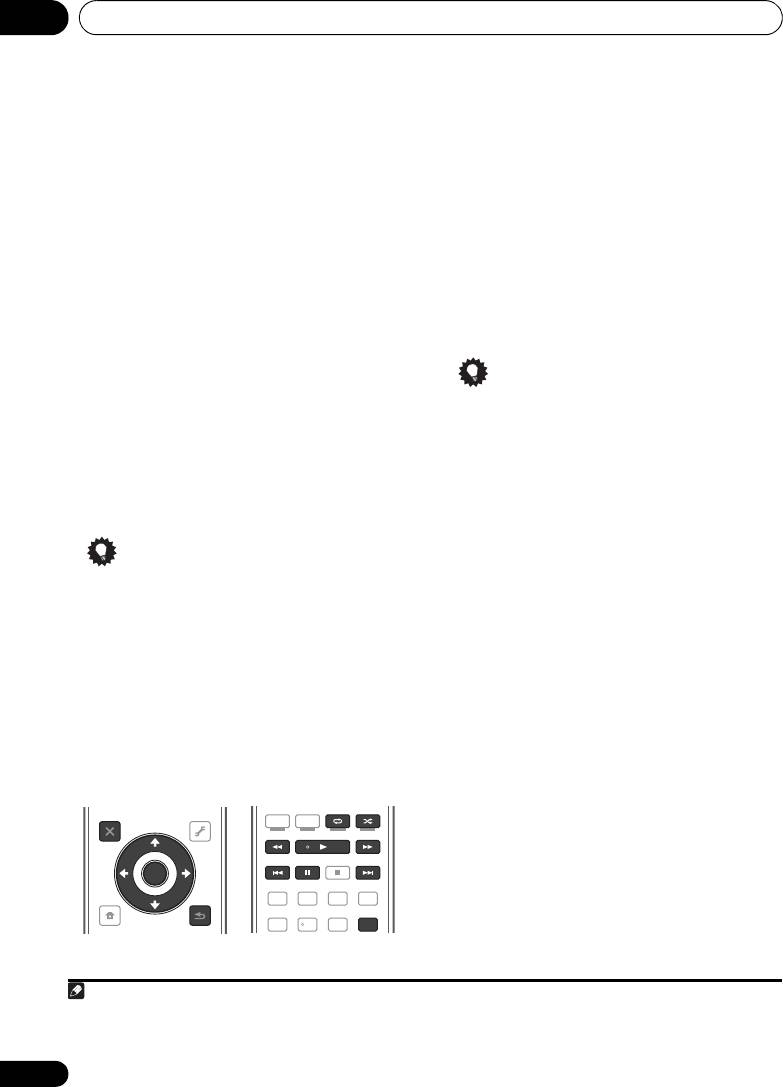
3 Press , then press
AUTO/ALC/
DIRECT
(
AUTO SURR
/
ALC
/
STREAM DIRECT
)
to select ‘
AUTO SURROUND
’ and start
3
playback of the source.
If you’re playing a Dolby Digital or DTS surround
sound DVD disc, you should hear surround
sound. If you are playing a stereo source, you
will only hear sound from the front left/right
speakers in the default listening mode.
•See also Listening to your system on
page 57 for information on different ways
of listening to sources.
44
En
Note
1 Make sure that the TV’s video input is set to this receiver (for example, if you connected this receiver to the VIDEO
jacks on your TV, make sure that the VIDEO input is now selected).
2 If you need to manually switch the input signal type press SIGNAL SEL (page 61).
3 • You may need to check the digital audio output settings on your DVD player or digital satellite receiver.
• Depending on your DVD player or source discs, you may only get digital 2 channel stereo and analog sound. In this
case, the receiver must be set to a multichannel listening mode (see Listening in surround sound on page 57 if you
need to do this) if you want multichannel surround sound.
RECEIVER
VSX-1020_SYXCN.book 44 ページ 2010年3月12日 金曜日 午前9時10分

Basic playback 05
Playing a source with HDMI
English
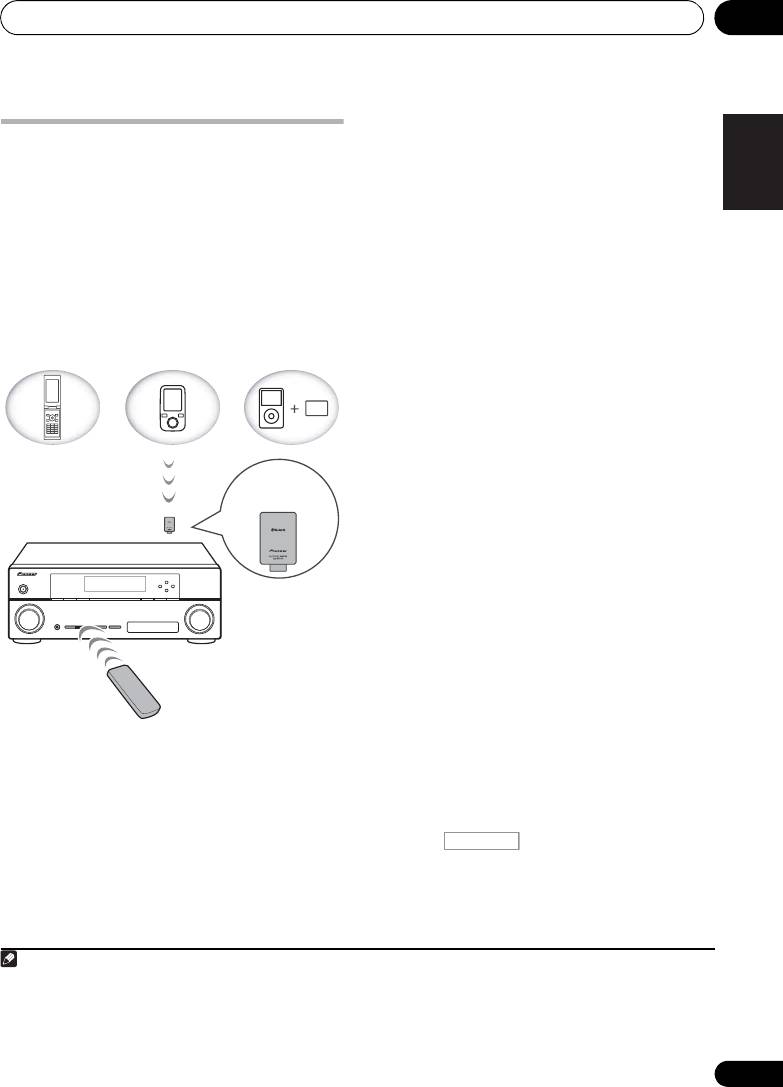
Playing an iPod
connection
This receiver has the iPod/iPhone/USB
•Use
INPUT SELECT
to select the HDMI
terminal that will allow you to control playback
input you’ve connected to (for example,
of audio content from your iPod using the
HDMI 1
).
1
controls of this receiver.
You can also perform the same operation by
Deutsch
1 Switch on the receiver and your TV.
using the INPUT SELECTOR dial on the front
See Connecting an iPod on page 35.
panel or by pressing HDMI on the remote
control repeatedly.
• It is also possible to operate the iPod on
the iPod itself, without using the TV
• Set the HDMI parameter in Setting the
screen. For details, see Switching the iPod
Audio options on page 68 to THROUGH if
Français
controls on page 46.
you want to hear HDMI audio output from
your TV (no sound will be heard from this
2Press
iPod USB
on the remote control to
receiver).
switch the receiver to the
iPod/USB
.
• If the video signal does not appear on your
Loading appears in the GUI screen while the
TV, try adjusting the resolution settings on
receiver verifies the connection and retrieves
Italiano
your component or display. Note that some
data from the iPod.
components (such as video game units)
When the display shows the iPod top menu
have resolutions that may not be
2
you’re ready to playback from the iPod.
converted. In this case, use an analog
video connection.
Playing back files stored on an iPod
Nederlands
To navigate songs on your iPod, you can take
advantage of the GUI screen of your TV
3
connected to this receiver.
You can also
control all operations for music in the front
panel display of this receiver.
Español
45
En
Note
VSX-1020_SYXCN.book 45 ページ 2010年3月12日 金曜日 午前9時10分
1 • This system is compatible with the audio and video of the iPod nano, iPod fifth generation (audio only), iPod classic,
iPod touch and iPhone. However, some of the functions may be restricted for some models. The system is not
compatible with the iPod shuffle.
•
Compatibility may vary depending on the software version of your iPod and iPhone. Please be sure to use the latest
available software version.
• iPod and iPhone are licensed for reproduction of non-copyrighted materials or materials the user is legally permitted
to reproduce.
• Features such as the equalizer cannot be controlled using this receiver, and we recommend switching the equalizer
off before connecting.
• Pioneer cannot under any circumstances accept responsibility for any direct or indirect loss arising from any
inconvenience or loss of recorded material resulting from the iPod failure.
2 • The controls of your iPod will be inoperable when connected to this receiver.
• VSX-1020/VSX-1025 only: The sub zone OSD screen shows the same content as the main zone GUI screen. Note,
however, that characters other than alphanumeric letters and numbers cannot be displayed and will be replaced by #.
• VSX-920 only: iPod/USB function cannot be selected for the MULTI-ZONE feature (page 73).
3 • Note that characters that cannot be displayed on this receiver are displayed as #.
• This feature is not available for photos on your iPod. To display photos, switch iPod operation to the iPod (see
Switching the iPod controls on page 46).
Basic playback05
3
Finding what you want to play
Switching the iPod controls
When your iPod is connected to this receiver,
You can switch over the iPod controls between
you can browse songs stored on your iPod by
the iPod and the receiver.
playlist, artist name, album name, song name,
1 Press
iPod CTRL
to switch the iPod
genre or composer, similar to using your iPod
controls.
directly.
This enables operation and display on your
1Use
/
to select ‘Music’ from the iPod
iPod, and this receiver’s remote control and
top menu.
GUI screen become inactive.
2Use
/
to select a category, then press
2 Press
iPod CTRL
again to switch back to
ENTER
to browse that category.
the receiver controls.
• To return to the previous level any time,
press RETURN.
Tip
3Use
/
to browse the selected category
• Change the receiver’s input to the iPod in
(e.g., albums).
one action by pressing the iPod iPhone
•Use / to move to previous/next levels.
DIRECT CONTROL button on the front
4 Continue browsing until you arrive at
panel to enable iPod operations on the
what you want to play, then press
to start
iPod.
1
playback.
Tip
• You can play all of the songs in a particular
category by selecting the All item at the top
of each category list. For example, you can
play all the songs by a particular artist.
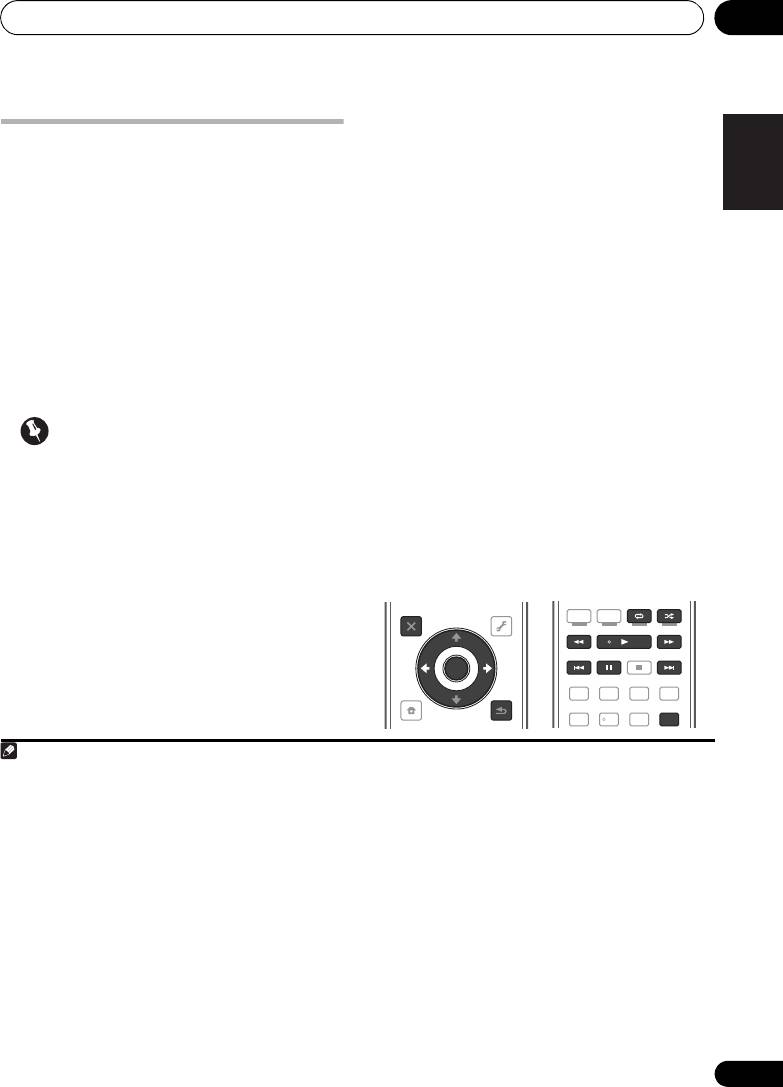
Basic playback controls
This receiver’s remote control buttons can be
used for basic playback of files stored on an
2
iPod.
• Press iPod USB to switch the remote
control to the iPod/USB operation mode.
46
En
Note
VSX-1020_SYXCN.book 46 ページ 2010年3月12日 金曜日 午前9時10分
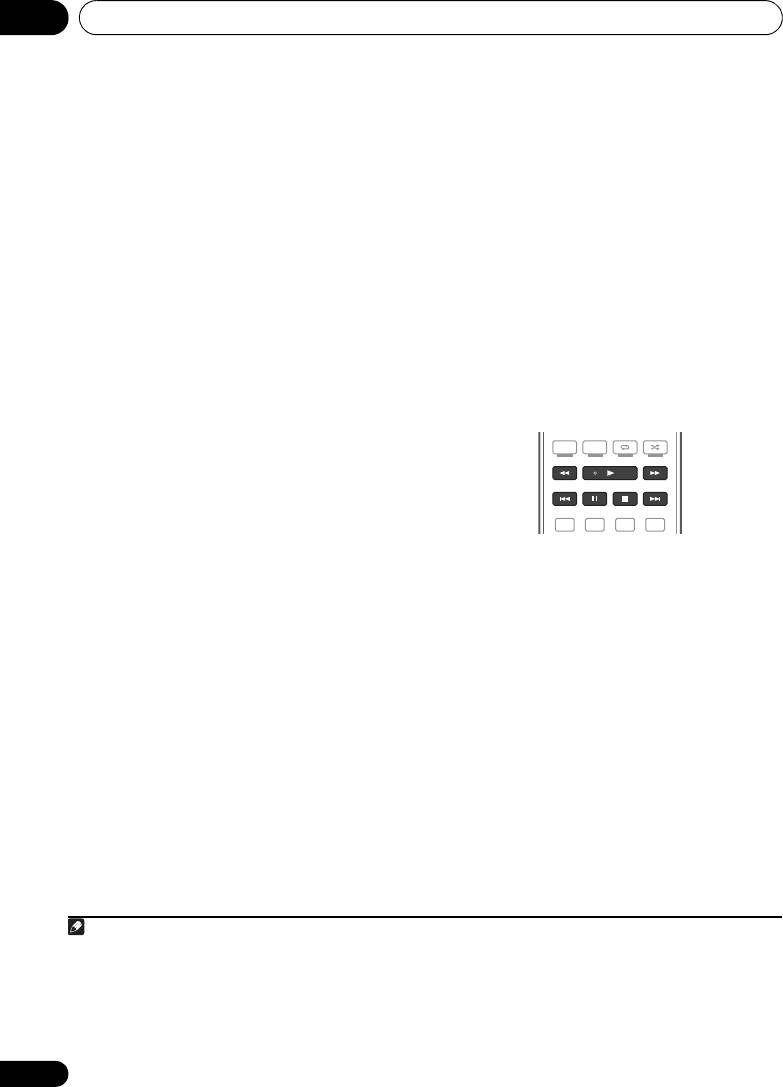
AUDIO
VIDEO
PGM MENU
PARAMETER
PARAMETER
HDD DVD
LIST
TUNE
TOOLS
PHASE
CTRL STATUS
TOP MENU
T.EDIT
BAND GUIDE
TV
/
DTV MPX PQLS
PRESET
ENTER
PRESET
S.RETRIEVER
MIDNIGHT
AUDIO
PTY
SEARCH
RETURN
213
HOME
SIGNAL SEL
MCACC SLEEP
INFO
MENU
TUNE
546
DISP
iPod CTRL
1 If you’re in the song category, you can also press ENTER to start playback.
2 During Audiobook playback, press / to switch the playback speed: Faster Normal Slower
3 You cannot use this function, when an iPod of fifth generation or iPod nano of first generation is connected.
Basic playback 05
Playing back audio files stored on a
English
Playing a USB device
USB memory device
1
It is possible to play files
using the USB
The maximum number of levels that you can
interface on the front of this receiver.
select in Step 2 (below) is 8. Also, you can
display and play back up to 30 000 folders and
1 Switch on the receiver and your TV.
5
files within a USB memory device.
2
See Connecting a USB device on page 36.
Deutsch
1Use
/
to select ‘Music’ from the
USB
2 Press
iPod USB
on the remote control to
3
Top
menu.
switch the receiver to the
iPod/USB
.
Loading appears in the GUI screen as this
2Use
/
to select a folder, then press
receiver starts recognizing the USB device
ENTER
to browse that folder.
4
connected.
When the display shows the USB
• To return to the previous level any time,
Français
Top menu you’re ready to play from the USB
press RETURN.
device.
3 Continue browsing until you arrive at
what you want to play, then press
to start
Important
6
playback.
If an Over Current message lights in the
Italiano
Basic playback controls
display, the power requirements of the USB
This receiver’s remote control buttons can be
device are too high for this receiver. Try
used for basic playback of files stored on USB
following the points below:
memory devices.
• Switch the receiver off, then on again.
•Press iPod USB to switch the remote
Nederlands
• Reconnect the USB device with the
control to the iPod/USB operation mode.
receiver switched off.
• Use a dedicated AC adapter (supplied with
the device) for USB power.
If this doesn’t remedy the problem, it is likely
your USB device is incompatible.
Español
47
En
Note
VSX-1020_SYXCN.book 47 ページ 2010年3月12日 金曜日 午前9時10分
AUDIO
VIDEO
PGM MENU
PARAMETER
PARAMETER
HDD DVD
LIST
TUNE
TOOLS
PHASE
CTRL STATUS
TOP MENU
T.EDIT
BAND GUIDE
TV
/
DTV MPX PQLS
PRESET
ENTER
PRESET
S.RETRIEVER
MIDNIGHT
AUDIO
PTY
SEARCH
RETURN
213
HOME
SIGNAL SEL
MCACC SLEEP
INFO
MENU
TUNE
546
DISP
iPod CTRL
1 • Compatible USB devices include external magnetic hard drives, portable flash memory drives (particularly key
drives) and digital audio players (MP3 players) of format FAT12/16/32. It is not possible to connect this unit to a
personal computer for USB playback.
• Pioneer cannot guarantee compatibility (operation and/or bus power) with all USB mass storage devices and
assumes no responsibility for any loss of data that may occur when connected to this receiver.
2 Make sure the receiver is in standby when disconnecting the USB device.
3 The iPod/USB function cannot be selected in the main zone when the Internet radio function is selected in the sub
zone. Also, the iPod/USB function cannot be selected in the sub zone when the Internet radio function is selected in
the main zone.
4 When a USB memory device with a large capacity is connected, it may take some time to read all the contents.
5 Note that characters that cannot be displayed on this receiver are displayed as #.
6 • If the file selected cannot be played back, this receiver automatically skips to the next file playable.
• When the file currently being played back has no title assigned to it, the file name is displayed in the GUI screen
instead; when neither the album name nor the artist name is present, the row is displayed as a blank space.
• VSX-920 only: iPod/USB function cannot be selected for the MULTI-ZONE feature (page 73).
• Playback stops when the last song in a USB memory device is played back to the end.
• Copyrighted audio files cannot be played back on this receiver.
• DRM-protected audio files cannot be played back on this receiver.

Basic playback05
Playing back photo files stored on a
Slideshow Setup
1
Make the various settings for playing
USB memory device
slideshows of photo files here.
1Use
/
to select ‘
Photos
’ from the
USB
1Use
/
to select ‘
Slideshow Setup
’
Top
menu.
from the
USB Top
menu.
2Use
/
to select a folder, then press
2 Select the setting you want.
ENTER
to browse that folder.
• Theme – Add various effects to the
• To return to the previous level any time, press
slideshow.
RETURN.
• Interval – Set the interval for switching the
3 Continue browsing until you arrive at
photos. This may not be available
what you want to play, then press
to start
depending on the Theme setting.
2
playback.
• BGM – Play music files stored on the USB
The selected content is displayed in full screen
device while displaying photos.
and a slideshow starts.
• Music Select – Select the folder containing
After a slideshow launches, pressing ENTER
the music files to be played when BGM is
toggles between play and pause (only when
set to ON.
Theme on the Slideshow Setup is set to
Normal (OFF)).
3 When you’re finished, press
RETURN
.
You will return to the USB Top
menu.
Basic playback controls
48
En
Note
VSX-1020_SYXCN.book 48 ページ 2010年3月12日 金曜日 午前9時10分
Button(s) What it does
ENTER, Starts displaying a photo and playing a
slideshow.
RETURN,
Stops the Player and returns to the
previous menu.
a
Displays the previous photo content.
a
Displays the next photo content.
a
Pauses/unpauses the slideshow.
a
DISP
Displays the photo information.
a.You can only use this button when Theme on the
Slideshow Setup is set to Normal (OFF).
1 Photo files cannot be played in the sub zone.
2 If the slideshow is left in the pause mode for five minutes, the list screen reappears.
VSX-1020_SYXCN.book 49 ページ 2010年3月12日 金曜日 午前9時10分
Basic playback 05
About playable file formats
English
The USB function of this receiver supports the following file formats. Note that some file formats are not
available for playback although they are listed as playable file formats.
Music files
Category Extension Stream
Deutsch
a
.mp3 MPEG-1, 2, 2.5 Audio
Sampling frequency 8 kHz to 48 kHz
MP3
Layer-3
Quantization bitrate 16 bit
Channel 2 ch
Bitrate 8 kbps to 320 kbps
VBR/CBR Supported/Supported
Français
WAV .wav LPCM Sampling frequency 32 kHz, 44.1 kHz, 48 kHz
Quantization bitrate 8 bit, 16 bit
Channel 2 ch, Monaural
WMA .wma
b
Sampling frequency 8 kHz to 48 kHz
WMA8/9
Italiano
Quantization bitrate 16 bit
Channel 2 ch
Bitrate 8 kbps to 320 kbps
VBR/CBR Supported/Supported
Nederlands
a.“MPEG Layer-3 audio decoding technology licensed from Fraunhofer IIS and Thomson multimedia.”
b.Files encoded using Windows Media Codec 9 may be playable but some parts of the specification are not supported;
specifically, Pro, Lossless, Voice.
Photo files
Category Extension
Español
JPEG .jpg
Format Meeting the following conditions:
.jpeg
• Baseline JPEG format (including files recorded in Exif/DCF
format)
.jpe
• Y:Cb:Cr - 4:4:4, 4:2:2 or 4:2:0
.jif
.jfif
Resolution 30 to 8184 pixels vertical, 40 to 8184 pixels horizontal
49
En

VSX-1020_SYXCN.book 50 ページ 2010年3月12日 金曜日 午前9時10分
Basic playback05
Using Neural Surround
Listening to the radio
This feature uses Neural Surround™
The following steps show you how to tune in to
technologies to achieve optimal surround
FM and AM radio broadcasts using the
sound from FM radio.
automatic (search) and manual (step) tuning
• While listening to FM radio, press AUTO/
functions. If you already know the frequency of
ALC/DIRECT for Neural Surround
the station you want, see Tuning directly to a
listening.
station below. Once you are tuned to a station
See Auto Surround, ALC and Stream Direct with
you can memorize the frequency for recall
different input signal formats on page 122 for
later—see Saving station presets below for
more on how to do this.
The NEURAL SURROUND mode can be
1Press
TUNER
to select the tuner.
selected also with STANDARD.
2
Use
BAND
to change the band (FM or
Tuning directly to a station
AM),
if necessary.
Sometimes, you’ll already know the frequency
Each press switches the band between FM and
of the station you want to listen to. In this case,
AM.
you can simply enter the frequency directly
3 Tune to a station.
using the number buttons on the remote
There are three ways to do this:
control.
Automatic tuning – To search for stations
1 Press
TUNER
to select the tuner.
in the currently selected band, press and
hold TUNE / for about a second. The
2
Use
BAND
to change the band (FM or
receiver will start searching for the next
AM),
if necessary.
station, stopping when it has found one.
Each press switches the band between FM and
Repeat to search for other stations.
AM.
Manual tuning – To change the frequency
3 Press
D.ACCESS
(Direct Access).
one step at a time, press TUNE /.
4 Use the number buttons to enter the
High speed tuning – Press and hold
frequency of the radio station.
TUNE / for high speed tuning. Release
For example, to tune to 106.00 (FM), press 1, 0,
the button at the frequency you want.
6, 0, 0.
Improving FM sound
If you make a mistake halfway through, press
D.ACCESS twice to cancel the frequency and
If the TUNED or STEREO indicator doesn’t light
start over.
when tuning to an FM station because the
signal is weak, press MPX to switch the
receiver into mono reception mode. This
should improve the sound quality and allow
you to enjoy the broadcast.
50
En

VSX-1020_SYXCN.book 51 ページ 2010年3月12日 金曜日 午前9時10分
Basic playback 05
Saving station presets
3 Input the name you want.
English
Choose from the following characters for a
If you often listen to a particular radio station,
name up to eight characters long.
it’s convenient to have the receiver store the
frequency for easy recall whenever you want to
ABCDEFGHIJKLMNOPQRSTUVWXYZ
listen to that station. This saves the effort of
abcdefghijklmnopqrstuvwxyz
manually tuning in each time. This receiver can
0123456789
Deutsch
memorize up to 63 stations, stored in seven
banks, or classes (A to G) of 9 stations each.
!”#$%&’()
∗+,–./:;<=>?@[ \ ]^_{|} ˜
When saving an FM frequency, the MPX
[space]
setting (see above) is also stored.
Use / to select a character, / to set
1 Tune to a station you want to memorize.
the position, and ENTER to confirm your
Français
See Listening to the radio above for more on
selection.
this.
Tip
2 Press
T.EDIT
(
TUNER EDIT
).
The display shows PRESET MEMORY, then a
• To erase a station name, simply repeat
blinking memory class.
steps 1 to 3 and input eight spaces instead
Italiano
of a name.
3 Press
CLASS
to select one of the seven
• Once you have named a station preset,
classes, then press
PRESET
/
to select the
you can press DISP when listening to a
station preset you want.
station to switch the display between
You can also use the number buttons to select
name and frequency.
a station preset.
Nederlands
4 Press
ENTER
.
Listening to station presets
After pressing ENTER, the preset class and
You will need to have some presets stored to
number stop blinking and the receiver stores
do this. See Saving station presets on page 51
the station.
if you haven’t done this already.
1Press
TUNER
to select the tuner.
Naming station presets
Español
For easier identification, you can name your
2Press
CLASS
to select the class in which
station presets.
the station is stored.
Press repeatedly to cycle through classes A to
1 Choose the station preset you want to
G.
name.
See Listening to station presets below for how
3Press
PRESET
/
to select the station
to do this.
preset you want.
• You can also use the number buttons on
2 Press
T.EDIT
(
TUNER EDIT
).
the remote control to recall the station
The display shows PRESET NAME, then a
preset.
blinking cursor at the first character position.
51
En

Basic playback05
An introduction to RDS
Searching for RDS programs
Radio Data System (RDS) is a system used by
One of the most useful features of RDS is the
most FM radio stations to provide listeners with
ability to search for a particular kind of radio
various kinds of information—the name of the
program. You can search for any of the
station and the kind of show they’re
program types listed above.
broadcasting, for example.
2
1 Press
TUNER
to select the FM band.
One feature of RDS is that you can search by
2 Press
PTY SEARCH
.
type of program. For example, you can search
PTY SEARCH shows in the display.
for a station that’s broadcasting a show with
the program type, JAZZ.
3 Press
PRESET
/
to select the program
1
You can search the following program types:
type you want to hear.
NEWS – News
FINANCE – Stock market
4 Press ENTER to search for the program type.
AFFAIRS – Current Affairs
reports, commerce,
The system starts searching through all
INFO
– General
trading, etc.
frequency for a match. When it finds one, the
Information
CHILDREN – Programs for
SPORT – Sport
children
search stops and the station plays for five
EDUCATE – Educational
SOCIAL – Social affairs
seconds.
DRAMA – Radio plays, etc.
RELIGION – Programs
CULTURE – National or
concerning religion
5 If you want to keep listening to the
regional culture, theater,
PHONE IN – Public
station, press
ENTER
within the five seconds.
etc.
expressing their views by
If you don’t press ENTER, searching resumes.
SCIENCE – Science and
phone
technology
TRAVEL – Holiday-type
If NO PTY is displayed it means the tuner
VARIED – Usually talk-
travel rather than traffic
couldn’t find that program type at the time of
based material, such as
announcements
3
the search.
quiz shows or interviews.
LEISURE – Leisure
POP M – Pop music
interests and hobbies
Displaying RDS information
ROCK M – Rock music
JAZZ – Jazz
Use the DISP button to display the different
EASY M – Easy listening
COUNTRY
– Country
4
types of RDS information available.
LIGHT M – ‘Light’ classical
music
music
NATION M – Popular
• Press
DISP
for RDS information.
CLASSICS – ‘Serious’
music in a language other
Each press changes the display as follows:
classical music
than English
OTHER M – Music not
OLDIES – Popular music
• Radio Text (RT) – Messages sent by the
fitting above categories
from the ’50s and ’60s
radio station. For example, a talk radio
WEATHER – Weather
FOLK M – Folk music
station may provide a phone number as RT.
reports
DOCUMENT
–
Documentary
• Program Service Name (PS) – The name of
the radio station.
•Program Type (PTY) – This indicates the
kind of program currently being broadcast.
• Current tuner frequency.
52
En
Note
VSX-1020_SYXCN.book 52 ページ 2010年3月12日 金曜日 午前9時10分
1 In addition, there are two other program types, TEST and NONE. You can’t search for these.
2 RDS is only possible in the FM band.
3 RDS searches all frequency. If the program type could not be found among all frequency, NO PTY is displayed.
4 • If any noise is picked up while displaying the RT scroll, some characters may be displayed incorrectly.
• If you see NO RT DATA in the RT display, it means no RT data is sent from the broadcast station.
• If you see NO PS DATA in the PS display, it means no PS data can be received.
• If you see NO PTY DATA in the PTY display, it means no PTY data can be received.
Basic playback 05
Wireless music play
English
Bluetooth
® ADAPTER for
When the Bluetooth ADAPTER (Pioneer Model
No. AS-BT100) is connected to this unit, a
Wireless Enjoyment of Music
product equipped with Bluetooth wireless
technology (portable cell phone, digital music
player, etc.) can be used to listen to music
Deutsch
wirelessly. Also, by using a commercially
available transmitter supporting Bluetooth
wireless technology, you can listen to music
on a device not equipped with Bluetooth
wireless technology. The AS-BT100 model
supports SCMS-T contents protection, so
Français
music can also be enjoyed on devices
equipped with SCMS-T type Bluetooth wireless
technology.
Remote control operation
The remote control supplied with this unit
Italiano
allows you to play and stop media, and
1
perform other operations.
Pairing the
Bluetooth
ADAPTER and
Bluetooth
wireless technology
Nederlands
device
“Pairing” must be done before you start
playback of Bluetooth wireless technology
content using the Bluetooth ADAPTER. Make
sure to perform pairing the first time you
operate the system or any time pairing data is
Español
cleared. The pairing step is necessary to
register the Bluetooth wireless technology
2
device to enable Bluetooth communications.
For more details, see also the operating
instructions of your Bluetooth wireless
technology device.
1 Press , then press
Home Menu
.
2 Select ‘
System Setup
’, then press
ENTER
.
3 Select ‘
Other Setup
’, then press
ENTER
.
53
En
Device not
equipped with
Bluetooth wireless
technology:
Digital music
Bluetooth
Bluetooth wireless
player
wireless
technology
+
technology
enabled device:
Bluetooth audio
enabled device:
Digital music
transmitter
cell phone
player
(sold commercially)
®
Music data
Bluetooth
ADAPTER
This receiver
Remote control
operation
Note
1 • It must be necessary that the Bluetooth wireless technology enabled device supports AVRCP profiles.
• Remote control operations cannot be guaranteed for all Bluetooth wireless technology enabled devices.
2 • Pairing is required when you first use the Bluetooth wireless technology device and Bluetooth ADAPTER.
• To enable Bluetooth communication, pairing should be done with both your system and Bluetooth wireless
technology device.
RECEIVER
VSX-1020_SYXCN.book 53 ページ 2010年3月12日 金曜日 午前9時10分
Basic playback05
4 Select ‘
Pairing Bluetooth Device
’, then
Listening to music contents of a
press
ENTER
.
Bluetooth
wireless technology
5 Select the ‘
Passcode
’ setting you want.
device with your system
Select the same passcode as the Bluetooth
1 Press
ADAPTER
on the remote control to
wireless technology device you wish to
3
switch the receiver to
ADAPTER PORT
input.
connect.
• 0000/1234/8888 – Select the passcode
2 Perform the connection operation from
from these options. These are the
the side of the
Bluetooth
wireless technology
passcodes that can be used in most cases.
device to the
Bluetooth
ADAPTER.
• Others – Select to use a passcode other
3 Start playback of music contents stored
than those mentioned above.
on the
Bluetooth
wireless technology device.
This receiver’s remote control buttons can be
6 If you selected
Others
in step 5, enter the
used for basic playback of files stored on
passcode.
4
Bluetooth wireless technology devices.
Use / to select a number and / to
move the cursor.
7 Follow the instructions displayed on the
GUI screen to conduct pairing with the
Bluetooth
wireless technology device.
Switch on the Bluetooth wireless technology
device that you want to make pair, place it near
®
The Bluetooth
word mark and logos are
the receiver and set it to the pairing mode.
registered trademarks owned by Bluetooth
8 Check to see that the
Bluetooth
ADAPTER
SIG, Inc. and any use of such marks by Pioneer
is detected by the
Bluetooth
wireless
Corporation is under license. Other
technology device.
trademarks and trade names are those of their
When the Bluetooth wireless technology device
respective owners.
is connected:
1
CONNECTED appears in the receiver display.
When the Bluetooth wireless technology device
is not connected:
Go back to the passcode setting in step 5. In
this case, perform the connection operation
from the Bluetooth wireless technology device.
9From the
Bluetooth
wireless technology
device list, select
Bluetooth
ADAPTER and
2
enter the Passcode selected in step 5.
54
En
Note
1 The system can display alphanumeric characters only. Other characters may not be displayed correctly.
2 The passcode may in some cases be referred to as “passkey” or PIN code.
3 When the Bluetooth ADAPTER is not plugged into the ADAPTER PORT, NO ADAPTER will be displayed if ADAPTER
PORT input is selected.
4• Bluetooth wireless technology device should be compatible with AVRCP profile.
• Depending on the Bluetooth wireless technology device you use, operation may differ from what is shown in the
remote control buttons.
PGM MENU
HDD DVD
PHASE
CTRL STATUS
TV
/
DTV MPX PQLS
S.RETRIEVER
MIDNIGHT
AUDIO
213
VSX-1020_SYXCN.book 54 ページ 2010年3月12日 金曜日 午前9時10分

Basic playback 05
1Press
NET RADIO
to switch to the
English
2
Listening to Internet radio
Internet radio input.
The Internet Radio list screen is displayed.
stations
Internet radio is an audio broadcasting service
2Use
/
to select the Internet radio
1
transmitted via the Internet.
There are a large
station to play back, and then press
ENTER
.
number of Internet radio stations broadcasting
Press / to scroll up and down the list and
Deutsch
a variety of services from every corner of the
select the desired item. When you press
world. Some are hosted, managed, and
ENTER, playback starts with the playback
broadcast by private individuals while others
screen being displayed for the selected item.
are by the corresponding traditional terrestrial
Depending on the Internet line conditions, the
radio stations or radio networks. Whereas
sound may not be smooth when playing
terrestrial, or OTA (over-the-air), radio stations
Internet radio. To return to the list screen,
Français
3
are geographically restricted on the range of
press RETURN.
radio waves broadcast from a transmitter
through the air, Internet radio stations are
Programming the Internet radio
accessible from anywhere in the world, as long
stations
as there is a connection to the Internet, as
By programming the Internet radio stations
Italiano
services are not transmitted through the air but
you wish to listen to onto this receiver, you will
are delivered over the World Wide Web. On this
be able to select those Internet radio stations.
receiver you can select Internet radio stations
You can program up to 24 stations.
by genre as well as by region.
There are two methods of programming: one
lets you use the GUI screen on this receiver;
Nederlands
Important
the other lets you connect your computer and
• Before listening to Internet radio, you need
use that screen.
to program the Internet radio stations you
Programming with the GUI screen
wish to listen to onto this unit (see
Programming the Internet radio stations
1Press
TOP MENU
when the Internet
below for how to program). Though the
Radio station list is displayed.
Español
Internet radio stations are programmed in
The Internet Radio Setup screen is displayed.
this receiver before it leaves the factory, the
2Use
/
to select the Internet Radio
link may have expired. In that case, preset
station list screen you wish to edit, and then
the stations again yourself.
press
ENTER
.
55
En
Note
VSX-1020_SYXCN.book 55 ページ 2010年3月12日 金曜日 午前9時10分
1 • To listen to Internet radio stations, you must have high-speed broadband Internet access. With a 56 K or ISDN
modem, you may not enjoy the full benefits of Internet radio.
• The port number varies depending on the Internet radio station. Check the firewall settings.
• Broadcasts may be stopped or interrupted depending on the Internet radio station. In this case, you cannot listen
to a radio station selected from the list of Internet radio stations.
• VSX-920 only: INTERNET RADIO function cannot be selected for the MULTI-ZONE feature (page 73).
2 The Internet radio function cannot be selected in the main zone when the iPod/USB function is selected in the sub
zone. Also, the Internet radio function cannot be selected in the sub zone when the iPod/USB function is selected in
the main zone.
3 When the list screen is displayed from the playback screen, the playback screen reappears automatically if no
operation is performed for 10 seconds while the list screen is displayed.
Basic playback05
3Use
/
to select “Edit“.
When the connection is made with the
•If you select “Delete”, information
receiver, the following programming screen
regarding the Internet radio stations
will be displayed.
programmed into the currently selected
memory will be deleted.
4 Enter the URL of the Internet radio station
1
you wish to program.
Use / to select a letter and / to move
the cursor.
• A URL containing up to 192 letters can be
entered.
3 Enter the title and URL of the Internet
5 Enter the title of the Internet radio
radio station you wish to program, then press
station.
‘Update’.
Use / to select a letter and / to move
The entered information will be transmitted to
the cursor.
the receiver.
• A title containing up to 22 letters can be
The connection to the URL designated from the
entered.
computer will be confirmed:
If connection is successful, ‘Connection OK’
Programming on the computer screen
will be displayed on screen, and the selected
You can enter the Internet radio list on the
Internet radio station will begin playing via this
screen of a computer that is connected to the
receiver.
same LAN as this receiver, and send the list to
this unit.
If the connection failed, ‘Connection NG’ will
be displayed. Check to see if the URL you
The computer needs to be connected in
entered is correct.
advance to the network of this receiver and set
up.
Important
1 Turn on the computer and launch the
Internet browser.
•‘Connection OK’ and ‘Connection NG’
are only displayed when this receiver is set
2 In the address bar on the browser, enter
to the Internet radio function.
the IP address assigned to this receiver.
• When entering the title and URL of Internet
For example, if the IP address of this receiver is
radio station, do not press ‘Update’ while
“192.168.0.2”, enter “http://192.168.0.2/”.
you are connected to other stations (i.e.,
• This receiver’s IP address can be found in
labelled as “Connecting...”).
the ‘IP address, Proxy’ menu (page 104).
56
En
Note
1 The URL can also be entered by connecting a USB keyboard (see Connecting a USB device on page 36).
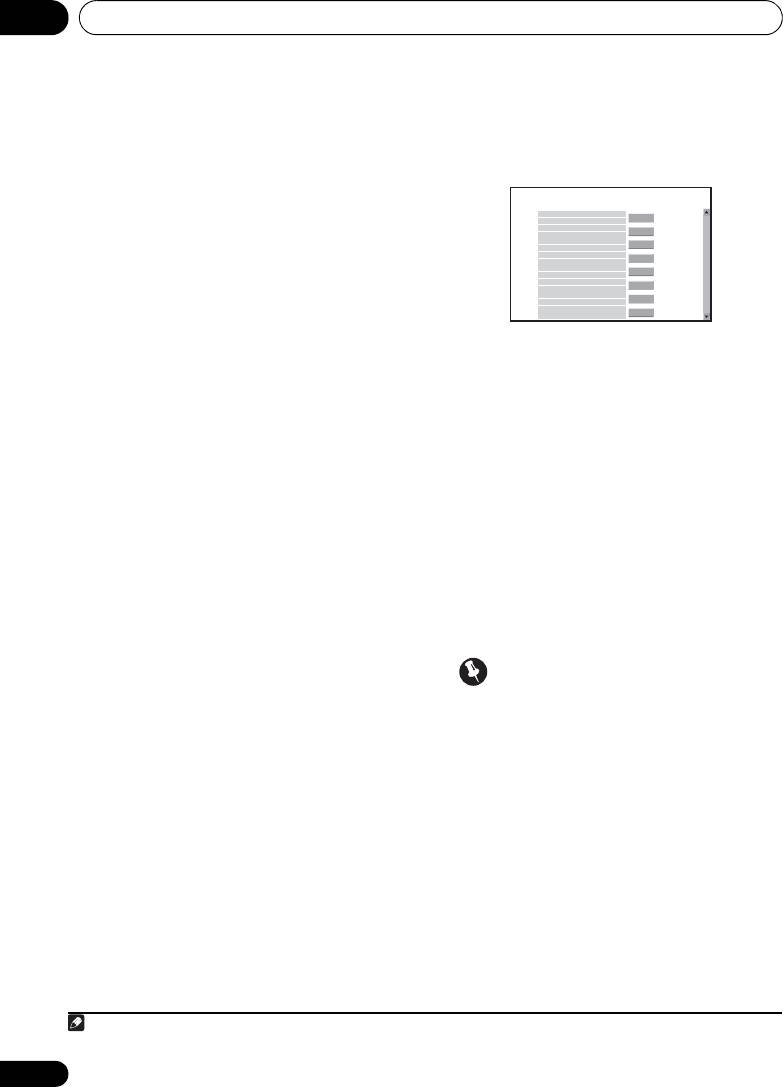
Pioneer
Top Menu
Internet Radio Setting
1
Title
J-POP
URL
http://www.xxxxxxx.net:9500
Update
Connection OK
2
Title
URL
Update
Connection OK
3
Title
Rock
URL
http://www.xxxxxxx.com:8096
Update
Connection OK
Title
Classic
4
http://www.yyyyyyy.com:8800
Update
URL
Connection OK
5
Title
Update
URL
Connection OK
Title
STATION6
6
URL
http://zzzzzzz.com:7040
Update
Connection OK
7
Title
Update
URL
Connection OK
ENKA
8
Title
Update
URL
http://www.zyxzyx.com:6000
Connection OK
VSX-1020_SYXCN.book 56 ページ 2010年3月12日 金曜日 午前9時10分
Оглавление
- Contents
- Flow of settings on the receiver
- Before you start
- Controls and displays
- Connecting your equipment
- Basic Setup
- Basic playback
- Listening to your system
- Control with HDMI function
- Using other functions
- Controlling the rest of your system
- The Advanced MCACC menu
- The System Setup and Other Setup menus
- Additional information
- Table des matières
- Organigramme des réglages sur le récepteur
- Avant de commencer
- Commandes et affichages
- Raccordement de votre équipement
- Configuration de base
- Lecture de base
- Écoute de sources à l’aide de votre système
- Fonction Control HDMI
- Utilisation d’autres fonctions
- Commander le reste de votre système
- Le menu MCACC avancé
- Configuration du système et autres réglages
- Informations complémentaires
- Содержание
- Порядок выполнения настроек на ресивере
- Перед началом работы
- Органы управления и индикаторы
- Подключение оборудования
- Основная настройка
- Основные операции воспроизведения
- Прослушивание системы
- Функция Управление по HDMI
- Использование других функций
- Управление остальными частями системы
- Меню Advanced MCACC
- Меню System Setup (Настройка системы) и Other Setup (Другие настройки)
- Дополнительная информация
