Vitek VT-1514 BK: инструкция
Раздел: Бытовая, кухонная техника, электроника и оборудование
Тип: Кофеварка рожкового типа
Характеристики, спецификации
Инструкция к Кофеварке рожкового типа Vitek VT-1514 BK
VT-1514 BK
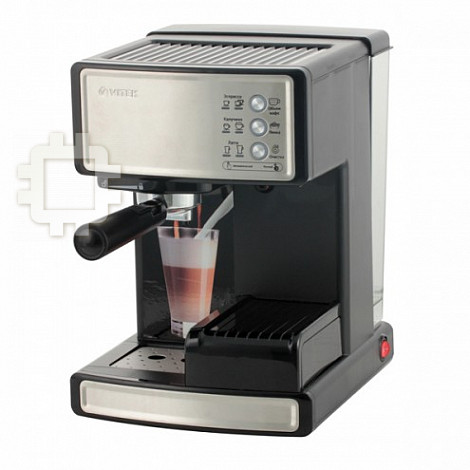
Coffee maker
Espresso/Cappuccino
Кофеварка
Эспрессо/Капучино
4
10
17
24
31
37
43
50
57
1
VT-1514_IM.indd 1 07.12.2012 9:29:23
1
12
15
АвтоматическийРучной
16
7
9
8
2
10
11
4
3
13
5
14
6
20
21
18
22
17
12
19
23
24
25
Автоматический Ручной
VT-1514_IM.indd 2 07.12.2012 9:29:23
VT-1514_IM.indd 3 07.12.2012 9:29:23

4
ENGLISH
COFFEE MAKER ESPRESSO/ CAPPUCCINO /
• Use the socket with reliable grounding contact.
LATTE
• In order to avoid fire do not use adapters for
connecting the unit to the mains.
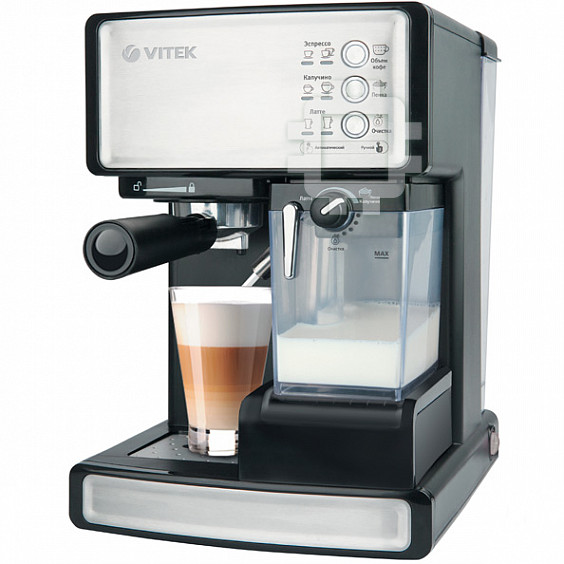
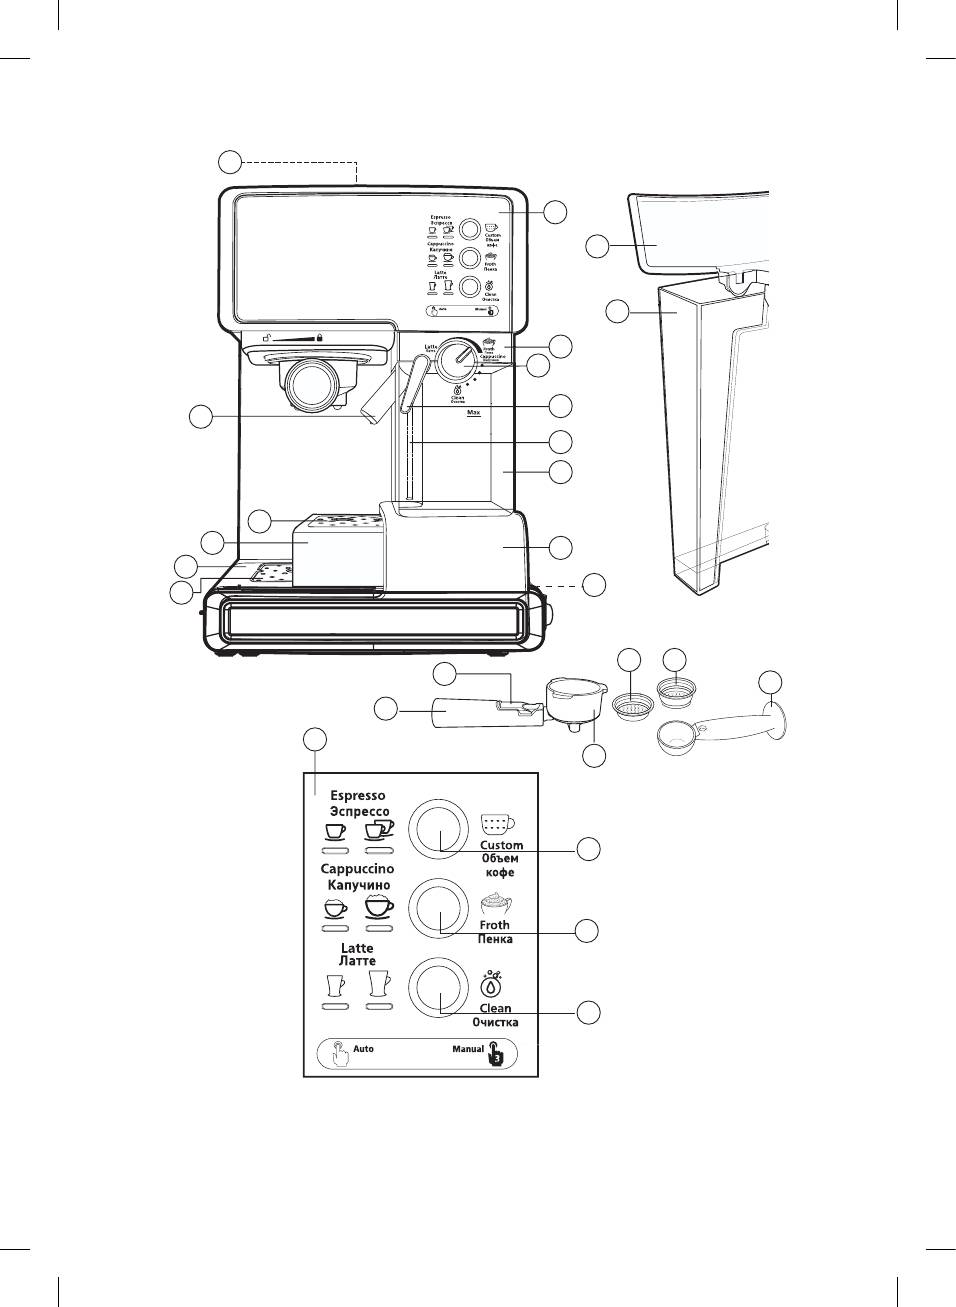
Description
• Do not switch the coffee maker on if the
1. Cup warming tray
water tank is empty.
2. Cappuccinator pipe
• Use only the accesories supplied.
3. Pull-out drip tray
• Before switching the unit on, make sure that
4. Pull-out tray lid
all removable parts are installed properly.
5. Drip tray
• Do not touch hot parts and surfaces of the
6. Drip tray lid
coffee maker.
7. Milk tank lid
• Be careful while operating with outgoing
8. Cappuccinator pipe angle adjustment bar
steam.
9. Frothed milk supply (intensity) knob
• Do not remove the filter holder during coffee
10. Milk intake pipe
maker operation.
11. Milk tank
• Place the unit on a flat steady surface.
12. Control panel
13. Coffee maker body
• To avoid fire, electric shock or physical inju-
14. On/Off button (I/O)
ries do not immerse the electric cord, the
15. Water tank lid
plug or the coffee maker body into water or
16. Removable water tank
other liquids.
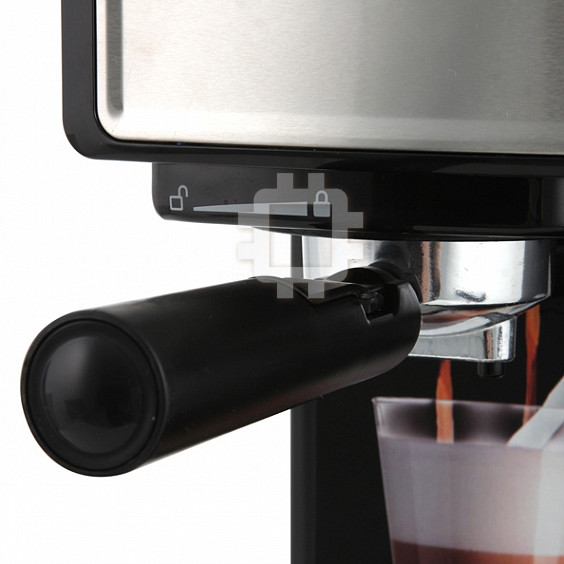
17. Filter holder handle
• Unplug the coffee maker if you don’t use it
18. Filter clamp
and before cleaning.
19. Filter holder
• To disconnect the coffee maker from the
20. Filter for one espresso cup
mains switch it off by pressing the button
21. Filter for two espresso cups
(14) and then remove the power plug from
22. Ground coffee measuring spoon with tamper
the socket.
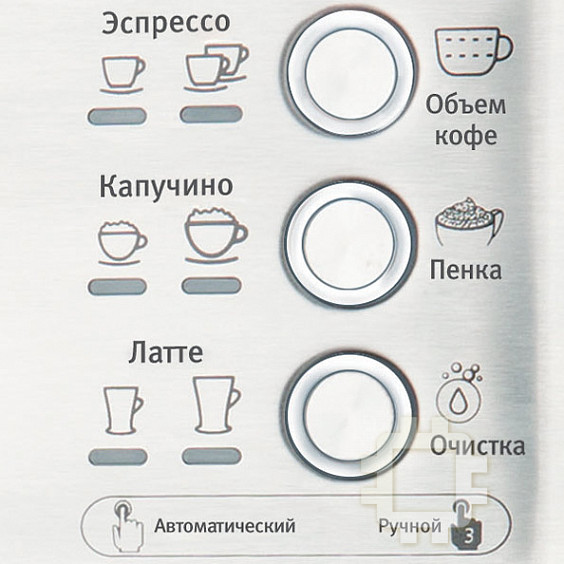
Control panel
• Do not let the power cord hang over the edge
23. Espresso button
of the table and touch hot surfaces.
24. Cappuccino button
• Do not place the coffee maker on hot sur-
25. Latte button
faces.
• Do not use the coffee maker outdoors.
Attention!
• Do not leave the coffee maker in places with
• For additional protection it is reason-
the temperature below 0°C.
able to install a residual current device
• For children safety reasons do not leave
(RCD) with nominal operation current not
polyethylene bags, used as a packaging,
exceeding 30 mA. To install RCD contact
unattended.
a specialist.
• Attention! Do not allow children to play with
Safety measures
polyethylene bags or film. Danger of suf-
Read these instructions carefully before using
focation!
the unit. Keep this instruction during the whole
• Do not allow children to use the unit as a toy.
operation period.
• Do not leave the operating unit unattended;
Mishandling the unit can lead to its breakage
be especially careful if children or disabled
and cause harm to the user or damage to his/
persons are near the operating unit.
her property.
• This unit is not intended for usage by children
Always observe the main safety measures when
or disabled persons unless they are given all
using electric appliances, namely:
the necessary instructions by a person who
• Read this instruction manual carefully.
is responsible for their safety on safety mea-
• Use the coffee maker according to its intend-
sures and information about danger that can
ed purpose only.
be caused by improper usage of the unit.
• Make sure that the mains voltage corre-
• Do not use the coffee maker if the power
sponds to the voltage specified on the unit
cord or the plug is damaged, if the unit mal-
body.
VT-1514_IM.indd 4 07.12.2012 9:29:24
5
E N G L I S H
functions or if there are other damages in
• Then press and hold the cappuccino but-
the unit.
ton (24) for 3 seconds. Let the water run for
• Do not repair the coffee maker by yourself;
80-90 seconds.
always apply to the authorized service center.
• Press the button (24) once again to switch
water supply off.
THE UNIT IS INTENDED FOR HOUSEHOLD US-
• The illumination of control buttons will light
AGE ONLY
up constantly, that means that the unit is
ready for operation and the boiler is clean.
Before using the unit
Attention!
• Make sure that the unit is switched off.
• Do not remove the filter holder (19) during
• Attention! Before using the coffee maker
the unit operation.
for the first time remove the red rubber
• Do not remove the filter holder (19) imme-
plug from the water tank (16).
diately after preparing coffee as there is
• Before using the coffee maker for the first
redundant water and steam pressure inside,
time, wash all removable parts with warm
let the coffee maker cool down completely.
water and dry them.
• To remove the filter holder (19) turn the han-
• Before switching the unit on, make sure that
dle to the left and remove the holder.
the mains voltage corresponds to the voltage
specified on the unit body.
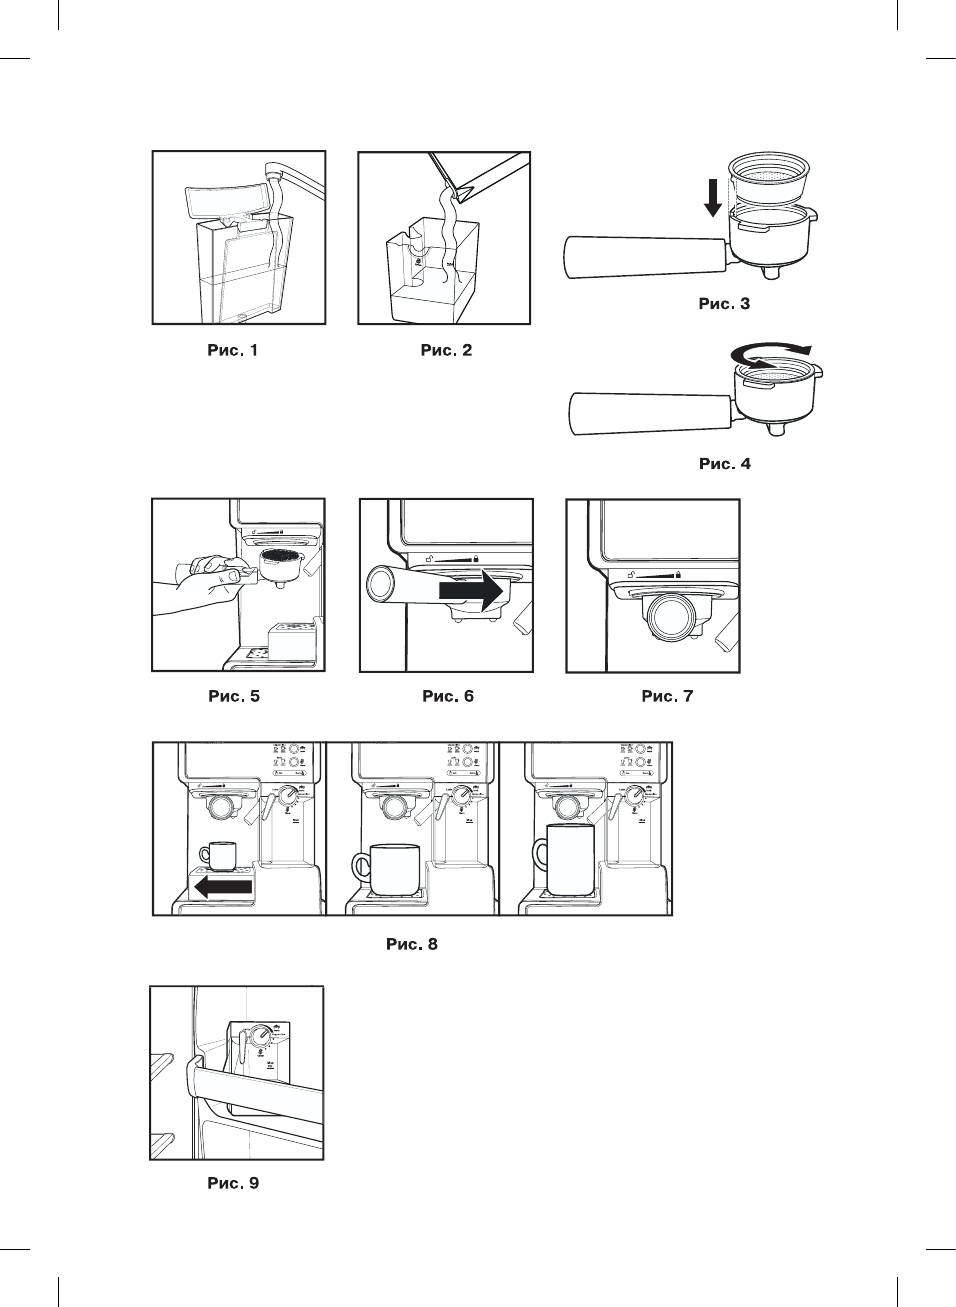
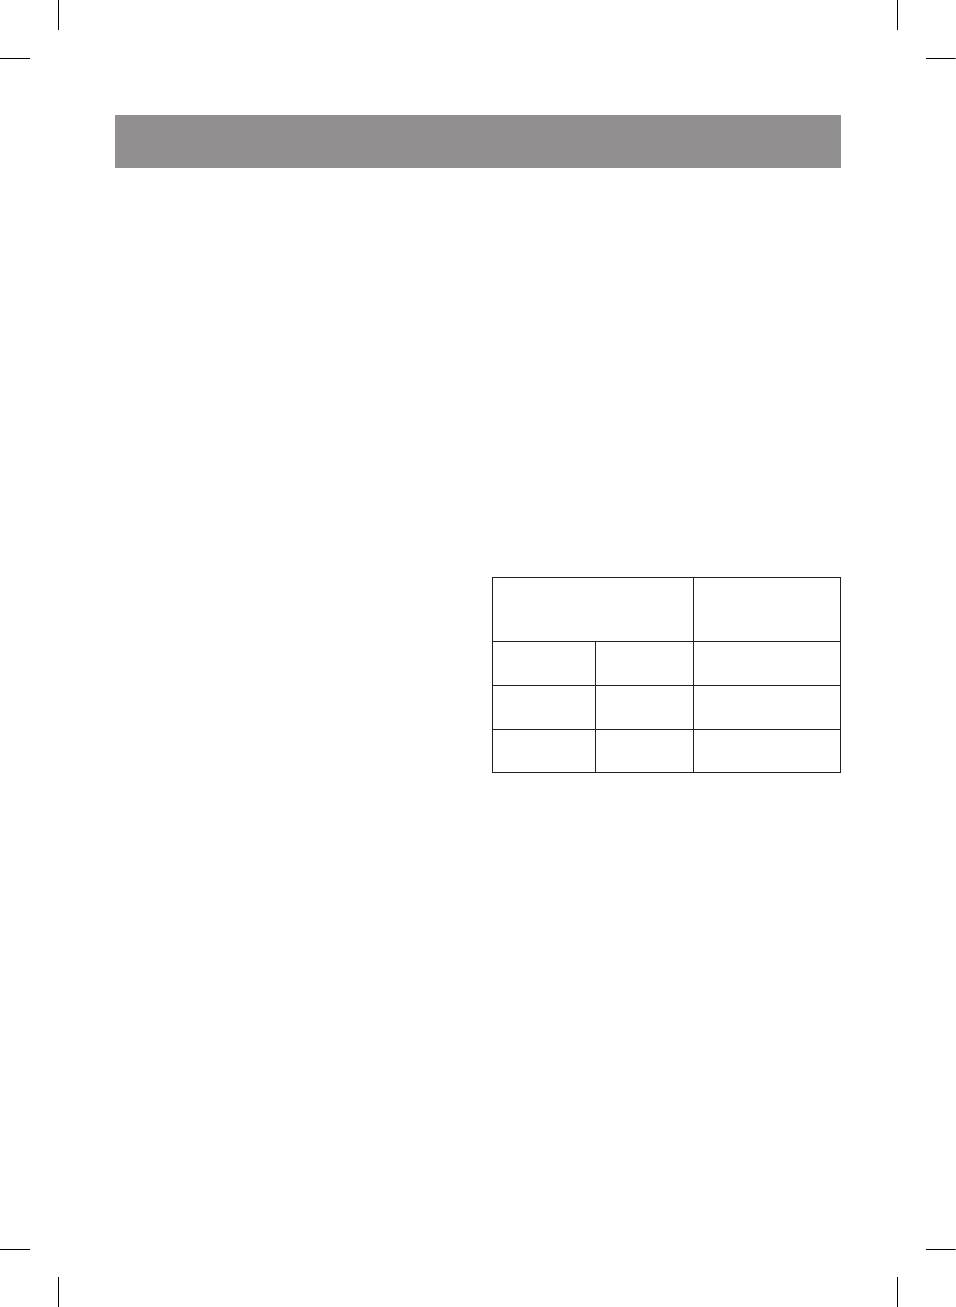
Choosing the appropriate cup
• Remove the water tank (16), fill it with cold
water till the MAX mark and install it back to
Drink Estimated
its place (pic. 1).
volume of the
• Remove the milk tank (11), fill it with cold
ready product
water till the MAX mark as well and install it
Espresso One cup
30-40 ml
back to its place (pic. 2).
Two cups
70-80 ml
• Select one of the coffee filters (20 or 21), and
Cappuccino One cup
170 ml
insert it into the holder (19), matching the
Two cups
280 ml
ledge on the filter with the hole on the holder
Latte One cup
340 ml
(19) and turn the filter clockwise/anticlock-
Two cups
430 ml
wise (pic. 3, 4).
• Install the filter holder into the coffee maker.
Note:
Holder ledges (19) should match the groves
• The cups should be preliminary heated up,
on the boiler (pic. 5) and then turn the filter
to do this, put the cups on the tray (1) while
holder handle (17) to the right till bumping
water heats up in the boiler.
(pic. 6, 7).
• Place a corresponding cup on the respective
Making espresso
tray (3 or 5) and turn the cappuccinator pipe
• Make sure that the unit is switched off.
(2) to the cup using the bar (8) (pic. 8).
• Remove the water tank (16), fill it with cold
• Insert the power plug into the mains socket.
water and install back to its place (pic. 1).
• Switch the coffee maker on by pressing the
• Select one of the coffee filters (20 or 21), and
button (14), the illumination of the buttons
insert it into the holder (19), matching the
(23, 24 and 25) on the control panel will start
ledge on the filter with the hole on the holder
flashing.
(19) and turn the filter clockwise/anticlock-
• When the illumination stops flashing, press
wise (pic. 3, 4).
and hold the espresso button (23) for 3 sec-
• Add ground coffee into the filter: 2 full mea-
onds. Let the water run for 80-90 seconds.
suring spoons - to make two coffee cups
• Press the button (23) once again to switch
and 1 full spoon - to make one coffee cup,
water supply off.
make even and slightly tamp the ground
• Select the washing mode “Cleaning” by turn-
coffee with the back side of the measuring
ing the frothed milk supply knob (9).
spoon (22).
VT-1514_IM.indd 5 07.12.2012 9:29:24
Оглавление
- ENGLISH
- E N G L I S H
- ENGLISH
- E N G L I S H
- ENGLISH
- E N G L I S H
- DEUTSCH
- D E U T S C H
- DEUTSCH
- D E U T S C H
- DEUTSCH
- D E U T S C H
- DEUTSCH
- русский
- русский
- русский
- русский
- русский
- русский
- русский
- ҚазаҚ
- ҚазаҚ
- ҚазаҚ
- ҚазаҚ
- ҚазаҚ
- ҚазаҚ
- ҚазаҚ
- romÂnĂ/ Moldovenească
- romÂnĂ/ Moldovenească
- romÂnĂ/ Moldovenească
- romÂnĂ/ Moldovenească
- romÂnĂ/ Moldovenească
- romÂnĂ/ Moldovenească
- Český
- Český
- Český
- Český
- Český
- Český
- УКРАЇНЬСКИЙ
- Беларусская
- Беларусская
- Беларусская
- Беларусская
- Беларусская
- Беларусская
- Беларусская
- Ўзбек
- Ўзбек
- Ўзбек
- Ўзбек
- Ўзбек
- Ўзбек


