Vitek VT-3492: инструкция
Раздел: Бытовая, кухонная техника, электроника и оборудование
Тип: Музыкальный Центр


Характеристики, спецификации
Инструкция к Музыкальному Центру Vitek VT-3492
Оглавление

3492.qxd 20.10.2004 18:30 Page 2
OPERATING MANUAL
ÈÍÑÒÐÓÊÖÈß ÏÎ ÝÊÑÏËÓÀÒÀÖÈÈ
MINISYSTEM WITH CD/MP3 PLAYER
ÌÈÍÈÑÈÑÒÅÌÀ Ñ CD/MP3 ÏÐÎÈÃÐÛÂÀÒÅËÅÌ
ÌÎÄÅËÜ VT-3492
3492.qxd 20.10.2004 18:30 Page 3
ENGLISH
IMPORT
ANT SAFETY INSTRUCTIONS
Please take good note of the following instructions:
• The unit must be connected to the power voltage, which is the same as the local area. If not, there is
a danger of "burning" the unit that causes a fire.
• Do not expose to temperatures higher than 35°C.
• Avoid installation near heaters or in areas subjected to direct sunlight.
• Ensure good air circulation.
• Protect the unit from dust, moisture and water.
• Avoid strong magnetic fields, e.g. near TVs or Speakers for other units.
• Avoid using strong chemical agents to clean.
• Do not grease or oil components, running mechanisms, etc. The CD player is designed to be main-
tenance free.
• Take the unit to autorized service center for servicing.
This symbol indicates the pres-
ence of hazardous voltage that
can lead to electric shock.
WARNING: TO REDUCE ELECTRIC SHOCK HAZARD DO NOT
This symbol indicates impor-
REMOVE THE COVER.
tant operating and mainte-
THE UNIT DO NOT CONTAIN ELEMENTS INTENDED FOR
nance recommendations in the
USER'S REPAIR.
operating manual.
SYSTEM INSPECTION AND REPAIR MUST BE PERFORMED BY
SKILLED TECHNICIAN.
ATTENTION:
• To avoid electric shock hazard protect the system from water drops or splashes.
• Leave sufficient space around the unit for ventilation.
•
Do not obstruct the ventilation of the system with newspapers, curtains, soft furnishings etc.
•
Do not place the system near open fire sources such as burning candles etc.
•
The system is intended for use in tropical and/or temperate climate.
•
Before discarding the system remove the batteries and place them into special disposal container.
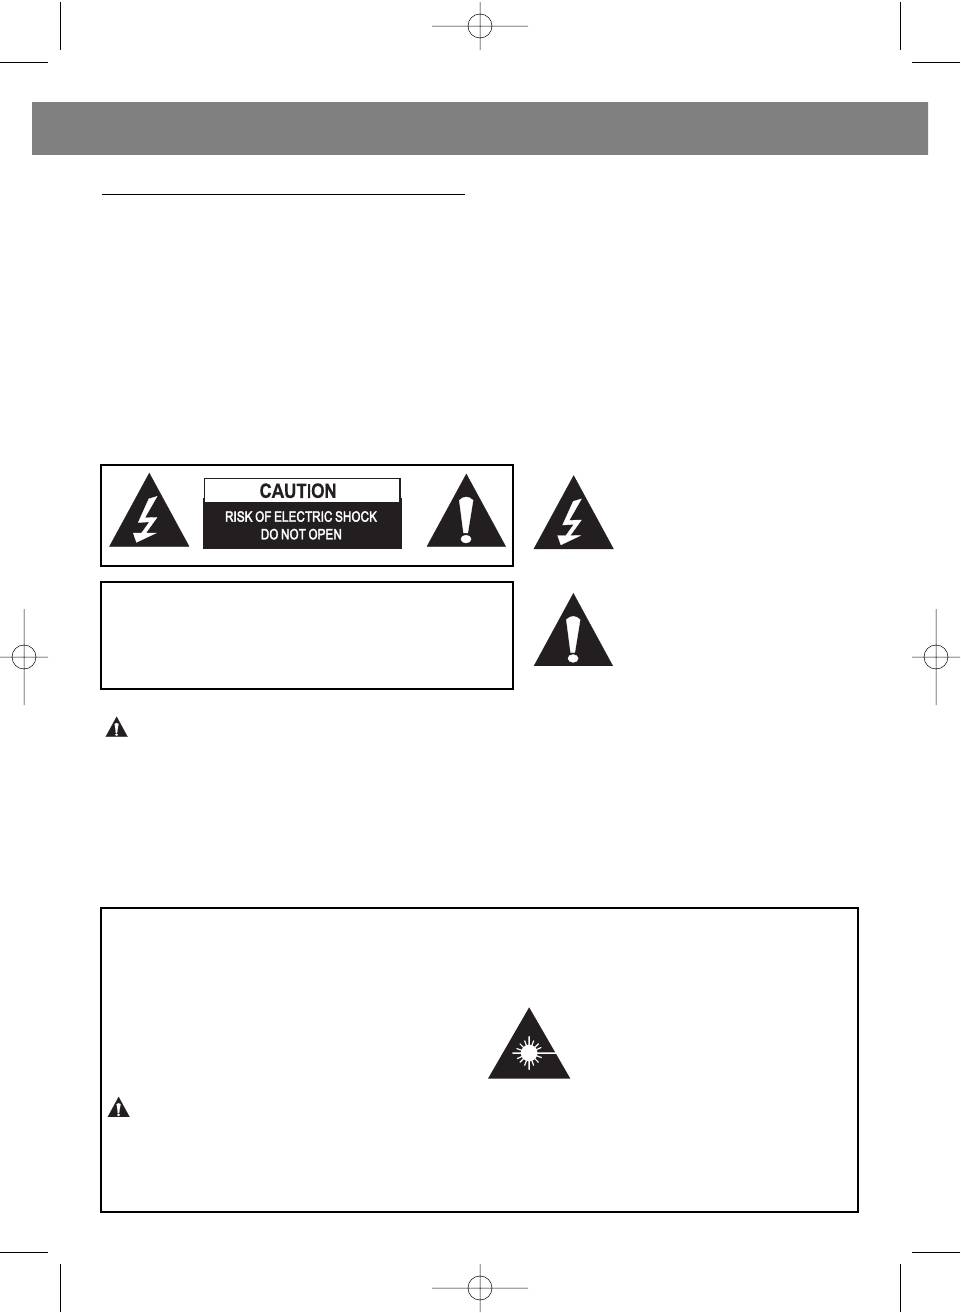
CAUTION
LASER SAFETY
CLASS 1 LASER PRODUCT
This unit employs a laser. Only qualified service
personnel should attempt repair.
Use of Controls or adjustments or performance
of procedures other than those specified herein
DANGER: INVISIBLE LASER RADIATION
WHEN OPEN AND INTERLOCK FAILED OR
may result in hazardous radiation exposure.
DEFEATED. AVOID DIRECT EXPOSURE TO
BEAM.
CAUTION: HAZARDOUS LASER RADIATION
WHEN OPEN AND INTERLOCK DEFEATED.
CAUTION
CLEANING: Always disconnect unit from power supply before attempting to clean it. Use soft cloth
moistened with soapy water, wipe gently.
Do not use solvents or abrasive materials.
2
3492.qxd 20.10.2004 18:30 Page 2

ENGLISH
SOME DO'S AND DON'TS ON THE SAFE USE OF EQUIPMENT
• This equipment has been designed and manufactured to meet European safety stan-
dards but like any electrical equipment, care must be taken if you are to obtain the best
results and safely is to be assured.
• DO read the operating instructions before you attempt to use the equipment.
• DO ensure that all electrical connections (including the mains plug, extension leads and
interconnections between pieces of equipment) are properly made in accordance with the
supplied instructions. Switch off and unplug the main plug when making or changing con-
nections.
• DON'T continue to operate the equipment if you are in any doubt about it working nor-
mally, or if it is damaged, in any way - switch off, unplug the mains plug and consult your
dealer.
• DON'T remove any fixed cover as this may expose dangerous voltages.
• DON'T listen to headphones at high volume, as such use can permanently damage your
hearing.
• DON'T obstruct the ventilation of the equipment, for example with curtains or soft fur-
nishings. Overheating will cause damage and shorten the life of the equipment.
• DON'T allow electrical equipment to be exposed to rain or moisture.
ABOVE ALL
• NEVER let anyone, especially children, push anything into holes, slots or any other open-
ings in the case because this could result in a fatal electric shock.
• NEVER guess or take chances with electrical equipment of any kind.
• It is better to be safe than sorry!
Note: If energy saving lamps (Fluorescent) is used in the same room as the unit
erratic operation may occur.
3
3492.qxd 20.10.2004 18:30 Page 3
ENGLISH
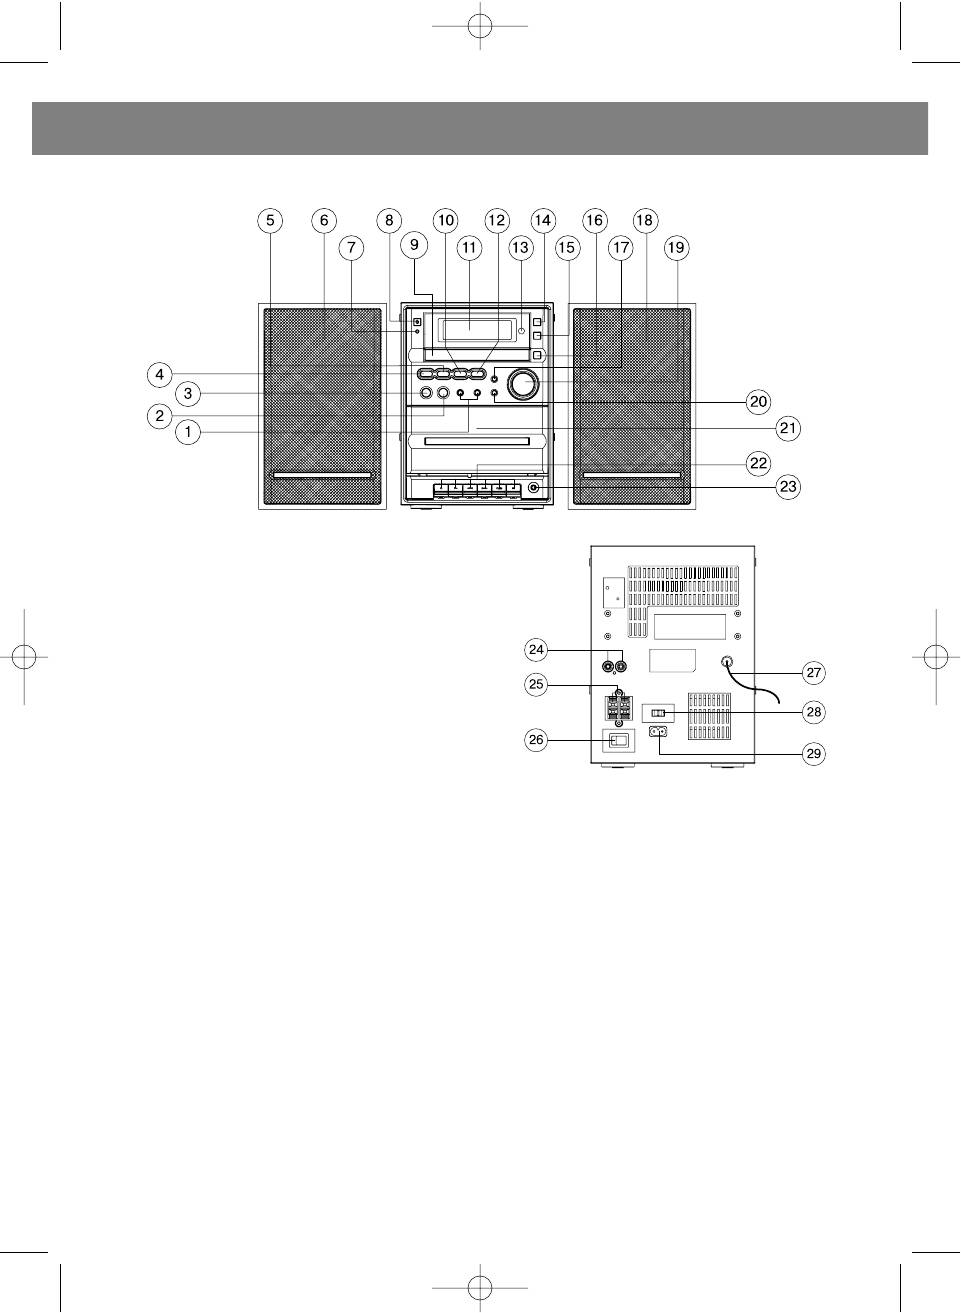
CONTROL REFERENCE GUIDE
MAIN UNIT
1. TUNER/SKIP/SEARCH / button
- searching and tuning stations manually, skip-
ping CD/MP3 tracks
2. CD STOP button
- CD/MP3 playback stop, CD/MP3 program reset
3. / CD/MP3 PLAY/PAUSE button
- CD/MP3 playback, CD/MP3 playback pause
4. FUNCTION button
- TUNER/CD/TAPE/AUX modes switching
5. BAND button
- band selection
6. Speaker (left)
7. STANDBY indicator
- selecting RDS transmition programme type
8. POWER button
18.Speaker (right)
- system ON/OFF switching, standby mode acti-
19.VOLUME control
vation
- volume level up and down
9. Cover of CD compartment / CD compart-
20.PROGRAM button
ment
- programming stations
10.EQ button
- programming CD-tracks
- selection of equalizer sound effects: CLASSIC,
21.Cassette compartment
ROCK, POP, JAZZ, PASS
22.Cassette recorder control keys
11.Liquid-crystal display
(REC/PLAY/REW/F.FWD/ST-EJ/PAUSE)
12.FIND/ESP button
- record/playback/rewind/fast forward/stop,
- MP3 title selection
eject/pause
- turning ESP function on
23.PHONES jack (3.5 mm)
13.Remote control sensor
- connection of stereo headphones jack
14.FOLDER UP button
24.Input (AUX)
- searching folders forward (MP3)
- auxiliary input
15.FOLDER DN button
25.Speaker terminals
- searching folders backward (MP3)
26.MAIN POWER switch
16.CD Tray OPEN/CLOSE button
27.FM antenna
- opens/closes CD compartment cover
28.Voltage selector (optional)
17.REPEAT/PTY button
29.Power cord jack
- turning REPEAT function on
- Connection to AC power
4
3492.qxd 20.10.2004 18:30 Page 4
ENGLISH
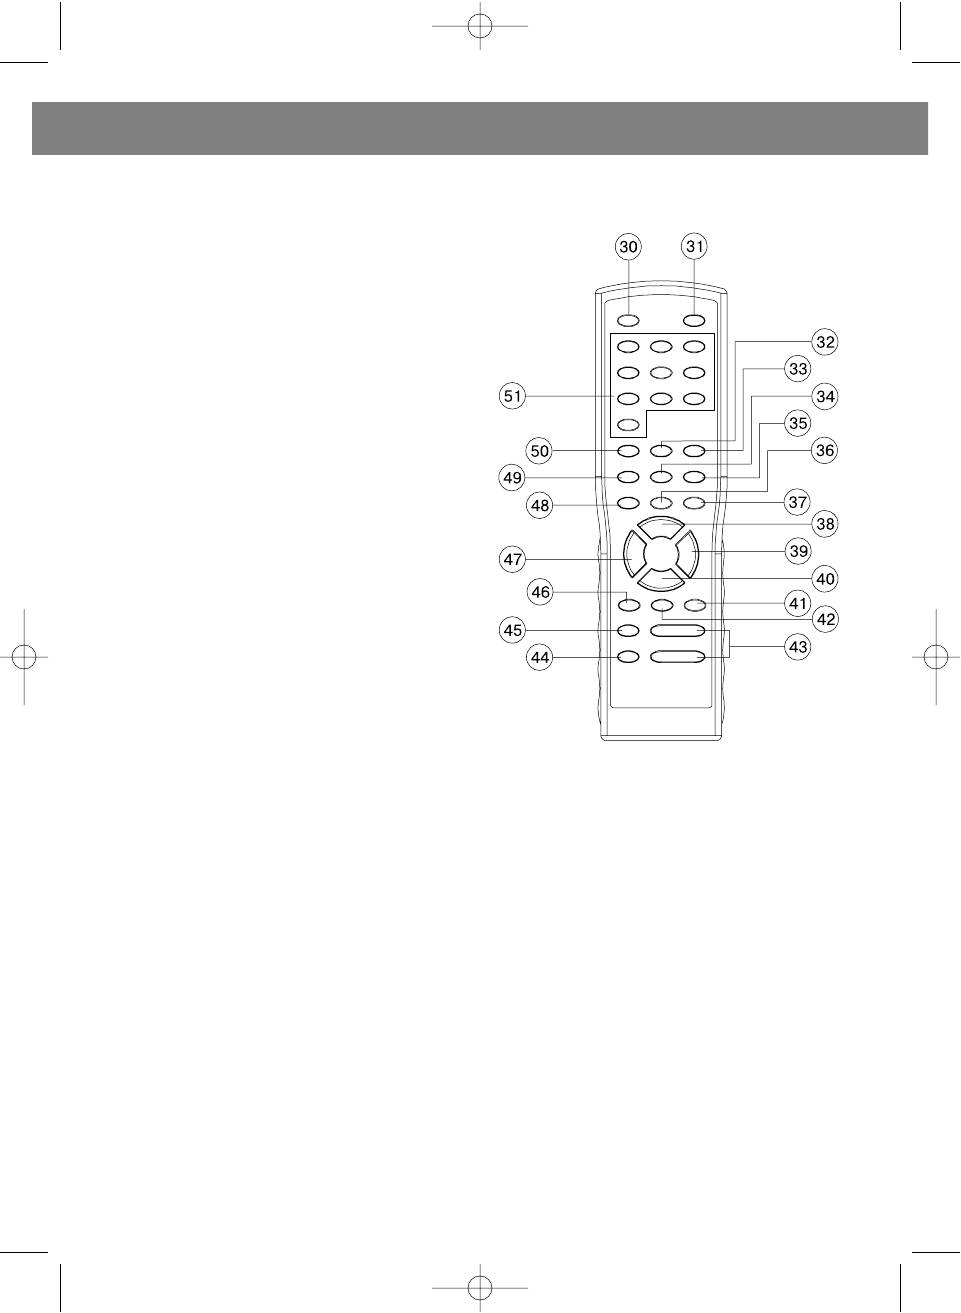
REMOTE CONTROL UNIT
30. POWER button
- system ON/OFF switching, standby mode acti-
vation
31. CD Tray OPEN/CLOSE button
- opens/closes CD compartment cover
32. REPEAT/PTY button
- turning REPEAT function on
- selecting RDS transmition programme type
33. FUNCTION button
- TUNER/CD/TAPE/AUX modes switching
34. BBS button
- low-frequency amplification
35. INTRO button
- turning INTRO function on
36. EQ button
- selecting equalizer sound effects: CLASSIC,
ROCK, POP, JAZZ, PASS
37. MUTE button
- sound muting
38. /CD/MP3 PLAY/PAUSE button
- CD/MP3 playback, CD/MP3 playback pause
39. TUNING/SKIP button
- searching and tuning stations manually, skip-
ping CD/MP3 tracks forward
40. CD/MP3 STOP button
- CD/MP3 playback stop, CD/MP3 program reset
41. SLEEP button
- turning SLEEP function on
42. TIMER button
- turning TIMER function on
43. VOLUME UP/DOWN button
- volume level up and down
44. FOLDER DN button
- searching folders forward (MP3)
49. RANDOM/RDS button
45. FOLDER UP button
- turning RANDOM function on
- searching folders backward (MP3)
- turning RDS function on
46. FIND/ESP/ST/MO button
50. PROGRAM button
- selection MP3 title
- turning PROGRAM function on
- turning ESP function on
51. Numeric buttons 0-9, +10
- selection of Stereo/Mono mode of FM band
- recall of programmed stations
47. TUNING/SKIP button
- recall of programmed CD/MP3 tracks
- searching and tuning stations manually, skip-
ping CD/MP3 tracks backward
48. BAND button
- Tuner band selection
5
3492.qxd 20.10.2004 18:30 Page 5
ENGLISH
OPERA
TING INSTRUCTIONS
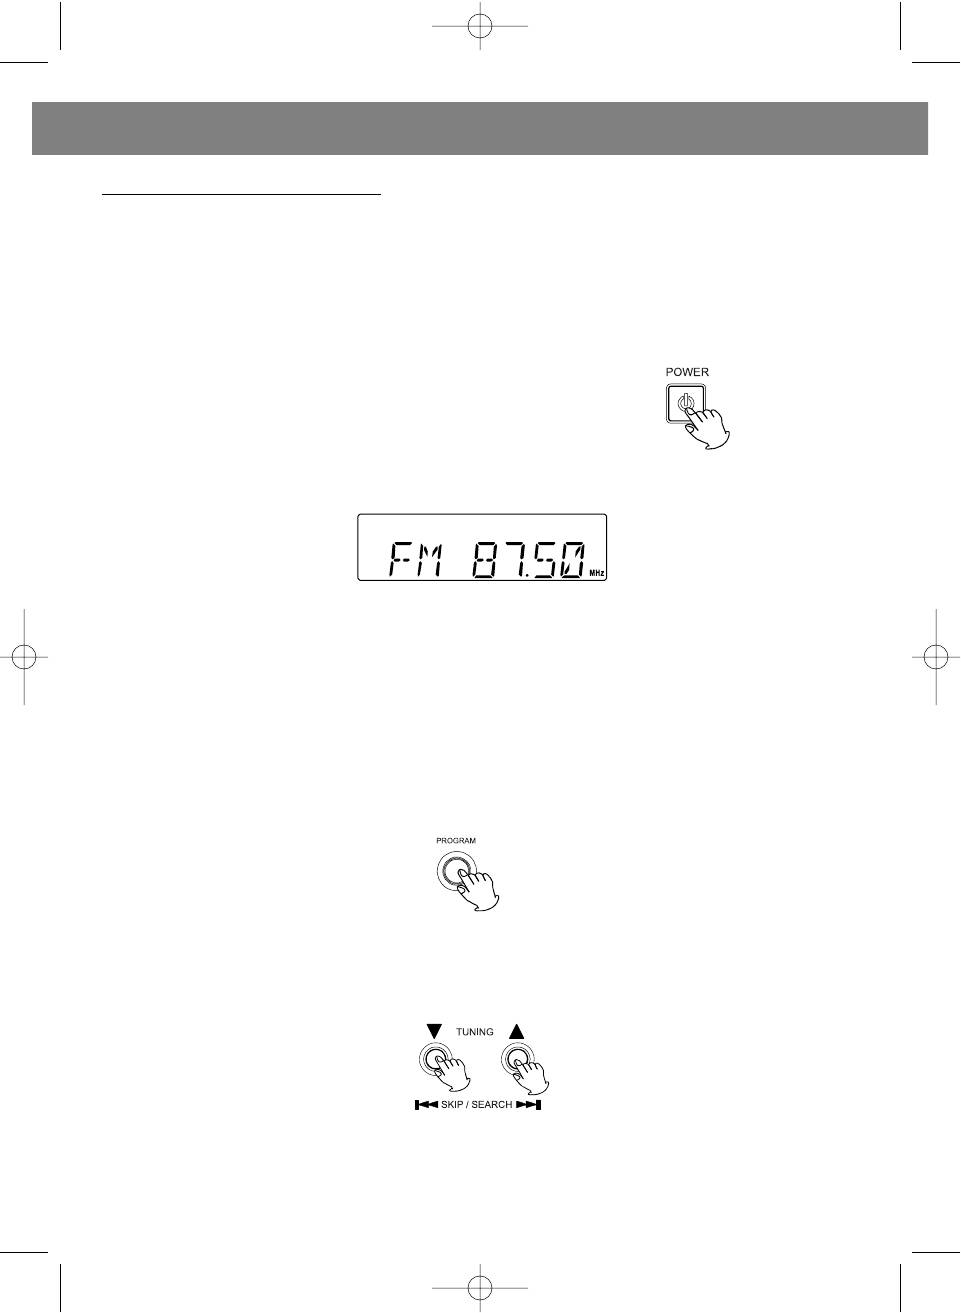
SYSTEM ON/OFF SWITCHING
Connect AC power cord of the system to the electrical outlet. Make sure that supply voltage corre-
sponds to the system voltage.
Turn MAIN POWER switch (26) into ON position.
1. To turn the system ON press the POWER button (8) or (30).
Note: LCD (11) will light.
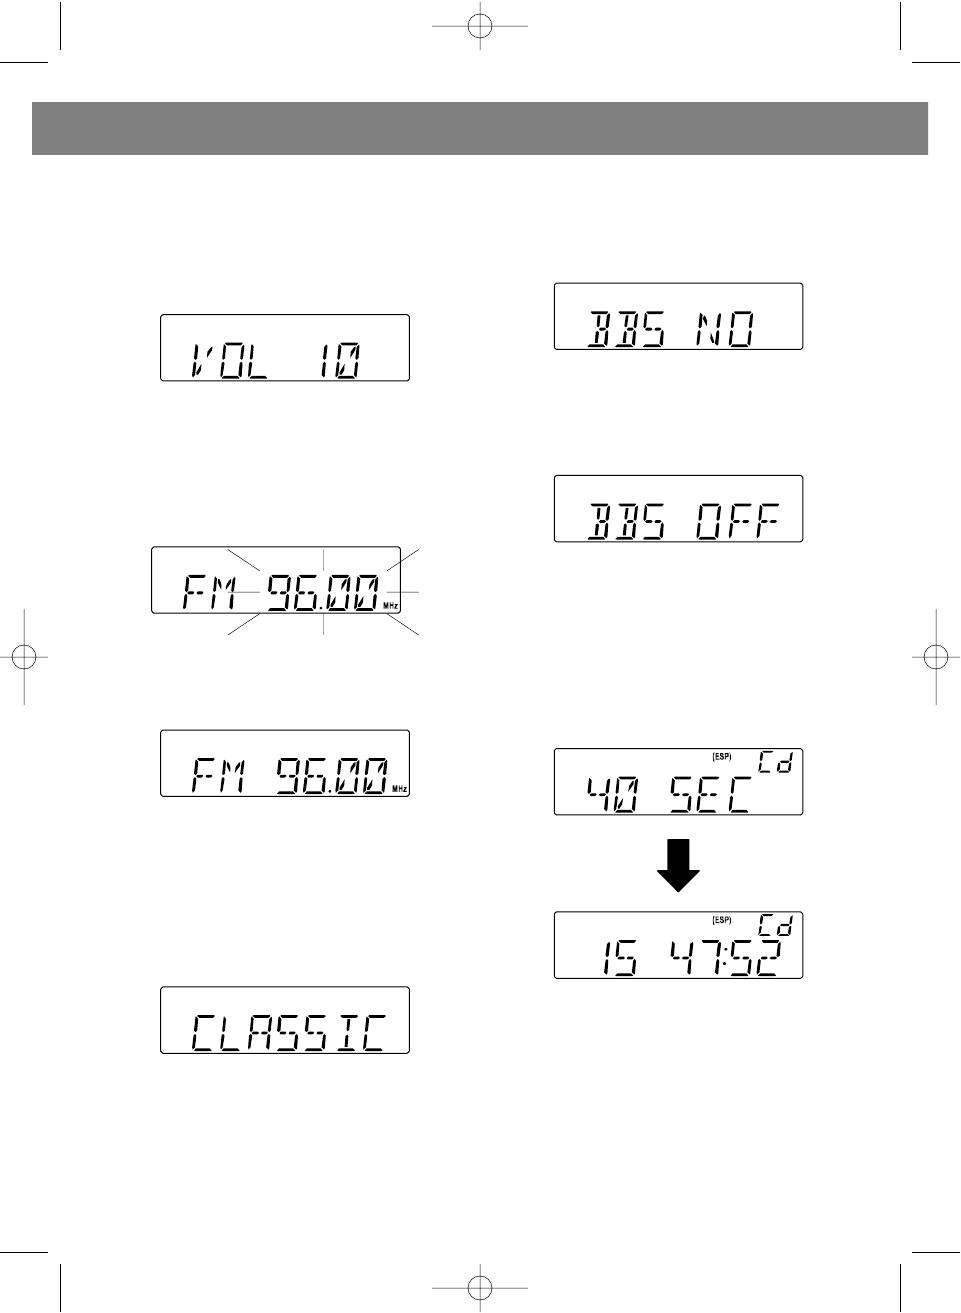
2. With FUNCTION button (4) or (33), select desired operating mode
(TUNER, CD, TAPE or AUX).
Note: When TUNER is selected, display will show tuning frequency.
Example: Tuner FM mode
3. To turn the system OFF press the POWER button (8) or (30).
LCD (11) will go out and STANDBY indicator (7) will light.
CURRENT TIME SETTING
When connecting the system into AC mains for the first time, display shows "-- --:-- --". To set current
time perform the following:
1. In OFF mode, press and hold down the PROGRAM button (20) or (50) for several seconds, then
select 12-hr or 24-hr mode. (If the data is not entered within 10 seconds, display returns into initial con-
dition).
2. Press the TUNING/SKIP button (1) or (39)/(47) to select 12-hr or 24-hr mode.
3. Press the PROGRAM button (20) or (50) again, hour digits will start blinking. Then press the TUN-
ING/SKIP button (1) or (39)/(47) to set hours.
4. Press the PROGRAM button
(20) or (50) again, minute digits will start blinking. Then press the SKIP Forward or Backward button (1)
or (39)/(47) to set minutes.
5. Press the PROGRAM button (20) or (50) again to start timing.
6
3492.qxd 20.10.2004 18:30 Page 6
ENGLISH
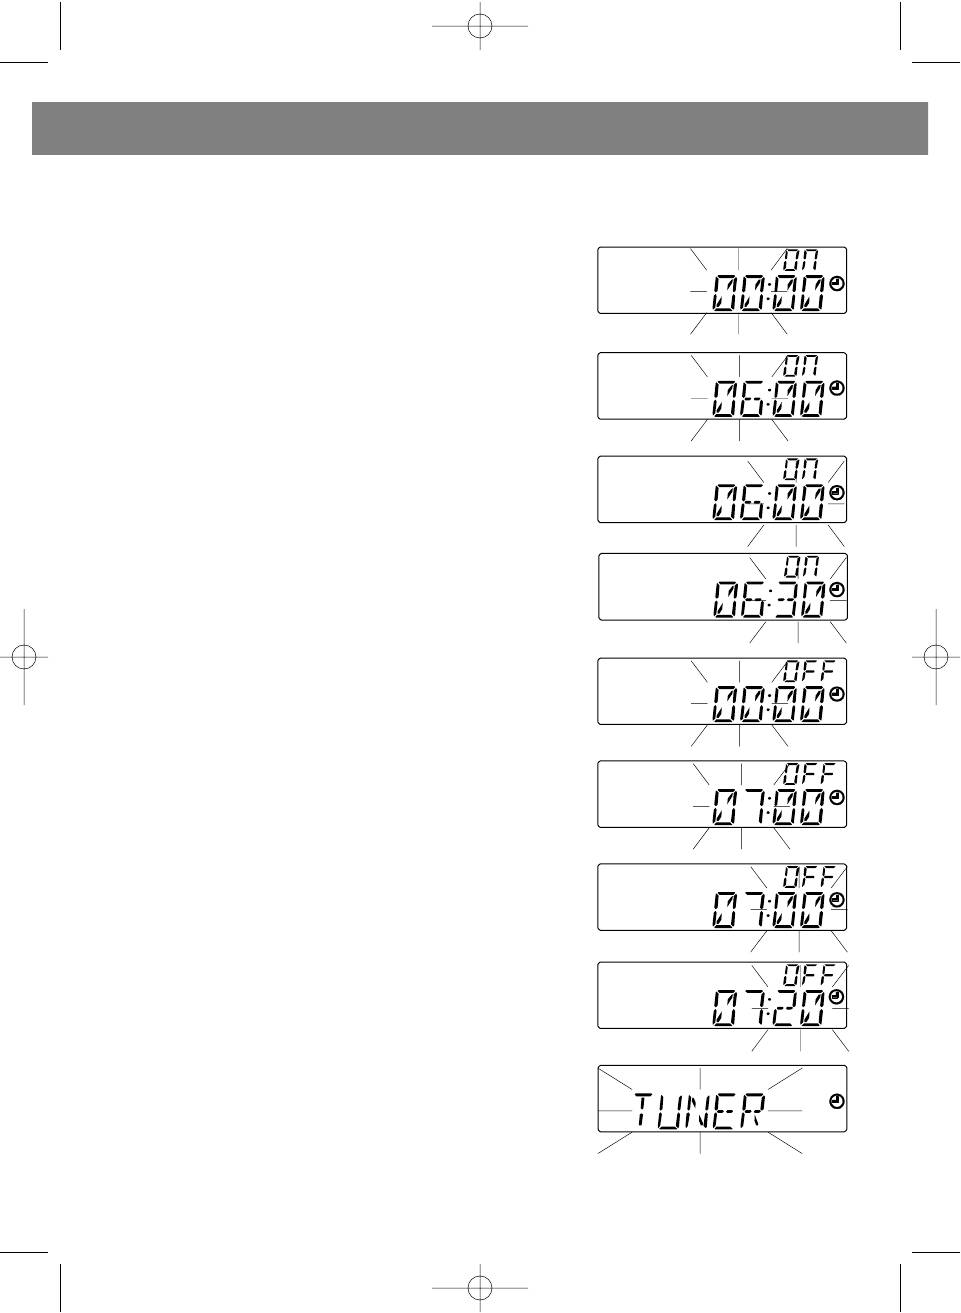
SWITCHING TIMER FUNCTION ON AND OFF
NOTE: Before switching timer function ON and OFF, current time must be set.
1. In OFF mode, press and hold down the TIMER button (42) on
the remote control unit for 2 seconds, indicator TIMER ON will
light digits will start blinking.
2. Press the TUNING/SKIP button (1) or (39)/(47) to set hours.
3. Press the TIMER button (42) of the remote control unit, minute
digits will start blinking.
4. Press the TUNING/SKIP button (1) or (39)/(47) to set minutes.
5. Press the TIMER button (42) on the remote control unit, indi-
cator TIMER OFF (time of turning the system off will light up), and
hour digits will start blinking.
6. Press the TUNING/SKIP button (1) or (39)/(47) to set hours.
7. Press the TIMER button (42) of the remote control unit, minute
digits will start blinking.
8. Press the TUNING/SKIP button (1) or (39)/(47) to set minutes.
9. Press the TIMER button (42) of the remote control unit, display
will show the mode (for example TUNER).
7
3492.qxd 20.10.2004 18:30 Page 7

ENGLISH
10. Press the TUNING/SKIP button (1) or (39)/(47) to select
desired audio source to wake up timer (for example CD).
11. Press the TIMER button (42) of the remote control unit, vol-
ume level will start blinking. Press the TUNING/SKIP button (1)
or (39)/(47) to set desired volume to wake up timer.
12. Press the TIMER button (42) of the remote control unit again, then timer settings will be stored and
displayed, whereupon display will return to current time.
CANCELLING TIMER SETTINGS
To cancel timer settings, press the TIMER button (42) of the remote control unit once, timer symbol will
go out.
To resume timer settings, press the TIMER button (42) of the remote control unit again, then timer sym-
bol will be displayed again.
SLEEP FUNCTION
In ON mode, pressing the SLEEP button (41) on the remote
control unit sets the delay time of the system automatic turn-off
within 90 to 10 minutes since function activation. Every time the
SLEEP button (41) is pressed, display will show the time to the
system automatic turn-off in minutes.
(To cancel SLEEP function, press the SLEEP button (41) repeat-
edly until SLEEP symbol will go out).
8
3492.qxd 20.10.2004 18:30 Page 8
ENGLISH
MAIN CONTROLS
BBS Function
With the VOLUME control (19) or the VOLUME
1. Press the BBS button (34) of the remote con-
button (43) of the remote control unit, set the
trol unit to turn low-frequency amplification func-
desired volume level. LCD will show volume level
tion (BBS) on.
value (VOL 00 ~ VOL 30).
Volume level adjustment display
2. To turn low-frequency amplification off, press
MUTE Function
the BBS button again.
Pressing the MUTE button (37) on the remote
control unit will turn off the playback sound, and
current display reading start blinking.
Example: the sound is turned off in FM mode
ESP Function
In CD playback mode, press the ESP/ST/MO but-
ton (12) or (46) to activate or deactivate the
To cancel MUTE function, press the MUTE button
Electronic Shock Protection function. In playback
(37) again.
mode of MP3 format, the Electronic Shock
Cancellation of sound muting
Protection function is activated automatically.
EQ Function
Press the EQ button (10) or (36) repeatedly to
select desired equalizer mode - CLASSIC, ROCK,
POP JAZZ or PASS.
Example: equalizer in CLASSIC mode
Note: CD or MP3 playback will be interrupted for
several seconds at the time of activation or deac-
tivation of the Electronic Shock Protection func-
tion (ESP).
9
3492.qxd 20.10.2004 18:30 Page 9
ENGLISH
TUNER OPERATION
1. Press the POWER ON/OFF button (8) or (30) to turn on the unit. LCD display (11) will light up.
2. Press the FUNCTION button (4) or (33) and
select the TUNER mode.
Example: FM mode
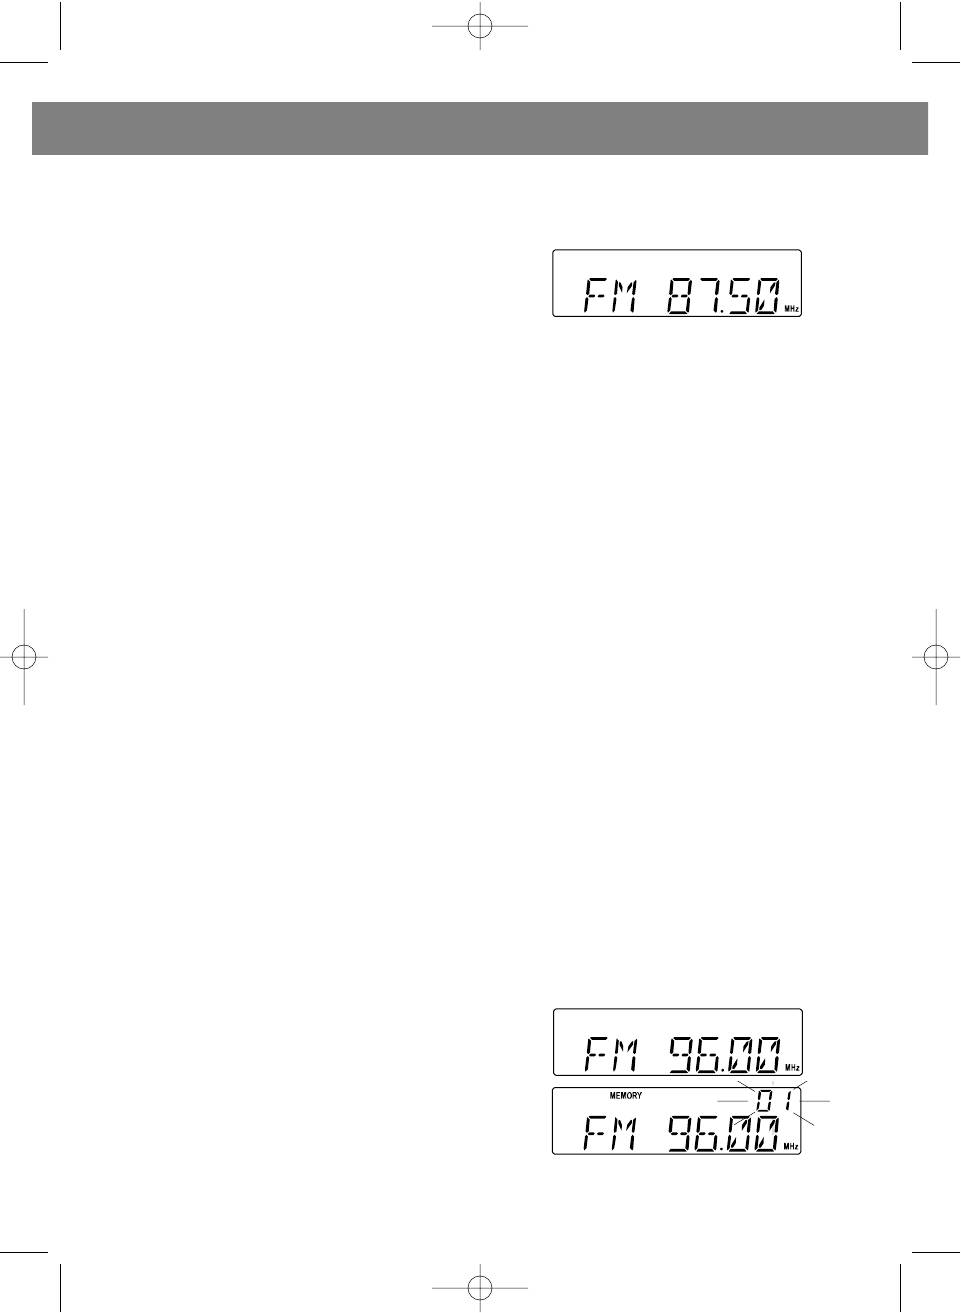
3. Press the BAND button (5) or (48) to select AM (MW) or FM band.
4. With TUNER/SKIP/SEARCH button (1) or (39)/(47), tune to desired station. To start automatic
search, press and hold down one of the TUNER/SKIP/SEARCH buttons (1) or (39)/(47) until display
shows frequency corresponding to that of the desired station. The tuner will search stations with the
most strong signal. To select stations manually, press and release one of the TUNER/SKIP/SEARCH
buttons (1) or (39)/(47) repeatedly until display shows exact frequency of the desired station.
5. On completion of tuner operation, press the POWER button (8) or (30) to turn off the system.
RDS (Remote Data System)
RDS is broadcasting system for transmitting text information in FM band. The stations carrying RDS
transmit the title of the station or, for example, radio schedule. The data is displayed by means of multi-
function display. Furthermore, the tuner can find the station by specific title.
To search stations by programme type:
1. Press the REPEAT/PTY button (32) of the remote control unit, and display (11) will show Programme
Type Search mode (PTY SEL).
2. By pressing the TUNER/SKIP/SEARCH button (1) or (39)/(47) repeatedly, select desired programme
type. To start searching, press the REPEAT/PTY button (32).
3. When the station corresponding the programme type is found, then search will be stopped and dis-
play (11) will show the program name.
To view station carrying RDS:
When the station carrying RDS is found (Note: display (11) will show RDS symbol), press the RAN-
DOM/RDS button (49) of the remote control unit to view informational text transmitted (for example sta-
tion title, type of radio programmes, programme titles, traffic summary, current time etc.).
STORING PRESET STATIONS
Up to 10 FM and 10 AM (MW) stations can be stored in preset memory.
1. Press one of the TUNER/SKIP/SEARCH buttons
(1) or (39)/(47) and tune in a station to be stored as
a preset station.
2. Press the PROGRAM button (20) or (50) once.
3. By pressing one of the FOLDER UP/DN/M -
UP/DN buttons (14)/(15) or (44)/(45), set the sequential number for this station before storing it.
10
3492.qxd 20.10.2004 18:30 Page 10
ENGLISH
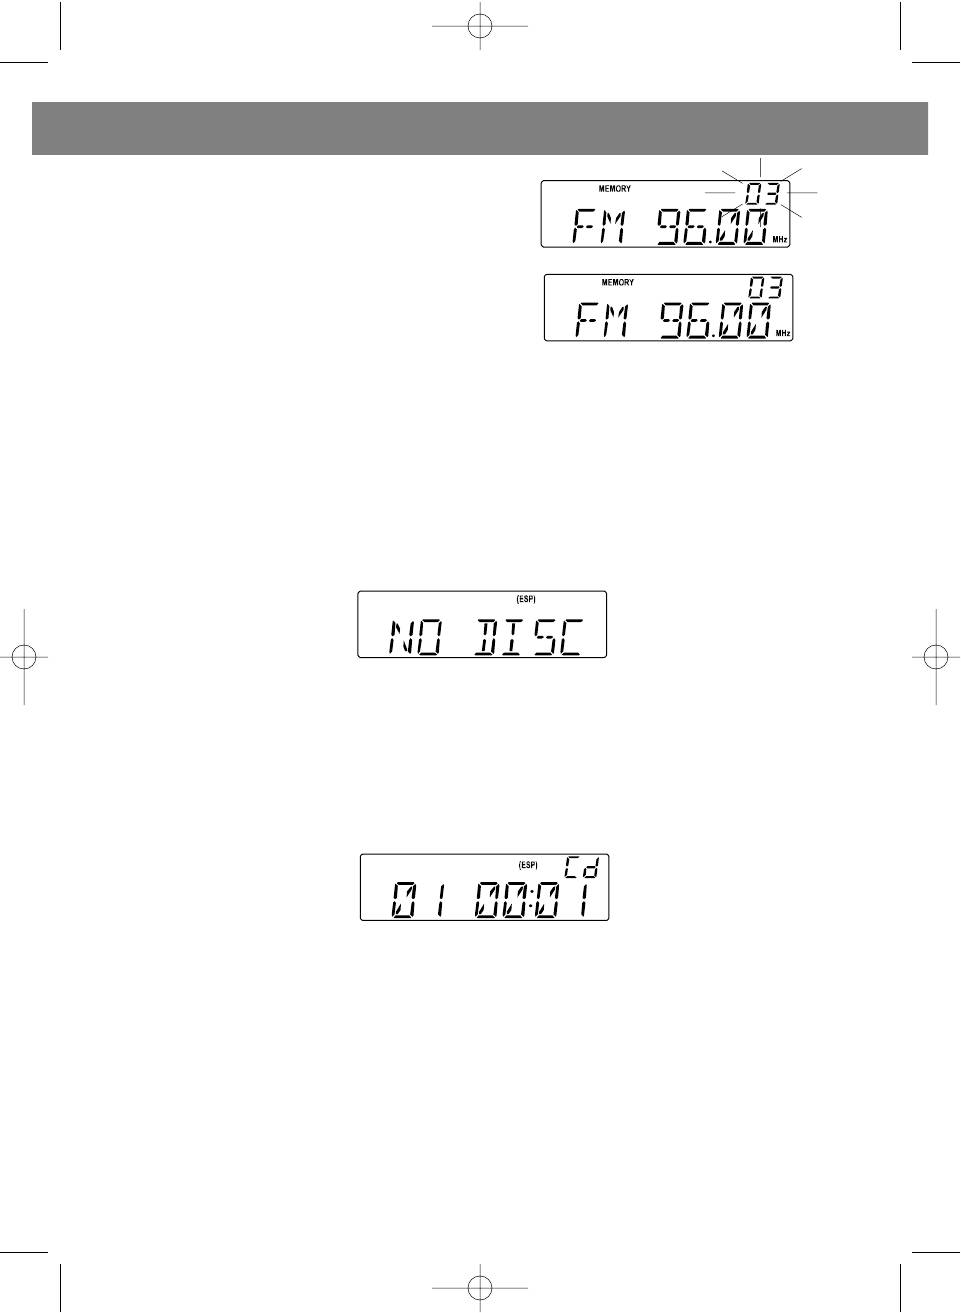
4. Press the PROGRAM button (20) or (50) again.
The station will be stored under previously selected
number.
5. To store more stations, repeat steps 1 to 4.
TO SELECT PRESET STATIONS
Select desired station with the FOLDER UP/DN/M-UP/DN (14)/(15) or (44)/(45) buttons.
CD PLAYBACK
1. Press the POWER button (8) or (30) to turn on the system. LCD (11) will light up. With the FUNCTION
button (4) or (33), select CD playback mode.
2. If no disk is in the CD compartment, display will show "NO DISK".
Example: no disk
DISK LOADING
1. Press the CD Tray OPEN/CLOSE button (16) or (31) once to open CD compartment.
2. Place a CD into compartment and close it by pressing CD Tray OPEN/CLOSE button (16) (31) again.
Disk reading will start.
DISK PLAYBACK
To play the disk, press the PLAY/PAUSE button (3) or (38) once.
Example: Track 1 playback
DISK PLAYBACK PAUSE
During disk playback, press the PLAY/PAUSE button (3) or (38), displayed symbols will start blinking.
To resume playback, press the PLAY/PAUSE button (3) or (38) again.
DISK PLAYBACK STOP
Press the STOP button (2) or (40).
11
3492.qxd 20.10.2004 18:30 Page 11
ENGLISH
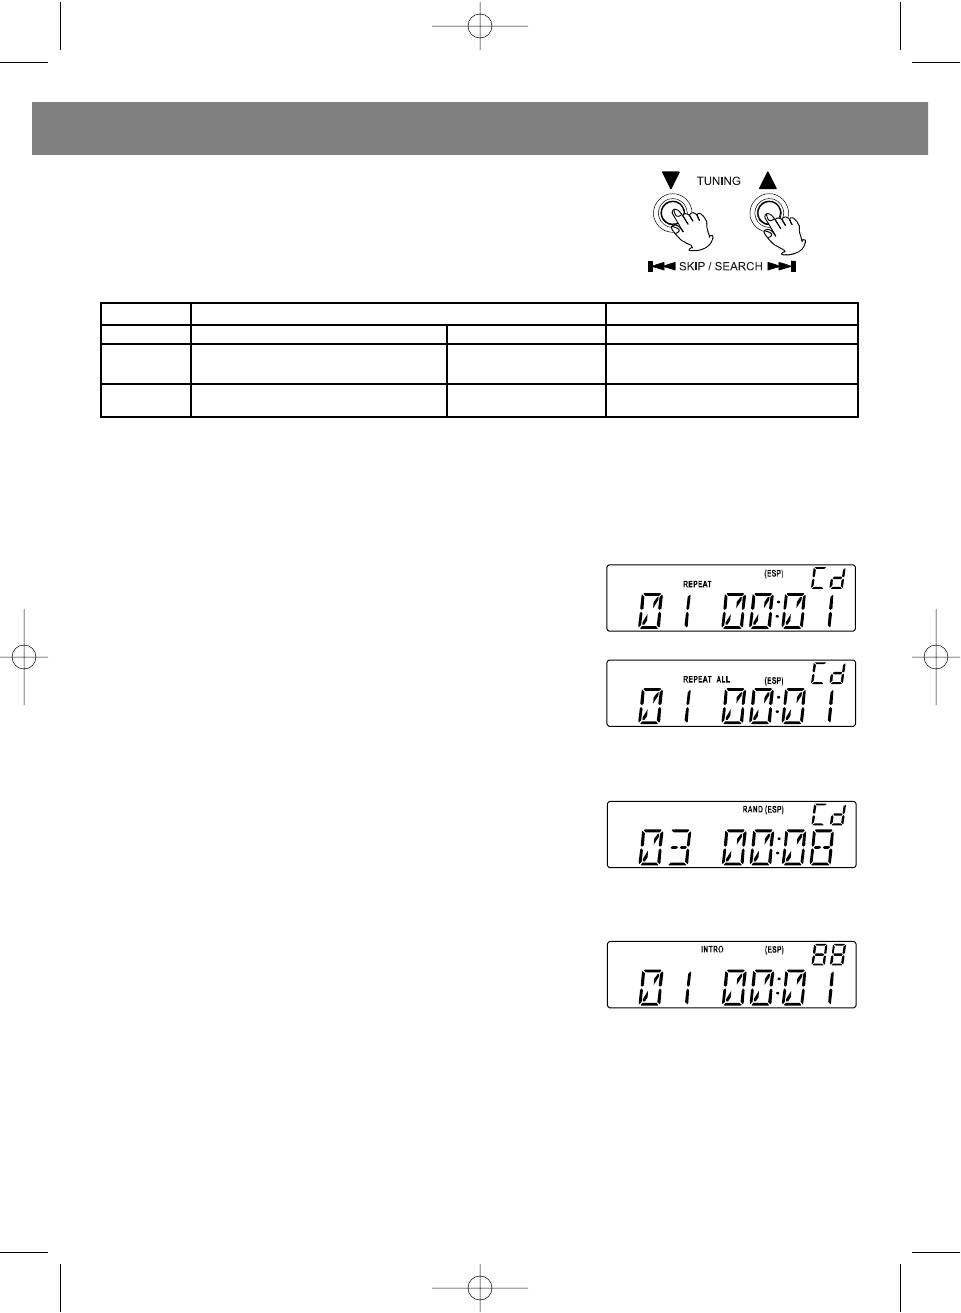
TO SKIP AND SEARCH TRACKS BY MUSIC FRAGMENT
Press one of the SKIP/SEARCH buttons (1) or (39)/(47) briefly.
PLAYBACK mode STOP mode
Press once Press twice Press once
Returns to the beginning of Previous track Previous track
the current track
Next track Next track
During playback, press and hold down one of the SKIP/SEARCH buttons (1) or (39)/(47) to turn on
function of searching tracks by music fragment.
NOTE: To facilitate the search, fast playback of the track will be heard at low volume level.
REPEAT FUNCTION
1. During playback stop mode, press the REPEAT button (17) or
(32) once to turn on the function of repeated playback of current
track.
Example: Repeating one track (playback mode)
2. Press the REPEAT button (17) or (32) twice to repeat tracks on
the disk.
Example: Repeating all tracks (playback mode)
RANDOM FUNCTION
Pressing the RANDOM button (49) on the remote control unit,
before or during CD playback, will turn on the function of random
playback of tracks.
Example: Random playback mode
To cancel this function, press the RANDOM button again.
INTRO FUNCTION
In STOP mode, press the INTRO button (35) of the remote control
unit to play back tracks in introduction mode. In this mode, the first
10 seconds of each track will be played. To restore normal playback
mode, press the INTRO button (35) again.
Playback in INTRO mode
12
3492.qxd 20.10.2004 18:30 Page 12
ENGLISH
PROGRAMMED PLAYBACK
It is possible to program the track playback order (up to 64 tracks). At the beginning of programming
procedure make sure that CD is in the STOP mode.
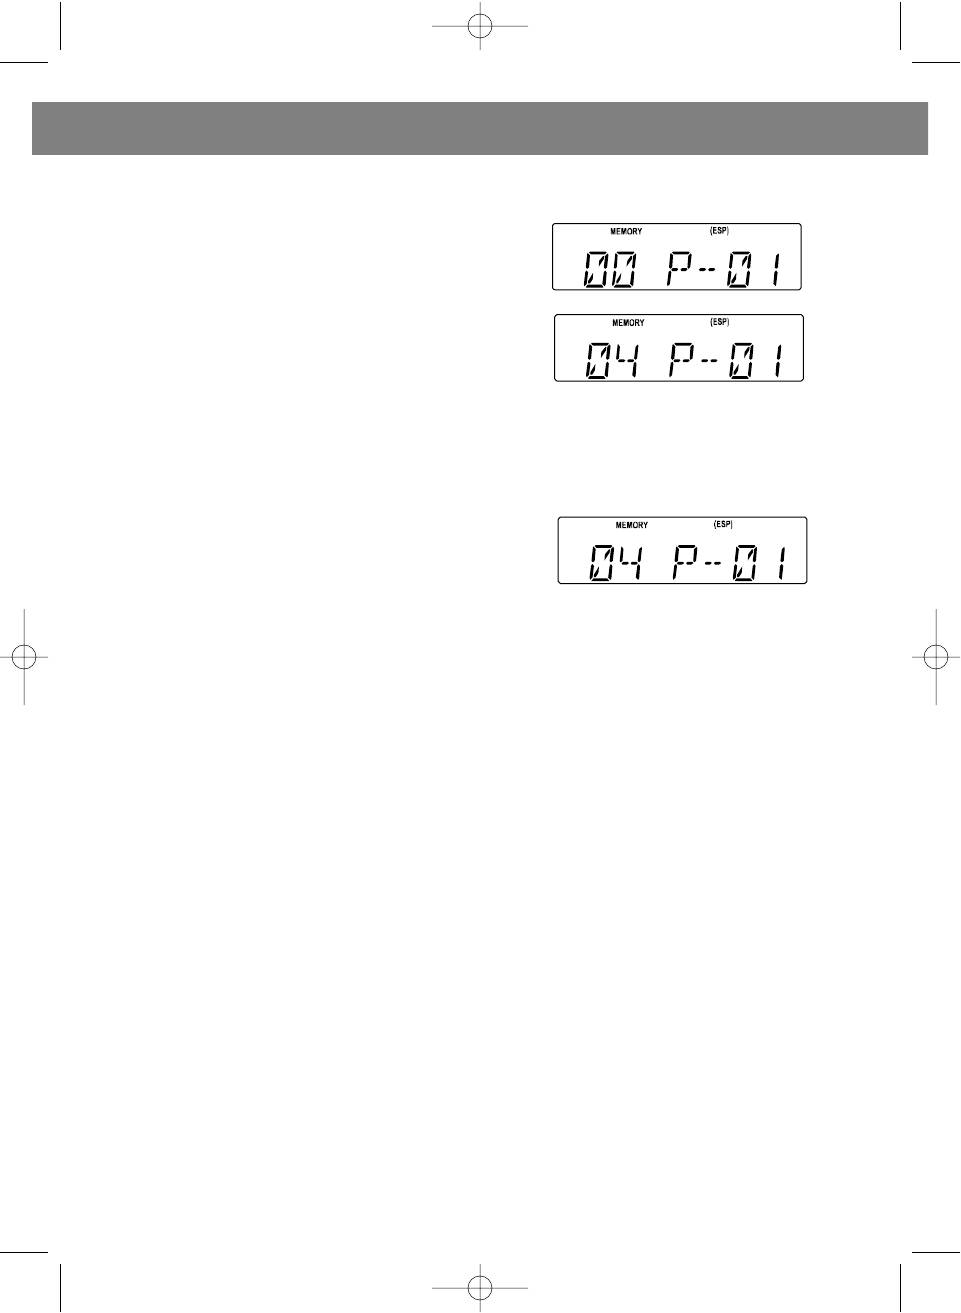
1. Press the PROGRAM button (20) or (50) once.
Example: Programming mode
2. With the SKIP/SEARCH buttons (1) or (39)/(47), select
desired track.
Example: Selection of track 4
3. Press the PROGRAM button (20) again, and track 4 will be stored in memory.
4. To continue programming, repeat steps 2 and 3.
5. Press the PLAY/PAUSE button (3) or (38) to start playback
of programmed tracks.
Note: To repeat playback of programmed tracks, press the PROGRAM button (20) and then the
PLAY/PAUSE button (3) (it is possible only if LCD keep showing MEMORY symbol).
TO VIEW PROGRAMMED TRACKS
During CD playback stop mode, press the PROGRAM button repeatedly to view sequential numbers of
the programmed tracks.
TO CANCEL PROGRAMMED PLAYBACK
Press the STOP button (2) or (40) to cancel programming (or open ÑD compartment or choose another
playback mode).
13
3492.qxd 20.10.2004 18:30 Page 13
ENGLISH
MP3 DISCS PLAYBACK
1. Press the POWER button (8) or (30) to turn the unit ON. LCD (11) will light up. With the FUNCTION
button (4) or (33) choose CD position
2. Press the OPEN/CLOSE button (16) or (31) to open the CD com-
partment door. Insert a disc and close the CD compartment door by
pressing the OPEN/CLOSE button (16) or (31) for the second time.
The disc will begin to spin and start playback.
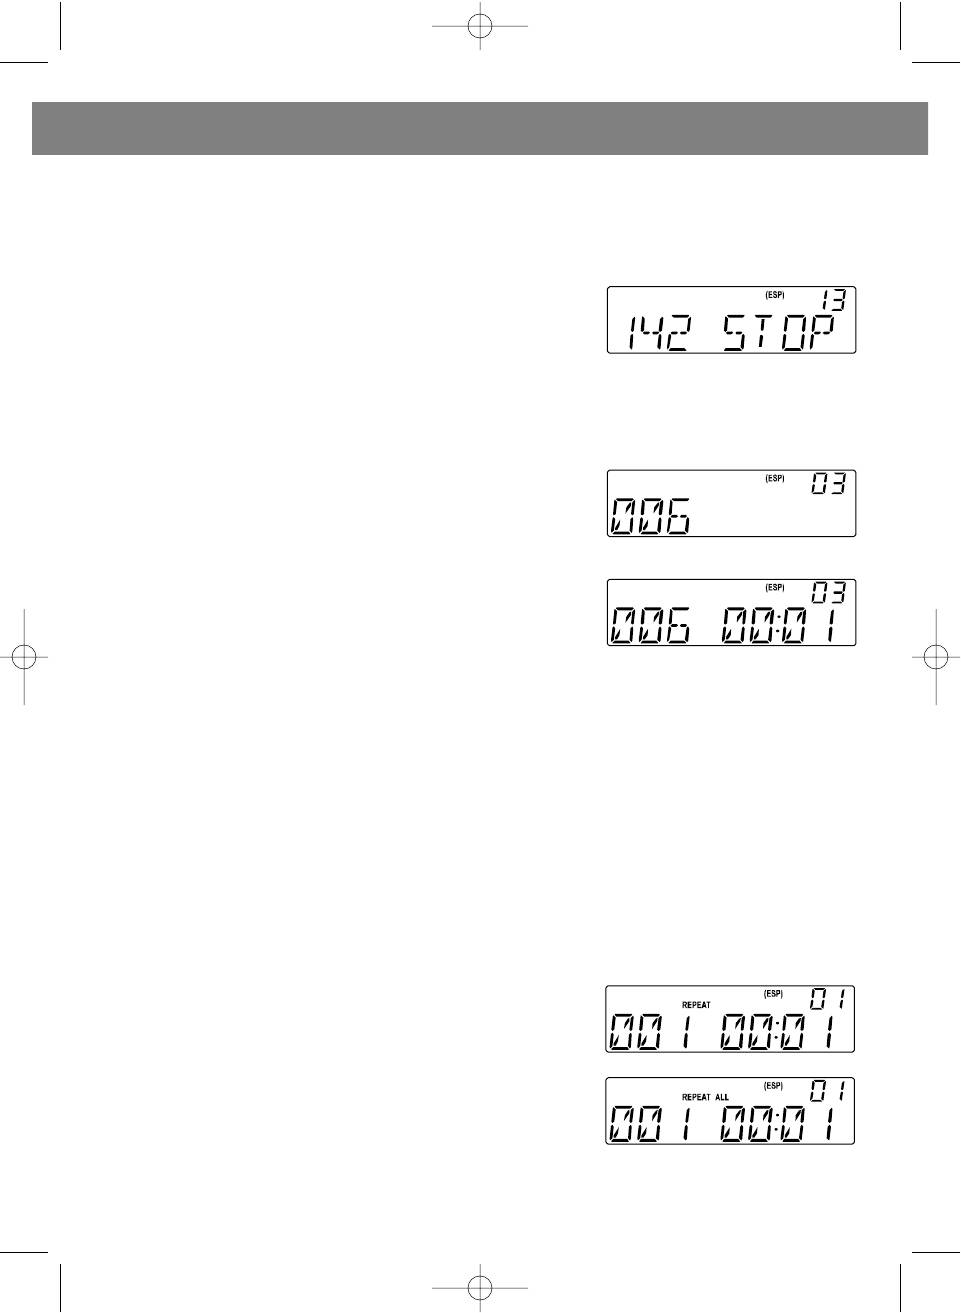
Example: LCD in the STOP mode (the number of tracks and folders
is shown)
3. Press the FOLDER UP/M UP button or FOLDER DN/M-DN button (14)/(15) or (44)/(45) to skip to
the desired folder of tracks. The first track of the desired folder will flash on the display.
Choose the 3rd folder
4. Press one of the SKIP/SEARCH buttons (1) or (39)/(47) to
choose to the desired track.
Choose the 6th track from the 3rd folder
5. Press the PLAY/PAUSE button (11)/(38) to start playback.
Note: During the MP3 disc playback press and hold down the
FIND/ESP button (12) for 1 second and the title of track/folder and
the artist's name will appear on the LCD (if such information is available). To restore the initial state of
the LCD picture, please press and hold down the FIND/ESP button (12) for 1 second again.
ÌÐ3 FORMAT PLAYBACK
1. During STOP mode press the FIND/ESP button (12) or (46) once, and choose the name of the track
from A to Z, 0-9 by pressing SKIP/SEARCH buttons (1) or (39)/(47). Then press the PLAY/PAUSE button
(3) or (38) to start the playback of the chosen track.
2. During STOP mode press the FIND/ESP button (12) twice and choose the name of the album (fold-
er) by pressing SKIP/SEARCH buttons (1) or (39)/(47). Press the PROGRAM button (20) or (50) once,
and the information about this album (folder) will be shown on the LCD until you press PROGRAM but-
ton (20) once again.
REPEAT FUNCTION
1. During playback stop mode, press the REPEAT button (17) or
(32) once to switch on the function of repeated playback of the cur-
rent track.
2. Press the REPEAT button (17) or (32) twice to repeat all the
tracks on the disk.
14
3492.qxd 20.10.2004 18:30 Page 14
ENGLISH
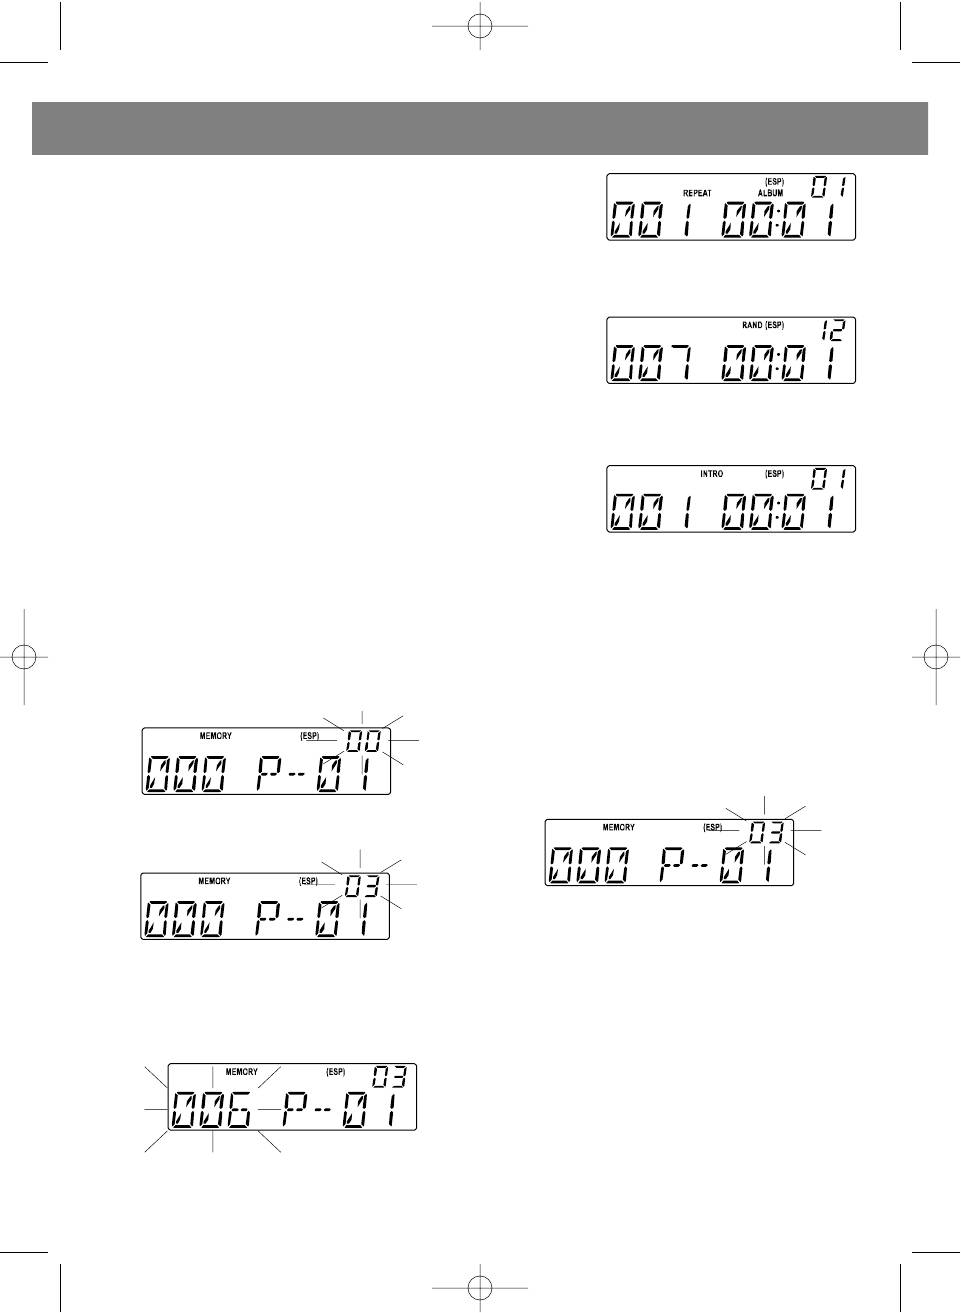
3. Press the REPEAT button (17) or (32) three times to repeat
album (folder).
4. To cancel the repeat function, press REPEAT button (17) or (32)
several times, until the REPEAT icon on the LCD will have lit down.
RANDOM FUNCTION
Pressing the RANDOM button (49) of the remote control unit, before
or during CD playback, will turn on the function of random playback
of tracks. To cancel this function, press the RANDOM button again.
Playback of the 7th track from the 12th album
INTRO FUNCTION
In STOP mode press the INTRO button (35) of the remote control
unit to playback tracks in introduction mode. In this mode, the first
10 seconds of every track will be played. To restore normal playback
mode, press the INTRO button (35) again.
MP3 PROGRAMMED PLAYBACK
It is possible to program the track playback order (up to 64 tracks). At the beginning of programming
procedure make sure that CD is in the STOP mode.
1. Press the PROGRAM button (20) or (50)
5. To continue programming, repeat steps 2
once.
and 3.
6. Press the PLAY/PAUSE button (3) or (38) to
start playback of programmed tracks.
Example: Playback of the 6th track from the 3rd
album
2. With the SKIP/SEARCH buttons (1) or
(39)/(47) select desired album (folder).
Note: To repeat playback of programmed
tracks, press the PROGRAM button (20) and
then the PLAY/PAUSE button (3) (it is possible
3. Press the PROGRAM button (20) or (50)
only if LCD keep showing MEMORY symbol).
again, and then press SKIP/SEARCH buttons
(1) or (39)/(47) or the numeric buttons (51) of
TO VIEW PROGRAMMED TRACKS
the remote control unit to choose the desired
In CD playback stop mode, press the PRO-
track.
GRAM button repeatedly to view sequential
numbers of the programmed tracks.
TO CLEAR THE PROGRAMM
Press the STOP button (2) or (40) to cancel pro-
gramming (or open ÑD compartment or choose
another playback mode).
4. Press the PROGRAM button once again, the
track 6 of album 3 is stored in memory.
15
3492.qxd 20.10.2004 18:30 Page 15
ENGLISH
LISTENING TO THE TAPES
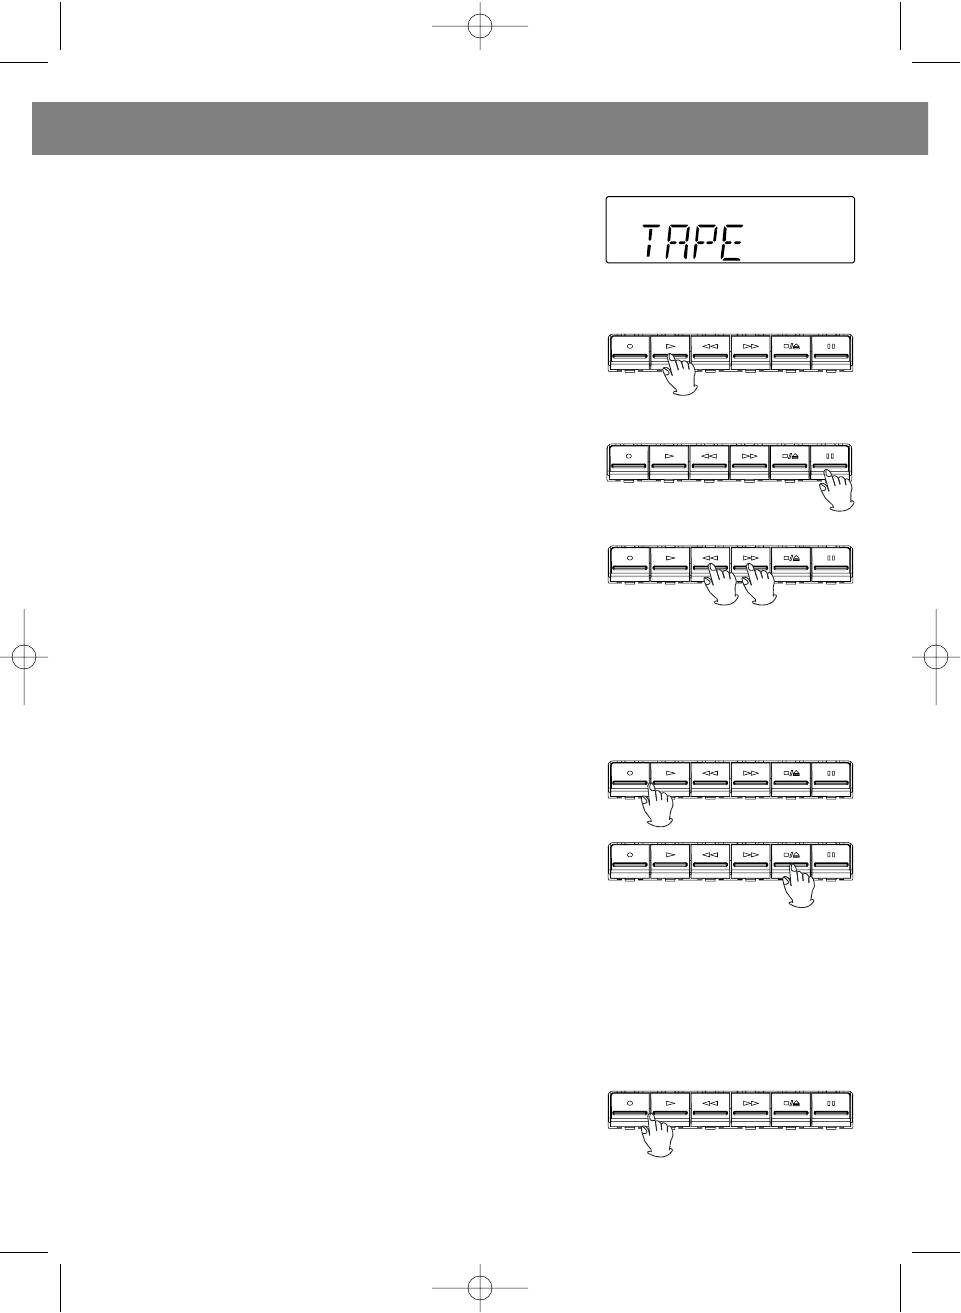
1. Press the POWER button (8) or (30) to turn the unit ON. LCD
(11) will light up. With the FUNCTION button (4) or (33) choose the
TAPE mode.
2. Press the STOP/EJECT button (22) to open the cassette holder (21). Load a cassette with its tape
down and the full bobbin to the left.
3. Press the PLAY button (22) to start playback of the tape.
4. Press the STOP/EJECT button (22) to stop playback.
TO PAUSE IN THE PLAYBACK
Press the PAUSE button (22). To resume playback, press the
PAUSE button (22) again.
FAST FORWARD AND REWIND
Press the REW or the F.FWD (22) buttons for rewind and fast for-
ward.
TAPE RECORDING FROM THE TUNER
1. Slide the FUNCTION switch (4) or (33) to TUNER position.
2. Perform actions 3 and 4 from the "TUNER OPERATION" section to choose the desired station.
3. Insert clear tape into cassette compartment (21).
4. Press the RECORD and PLAY buttons (22) at the same time to
start recording.
5. To cancel the recording press STOP/EJECT button (22) to stop
the recording.
TAPE RECORDING FORM CD AND MP3
1. Choose the CD playback mode with FUNCTION button (4) or (33), and then open the door of the CD
compartment by pressing the CD Tray OPEN/CLOSE button (16) or (31) once.
2. Insert the disc and close CD compartment.
3. Press the STOP/EJECT button (22), to open the cassette compartment (21). Insert the cassette with
its tape down and the full bobbin to the left.
4. Press the RECORD and PLAY buttons (22) at the same time to
commence recording, and at this time the CD/MP3 disc will com-
mence playback, starting from the first or current track.
16
3492.qxd 20.10.2004 18:30 Page 16
ENGLISH
5. Press STOP/EJECT button (22) to stop the recording, and at this
time the playback of the disc will automatically stop.
Note:
1. If you want to listen to the newly recorded, switch on the tape
mode and rewind the tape.
2. To record from additional devices AUX, use the recommendation described above.
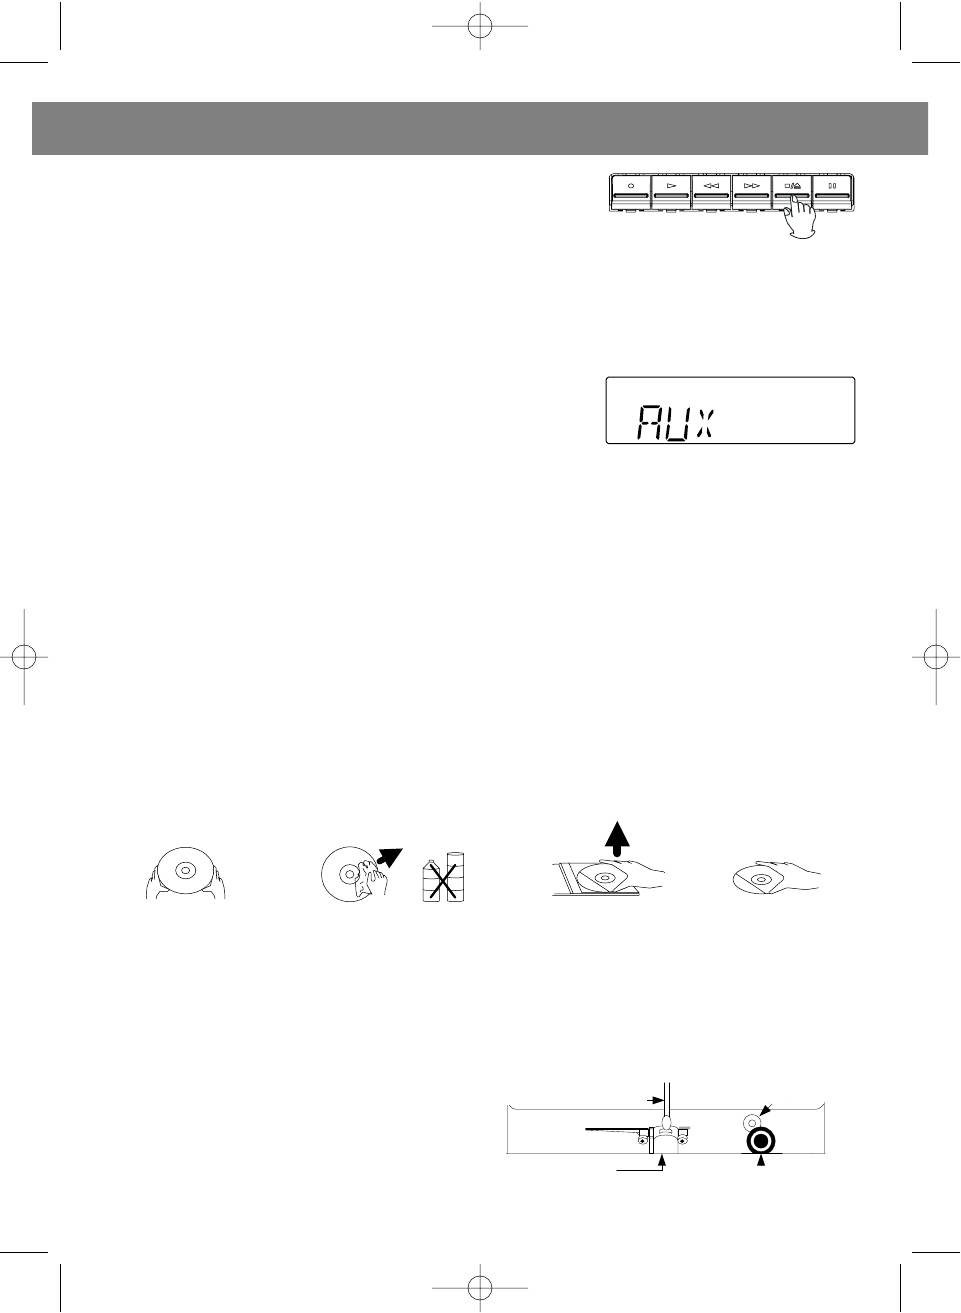
HOW TO LISTEN TO AND RECORD FROM ADDITIONAL DEVICES
You can listen to and record the sound programs from the additional devices with the aid of this system.
1. Switch the additional device into the assigned AUX input (24).
2. Press POWER button (8)/(30) to switch the system ON. The LCD
(11) will light. Choose the AUX mode with the FUNCTION button (4)
or (33).
3. To operate additional device, follow operating instructions for
this device.
CARE AND MAINTENANCE
COMPACT DISCS CARE
• Treat the discs carefully. Hold the discs only by its edges. Never touch the shining surface of the
discs.
• Do not attach pieces of the adhesive tape, stickers, etc. to the ornamental surface of the disc.
• Occasionally clear the disks with the soft (not woolen) dry fabric. Never use clearing sprays or anti-
static sprays to clean the discs. In the case of need, purchase the special preparation for compact
discs cleaning.
• If you observe pauses or failures during playback, the disc is possibly dirty or damaged (scratched).
• Wipe the discs from the center out towards the edge. Do not wipe in a circular motion.
• To remove a disc from its storage case, press down on the center of the case and lift the disc out,
holding it carefully by the edges.
• Fingerprints and dust should be wiped from the surface of the disc with a soft cloth. Unlike conven-
tional records, compact discs have no groove to collect dust and microscopic debris, so gently wiping
them with a cloth should remove most of the particles.
MAGNETIC HEAD CLEANING
Magnetic head, pinch rollers and capstan axis require occasional cleaning. The small parts of metal
oxide are accumulated on the above-mentioned parts, cause the premature wear of the magnetic tape
and worsen the playback quality.
Switch the system OFF, press the STOP/EJECT button (22) to open the door of the cassette compart-
ment, and then press the PLAY button (22). Wipe the Magnetic head, pinch rollers and capstan axis with
the soft fabric or wad of cotton swab, wetted in
the isopropyl alcohol or special solution for clean-
ing the magnet heads.
Note: Avoid the contact of metal items with the
magnetic heads and do not use them for cleaning.
Keep the cleaning material from falling into tape
mechanism.
17
COTTON SWAB
CAPSTAN
RECORD/PLAY HEAD
PINCH ROLLER
COTTON SWAB
CAPSTAN AXIS
MAGNETIC HEAD
PINCH ROLLER
3492.qxd 20.10.2004 18:30 Page 17
ENGLISH
CLEANING OF EXTERNAL SURFACES
• To avoid fire or electrical shock, unplug the system from electrical outlet before cleaning it.
• Be careful while cleaning the plastic parts. If the system's cabinet gets dusty, wipe it with the soft dry
fabric.
•To clear front panel from dust and fingerprints, wipe it with the soft fabric wetted in the light soap solu-
tion.
• Never use abrasive materials or polishing materials, because they can damage the external sur-
faces.
WARNING: DO NOT ALLOW WATER AND OTHER LIQUIDS TO GET INSIDE THE SYSTEM.
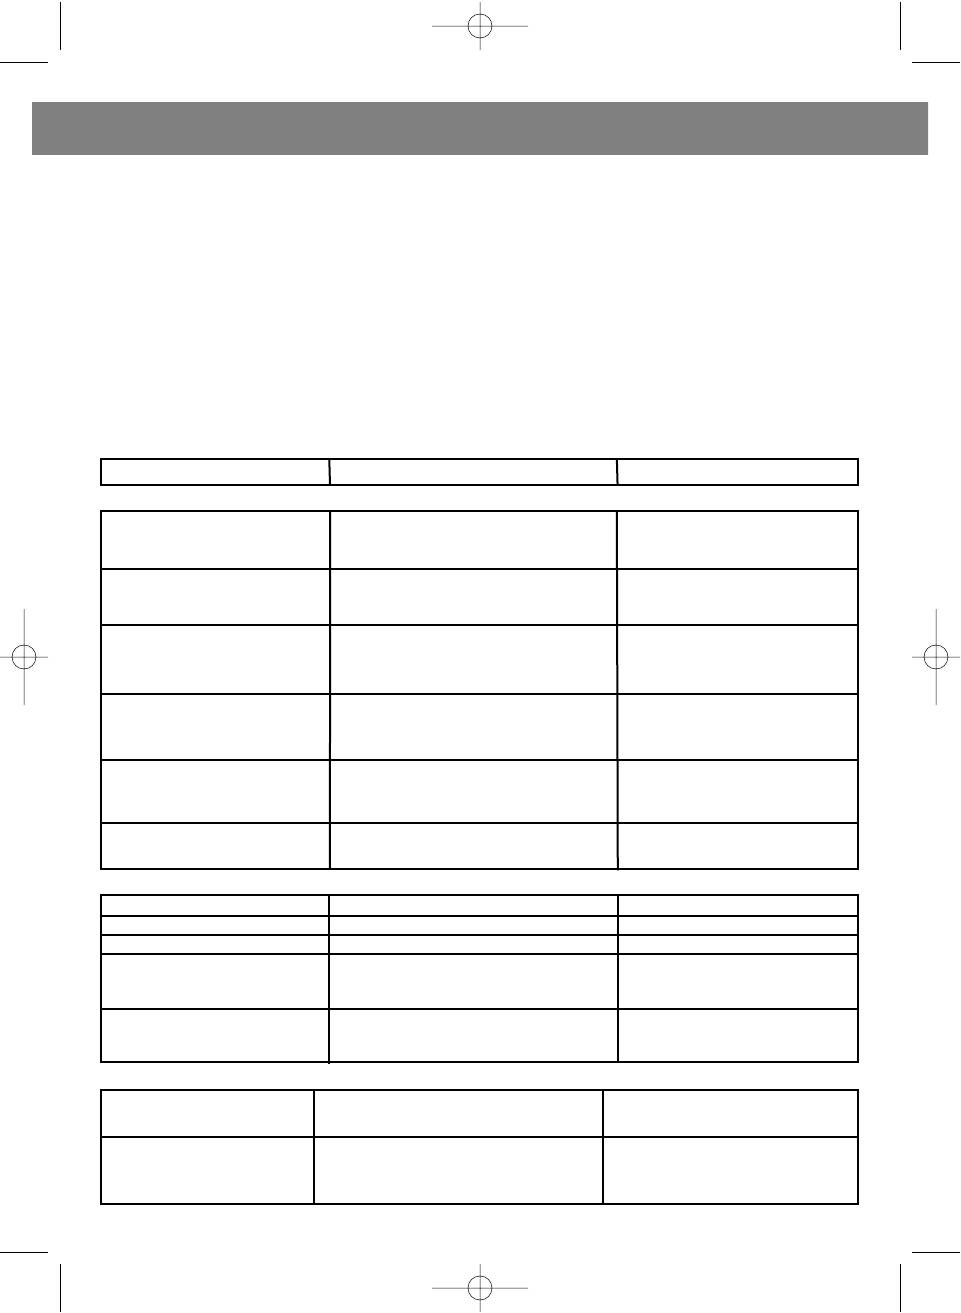
TROUBLE-SHOOTING
In the case you have encountered the troubles with operation of the system, please, acquaint yourself
with the recommendations below.
TROUBLE POSSIBLE REASON SOLUTION
Noise or poor AM/FM receiver is not tuned Correct the station settings on
reception AM correctly the AM or FM bands
or FM bands
FM: Antenna is not spread at Fully spread the FM antenna
the full length.
AM: The system is Turn the body of the system
unsatisfactorily placed until the AM station reception
gets better.
FM STEREO FM STEREO mode is not on Choose the FM STEREO mode
indicator does not and tune up the antenna.
light up
No sound while listening TUNER mode is not switched on. Switch the TUNER mode on.
to the stations of AM
and FM bands
Volume level is too low. Increase the volume level.
No sound. TAPE mode is not switched on. Switch the TAPE mode on.
Volume level is too low. Increase the volume level.
The sound is distorted Magnetic heads are dirty. Clear the magnetic heads.
Tape playback speed Magnetic tape is old or Replace the cassette.
is not constant. damaged.
Pinch rollers or capstan Clean pinch rollers or
axis are dirty. capstan axis.
Cannot record. The safety tabs have been Seal the appropriate holes on
removed. the cassette with adhesive tape.
Distorted sound while Magnetic tape or magnetic Replace the cassette or clean
playback of the heads are dirty. the magnetic heads.
recorded tape.
18
3492.qxd 20.10.2004 18:30 Page 18
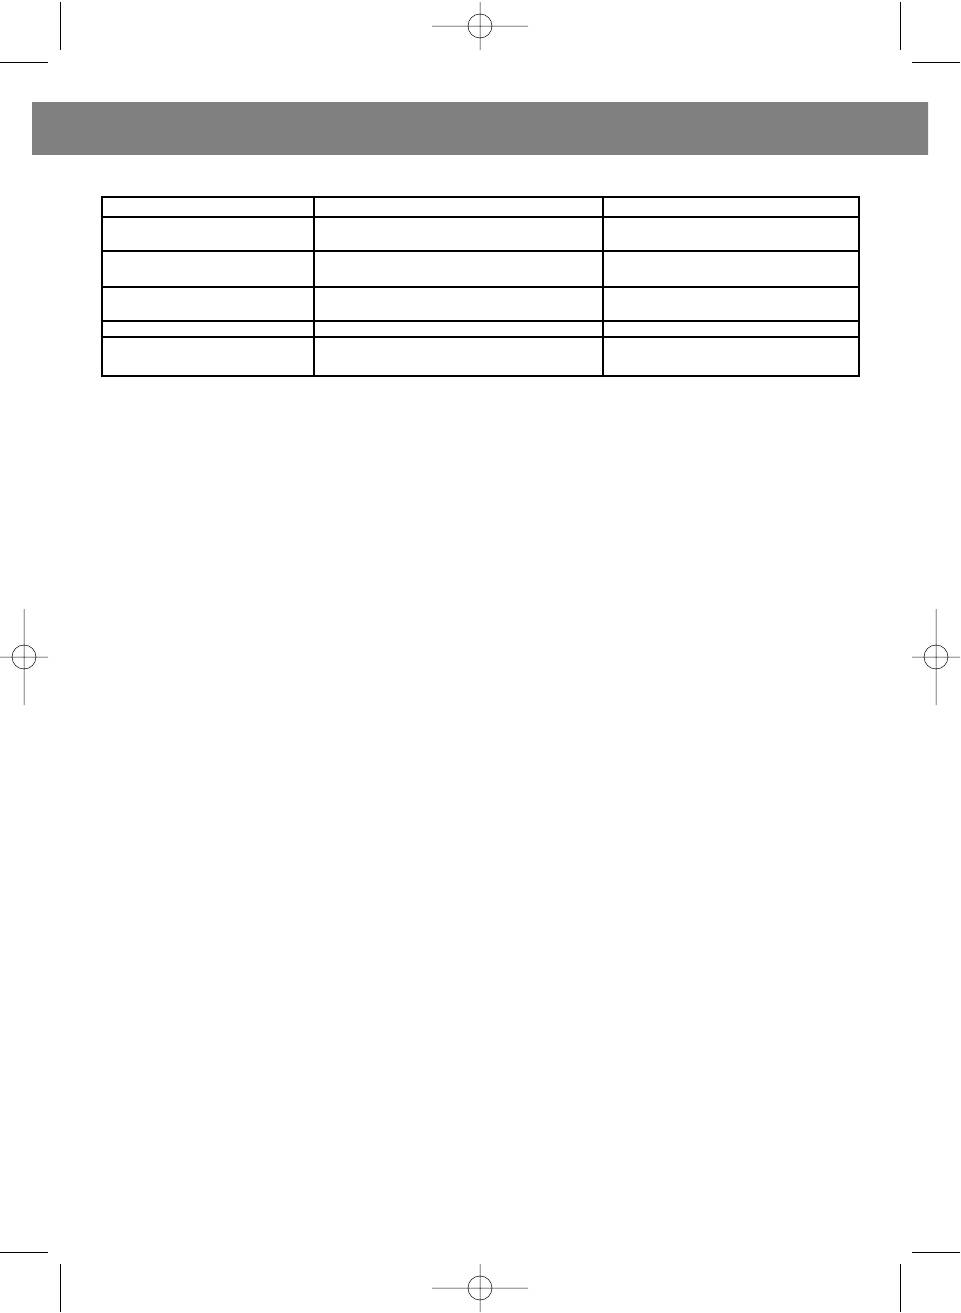
ENGLISH
RADIO RECEIVER
No compact disc playback CD mode is not switched on. Switch the CD mode on.
Compact disk is not inserted Insert the compact disc with its
or is incorrectly inserted. label side up.
Sound skips while Disc is dirty or damaged Wipe the disc with soft
playback fabric or use another disc
Disc is inserted, Disc is inserted with its Insert the disc correctly.
but no playback label side down.
Disc is dirty. Clear the disc.
Disc has non-standard format. Use the disc with standard
format.
CASSETTE PLAYBACK
TAPE RECORDING
COMPACT DISCS PLAYER
MAIN SPECIFICATIONS
Power supply AC: 220 V
DC: 3 V "AA" size/UM-3 x 2 for remote handset
Power consumption AC: 30 W
Weight 4.2 kg
Dimensions:
Cabinet 168 mm (W) x 220 mm (H) x 226.5 mm (D)
Speaker 140 mm (W) x 220 mm (H) x 203 mm (D)
Operating temperature +5C- - +35C
TUNER
Receiving bands AM (MW)/FM
Tuning range AM (MW) 522 - 1620 KHz
FM 87.5 - 108 KHz
CD PLAYER
Discs formats CD, MP3
DAC 8 x digitization
1-bit digital-analog conversion
Audio frequency response 100-20,000 Hz
CASSETTE DECK
Track system 4-tracks, 2-channel stereo
Biasing system AC, magnetic erasing
Frequency range 125-6300 Hz
Wow and Flutter 0.35% WRMS (JIS)
AMPLIFIER and SPEAKERS
Output power 5 Watt x 2 (RMS)
250 Watt x 2 (P.M.P.O.)
Speakers impedance 3.2 Ohm
Headphones impedance 8-32 Ohm
ACCESSORIES
Remote control unit 1
Operating instruction 1
AC Power cord 1
Antenna wire 1
IN ORDER TO DELIVER THE BEST QUALITY, THE SPECIFICATION OF THE UNIT MIGHT CHANGE
WITHOUT SUBJECT OF NOTICE
SERVICE LIFE OF THE UNIT NOT LESS 5 YEARS
19
3492.qxd 20.10.2004 18:30 Page 19
- 1
- 2


