Vitek VT-3473: инструкция
Раздел: Бытовая, кухонная техника, электроника и оборудование
Тип: Магнитола
Инструкция к Магнитоле Vitek VT-3473
Оглавление
- МЕРЫ ПРЕДОСТОРОЖНОСТИ
- УСЛОВИЯ ТЕХНИКИ БЕЗОПАСНОСТИ ПРИ ЭКСПЛУАТАЦИИ
- КНОПКИ УПРАВЛЕНИЯ ИНСТРУКЦИЯ ПО ЭКСПЛУАТАЦИИ ВКЛЮЧЕНИЕ ВОСПРОИЗВЕДЕНИЕ Регулировка громкости Прослушивание радио ВОСПРОИЗВЕДЕНИЕ КОМПАКТДИСКОВ Загрузка диска Воспроизведение диска Пауза в воспроизведении
- Остановка воспроизведения Поиск треков Просмотр программы Удаление программы ВОСПРОИЗВЕДЕНИЕ MP3ДИСКОВ Загрузка диска Повтор воспроизведения трека или диска Воспроизведение диска Функция воспроизведения в произвольном порядке Пауза воспроизведения ПРОГРАММНОЕ ВОСПРОИЗВЕДЕНИЕ Остановка воспроизведения ПРОГРАММНОЕ ВОСПРОИЗВЕДЕНИЕ MP3
- Просмотр программы Удаление программы ВОСПРОИЗВЕДЕНИЕ КАССЕТЫ Пауза воспроизведения Перемотка кассеты ЗАПИСЬ с РАДИО ЗАПИСЬ с CD/MP3 УХОД И ТЕХНИЧЕСКОЕ ОБСЛУЖИВАНИЕ УХОД ЗА КОМПАКТДИСКОМ
- ЧИСТКА МАГНИТОФОННОГО МЕХАНИЗМА ЧИСТКА УСТРОЙСТВА
- УСТРАНЕНИЕ НЕИСПРАВНОСТЕЙ Симптом Возможная причина Способ устранения Симптом Возможная причина Способ устранения
- Симптом Возможная причина Способ устранения ТЕХНИЧЕСКИЕ ДАННЫЕ РАДИОПРИЕМНИК ПРОИГРЫВАТЕЛЬ КОМПАКТДИСКОВ КАССЕТНЫЙ МАГНИТОФОН АУДИО
- ПРИНАДЛЕЖНОСТИ
RADIO CASSETTE RECORDER
with CD/MP3 PLAYER
MODEL VT3473 GY/VT3473 SR
INSTRUCTION MANUAL
3
11
19
28
www.vitekaus.com
3473.qxd 26.07.05 11:13 Page 1
3473.qxd 26.07.05 11:13 Page 2
ENGLISH
PRECAUTIONS
•
Ensure good air circulation.
•
Protect the unit from dust, moisture and water.
•
Please take good note of the following instructions:
•
Avoid strong magnetic fields, e.g. near TVs or Speakers
•
The unit must be connected to the power voltage which
for other units.
is the same as the local area. If not, there is a danger of
•
Avoid using strong chemical agents to clean.
"burning" the unit that causes a fire.
•
Do not grease or oil components, running mechanisms,
•
Do not expose to the temperature higher than 35OC.
etc. The CD player is designed to be maintenance free.
•
Avoid installation near heaters or in areas subjected to
•
Take the unit to approved service point for servicing.
direct sunlight.
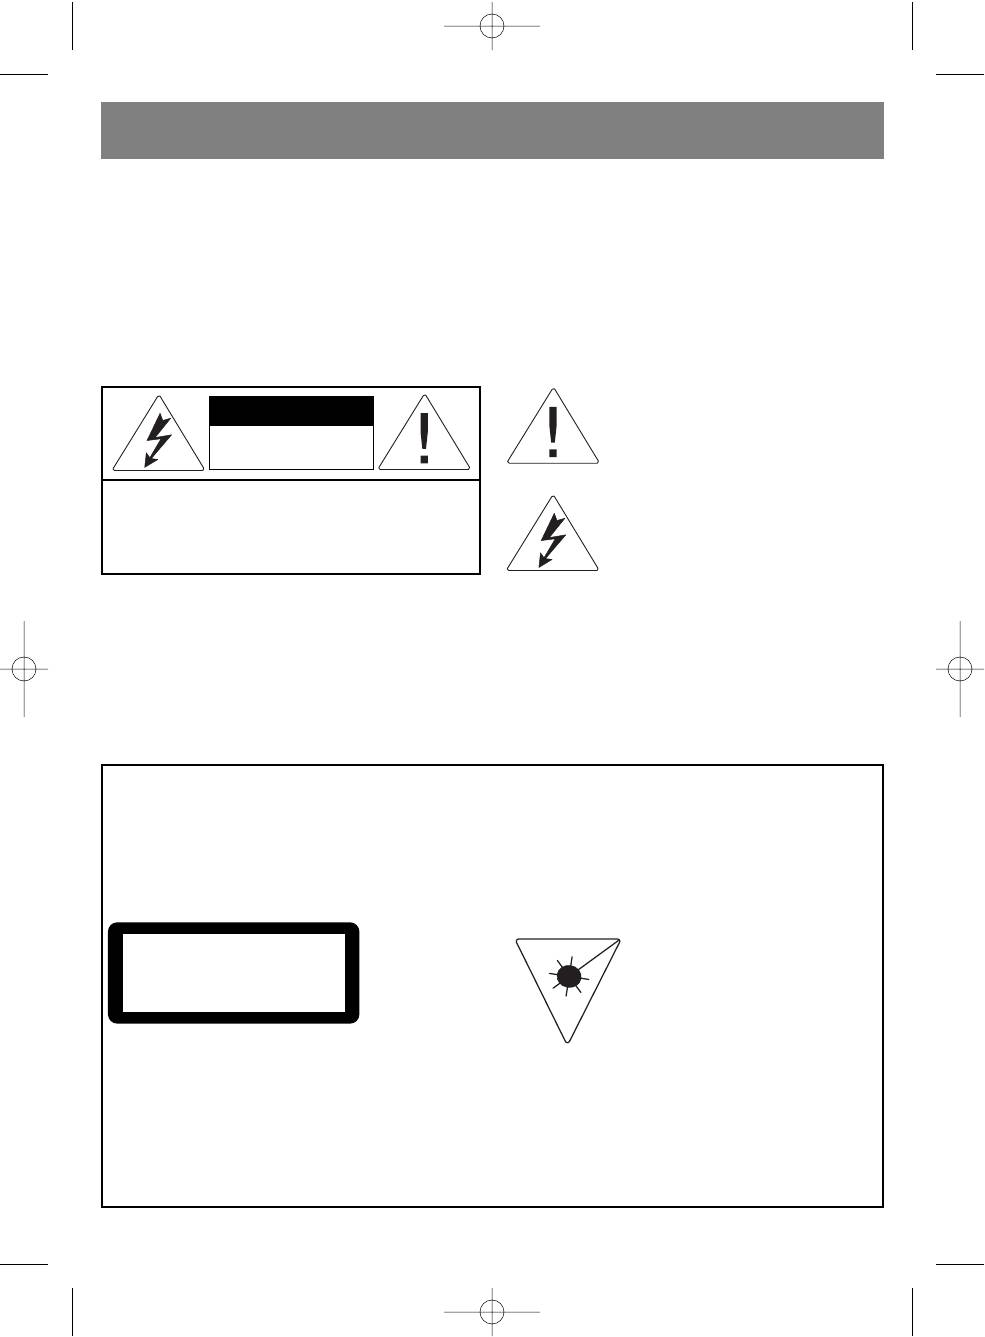
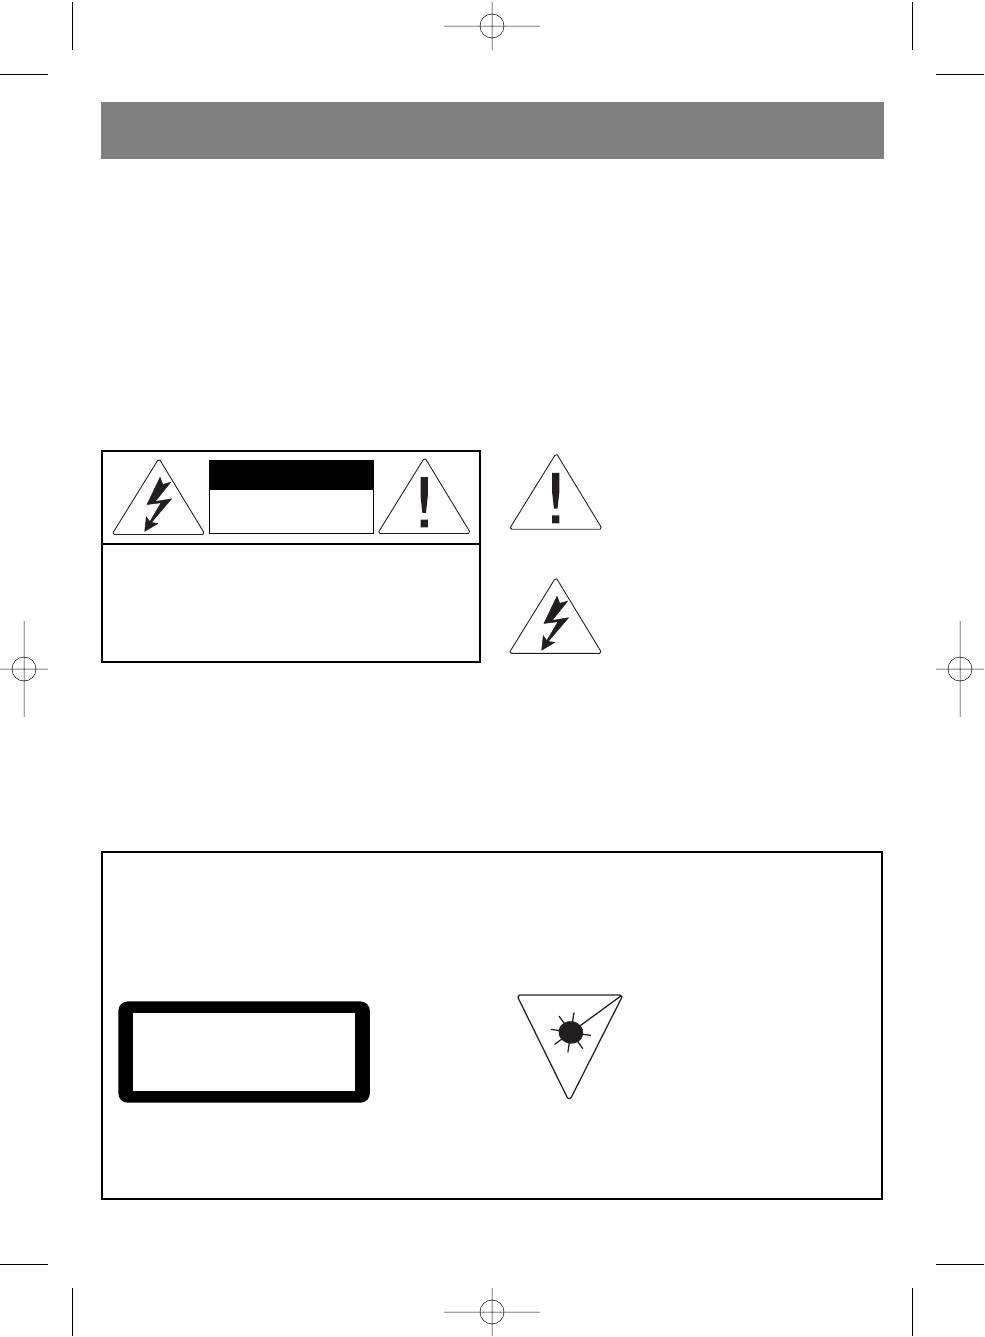
The "exclamation point" calls attention to
CAUTION
features for which you should read the
RISK OF ELECTRIC SHOCK
enclosed literature closely to prevent
DO NOT OPEN
operating and maintenance problems.
This "bolt of lightning" indicates uninsulat
CAUTION: TO REDUCE THE RISK OF ELECTRIC SHOCK,
ed material within your unit which may
DO NOT REMOVE COVER.
NO USERSERVICEABLE PARTS INSIDE.
cause an electrical shock. For the safety of
REFER SERVICING TO QUALIFIED SERVICE PERSONNEL
everyone in your household, please do not
remove product covering.
CAUTION:
•
To avoid electric shock, this unit must not be exposed to dripping water or water splash.
•
Minimum distances around the apparatus for sufficient ventilation;
•
The ventilation should not be impeded by covering the ventilation openings with items, such as newspapers, tablecloths,
curtains, etc.
•
No naked flame sources, such as lighted candles, should be placed on the apparatus.
•
Before scrapping the appliance, remove the batteries and place them in the appropriate battery collection container.
CAUTION
LASER SAFETY
CLASS 1 LASER PRODUCT
This unit employs a laser. Only qualified service
Use of Controls or adjustments or performance
personnel should attempt repair.
of procedures other than those specified herein
may result in hazardous radiation exposure.
DANGER: INVISIBLE LASER
CLASS 1
RADIATION WHEN OPEN AND
LASER PRODUCT
INTERLOCK FAILED OR
DEFEATED. AVOID DIRECT
EXPOSURE TO BEAM.
CAUTION: HAZARDOUS LASER
RADIATION WHEN OPEN AND
INTERLOCK DEFEATED.
CAUTION
CLEANING: Always disconnect unit from power supply before attempting to clean it.
Use soft cloth moistened with soapy water, wipe gently.
Do not use solvents or abrasive materials.
3
3473.qxd 26.07.05 11:13 Page 3

ENGLISH
SOME DO'S AND DON'TS ON THE SAFE USE OF EQUIPMENT
This equipment has been designed and manufactured to meet European safety standards but like any
electrical equipment, care must be taken if you are to obtain the best results and safety is to be assured.
•
DO read the operating instructions before you attempt to use the equipment.
•
DO ensure that all electrical connections ( including the mains plug, extension leads and interconnections between piece
of equipment ) are properly made in accordance with the supplied instructions. Switch off and withdraw the mains plug
when making or changing connections.
•
DO consult your dealer if you are ever in doubt about the installation, operation, or safety of your equipment.
•
DO be careful with glass panels or doors on equipment.
•
DON'T continue to operate the equipment if you are in any doubt about it working normally, or if it is damaged, in any way
switch off, withdraw the mains plug and consult your dealer.
•
DON'T remove any fixed cover as this may expose dangerous voltages.
•
DON'T leave equipment switched on when it is unattended unless it is specifically stated that it is designed for unattend
ed operation or has a standby mode. Switch off using the switch on the equipment and make sure that your family knows
how to do this. Special arrangements may need to be made for infirm or handicapped people.
•
DON'T listen to headphones at high volume, as such use can permanently damage your hearing.
•
DON'T obstruct the ventilation of the equipment, for example with curtains or soft furnishings. Overheating will cause
damage and shorten the life of the equipment.
•
DON'T allow electrical equipment to be exposed to rain or moisture.
Above all
•
NEVER let anyone, especially children, push anything into holes, slots or any other openings in the case. This could result
in a fatal electric shock.
•
NEVER guess or take chances with electrical equipment of any kind.
It is better to be safe than sorry!
Note : If energy saving lamps (Fluorescent) are used in the same room as the unit, erratic operation may occur.
4
3473.qxd 26.07.05 11:13 Page 4

ENGLISH
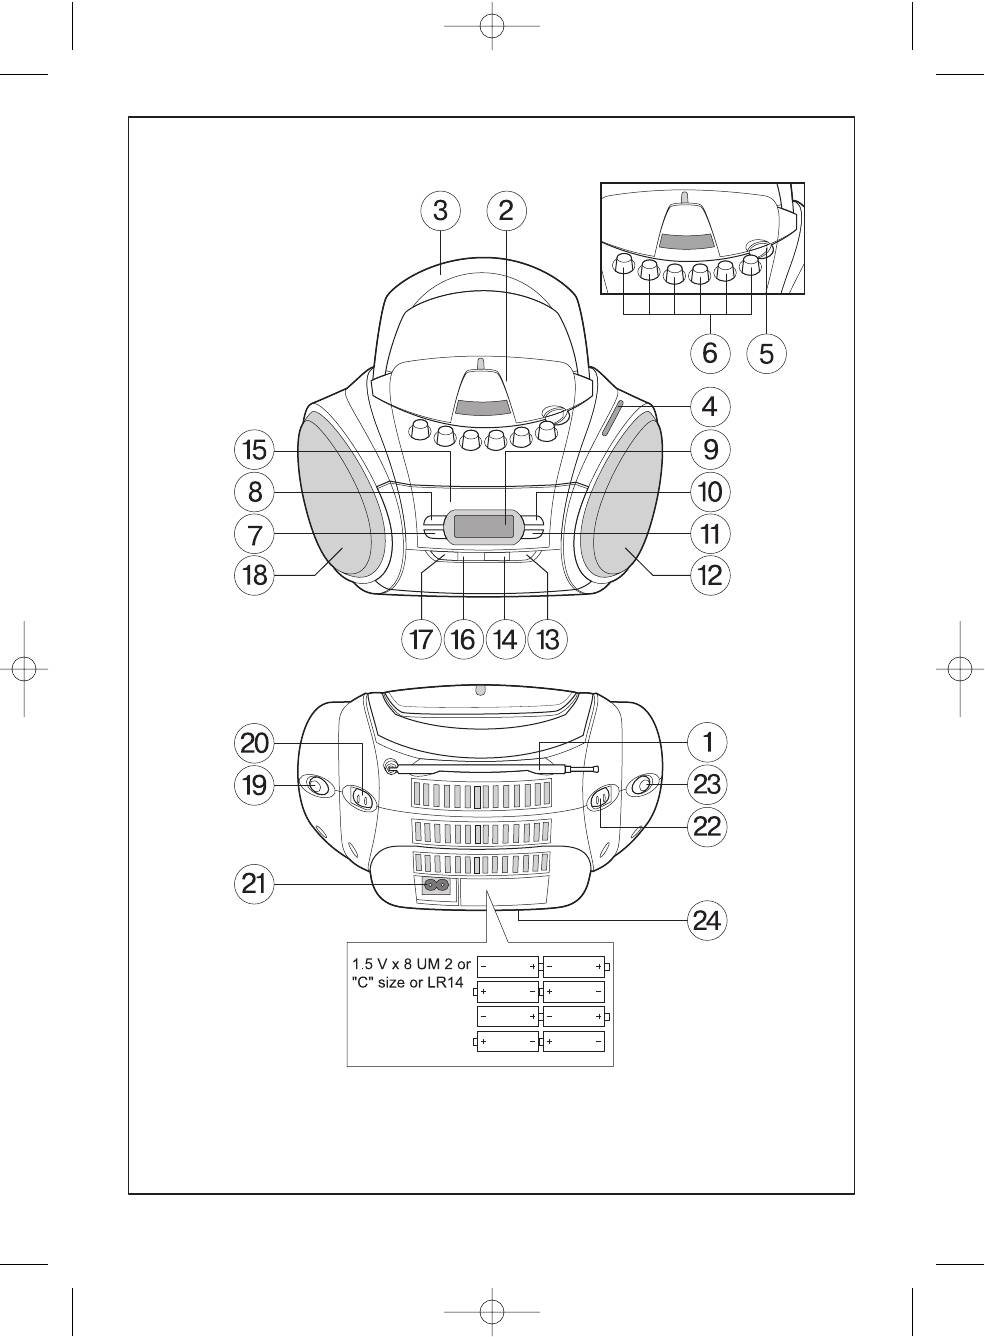
LOCATION OF CONTROLS
OPERATING INSTRUCTIONS
1. FM antenna
TURNING ON
2. CD compartment
1. Connect the power cord to the power cord jack (21).
3. Carrying handle
Connect the power cord plug to the power supply sock
4. Radio Tuning scale
et. Set the function switch (23) to the desired position
5. Open CD Compartment location
(CD, TAPE or RADIO).
6. Cassette mechanism control buttons: PAUSE,
2. To turn off the power, set the function switch (23) to
STOP/EJECT, F. FWR, REV, PLAY, REC
TAPE position.
7. BACK button (search backward)
8. NEXT button (search forward)
PLAYBACK
9. LED display
Volume Control
10. PLAY/PAUSE button.
After tuning to a desired radio station, turn the VOLUME
11. STOP button.
knob (22) to adjust the volume level as needed.
12. Speaker
13. FOLDER UP button (folder search forward)
LISTENING TO THE RADIO
14. FOLDER DN button (folder search backward)
1. Set the FUNCTION switch (23) into RADIO position.
15. Cassette compartment door
2. Set the Band Switch (19) to AM, FM or FM ST radio
16. PLAY MODE button.
band.
17. PROG button (Program)
3. Set the RADIO TUNING KNOB (20) to the desired radio
18. Speaker
station.
19. AM/FM/FM ST. band switch
4. When you have finished listening, set the function switch
20. Radio Tuning knob
(23) to TAPE position (OFF).
21. Power cord jack
22. Volume control
PLAYING COMPACT DISCS
23. CD/TAPE (OFF)/RADIO Function switch
24. Battery compartment cover/ Battery compartment
1. Set the Function switch (23) into CD position.
2. If there is no disc in the CD compartment or the disk is
inserted incorrectly, "no" will appear on the LED display.
Loading a CD
1. Open the CD compartment door (5).
2. Insert a disc, close the CD compartment door.
The system starts reading the disc.
Note: Make sure that the disc is inserted correctly.
Note: This device is CDR/RW compatible.
Playing CD
To start playing CD, press the PLAY/PAUSE button (10).
Pause during playback
Press the PLAY/PAUSE button during the playback, the play
back time will flash. Press the PLAY/PAUSE button again to
resume playback.
Stopping playback
Press the STOP button (11).
Searching tracks
Press the NEXT (8) or BACK (7) button to search forward or
backward.
5
3473.qxd 26.07.05 11:13 Page 5
ENGLISH
In play mode In stop mode
MP3 DISC PLAYBACK
9
Press once Press twice Press once
1. Set the Function switch (23) into CD position.
Back to the Previous track Previous track
2. If there is no disc inside, or the disc is damaged or
begining of
inserted incorrectly, "no" will appear on the LED display.
the current
track
Loading a Disc
:
Next track Next track
1. Open the CD compartment door (5).
2. Insert the disc and close the door.
The system starts reading the disc.
To search by music fragment, press and hold the NEXT but
Note: Make sure that the disc is inserted correctly.
ton (8) to search forward, or the BACK button (7) to search
This device supports CDR / RW discs.
backward.
NOTE: When searching by music fragment, the track will be
Playing Discs
played in the Fast Play mode.
1. Press the FOLDER UP or DN buttons (13) or (14) to
choose the desired folder.
To repeat a track or entire disc
2. To select the desired track, press the NEXT (7) or BACK
•
Press the PLAY MODE button (16), to activate the
(8) button.
REPEAT function for the current track.
3. To start playback, press the PLAY/PAUSE button (10).
•
Press the button again to activate the REPEAT ALL
tracks function.
Pause Playback
•
Turn off the REPEAT function by pressing the PLAY
To pause playback, press the PLAY/PAUSE button (10) dur
MODE button (16) again.
ing the disc playback. To resume playback, press the
PLAY/PAUSE button (10) again.
Random Playback Function
To activate the random playback mode, in the CD stop mode
Stop playback
press the PLAY MODE button (16) three times, ("RANDOM"
To stop playback, press the STOP button (11).
will appear on the LED display), after which press the
PLAY/PAUSE button (10). To turn off the function, press PLAY
MP3 PROGRAM PLAYBACK
MODE button (16) once again.
The player allows programming up to 10 MP3 tracks in any
order.
PROGRAM MODE
1. When the CD stop mode press the PROG button (17)
The device allows programming tracks (up to 20 tracks) in
once.
any order, first select the CD Stop mode by pressing the
2. Press FOLDER UP (13) or FOLDER DN (14) button to
STOP button.
select the needed folder.
1. Press the PROG button. (17) once. ("PROG" will flash on
3. Press the NEXT (8) or (7) button to select a track
the LED display.)
4. Again press the PROG button (17) to include the selected
2. Press the NEXT (8) or BACK (7) button to select a
track into the program.
desired track.
5. To continue programming, repeat the steps 2 and 3.
3. Press the PROG button. (17) to add the selected track to
Programming is finished
the program.
6. To start the program playback, press the PLAY/PAUSE
4. Continue programming, repeating steps 2 and 3.
button (10).
Programming is finished.
5. To start playback, press the PLAY/PAUSE button (10).
Viewing the program
Press the PROG. button (17). The numbers of programmed
Viewing the program
tracks will be shown on the display.
Press the PROG button. (17). Numbers of programmed
tracks will be shown on the LED display.
Clearing the program
To clear the program, press the STOP button (11) or open
Clearing the program
the CD compartment door..
To clear the program from the memory, press the STOP but
ton (11) twice or open the CD compartment door
6
3473.qxd 26.07.05 11:13 Page 6
ENGLISH
CASSETTE TAPE PLAYBACK
1. Set the Function switch (23) into TAPE position.
2. Press the STOP/EJECT button (6) to open the cassette door. Insert a tape and push the cassette door to close.
3. Press the PLAY (6) button to start playback.
Pause Playback
To pause playback, press the PAUSE button (6).
To resume playback, press the PAUSE button (8) again.
To Fast Forward or Rewind tape
Press the REW or F.FWD button (6).
RECORDING FROM RADIO
1. Set the Function switch (23) into RADIO position.
2. Repeat actions described in steps 2 and 3 in the Listening to the Radio section, to tune to the desired radio station.
3. Insert a clean tape and push the cassette door to close.
4. To start recording, press the REC and PLAY (6) buttons simultaneously.
5. Press the STOP/EJECT button to stop recording.
Note:
Return to Tape mode, rewind the tape to listen to recorded materials.
RECORDING FROM CD/MP3
1. Set the Function switch (23) into CD position, open the CD compartment door (5).
2. Insert the disc into the CD compartment and close the door.
3. Insert the tape and push the cassette door to close.
4. Press the RECORD and PLAY (6) buttons together.
5. To start CD / MP3 disc playback, press PLAY/PAUSE button (10).
6. To pause recording, press PAUSE button (6), to stop recording, press STOP/EJECT (6).
CARE AND MAINTENANCE
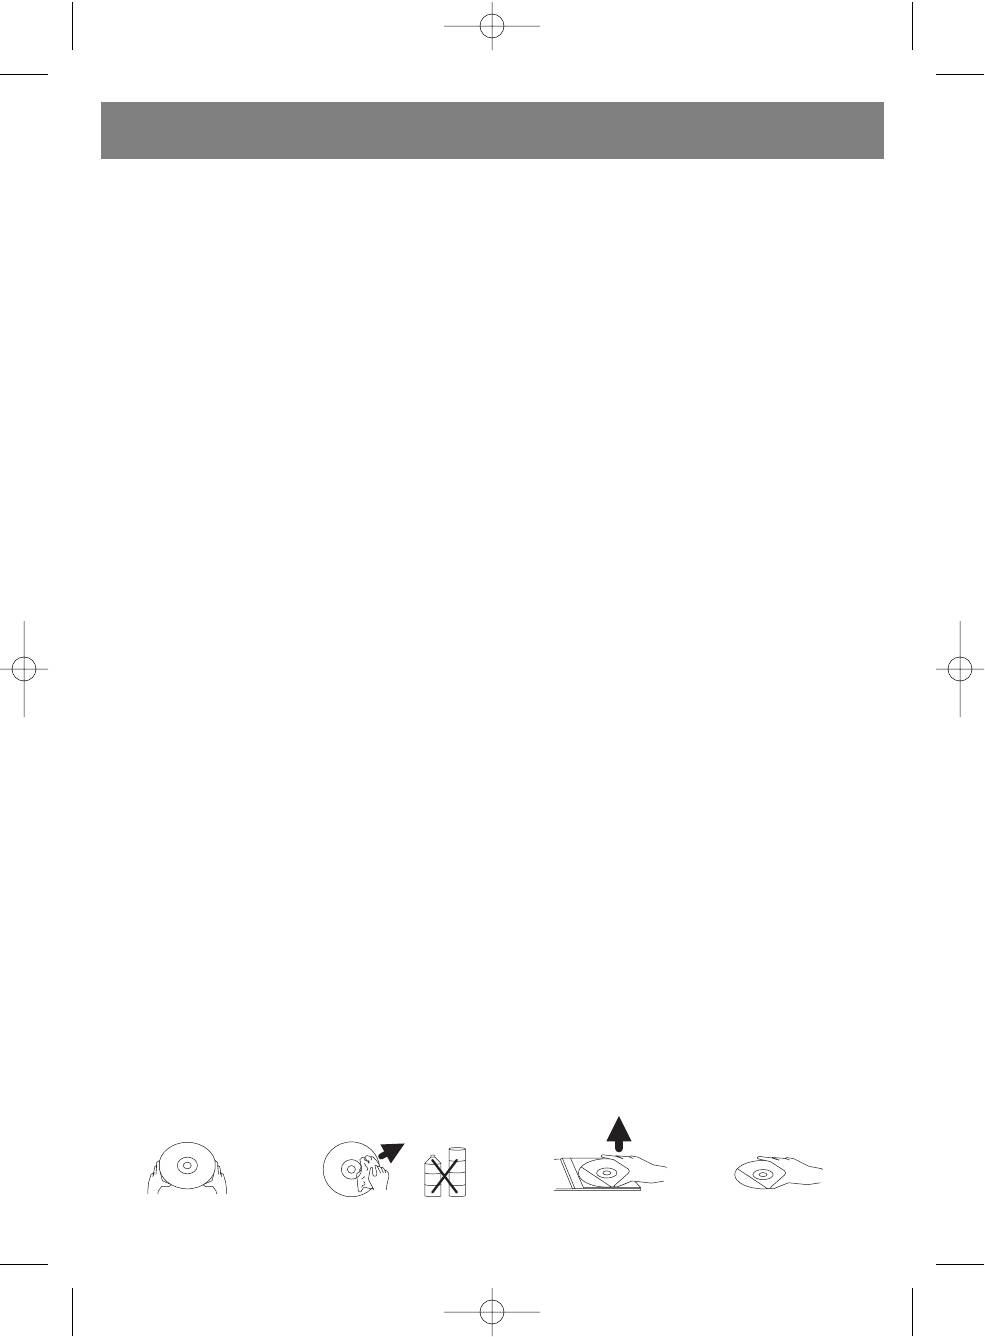
COMPACT DISC CARE
•
Treat the disc carefully. Handle the disc only by its edges. Never allow your fingers to come in contact with the shiny,
unprinted side of the disc.
•
Do not attach adhesive tape, stickers etc., to the disc label.
•
Clean the disc periodically with soft, lintfree, dry cloth. Never use detergents or adhesive cleaners to clean the disc. If
necessary, use a CD cleaning kit.
•
If disc skips or gets stuck on a section of the disc, it is probably dirty or damaged (scratched).
•
When cleaning the disc, wipe in straight lines from the centre of the disc to the edge of the disc.
•
Never wipe in circular motions.
•
To remove a disc from its storage case, press down on the centre of the case and lift the disc out, holding it carefully by
the edges.
•
Fingerprints and dust should be carefully wiped off the disc's recorded surface with a soft cloth.
•
Unlike conventional records. compact disc have no grooves to collect dust and microscopic debris so gently wiping with
a soft cloth should remove most particles.
7
3473.qxd 26.07.05 11:13 Page 7

ENGLISH
TAPE HEAD CLEANING
The tape heads, pinch roller and capstan require periodic cleaning. This removes particles of the metal oxide
coating that wear off the tape and accumulate on these parts and impair performance. Switch off the power,
press the Stop/Eject Key to open the cassette door, and press the Play Key. Clean the tape heads, pinch roller
and capstan with a soft cloth or cotton swab dampened in isopropyl alcohol or special tape head cleaner.
NOTE: Never use any metal objects on or near the tape heads. Do not allow any cleaning material to fall into
the tape assembly.
CLEANING THE DEVICE
• To prevent fire or electric shock hazard, disconnect the device from the AC outlet before cleaning.
• Clean the unit surfaces with a soft dry cloth. Be careful when cleaning and wiping plastic parts.
• Clean speakers surfaces with a soft dry cloth. Do not apply wax or other polishing spray for cleaning the speakers.
• If the front panel becomes dirty, wipe it with a soft cloth slightly moistened with warm soap water. Never use for cleaning
any abrasives or polishing agents, as they can damage the unit surfaces.
CAUTION: During cleaning, do not allow water or other liquids to get inside the unit.
8
3473.qxd 26.07.05 11:13 Page 8
ENGLISH
TROUBLESHOOTING GUIDE
Before applying to a service center, please consult the following table.
9
3473.qxd 26.07.05 11:13 Page 9

ENGLISH
SPECIFICATIONS
Power supply 230 V 50Hz
8 x "C" /UM2 batteries
Power consumption 18W
Dimensions:
Main unit 260mm (W) x 147mm (H) x 232mm (D)
Operating temperature +535°C
RADIO
Reception bands AM (MW)/FM
Frequency bands AM (MW) 540 1600KHz
FM 64 108MHz
CD PLAYER
Playback system Digital audio player of compact discs
DAC 8 times over sampling
1 bit D/A converter
Reproduced frequency band 10020000 Hz
CASSETTE OPERATION
Recording system 4 tracks, 2 stereo channels
Magnetic bias system AC, magnetic erasure
Reproduced frequency band 125 6300 Hz
Detonation ratio 0.35% WRMS (JIS)
AUDIO
Output power 1.8 W x 2 (RMS)
Speakers impedance 8 Ohm
Headphones impedance 1632 Ohm
ACCESSORIES
Operating instructions 1
AC power cord: 1
Wire FM antenna (optional) 1
The manufacturer reserves the right to make changes to the technical characteristics of this device without prior notice.
Service life – no less than 5 years.
Guarantee
Details regarding guarantee conditions can be obtained from the dealer from whom the appliance was purchased. The bill of
sale or receipt must be produced when making any claim under the terms of this guarantee.
This product conforms to the EMCRequirements as laid down by the Council Directive 89/336/EEC and to the Low
Voltage Regulation (23/73 EEC)
10
3473.qxd 26.07.05 11:13 Page 10
DEUTSCH
VORSICHTSMASSNAHMEN
und vor Wasser.
Bitte beachten Sie die folgenden Hinweise:
• Starke Magnetquellen sind zu vermeiden, z.B. neben
dem Fernseher oder den Lautsprechern von anderen
• Das System soll an das Netz mit der ortsüblichen
Geräten.
Spannung angeschlosen werden, ansonsten könnte dies
• Verwenden Sie keine starken chemischen Substanzen
zu Brandgefahr führen.
für die Reinigung des Gerätes.
• Lassen Sie keine Temperaturen über 35°C auf das Gerät
• Schmieren Sie die Komponenten und Triebwerke nicht.
einwirken.
Der CDPlayer ist wartungsfrei.
• Vermeiden Sie Aufstellungsorte neben Heizungen sowie
• Lassen Sie alle erforderlichen Reparaturen und
unter direkter Sonneneinstrahlung.
Wartungsarbeiten nur vom zertifizierten Fachhändler
• Gewähren Sie eine gute Luftzirkulation.
durchführen.
• Schützen Sie das Gerät vor Staub, hoher Feuchtigkeit
Das Ausrufezeichen im gleichschenkligen
Dreieck weist den Benutzer darauf hin,
ACHTUNG
dass in der Begleitdokumentation des
Stromschlaggefahr.
Gerätes wichtige Anweisungen zum
Nicht öffnen!
Betrieb und der technischen Wartung
enthalten sind.
Achtung: öffnen Sie den Deckel (oder die Hintertafel)
Das Blitzsymbol im gleichschenkligen
nicht, um Stromschlag zu vermeiden. Um Inneren des
Dreieck weist den Benutzer darauf hin,
Gerätes befinden sich keine Teile, die der
dass sich im Inneren des Gerätes eine
Aufmerksamkeit des Benutzers erfordern. Wenden Sie
gefährliche Spannung befindet, die
sich an qualifiziertes Fachpersonal.
Stromschlag erzeugen kann.
Warnung
• Wegen Feuer und Stromschlaggefahr darf das Gerät keinem Regen oder Feuchtigkeit aufgesetzt werden.
• Schützen Sie das Gerät vor tropfenden oder spritzenden Flüssigkeiten, und stellen Sie keine mit Flüssigkeit gefüllten
Gefäße (z.B. Vasen) auf das Gerät.
Belüftung
• Bei Dauergebrauch ist für ausreichende Belüftung zu sorgen.
HINWEISE ZUR SICHERHEIT
Achtung
SICHERHEIT
LASERPRODUKT DER KLASSE 1
Laserstrahlung im Inneren des Gerätes. Reparatur und
Bei unsachgemäßem Gebrauch besteht die Gefahr, dass
Wartungsarbeiten am System müssen von qualifiziertem
aus dem Gerät Strahlung austritt.
Kundendienstpersonal durchgeführt werden.
GEFAHR: UNSICHTBARE LASER
STRAHLUNG BEI OFFENEM GERÄT
Ein Laserprodukt
UND FEHLERHAFTER ODER
der Klasse 1
BESCHÄDIGTER SICHERHEITSVER
RIEGELUNG. SETZEN SIE SICH DEM
STRAHL NICHT DIREKT AUS.
11
3473.qxd 26.07.05 11:13 Page 11

DEUTSCH
Dieses Gerät wurde den europäischen Sicherheitsnormen entsprechend ausgelegt und hergestellt. Es muss jedoch mit der
gleichen Vorsicht behandelt werden, wie alle Elektrogeräte, um das Leistungsvermögen und die Sicherheit zu gewährleisten.
Lesen Sie bitte die Bedienungsanleitung vor dem Gebrauch des Gerätes.
Überzeugen Sie sich davon, dass alle elektrischen Verbindungen (einschließlich der Stromsteckdose, der
Verlängerungskabeln und der Verbindungen der einzelnen Geräteteile) korrekt ausgeführt worden sind und den beigelegten
Anweisungen entsprechen. Beim Einstellen oder Ändern schalten Sie das Gerät aus und nehmen Sie den Stecker aus der
Dose.
Sollten Sie Fragen bezüglich Installation, Betrieb oder Sicherheit haben, wenden Sie sich bitte an Ihren Fachhändler.
Seien Sie vorsichtig im Umgang mit den Glastafeln und den Deckeltüren des Gerätes.
Sollten Sie die normale Arbeit des Gerätes bezweifeln oder wenn es auf irgendeine Weise beschädigt wurde, schalten Sie das
Gerät aus, nehmen den Stecker aus der Dose aus und wenden sich an Ihren Fachhändler.
Entfernen Sie keine befestigten Teile des Gerätes, da sie den Zugang zu der gefährlichen Spannung im Inneren des Gerätes
freilegen können.
Ziehen Sie das Netzkabel aus der Steckdose ab, wenn Sie vorhaben, das Gerät längere Zeit nicht zu benutzen.
Hören Sie das Gerät nicht mit hoher Lautstärke über Kopfhörer an, da das zu einer Beschädigung Ihres Gehörs führen kann.
Blockieren Sie keine Belüftungsschlitze. Wenn die Belüftungsschlitze durch eine Zeitung oder Vorhänge etc. blockert werden,
kann die entstehende Hitze nicht abgeführt werden und daher die Komponenten des Gerätes beschädigen oder zum vorzeiti
gen Verschleiß bringen.
Setzen Sie dieses Gerät weder Regen noch Feuchtigkeit aus.
Insbesondere:
* Lassen Sie niemanden, vor allem Kinder, keine Gegenstände in die Öffnungen, Fugen oder andere offenen Stellen des
Gehäuses stecken. Das kann zu einem tödlichen Stromschlag führen.
* Verlassen Sie sich bei der Anwendung von Elektrogeräten auf keine Vermutungen oder auf Zufälle.
12
3473.qxd 26.07.05 11:13 Page 12

DEUTSCH
BEDIENELEMENTE DES GERÄTES
BETRIEBSANLEITUNG
EINSCHALTUNG
1. FM Antenne
1. Stecken Sie das Ende des Stromkabels in die Buchse
2. CDFach
(21). Verbinden Sie das Netzkabel mit einer Steckdose.
3. Tragegriff
Betätigen Sie den WiedergabemodusSchalter (23), um
4. Abstimmungsskala
die gewünschte Betriebsart (CD,TAPE oder RADIO)
5. CDFachdeckel
auszuwählen.
6. Kassettenbetriebstasten: PAUSE (Pause), STOP/EJECT
2. Zum Ausschalten der Speisung stellen Sie den
(Stopp/Auswurf), F. FWR (Schnell Vorlauf), REV
WiedergabemodusSchalter (23) in die Position TAPE
(Rücklauf), PLAY (Wiedergabe), REC (Aufnahme)
(OFF).
7. Taste BACK (Titelsprung vorwärts)
8. Taste NEXT (Titelsprung rückwärts)
WIEDERGABE
9. LCDDisplay (FlüssigkristallAnzeigeeinheit)
Einstellen der Lautstärke
10. Taste PLAY/PAUSE (Wiedergabe/Pause)
Sobald der gewünschte Sender abgestimmt ist, drehen Sie
11. Taste STOP (Stopp)
den VOLUMEKnopf (Lautstärke) (22), um eine gewünschte
12. Lautsprecher
Lautstärke einzustellen.
13. Taste FOLDER UP (Suchlauf vorwärts)
14. Taste FOLDER DN (Suchlauf rückwärts)
RADIOEMPFANG
15. Kassettenfachdeckel
1. Schalten Sie mit Hilfe des WiedergabemodusSchalters
16. Taste PLAY MODE (Wiedergabemodus)
(23) auf den TunerModus.
17. Taste PROG. (Programm)
2. Wählen Sie mit dem WellenbereichSchalter (19) den
18. Lautsprecher
Wellenbereich AM, oder FM, oder FM ST.
19. WellenbereichSchalter (AM/FM/FM ST.)
3. Stellen Sie den Abstimmknopf (20) auf den gewünschten
20. Abstimmknopf
Sender.
21. Netzteilbuchse
4. Nach dem Anhören stellen Sie den Wiedergabemodus
22. VOLUME Knopf (Lautstärkeregler)
Schalter (23) in die Position TAPE (OFF).
23. WiedergabemodusSchalter (CD/TAPE (OFF)/RADIO)
24. Batteriefachdeckel
CDs abspielen
1. Schalten Sie durch Betätigen des Wiedergabemodus
Schalters (23) in den CDModus um.
2. Die folgende Meldung wird auf dem LCDDisplay
angezeigt, wenn sich keine CD im CDFach befindet
oder eine CD falsch herum eingelegt wurde.
Einlegen der CD
1. Öffnen Sie den CDFachdeckel (5).
2. Legen Sie eine CD ein, und schließen Sie den Deckel.
Es beginnt daraufhin mit dem Auslesen der CD.
Anmerkung: überzeugen Sie sich davon, dass die CD
richtig eingelegt wurde.
Anmerkung: Dieses Gerät ist CDR/RW kompatibel.
CD Abspielen
Starten Sie die Wiedergabe durch Drücken der PLAY/PAUSE
Taste (10).
Wiedergabepause
Betätigen Sie während der Wiedergabe die PLAY/PAUSE
Taste. Während der Pause blinkt die Angabe zur abgelaufe
nen Zeit des Titels. Betätigen Sie zum Fortsetzen der
Wiedergabe noch einmal die PLAY/PAUSE Taste.
13
3473.qxd 26.07.05 11:13 Page 13
DEUTSCH
Abbruch der Wiedergabe
Programmansicht
Drücken Sie die Taste STOP (11).
Drücken Sie mehrmals auf die PROG. Taste (17). Mit jedem
Tastendruck wird die jeweilige Programmnummer und
Titelsuche
Titelnummer auf dem LCDDisplay angezeigt.
Betätigen Sie die NEXT Taste (8), um zum Anfang des näch
sten Titels, oder die BACK Taste (7), um zum Anfang des
Löschen des Programms
vorhergegangenen Titels zu springen.
Zum Löschen des Programms betätigen Sie zweimal die
STOP Taste (11) oder machen Sie den CDFachdeckel auf.
WÄHREND DER WIEDERGABE IM STOPPMODUS
EINMAL DRÜCKEN ZWEIMAL DRÜCKEN EINMAL DRÜCKEN
ABSPIELEN DER MP3 DISCs
9
ZUM ANFANG DES ZUM VORHERIGEN TITEL ZUM VORHERIGEN TITEL
1. Schalten Sie durch Betätigen des Wiedergabemodus
AKTUELLEN TITELS
Schalters (23) auf den CDModus um.
:
ZUM NÄCHSTEN TITEL ZUM NÄCHSTEN TITEL
2. Die „no“Aufschrift wird auf dem LCDDisplay angezeigt,
wenn sich keine CD im CDFach befindet oder eine CD
Die manuelle Suche innerhalb eines Titels erfolgt durch
falsch herum eingelegt wurde.
Betätigen und Halten der NEXT Taste (8) oder BACK (7)
Taste.
Einlegen der Disc
ANMERKUNG: Während des Suchlaufs innerhalb eines
1. Öffnen Sie den CDFachdeckel (5).
Titels wird der Titel im SchnellaufModus wiedergegeben.
2. Legen Sie eine Disc ein und schießen sie den Deckel.
Es beginnt daraufhin mit dem Auslesen der Disc.
Wiedergabe mit Wiederholung
Auswahl des Titels 4
• Betätigen Sie die PLAY MODE Taste (16) einmal, um auf
die Wiederholung des aktuellen Titels (REPEAT)
Anmerkung: überzeugen Sie sich davon, dass die CD
umzuschalten.
richtig eingelegt wurde.
• Bei dem zweitem Druck wird die wiederholte Wiedergabe
Anmerkung: Dieses Gerät ist CDR/RW kompatibel.
aller Titel der Disc ( REPEAT ALL) aktiviert.
Durch eine weitere Betätigung der PLAY MODE Taste (16)
Disc abspielen
wird die wiederholte Wiedergabe abgebrochen.
1. Drücken Sie die FOLDER UP (13) Taste oder FOLDER DN
Taste (14), um den gewünschten Ordner zu finden.
2. Wählen Sie den gewünschten Titel mittels NEXT Taste (7)
Zufallswiedergabe
Taste oder BACK Taste (8).
Pressen Sie im Stoppmodus der CD dreimal die PLAY MODE
3. Starten Sie die Wiedergabe durch Drücken der
Taste (16) (es erscheint die Aufschrift RANDOM), danach
PLAY/PAUSE Taste (10).
pressen Sie die PLAY/PAUSE Taste (10), um die zufällige
Reihenfolge der Wiedergabe einzuschalten. Drücken Sie
Wiedergabepause
wieder die PLAY MODE Taste (16), um die Wiedergabe mit
Betätigen Sie während der Wiedergabe die PLAY/PAUSE
Zufallsfolge abzubrechen.
Taste (10). Betätigen Sie zum Fortsetzen der Wiedergabe
noch einmal die PLAY/PAUSE Taste (10).
PROGRAMMIERTE WIEDERGABE
Bis zu 20 Titel können in jeder beliebiger Folge
Abbruch der Wiedergabe
wiedergegeben werden. Stoppen Sie zunächst die CD
Drücken Sie die STOP Taste (11), um die Wiedergabe
Wiedergabe durch Betätigen der STOP Taste.
abzubrechen.
1. Betätigen Sie die PROG. Taste (17) einmal. (Die
“PROG”Anzeige blinkt)
PROGRAMMWIEDERGABE EINER MP3DISC
2. Wählen Sie mittels NEXT Taste (8) oder BACK Taste (7)
Im MP3Betrieb können bis zu 10 Titel in jeder
einen bestimmten Titel aus.
beliebiger Folge wiedergegeben werden.
3. Betätigen Sie die PROG. Taste (17), um den aus
1. Drücken Sie einmal die PROG. Taste (17) im
gewählten Titel abzuspeichern.
Stoppmodus.
4. Wiederholen Sie die Schritte 2 und 3, um die weiteren
2. Wählen Sie mittels FOLDER UP Taste (13) oder FOLDER
Titel in das Programm aufzunehmen.
DN Taste (14) einen bestimmten MP3Ordner aus.
5. Starten Sie die Programmwiedergabe durch Drücken der
3. Betätigen Sie die NEXT (8) oder BACK Taste (7), um
PLAY/PAUSE Taste (10).
einen bestimmten Titel zu finden.
14
3473.qxd 26.07.05 11:13 Page 14

DEUTSCH
4. Drücken Sie die PROG Taste (17 ) noch einmal, um den Titel in das Programm aufzunehmen.
5. Wiederholen Sie die Schritte 2 und 3, um die weiteren Titel in das Programm aufzunehmen.
PROGRAMMANSICHT
Drücken Sie mehrmals auf die PROG. Taste (17). Mit jedem Tastendruck wird die jeweilige Programmnummer und
Titelnummer auf dem LCDDisplay angezeigt
6. Starten Sie die Programmwiedergabe durch Drücken der PLAY/PAUSE Taste (10).
Löschen des Programms
Zum Löschen des Programms betätigen Sie die STOP Taste (11) oder machen Sie den CDFachdeckel auf.
KASSETTEN ABSPIELEN
1. Schalten Sie mit WiedergabemodusSchalter (23) auf den TAPEModus um.
2. Drücken Sie die STOP/EJECT Taste (6), um den Kassettenhalter zu öffnen. Lege Sie eine Kassette ein und schließen den
Kassettenfachdeckel.
3. Starten Sie die Wiedergabe mit der PLAY Taste (6).
4. Um die Wiedergabe abzubrechen, drücken SIe die STOP/EJECT Taste (6).
Wiedergabepause
Betätigen Sie die PAUSE Taste (6).
Drücken Sie zum Fortsetzen der Wiedergabe noch einmal die PAUSE (6) Taste.
Schnellspulen des Kassettenbands
Verwenden Sie die F.FWD Taste (6) oder REW Taste (6), um den Kassettenband vorwärts oder rückwärts zu spulen.
AUFNAHME VOM RADIO
1. Schalten Sie mittels WiedergabemodusSchalter (23) auf den RADIOModus um.
2. Wiederholen Sie die Schritte 2 und 3 im Abschnitt “RADIOEMPFANG”, und stimmen Sie auf den gewünschten Sender
ab.
3. Legen Sie eine leere Kassette in das Kassettenfach ein und schließen Sie den Kassettenfachdeckel.
4. Legen Sie eine leere Kassette ein und schließen Sie den Kassettenfachdeckel.
5. Um mir der Aufnahme zu beginnen, betätigen Sie gleichzeitig die RECTaste und PLAYTaste (6).
AUFNAHME VON CD / MP3
1. Schalten die durch Betätigen des WiedergabemodusSchalters (23) auf den CDModus um, und öffnen Sie den CD
Fachdeckel (5).
2. Legen Sie eine CD ein und schließen den CDFachdeckel.
3. Legen Sie eine leere Kassette in das Kassettenfach ein und schließen Sie den Kassettenfachdeckel.
4. Betätigen Sie gleichzeitig die RECTaste und PLAYTaste (6).
5. Um mit der Wiedergabe der CD / MP3 Disc zu beginnen, drücken Sie die PLAY/PAUSE Taste (10).
6. Drücken Sie die PAUSE Taste (6), um die Aufnahme zu unterbrechen. Drücken Sie die STOP/EJECT Taste (6) zum
Beenden der Aufnahme.
PFLEGE UND WARTUNG
PFLEGE DER CDs
• Gehen Sie mit den CDs vorsichtig um. Halten Sie die CD nur an den Kanten. Berühren Sie nicht die reflexive
Aufnahmeflache.
• Die Etikettseite darf nicht beklebt oder beschrieben werden.
• Wischen Sie regelmäßig Fingerabdrücke mit einem weichen, trockenen Tuch ab. Verwenden Sie für das Reinigen der CDs
keinesfalls Reinigungsmittel und Schleifpulver. Wenn nötig, benutzen Sie CDReinigungSet, das im Audiofachhandel
erhältlich ist.
15
3473.qxd 26.07.05 11:13 Page 15
DEUTSCH
• Sollten bei dem CDAbspielen Störungen erscheinen oder sollte die Disc bei der Wiedergabe eines Titels “anhängen”, ist
die Disc offensichtlich verschmutzt oder verletzt (verkratzt).
• Discs sollten nur durch eine gerade Wischbewegung von der Mitte her weg zum Außenrand gereinigt werden, auf keinen
Fall durch eine Kreisbewegung.
• Drücken Sie auf die Kassettenmitte, um die Disc herausnehmen zu können
• Wischen Sie sorgfältig und regelmäßig Fingerabdrücke von der reflexiven Aufnahmeflache mit einem weichen, trockenen
Tuch ab.
• Im Gegensatz zu gewöhnlichen Aufnahmen haben CDs keine Rillen, wo sich der Staub ansammeln könnte, deshalb wird
eine sorgfältige Reinigung mit einem weichen Tuch die meisten Schmutzpartikel entfernen.
REINIGUNG DES KASSETTENANTRIEBS
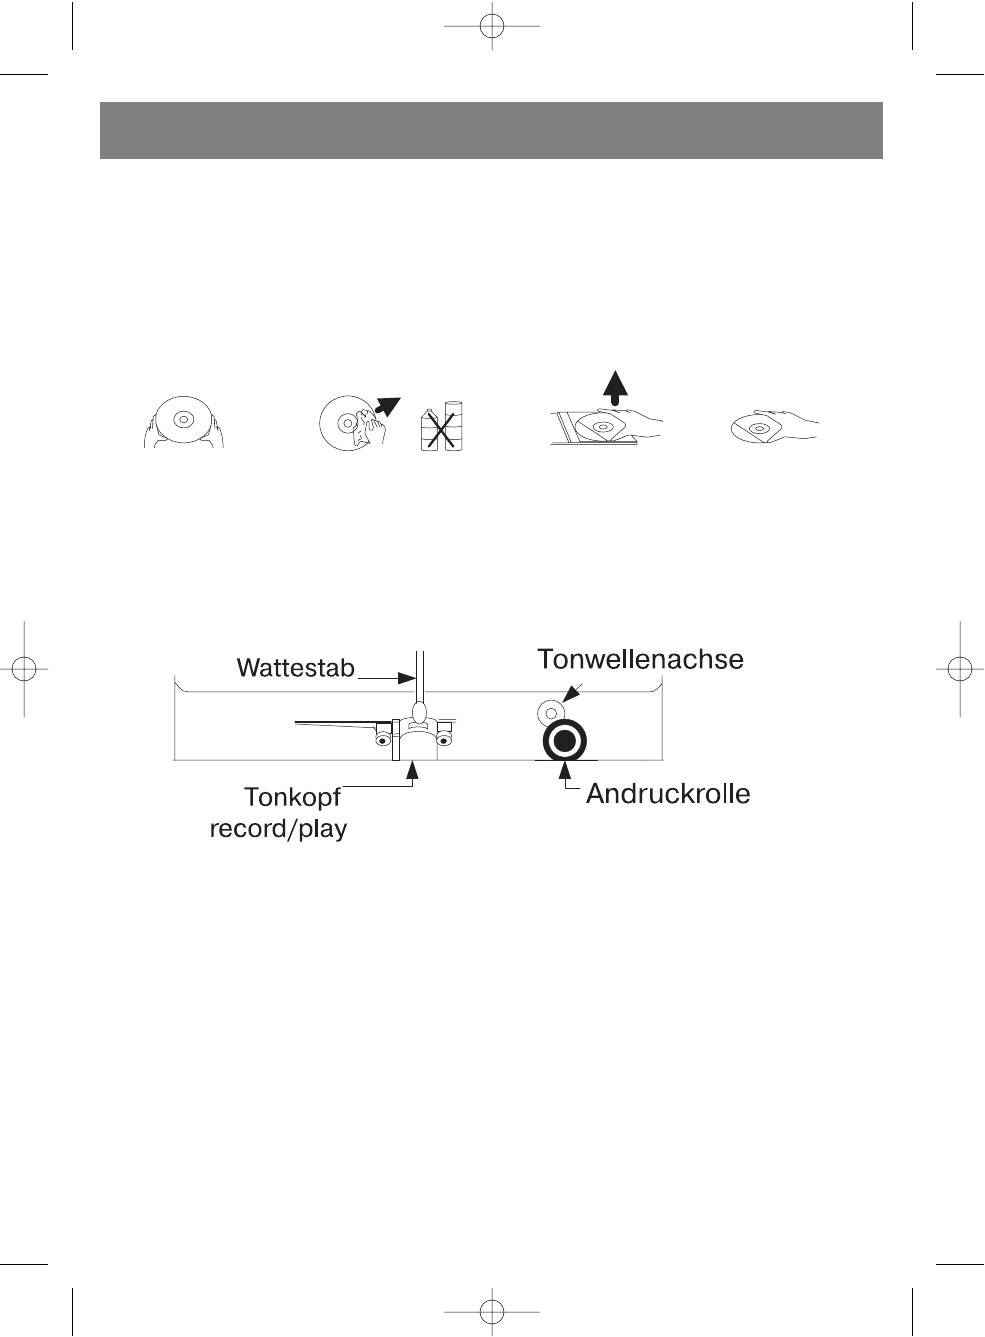
Tonköpfe, Tonwellenachse und Andruckrolle sollten regelmäßig gereinigt werden. Magnetisches Pulver und Staub sammelt
sich auf diesen Teilen des Gerätes und führt zu dem Bandverschleiß und der schlechteren Klangqualität. Schalten Sie das
Gerät aus, drücken die STOP/EJECT Taste (21), um das Kassettenfach zu öffnen, und betätigen die PLAY Taste (21).
Reinigen Sie Tonköpfe, Tonwellenachse und Andruckrolle mit einem weichen Tuch oder einem Wattepad. Benutzen Sie für
die Reinigung Isopropylalkohol oder ein Kopfreinigungsmittel, das im Audiofachhandel erhältlich ist.
ANMERKUNG: Halten Sie metallische Gegenstände vom Tonkopf entfernt! Achten Sie bitte darauf, dass kein
Reinigungsmittel ins Kassettenfach gelangt ist.
REINIGUNG DES GERÄTES
Um die Brand oder Stromschlaggefahr zu vermeiden, ziehen Sie den Netzstecker vor der Reinigung des Gerätes.
Die Oberfläche des Gerätes können mit einem Staubtuch abgewischt werden. Seien Sie vorsichtig bei dem Reinigen und
Abwischen von Plastikteilen.
Wenn die Lautsprechergehäuse staubig sind, wischen Sie sie mit einem weichen, trockenen Staubtuch ab. Es dürfen keine
Reinigungssprays oder Wachs für die Reinigung der Gehäuse verwendet werden.
Wenn die Fronttafel verschmutzt wird oder Flecken aufweist, kann sie mit einem weichen Tuch gereinigt werden, das leicht mit
einer SeifenWasserLösung durchtränkt ist. Verwenden Sie keine groben Lappen oder Poliermittel, da dies der äußerlichen
Erscheinung des Gerätes schaden kann.
VORSICHT: Lassen Sie kein Wasser oder andere Flüssigkeit ins Innere des Gerätes eindringt.
FEHLERSUCHE und BEHEBUNG
Schlagen Sie auf dieser Tabelle nach, bevor Sie sich an den Kundendienst wenden.
16
3473.qxd 26.07.05 11:13 Page 16

DEUTSCH
17
3473.qxd 26.07.05 11:13 Page 17

DEUTSCH
TECHNISCHE DATEN
Stromversorgung 230 Volt 50Hz
8 Batterien “C” /UM2
Leistungsaufnahme 18W
Abmessungen:
Hauptgerät 260mm (B) x 147mm (H) x 232mm (T)
Betriebstemperatur +535°C
RADIOEMPFÄNGER
Abstimmbereich AM (MW)/FM
Frequenzbereich AM (MW) 540 – 1600kHz
FM 64 108MHz
CDPLAYER
Wiedergabesystem Digitaler CDAbspieler
DigitalAnalogwandler 8fach Diskretisierung,
1 bit DigitalAnalogwandler.
Frequenzbereich 100 20000 Hz
KASSETTENDECK
Aufnahmesystem 4 Laufbahnen, 2 Stereokanäle
Vormagnetisierung Wechselstrom, magnetische Löschung
Frequenzgang 125 – 6300 Hz
Gleichlauf 0.35% WRMS (JIS)
AUDIO
Ausgangskraft 1.8 W x 2 (RMS)
LautsprecherImpedanz 8 Ohm
KopfhörerImpedanz 1632 Ohm
ZUBEHÖR
Bedienungsanleitung 1
Netzkabel (für das Wechselstromnetz) 1
Drahtantenne FM (nicht bei allen Modellen) 1
Der Hersteller behält sich das Recht vor die Charakteristiken des Gerätes ohne Vorbescheid zu
ändern.
Die Lebensdauer des Gerätes beträgt nicht weniger als 5 Jahre
Gewährleistung
Ausführliche Bedingungen der Gewährleistung kann man beim Dealer, der diese Geräte verkauft hat, bekommen. Bei
beliebiger Anspruchserhebung soll man während der Laufzeit der vorliegenden Gewährleistung den Check oder die Quittung
über den Ankauf vorzulegen.
Das vorliegende Produkt entspricht den Forderungen der elektromagnetischen Verträglichkeit, die in 89/336/EWG
Richtlinie des Rates und den Vorschriften 23/73/EWG über die Niederspannungsgeräte vorgesehen sind.
18
3473.qxd 26.07.05 11:13 Page 18
РУССКИЙ
МЕРЫ ПРЕДОСТОРОЖНОСТИ
•
Система должна быть подключена к сети с тем же напряжением, что и в местной электросети. В противном
случае возможно возгорание системы.
•
Не подвергайте систему нагреванию свыше 35°С.
•
Не устанавливайте систему вблизи обогревателей, следите за тем, чтобы на нее не попадали прямые солнечные
лучи.
•
Обеспечьте хорошую циркуляцию воздуха.
•
Предохраняйте систему от пыли, влажности и попадания воды.
•
Избегайте сильных магнитных полей, например возле ТВ и колонок других устройств.
•
Не используйте сильнодействующие химические реагенты при чистке устройства.
•
Не смазывайте детали, подвижные механизмы системы. CDплеер не требует технического обслуживания.
•
Для технического обслуживания используйте только сертифицированные центры обслуживания.
•
Не допускайте попадания влаги:
•
На данное устройство не должна попадать вода. Не допускается ставить на устройство какиелибо наполненные
жидкостью предметы, например вазы.
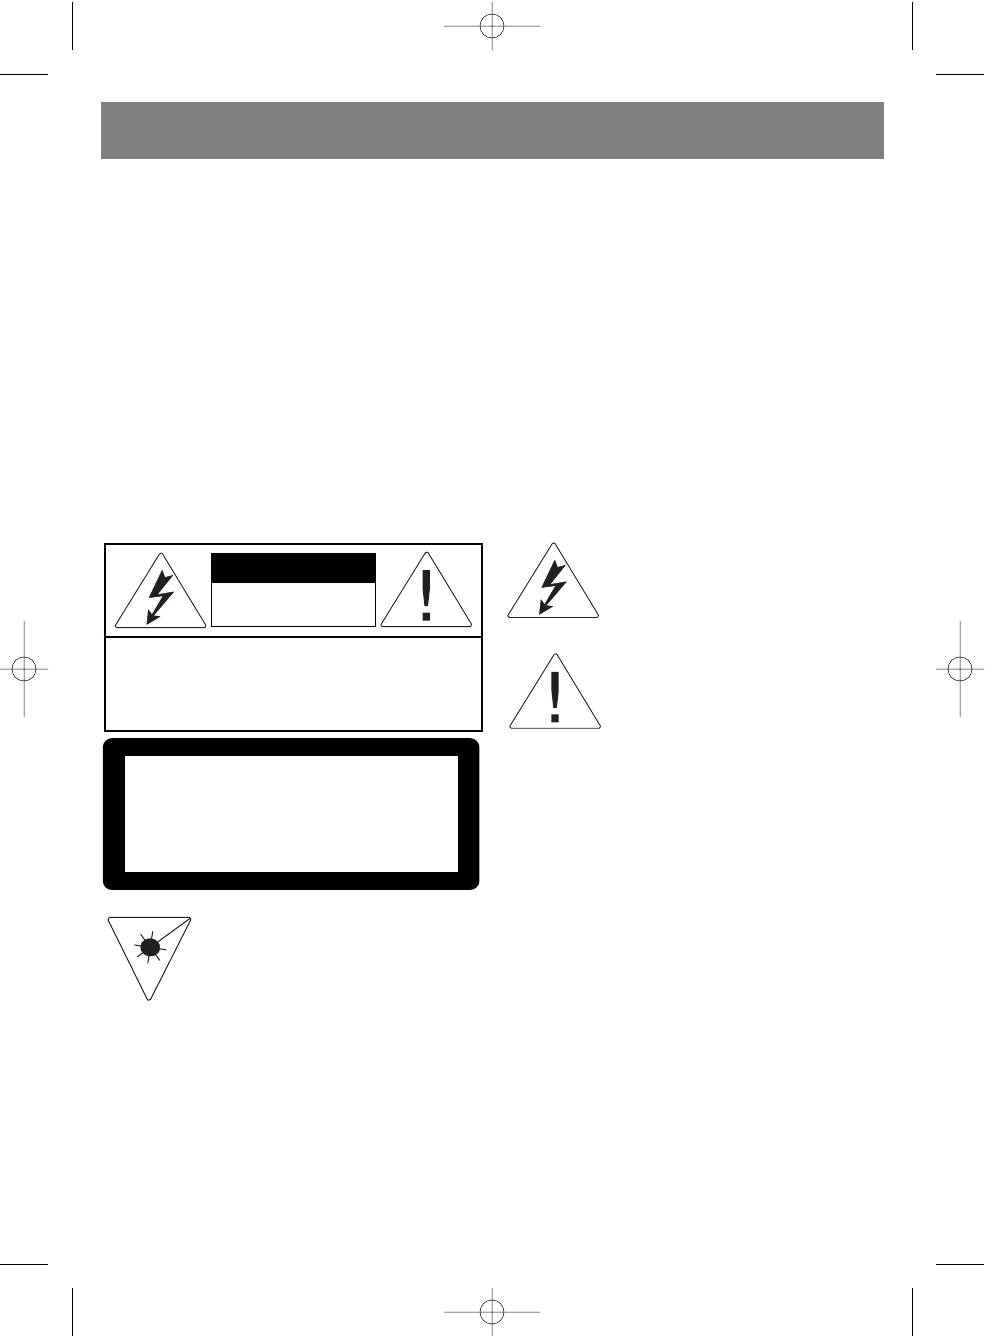
Значок молнии в равностороннем
треугольнике указывает пользователю на
ВНИМАНИЕ
Опасность удара
наличие опасного напряжения внутри
электрическим током.
корпуса изделия, способного привести к
Не вскрывать!
поражению электрическим током.
Внимание: для снижения риска удара
Значок восклицательного знака
электрическим током не снимайте крышку (или
в равностороннем треугольнике
заднюю панель). Внутри Устройства нет частей,
указывает пользователю на наличие
требующих внимания пользователя. Пользуйтесь
услугами квалифицированного персонала.
важных инструкций по эксплуатации и
техобслуживанию в сопутствующей
изделию литературе.
лазерный продукт
Система снабжена лазером. Только квалифицированный
персонал может ремонтировать систему.Использование
класса 1
регулировок, выполнение иных функций, не указанных в
инструкции, может привести к риску, связанному с
излучением
ОПАСНО! НЕВИДИМОЕ ЛАЗЕРНОЕ ИЗЛУЧЕНИЕ ПРИ ОТКРЫТИИ И ОТСУТСТВИИ БЛОКИРОВКИ.
ИЗБЕГАЙТЕ ПРЯМОГО ПОПАДАНИЯ ЛУЧА ЛАЗЕРА.
ПРЕДУПРЕЖДЕНИЕ:
Для предотвращения поражения электрическим током, не допускайте попадания на данное устройство дождя или
влаги. Не помещайте на систему какиелибо сосуды (вазы) с жидкостью.
Вентиляция:
Не закрывайте вентиляционные отверстия посторонними предметами.
19
3473.qxd 26.07.05 11:13 Page 19

РУССКИЙ
УСЛОВИЯ ТЕХНИКИ БЕЗОПАСНОСТИ ПРИ ЭКСПЛУАТАЦИИ
•
Данное оборудование было создано и произведено в соответствии с европейскими стандартами безопасности,
но, как и любое электронное оборудование, оно требует ухода для обеспечения качества работы и безопасности.
•
Внимательно прочитайте инструкцию по эксплуатации перед использованием.
•
Убедитесь, что все электрические соединения (включая розетки, удлинители и соединения между частями
оборудования) выполнены в соответствии с инструкциями. Обязательно отключайте вилку сетевого шнура от
электросети при замене соединительных проводов.
•
При какихлибо вопросах по установке, работе или безопасности вашей системы свяжитесь с вашим торговым
агентом.
•
Соблюдайте осторожность при работе со стеклянными панелями и дверцами системы.
•
Прекратите эксплуатацию системы, если она функционирует со сбоями либо повреждена, отключите систему от
электросети и свяжитесь с торговым агентом.
•
Не снимайте какуюлибо закрепленную панель, т.к. компоненты могут находиться под напряжением.
•
Не оставляйте систему включенной, если она не используется.
•
Не прослушивайте наушники на большой громкости, т.к. это может повредить слух.
•
Ничто не должно мешать вентиляции системы (занавеска или обивочный материал и пр.). Перегрев может
привести к поломке либо преждевременному износу компонентов системы.
•
Не эксплуатируйте систему в дождь или влажную погоду в незащищенном месте.
Прежде всего
• Никогда не разрешайте, особенно детям, вставлять в отверстия, слоты или другие открытые части системы какие
либо предметы, т.к. это может привести к поражению их электрическим током.
• Никогда не принимайте сомнительных решений при работе с электрооборудованием любого типа.
20
3473.qxd 26.07.05 11:13 Page 20
- 1
- 2
