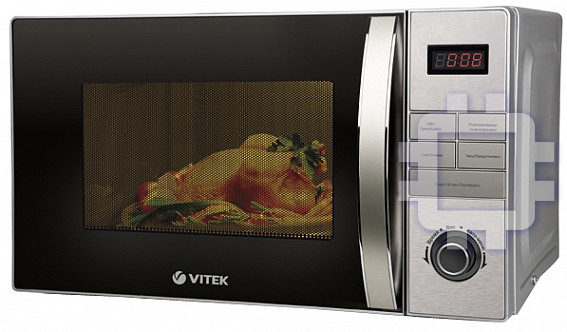
Vitek VT-1699: инструкция
Раздел: Бытовая, кухонная техника, электроника и оборудование
Тип: Микроволновая Печь

Характеристики, спецификации
Инструкция к Микроволновой Печи Vitek VT-1699
Оглавление
- МИКРОВОЛНОВАЯ ПЕЧЬ ПРЕДОСТОРОЖНОСТИ, КОТОРЫЕ НЕОБХОДИМО СОБЛЮДАТЬ, ЧТОБЫ НЕ ПОДВЕРГАТЬСЯ РИСКУ ВОЗДЕЙСТВИЯ МИКРОВОЛНОВОЙ ЭНЕРГИИ ВАЖНЫЕ УКАЗАНИЯ ПО МЕРАМ БЕЗОПАСНОСТИ МЕРЫ БЕЗОПАСНОСТИ
- Если возгорание произошло: Правила, о которых всегда следует помнить ПРЕДОСТЕРЕЖЕНИЕ Поражение электрическим током Заземление микроволновой печи
- Посуда для микроволновой печи Проверка посуды перед использованием в микроволновой печи Материалы, и посуда пригодные для использования в микроволновой печи
- Материалы и посуда, не пригодные для использования в микроволновой печи СБОРКА МИКРОВОЛНОВОЙ ПЕЧИ Названия частей и аксессуаров Дисплей Вертел Защитное покрытие
- УСТАНОВКА ВРАЩАЮЩЕГОСЯ СТЕКЛЯННОГО ПОДДОНА Установка ЭКСПЛУАТАЦИЯ Работа с микроволновой печью и её функции 1.Установка времени. 2. Приготовление в микроволновой печи
- Отображение уровней мощности микроволнового излучения на дисплее. 3. Функции режима работы гриля 4. Режимы комбинированного приготовления 5. Режим конвекция без предварительного нагрева).
- 6. Режим конвекции (с предварительным нагревом). 7. Использование вертела 8. Размораживание продуктов Разморозка по весу Разморозка по времени
- 9. Предустановка времени начала приготовления 10. Поэтапное приготовление продуктов 11. Быстрое приготовление Быстрая установка времени приготовления
- 12. Автоматическое меню МЕНЮ МАССА (г)
- 13. Блокировка от детей 14. Проверка установленных параметров 15. СПЕЦИАЛЬНЫЕ ЗАМЕЧАНИЯ СПЕЦИАЛЬНОЕ ПРИМЕЧАНИЕ Неисправности и методы их устранения Нормальная работа
- Неисправность Возможная причина Способ устранения ТЕХНИЧЕСКИЕ ДАННЫЕ:
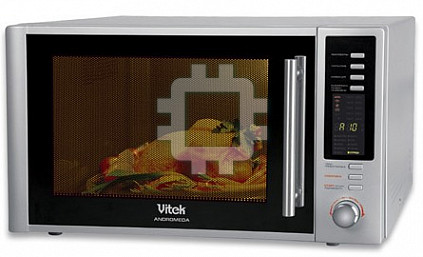
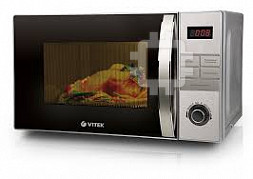
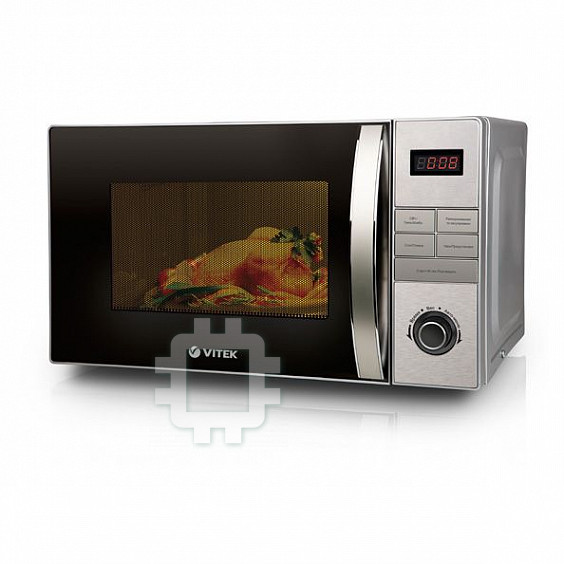
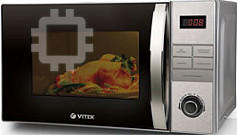
Andromeda
VT-1699
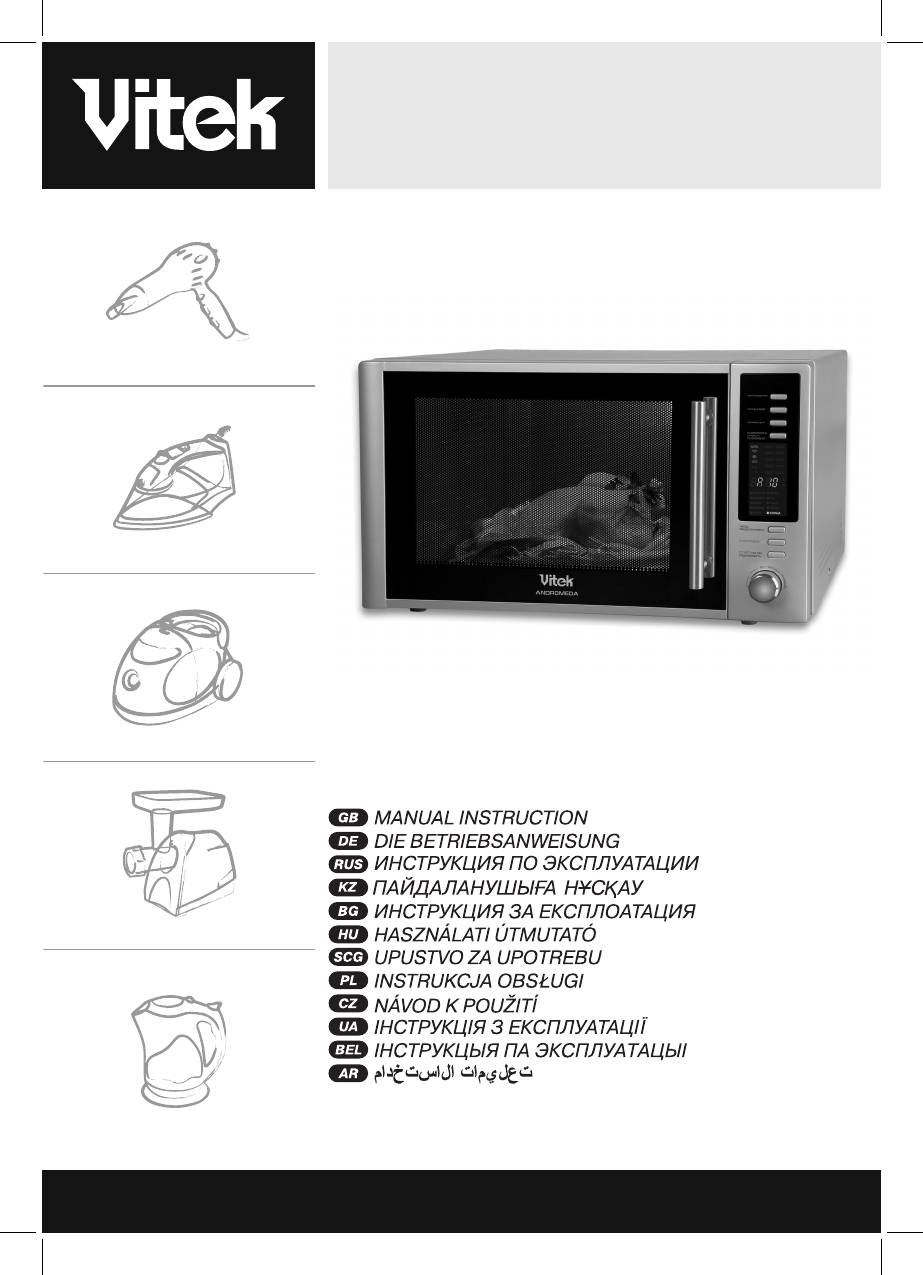
MANUAL INSTRUCTION
3
12
23
34
45
55
64
73
82
91
102
11 2
www.vitek-aus.com
1699.indd 11699.indd 1 12.03.2007 16:51:4112.03.2007 16:51:41
1699.indd 21699.indd 2 12.03.2007 16:51:4112.03.2007 16:51:41

ENGLISH
MICROWAVE OVEN
Please acquaint yourself with these instructions before using your microwave oven.
If these instructions are strictly adhered to, your microwave oven will serve you trouble-free for many years.
Store these instructions in an easily accessible location
PRECAUTIONS, WHICH MUST BE FOLLOWED IN ORDER TO MINIMIZE THE RISK OF MICROWAVE ENERGY
EXPOSURE
1. Do not attempt to use the microwave oven with the door open as you will risk exposure to harmful microwave energy. It
is very important that you do not damage the internal latches and door blocking mechanism.
2. Do not place foreign objects between the door and the front of the microwave oven and do not allow food or cleaning
liquid remnants to build up on the screening grill or on the inside of the door.
3. Do not use the microwave oven if it is damaged or malfunctioning. It is especially important that the door always be
closed and that the following parts are not damaged:
• door (bent)
• hinges and latches (broken or weakened)
• screening grill on the inside of the door
IMPORTANT SAFETY INSTRUCTIONS
WARNING: While the microwave oven is operating in combination mode (MICROWAVE + GRILL) or being operated by chil-
dren, an adult should always be present to supervise in order to prevent the children from burning themselves.
WARNING: Do not use the microwave oven if the screening grill on the door is damaged.
WARNING: Repairing a microwave oven always presents danger to any person conducting the repairs if it is necessary to
remove the metal housing that provides protections from microwave radiation. Do not repair the microwave oven yourself.
WARNING: Do not forget to open products packaged in hermetic or vacuum packaging before heating or cooking.
Otherwise, pressure could grow within the package and cause it to explode, regardless of whether or not the food was
prepared earlier.
WARNING: Children may only use the microwave oven by themselves after they have been acquainted with these instruc-
tions and understand the dangers associated with operating a microwave oven.
• Use only microwave-safe dishes. Do not use metallic dishes in the microwave oven as microwaves reflected off the dish
may cause sparks and fire.
• In order to avoid overheating and burning food, constantly supervise the microwave's operation if you are heating food
in disposable plastic, paper or other similar containers or if the oven is heating only a small amount of food.
• When heating any kind of liquid (water, coffee, milk, etc.), keep in mind that it can suddenly start to boil and splash on
your hands while you are removing it from the oven. To avoid this, place a heat resistant plastic spoon or glass mixer in
the container and stir the liquid before removing it from the oven.
• Infant feeding bottles and jars of baby food should be heating without lids or nipples. Their contents should be mixed or
periodically shaken. Test the temperature of the food before feeding in order to prevent burns.
Important information
• ALWAYS check to make sure the food is not too hot before giving it to a child. We recommend shaking the bottle or jar
to make sure the heat is distributed evenly throughout the volume of the container.
• Do not cook an egg in its shell or reheat an egg in its shell in MICROWAVE mode as they can break from the internal
pressure.
SAFETY MEASURES
1. Install the oven on a flat, stable surface. Choose a place that will not be accessible to small children.
2. Install the oven so that the distance between the wall and the back of the oven is no less than 7-8 cm and the free space
above the microwave is no less than 30 cm.
3. The microwave door is equipped with a blocking system that turns off the power when it is open. Do not make changes
to the operation of the door blocking mechanism.
4. Do not turn on the microwave while empty; operating the oven with no food inside can lead to malfunction.
5. Preparing foods with extremely small moisture contents can lead to burning and fire.
If a fire occurs:
• Do not open the door.
• Turn off the microwave oven and disconnect the plug from the electrical outlet.
6. When preparing bacon, do not place it directly on the glass tray; localized overheating of the glass tray can cause it to
crack.
7. Do not heat liquids in containers with narrow openings.
8. Do not attempt to heat products to a well-done state.
9. Do not use the microwave for canning and preserving food because there is no way of knowing if the contents of the jar
reached boiling temperature.
10. In order to avoid prolonged rapid boiling of liquid foods and drinks, and also to prevent burns, we recommend stirring
3
1699.indd 31699.indd 3 12.03.2007 16:51:4112.03.2007 16:51:41

ENGLISH
the product before and in the middle of the cooking process. To do this, start cooking, wait a while, remove the dish from
the oven and stir, then place it back in the oven to continue the cooking process.
11. Clean the microwave oven regularly. Irregular care for your oven can lead to poor outward appearance, negatively
affects its operating ability, and also can lead to danger during further exploitation.
Rules that should always be remembered:
1. Do not exceed product cooking times in the microwave oven. Always monitor the cooking process when using dishes
made from paper, plastic and other flammable materials.
2. Never use the microwave oven to store things. Never store flammable materials and food in the microwave like bread,
cookies, paper packaging, etc., because during lightning storms, the microwave oven can turn on by itself.
3. Metal ties and wire handles must be removed from paper and plastic bags and containers before placing them into the
microwave oven.
4. The microwave oven should be properly grounded. Only connect the microwave oven to an electrical outlet that is
properly grounded.
5. Some food items, like eggs in their shells, liquid or hard fats, and also hermetically sealed jars and sealed glass contain-
ers can be explosive and should not be placed in your microwave oven.
7. Use your microwave oven exclusively for the purposes for which it was designed and in strict adherence to the instruc-
tions explained herein.
8. The microwave oven in designed exclusively for heating and preparing food and is not designed for laboratory or indus-
trial use.
8. Pay special attention when children are using the microwave oven.
9. Do not use the microwave oven if the power cord or plug is damaged, or if the oven has been damaged or dropped.
10. Repair of the microwave oven should only be conducted by qualified specialists at an authorized service center.
11. Do not block the ventilation openings on the microwave oven's housing.
12. Do not store or use the microwave oven outdoors.
13. Do not use the microwave oven near water, immediately near kitchen sinks, in damp basements or directly near swim-
ming pools.
14. Do not submerse the power cord and plug in water.
15. Avoid allowing the power cord and plug to come into contact with hot surfaces.
16. Do not allow the power cord to hang off the edge of the table or counter.
17. When cleaning the door and internal surfaces of the microwave oven, always use a soft, non-abrasive cleanser on a
sponge or soft cloth.
CAUTION
Injury due to electric shock.
Touching the elements of the electrical circuits inside the microwave oven can lead to serious trauma and injury from elec-
tric shock. Do not take apart the microwave oven yourself.
Grounding the Microwave Oven
The microwave oven should be properly grounded. In case of any kind of short-circuit, grounding reduces the risk of electric
shock, as the current will flow through the ground wire.
The microwave oven uses a power cord with ground wire and a grounded plug. The plug should be connected to an electri-
cal outlet that also has a ground contact.
WARNING: Connecting a grounded plug to an un-grounded outlet can lead to electric shock.
Consult with a qualified electrician if you do not understand these grounding instructions or if you are not sure that the
microwave oven is properly grounded.
• In order to avoid confusion, the microwave oven is equipped with a short power cord.
• If an extension cord is necessary, only use a 3-wire extensions cord with ground contacts on the power plug and
outlet(s).
• The sectional markings on the microwave oven's power cord should match those on the extension cord.
• The extension cord should not hang off the edge of the table where children can pull on it; it should be placed where it
will not be walked on.
Dishes for microwave ovens
CAUTION!
• Tightly sealed containers heated in a microwave can be explosive.
• Sealed containers should be opened and plastic bags should be poked a few times with a fork in order to allow steam
to escape before being placed in the microwave oven.
• If you are unsure about using a certain dish in the microwave oven, then conduct a test.
Checking dishes before using them in the microwave
• Place the dish in the cooking chamber of the oven (a plate, for example) and place a glass cup of water in the center of
the dish.
• Set the microwave to maximum power and heat for no more than one minute.
4
1699.indd 41699.indd 4 12.03.2007 16:51:4112.03.2007 16:51:41
ENGLISH
• Carefully touch the dish you are testing: if it heated up and the water in the cup is cold, than the dish should not be used
in the microwave.
• Avoid testing dishes for more than one minute.
Materials you can use in microwave oven
Utensils Remarks
Aluminum foil Shielding only. Small smooth pieces can be used to cover thin parts of meat or poultry to
prevent overcooking. Arcing can occur if foil is too close to oven walls. The foil should be at
least 1 inch (2.5cm) away from oven walls.
Browning dish Follow manufacturer's instructions. The bottom of browning dish must be at the turntable to
break.
Dinnerware Microwave-safe only. Follow manufacturer's instructions. Do not use cracked or chipped
dishes.
Glass jars Always remove lid. Use only to heat food until just warm. Most glass jars are not heat resist
ant and may break.
Glassware Heat-resistant oven glassware only. Make sure there is no metallic trim. Do not use cracked
or chipped dishes.
Oven cooking Follow manufacturer's instructions. Do not close with metal tie. Make slits to bags allow
steam to escape.
Paper plates Use for short -term cooking/warming only. Do not leave oven unattended while and cups
cooking.
Paper towels Use to cover food for reheating and absorbing fat. Use with supervision and only for short
term cooking.
Parchment paper Use as a cover to prevent splattering or a wrap for steaming.
Plastic Microwave-safe only. Follow the manufacturer's instructions. Should be labeled
"Microwave Safe". Some plastic containers soften as the food inside gets hot. "Boiling
bags" and tightly closed plastic bags should be slit, pierced or vented as directed by pack
age.
Plastic wrap Microwave-safe only. Use to cover food during cooking to retain moisture. Do not allow
plastic wrap to touch food.
Thermometers Microwave-safe only (meat and candy thermometers).
Wax paper Use as a cover to prevent splattering and retain moisture.
Materials to be avoided in microwave oven
Utensils Remarks
Aluminum tray May cause arcing. Transfer food into microwave-safe dish.
Food carton with May cause arcing. Transfer food into microwave-safe dish.
metal handle
Metal or metal- Metal shields the food from microwave energy. Metal trim may cause arcing.
trimmed utensils
Metal twist ties May cause arcing and could cause a fire in the oven.
Paper bags May cause a fire in the oven.
Plastic foam Plastic foam may melt or contaminate the liquid inside when exposed to high temperature.
Wood Wood will dry out when used in the microwave oven and may split or crack.
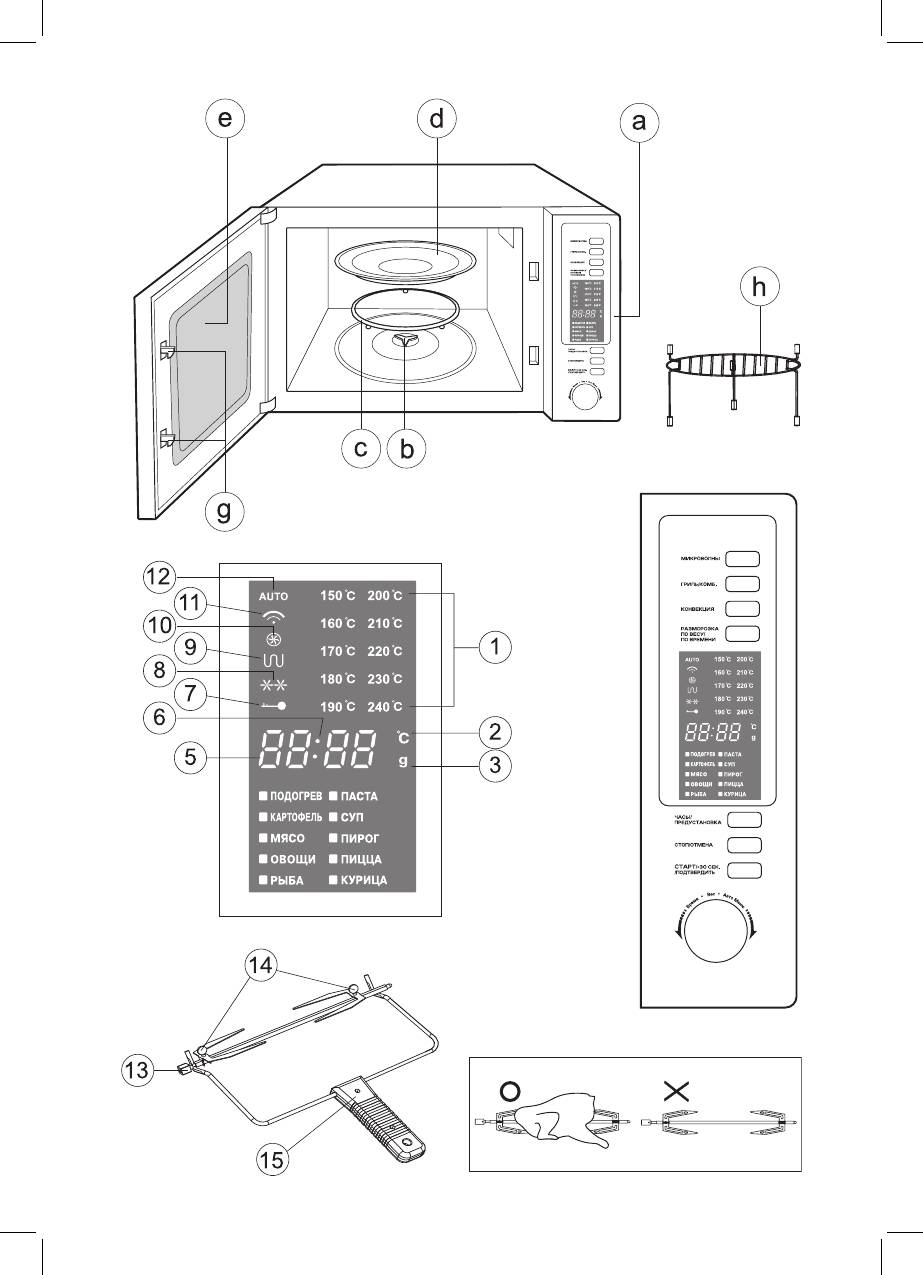
MICROWAVE OVEN ASSEMBLY
Name of parts and accessories
а) Control panel
b) Glass tray support
с) Roller ring
d) Glass tray
e) Viewing window
f) Oven door
g) Lockout system
h) Grill rack (only for Grill mode)
Display
1. Temperature in “Convection” mode
2. Temperature symbol
3. Product weight symbol
4. Auto cooking programs
5. Digital readings
6. Flashing dots
5
1699.indd 51699.indd 5 12.03.2007 16:51:4112.03.2007 16:51:41

ENGLISH
7. Lock symbol
8. “Defrost by weight/time” symbol
9. “Grill/Comb” symbol
10. “Convection” symbol
11. “Microwave” symbol
12. Auto cooking mode symbol
Broiling rack
13. Coupling
14. Clamps
15. Accessory for removing the broiling rack
Remove the package and accessories from the operating chamber. Check the oven whether there is deformation or not. Pay
special attention to the door state. If there is some problem do not set and do not switch on the oven.
Protective covering
Case: if there is protective covering on the case, remove it.
Do not remove light grey mica plate inside the operating chamber; it serves to protect the magnetron.
Setting the glass tray
1. Set the glass tray support (b) in the opening situated on the bottom of the operating chamber.
2. Set the roller ring (c) on the bottom of the operating chamber.
3. Carefully set glass tray (d), by matching ledges and grooves of the support.
Never set the glass tray with its bottom upside down. Do not prevent rotation of the glass tray while operating the oven.
During cooking always use glass tray and tray support.
Products and cookware should be always set only on the glass tray.
The glass tray can rotate clockwise/anti clockwise. It is normal.
If cracks or chops appear immediately replace the glass tray.
Setting
1. Select even stable surface to set the oven, provide proper ventilation of the oven.
(1) Set the oven leaving at least 7-8 cm of space behind and on the sides of the oven and 30 cm of space above
the oven.
(2) Do not remove supporting legs from the bottom of the oven.
(3) Do not block ventilation openings on the microwave oven case.
(4) Place the oven away from television and radio receivers in order to avoid interference while reception of tele-radio sig-
nals.
2. Before connecting the microwave oven make sure that operating voltage and power correspond to voltage of the wall
outlet. Connect the oven to the wall outlet with secure grounding.
NOTE: Never place the microwave oven on the heating surface (stove) and other heating sources.
If the microwave oven is out of order due to owner’s actions, the owner is deprived of rights for warranty service
and repair.
During operating the surface of the microwave oven can get hot. Avoid touching the heated surface in order to
prevent risk of getting burnt.
USAGE
Microwave oven operation and its functions
1. Current time setting
Switch on the oven. 0:00 will appear on the display and sound signal will be heard.
• Press “ЧАСЫ/ПРЕДУСТАНОВКА” (Clock/Preset) once or twice to select 12-hour or 24-hour time format.
• Turning the “Время•Вес•Авто меню” (Time•Weight•Auto menu) knob clockwise/anticlockwise set hours in between
0 - 12 or 0 - 24 depending on the chosen time format;
• Press “ЧАСЫ/ПРЕДУСТАНОВКА” (Clock/Preset). Digits indicating Minutes will start flashing.
• Turning the “Время•Вес•Авто меню” (Time•Weight•Auto menu) knob clockwise/anticlockwise set minutes in be-
tween 0 - 59 depending on the chosen time format;
• Press “ЧАСЫ/ПРЕДУСТАНОВКА” (Clock/Preset) to finish, the preset time will be displayed and dots will be flashing (6)
it means the proper setting has been made.
Note: if you press the “СТОП/ОТМЕНА” (Stop/Cancel) button during the setting or if you do not press any key for 15
minutes the indicator will return to the initial settings.
6
1699.indd 61699.indd 6 12.03.2007 16:51:4212.03.2007 16:51:42
ENGLISH
2. Cooking in microwave oven
• Press the “МИКРОВОЛНЫ” (Microwaves) button. “P100” will start flashing and microwave symbol (11) will appear on
the display.
• Second press the “МИКРОВОЛНЫ” (Microwaves) button or turning the “Время•Вес•Авто меню” (Time•Weight•Auto
menu) knob clockwise/anticlockwise select the required power of microwaves. (See the table below).
• Press “СТАРТ/+30 СЕК/ПОДТВЕРДИТЬ” (Start/+30 sec./Confirm) to confirm the selection.
• Turning the “Время•Вес•Авто меню” (Time•Weight•Auto menu) knob clockwise/anticlockwise set the cooking time
(max. 95 minutes).
• Press “СТАРТ/+30 СЕК/ПОДТВЕРДИТЬ” (Start/+30 sec./Confirm) to start cooking. The remained cooking time and
microwave symbol (11) will be flashing on the display.
Displaying the microwave power levels
Power level
100% 80% 50% 30% 10%
Display
P-100 P-80 P-50 P-30 P-10
Note:
Maximum cooking time is 95 minutes.
Time setting step:
From 0 to1 min - 5 sec
From 1 to 5 min -10 sec
From 5 to 10 min - 30 sec
From 10 to 30 min -1 min
From 30 to 95 min - 5 min
After cooking time is over the oven will switch off and five sound signals will be heard.
3.Grill mode functions
• Press the “ГРИЛЬ/КОМБ.” (Grill/Comb) button. Grill mode symbol (9) and flashing grill symbol G-1 will be displayed.
• Press “СТАРТ/+30 СЕК/ПОДТВЕРДИТЬ” (Start/+30 sec./Confirm) to confirm the selection.
• Turning the “Время•Вес•Авто меню” (Time•Weight•Auto menu) knob clockwise/anticlockwise set the cooking time
(max. 95 minutes).
• Press “СТАРТ/+30 СЕК/ПОДТВЕРДИТЬ” (Start/+30 sec./Confirm) to start cooking. In grill mode G-1 the remained
cooking time and microwave symbol (11) will appear on the display.
• In G-1 grill mode the heating element of the grill is on –100% power.
Note: During cooking in grill mode (G-1) only grill heating element works. After half time is passed three sound signals will
be heard, this moment you can turn over the products that are being cooked in the oven.
4. Combination cooking modes
• Press the ГРИЛЬ КОМБ (Grill/Comb) button, symbol (9) will light up on the display, and grill symbol G-1 will be flash-
ing.
• Second press the “ГРИЛЬ/КОМБ “(Grill/Comb) button or turn the “Время•Вес•Авто меню” (Time•Weight•Auto
menu) knob clockwise/anticlockwise to select the required function of combination cooking. “С-1”, “С-2”, “С-3”, “С-4”.
• Press “СТАРТ/+30 СЕК/ПОДТВЕРДИТЬ” (Start/+30 sec./Confirm) to confirm the selection.
• Turning the “Время•Вес•Авто меню” (Time•Weight•Auto menu) knob clockwise/anticlockwise set the cooking time
(max. 95 minutes).
• Press “СТАРТ/+30 СЕК/ПОДТВЕРДИТЬ” (Start/+30 sec./Confirm) to start cooking.
In combination mode remained time will countdown on the display and symbols corresponding to the selected mode will
be flashing.
- “С-1” combination cooking mode, microwave mode and convection cooking mode, symbols (10, 11) are flashing.
- “С-2” combination cooking mode, microwave mode and grill cooking mode, symbols (9, 11) are flashing.
- “С-3” combination cooking mode, convection mode and grill cooking mode, symbols (9, 10) are flashing.
- “С-4” combination cooking mode, microwave mode, convection mode and grill cooking mode, symbols (9, 10, and 11)
are flashing.
5. Convection mode without preheating.
• Press the “КОНВЕКЦИЯ” (Convection) button, 150°С temperature will be flashing on the display and convection symbol
(10) will light up.
• Second press the “КОНВЕКЦИЯ “(Convection) button or turn the “Время•Вес•Авто меню” (Time•Weight•Auto
menu) knob clockwise/anticlockwise to select the required temperature in convection mode (from 150°С to 240°С)
• Press “СТАРТ/+30 СЕК/ПОДТВЕРДИТЬ” (Start/+30 sec./Confirm) to confirm the selection.
• Turning the “Время•Вес•Авто меню” (Time•Weight•Auto menu) knob clockwise/anticlockwise set the cooking time
(max. 95 minutes).
7
1699.indd 71699.indd 7 12.03.2007 16:51:4212.03.2007 16:51:42

ENGLISH
• Press “СТАРТ/+30 СЕК/ПОДТВЕРДИТЬ” (Start/+30 sec./Confirm) to start cooking.
In convection mode convection symbol (10) and temperature symbol (1) will be flashing.
Note: The microwave oven has function of temperature control in convection mode: - during heating the symbol of
the preset temperature (1) is flashing, when the preset temperature is reached the symbol (1) will be lighting.
6. Convection mode with preheating
Cooking in convection mode with preheating allows you cooking products like in the traditional oven.
• Press the “КОНВЕКЦИЯ” (Convection) button, 150°С temperature will be flashing on the display and convection symbol
(10) will light up.
• Second press the “КОНВЕКЦИЯ “(Convection) button or turn the “Время•Вес•Авто меню” (Time•Weight•Auto
menu) knob clockwise/anticlockwise to select the required temperature in convection mode (from 150°С to 240°С)
• Press “СТАРТ/+30 СЕК/ПОДТВЕРДИТЬ” (Start/+30 sec./Confirm) to confirm the selection.
• Press “СТАРТ/+30 СЕК/ПОДТВЕРДИТЬ” (Start/+30 sec./Confirm) again to switch on preheating, symbols (1, 10) will
be flashing, sound signal will be heard, indications on the display will be flashing.
• Open the door of the oven and put the products there.
• Turning the “Время•Вес•Авто меню” (Time•Weight•Auto menu) knob clockwise/anticlockwise set the cooking time
(max. 95 minutes).
• Press “СТАРТ/+30 СЕК/ПОДТВЕРДИТЬ” (Start/+30 sec./Confirm) to switch on the oven. After cooking time is over
the oven will switch off and five sound signals will be heard.
7. Setting the broiling rack
Attention:
- You can use the broiling rack only in Grill mode, Convection mode or Combination cooking mode “С-3”.
• Turn off the first clamp and remove it.
• Thread chicken on the broiling rack.
• Put the clamp on the broiling rack and fix the chicken with it.
• Set the broiling rack in the oven:
- put the coupling (13) of the broiling rack on the pin of the rolling drive.
- the opposite sides of the broiling rack insert in the guiding firmly with little effort, sink it to the deepening.
To remove the broiling rack use the adjustment (15):
- holding the handle (15) put it under the broiling rack.
- first raise right side of the broiling rack up
- put right side beyond the borders of the guiding
- remove the coupling of the broiling rack (13) from the pin of the drive
Be especially careful when taking the broiling rack out of the oven in order not to get burnt.
8. Products defrost
DEFROST BY WEIGHT
• Press the РАЗМОРОЗКА ПО ВЕСУ (Defrost by weight) button thrice - “d3” and symbol (8, 11) will light up on the display.
• Turning «Время•Вес•Авто меню» (Time•Weight•Auto menu) knob clockwise/anticlockwise set the weight of the
product (from 100 g to 2 kg).
Setting step from 100 g to 1kg – 10 g, from1 kg to 2 kg –100 g.
• Press “СТАРТ/+30 СЕК/ПОДТВЕРДИТЬ” (Start/+30 sec./Confirm) to start defrost. Symbols (8, 11) will be flashing
and the remained time will countdown.
DEFROST BY WEIGHT
• Press twice “РАЗМОРОЗКА ПО ВЕСУ/ПО ВРЕМЕНИ” (DEFROST BY WEIGHT/TIME) “dE F2” and symbols (8, 11) will
appear on the display.
• Turning the “Время•Вес•Авто меню” (Time•Weight•Auto menu) knob clockwise/anticlockwise set the cooking time
(from 5 sec. to 95 min).
• Press “СТАРТ/+30 СЕК/ПОДТВЕРДИТЬ” (Start/+30 sec./Confirm) to start defrost.
Symbols (8, 11) will be flashing and the remained time will countdown.
9. Start cooking time preset
• Before setting the starting time check if the current time is set properly.
• Press “МИКРОВОЛНЫ” (Microwaves) and set the required cooking power.
• Press “СТАРТ/+30 СЕК/ПОДТВЕРДИТЬ” (Start/+30 sec./Confirm) to confirm.
• Turning the “Время•Вес•Авто меню” (Time•Weight•Auto menu) knob clockwise/anticlockwise set the cooking time
(max. 95 minutes).
• Press “ЧАСЫ/ПРЕДУСТАНОВКА” (Clock/Preset)
• Turning the “Время•Вес•Авто меню” (Time•Weight•Auto menu) knob clockwise/anticlockwise set the starting
hours.
8
1699.indd 81699.indd 8 12.03.2007 16:51:4212.03.2007 16:51:42

ENGLISH
• Press “ЧАСЫ/ПРЕДУСТАНОВКА” (Clock/Preset).
• Turning the “Время•Вес•Авто меню” (Time•Weight•Auto menu) knob clockwise/anticlockwise set the minutes.
• Press “СТАРТ/+30 СЕК/ПОДТВЕРДИТЬ” (Start/+30 sec./Confirm) to confirm.
When preset starting time will match the current time the microwave oven will switch on.
To check the starting time press “ЧАСЫ/ПРЕДУСТАНОВКА” (Clock/Preset), the starting time will be displayed during 3
seconds.
10. Staged cooking
- You can cook in three stages.
- While staged cooking “РАЗМОРОЗКА ПО ВЕСУ/ПО ВРЕМЕНИ” (DEFROST BY WEIGHT/TIME) mode should be set
first.
Example:
To defrost 300 g of products/start at 50% power during 5 minutes then use grill for 1 minute.
• Press “РАЗМОРОЗКА ПО ВЕСУ/ПО ВРЕМЕНИ” (DEFROST BY WEIGHT/TIME) «dE F1» and symbols (8, 11) will ap-
pear on the display.
• Turning the “Время•Вес•Авто меню” (Time•Weight•Auto menu) knob clockwise/anticlockwise set the weight 300 g.
• Press “МИКРОВОЛНЫ” (Microwaves). “P100” will be flashing on the display and microwave symbol (11) will be dis-
played.
• Second press the “МИКРОВОЛНЫ “(Microwaves) button or turn the “Время•Вес•Авто меню” (Time•Weight•Auto
menu) knob clockwise/anticlockwise to select the required power of microwaves 50%.
• Press “СТАРТ/+30 СЕК/ПОДТВЕРДИТЬ” (Start/+30 sec./Confirm) to confirm the selection.
• Turning the “Время•Вес•Авто меню” (Time•Weight•Auto menu) knob clockwise/anticlockwise set the cooking time
5 minutes.
• Press «ГРИЛЬ/КОМБ.». Grill mode symbol (9) and grill symbol G-1 will appear on the display.
• Press “СТАРТ/+30 СЕК/ПОДТВЕРДИТЬ” (Start/+30 sec./Confirm) to confirm the selection.
• Turning the “Время•Вес•Авто меню” knob clockwise/anticlockwise set the cooking time 1 minute.
• Press “СТАРТ/+30 СЕК/ПОДТВЕРДИТЬ” (Start/+30 sec./Confirm) to start cooking.
• During cooking, operation mode symbols and operation time of each stage are displayed.
11. Quick cooking
In quick cooking mode the oven is switched on at full power «Р-100», during the preset time.
• Put the products into the oven and close the door.
• Press “СТАРТ/+30 СЕК/ПОДТВЕРДИТЬ” (Start/+30 sec./Confirm) to start cooking.
• Each second press “СТАРТ/+30 СЕК/ПОДТВЕРДИТЬ” (Start/+30 sec./Confirm) adds 30 seconds of quick cooking
time (max. 95 minutes).
Note:
- During the oven operation in any mode you can add 30 seconds to the main cooking time by pressing “СТАРТ/+30
СЕК/ПОДТВЕРДИТЬ” (Start/+30 sec./Confirm).
Quick setting of cooking time
• Put the products into the oven and close the door.
• Turning the “Время•Вес•Авто меню” (Time•Weight•Auto menu) knob clockwise/anticlockwise set the required
cooking time.
• Press «СТАРТ/+30 СЕК/ПОДТВЕРДИТЬ (Start/+30 sec./Confirm) to start cooking.
• The oven will switch on for the preset time at max. power «Р-100».
12. Auto menu
• Turning the “Время•Вес•Авто меню” (Time•Weight•Auto menu) knob clockwise/anticlockwise select the required
program of auto cooking. The programs are chosen in the following sequence: А – 1 - heating; А – 2 - potato; А – 3
–meat; А – 4 –vegetables; А – 5 – fish; А – 6 - paste; А – 7 - soup; А – 8 - cake; А – 9 – pizza; А – 10 - chicken.
• Press “СТАРТ/+30 СЕК/ПОДТВЕРДИТЬ” (Start/+30 sec./Confirm) to confirm the selected auto cooking mode.
• Turning the “Время•Вес•Авто меню” (Time•Weight•Auto menu) knob clockwise/anticlockwise select the required
weight and number of portions.
• Press “СТАРТ/+30 СЕК/ПОДТВЕРДИТЬ” (Start/+30 sec./Confirm) to start cooking.
• Symbols corresponding to the operation mode and auto cooking symbol (12) will be flashing on the display. The remained
time will countdown.
Menu Weight (g)
150
250
А-1
350
Heating
450
600
9
1699.indd 91699.indd 9 12.03.2007 16:51:4212.03.2007 16:51:42
ENGLISH
1
А-2
2
Potato
3
150
А-3
300
Meat
450
600
150
А-4
350
Vegetables
500
150
250
А-5
350
Fish
450
650
А-6
50
Paste
100
150
200
А-7
400
Soup
600
А-8
475
Cake
200
А-9
300
Pizza
400
500
А-10
750
Chicken
1000
1200
Cooking result at auto cooking mode depends on the size and form of a product, and on the location on the glass tray. In any
case if you find the cooking result insufficient, increase or decrease weight of the product in auto cooking menu.
13. “LOCK FROM CHILDREN”
Switching on Lock mode
In stand by mode (the current time is displayed, dots are flashing) press “СТОП/ОТМЕНА” (Stop/Cancel), and hold it for 3
seconds. Long sound signal will be heard lock symbol (7) will appear on the display.
To cancel Lock mode
In lock state press “СТОП/ОТМЕНА” (Stop/Cancel), and hold it for 3 seconds.
Long sound signal will be heard lock symbol (7) will be faded out.
14. Checking the preset settings
• Checking microwave power while cooking: - press “МИКРОВОЛНЫ” (Microwaves), microwave power will be displayed
for 3 sec., after that the remained cooking time will appear on the display.
• Checking combination cooking mode (С-1, С-2, С-3, С4): - while cooking press “ГРИЛЬ/КОМБ.” (Grill/Comb), the
preset combination cooking mode (С-1, С-2, С-3, С4) will be displayed for 3 sec.
• Checking temperature while cooking in convection mode: - press “КОНВЕКЦИЯ” (Convection), temperature of convec-
tion mode will be displayed for 3 sec.
• Checking starting cooking time. When all settings are made, press “ЧАСЫ/ПРЕДУСТАНОВКА” (Clock/Preset) starting
cooking time will appear on the display, time indications will be flashing for 3 sec., then the current time will appear on the
display.
15. Special notes
Max. cooking time in all modes (Microwaves, Grill, Convection) is 95 minutes. In Grill mode (G 1), after half of time has passed
two sound signals will be heard. This moment you can turn over the products.
SPECIAL NOTE
1. With each press of control buttons or with one turn of “Время•Вес•Авто меню” knob one sound signal will be
heard.
10
1699.indd 101699.indd 10 12.03.2007 16:51:4312.03.2007 16:51:43

ENGLISH
2. After the cooking program is finished five sound signals will be heard.
3. If during cooking the door is open lockout system will switch off the oven. When the door is closed you should press
“СТАРТ/+30 СЕК/ПОДТВЕРДИТЬ” (Start/30 sec./Confirm) to continue cooking. One signal will confirm the normal
cooking process.
4. You can stop cooking by pressing “СТОП/ОТМЕНА” (Stop/Cancel), second press this button will remove the cooking
program.
Eliminating malfunctions
Malfunction Possible causes Method of elimination
The power plug is not firmly connected to
Remove the power plug from the outlet.
the electrical outlet
Wait 10 seconds and then replace
The oven will not turn on
Try plugging another electrical device into
Problem with power outlet
the outlet to test it
The oven will not heat The door is not closed firmly Close the door firmly
When the oven is operating, the
Remove the glass tray and roller ring. Wash
The roller ring or the cooking chamber floor
rotating glass tray makes strange
the roller ring and the cooking chamber
is dirty
noises
floor
Normal operation
The microwave oven creates
Static in television and radio signals can occur while the oven is operating. Similar
static in television and radio sig-
static is created by small electrical devices like mixers, vacuum cleaners and electrical
nals.
fans. This is a normal occurrence.
If the oven is set to a low power level, the light in the cooking chamber may also be
The oven light is dim.
low. This is a normal occurrence.
Steam collects on the door and
During the cooking process, steam is released from the food. Most of the steam is
hot air comes out of the ventila-
released through the ventilation openings, but some can collect on the inside of the
tion openings.
door. This is a normal occurrence.
The microwave oven was turned
Turning on the microwave oven for a short period of time while empty will not cause
on without food inside.
any harm. Always make sure there is food in the oven before starting it.
Specifications:
Power supply 230 V ~ 50 Hz
Operating frequency: 2450 MHz
Power consumption: 1450 W
Maximum microwave power : 900 W
Grill power: 1100 W (convection mode 2500 W)
Oven capacity: 25 l
Glass tray diameter: 315 mm
Dimensions (L/W/H): 513х505х305 mm
Weight Netto: Approx. 17,85 kg
The manufacturer reserves the right to change the characteristics of the device without prior warning.
Service life of the unit not less than 5 years
Guarantee
Details regarding guarantee conditions can be obtained from the dealer from whom the appliance was purchased. The bill
of sale or receipt must be produced when making any claim under the terms of this guarantee.
This product conforms to the EMC-Requirements as laid down by the Council Directive 89/336/EEC and to the
Law Voltage Regulation (73/23 EEC)
11
1699.indd 111699.indd 11 12.03.2007 16:51:4312.03.2007 16:51:43

DEUTSCH
MIKROWELLENGERÄT
Vor dem Gebrauch des Mikrowellengerätes diese Anweisung sorgfältig durchlesen
Unter Voraussetzung, dass alle Hinweise der Anweisung genau befolgt werden, kann das Mikrowellengerät Ihnen
auf Jahre hinaus einwandfrei dienen.
Die Gebrauchsanweisung leicht zugänglich aufbewahren
BEIM UMGANG MIT MIKROWELLEN BITTE BEACHTEN, UM AUSTRETEN VON MIKROWELLEN UND
DADURCH MÖGLICHE GESUNDHEITSBEEINTRÄCHTIGUNGEN AUSZUSCHLIEßEN
1. Versuchen Sie keinesfalls, das Mikrowellengerät bei geöffneter Garraumtür zu betreiben, Änderungen an der
Türverriegelung vorzunehmen oder Gegenstände in die Öffnungen der Sicherheitsverriegelung zu stecken.
Andernfalls können Mikrowellen austreten.
2. Stecken Sie niemals Gegenstände zwischen Garraumtür und Frontseite. Achten Sie darauf, dass keine
Rückstände von Speisen oder Reinigungsmitteln auf dem Schirmgitter oder auf der internen Türseite verblei-
ben.
3. Bei Beschädigung darf das Gerät nicht betrieben werden. Achten Sie besonders darauf, dass die Garraumtür
korrekt schließt und folgende Teile nicht beschädigt sind:
• Tür (gebogen)
• Türscharniere (gebrochen oder locker)
• Schirmgitter von der internen Türseite
WICHTIGE SICHERHEITSHINWEISE
WARNUNG: Der Kombinationsbetrieb (MIKROWELLE+GRILL) und Gebrauch des Geräts von Kindern soll immer
unter Aufsicht der Erwachsenen erfolgen, um Verbrennungen bei Kindern zu verhindern.
WARNUNG: Das Gerät darf nicht benutzt werden, wenn das Schirmgitter der Tür beschädigt ist.
WARNUNG: Reparaturen, bei denen die Schutzabdeckung gegen Mikrowellenenergie abgenommen werden
muss, dürfen wegen der dabei bestehenden Risiken nur von Fachpersonal vorgenommen werden. Reparieren
Sie den Ofen nie selbst.
WARNUNG: Vor dem Erhitzen oder Garen der Produkte in einer luftdichten oder vakuumversiegelten Verpackung
vergessen Sie nicht, diese zu öffnen. Ggf. der erhöhte Druck kann zur Explosion führen, sogar wenn das Produkt
zuvor zubereitet war.
WARNUNG: Kinder dürfen die Mikrowelle nur dann unbeaufsichtigt benutzen, wenn ihnen vorher genau deren
sicherer Betrieb erklärt wurde und sie über die Gefahren einer unsachgemäßen Handhabung aufgeklärt worden
sind.
• Verwenden Sie nur das für Mikrowellen geeignete Geschirr. Verwenden Sie kein Kochgeschirr aus Metall in
Ihrer Mikrowelle, da es zu elektrischer Lichtbogen- oder Funkenbildung kommen kann, die das Gerät beschä-
digen kann.
• Sehen Sie hin und wieder in den Garraum, wenn Essen in Einwegbehältern aus Plastik, Papier oder anderen
brennbaren Materialien erwärmt oder gegart wird, um Überhitzung oder Brand zu vermeiden.
• Beim Erhitzen von Gertänken (Wasser, Kaffe, Milch o.ä.) achten Sie darauf, dass diese plötzlich aufkochen
und auf Ihre Hände spritzen können, wenn Sie Behälter aus dem Ofen nehmen. Um das zu vermeiden, legen
Sie in den Behälter einen temperaturbeständigen Plastiklöffel oder Glasrührer und rühren Sie die Flüssigkeit
um, bevor der Behälter herausgenommen wird.
• Babyfläschchen und Babynahrungsdosen sollen ohne Deckel und Gummisauger erhitzt werden. Rühren Sie
den Inhalt um oder schütteln Sie ihn regelmäßig auf. Prüfen Sie immer die Temperatur von Babynahrung,
bevor Sie das Baby füttern, um Verbrennungen auszuschließen.
Wichtige Informationen
• Prüfen Sie IMMER die Temperatur von Babynahrung oder -milch, bevor Sie das Baby füttern. Es empfiehlt sich
den Inhalt aufzuschütteln, um die Wärme gleichmäßig zu verteilen.
• Erhitzen Sie keine Eier im MIKROWELLENBETRIEB, da diese wegen des erhöhten internen Druck platzen.
SICHERHEITSMAßNAHMEN
1. Stellen Sie das Gerät auf einer flachen, ebenen und stabilen Oberfläche auf. Wählen Sie einen für kleine
Kinder unzugänglichen Platz.
2. Überzügen Sie Sich, dass das Gerät ausreichend Luftzufuhr hat, indem Sie nach hinten und zu beiden Seiten
mindestens 7-8 cm Freiraum, und nach oben mindestens 30 cm Freiraum lassen.
3. Die Gerätetür ist mit einer Verriegelung ausgestattet, die die Stromversorgung sperrt, wenn die Tür geöffnet
wird. Vornehmen Sie keine Änderungen in der Funktion der Tür.
12
1699.indd 121699.indd 12 12.03.2007 16:51:4312.03.2007 16:51:43

DEUTSCH
4. Setzen Sie das Mikrowellengerät nicht in Betrieb, wenn es leer ist, der leere Betrieb kann zum Ausfall des
Gerätes führen.
5. Das Garen von Produkten mit einem niedrigen Feuchtigkeitsgehalt kann zu ihrem Anbrennen oder Brand füh-
ren.
Beim Brand:
• Halten Sie die Gerätetür geschlossen.
• Schalten Sie das Gerät aus und ziehen Sie den Netzstecker aus der Steckdose.
6. Legen Sie Bacon nicht direkt auf den Glasdrehteller, lokale Überhitzung des Drehtellers kann zu Rissen füh-
ren.
7. Versuchen Sie nicht, Produkte im Gerät bis zum vollen Durchbraten zubereiten.
8. Erhitzen Sie keine Flüssigkeiten in den Flaschen mit engen Halsen.
9. Verwenden Sie die Mikrowelle für Konservierung nicht, weil es kein Siedegrad sichergestellt werden kann.
10. Um intensives Kochen der Flüssigkeiten zu vermeiden, sowie Verbrennungen vorzubeugen, empfiehlt sich,
Produkte am Anfang und in der Mitte des Garvorgangs umzurühren. Schalten Sie dazu die Aufheizung aus,
warten Sie einige Zeit ab, nehmen Sie das Geschirr mit Produkt heraus, rühren Sie dieses um und stellen Sie
es wieder in den Garraum, um den Vorgang fortzusetzen.
11. Halten Sie den Garraum sauber. Unregelmäßige Pflege kann das Aussehen des Geräts verschlimmern, nega-
tive Auswirkungen auf die Funktion haben, sowie zu Gefahren während des Betriebes führen.
Regeln, die immer zu befolgen sind:
1. Überschreiten Sie die Garzeit nicht. Sehen Sie hin und wieder in den Garraum, wenn Essen in
Einwegbehältern aus Plastik, Papier oder anderen brennbaren Materialien erwärmt oder gegart wird.
2. Benutzen Sie die Mikrowelle nicht, um Gegenstände aufzubewahren. Bewahren Sie im Ofen keine brennbare
Materialien und Produkte wie Brot, Gebäck, Verpackungen etc., weil das Gerät bei Gewitter spontan einge-
schaltet werden kann.
3. Metalldralle, Halterungen, Drahtgriffe der Papier- oder Plastiktüten sind zu entfernen.
4. Das Mikrowellengerät soll sachgemäß geerdet sein. Schlissen Sie das Gerät nur an eine sicher geerdete
Steckdose an.
5. Einige Produkte, Eier in Schale, flüssige oder harte Fette, sowie luftdichte Dosen, verschlossene Glasbehälter
sind explosionsgefährlich, diese sind in die Mikrowelle nicht zu gären oder erhitzen.
7. Benutzen Sie das Gerät ausschließlich bestimmungsgemäß und entsprechend den Hinweisen der
Gebrauchsanweisung.
8. Das Mikrowellengerät ist ausschließlich für das Erhitzen und Garen von Lebensmitteln ausgelegt und darf
nicht für Labor oder industrielle Zwecke benutzt werden.
8. Achten Sie besonders auf, wenn das Gerät von Kindern benutzt wird.
9. Verwenden Sie das Gerät nicht, wenn das Netzkabel oder Netzstecker beschädigt sind bzw. wenn das Gerät
wegen der Beschädigung oder des Sturzes nicht ordnungsmäßig funktioniert.
10. Das Mikrowellengerät sollte nur durch einen qualifizierten Kundendiensttechniker repariert werden.
11. Verstopfen Sie niemals die Lüftungsöffnungen.
12. Das Mikrowellengerät darf nicht in Freie benutzt oder gelagert werden.
13. Installieren Sie das Mikrowellengerät nicht in heißer oder feuchter Umgebung, etwa neben einem Backofen
oder Spülbecken, in feuchten Kellerräumen oder in der Nähe von Schwimmhallen.
14. Tauchen Sie das Netzkabel oder den Netzstecker nicht in Wasser.
15. Halten Sie das Netzkabel und den Netzstecker von heißen Flächen fern.
16. Lassen Sie nicht, dass das Netzkabel am Tischrand durchhängt.
17. Bei der Reinigung von der Tür und internen Flächen des Gerätes verwenden Sie milde, nicht abreibende
Reinigungsmittel mit einem Schwamm oder weichen Lappen.
WARNUNG
Elektrounfall.
Die Berührung der elektrischen Komponente kann zu schweren Verletzungen und Elektrounfall führen.
Versuchen Sie nicht das Gerät selbständig auszubauen.
Erdung des Mikrowellengerätes
Das Mikrowellengerät soll sicher geerdet sein. Die Erdung verringert Risiken von Stromschlag durch Kurzschluss,
da dabei Strom durch Erdungskabel abgeleitet wird.
Das Gerät verfügt über ein Netzkabel mit dem Erdungsleiter und einen Netzstecker mit dem Erdungskontakt. Der
Stecker soll an eine Steckdose mit dem Erdungskontakt angeschlossen werden.
13
1699.indd 131699.indd 13 12.03.2007 16:51:4312.03.2007 16:51:43

DEUTSCH
WARNUNG: Anschluss des Steckers mit dem Erdungskontakt an eine nicht geerdete Steckdose kann zur Gefahr
eines Stromschlages führen.
Ziehen Sie einen qualifizierten Elektriker zu Räte, falls Ihnen die Anweisungen zur Erdung unklar sind oder beim
Zweifel an sicherer Erdung des Gerätes.
• Das Mikrowellengerät ist mit einem kurzen Netzkabel ausgestattet, um dessen Verwirrung zu vermeiden.
• Wenn eine Verlängerung des Kabels erforderlich ist, verwenden Sie nur eine 3-Leiter-Verlängerung mit dem
Erdungskontakt im Netzstecker und in der Steckdose.
• Die am Netzkabel des Gerätes angegebene Querschnittmarkierung soll mit der Angabe an der Verlängerung
übereinstimmen.
• Die Verlängerung ist so zu verlegen, dass Durchhängen des Kabels am Tischrand auszuschließen ist, wo es
Kinder ziehen können, und dass es nicht zu betreten ist.
Mikrowellengeeignetes Geschirr
VORSICHT!
• Dicht verschlossene Behälter können im Mikrowellengerötes eine Explosionsgefahr darstellen.
• Die verschlossenen Behälter sind zu öffnen, bei Plastiktüten sind Öffnungen für Dampfaustritt zu machen,
bevor sie ins Gerät gelegt sind.
• Wenn Sie Zweifel haben, ob das Geschirr im Gerät einzusetzen ist, nehmen Sie eine Prüfung vor.
Prüfung des Geschirrs vor dem Gebrauch im Gerät:
• Stellen Sie zu prüfendes Geschirr in den Garraum (z.B. einen Teller) mit einem Glas mit Kaltwasser.
• Schalten Sie das Gerät bei der Maximalleistung ein und stellen Sie eine Garzeit max. 1 Minute ein.
• Berühren Sie vorsichtig das zu prüfende Geschirr. Wenn das Geschirr warm geworden und Wasser im Glass
kalt geblieben ist, ist dieses Geschirr im Mikrowellengerät nicht zu verwenden.
• Stellen Sie die Prüfzeit nicht über 1 Minute ein.
Materialien und Geschirr, die für die Nutzung in den Mikrowellenöfen brauchbar sind
Aluminiumfolie die Folie kann man nur in der Betriebsart der Arbeit des Grills benutzen. Die
Entfernung zwis chen der Folie und den Wänden des Mikrowellenofens soll nicht
weniger als 2,5 cm betragen. Die kleinen Stückchen der Folie kann man für das
Bedecken der feinen Fleischstückchen oder des Geflügels benutzen, um deren
Verbraten zu meiden. In der Mikrowellenbetriebsart, wenn die Folie allzu nahe an
den Wänden des Ofens liegt, kann Funkenbildung, Verbrennen des abschir
menden Gitters an der Tür und Funktionsausfall des Ofens geschehen. In diesem
Fall verlieren Sie das Recht der Verwirklichung der kostenlosen Garantiewartung
und der Reparatur.
Geschirr fürs Braten Folgen Sie den Hinweisen des Produzenten. Der Boden des Geschirrs fürs Braten
soll um 5 mm dicker sein, als der bei dem drehenden Glasaufnahmeteller. Der
Missbrauch des Geschirrs fürs Braten kann zur Entstehung der Risse im Geschirr
selbst und im drehenden Glasaufnahmeteller führen.
Tafelgeschirr Nur das, das entsprechende Markierung hat. Folgen Sie den Hinweisen des
Produzenten des Geschirres. Verwenden Sie das Geschirr mit Rissen oder
Absplitterungen nicht.
Glasbehälter Nur die Behälter, die aus hitzebeständigem Glas hergestellt sind. Überzeugen Sie
sich im Fehlen der Metallgeschirrrandbänder. Verwenden Sie die Behälter mit
Rissen oder Absplitterungen nicht.
Glasgeschirr Nur das Geschirr, das aus hitzebeständigem Glas hergestellt ist. Überzeugen Sie
sich im Fehlen der Metallgeschirrrandbänder. Verwenden Sie das Geschirr mit
Rissen oder Absplitterungen nicht.
Prozess der Zubereitung Folgen Sie den Hinweisen des Produzenten. Verschließen Sie die
in den Mikrowellenöfen Säcke unter Verwendung von Metallverdrehungen oder Verspannungen nicht.
In mit der Nutzung Spezieller den Säcken muss man einige Öffnungen für den Dampfaustritt machen.
Säcke
Papierteller und –tassen verwenden Sie nur für kurzzeitige Zubereitung / Aufwärmen. Lassen Sie den
Mikrowellenofen ohne Beaufsichtigung während der Zubereitung / des
Aufwärmens der Produkte in solchem Geschirr nicht.
Papierhandtücher damit kann man die zubereitenden Produkte für Verwahrung der Wärme darin und
für Vorbeugung des Fettspritzens bedecken. Verwenden Sie nur bei ständiger
Kontrolle und nur für kurzzeitige Zubereitung / Aufwärmen.
14
1699.indd 141699.indd 14 12.03.2007 16:51:4312.03.2007 16:51:43
DEUTSCH
Pergamentpapier verwenden Sie zwecks Vorbeugung des Fettspritzens oder als Umschlag.
Plaststoff Nur jene Erzeugnisse aus Plaststoff, die entsprechende Markierung “ Ist für
Mikrowellenöfen brauchbar ” haben. Folgen Sie den Hinweisen des Produzenten.
Einige Plastbehälter können als Ergebnis der Erwärmung der darin enthaltenen
Produkte aufgeweicht werden. Dicht zugemachte Plastiktüten muss man durch
stechen oder durchschneiden, wie es auf Verpackungen selbst gezeigt ist.
Plastumschlag nur jene Erzeugnisse aus Plaststoff, die entsprechende Markierung haben. Man
kann die zubereitenden Produkte zwecks Sicherung darin der Feuchtigkeit
bedecken.
Wachspapier Verwenden Sie für Vorbeugung des Fettspritzens und auch für die Sicherung der
Feuchtigkeit.
Materialien und Geschirr, die für die Nutzung in den Mikrowellenöfen nicht brauchbar sind
Aluminiumtabletts können Funkenbildung bedingen. Benutzen Sie das Geschirr, das speziell für die
Nutzung in den Mikrowellenöfen bestimmt ist.
Papptasse mit Metallgriff Benutzen Sie das Geschirr, das speziell für die Nutzung in den Mikrowellenöfen
bestimmt ist.
Metallgeschirr oder Geschirr Metall schirmt die Energie der Mikrowellen ab. Das Metallgeschirrrandband mit
Metallgeschirrrandband kann die Funkenbildung bedingen.
Metallverdrehungen können Funkenbildung, und auch das Entzünden der Verpackung während der
Zubereitung/ Aufwärmung der Produkte bedingen.
Papierbeutel können das Entzünden in den Mikrowellenöfen bedingen.
Seife die Seife kann schmelzen und Verschmutzung der Arbeitskammer des
Mikrowellenofens bedin gen.
Holz Das Holzgeschirr kann austrocknen, Risse bekommen und sich entzünden.
MONTAGE DER MIKROWELLE
Bezeichnung der Bestandteile und des Zubehörs
a) Steuerungsplatte
b) Stütze des Glastellers
c) Rollenring
d) Glasteller
e) Sichtfenster
f) Mikrowellentür
g) Ausfallsperrsystem fürs Abschalten der Stromversorgung beim Türöffnen während des Betriebs der Mikrowel-
le.
h) Grillgitter. Wird nur im Grillbetrieb benutzt.
Bildschirm
1. Temperatur in der Betriebsstufe «KONVEKTION»
2. Temperaturpiktogramm
3. Piktogramm des Produktgewichtes
4. Automatische Zubereitungspiktogramme
5. Digitale Anzeige
6. Blinkende Teilungspunkte
7. Piktogramm der Sperrbetriebsstufe
8. Piktogramm der Betriebsstufe «AUFTAUEN NACH GEWICHT/ZEIT»
9. Piktogramm der Betriebsstufe «GRILL/KOMB.»
10. Piktogramm der Betriebsstufe «KONVEKTION»
11. Piktogramm der Betriebsstufe «MIKROWELLEN»
12. Piktogramm der Betriebsstufe der automatischen Zubereitung
Spieß
13. Verbindungsmuffe
14. Sperren
15. Vorrichtung zum Abnehmen des Spießes
Beseitigen Sie die Verpackungsmaterialien und Zubehör aus der Arbeitskammer der Mikrowelle. Überprüfen Sie
15
1699.indd 151699.indd 15 12.03.2007 16:51:4312.03.2007 16:51:43

DEUTSCH
die Mikrowelle auf Deformierungen. Achten Sie besonders auf den Stand der Tür der Mikrowelle. Wenn Sie Scha-
den feststellen, montieren und schalten Sie die Mikrowelle nicht.
Schutzbeschichtung
Gehäuse: Wenn die Schutzfolie vorhanden ist, beseitigen Sie diese von der Gehäuseoberfläche.
Entfernen Sie nicht die hellgraue Glimmerplatte im Inneren der Arbeitskammer, sie dient dem Schutz des
Magnetrons.
AUFSTELLUNG DES ROTIERENDEN GLASTELLERS
1. Setzen Sie die Stütze des rotierenden Glastellers (b) in die Öffnung ein, die sich im Boden der Arbeitskammer
befindet.
2. Setzen Sie den Rollenring (с) am Boden der Arbeitskammer auf.
3. Setzen Sie den Glasteller (d) ein, achten Sie darauf, dass die Rippen darauf mit den Öffnungen der Stütze zu-
sammenpassen.
Setzen Sie den Glasteller nie mit dem Unterteil nach oben. Verhindern Sie nicht die Rotationen des Glastellers
während des Betriebs der Mikrowelle.
Während der Zubereitung der Produkte benutzen Sie immer den Glasteller und die rotierende Stütze.
Produkte und Geschirr für die Zubereitung muss man immer ausschließlich auf den Glasteller aufstellen.
Der Glasteller kann sich in/gegen Uhrzeigerichtung drehen. Das ist in Ordnung.
Falls Spalten oder Spaltflächen am Glasteller auftreten, ersetzen Sie ihn sofort.
Installation
1. Für die Aufstellung wählen Sie eine gerade und beständige Oberfläche und sichern Sie gute Lüftung der Mikro-
welle.
Minimaler Abstand von jeder Wand oder Wandung bis zu den Gehäusewänden muss 7-8 cm betra-
gen.
(1) Minimaler freier Abstand von den Oberflächen des Deckels der Mikrowelle muss nicht weniger als 30
cm betragen.
(2) Es wird nicht gestattet, die Stützfüße des Bodens der Mikrowelle abzunehmen.
(3) Es ist nicht gestattet, die Ventilierungsöffnungen am Gehäuse der Mikrowelle zu verschleißen.
(4) Die Mikrowelle muss weit weg von den Fernseh- und Radioempfänger aufgestellt werden, um Störungen beim
Empfang der Fernseh- und Radiosignale zu verhindern.
2. Vor dem Anschluss der Mikrowelle vergewissern Sie sich, dass die Betriebsspannung und die gespeiste Leis-
tung den Parametern des Elektronetzes entsprechen. Schließen Sie die Mikrowelle an die Netzsteckdose, die
über eine sichere Erdung verfügt.
WARNUNG: Es ist nicht gestattet, die Mikrowelle auf die Oberfläche mit Unterheizung (Küchenherd) und andere
Wärmequellen aufzustellen.
Falls die Mikrowelle Fehler infolge falschen Betriebs aufweist, erlischt kostenlose Garantiewartungs-
und -Reparaturberechtigung.
Während des Betriebs kann sich die Oberfläche der Mikrowelle stark erhitzen. Vermeiden Sie den Kon-
takt der Haut mit der heißen Oberfläche der Mikrowelle, um Brandwunden zu vermeiden.
BEDIENUNG
Betrieb der Mikrowelle und ihre Funktionen
1.Zeiteinstellungen.
Schalten Sie die Mikrowelle an. Am Bildschirm erscheint 0:00 und erklingt ein Tonsignal.
• Drücken Sie die Taste «UHR/VOREINSTELLUNGEN» ein oder zwei Mal, um den Format der aktuellen Zeit für 24
oder 12 Stunden zu wählen.
• Drehen Sie den Regler «Zeit•Gewicht•Automenü» in/gegen Uhrzeigerichtung, stellen Sie «Stunden» im Be-
reich von 0 bis 12, oder von 0 bis 24 ein, abhängig von dem Gewählten Zeitformat;
• Drücken Sie die Taste «UHR/VOREINSTELLUNGEN». Die Zahlen, die Minuten bedeuten, fangen an zu blin-
ken.
• Drehen Sie den Regler «Zeit•Gewicht•Automenü» in/gegen Uhrzeigerichtung, stellen Sie «Minuten» im Be-
reich von 0 bis 59;
• Drücken Sie die Taste «UHR/VOREINSTELLUNGEN» für die endgültige Bestätigung, dabei erscheint am Bild-
schirm die eingestellte Zeit und blinken Trennpunkte (6), das bedeutet die Richtigkeit der durchgeführten Ein-
stellungen.
16
1699.indd 161699.indd 16 12.03.2007 16:51:4312.03.2007 16:51:43

DEUTSCH
Anmerkung: Wenn Sie während der Eingabe die Taste «STOPP/VERWERFEN» drücken oder während 1 5 Minu-
ten gar keine Tasten drücken, kehrt der Indikator zu seinen ursprünglichen Werten zurück.
2. Zubereitung in der Mikrowelle
• Drücken Sie die Taste «MIKROWELLEN». am Bildschirm erscheinen die blinkende Überschrift „P100“ und das
Piktogramm der Ausstrahlung der Mikrowellen (11).
• Durch die wiederholten Betätigungen der Taste «MIKROWELLEN» oder durch die Drehungen am Regler
«Zeit•Gewicht•Automenü» in/gegen Uhrzeigerichtung wählen Sie die notwendige Leistung der Ausstrahlung
der Mikrowellen (sehen Sie die Tabelle).
• Drücken Sie die Taste «START/+30 SEK/BESTÄTIGEN» für die Bestätigung der Wahl.
• Drehen Sie den Regler «Zeit•Gewicht•Automenü» in/gegen Uhrzeigerichtung, stellen Sie die Zeit der Zube-
reitung (maximale Zeit der Zubereitung – 95 Minuten).
• Drücken Sie die Taste «START/+30 SEK/BESTÄTIGEN», um den Zubereitungsprozess zu starten. am Bild-
schirm erscheint die verbleibende Zeit der Zubereitung und das Piktogramm der Ausstrahlung der Mikrowellen
(11) blinkt.
Bildschirmanzeige der Leistungsgrade der Ausstrahlung der Mikrowellen.
Leistungsgrad
100% 80% 50% 30% 10%
Anzeige am Bildschirm
P-100 P-80 P-50 P-30 P-10
Anmerkung:
maximale Zeit der Zubereitung der Produkte beträgt 95 Minuten.
Schritte der Zeiteinstellung:
von 0 bis 1 Minuten - 5 Sek.
von 1 bis 5 Minuten -10 Sek.
von 5 bis 10 Minuten - 30 Sek.
von 10 bis 30 Minuten -1 Minuten
von 30 bis 95 Minuten - 5 Minuten
Nachdem die Zubereitungszeit abgelaufen ist, schaltet die Mikrowelle ab und es ertönen 5 Tonsignale.
3. Die Funktionen der Betriebsstufe «Grill»
• Drücken Sie die Taste «GRILL/KOMB.». Am Bildschirm erscheint das Piktogramm des Grills (9) und die blinken-
de Anzeige des Grillbetriebs G-1.
• Drücken Sie die Taste «START/+30 SEK/BESTÄTIGEN» für die Bestätigung der Wahl.
• Drehen Sie den Regler «Zeit•Gewicht•Automenü» in/gegen Uhrzeigerichtung stellen Sie die Zeit der Zuberei-
tung (maximale Zeit der Zubereitung – 95 Minuten).
• Drücken Sie die Taste «START/+30 SEK/BESTÄTIGEN», um den Zubereitungsprozess zu starten. Im Grillbe-
trieb G-1 erfolgt am Bildschirm der Rücklauf der verbleibenden Zubereitungszeit und blinkt das Piktogramm
(9).
• Im Betrieb G-1 – ist das Heizelement des Grills im 100%-tigen Einsatz.
Anmerkung: Während der Zubereitung mit Anwendung der Funktion Grill (G-1) funktioniert nur ein Heizelement
des Grills. Wenn die Hälfte der eingestellten Zeit abgelaufen ist, erklingen zwei Tonsignale, in diesem Moment
können Sie Produkte umdrehen, die sich in der Arbeitskammer der Mikrowelle befinden.
4. Betriebsstufe der kombinierten Zubereitung
• Drücken Sie die Taste «GRILL/KOMB.». Am Bildschirm erscheint das Piktogramm des Grills (9) und die blinken-
de Anzeige des Grillbetriebs G-1.
• Durch die wiederholten Betätigungen der Taste «GRILL/KOMB.» oder durch die Drehung des Griffs
«Zeit•Gewicht•Automenü» in/gegen Uhrzeigerichtung wählen Sie eine der Funktionen der kombinierten Zu-
bereitung «C-1», «C-2», «C-3», «C-4».
• Drücken Sie die Taste «START/+30 SEK/BESTÄTIGEN» für die Bestätigung der Wahl.
• Drehen Sie den Regler «Zeit•Gewicht•Automenü» in/gegen Uhrzeigerichtung stellen Sie die Zeit der Zuberei-
tung (maximale Zeit der Zubereitung – 95 Minuten) ein.
• Drücken Sie die Taste «START/+30 SEK/BESTÄTIGEN», um den Zubereitungsprozess zu starten.
Im Betrieb der kombinierten Zubereitung erfolgt am Bildschirm der Rücklauf der verbleibenden Zubereitungs-
zeit, und die Piktogramme, die der gewählten Betriebsstufe entsprechen, werden blinken.
- Die Betriebsstufe der kombinierten Zubereitung «C-1», die Zubereitung erfolgt im Mikrowellenbetrieb und im
Konvektionsbetrieb, dabei blinken die Piktogramme (10, 11).
17
1699.indd 171699.indd 17 12.03.2007 16:51:4312.03.2007 16:51:43

DEUTSCH
- Die Betriebsstufe der kombinierten Zubereitung «C-2», die Zubereitung erfolgt im Mikrowellenbetrieb und im
Grillbetrieb, dabei blinken die Piktogramme (9, 11).
- Die Betriebsstufe der kombinierten Zubereitung «C-3», die Zubereitung erfolgt im Konvektionsbetrieb und im
Grillbetrieb, dabei blinken die Piktogramme (9, 10).
- Die Betriebsstufe der kombinierten Zubereitung «C-4», die Zubereitung erfolgt im Mikrowellenbetrieb und im
Konvektionsbetrieb und im Grillbetrieb, dabei blinken die Piktogramme (9, 10, 11).
5. Betriebsstufe Konvektion (ohne Vorheizung).
• Drücken Sie die Taste «KONVEKTION», am Bildschirm blinkt die Temperatur 150°C und erscheint das Pikto-
gramm der Betriebsstufe der Konvektion (10).
Durch die wiederholten Betätigungen der Taste «Konvektion» oder durch die Drehungen des Reglers
«Zeit•Gewicht•Automenü» in/gegen Uhrzeigerichtung stellen Sie die Betriebstemperatur im Konvektionsbe-
trieb (von 150°C bis 240°C) ein.
• Drücken Sie die Taste «START/+30 SEK/BESTÄTIGEN» für die Bestätigung der Wahl.
• Drehen Sie den Regler «Zeit•Gewicht•Automenü» in/gegen Uhrzeigerichtung stellen Sie die Zeit der Zuberei-
tung (maximale Zeit der Zubereitung – 95 Minuten) ein.
• Drücken Sie die Taste «START/+30 SEK/BESTÄTIGEN», um die Zubereitung zu starten. Im Betrieb der Kon-
vektion blinkt am Bildschirm das Piktogramm der Betriebsstufe der Konvektion (10) und der Temperatur (1).
Anmerkung: Die Mikrowelle verfügt über die Kontrollfunktion der eingegebenen Zubereitungstemperatur für
Produkte im Konvektionsbetrieb: - Während der Heizung blinkt das Piktogramm der eingegebenen Temperatur
(1), wenn die Temperatur erreicht wurde, leuchtet das Piktogramm (1) ständig.
6. Betriebsstufe der Konvektion (mit der Vorheizung).
Die Zubereitung im Konvektionsbetrieb mit der Vorheizung erlaubt es Ihnen, Produkte wie in einem traditionellen
Ofen zuzubereiten.
• Drücken Sie die Taste «Konvektion», am Bildschirm blinkt die Temperatur 150°C und erscheint das Piktogramm
der Betriebsstufe der Konvektion (10).
• Durch die wiederholten Betätigungen der Taste «Konvektion» oder durch die Drehungen des Reglers
«Zeit•Gewicht•Automenü» in/gegen Uhrzeigerichtung stellen Sie die Betriebstemperatur im Konvektionsbe-
trieb (von 150°C bis 240°C) ein.
• Drücken Sie die Taste «START/+30 SEK/BESTÄTIGEN» für die Bestätigung der Wahl.
• Noch ein Mal drücken Sie die Taste «START/+30 SEK/BESTÄTIGEN», um die Vorheizung anzuschalten, dabei
blinken die Piktogrammen (1, 10), wenn die Temperatur die Eingabe erreicht, erklingt ein Tonsignal, die Anzeige
am Bildschirm blinkt.
• Öffnen Sie die Mikrowellentür und platzieren Sie die Produkte in der Betriebskammer.
• Drehen Sie den Regler «Zeit•Gewicht•Automenü» in/gegen Uhrzeigerichtung, stellen Sie die Zeit der Zube-
reitung (maximale Zeit der Zubereitung – 95 Minuten) ein.
• Drücken Sie die Taste «START/+30 SEK/BESTÄTIGEN», um die Mikrowelle anzuschalten.
Wenn die eingegebene Betriebszeit abgelaufen ist, schaltet die Mikrowelle ab und erklingen fünf Tonsignale.
7. Benutzung des Spießes
Achtung:
- Die Benutzung des Spießes ist nur im Betrieb «GRILL» oder «KONVEKTION» oder im Betrieb der kombi-
nierten Zubereitung «C-3» zugelassen.
• Schrauben Sie die rechte Klemme und nehmen Sie diese ab.
• Spießen Sie das Huhn auf.
• Setzen Sie die Klemme auf den Spieß auf und befestigen Sie dadurch das Huhn.
• Setzen Sie den Spieß in die Mikrowelle ein:
- Setzen Sie die Spießmuffe (13) auf die Achse des Rotationsantriebs auf.
- Die gegenüberliegenden Seite des Spießes stellen Sie in die Leitkurve bis zum Anschlag und setzen Sie diese mit
etwas Kraft in die Ritze hinein.
Um den Spieß anzunehmen benutzen Sie die Vorrichtung (15):
- Halten Sie die Vorrichtung am Griff (15) und führen Sie diese unter den Spieß
- Zuerst heben Sie die rechte Seite des Spießes nach oben
- Führen Sie die rechte Seite des Spießes außerhalb der Richtkurve
- Nehmen Sie die Spießmuffe (13) von der Achse des Rotationsantrieb ab
Befolgen Sie besondere Vorsichtsmaßnahmen, wenn Sie den Spieß aus der Mikrowelle entnehmen, um die
Gefahr der Brandwunden zu vermeiden.
18
1699.indd 181699.indd 18 12.03.2007 16:51:4412.03.2007 16:51:44

DEUTSCH
8. Produktauftauen
Auftauen nach dem Gewicht
• Drücken Sie die Taste „AUFTAU NACH DEM GEWICHT/NACH DER ZEIT“. am Bildschirm erscheinen «dE F1»
und die Piktogramme (8, 11).
• Drehen Sie den Regler «Zeit•Gewicht•Automenü» in/gegen Uhrzeigerichtung stellen Sie das Gewicht des
aufzutauenden Produktes ein (von 100 g bis 2 kg).
Einstellungsschritt von 100 g bis 1 kg – 10 g, von 1 kg bis 2 kg –100 g.
• Drücken Sie die Taste „START/+30 SEK/BESTÄTIGEN“, um den Auftauprozess zu starten. Die Piktogramme
(8, 11) blinken und Rücklauf der verbleibenden Zeit läuft
Auftauen nach der Zeit
• Drücken Sie die Taste «AUFTAU NACH DEM GEWICHT/NACH DER ZEIT» zwei Mal. Am Bildschirm erscheinen
«dE F2» und die Piktogramme (8, 11)
• Drehen Sie den Regler «Zeit•Gewicht•Automenü» in/gegen Uhrzeigerichtung stellen Sie die Auftauzeit der
Produkte ein (von 5 Sek. bis 95 Minuten).
• Drücken Sie die Taste «START/+30 SEK/BESTÄTIGEN», um den Auftauprozess zu starten. Die Piktogramme
(8, 11) blinken und Rücklauf der verbleibenden Zeit läuft.
9. Voreinstellungen der Zubereitungszeit
Vor der Eingabe des Anfangszeitpunktes für den Kochprozess überprüfen Sie die Richtigkeit der Einstellungen
für aktuelle Zeit.
• Drücken Sie die Taste «MIKROWELLEN» und stellen Sie die gewünschte Kochleistung ein.
• Drücken Sie die Taste «START/+30 SEK/BESTÄTIGEN» für die Bestätigung.
• Drehen Sie den Regler «Zeit•Gewicht•Automenü» in/gegen Uhrzeigerichtung stellen Sie die Zeit der Zuberei-
tung (maximale Zeit der Zubereitung – 95 Minuten) ein.
• Drücken Sie die Taste «UHR/VOREINSTELLUNGEN»
• Drehen Sie den Regler «Zeit•Gewicht•Automenü» in/gegen Uhrzeigerichtung stellen Sie den Zeitpunkt des
Kochanfangs mit «Stunden» ein.
• Drücken Sie die Taste «UHR/VOREINSTELLUNGEN»
• Drehen Sie den Regler «Zeit•Gewicht•Automenü» in/gegen Uhrzeigerichtung stellen Sie den Zeitpunkt des
Kochanfangs mit «Minuten» ein.
• Drücken Sie die Taste «START/+30 SEK/BESTÄTIGEN» für die Bestätigung.
Wenn die aktuelle Zeit der eingegebenen Zeit zum Start des Kochprozesses entspricht, schaltet die Mikrowelle
an.
Um die Zeitangabe zum Kochstart zu überprüfen, drücken Sie die Taste «UHR/VOREINSTELLUNGEN», am Bild-
schirm erscheint die Zeit des Kochstarts für drei Sekunden.
10. Schrittweise Zubereitung der Produkte
- Eine Zubereitung der Produkte in drei Schritten ist möglich.
- Bei der schrittweisen Zubereitung ist die Eingabe der Betriebsstufe «AUFTAU NACH DEM GEWICHT/NACH
DER ZEIT» erforderlich.
Beispiel:
Tauen Sie Produkte mit dem Gewicht 300 g auf/Fangen Sie mit der Zubereitung bei 50% der Leistung im Laufe
von 5 Minuten an/danach benutzen Sie den Grill im Laufe von 1 Minute.
• Drücken Sie die Taste «AUFTAU NACH DEM GEWICHT/NACH DER ZEIT». Am Bildschirm erscheint «dE F1»
und die Piktogramme (8, 11)
• Drehen Sie den Regler
«Zeit•Gewicht•Automenü» in/gegen Uhrzeigerichtung stellen Sie das Gewicht des
aufzutauenden Produktes 300 Gramm.
• Drücken Sie die Taste «MIKROWELLEN». Am Bildschirm erscheint die blinkende Überschrift „P100“ und Pikto-
gramm der Ausstrahlung der Mikrowellen (11).
• Durch die wiederholten Betätigungen der Taste «MIKROWELLEN» oder durch die Drehungen des Reglers
«Zeit•Gewicht•Automenü» in/gegen Uhrzeigerichtung wählen Sie die notwendige Leistung der Ausstrahlung
der Mikrowellen 50%.
• Drücken Sie die Taste «START/+30 SEK/BESTÄTIGEN» für die Bestätigung der Wahl.
• Drehen Sie den Regler «Zeit•Gewicht•Automenü» in/gegen Uhrzeigerichtung stellen Sie die Zeit der Zuberei-
tung 5 Minuten.
• Drücken Sie die Taste «GRILL/KOMB.». am Bildschirm erscheint das Piktogramm des Grills (9) und die blinken-
de Anzeige des Grillbetriebs G-1.
19
1699.indd 191699.indd 19 12.03.2007 16:51:4412.03.2007 16:51:44
DEUTSCH
• Drücken Sie die Taste «START/+30 SEK/BESTÄTIGEN» für die Bestätigung der Wahl.
• Drehen Sie den Regler «Zeit•Gewicht•Automenü» in/gegen Uhrzeigerichtung stellen Sie die Zeit der Zuberei-
tung für1 Minute ein.
• Drücken Sie die Taste «START/+30 SEK/BESTÄTIGEN», um den Zubereitungsprozess zu starten.
Während der Zeit der Zubereitung erscheinen am Bildschirm die Piktogramme der Betriebsstufen und die Be-
triebszeit für jeden Schritt der Zubereitung.
11. Schnelle Zubereitung
Im Betrieb der schnellen Zubereitung schaltet die Mikrowelle mit voller Leistung «Р-100» während der einge-
stellten Zeit an.
• Geben Sie Produkte in die Mikrowelle und schließen Sie die Tür.
• Drücken Sie die Taste «START/+30 SEK/BESTÄTIGEN», um den Zubereitungsprozess zu starten.
• Jede wiederholte Betätigung der Taste «START/+30 SEK/BESTÄTIGEN» verlängert die Zeit der schnellen Zu-
bereitung um 30 Sekunden (maximale Dauer beträgt 95 Minuten).
Anmerkung:
- Während des Betriebs der Mikrowelle in jeder Betriebsstufe kann man durch die Betätigung der Taste «START/
+30 SEK/BESTÄTIGEN» den Kochprozess um je 30 Sekunden verlängern.
Schnelle Eingabe der Zubereitungszeit
• Geben Sie Produkte in die Mikrowelle und schließen Sie die Tür.
• Drehen Sie den Regler «Zeit•Gewicht•Automenü» gegen Uhrzeigerichtung und stellen Sie die notwendige
Zeit der Zubereitung ein.
• Drücken Sie die Taste «START/+30 SEK/BESTÄTIGEN», um den Zubereitungsprozess zu starten.
Die Mikrowelle schaltet für die eingegebene Zeit bei maximaler Leistung «P-100» an.
12. Automatisches Menü
• Drehen Sie den Regler «Zeit•Gewicht•Automenü» in Uhrzeigerichtung und wählen Sie das notwendige Pro-
gramm der automatischen Zubereitung. Programme werden in folgender Reihenfolge gewählt: a – 1 - ERHIT-
ZUNG; a – 2 - KARTOFFEL; a – 3 –FLEISCH; a – 4 –GEMÜSE; a – 5 – FISCH; a – 6 - PASTA; a – 7 - SUPPE;
a – 8 - KUCHEN; a – 9 – PIZZA; a – 10 - HUHN.
• Drücken Sie die Taste «START/+30 SEK/BESTÄTIGEN» für die Bestätigung der gewählten Betriebsstufe der
automatischen Zubereitung.
•
Drehen Sie den Regler «Zeit•Gewicht•Automenü» in/gegen Uhrzeigerichtung und wählen Sie das notwendi-
ge Gewicht der Produkte oder die Anzahl der Portionen.
• Drücken Sie die Taste «START/+30 SEK/BESTÄTIGEN», um den Zubereitungsprozess zu starten. Am Bild-
schirm blinken die Piktogramme, die der Betriebsstufe und das Piktogramm der Betriebsstufe der automati-
schen Zubereitung (12) entsprechen, und dabei erfolgt der Rücklauf der verbleibenden Zubereitungszeit der
Produkte.
MENÜ GEWICHT (g)
150
250
A-1
350
ERHITZUNG
450
600
1
A-2
2
KARTOFFEL
3
150
A-3
300
FLEISCH
450
600
150
A-4
350
GEMÜSE
500
20
1699.indd 201699.indd 20 12.03.2007 16:51:4412.03.2007 16:51:44


