Vitek VT-3601: Гарантийный талон
Гарантийный талон: Vitek VT-3601
Оглавление
- Гарантийный талон
- УСЛОВИЯ ГАРАНТИЙНОГО ОБСЛУЖИВАНИЯ Условия гарантии:
- СПЕЦИФИКАЦИЯ
- Кнопка REPEAT. Кнопка SCN. Кнопка SHUFFLE. Кнопки выбора дорожек компактдиска. ОБСЛУЖИВАНИЕ КОМПАКТ*ДИСКОВ ЭКСПЛУАТАЦИОННЫЕ ОГРАНИЧЕНИЯ И ТЕКУЩИЙ РЕМОНТ
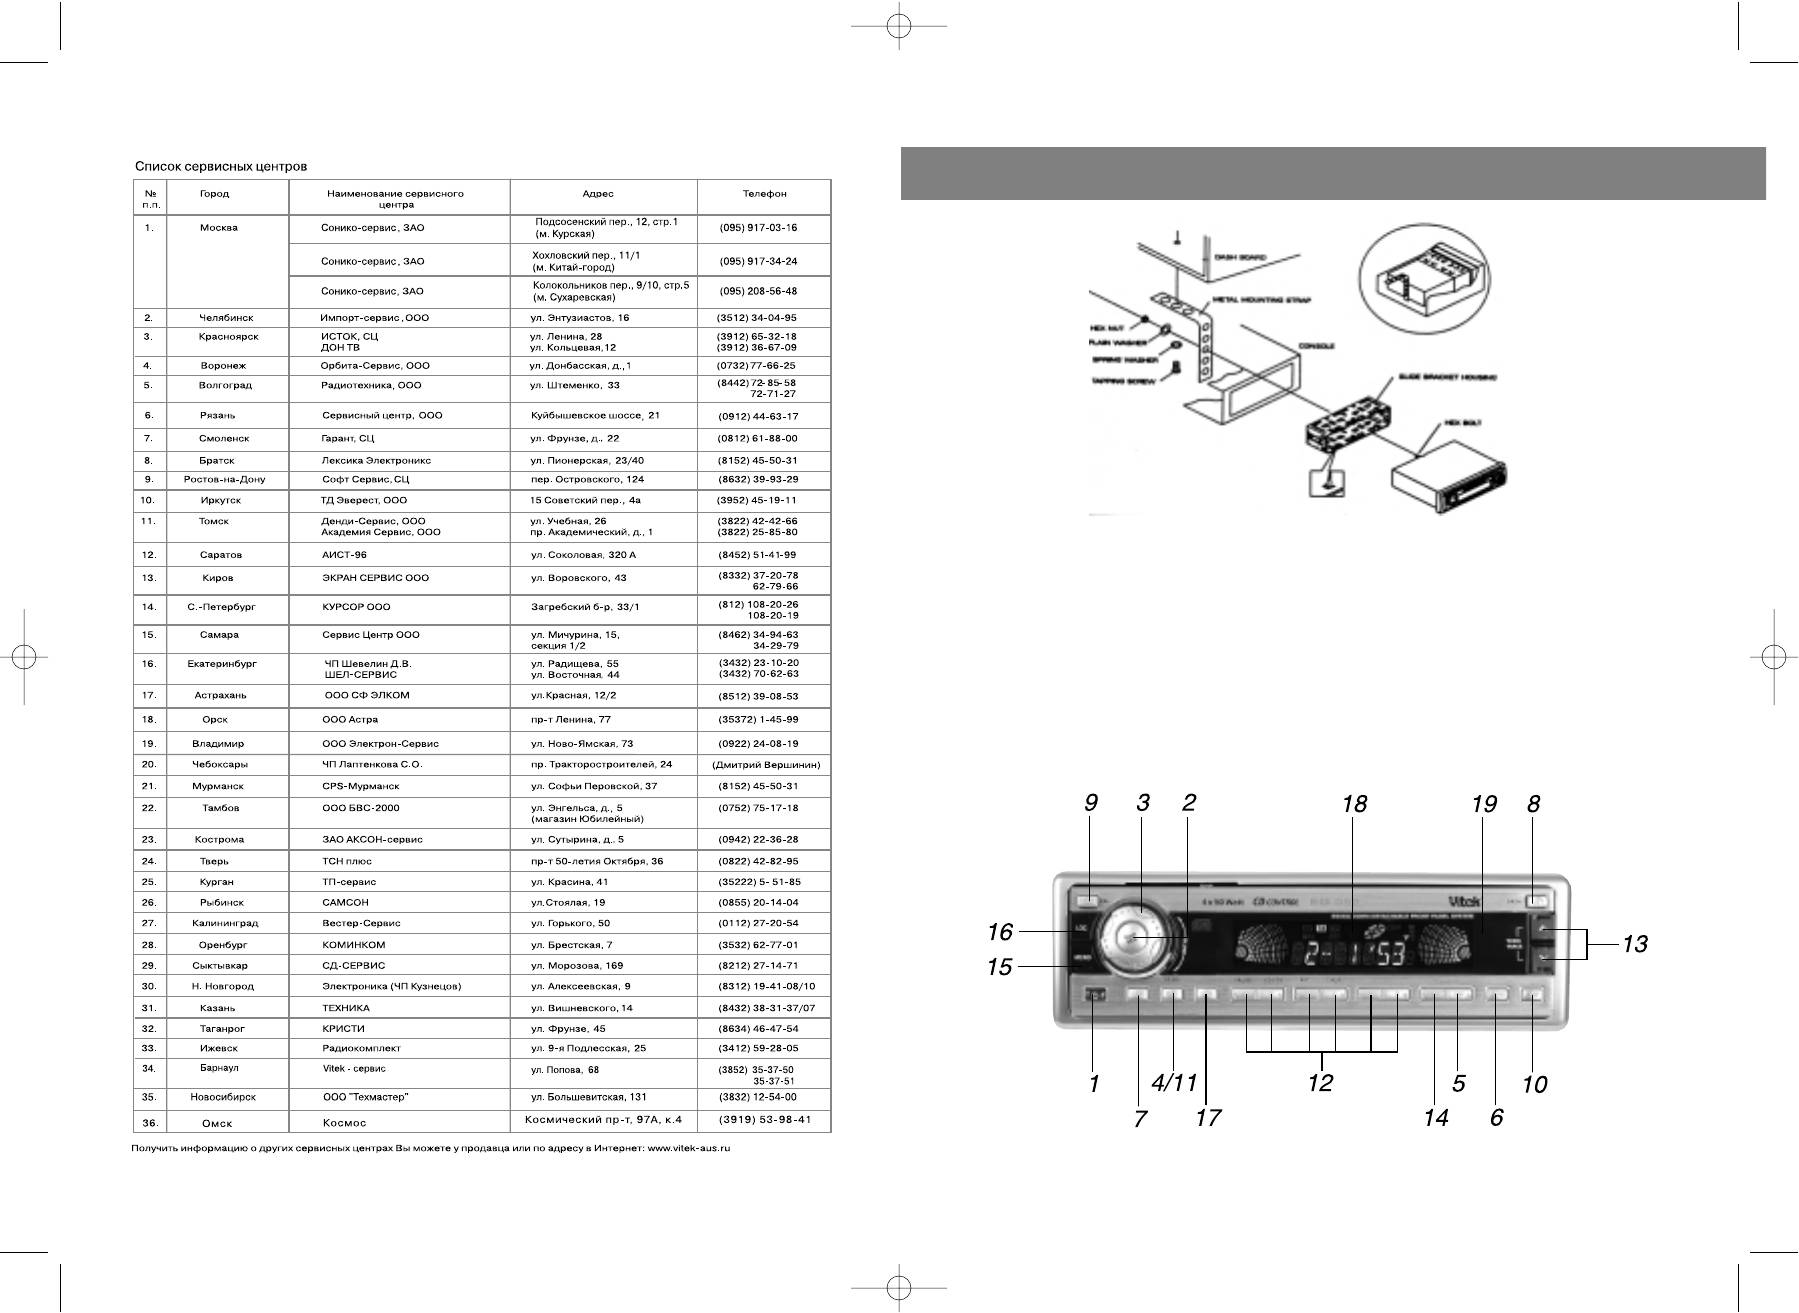
- (15) Переключатель FMстерео/моно. (16) Кнопка ограничения выбора станций с наиболее сильным сигналом. (17) Кнопка AMS. (18) Кнопка RESET. КОМПАКТ*ДИСК Отсек для загрузки компактдиска.
- (10). Кнопка режима дисплея. (11) Кнопка выбора диапазона BND. (12) Кнопки предварительной настройки радиостанций (М1 М6). (13) Кнопки настройки на радиостанции. (14) Кнопка сканирования радиостанций.
- НАЗНАЧЕНИЕ ФУНКЦИИ ПРОИГРЫВАТЕЛЯ (3). Кнопки увеличения/уменьшения громкости (4) Кнопка LOUD. (5) Кнопка P.EQ. ХРАНЕНИЕ, ТРАНСПОРТИРОВКА (6) Кнопка MUTE. (7) Кнопка MOD. УСТАНОВКА ПРОИГРЫВАТЕЛЯ (8) Кнопка, выдвигающая лицевую панель. (9) Кнопка REL.
- СЪЕМНАЯ ПЕРЕДНЯЯ ПАНЕЛЬ ПРОИГРЫВАТЕЛЯ Осторожно ЭЛЕМЕНТЫ УПРАВЛЕНИЯ И ИХ ФУНКЦИИ РАСПОЛОЖЕНИЕ ЭЛЕМЕНТОВ УПРАВЛЕНИЯ ПРОИГРЫВАТЕЛЕМ СХЕМА ПОДКЛЮЧЕНИЯ ПРОВОДОВ ПРОИГРЫВАТЕЛЯ
Гарантийный талон
ENGLISH
Сведения о покупке
HANDLING COMPACT DISCS
MOISTURE CONDENSATION
Модель:
On a rainy day or in a very damp area, moisture may condense on the lenses inside the unit.
Should this occur, the unit will not operate properly. In such a case, remove the disc and wait
Серийный №:
CCP 360100000
for about an hour until the moisture has evaporated.
Дата покупки:
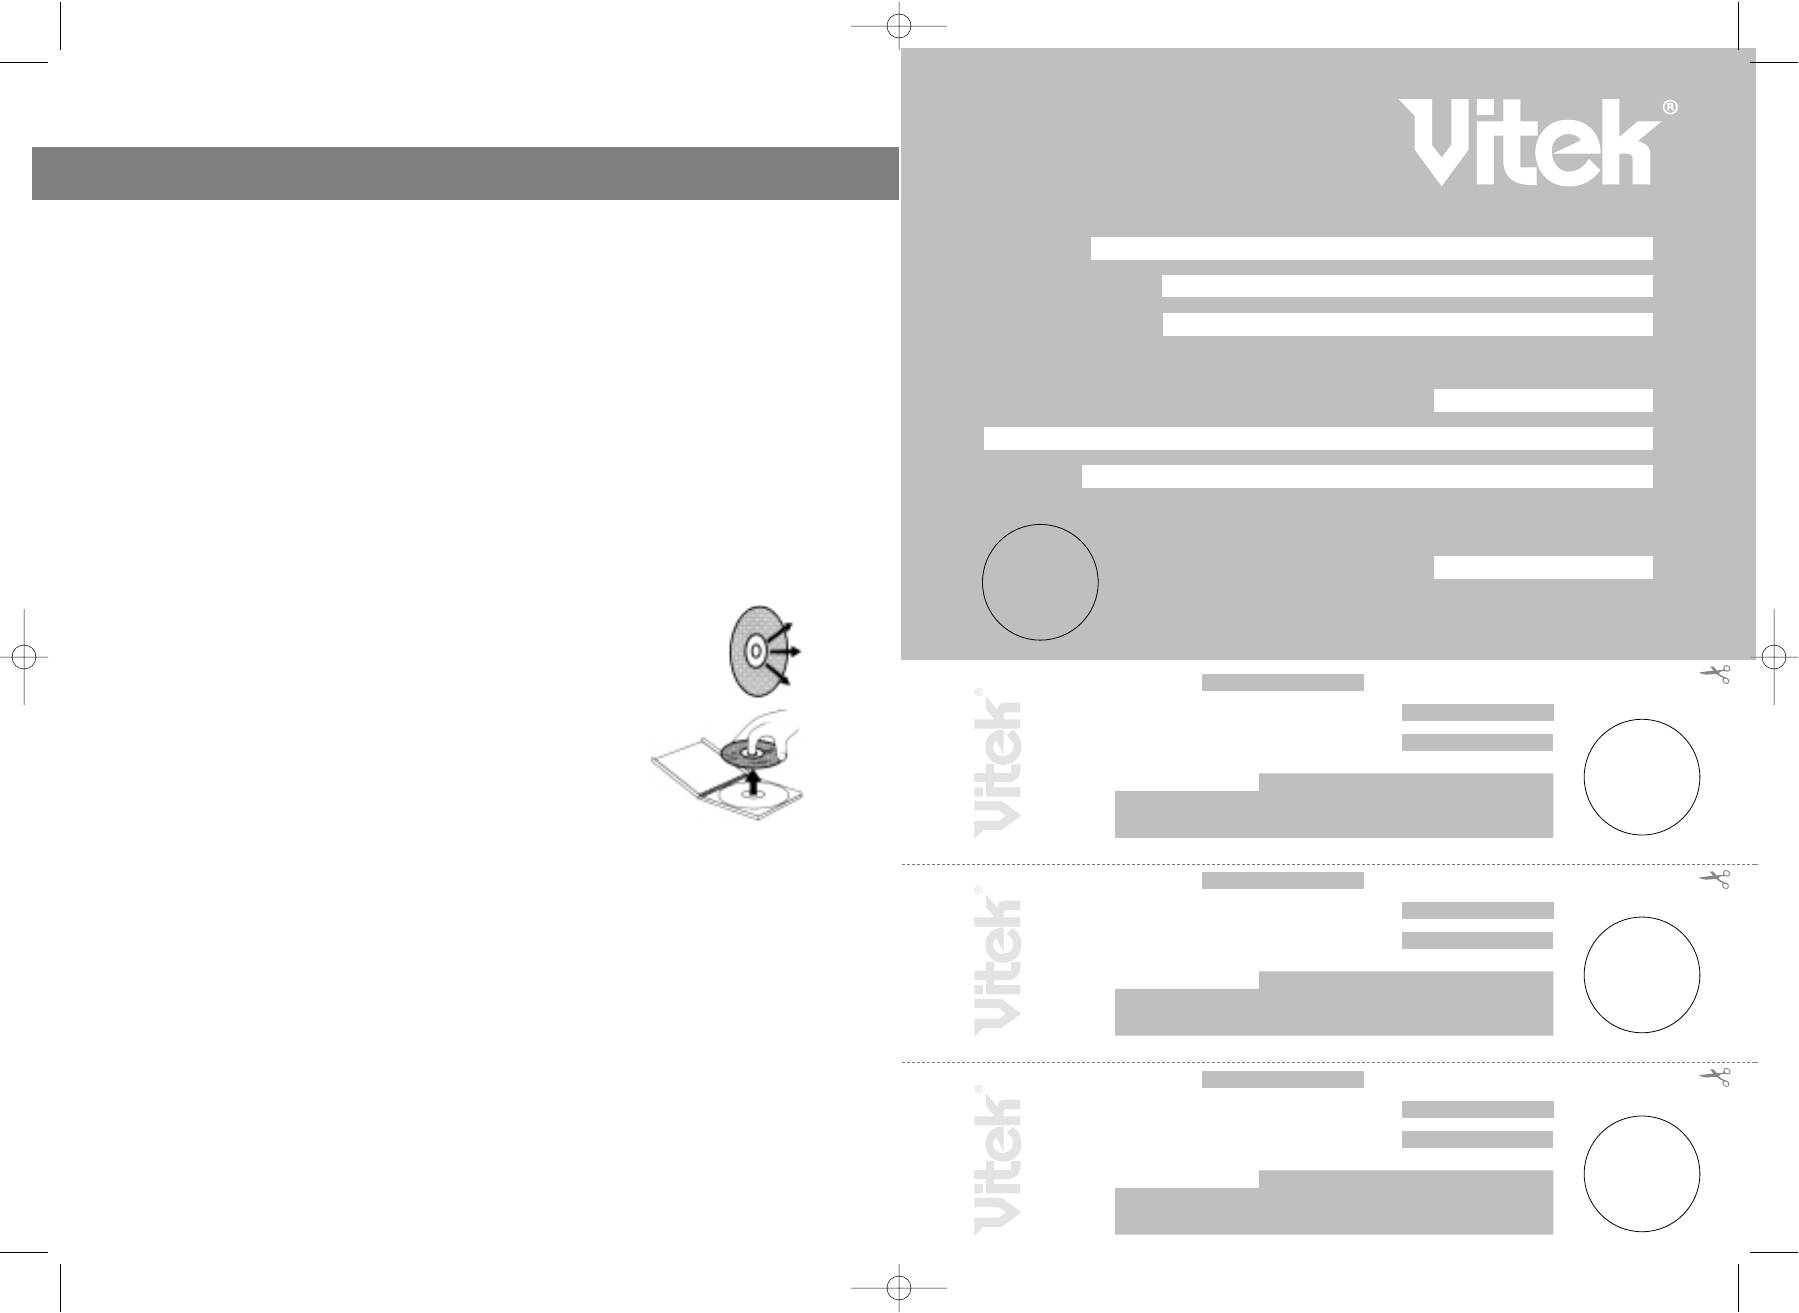
NOTES ON CDs
1. A dirty or defective disc may cause sound dropouts while playing. To enjoy optimum
Сведения о продавце
sound, handle the disc as follows. Handle the disc by its edge. To keep the disc clean, do
not touch the surface.
Название и адрес продающей организации
2. Do not stick paper or tape on the disc.
3. Do not expose the discs to direct sunlight or heat sources such as hot air&ducts, or leave
them in a car parked in direct sunlight where there can be a considerable rise in temper&
ature inside the car.
Телефон:
4. Before playing, clean the discs with an optional cleaning cloth. Wipe each disc from the
centre out.
Подтверждаю получение исправного изделия, с условиями гарантии ознакомлен
5. Do not use solvents such as benzine, thinner, commercially available cleaners, or antista&
tic spray intended for analog discs.
П
одпись покупателя
М.П.
NOTES ON DISCS
If you use the discs explained below, the sticky residue can cause
Внимание!
the CD to stop spinning and may cause malfunction or ruin your
Гарантийный талон действителен только при наличии печати
discs.
продающей организации
Do not use second&hand or rental CDs that have a sticky residue
on the surface (for example, from peeled&off stickers or from ink,
Модель: Серийный №:
CCP 360100000
or glue leaking from under the stickers).
Дата поступления в ремонт:
There are paste residue. Ink is sticky.
Do not use rental CDs with old labels that are beginning to peel off.
Дата выполнения ремонта:
Stickers that are beginning to peel away, leaving a sticky residue.
Do not use your CDs with labels or stickers attached.
Вид ремонта:
М.П.
Labels are attached.
Do Not Use Special Shape CDs
Купон №3
Be sure to use round shape CDs only for this unit and do not use any special shape CDs. Use
of special shape CDs may cause the unit to malfunction.
Be sure to use CDs with disc mark.
Модель: Серийный №:
CCP 360100000
INSTALLATION
Дата поступления в ремонт:
Precautions
Дата выполнения ремонта:
• Choose the mounting location carefully so that the unit will not interfere with the
normal driving functions of the driver.
Вид ремонта:
М.П.
• Avoid installing the unit where it would be subject to high temperatures, such as
from direct sunlight or hot air from the heater, or where it would be subject to
Купон №2
dust, dirt or excessive vibration.
• Use only the supplied mounting hardware for a safe and secure installation.
Модель: Серийный №:
CCP 360100000
• Be sure to remove the front panel before installing the unit.
Дата поступления в ремонт:
Дата выполнения ремонта:
2
Вид ремонта:
М.П.
Купон №1
3601-new.qxd 21.04.03 17:28 Page 4
ENGLISH
Unit Removal
• Remove the detachable front panel.
• Insert the supplied key into the slot as shown, and slide the unit out of the dash&
board while holding the trim plate.
• Slide the unit out of the dashboard.
• Remove the metal strap attached to the back of the unit.
• Remove the key from the slot.
• Disconnect all the wires of the unit and the antenna plug.
LOCATION AND FUNCTION OF CONTROLS
318
3601-new.qxd 21.04.03 17:28 Page 6


