Vitek VT-1216: КРАТКОВРЕМЕННАЯ ОБРАБОТКА ПАРОМ ВЕРТИКАЛЬНОЕ ОТПАРИВАНИЕ
КРАТКОВРЕМЕННАЯ ОБРАБОТКА ПАРОМ ВЕРТИКАЛЬНОЕ ОТПАРИВАНИЕ: Vitek VT-1216
Оглавление
- ИНСТРУКЦИЯ ПО ЭКСПЛУАТАЦИИ
- РУССКИЙ
- СПЕЦИФИКАЦИЯ
- УДАЛЕНИЕ ВОДЫ ИЗ РЕЗЕРВУАРА ЧИСТКА
- САМООЧИСТКА АВТОМАТИЧЕСКАЯ ЗАЩИТА ОТ НАКИПИ
- КРАТКОВРЕМЕННАЯ ОБРАБОТКА ПАРОМ ВЕРТИКАЛЬНОЕ ОТПАРИВАНИЕ
- УВЛАЖНЕНИЕ ГЛАЖЕНИЕ БЕЗ ПАРА ПАРОВОЕ ГЛАЖЕНИЕ
- ПЕРВОЕ ИСПОЛЬЗОВАНИЕ ТЕМПЕРАТУРА ГЛАЖЕНИЯ
- МЕРЫ ПРЕДОСТОРОЖНОСТИ НАПОЛНЕНИЕ УТЮГА ВОДОЙ
- ОПИСАНИЕ ЧАСТЕЙ УТЮГА
ENGLISH РУССКИЙ
DRY IRONING
Установите регулятор режимов отпаривания (4) в нужную позицию :
1. Connect the iron to a suitable mains supply outlet.
для интенсивного отпаривания
2. Turn the Temperature Dial in clockwise direction; select '•' (1 dot),
для слабого отпаривания
•
'••' (2 dots) or '•••' (3 dots) according to the recommendation of
для глаженья без пара
garment label.
После использования установите регулятор в положение:
3. Pilot light glows indicating the iron is switched on.
4. When the required temperature is reached; pilot light goes off. The
iron is ready for use.
КРАТКОВРЕМЕННАЯ ОБРАБОТКА ПАРОМ
5. Move the Temperature Dial in anticlockwise direction to 'Min'; the
Эта функция используется для
раз
iron is switched off.
глаживания глубоких складок.
6. Disconnect the iron from mains supply outlet.
Установите терморегулятор (9) в
7. When the iron gets cool completely, store it vertically in a safe place
позицию «
•••
».
Нажмите кнопку подачи струи
STEAM IRONING
пара (5).
1. Fill the iron as described in How To Fill Water.
Произойдет интенсивное
2. Connect the iron to a suitable mains supply outlet.
выделение пара из подошвы
3. Turn the Temperature Dial in clockwise direction to '•••' (3 dots)
утюга.
setting. (For optimum steam quality, do not use 1 dot or 2 dots setting
for steam ironing)
4. Pilot light glows indicating the iron is switched on.
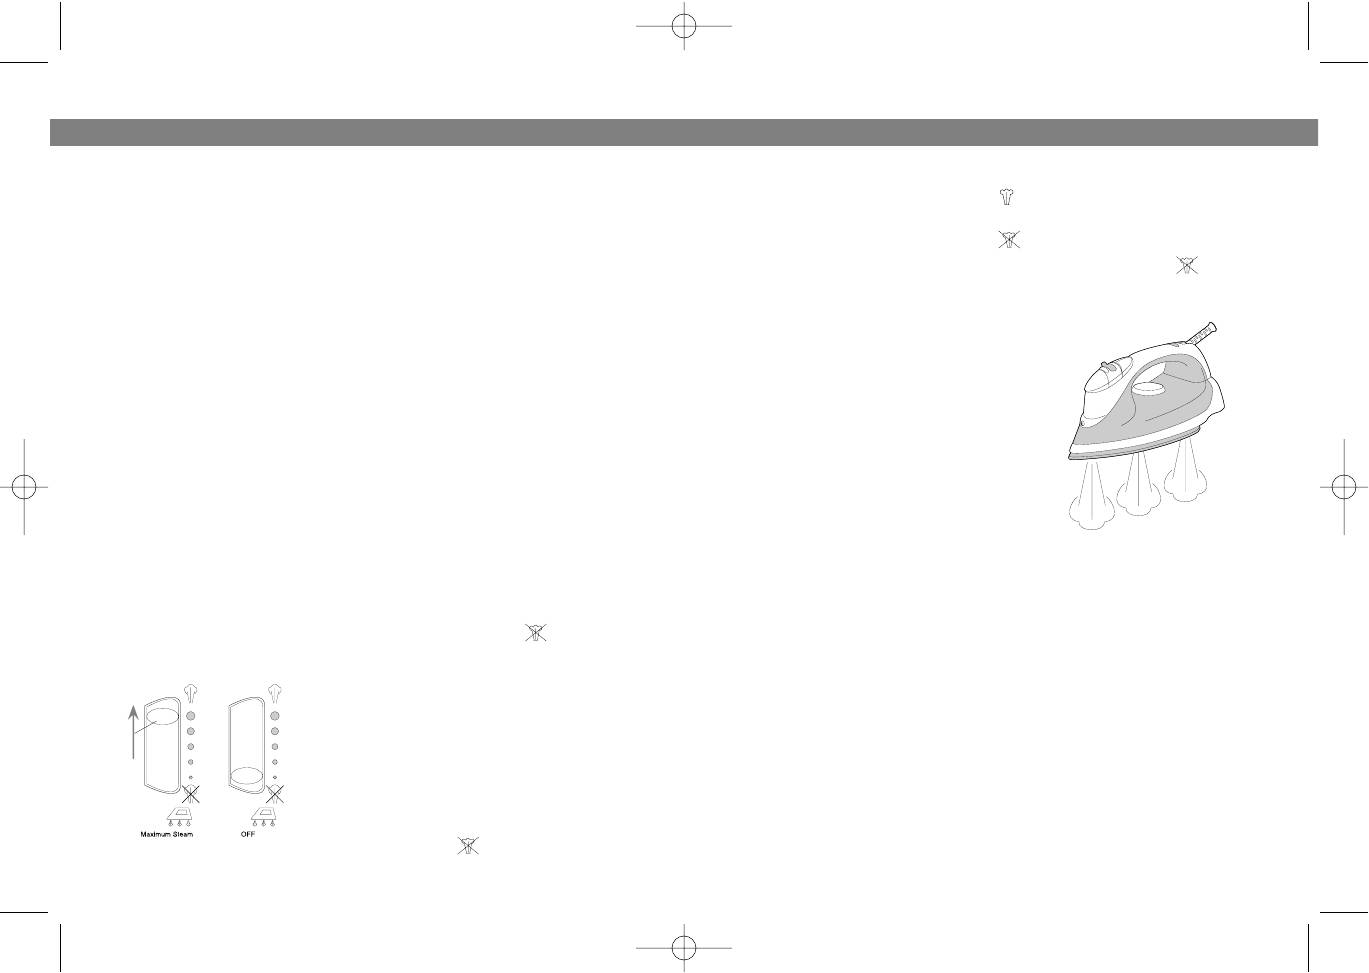
ВЕРТИКАЛЬНОЕ ОТПАРИВАНИЕ
5. Pilot light goes off when the required temperature is reached.
Вертикальное отпаривание разглаживает складки на тонких тканях,
6. The iron is ready for use.
занавесках, одежде.
7. Move the Variable Steam Control/SelfCleaning Knob to give the
Повесьте одежду на плечики.
desired amount of steam.
Держите утюг вертикально на расстоянии 1530 см от одежды.
(Forward for more steam, backward for less steam, or
Нажмите на кнопку подачи струи пара (5) несколько раз, двигая
to position with no steam.)
утюгом вдоль того места, которое вы отпариваете.
8. Turn the Temperature Dial in anticlock
При отпаривании глубоких складок нажмите на кнопку несколько
wise direction to 'Min'; the iron is switched
раз.
off.
Обратите внимание:
9. Disconnect the iron from mains supply
Иногда необходимо нажать на кнопку подачи струи (5) пара
outlet.
несколько раз, прежде чем пар начнет поступать из подошвы.
10. When the iron gets cool completely,
После того как индикатор (8) погас, не используйте функцию
store it vertically in a safe place.
подачи пара более трех раз.
Note: Set the Steam Control Knob to this
position after use:
6
15
1216.qxd 14.10.03 12:26 Page 12


