Vitek VT-3629: Гарантийный талон
Гарантийный талон: Vitek VT-3629
Оглавление
- Гарантийный талон
- УСЛОВИЯ ГАРАНТИЙНОГО ОБСЛУЖИВАНИЯ Условия гарантии:
- СХЕМА ПОДКЛЮЧЕНИЯ МАГНИТОЛЫ СПЕЦИФИКАЦИЯ
- ИЗВЛЕЧЕНИЕ ПРИБОРА ИЗ ПРИБОРНОЙ ПАНЕЛИ ТЕХНИЧЕСКОЕ ОБСЛУЖИВАНИЕ МАГНИТОЛЫ
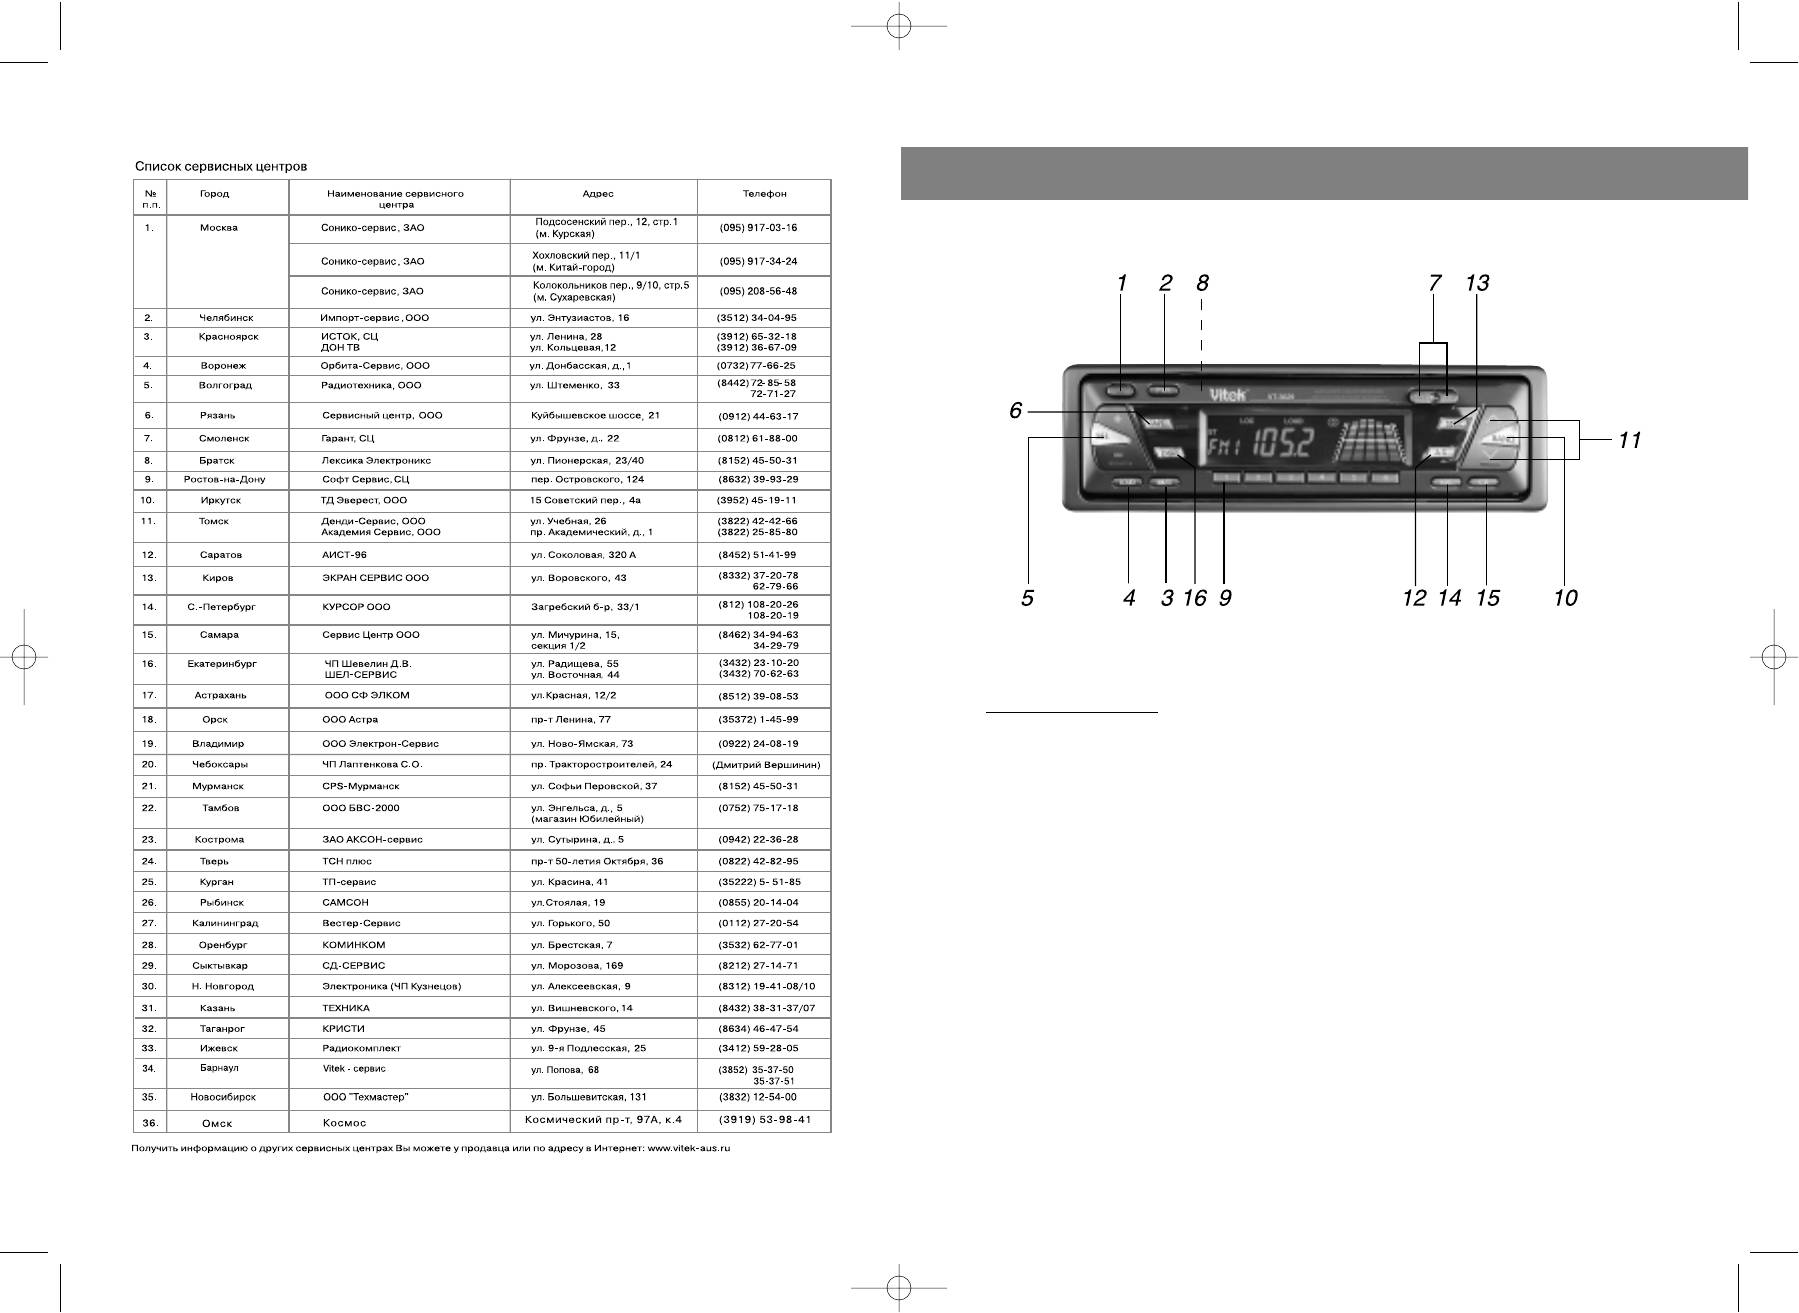
- 11. Кнопки поиска радиостанций УСТАНОВКА 12. Клавиша AMS (автоматическое сканирование станций) 13. Поиск следующей станции 14. Кнопка ограничения выбора станций с наиболее сильным сигналом Примечания: 15. Кнопка сканирования 16. Кнопка режима дисплея
- РЕГУЛЯТОРЫ УПРАВЛЕНИЯ И ФУНКЦИИ
Гарантийный талон
ENGLISH
Сведения о покупке
INSTALLATION
Модель:
Серийный №:
CCP 362900000
Дата покупки:
Сведения о продавце
Название и адрес продающей организации
Телефон:
Подтверждаю получение исправного изделия, с условиями гарантии ознакомлен
П
одпись покупателя
М.П.
Precautions
• Choose the mounting location carefully so that the unit will not interfere with the
Внимание!
Гарантийный талон действителен только при наличии печати
normal driving functions of the driver.
продающей организации
• Avoid installing the unit where it would be subject to high temperatures, such as
from direct sunlight or hot air from the heater, or where it would be subject to
Модель: Серийный №:
CCP 362900000
dust, dirt or excessive vibration.
Дата поступления в ремонт:
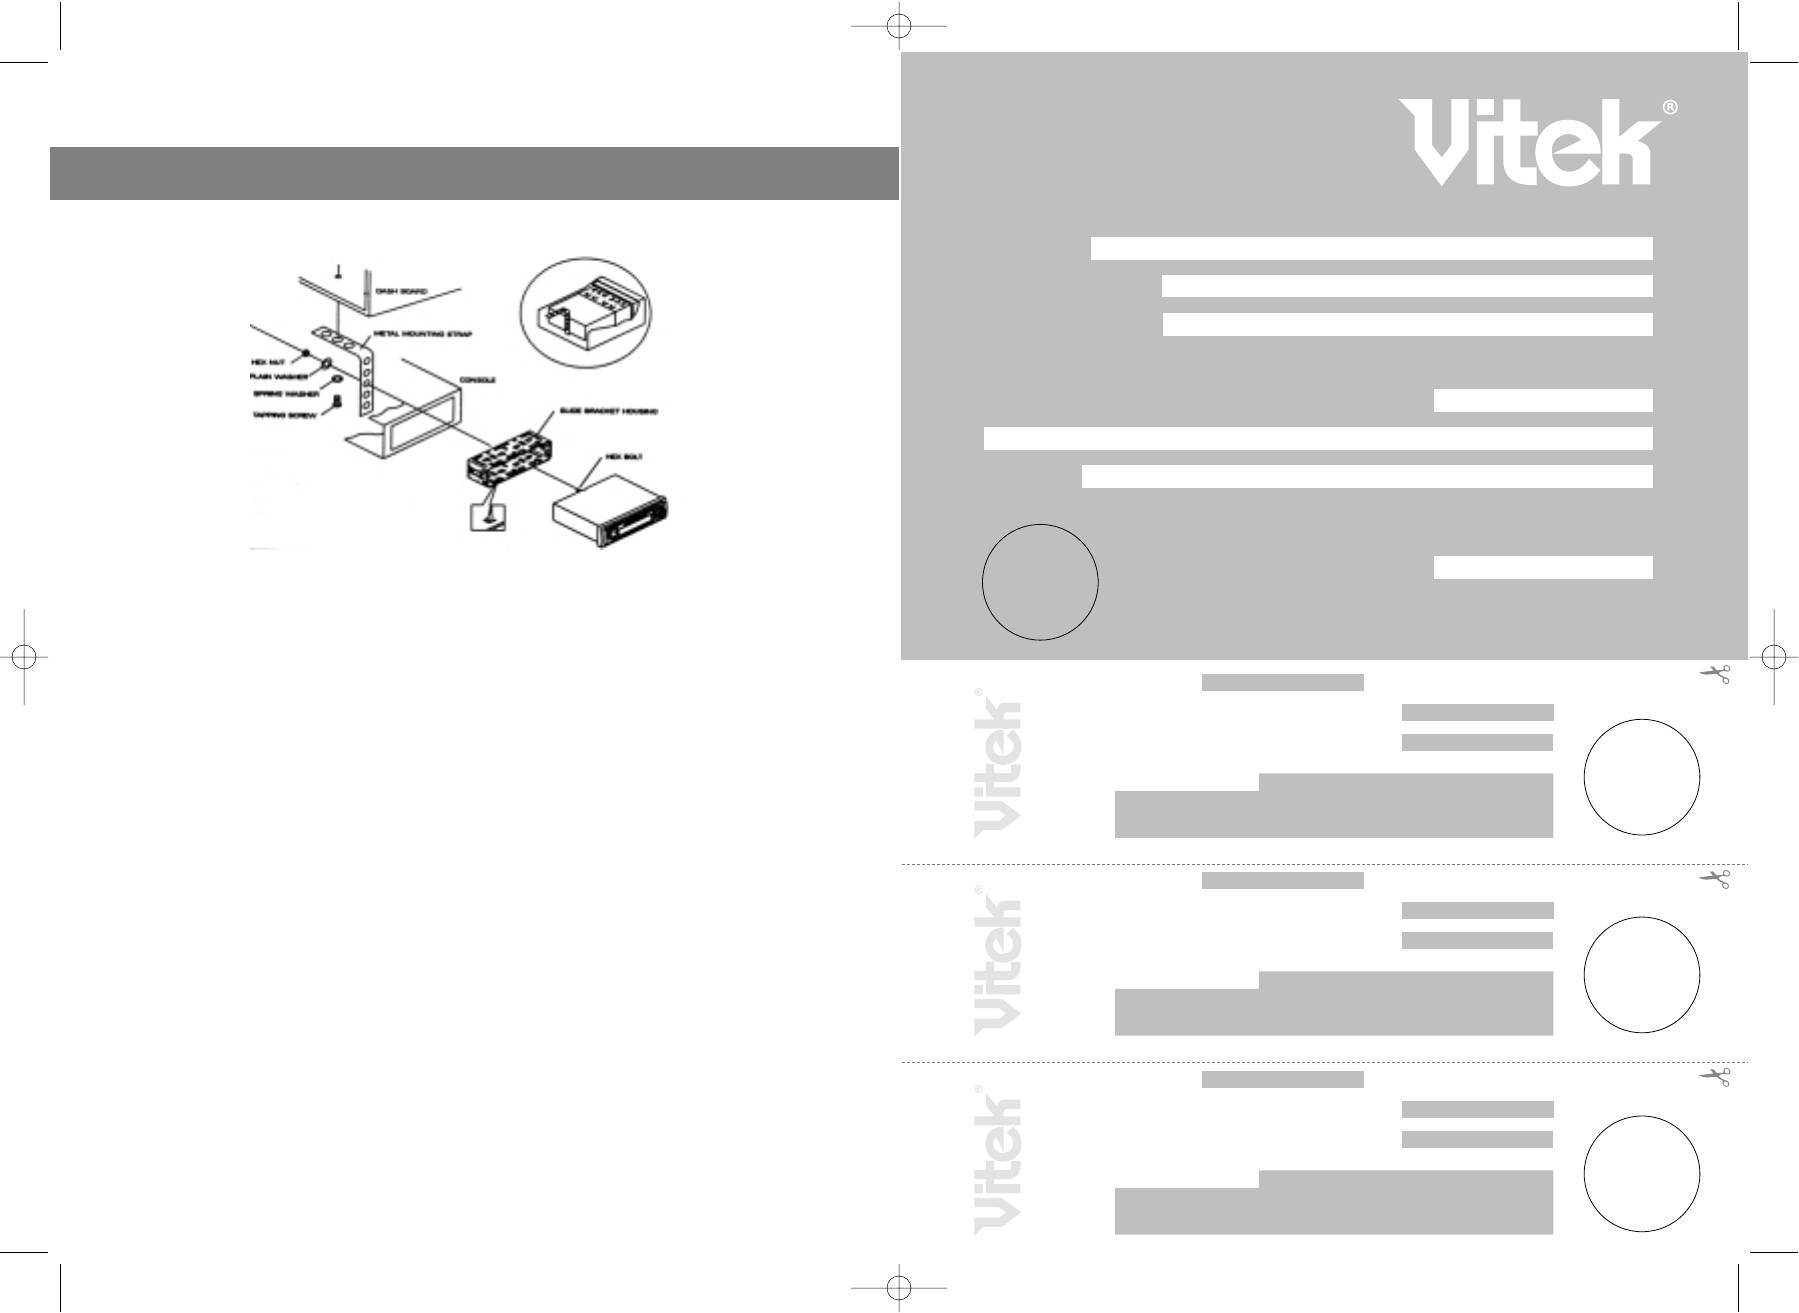
• Use only the supplied mounting hardware for a safe and secure installation.
• Be sure to remove the front panel before installing the unit.
Дата выполнения ремонта:
Вид ремонта:
М.П.
Unit Removal
• Remove the detachable front panel.
Купон №3
• Insert the supplied key into the slot as shown, and slide the unit out of the dash
board while holding the trim plate.
• Slide the unit out of the dashboard.
Модель: Серийный №:
CCP 362900000
• Remove the metal strap attached to the back of the unit.
Дата поступления в ремонт:
• Remove the key from the slot.
• Disconnect all the wires of the unit and the antenna plug.
Дата выполнения ремонта:
Вид ремонта:
М.П.
Купон №2
Модель: Серийный №:
CCP 362900000
Дата поступления в ремонт:
Дата выполнения ремонта:
2
Вид ремонта:
М.П.
Купон №1
3629.qxd 28.10.03 15:12 Page 4
ENGLISH
LOCATION AND FUNCTION OF CONTROLS
BASIC OPRERA
TIONS
1. PANEL RELEASE BUTTON
1. Press the panel release button, then the front panel will be folded down.
2. Remove the front panel by pulling its middlehand outward.
3. Push the front metal plate into the main body. A 'click' sound be heard.
4. To attach the panel again, push the front panel into the main body. A 'click' sound should
be heard.
2. POWER ON / OFF BUTTON
Press this button to turn on or off the power.
3. MUTE BUTTON
Press this button to mute the audio, press it again to resume the audio, when mute is acti
vated, the 'Mute' Symbol on the LCD will flash.
4. LOUDNESS BUTTON
Press the loudness button to boost the low frequencies at low and medium listening level.
5. ADJUST MODE SELECT BUTTON
The level adjustment of volume, bass, treble, balance and fader are performed through the
combination with the level up/down buttons.
Sequence of the adjust modes: VOL >BAS >TRE >BAL >FAD
Each time this button is pressed, the adjust mode will advance one position. The selected
adjusted mode can be viewed on the LCD as follow:
314
VO VOLUME ADJUST MODE
B BALANCE ADJUST MODE
BA BASS ADJUST MODE
F FADER ADJUST MODE
TR TREBLE ADJUST MODE
3629.qxd 28.10.03 15:12 Page 6


