Pioneer HTP-SB300: Connecting up
Connecting up: Pioneer HTP-SB300
Connecting up 02
11
En
English Deutsch Italiano Español
Français
Nederlands
Pyccкий
Chapter 2
Connecting up
About HDMI
Making cable connections
HDMI (High Definition Multimedia Interface)
Make sure not to bend the cables over the top
supports both video and audio on a single
of this unit. If this happens, the magnetic field
digital connection for use with DVD players,
produced by the transformers in this unit may
DTV, set-top boxes, and other AV devices.
cause a humming noise from the speakers.
HDMI was developed to provide the
technologies of High Bandwidth Digital
Content Protection (HDCP) as well as Digital
Caution
Visual Interface (DVI) in one specification.
• When connecting this system or changing
HDCP is used to protect digital content
connections, be sure to switch power off
transmitted and received by DVI-compliant
and disconnect the power cord from the
displays.
wall socket.
HDMI has the capability to support standard,
After completing all connections, connect
enhanced, or high-definition video plus
the power cords to the wall socket.
standard to multi-channel surround-sound
audio. HDMI features include uncompressed
HDMI cables
digital video, a bandwidth of up to 2.2 gigabytes
The HDMI cables transfers uncompressed
per second (with HDTV signals), one connector
digital video, as well as almost every kind of
(instead of several cables and connectors),
digital audio that the connected component is
and communication between the AV source
compatible with, including DVD-video, DVD-
and AV devices such as DTVs.
Audio, Dolby Digital Plus, Dolby TrueHD, DTS-
This system is also compatible with the
HD Master Audio (see below for limitations),
DeepColor and x.v.Color feature (x.v.Color is
Video CD/Super VCD, CD and 192 kHz/8 ch
trademarks of Sony Corporation).
1
(Max. number of channel inputs) PCM.
HDMI, the HDMI logo and High-Definition
Multimedia Interface are trademarks or
registered trademarks of HDMI Licensing, LLC.
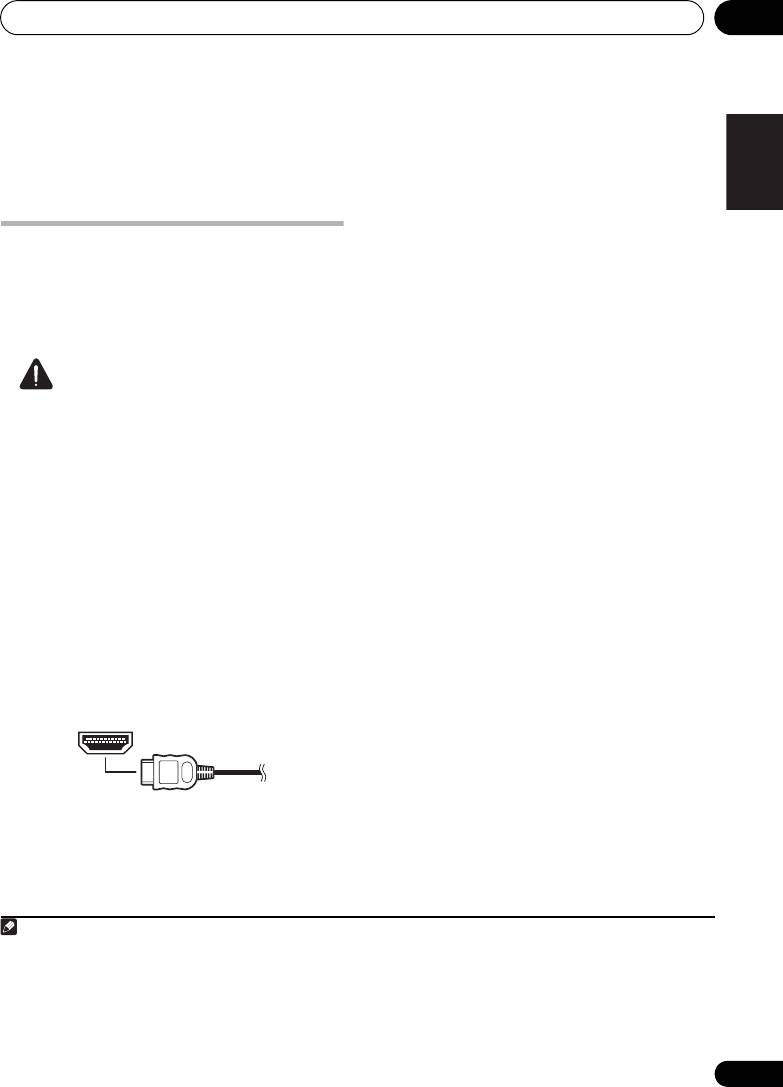
Be careful to connect the terminal in the
proper direction.
Note
HTP-SB300_SVYXCN_En.book 11 ページ 2009年10月23日 金曜日 午後1時58分
1 • Set the HDMI parameter in Setting the Audio options on page 23 to THRU (THROUGH), if you want to hear HDMI
audio output from your TV or flat screen TV (no sound will be heard from this system).
• If the video signal does not appear on your TV or flat screen TV, try adjusting the resolution settings on your
component or display. Note that some components (such as video game units) have resolutions that may not be
displayed. In this case, use a method other than HDMI to connect your television to the other component.
• When the video signal from the HDMI is 480i, 480p, 576i or 576p, Multi Ch PCM sound and HD sound cannot be
received.
Connecting up02
Important
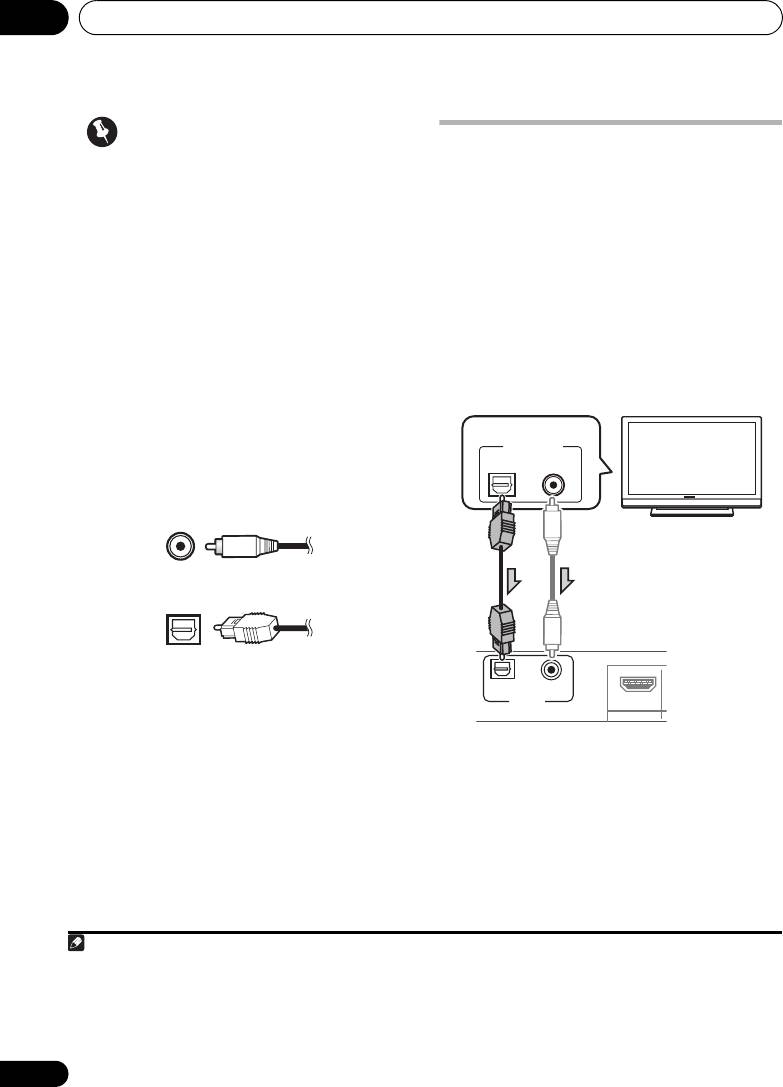
Connect your TV (For TV audio)
• Compared to existing digital audio
This will allow you to play the sound from the
transmission formats (optical and coaxial),
TV’s built-in tuner.
HDMI format digital audio transmissions
• Televisions without digital audio output
requires a longer time to be recognized.
connectors cannot be connected to this
Due to this, interruption in the audio may
unit.
occur when switching between formats or
beginning playback.
• Connect the optical digital output on your
2
Additionally, turning on/off the component
TV to the OPTICAL AUDIO IN on this system.
connected to this unit’s HDMI OUT
Use an optical cable.
terminal or disconnecting/connecting the
• If your TV has a coaxial digital output, you
HDMI cable may cause noise or
can also use a coaxial digital audio cable
interrupted audio.
for the connection.
Digital audio cables
Commercially available coaxial digital audio
cables or optical cables should be used to
1
connect digital components to this system.
Coaxial digital audio cable
Optical cable
12
En
Note
1 • When connecting optical cables, be careful when inserting the plug not to damage the shutter protecting the optical
socket.
• When storing optical cable, coil loosely. The cable may be damaged if bent around sharp corners.
• You can also use a standard RCA video cable for coaxial digital connections.
2 When connecting this system to a playback component through a television set, in some cases sound may not be
produced from the televisions digital audio output. In this case, connect this system directly to the playback component.
DIGITAL OUT
OPTICAL COAXIAL
OPTICAL COAXIAL
AUDIO IN
OUT
Select one
TV
HTP-SB300_SVYXCN_En.book 12 ページ 2009年10月23日 金曜日 午後1時58分
Connecting up 02
13
En
English Deutsch Italiano Español
Français
Nederlands
Pyccкий
Connecting your TV and playback components
Connecting using HDMI
Connecting your component with no
If you have an HDMI or DVI (with HDCP)
HDMI terminal
equipped component (Blu-ray disc player,
This diagram shows connections of a TV and
etc.), you can connect it to this system using a
DVD player (or other playback component)
commercially available HDMI cable.
with no HDMI terminal to the system.
HDMI
OUT IN 1 IN 2
1 Connect the coaxial digital output from
your DVD player to the COAXIAL AUDIO IN on
this system.
Use a coaxial digital audio cable.
1 Connect the HDMI output on your BD/
• If your DVD player has an optical digital
DVD player to the HDMI IN1 on this system.
output, you can also use an optical digital
Use an HDMI cable for the connection.
audio cable for the connection.
2 Connect the HDMI OUT on this system to
2 Connect the video output on your DVD
an HDMI input on your TV.
player to the video input on your TV.
HDMI IN
2
1
HDMI OUT
HDMI/DVI-compatible TV
or flat screen TV
HDMI/DVI-equipped
component
OPTICAL COAXIAL
AUDIO IN
OUT
2
1
OPTICAL COAXIAL
DIGITAL OUT
TV
Video cable
Select one
DVD player, etc.
HTP-SB300_SVYXCN_En.book 13 ページ 2009年10月23日 金曜日 午後1時58分
Connecting up02
CAUTION
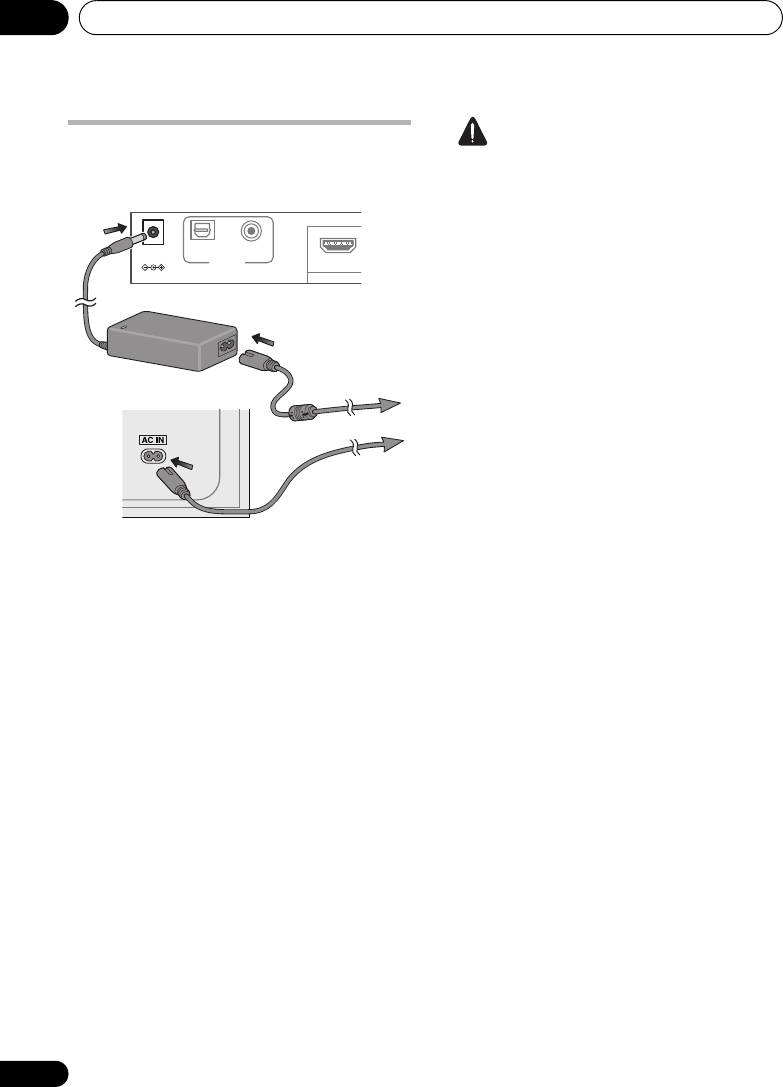
Plugging in the system
Only plug in after you have connected all your
• Handle the power cord by the plug part. Do
components to this system.
not pull out the plug by tugging the cord,
and never touch the power cord when your
hands are wet, as this could cause a short
circuit or electric shock. Do not place the
DC IN
OPTICAL
COAXIAL
24V
AUDIO IN
unit, a piece of furniture, or other object on
OUT
the power cord or pinch the cord in any
other way. Never make a knot in the cord or
tie it with other cables. The power cords
should be routed so that they are not likely
to be stepped on. A damaged power cord
can cause a fire or give you an electric
shock. Check the power cord once in a
while. If you find it damaged, ask your
nearest Pioneer authorized independent
service company for a replacement.
• Do not use any power cord other than the
one supplied with this unit.
• Do not use the supplied power cord for any
purpose other than that described below.
Main unit:
• The system should be disconnected by
1 Plug the supplied AC adapter into the
DC
removing the mains plug from the wall
IN
socket on the back of the unit.
socket when not in regular use, e.g., when
on vacation.
2 Plug the supplied power cord into the AC
adapter then plug the other end into a power
• Do not use any AC adapter other than the
outlet.
recommended unit, since fire or shock may
occur.
Subwoofer:
• The supplied AC adapter is designed
• Plug the supplied power cord into the
AC
exclusively for use with this unit. Never
IN
socket on the back of the subwoofer then
attempt to use it with any device for which
plug the other end into a power outlet.
it was not expressly designed, since fires or
shocks may occur.
14
En
Main unit
AC adapter
To AC outlet
Subwoofer
HTP-SB300_SVYXCN_En.book 14 ページ 2009年10月23日 金曜日 午後1時58分
Оглавление
- Setup Guide
- Contents
- Installation
- Connecting up
- Controls and displays
- Listening to your system
- Controlling the rest of your system
- Additional information
- Guide d’installation
- Sommaire
- Installation
- Connexions
- Commandes et affichages
- Écoute de votre système
- Commande des autres fonctions du système
- Informations complémentaires
- Руководство по установке
- Содержание
- Установка
- Подключение
- Органы управления и дисплеи
- Прослушивание системы
- Управление другими компонентами системы
- Дополнительная информация


