AEG mrc 4140 i – страница 5
Инструкция к Радиобудильнику AEG mrc 4140 i
81
Italiano
NOTA: Sveglia 2 ( )
• Ildispositivoattivalasvegliaconlastazioneradioel’ulti-
ma impostazione del volume. Non è possibile regolare il
volume durante la sveglia.
• Lafunzionediripetizionedellasveglia
non è disponibi-
le.
NOTA:
Se l’impostazione è la stessa per entrambe le sveglie (
e
), il dispositivo sveglierà solo con radio. La funzione di
ripetizione della sveglia
non è disponibile.
Attivazione dell’orario della sveglia e dell’intervallo della
sveglia
(durante la modalità di visualizzazione normale (Fig. 2))
1. Impostare l’interruttore SPK-FM in posizione “FM” e lasciare a
radio spenta.
2. Premere il tasto
ripetutamente per selezionare tra le
seguenti opzioni:
•
=Primoorariodellasvegliaattivato.All’oradellasveglia
preimpostata, si attiva il suono della natura selezionato o
segnale della sveglia (cicalino).
• + =Primoorariodellasvegliaeintervallosvegliaattivato.
La sveglia selezionata suona quando si raggiunge l’orario im-
postato. La sveglia si spegne premendo il tasto RD. L’icona
inizia a lampeggiare sul display. Al termine del secondo orario
Snooze, la suoneria impostata suona di nuovo.
NOTA:
Èimportantenotarechelasvegliaripetutaèdisattivata
automaticamente dopo essere usata due volte.
•
=Secondoorariodellasvegliaattivato.Lastazioneradio
sintonizzata alla fine sarà riprodotta al volume impostato per
ultimo e per il tempo di riproduzione impostato in preceden-
za.

82
Italiano
Spegnere il segnale della sveglia
Simbolo Funzioni
/ Premere qualsiasi tasto. La funzione sveglia sarà disat-
tivata fino al giorno successivo.
+
Premendo qualsiasi tasto eccetto il tasto SET si attiverà
la funzione ripeti sveglia (snooze). L’icona lampeg-
gerà se la funzione ripeti sveglia è stata attivata.
Premere il tasto SET per disattivare la sveglia fino al
giorno successivo.
Disattivazione dell’orario della sveglia
Premere il tasto
ripetutamente finché il simbolo “ ” o
“ “ e “ “ scompaiono dal display.
Funzione induzione
La riproduzione musicale è resa molto semplice. Non sono neces-
sari cavi o configurazione complicata. Il segnale audio è trasferito
tramiteinduzioneelettromagnetica.Questafunzioneècompatibi-
le con smartphone e dispositivi audio che presentano altoparlanti
integrati.
1. Regolare l’interruttore SPK-FM in posizione “SPK”.
2. Se la spia luminosa (4) non si accende, premere il tasto (6).
3. Avviare la riproduzione musicale sul dispositivo audio.
4. Mettere, ad esempio, lo smartphone sul dispositivo. Verificare
che l’altoparlante integrato dello smartphone sia allineato con
la posizione (5) sul dispositivo.
NOTA:
Poiché ogni smartphone o dispositivo audio integra gli
altoparlanti ad una posizione diversa, non è possibile fornire
una descrizione specifica della posizione perfetta.
5. Se necessario, cambiare la posizione dello smartphone fino
ad ottenere un buon suono. Se necessario, girare il dispositivo
audio.
83
Italiano
6. Regolare il volume del dispositivo audio.
NOTA:
• Glismartphoneeidispositiviaudioconalloggiamenti
metallici possono causare rumori.
• Nonimpostareilvolumedeldispositivoaudiotroppo
alto, in quanto questo potrebbe causare distorsione.
Pulizia
ATTENZIONE: Non immergete l’apparecchio in acqua.
• Primadipulireestraetelaspina.
• Pulitel’apparecchioconunpannoleggermenteinumidito
senza additivi.
Risoluzione di problemi
Problema Possibile causa Soluzione
Il dispositivo non
Dispositivo blocca-
Scollegare l’adattatore di
funziona.
to.
corrente dalla presa a pa-
rete per ca. 5 secondi. Poi
riaccendere nuovamente
il dispositivo.
Suono della sve-
Attivazione con
Regolare l’interruttore in
glia non udibile.
l’interruttore in
posizione “FM”.
posizione “SPK”.
Nessun segnale
Attivazione con
Regolare l’interruttore in
audio durante
l’interruttore in
posizione “SPK”.
la riproduzione
posizione “FM”.
tramite funzione
di induzione.
84
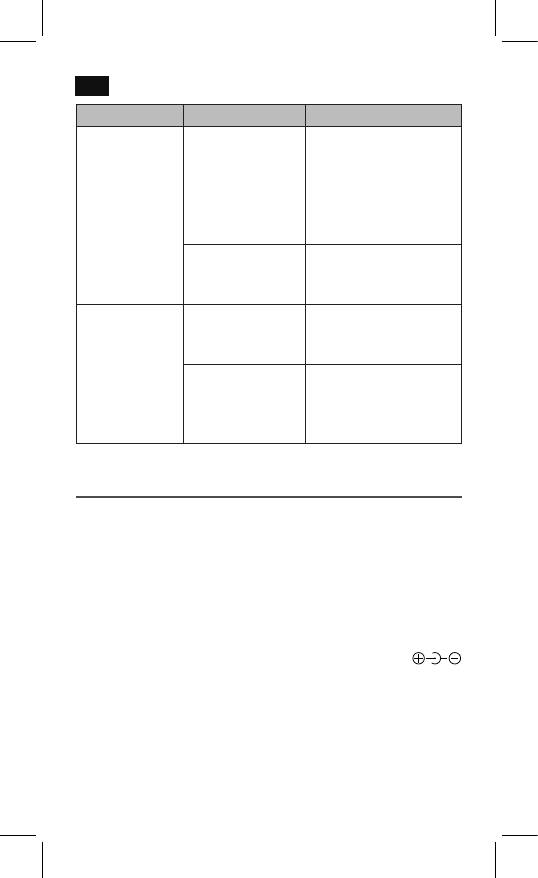
Italiano
Problema Possibile causa Soluzione
Nessun segnale
La sorgente audio
Cambiare la posizione
audio durante
non è allineata con
della sorgente audio. Ac-
la riproduzione
la posizione corret-
certarsi che l’altoparlante
tramite funzione
ta del dispositivo.
integrato della sorgente
di induzione.
audio sia in posizione (5)
del dispositivo.
Funzione a induzio-
Premere il tasto (6) finché
ne disattivata.
la spia luminosa (4) non si
accende.
Rumore durante
Tensione della bat-
Inserire nuove batterie
la riproduzione
teria troppo bassa.
o usare l’adattatore di
musicale tramite
corrente fornito.
funzione a indu-
La sorgente audio
Usare una sorgente audio
zione.
presenta un allog-
senza alloggiamento
giamento metalli-
metallico.
co.
Dati tecnici
Modello: ................................................................................... MRC 4140 I
Batteria di backup: ............................................................ 2x1,5V,AG13
Peso netto: ..........................................................................................325 g
Consumo di potenza: .......................................................................... 5 W
Adattatore di alimentazione esterno
Ingresso: ..............................................................AC 100-240 V, 50/60 Hz
Uscita: ......................................................................................DC 5 V / 1 A
Polarità: ...........................................................................................
Classe di protezione: ................................................................................II
Radio
Risposta in frequenza: ............................................FM 87,5 ~ 108 MHz
Si riserva il diritto di apportare modifiche tecniche e di design nel
corso dello sviluppo del prodotto.
85
Italiano
Questoapparecchioèstatocontrollatosullabasedituttelediret-
tive CE attuali in vigore in questo settore, quali per esempio la nor-
mativa in materia di compatibilità elettromagnetica e la direttiva
in materia di bassa tensione, ed è stato costruito conformemente
alle norme di sicurezza più moderne.
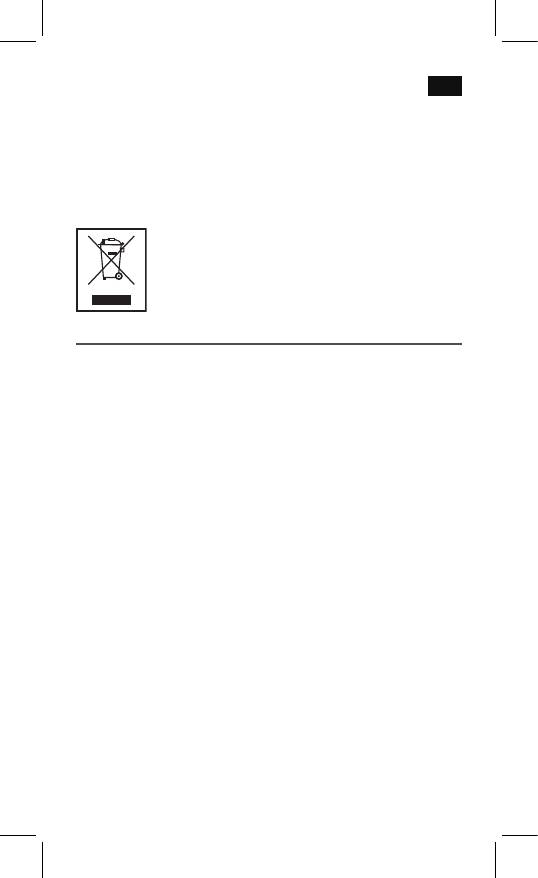
Smaltimento
Significato del simbolo “Cassonetto con ruote”
Rispettare l’ambiente, non smaltire dispositivi elettrici nei rifiuti
domestici.
Lo smaltimento di dispositivi obsoleti o difettosi deve avvenire
tramite consegna presso punti di raccolta locali.
Aiutate ad evitare pericoli potenziali per l’ambiente e la nostra
salute tramite uno smaltimento non corretto.
Voi contribuite al riciclaggio e altro forme di utilizzo di dispositivi
elettrici e elettronici.
Il vostro comune è in grado di fornirvi informazioni sui punti di
raccolta.
86
English
Instruction Manual
Thank you for choosing our product. We hope you will enjoy using
the appliance.
Symbols in these Instructions for Use
Important information for your safety is specially marked. It is
essential to comply with these instructions in order to avoid ac-
cidents and prevent damage to the machine:
WARNING:
Warns of dangers for your health and indicates potential risks of
injury.
CAUTION:
Indicates potential dangers for the device or other objects.
NOTE: Highlights tips and information for you.
General Safety Guidelines
Before using this device, carefully read this user manual and keep
it together with the Warranty Certificate, cashier receipt and if pos-
sible, the original package inclusive its interior packing. If you hand
on the device to any third person, include the user manual as well.
• Toavoidtheriskofreorelectricshock,youshouldnot
exposethedevicetorainorhumidity.Donotusethedevice
near water (e.g. bathroom, swimming pool, humid cellars).
• Donotusetheunitinextremelyhot,cold,dusty,ordamp
places.
• Theunitisdesignedsolelyforprivateuseanditsintended
purpose. This unit is not designed for commercial use.
• Makesurethatthepowercableisnotbent,pinched,orcomes
into contact with heat sources.
• Makesurethatthepowercableisnotatrippinghazard.
English
87
• Thepowersupplyunitisonlysuitableforuseindryrooms.
• Nevertouchthepowersupplyunitorthecablewithwet
hands.
• Onlyconnectthepowersupplyunittoaproperlyinstalledwall
outlet. Ensure that the listed voltage matches the voltage of
the wall outlet. Also ensure that the output current, voltage
and the polarity of the power supply unit match the informa-
tion on the connected device.
• Alwaysinstallbatteriesinthecorrectdirection.
• Avoidcoveringthedevice’sventopenings.
• Nevercovertheventholeswithobjects,suchasmagazines,
tablecloths, curtains etc.
• Thisapplianceshallnotbeexposedtodrippingorsplashing
water and that no object filled with liquids such as vases shall
be placed on apparatus.
• Opensourcesofre,suchase.g.burningcandlesmaynotbe
placed onto the unit.
• Neveropenthedevice’scase.Improperrepairscancausese-
vere danger to the user. If the device or particularly the power
cord is damaged, don’t use the device any further and have
it repaired by a qualified specialist. Check the power cord
regularly for damage.
• Ifyoudonotusethedeviceforalongperiodoftime,pullthe
power supply unit from the wall socket and/or remove the bat-
teries.
These symbols may be found on the device and shall indicate the
following:
The lightning symbol warns the user of dangerously
high voltages inside the case.
Theexclamationmarksymbolpointstoimportant
instruction or maintenance remarks in the accompa-
nying guidelines.
88
English
Children and disabled persons
• Forthesafetyofyourchildren,keepanypackingparts(plastic
bags, cartilage, Styrofoam etc.) out of their reach.
WARNING!
Don’t let small children play with foils for danger of suffoca-
tion!
• Thisdeviceisnotintendedforusebypersons(includingchil-
dren) with reduced physical, sensory or mental capabilities, or
lackofexperienceand/orknowledgeunlesstheyhavebeen
given supervision or instructions concerning the use of the
device by a person responsible for their safety.
• Supervisechildrentoensuretheydonotplaywiththedevice.
Special Safety Instructions
CAUTION:
Do not touch the speaker diaphragm on the back of the device
with hands or objects, as this would damage the diaphragm.
Overview of the Components
Fig. 1
1 “M” button (mode)
2 SET button (setting)
3
buttons (volume)
4 Indicator lamp for activated induction function
5 Approximatespeakerpositionoftheaudiosource
6 Induction function on/off
7 CHN button (store radio stations / recall stored radio stations)
8 CH-/CH+ buttons (scan radio stations)
9 RD button (radio on/off)
Back of unit (not shown)
SPK-FM switch (speaker - radio)

English
89
DC 5 V/1 A jack
FM aerial
Speaker
Bottom (not shown)
Battery compartment
Fig. 2
Normal Display mode
Fig. 3
Showing all display segments
First Use of the Device/Introduction
• Selectaproperplaceforthedevicesuchasadry,andeven
non slip area where you can easily operate the device.
• Makesurethedeviceisventedsufciently!
• Ifstillinplace,removetheprotectionfoilfromthedisplay.
Inserting the batteries (Backup)
(Batteries included in delivery scope)
NOTE:
The alkaline button cells located in the small compartment
inside the battery compartment have been secured with a foil
for transport, therefor prolonging the life span of the batteries.
Open the battery compartment on the bottom and pull the foil
from the slot in the small compartment.
In case of a power cut or if the device is unplugged, with batteries
inserted,thesettingswillbekept.Onceexhausted,insertnew
batteries as follows:
1. Open the battery compartment at the bottom. There you will
find another small compartment secured with a screw.
2. Insert 2 AG13 batteries 1.5 V. Mind the correct polarity (indi-
catedonthebottomofthebatterycase)!

90
English
3. Close the battery case. Secure the small battery compartment
by reattaching the screw.
WARNING:
• Donotexposethebatteriestointenseheatsuchassunlight,
fire or similar. There is a risk of explosion!
• Keepbatteriesawayfromchildren!Theyarenotatoy.
• Donotopenbatterieswithforce.
• Avoidcontactwithmetallicobjects(rings,nails,screws,etc.).
Thereisariskofshortcircuit!
• Batteriesmayheatupconsiderablythroughashortcircuitor
may even ignite. It could result in burns.
• Thebatteryterminalsshouldbecoveredwithadhesivetape
during transport for your safety.
• Batteriescanleakoutandcanlosebatteryacid.Ifthedevice
is not used for a longer period of time, remove the battery
from the remote control.
• Ifabatterydoesleakout,donotrubtheliquidintoyour
eyes or the mucous membranes. In case of contact, wash
your hands, rinse your eyes with clear water, and if the symp-
toms persist, consult a doctor.
CAUTION:
• Differentbatterytypesornewandusedbatteries may not
be used together.
• Batteriesmustnotbedisposedofinthegarbage.Please
bring used batteries to competent collection centers or back
to the dealer.
Power supply (Adaptor)
1. Make sure the grid voltage corresponds to the figures on the
rating plate.
2. Insert the grid plug into a properly installed three prong
socket. Connect the device with the plug connector by insert-
ing its plug into the DC 5 V jack of the device.
English
91
If no backup battery is inserted, time and station settings will be
deleted during a power failure or when disconnecting from mains
power supply.
CAUTION:
• Onlyusethesuppliedpoweradaptorforthisdevice.Donot
use for other devices
• Onlyusepoweradaptorwith5V(
), other adaptors
may cause damage to the device.
NOTE:
Disconnect from mains power supply during longer periods of
non-use.
Battery Operation
You also have the option of operating the unit with 3 Type R6 “AA”
batteries. (Batteries not included in delivery scope.)
1. Open the battery compartment at the bottom.
2. Insert 3 R6 “AA” batteries 1.5 V. Mind the correct polarity
(indicatedonthebottomofthebatterycase)!
3. Close the battery case.
WARNING:
Donotexposethebatteriestointenseheat,suchassunlight,
fire or similar. Danger of explosion!
CAUTION
• Batteriescanleakbatteryacid.Whennotusingthedevice
for a longer period of time, remove the batteries.
• Differentbatterytypesornewandusedbatteriesmay not
be used together.
• Batteriesmustnotbedisposedofinthegarbage.Please
bring used batteries to competent collection centers or back
to the dealer.
92
English
Volume
The volume can be adjusted using the
buttons.
Temperature display (with the radio switched off)
The unit detects the current ambient temperature and it is shown
in the display.
• Innormaldisplaymode(Fig.2)youcanalternatethetem-
perature display between °C (degrees Celsius) and °F (degrees
Fahrenheit) with the
button. When pressing the but-
ton again, the display will show the set alarm time.
Display backlight
• Operation via mains adapter: The display will be lit perma-
nently. In order to switch off the continuous backlight, press
andholdthe“M”buttonforapprox.2seconds.Toswitchthe
display backlight on again, press and hold the “M” button
againforapprox.2seconds.
• Battery operation: Press the CHN button to light up the
display for 5 seconds.
Switch-off
Set the switch on the back to the “FM” position and switch off
the device using the RD button. The unit is switched off when the
display shows normal mode (see Fig. 2).
NOTE:
The volume icon (
) does not appear during normal display
mode.
Set time
1. Press the SET button when the radio is switched off.
2. You may then adjust the hours, minutes and 12-/ 24-hour
format in sequence using the buttons.
English
93
Confirm your entry each time with the SET button. The current
item to be set flashes in the display.
NOTE:
• Ifnobuttonispressedforapprox.20seconds,allsettings
will be saved.
• Inthe12hourdisplayappearsthefollowing:PM=afternoon
Radio operation
Setting and storing stations
1. Set the SPK-FM switch to the “FM” position.
2. Press the RD button, to switch the unit to radio mode. The
radio symbol and the current frequency appear in the display.
3. Press the CH+ button or CH- button, to set a station. The cor-
responding frequency is shown in the display.
4. Press and hold the CHN button to save the radio station
found. The display will show the respective preset number.
NOTE:
• Radiostationscanonlybestoredoneafteranother.The
devicewillautomaticallyselectthenextavailablepreset.
• Amaximumof6stationscanbestored.Adjustingthe
sequence afterwards is not possible.
• Whenstoringanadditionaloranotherstation,the
device will overwrite the last preset accordingly.
• Allstoredradiostationscanbedeletedbypressingthe
buttons CH+ and at the same time.
5. If reception is too weak, change the position of the dipole
antenna in order to improve the reception.
Select stored stations
To select the stored radio station, press the CHN button repeat-
edly.
94
English
Alarm function
You can choose to wake up to nature sounds, an alarm signal, or a
radio station.
Demonstration of nature sounds
1. Set the SPK-FM switch to the “FM” position and leave the
radio switched off.
2. Press the “M” button to start playing the first nature sound.
3. Press the SET button to stop the sound.
4. PressSETagaintostartplayingthenextsound.Thereare
5 different nature sounds available. Setting “6” is a potpourri.
5. After you have chosen your desired sound, use the
buttons to adjust the volume.
NOTE:
If not pressing the SET button, the sound will play for
5 minutes and then stop.
6. Press the “M” button to stop the sound demonstration.
Setting the alarm times
1. Set the SPK-FM switch to the “FM” position and leave the
radio switched off.
2. Press the “M” button twice. The currently set alarm time ap-
pears and the “
” icon starts flashing.
3. Press the button to select the first alarm time (alarm 1)
or the second alarm time (alarm 2).
NOTE:
• Alarm 1: The first alarm time allows you to wake up to
nature sounds or an alarm signal.
• Alarm 2: The second alarm time only supports waking
up to radio stations.
4. Press the SET button.
5. Use the
buttons to adjust the following settings one
after another:
English
95
NOTE:
• Therespectivesettingtobeadjustedwillbeashingin
the display.
• ConrmeachsettingbypressingtheSETbutton.
Alarm 1: Hours
minutes repeat alarm alarm sound
Alarm 2: Hours minutes playback time
NOTE: Alarm 1 ( )
• “Repeatalarm
” (snooze) is the pause between alarm
sounds. You can adjust that time choosing a setting
between 5 and 60 minutes.
• Alarmsound:Youcanchoosenaturesoundsoranalarm
signal (buzzer).
• Whenthealarmsoundsatthepresettimeandnobut-
ton is pressed, the alarm will stop automatically after one
minute.
NOTE: Alarm 2 ( )
• Playbacktime:Adjustforhowlongtheradioshallplay
after the alarm turns on at the preset time. Choose a
setting between 5 and 60 minutes.
• Thedeviceactivatesthealarmwiththeradiostationand
volume setting used last. It is not possible to adjust the
volume during the alarm.
• Therepeatalarmfunction
is not available.
NOTE:
If setting the same alarm time for both alarms (
and
), the device will wake you to radio only. The repeat alarm
function
is not available.
Activating alarm time and alarm interval
(during normal display mode (Fig. 2))
1. Set the SPK-FM switch to the “FM” position and leave the
radio switched off.
96
English
2. Press the button repeatedly to select between the follow-
ing options:
•
=Firstalarmtimeactivated.Atthepresetalarmtime,the
chosen nature sound or alarm signal (buzzer) turns on.
• + =Firstalarmtimeandalarmintervalactivated.The
selected alarm tone sounds when the set time is reached. The
alarm is switched off by pressing the RD button. The icon
starts flashing in the display. After the set Snooze time ends,
the set alarm tone sounds again.
NOTE:
Note that the repeated alarm is automatically deactivated
after being used twice.
•
=Secondalarmtimeactivated.Theradiostationtunedin
last will be played at the volume setting used last and for the
previously set playback time.
Turning off the Alarm
Symbol Functions
/ Press any button. The alarm function will be turned off
untilthenextday.
+
PressinganybuttonexceptfortheSETbuttonwillacti-
vate the repeat alarm function (snooze). The icon will
flash if the repeat alarm function has been activated.
Press the SET button to switch off the alarm until the
following day.
Deactivate Wake-Up Time
Press the
button repeatedly until the symbol o “ ” or “ “
and “ “ disappears from the display.
English
97
Induction function
Playing music made very easy. No cables or complicated setup
required. The audio signal is transferred via electromagnetic in-
duction. This function is compatible with smartphones and audio
devices featuring built-in speakers.
1. Set the SPK-FM switch to “SPK” position.
2. If the indicator lamp (4) does not light up, press the button (6).
3. Start music playback on your audio device.
4. Place,forexample,yoursmartphoneonthedevice.Makesure
the built-in speaker of your smartphone is aligned with the
position (5) on the device.
NOTE:
Since each smartphone or audio device integrates its speak-
ers at a different position, we cannot provide you with a
specific description of the perfect position.
5. If necessary, change the position of your smartphone until the
sound output is good. If necessary, turn the audio device.
6. Adjust the volume on the audio device.
NOTE:
• Smartphonesandaudiodeviceswithmetalhousings
can cause interfering noise.
• Donotsetthevolumeonyouraudiodevicetoohigh,as
this could cause distortion.
Cleaning
CAUTION: Do not dip the appliance in water.
• Removetheplugbeforecleaning.
• Cleantheappliancewithaslightlyhumidclothwithoutany
additives.

98
English
Troubleshooting
Problem Possible cause Solution
Device cannot
Device blocked or
Disconnect the mains
be operated.
“frozen”.
adapter from the wall
socketforapprox.
5 seconds. Then switch
the device on again.
Alarm sound not
Switch on the back
Set the switch to the
audible.
is set to the “SPK”
“FM” position.
position.
No audio signal
Switch on the back
Set the switch to the
during playback
is set to the “FM”
“SPK” position.
via induction
position.
function.
Audio source is not
Change the position of
aligned with the
the audio source. Make
correct position on
sure to place the built-
the device.
in speaker of your audio
source on position (5) of
the device.
Induction function
Press the button (6) until
switched off.
the indicator lamp (4)
lights up.
Interfering noise
Battery voltage too
Insert new batteries or
during music
low.
use the mains adapter
playback via in-
provided.
duction function.
Audio source
Use an audio source
features a metal
without metal housing.
housing.

English
99
Technical Data
Model: ......................................................................................MRC 4140 I
Backup battery: ..................................................................2x1.5V,AG13
Net weight: ........................................................................................ .325 g
Power Consumption:...........................................................................5 W
External power adaptor
Input: ....................................................................AC 100-240 V, 50/60 Hz
Output: ....................................................................................DC 5 V / 1 A
Polarity: ...........................................................................................
Protection Class: ........................................................................................ II
Radio
Frequency Range: ................................................... FM 87.5 ~ 108 MHz
The right to make technical and design modifications in the
course of continuous product development remains reserved.
This device has been tested according to all relevant current CE
guidelines, such as electromagnetic compatibility and low voltage
directives, and has been constructed in accordance with the latest
safety regulations.

100
English
Disposal
Meaning of the “Wheelie Bin” Symbol
Take care of our environment, do not dispose of electrical ap-
plicances via the household waste.
Dispose of obsolete or defective electrical appliances via munici-
pal collection points.
Please help to avoid potential environmental and health impacts
through improper waste disposal.
You contribute to recycling and other forms of utilization of old
electric and electronic appliances.
Your municipality provides you with information about collecting
points.


