AEG mmr 4128: English
English: AEG mmr 4128
30
English
Battery Operation
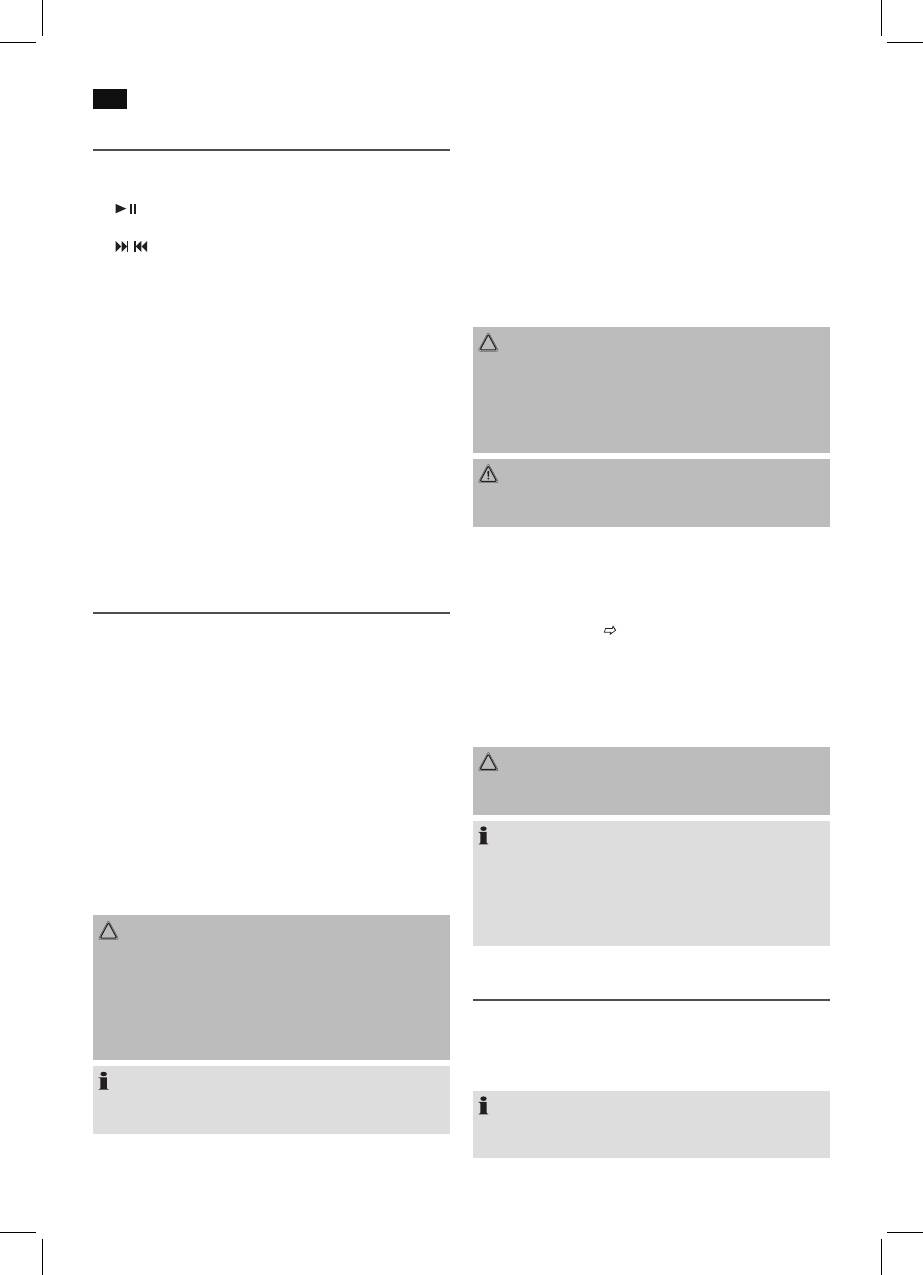
Overview of the components
You can optionally also operate the device with the enclosed
Front (Fig. 1)
3.7 V Li-Ion battery.
1 LCD Display
1. Open the battery compartment (14) on the back.
2
Button (Play/pause)
2. Insert the enclosed battery. Mind the correct polarity
3 MODE button
(indicated on the bottom of the battery case)!
4
/
buttons (Scan forwards / backwards)
3. Close the battery case.
5 Cover USB /memory cards connection
4. If the device is not used for a longer period of time,
6 VOL+/VOL- buttons (volume)
remove the battery from the device to prevent a “leaking
7 PRESET button
out”ofbatteryacid.
8 RPT/MEM button (Repeat/store)
9 Telescopic antenna
CAUTION:
• Batteriesmustnotbedisposedofinthegarbage.
Rear view (Fig. 2)
Please bring used batteries to competent collection
10 ON/OFF switch
centers or back to the dealer.
11 AUX IN connector
• Onlyreplacethebatterywithadifferentbatteryofthe
12 DC +5 V connector
same type.
13 USB +5 V connector
14 Battery compartment
WARNING:
Neverexposebatteriestohightemperaturesordirectsun-
Accessories (without illustration)
light or throw batteries into fire for danger of explosion!
Power supply
Li-Ion battery (BL -5 C)
Charging the battery
Before you can operate the device with the battery, you need
Installation
to charge it first.
• Readthemanualthoroughlybeforeoperatingthede-
1. Insert the battery. (
see “Battery operation”)
vice!
2. Connect the device to a wall socket with the power adap-
• Chooseasuitablelocationforthedevice.Suitableloca-
tor. The control lamp on the power adapter lights up red
tions are dry, even and antislip surfaces on which you may
and the battery is being charged.
operate the device easily.
When the battery is fully charged, the control lamp on the
• Makesurethereisproperventilationforthedevice!
power adapter will change to green.
• Remove,ifnecessary,theprotectionsheetfromthe
display.
CAUTION:
Never leave the device unattended during the charging
Power supply (Adaptor)
process.
• Insertthegridplugintoaproperlyinstalledthreeprong
NOTE:
socket. Connect the device with the plug connector by
• YoucanalsochargethebatterythroughtheUSBcon-
inserting its plug into the DC +5 V jack of the device.
nector +5 V (13). Connect the device with a USB cable
• Makesurethegridvoltagecorrespondstothegureson
to a running PC.
the rating plate.
• Thedurationofthechargingprocessdependsonthe
CAUTION:
state of charge of the battery.
• Onlyusethesuppliedpoweradaptorforthisdevice.
Do not use for other devices.
General operation
• OnlyusetheoriginalACadapter.Thisadapteris
optimally attuned to the enclosed battery to charge
Switch the device on/off
the battery in a gentle process. Any other adapter can
• SwitchthedeviceonbysettingtheONOFFswitchon
shorten the battery life or can damage it or the device.
the back of the device to ON.
NOTE:
• Toswitchoffthedevice,settheONOFFswitchtoOFF.
Disconnect from mains power supply during longer periods
NOTE:
of non-use.
The device will always be reset to the factory default vol-
ume when it is turned on again.


